Leaderboard


Popular Content
Showing content with the highest reputation on 12/03/19 in all areas
-
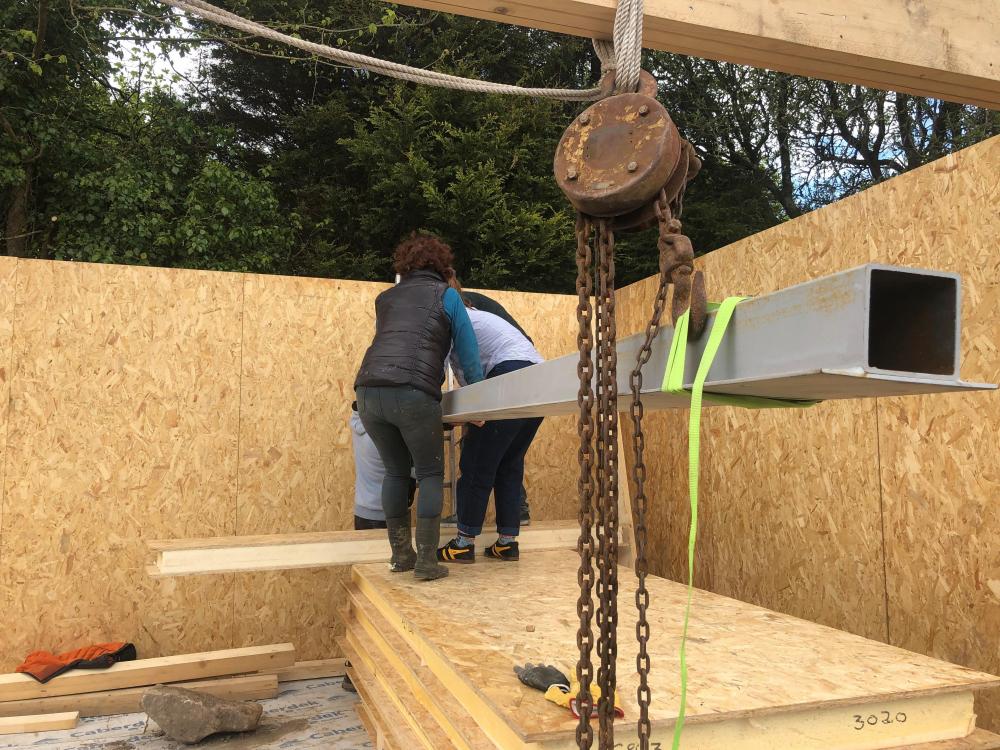
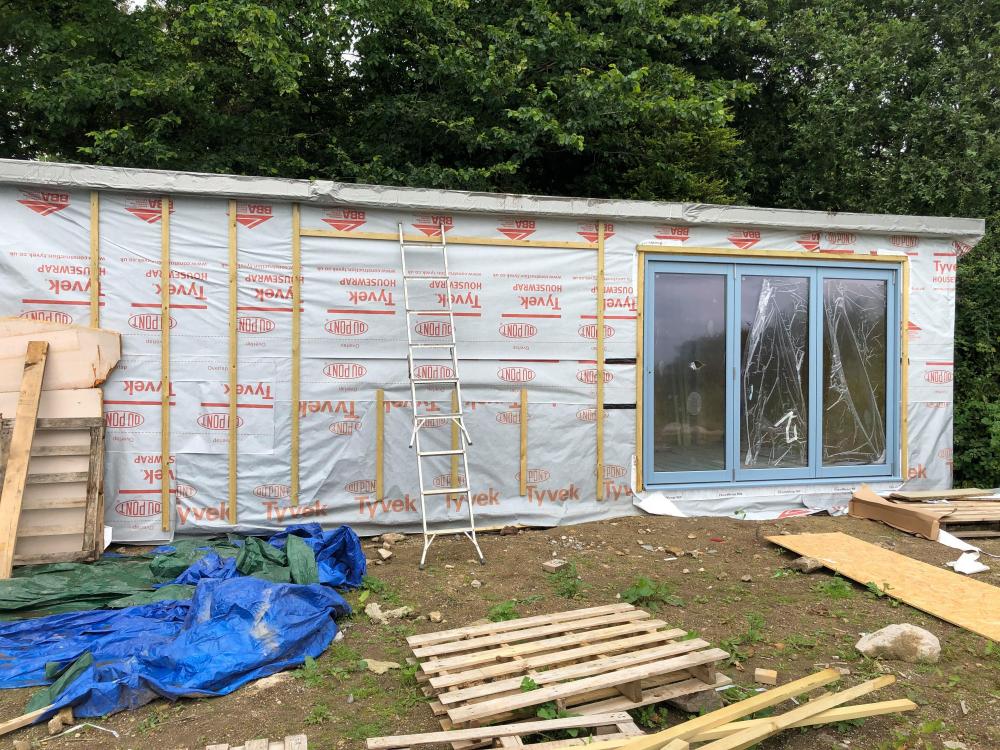
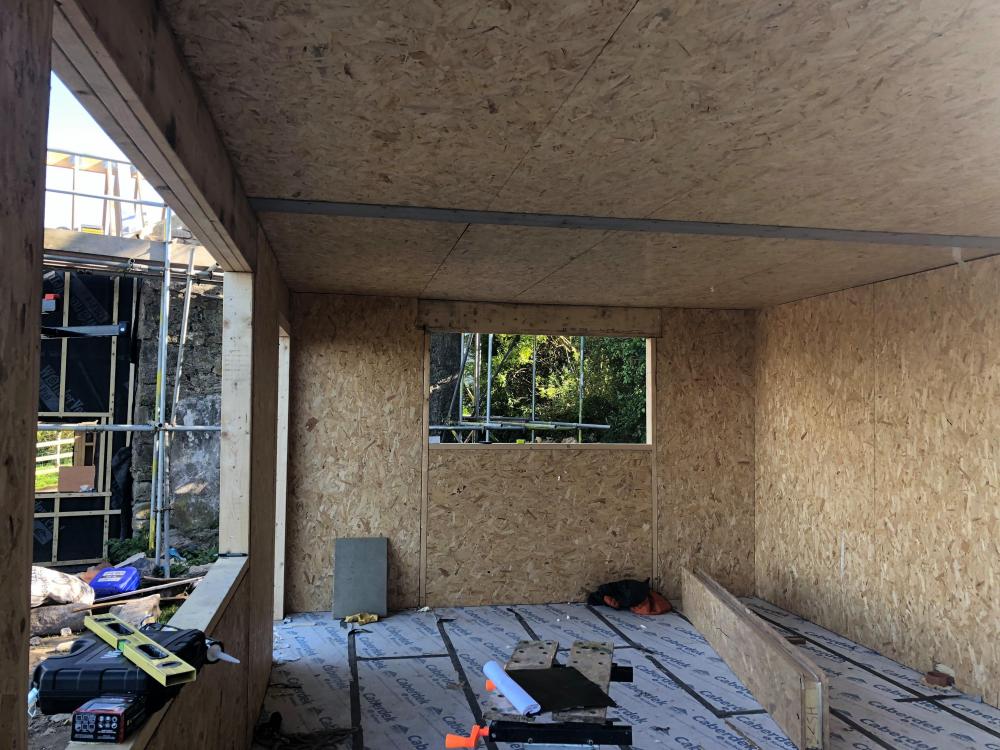
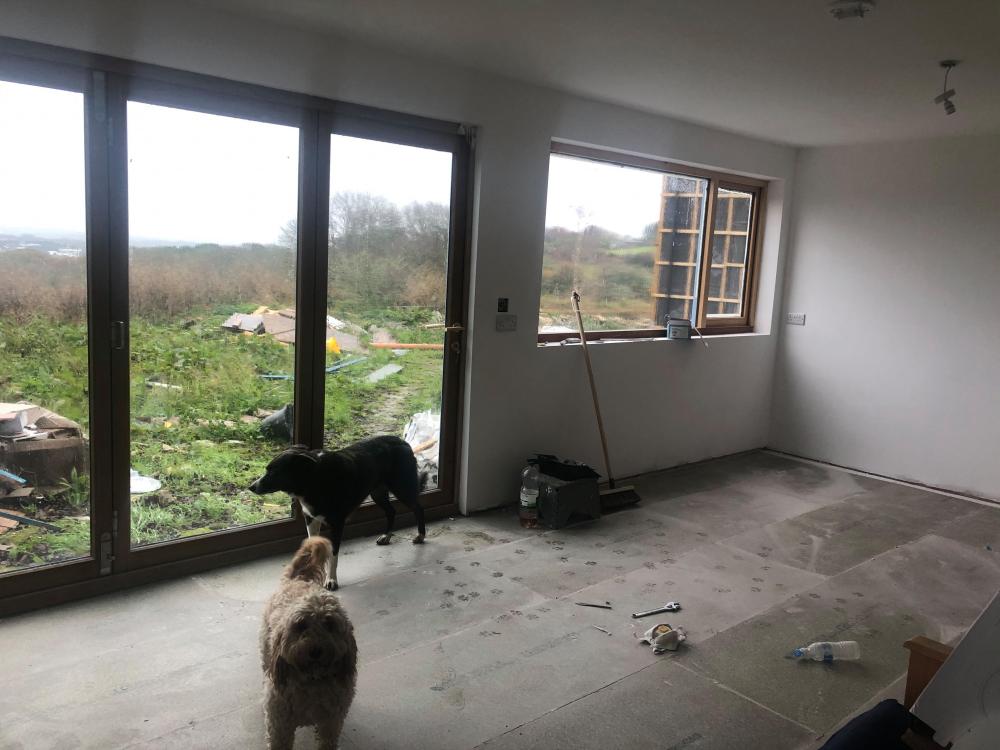
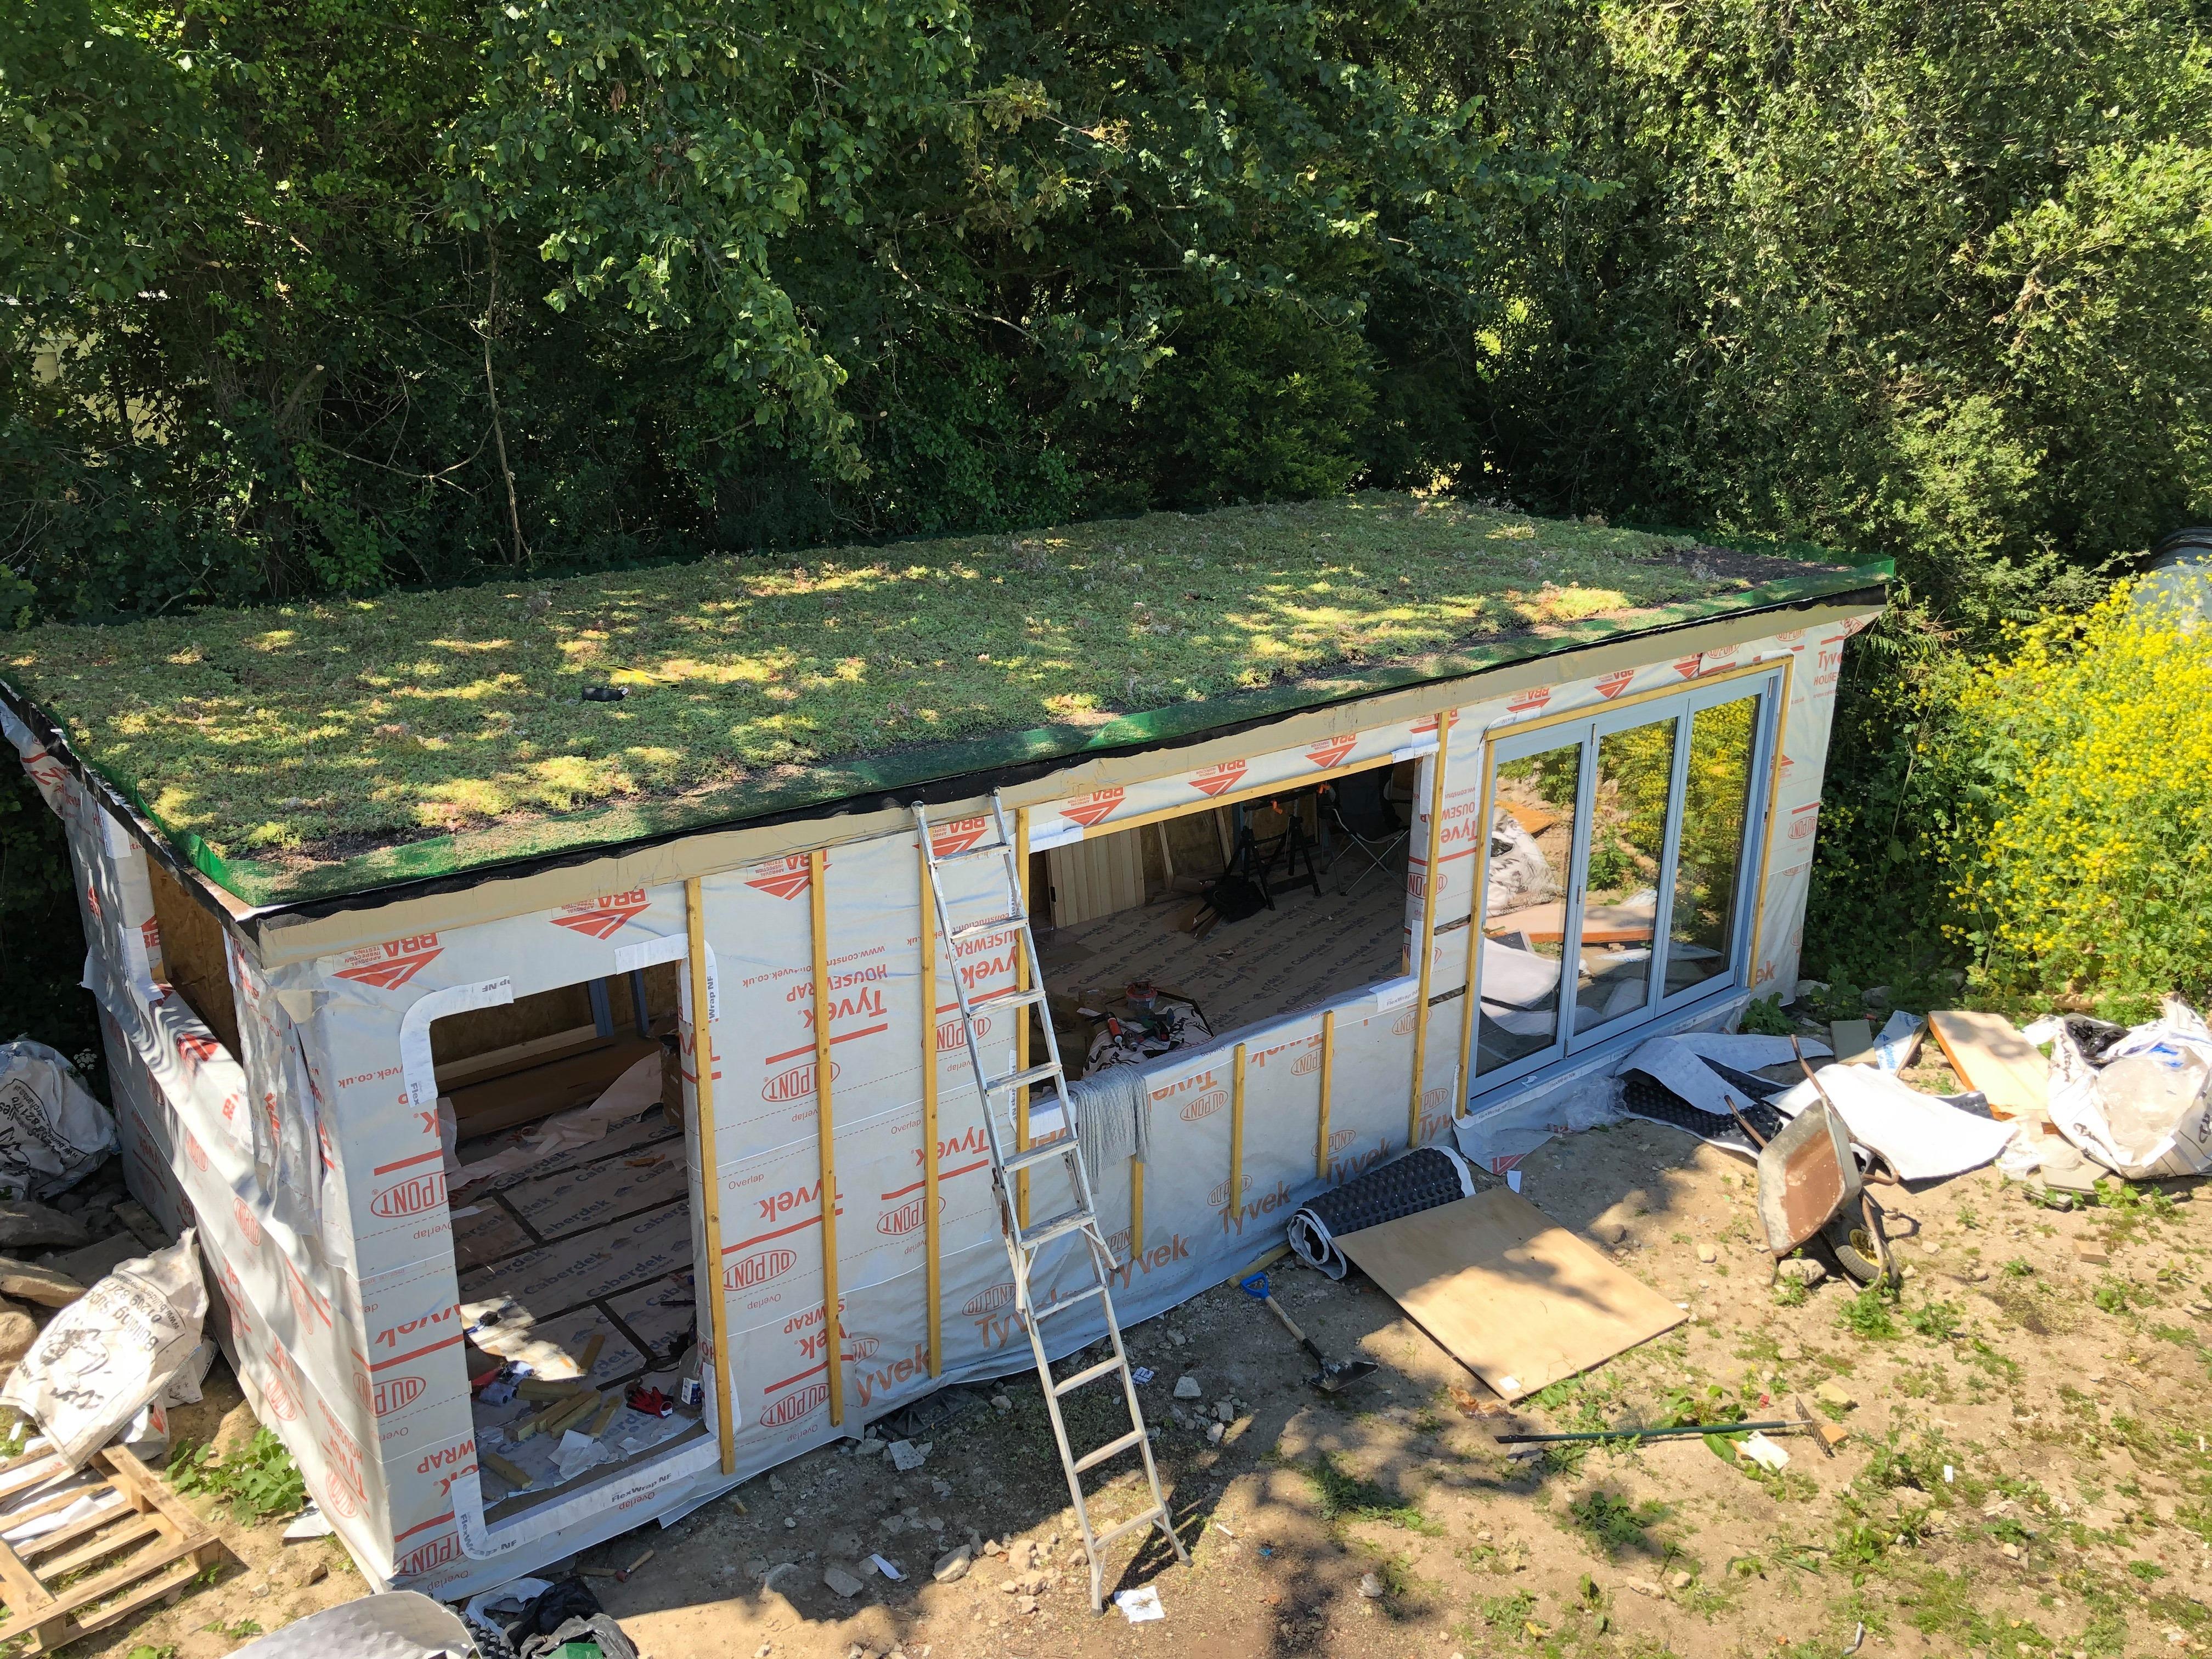
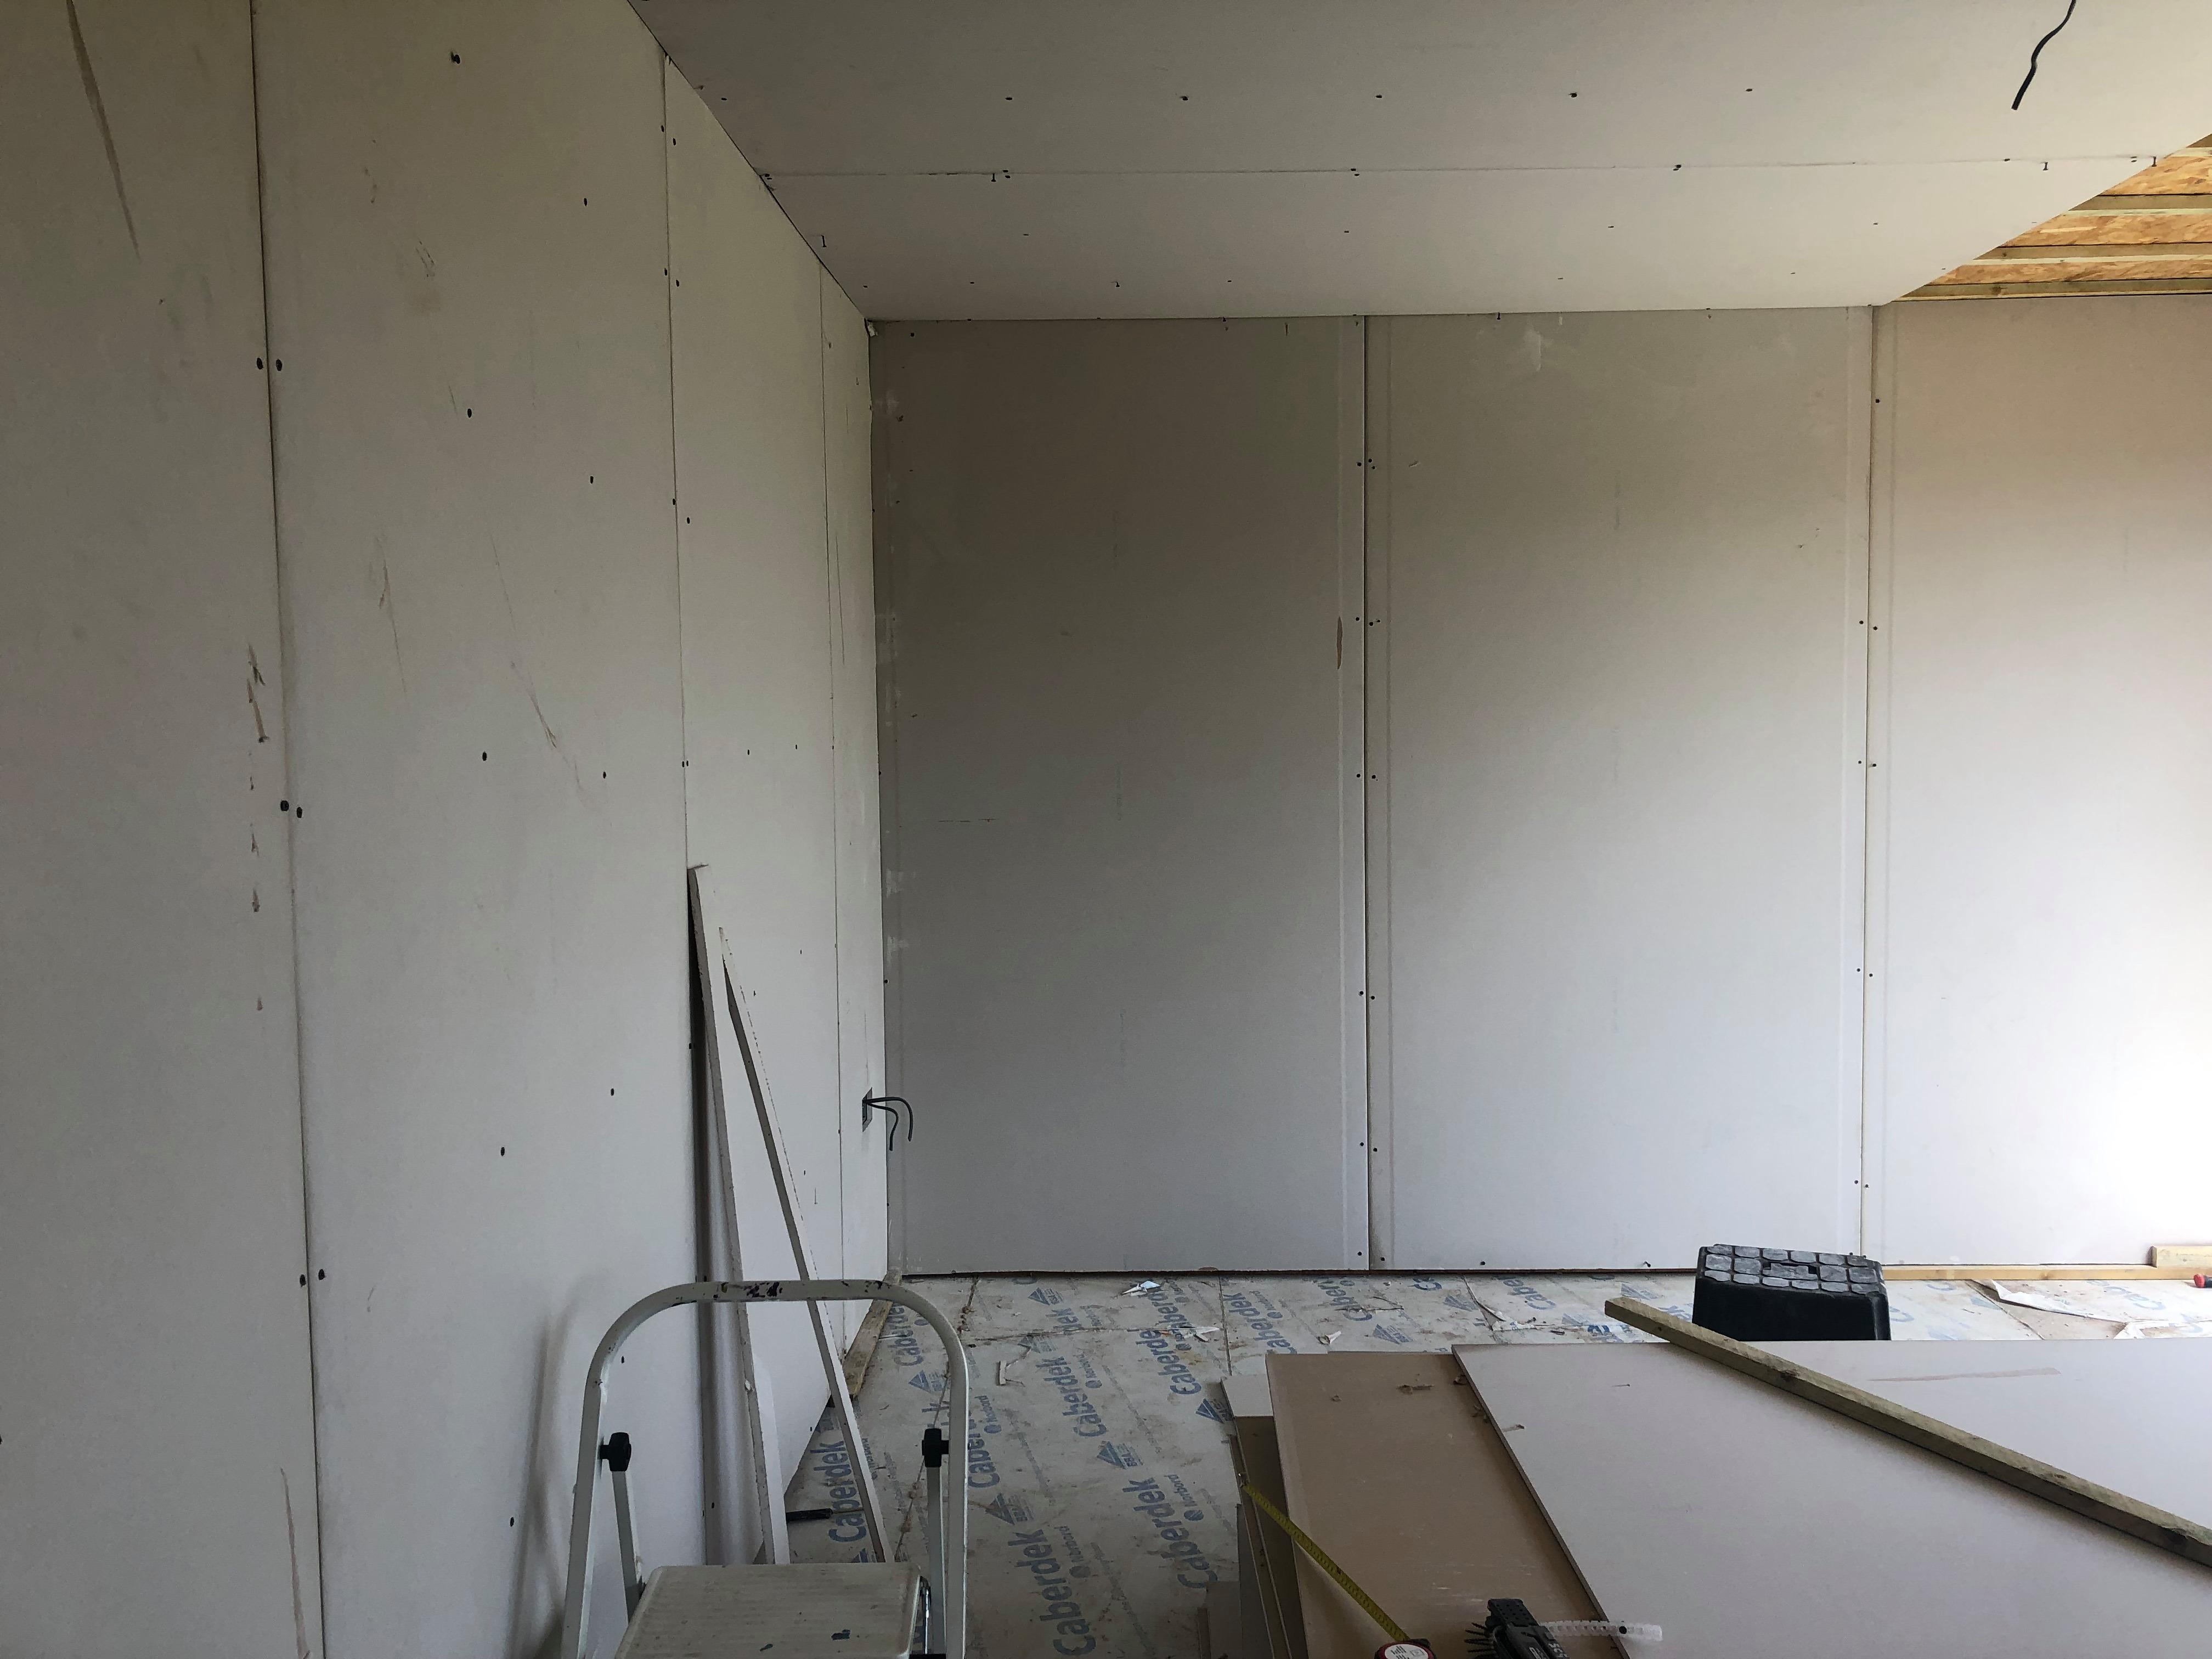
It appears we may have rushed into stage 2 eleven days before we were meant to. Nevermind, at least we had one night in the house..
 4 points
 -
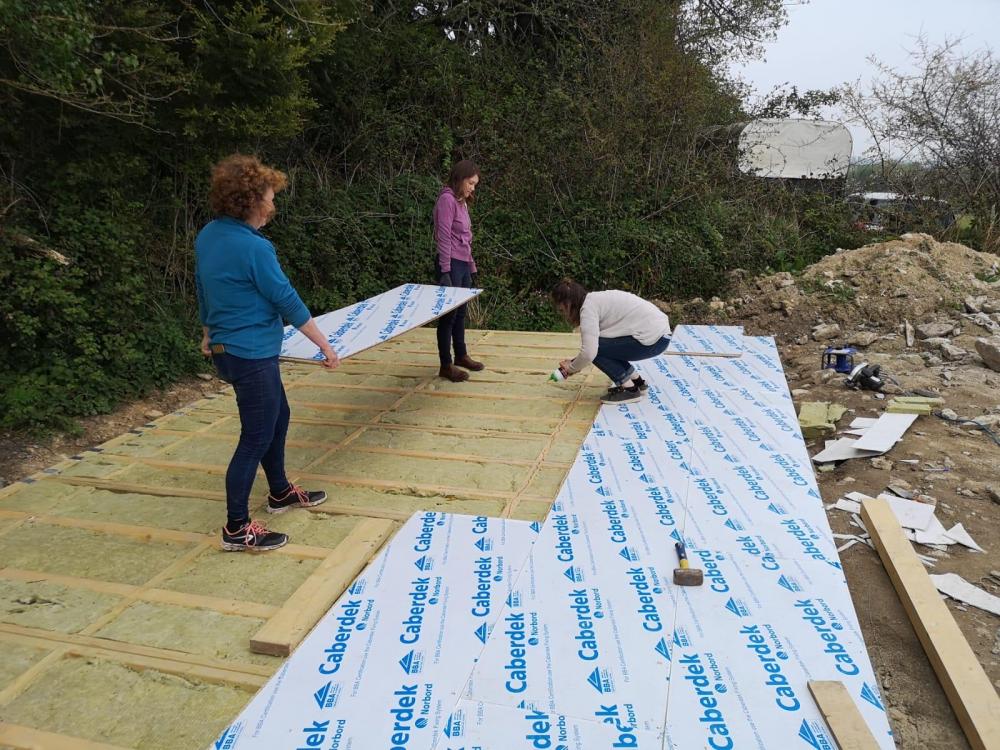
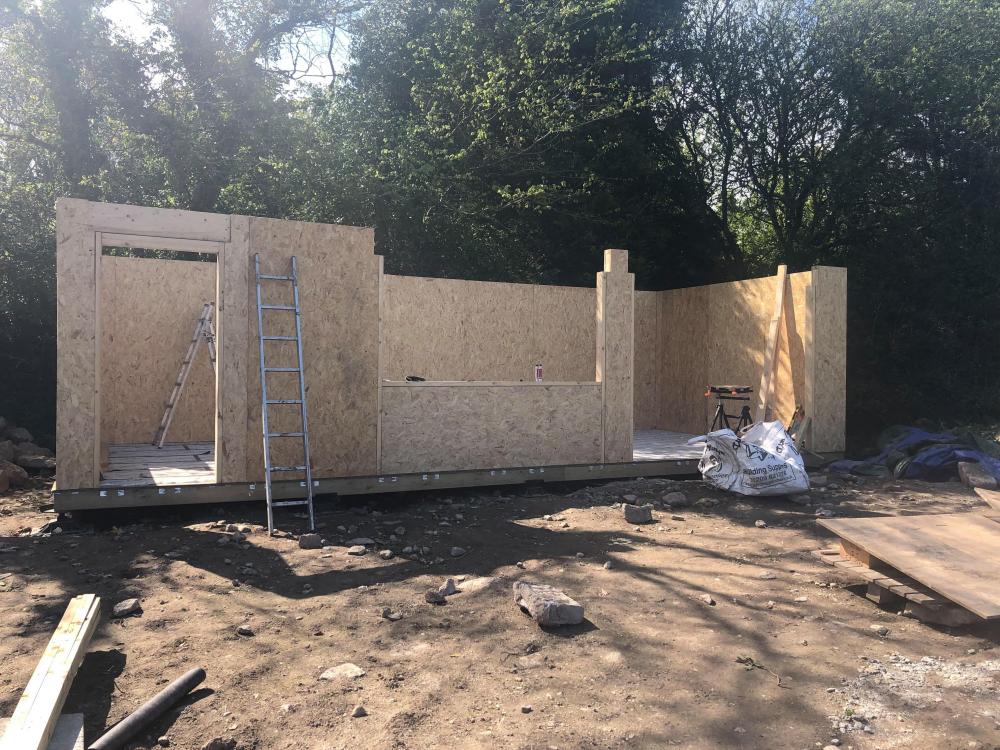
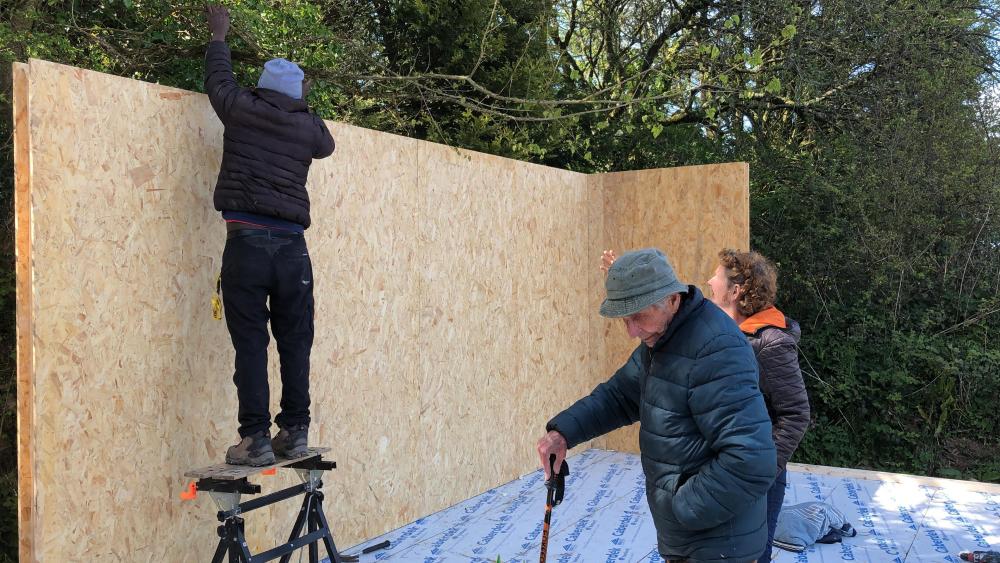
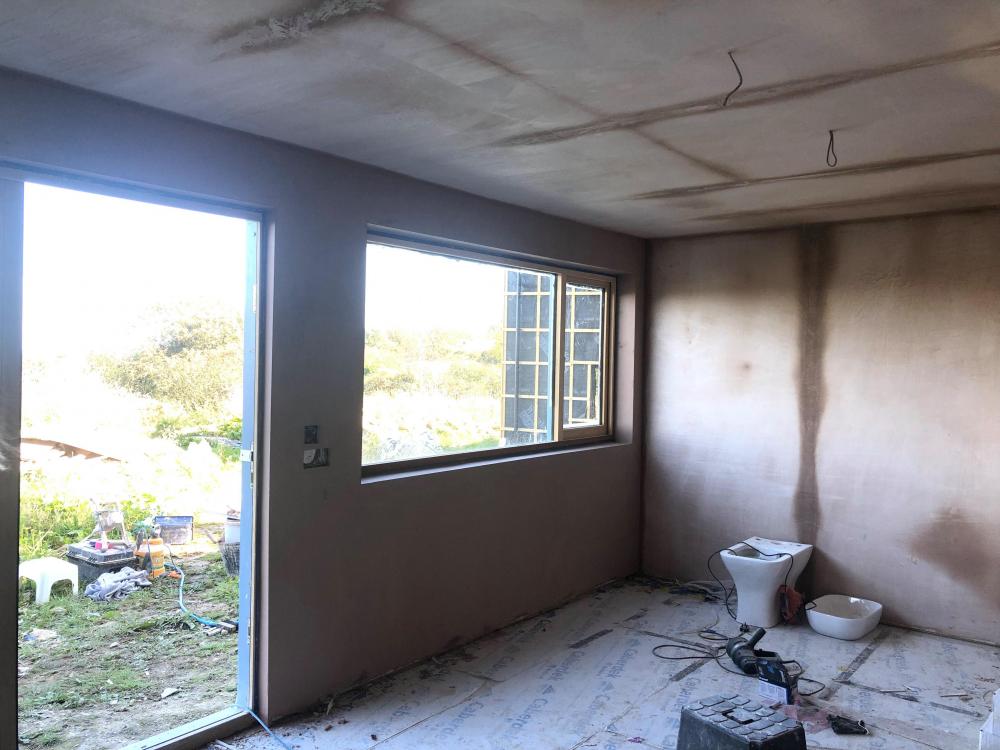
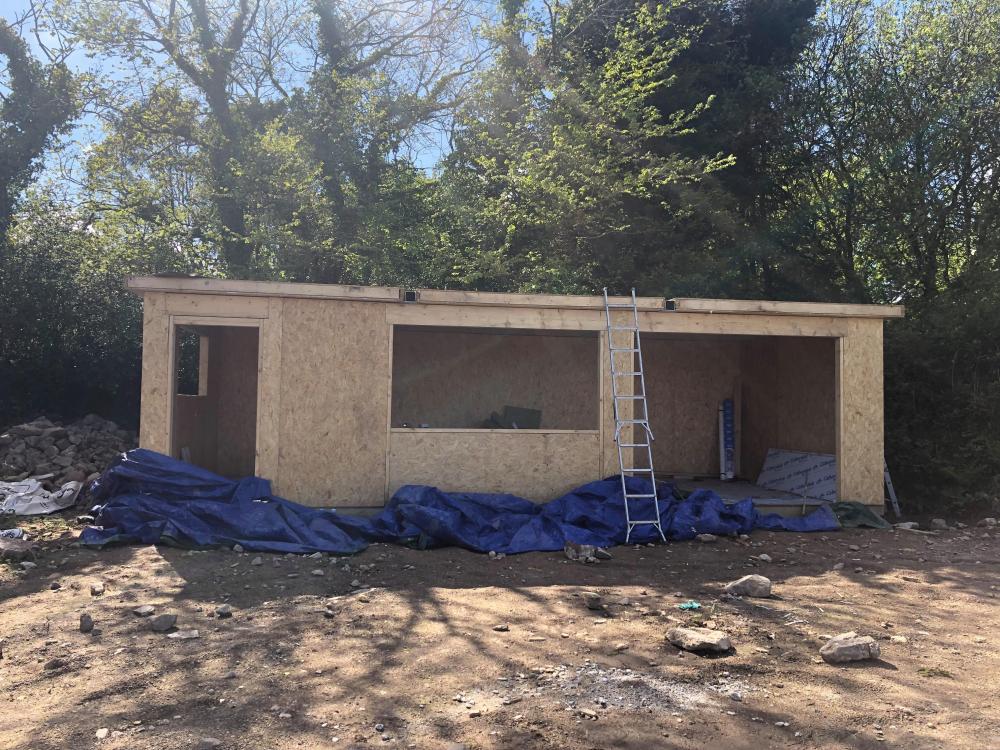
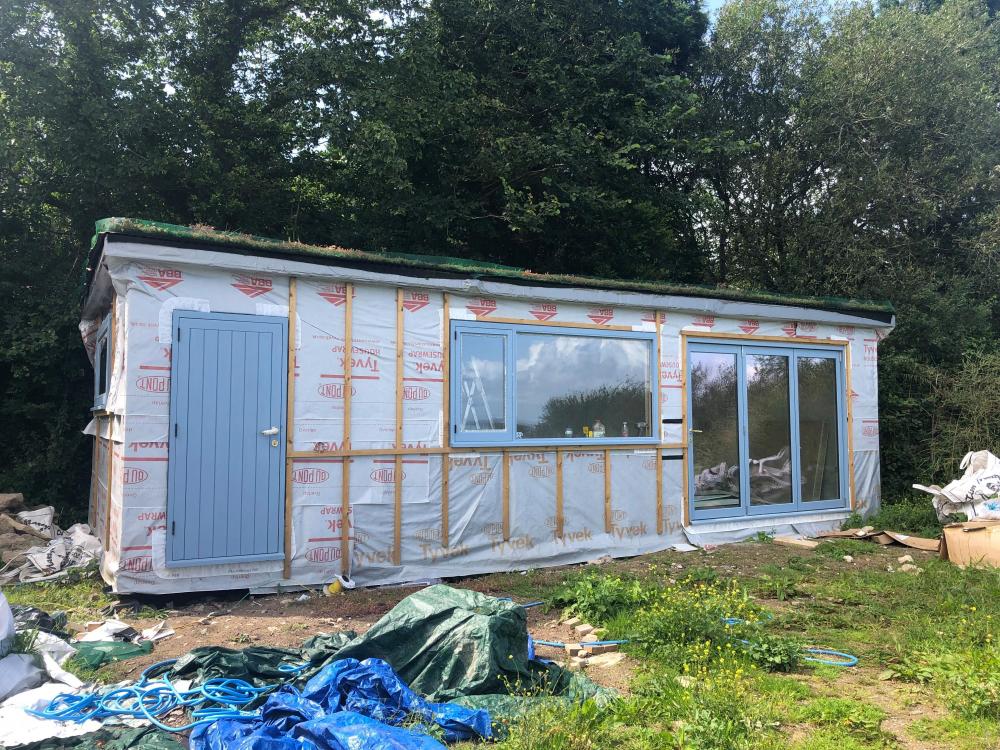
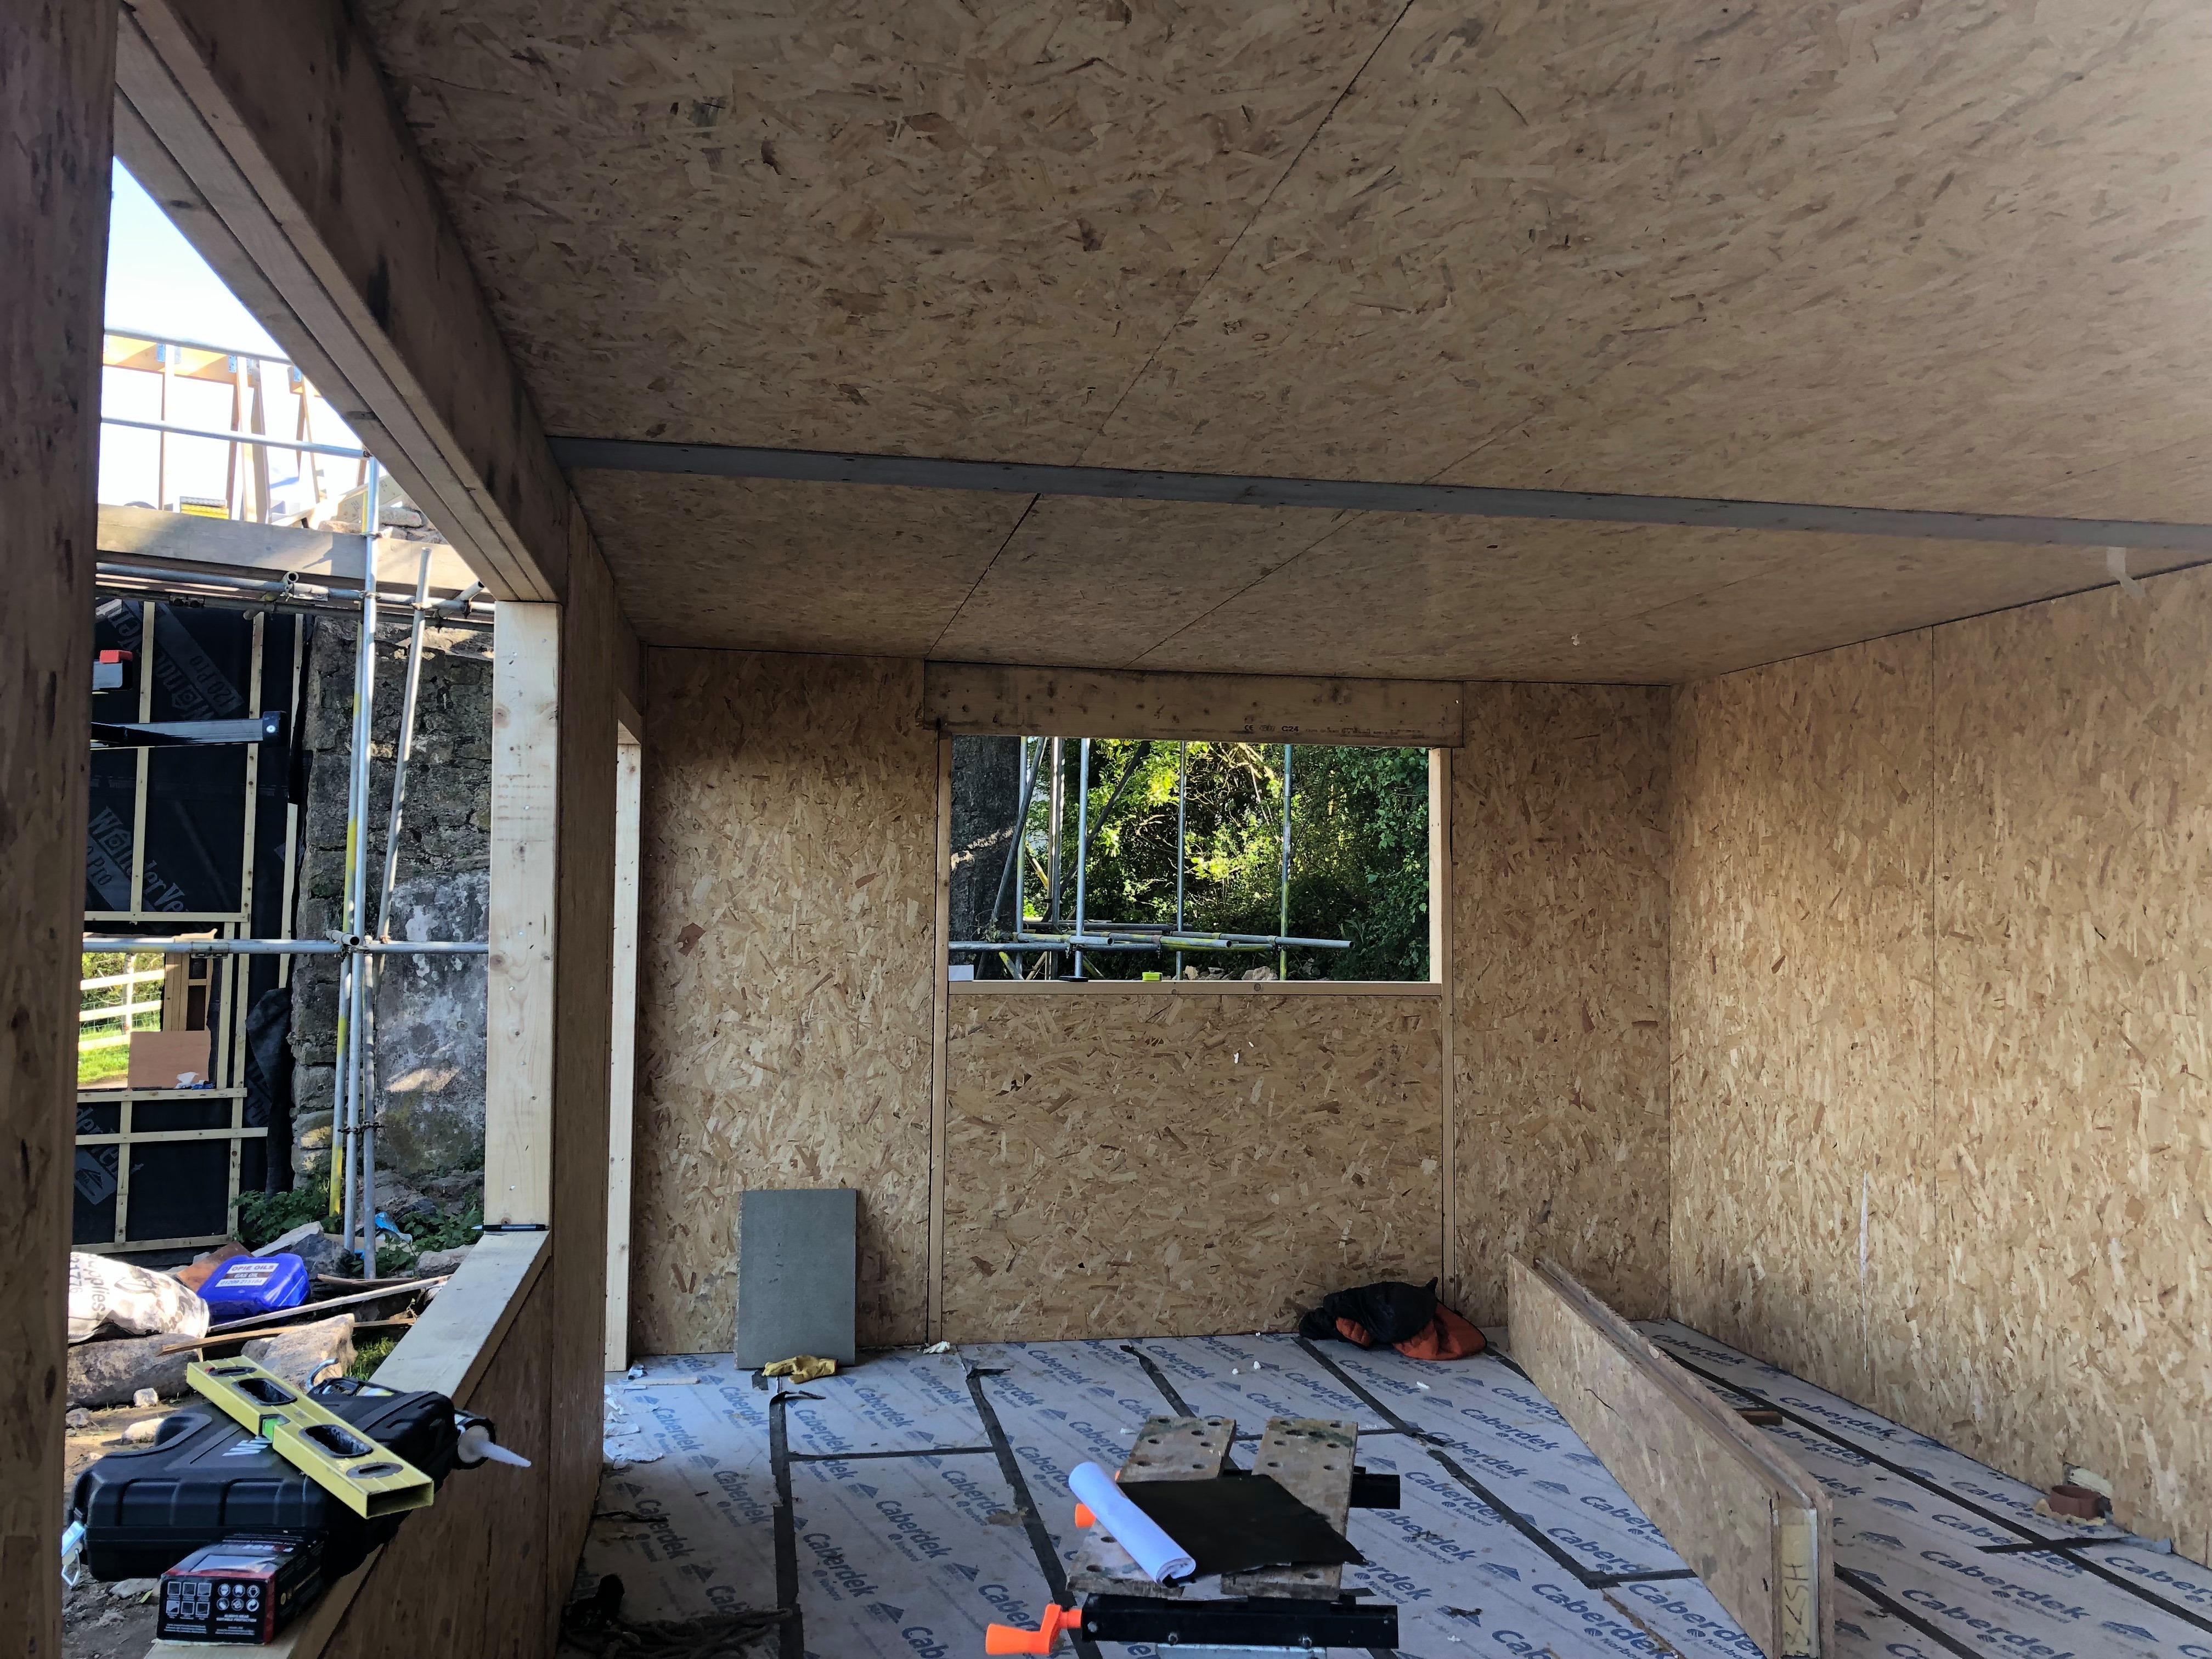
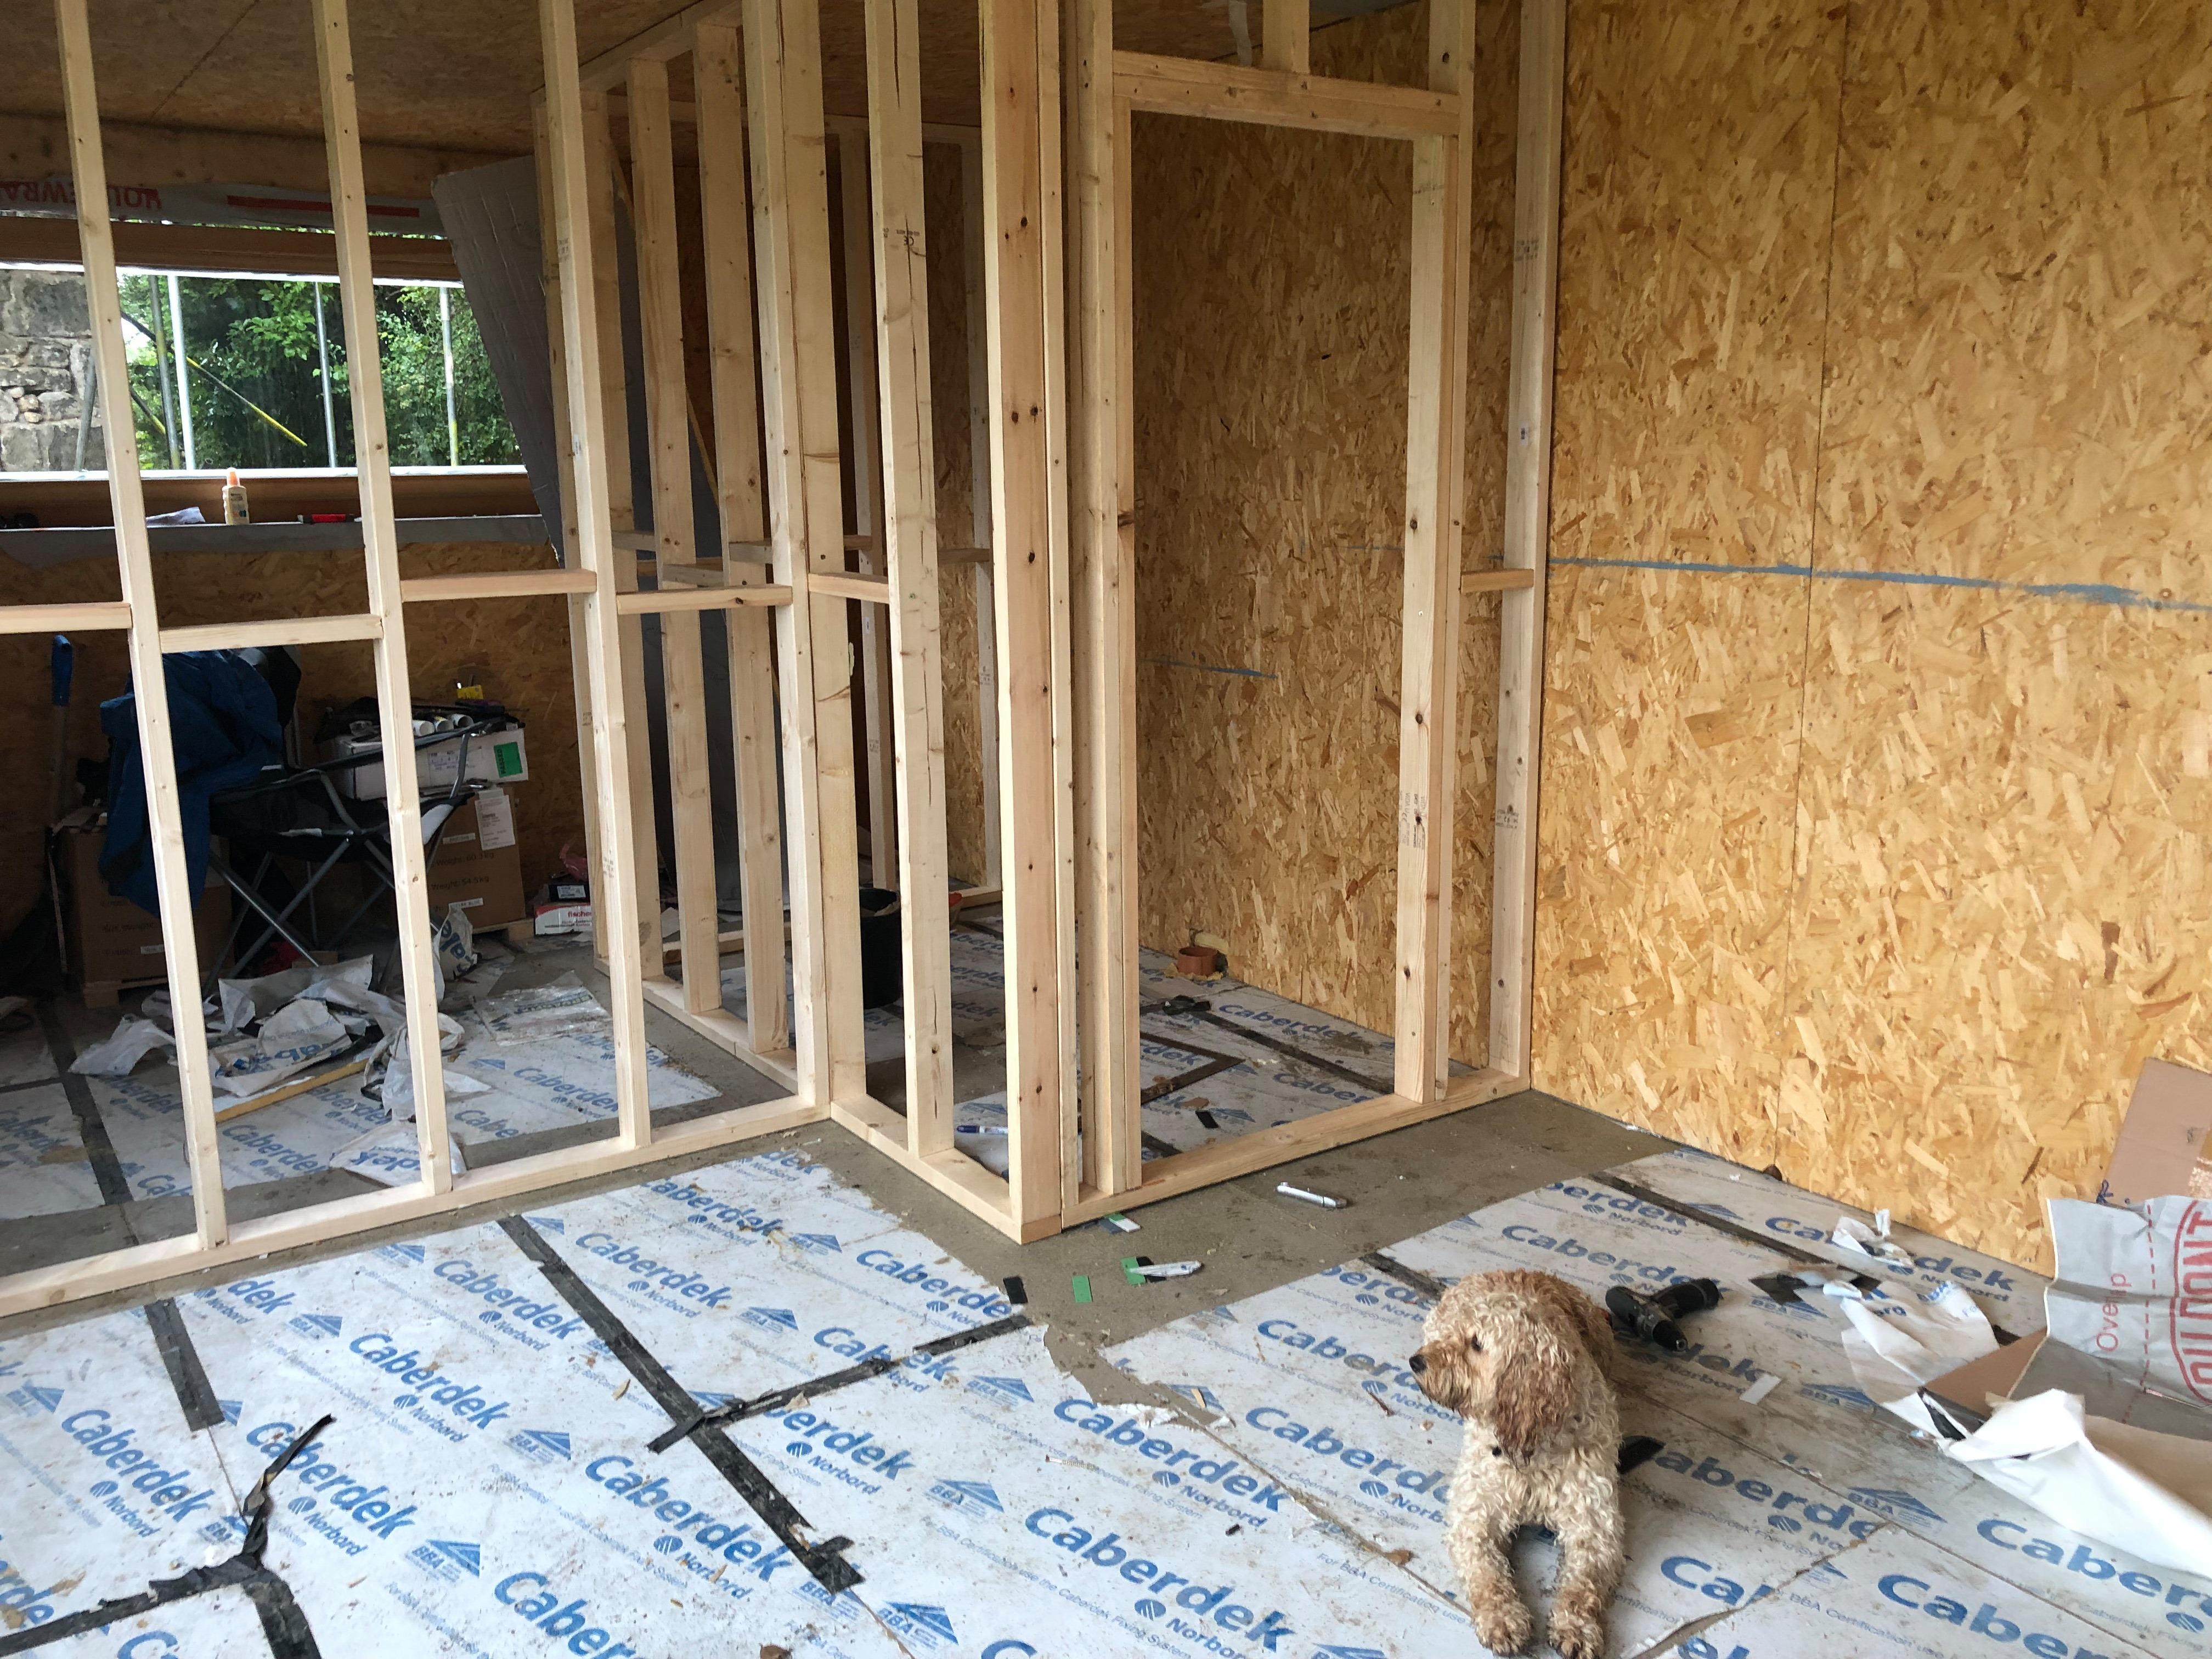
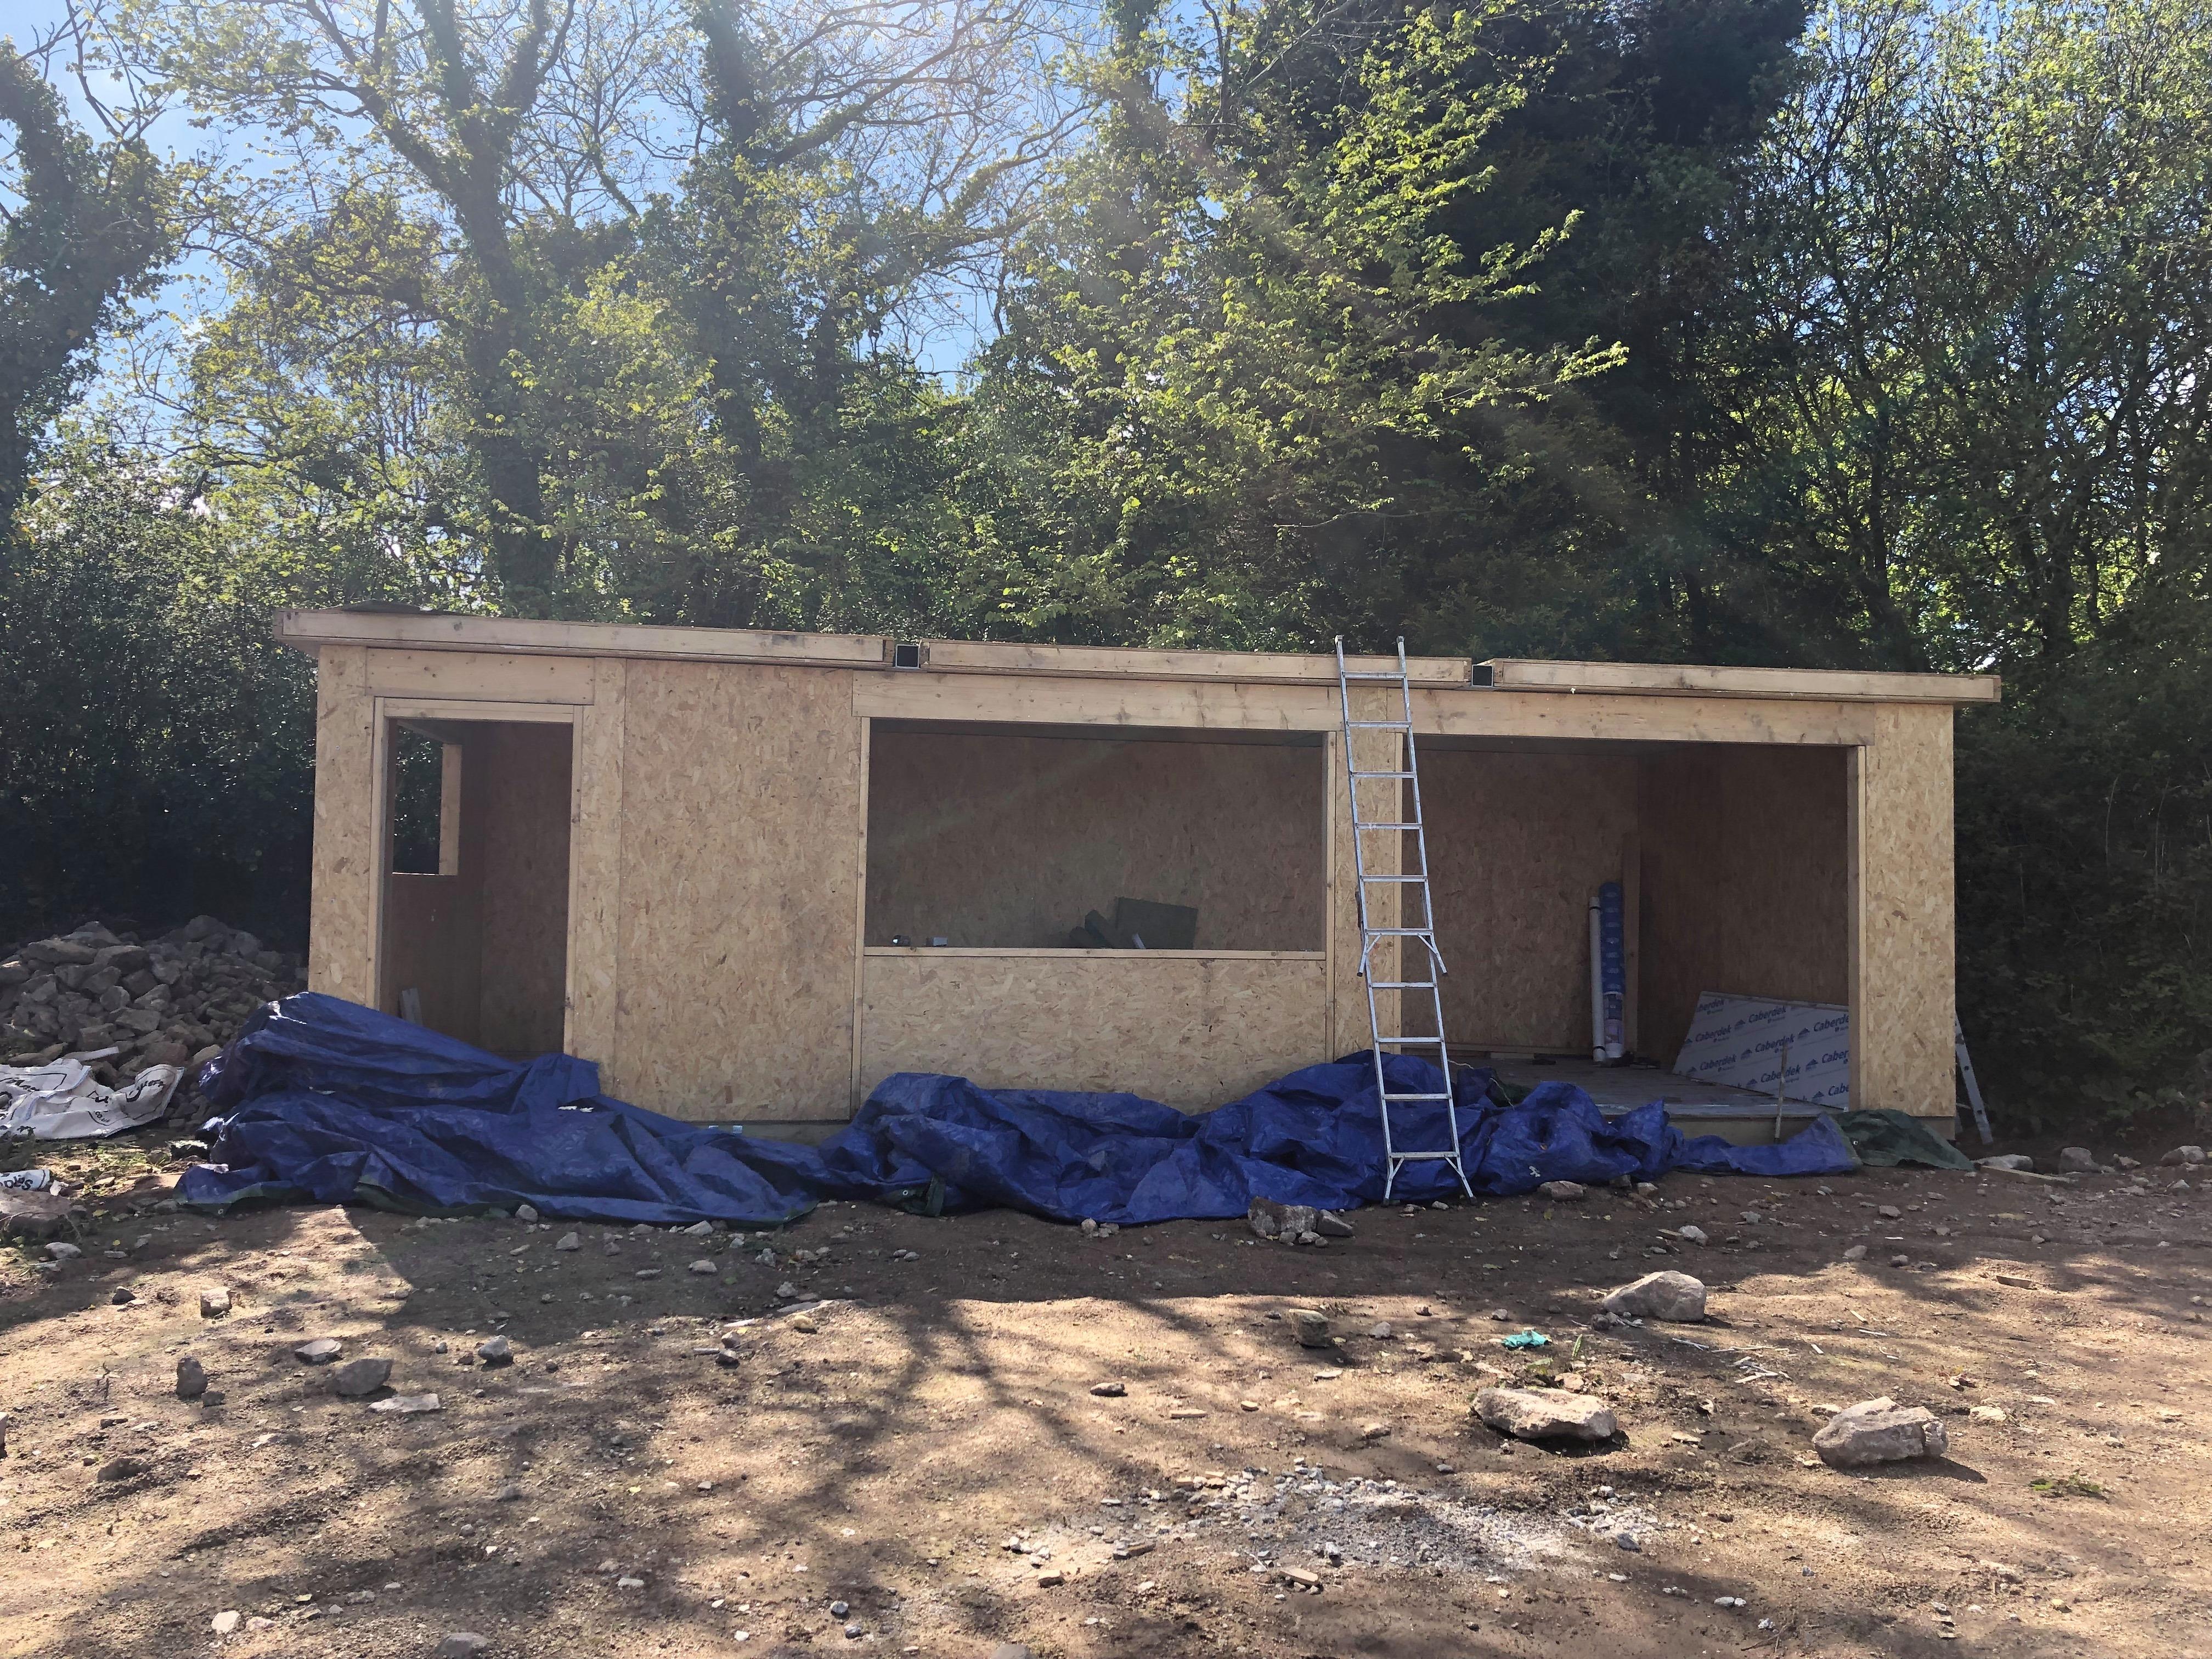
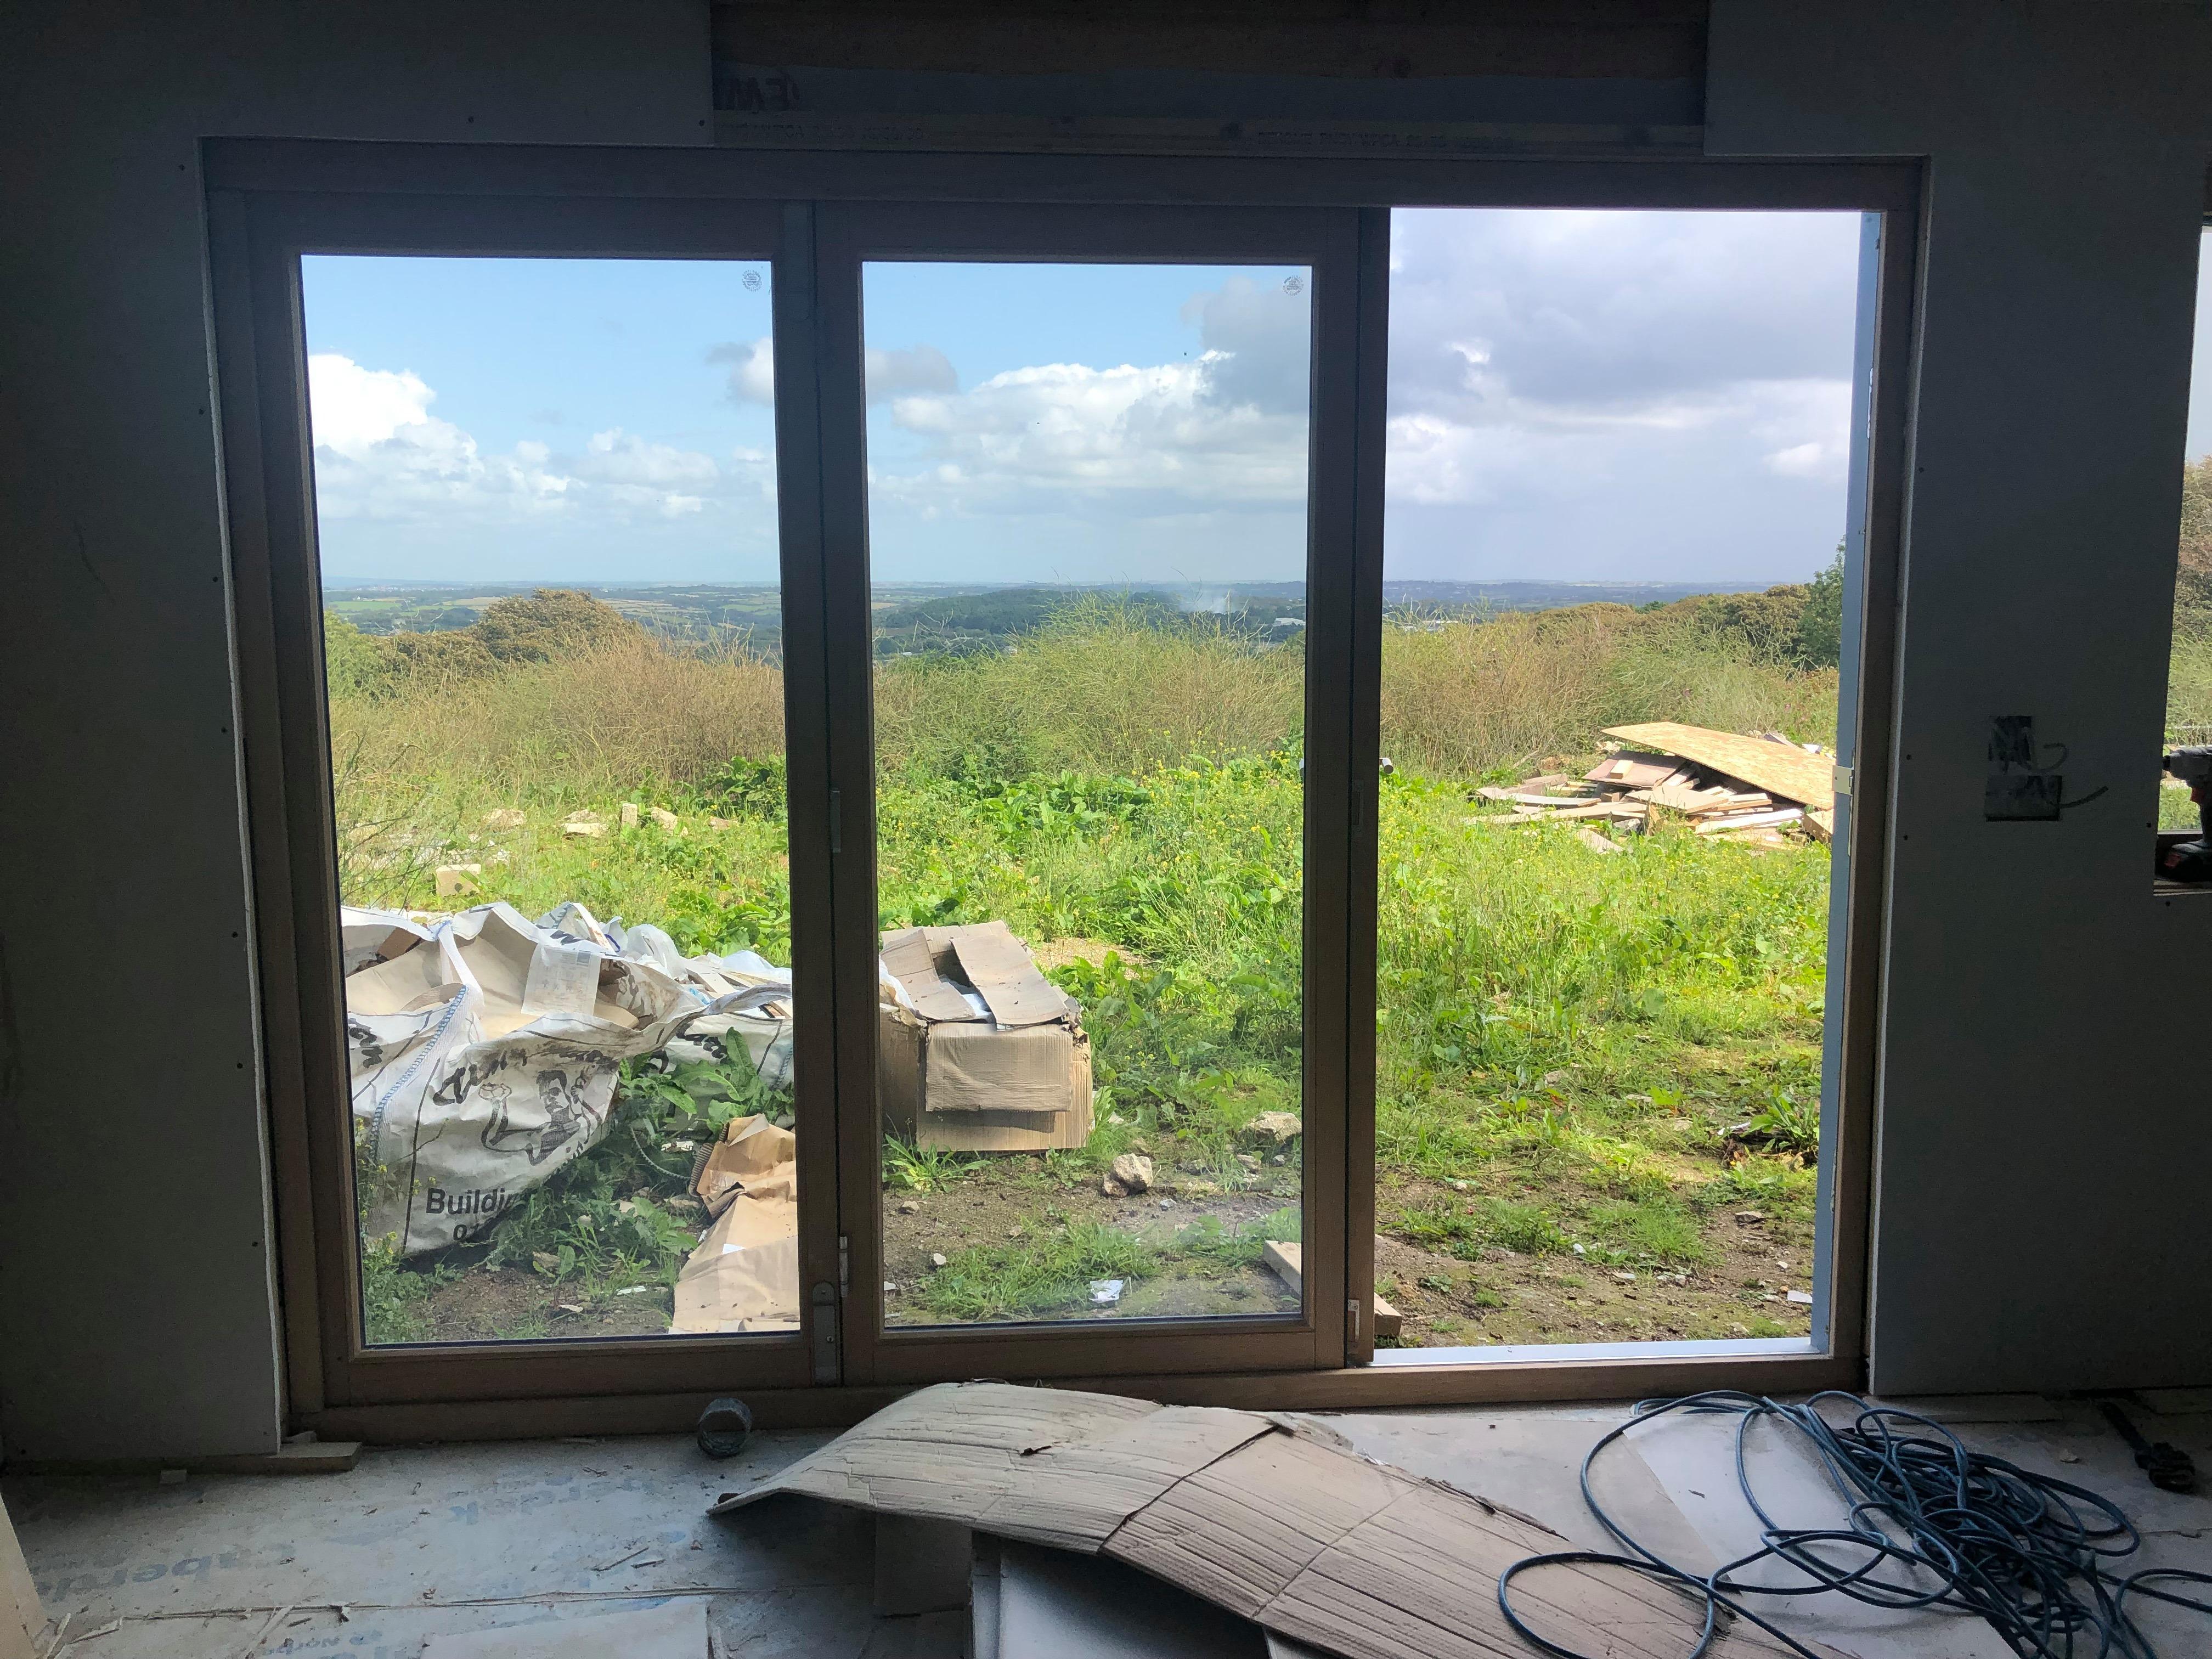
Sorry had to find these amongst the other crap on my phone! Obviously we haven't done the cladding yet. It was a family affair at times. It's sitting on Jackpad plinth foundations which I didn't get a photo of. We probably did a lot of things wrong, but we got there in the end and it's still standing. p.s. yes there were a lot more screws in the plasterboard than the pictures show ?


 4 points
 -
Kenneth Mark Graves currently identifies as male. He weighed 6lb 14oz at birth. He was born naturally with only minor complications at 19.16 on the 2/12/2019 in the Rosie maternity hospital in Cambridge. Waters broke approximately 06.00, contractions started at about 12.00. He is currently in the nicu ward waiting for blood test results as initially there was a worry of an infection. We will get the results tomorrow but all symptoms have now stabilised. Current theory is that he came out too fast and his lungs didn't get squished enough. He had help breathing overnight and is off that machine now as his chest noises have stopped. He also had slightly low blood sugars and temperature which have also been resolved over night. Hopefully he will be in with us tomorrow night (depending on the results). With any luck we will be able to take him home tomorrow evening. Faye is doing great, couple of stitches, no dramas. That should answer most questions. ?3 points
-
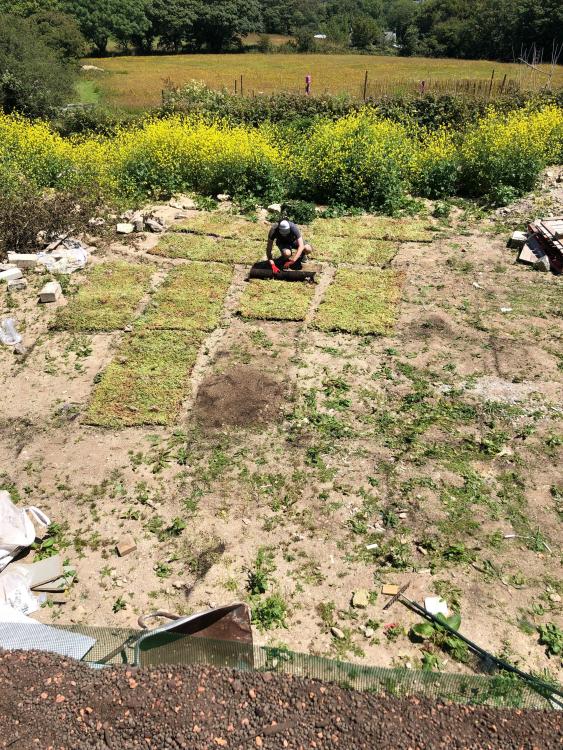
Here are a few pictures of the site from the time we took posession and started to clear the undergrowth and satisfy the planning conditions. The driveway to be. It makes Range Rovers look small. Only a few bits of tree and detritus to remove! The boss hard at work during some tree removal work. The back garden being fenced off after felling a very large diseased eucalyptus. Another planning condition: Social housing for bats!3 points
-
Ok..so I'm as rusty as hell, but before I eventually came off the tools 15 years ago I was/am, a qualified and time served carpenter/joiner (I like to think a pretty decent one too) admittedly more experienced in fit out than first fix framing, but I have cut a few roofs and first fixed a fair amount, wood is wood when all said and done. Once the design engineering process is complete...other than it taking a millennia, what's stopping me dusting off my Paslodes and building the whole thing on site, on my tod, stick by stick...?? Anyone else done this???♂️?2 points
-
It's hard to tell but it seems to me like that might increase the condensation risk in the loft considerably. Personally, I wouldn't mix the insulation layers like this; either have all the insulation immediately on top of the ceiling (cold loft) with good ventilation of the loft to the outside or all at rafter level (warm loft, warm or cold roof) with the airtightness layer there as well. With this mixed insulation it's almost impossible to get the ventilation of the loft space right to avoid condensation. If the current level of airtightness seems to be working it'd probably be better not to mess with it without rethinking the insulation as well.2 points
-
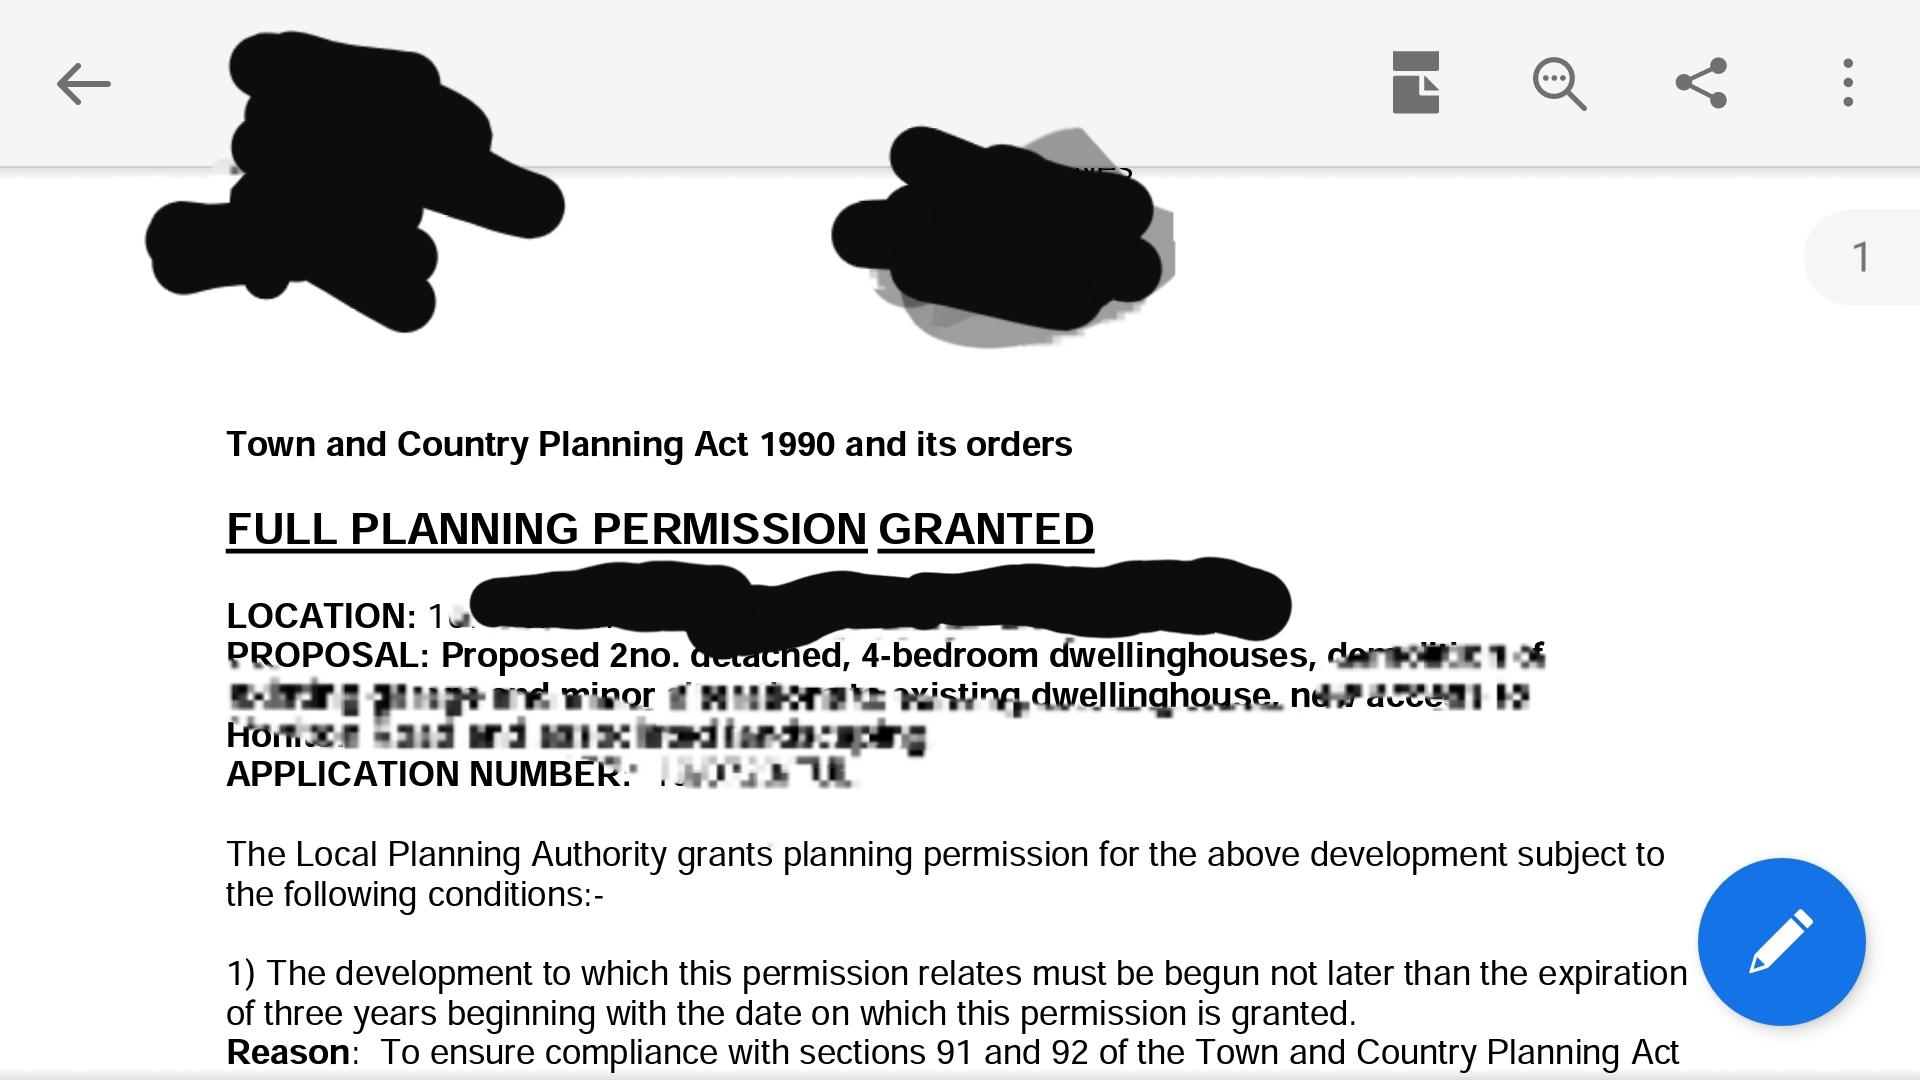
And....... Granted, after 27.6 weeks, not that I am counting ? Not even a request for an extension with the decision. Massive thank you to the buildhub community for the help getting this through! Can't quite believe it's actually got permission after the sites history of refusals and us asking for more than those! Today feels like a win!
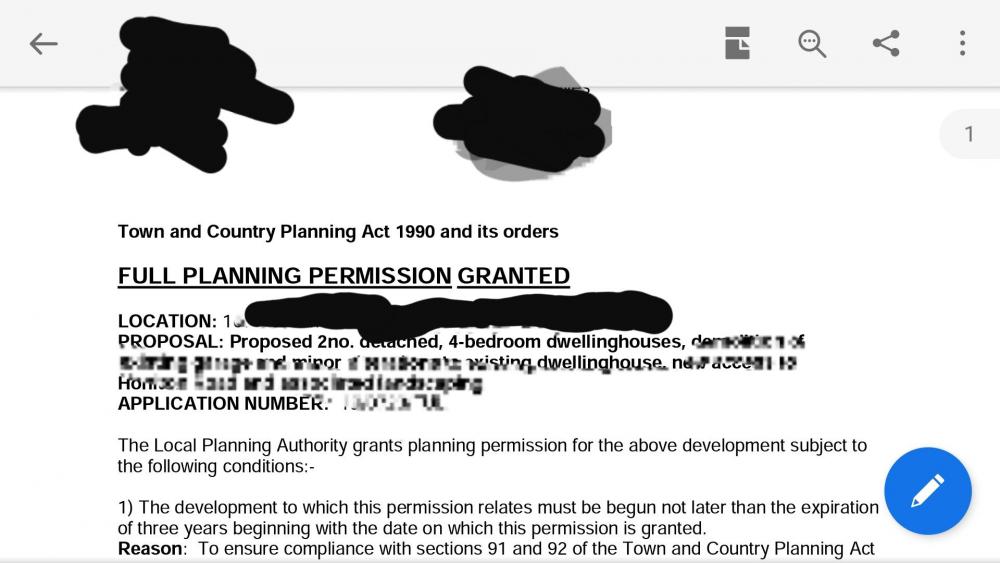 2 points
 -
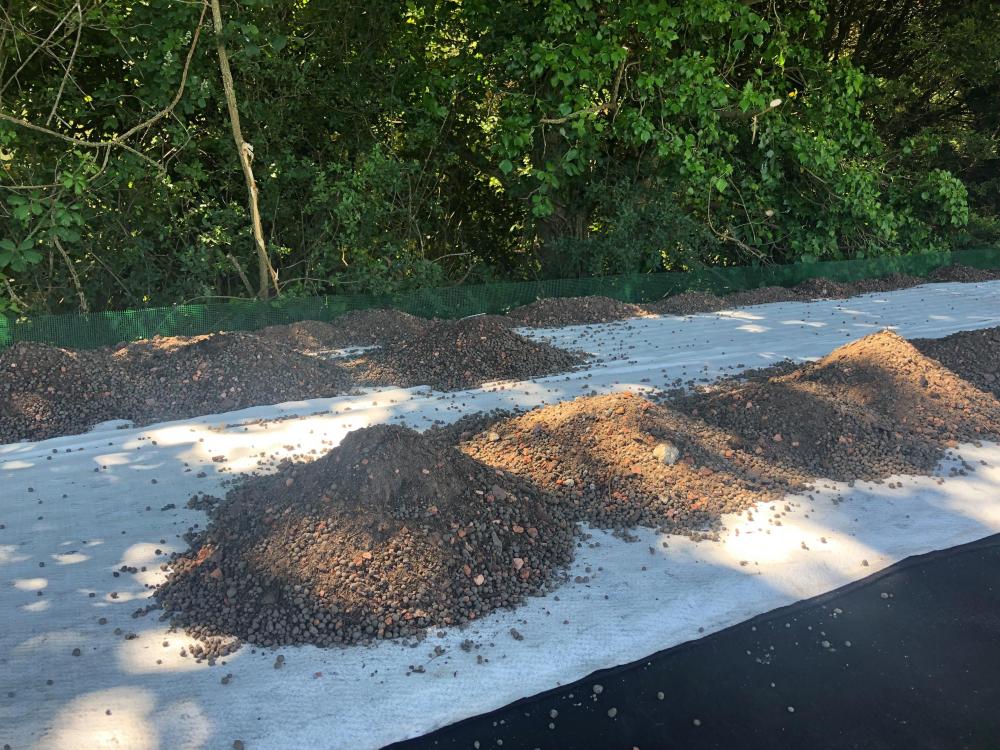
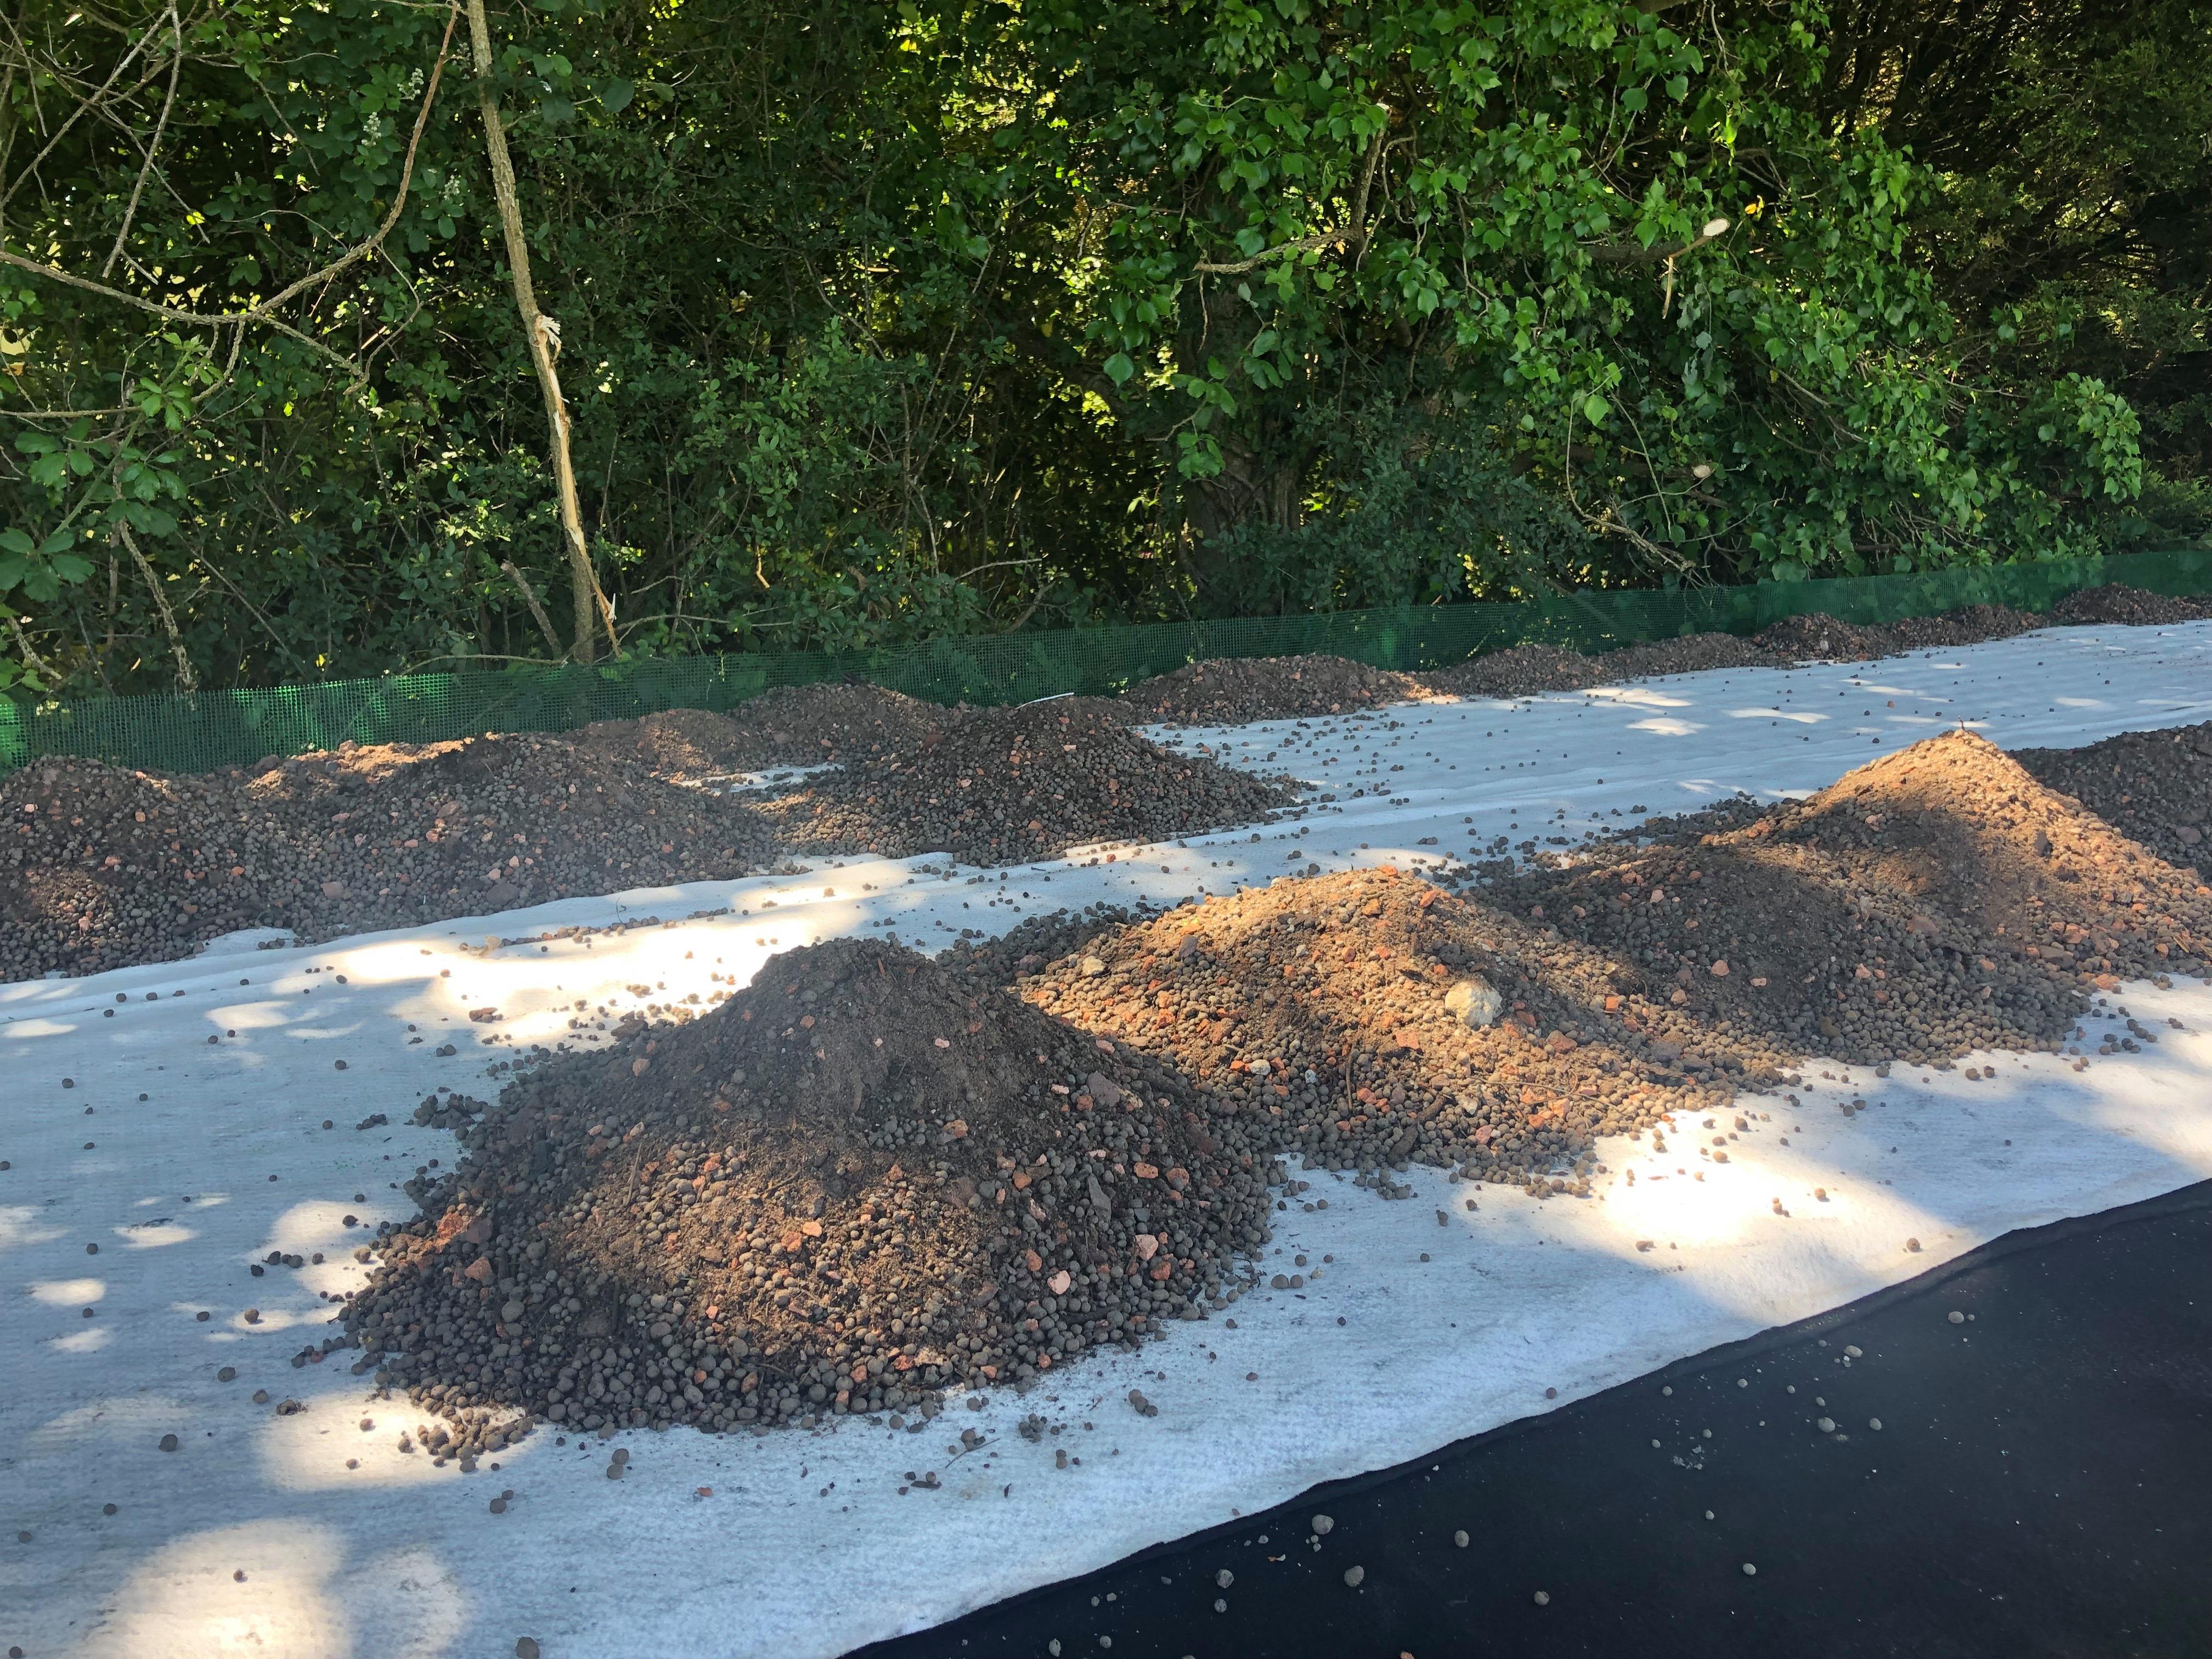
One of the more onerous (read expensive) planning conditions related to the driveway design and protection of tree roots. We were required to install a "no dig" foundation layer using Core geocells (or similar) after the planners were happy with the site fencing, but before the old bungalow was demolished. Typically the planners said "no" the first time we applied for discharge for no readily apparent reason. I re-applied having done more work for an unrelated condition and they said "yes". Braced fencing and signage seemed really important to the planners. So I have lots, all bought for bargain price second hand. We didn't spend much time on site in 2018 or the early part of 2019 because of a perfect storm of family things and working away from home. The winter of 2018 was not kind to the bungalow. there was a lot of rain and several periods of extremely high wind. This redistributed the roofing felt over the lawn and caused the very rotten parts of the structure to collapse. Everybody needs a site office! A bargain £250 caravan will do nicely for a while. Getting a good start on the driveway. Wooden sleeper edging in place and the first couple of geocell panels pinned down. The first (of many) loads of stone. And my old, but perfectly formed digger. (called Digby) A little while later we have most of a driveway. The other entrance is waiting for the land drains to be completed and for the small swamp to become less swampy. This is however enough access for the next stage of proceedings.1 point
-
Congrats!1 point
-
No need. Ed Jnr just works, either Edwina or Edward...1 point
-
We're not in a conservation area but it's a very rural location. The plot came with PP for a traditional Edwardian style 1.5 storey house. Had a chat with the planning officer, who said that he greatly disliked pastiche design, prior to putting in for our completely different contemporary design. It passed first time with minimal conditions. Don't assume that because all around is old and traditional that the planners want more of the same.1 point
-
Nothing wrong with that idea. I m stick building on site. Should be cheaper then any other method if you got some skills as well.1 point
-
We are doing it with I joists and I am not a time served chippy so it should be a breeze for someone who is.1 point
-
Depends on your supplier. In my case, it's a 600x600x1200mm concrete block box on a 100mm concrete slab with earth rod, 110mm duct etc. I'm building mine myself so only about £50 in materials. They also accept a standard meter box built in to a cavity wall.1 point
-
OR checked by BC. I am relying on that. This is mine going in It all came from https://www.flue-pipes.com/ the cheapest I could find at the time.1 point
-
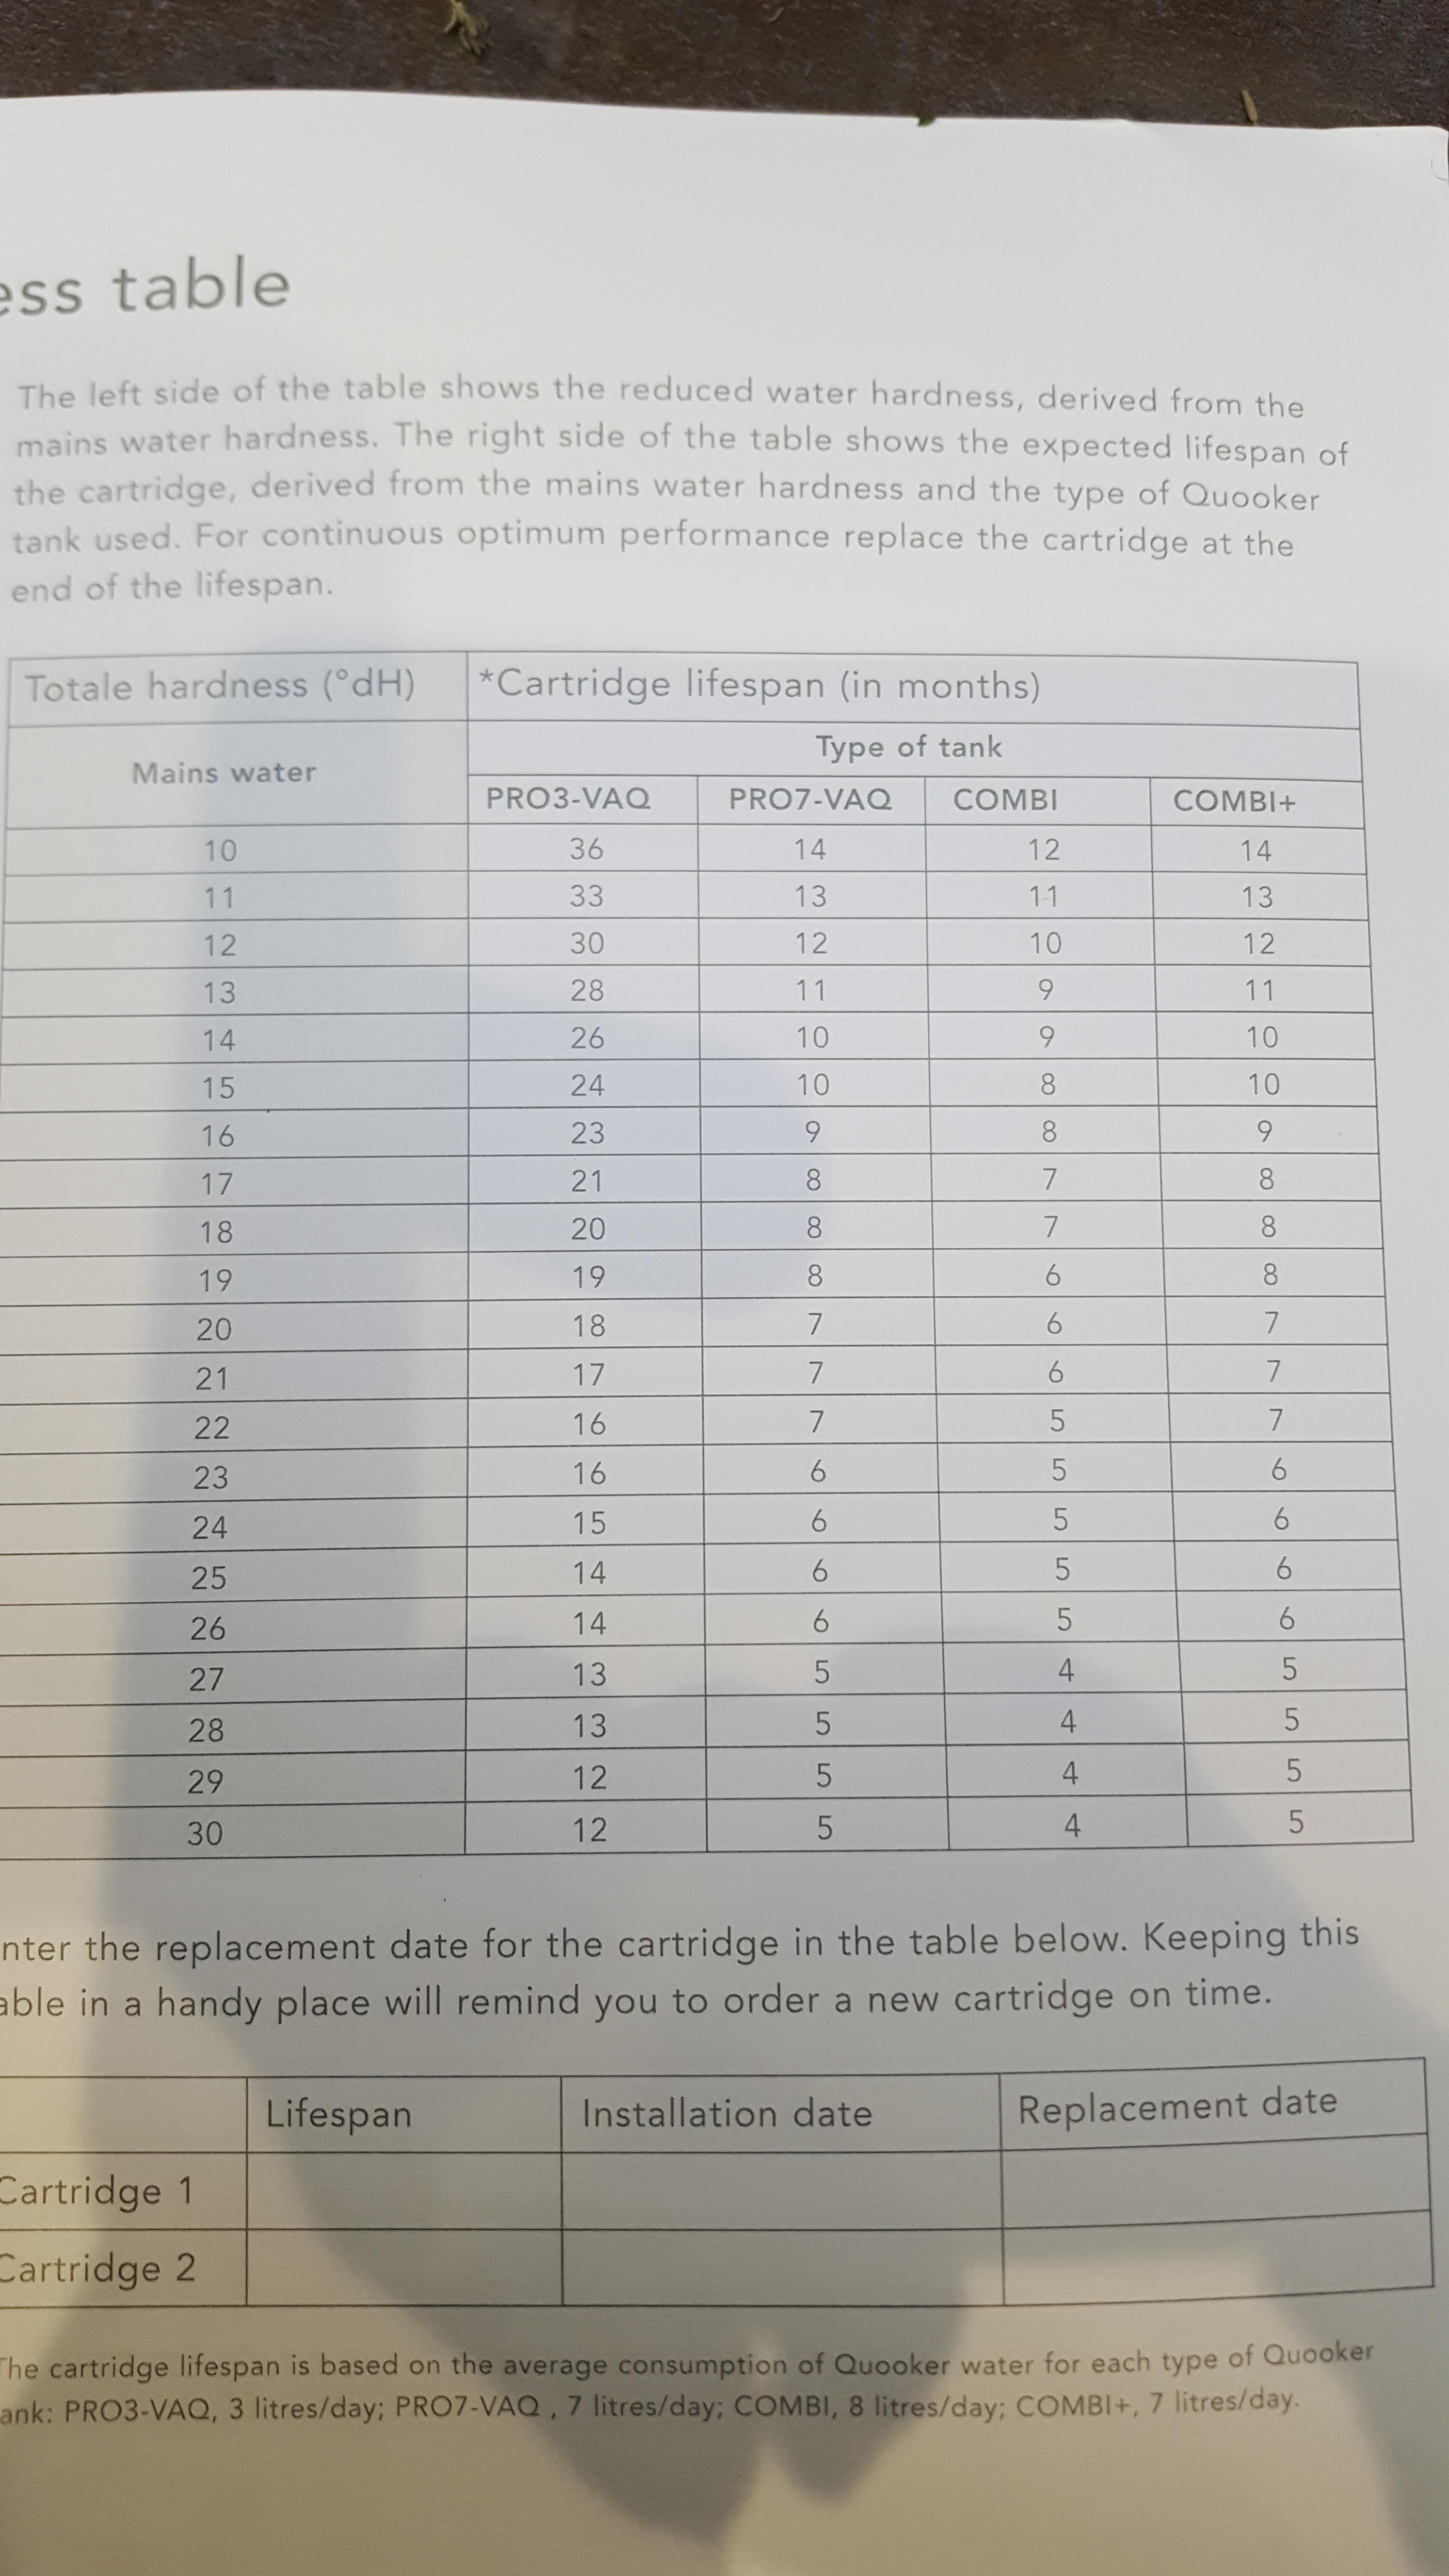
Here you go, @nod This should give you the info you need. We're about 4 months on now with ours and I am considering switching to the house softened water. We set the filter to the hardness level indicated but we have a slight bit of leakage from the tap and at the base it's leaving a trace of limescale so I assume the filter isn't as effective as the water softener. I will turn up the filtration level for the life of this filter but after that, I think it's simpler to just use softened water.
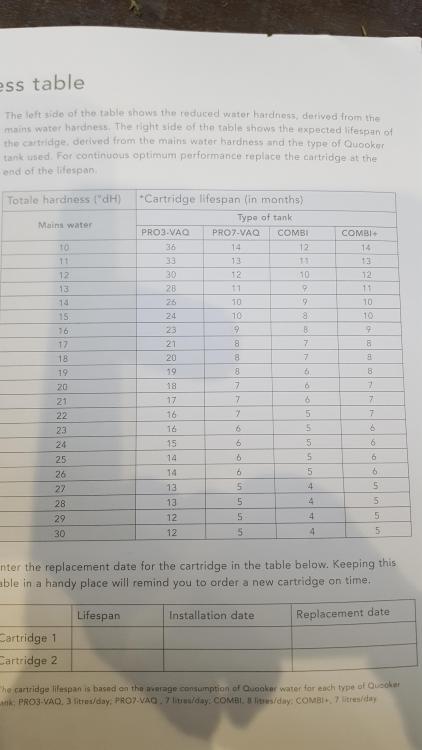 1 point
 -
They should give you a design. Once you have seen one you will notice them all over the place.1 point
-
What does that "kit" include? Not a lot judging by the price. It cost me just about £1K for all the flue pipe bends, brackets, roof kit, flashing etc to go up through an upstairs bedroom and out of the roof.1 point
-
Congratulations. Boy or girl?1 point
-
IMPORTANT TIP: Some light fittings like that, you can only assemble ONCE. The back cover clips onto the actual lamp holder and it WILL NOT unscrew or otherwise detach. DO NOT think about trying to fit the cover until the cable is connected. Of course you know how I know that.1 point
-
There are a few other vids on their Youtube channel, but this isn't a bad start:1 point
-
And when it comes to water ~ make sure their design includes a valve which isolates your property, and which you can turn off.1 point
-
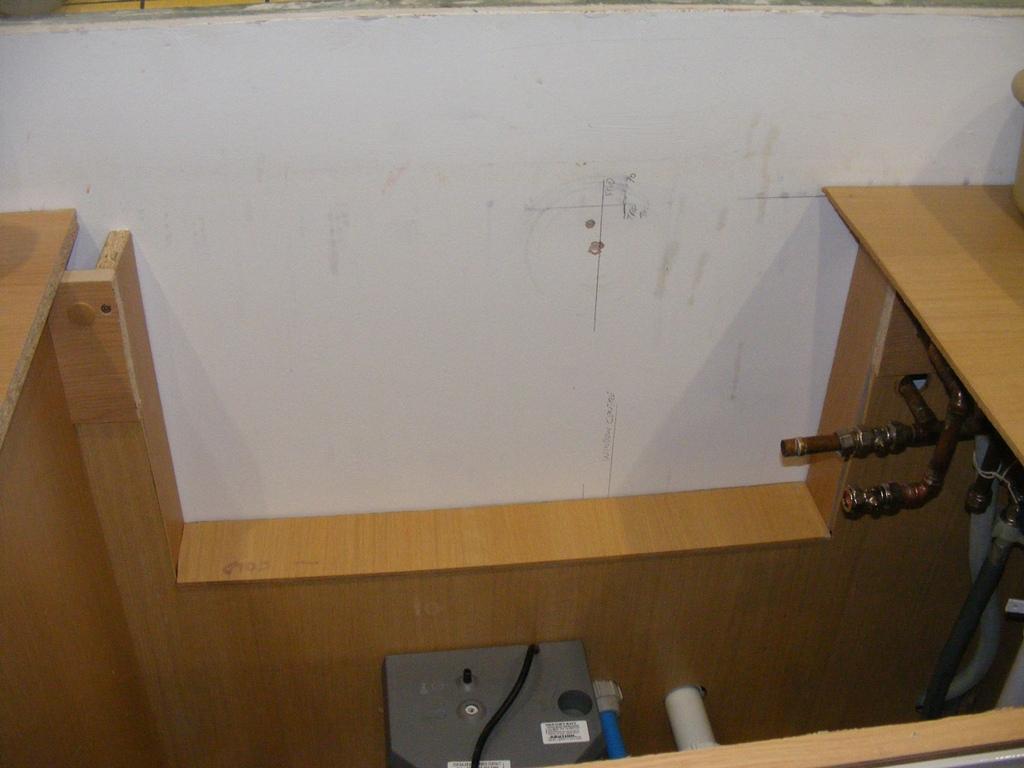
Well the man came today to template the worktops. As I suspected the centreline of the tap hole is going to be 70mm in from the back of the worktop. putting it right on top of the back section of the unit. The fitter said don't worry we will make any cut outs we need. But I got the distinct impression they would fit the tap to the worktop then notch just enough to get the hoses through. I like things to be maintainable, and work on the basis that some day someone might want to change the tap and might like easier access. So I got busy with a saw. The cut out is a bit wider than the sink, and plenty low enough. And by lining the sides and the bottom should ensure when you drop a nut or a washer, it won't end up lost under the unit. That's the boiling water unit sitting in the bottom. It's final location won't be decided until I see the sink and tap in place and see were it best fits.
 1 point
 -
Proving Faye does all the hard work! Congrats to you both! ?1 point
-
Congratulations! ?1 point
-
Totally depends on the state of the title. If the land is already registered with its own title, £500 - £1000 should do it. Ours was a purchase of a part of a larger piece of land with a complex title (title needed to be traced back to early 1800s), and the conveyancing cost us £2k. Solicitor said it was actually £4k of work on her part but as she had quoted us £1k, capped her fees at £2k. Not too sure I believed that line.1 point
-
The law society in Scotland publishes a schedule of charges for conveyancing which is partly weighted to purchase price. Not sure if the same applies where you are but unless it's complex you shouldn't pay any more than a straightforward house transaction for the same value.1 point
-
Doesn’t sound to bad I think we paid about £1000 three years ago1 point
-
IIRC, we paid ~£800 back in 2012. Used a local firm of solicitors that knew the area, not that I suspect that helped much.1 point
-
I did exactly as @Conor has described. I built a fence to hold a meter box, and did not ask SSE for a temporary supply, I asked them for a normal 100 A supply. The only thing different between the two is that whilst the supply is being used as a temporary building supply it must be connected using a TT earthing system (i.e. an earth electrode and 100mA RCD) and when the house is built the supply can then be reconfigured to be (most probably) TN-C-S. Not a problem at all, just a matter of moving the earth wire over and connecting it to the PE terminal in the cut out housing.1 point
-
Yep, i definitely don't want that and I am mulling the best outcome (also wanted some second options hence this post), and hopefully meet up with him later this week..1 point
-
The IMPORTANT thing before you do ANYTHING is to note that not all cables of the same colour do the same thing, so you need to mark EVERY cable in some way before you disconnect anything so you can always revert to how it was. There is a LOT going on there. You have two 3 core & earth cables, one being red / yellow / blue and one being Brown / black / grey. 2 way switching? I would be inclined to sink a round plasterboard box into the ceiling to give you space to terminate everything exactly as it is now, bringing one bit of 3 core flex out to your light fitting. something like this, https://www.screwfix.com/p/appleby-circular-dry-liner-box-35mm/90517 Once all your terminals are tucked up inside the box, I am sure the mounting bracket for the light fitting will just fix to the two screws with standard socket screws.1 point
-
Welcome. Check, and double check, that the utilities will actually be able to provide services at a reasonable price. When we first saw our plot, it was advertised as having outline PP and "services available". Electricity and a telephone connection weren't too much of a problem, around £3.5k. However, a water connection was going to be ~£24k and a mains sewerage connection was going to be another ~£14k, plus the cost of the pump and pump chamber. The fact that our neighbours all have mains water and sewerage, and none have a pumped system, was neither here nor there. The vagaries of the way the water company work meant that we were going to be faced with a massive bill if we wanted their services. In the end we had a borehole drilled for water and installed a treatment plant for sewage, at a total cost of ~ 1/3rd of that for getting connections from the water company. Did I mention checking with the utilities? ?1 point
-
Guess I should check you know about the CIL exemption for self builders? To qualify you must not do any work on site before getting the paperwork done.1 point
-
You could replace the current fittings with some WAGO blocks. They'll lie nice and flat in your new fitting I suspect. Pic of the new fitting's base plate pls.1 point
-
@PeterStarck, ref your question on the other thread. Fag packet sketch at the start here shows my musings to have a buffer tank (central to the house), fed from the oil boiler. Use that for any new UFH circuits to keep separate from the filthy old single pipe system here.1 point
-
@scottishjohnPlease have a look at BR 443 and the various caveats about metal (not discrete screw fixings or wall ties) penetrating an insulation layer. Kingspan composite panels normally sit above the purlins, similarly the insulation division normally show the insulation external to purlins/deck or light steel frame studs. @moldyProblem with a compressible insulation is that it's insulation value will depend upon its compressed thickness! Simple solution is to use the loft legs that are designed for this application.1 point
-
We have a secure delivery box, one of these: https://www.brizebox.com/ I bolted it to the wall by our back door, with a sign on the external letter-only box by the front door pointing to it. Seems to work very well.1 point
-
15mm inlet on the combi = total waste of time putting 22mm on the outlet. The only reason you’d go to 22mm would be to reduce resistance over a VERY long run. To be honest, utilising manifolds with a remote combi is not a very good idea IMO as you’re adding a huge amount of dead leg to each outlet, particularly the basin tap ( high frequency / low volume use ) which will be a PITA. If you want some divisibility then you could do 2x 15mm runs from the combi 1x 1st floor 1xground floor / whatever best divides the system, and just have an isolator ( FULL BORE ) at the combi for each run. The Vaillant 938 is a fantastic boiler with IIRC a 15L pre-heat cylinder ( actually it’s 2x 7.5’s for less physical space requirements ) and is comparable in DHW delivery to a 200L UVC. It’s only Ach’s heel is it’s still only a 15mm inlet & outlet, but with a good cold main you really can’t tell. The time from opening an outlet to actually getting premium temp DHW is massively reduced as it’s always got that buffer ready to go, so definitely a contender for anywhere where longer DHW runs will end up causing inconvenience. Veismann combis seem to have a good following but I can’t really say I’d rate them over the Vaillant if I’m honest. Guess I’m biased because I’ve fitted so many of the Vaillant units without an ounce of grief. Adding a DIY hot return to a heat store boiler will, I’m pretty sure, void the warranty. Ring the various manufacturers to ask, but I think the only heat-store combi I’ve ever seen with a tank and a hot return tapping was the Arirton 27 Plus ( a steaming bag of shit on a good day though, and I’d only fit one for someone I disliked ). The 27 Plus was the old model, they may have renamed it since I saw one of them last. Vaillant 938 all the way if it was me.1 point
-
That would pierce the insulated envelope. Hard work to avoid a cold bridge. My impression is that something like that would make the room feel much colder, as in you will feel a chill in the hall. Suggest rather something in your accessible porch, or outside. One nice way to do it is to have a thing in your porch for resting bags or boxes on whilst you unlock the door, and for that to have a lock-as-it-closed door of some sort. F1 point
-
What about ventilation? In a true warm roof, you don't ventilate it. A cold roof needs ventilation. What have they done for this half way house? From experience, Something like Frametherm 35 will push in between the rafters and stay there. I had a test piece in place like that for over 6 months before finally covering it with OSB and it did not budge. A LOT easier to cut to width so it is a snug fit than any solid insulation. To be sure it stays, once in place fix some thin battens across to hold it in place.1 point
-
My suggestion is use an internal stack pipe. Stack pipes up the outside are so last century.1 point
-
Beautiful house! Just wait till the boredom sets in once you’re finished, you’ll end up doing it all again ?1 point
-
The Sun: Couple’s £1m bill as home COLLAPSES after botched basement conversion. And that's not the rebuild cost.... https://www.thesun.co.uk/news/10471808/couples-dream-home-botched-conversion-mortgage/ There was another flat above theirs.0 points
-
The 7m of twinwall flue and all the bends and cap cost more than my stove.0 points
-
Modesty0 points
-
Faye's looks thank God! ?0 points
-
You left off: Cat Flaps Letter Boxes0 points


.jpg.c21f3ac78c9b7efd90cbdcb312744dc5.thumb.jpg.7adcad4c0e384f5ecd7d56b0618df6e5.jpg)