Leaderboard


Popular Content
Showing content with the highest reputation on 07/18/19 in all areas
-
The wall fortunatley isn t listed. It belongs to the council and as far as I'm aware, it has been like that since these last terrible storms a few weeks ago . But as a good citizen i am willing to put it back together myself without making a big fuss about it ?3 points
-
That is absolutely ludicrous!!! At the very most, installation might cost around £400 to £500, but frankly I'd have thought closer to around £250 to £300 would normally be the case (half a day's work plus some pipe, fittings and a run of cable). The "25% off" is just classic double-glazing sales technique, and isn't real at all, given the greater than 100% markup on the discounted price anyway. I'm all for people being in business to make a fair profit, but this seems to be just a massive rip-off. Sure the Sunamp UniQ is a good product, and now that the glitches in the controller and sensors seem to have ironed out it does work very well indeed. Whether it works well enough to be priced way, way above an unvented cylinder is very questionable, though. I'd say that, for the majority of people this sort of price makes it very poor value, as the small energy saving made from the lower standing loss is likely to never be recovered through life from the higher price. At a guess, our's saves us maybe 1 kWh/day in reduced loss, and that saving is only real outside the heating season, when the heat loss isn't beneficial to heating the house. For most of the time the Sunamp is heated by excess PV generation outside the heating season, so is "free", but if I assume that we didn't have PV, then that 1 kWh/day for around 240 days is worth between £20/year (assuming E7 tariff) and £36/year (assuming peak rate tariff). If we assume a life for the unit of 20 years then the saving will be between £400 and £720 at today's prices. That doesn't begin to cover the higher capital cost over installing a UVC.3 points
-
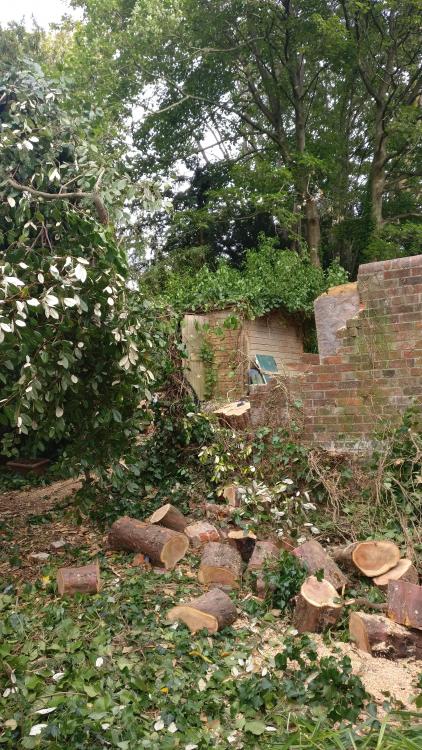
Thanks to @JSHarris @PeterWand all the rest of you for the kind wishes. Everyone is safe. The almighty @Russell griffiths came to my rescue with his mate. Chopped up the tree in no time with their magic chainsaw skills : Now I am just left with a whole in the wall: and a few logs from my chainsaw massacre Wiltshire edition I m off now for a cold one and will update blog maybe later. Russel has a great photo of how I butchered the trunk with my 1st try felling a tree. I have some time-lapse which I might post later on once I found some time to edit it. Might take a few days.

 3 points
 -
Eyewateringly expensive crap unless you buy the Hep2O one, and then it’s just eyewateringly expensive ... Every hole you drill will have to be 50mm - that may compromise some of your joists. No-one makes a cover for elbows or tees, so you will have to buy a different product to do these. Buy self seal nitrile rubber insulation and just do it yourself when it’s installed. I could probably do a whole house in less than a day.2 points
-
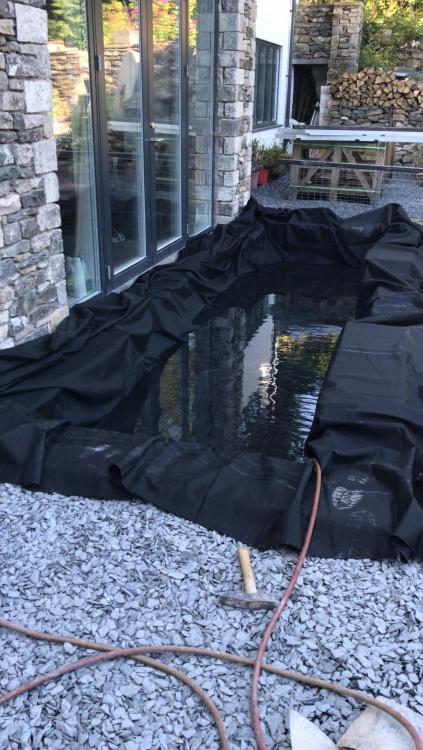
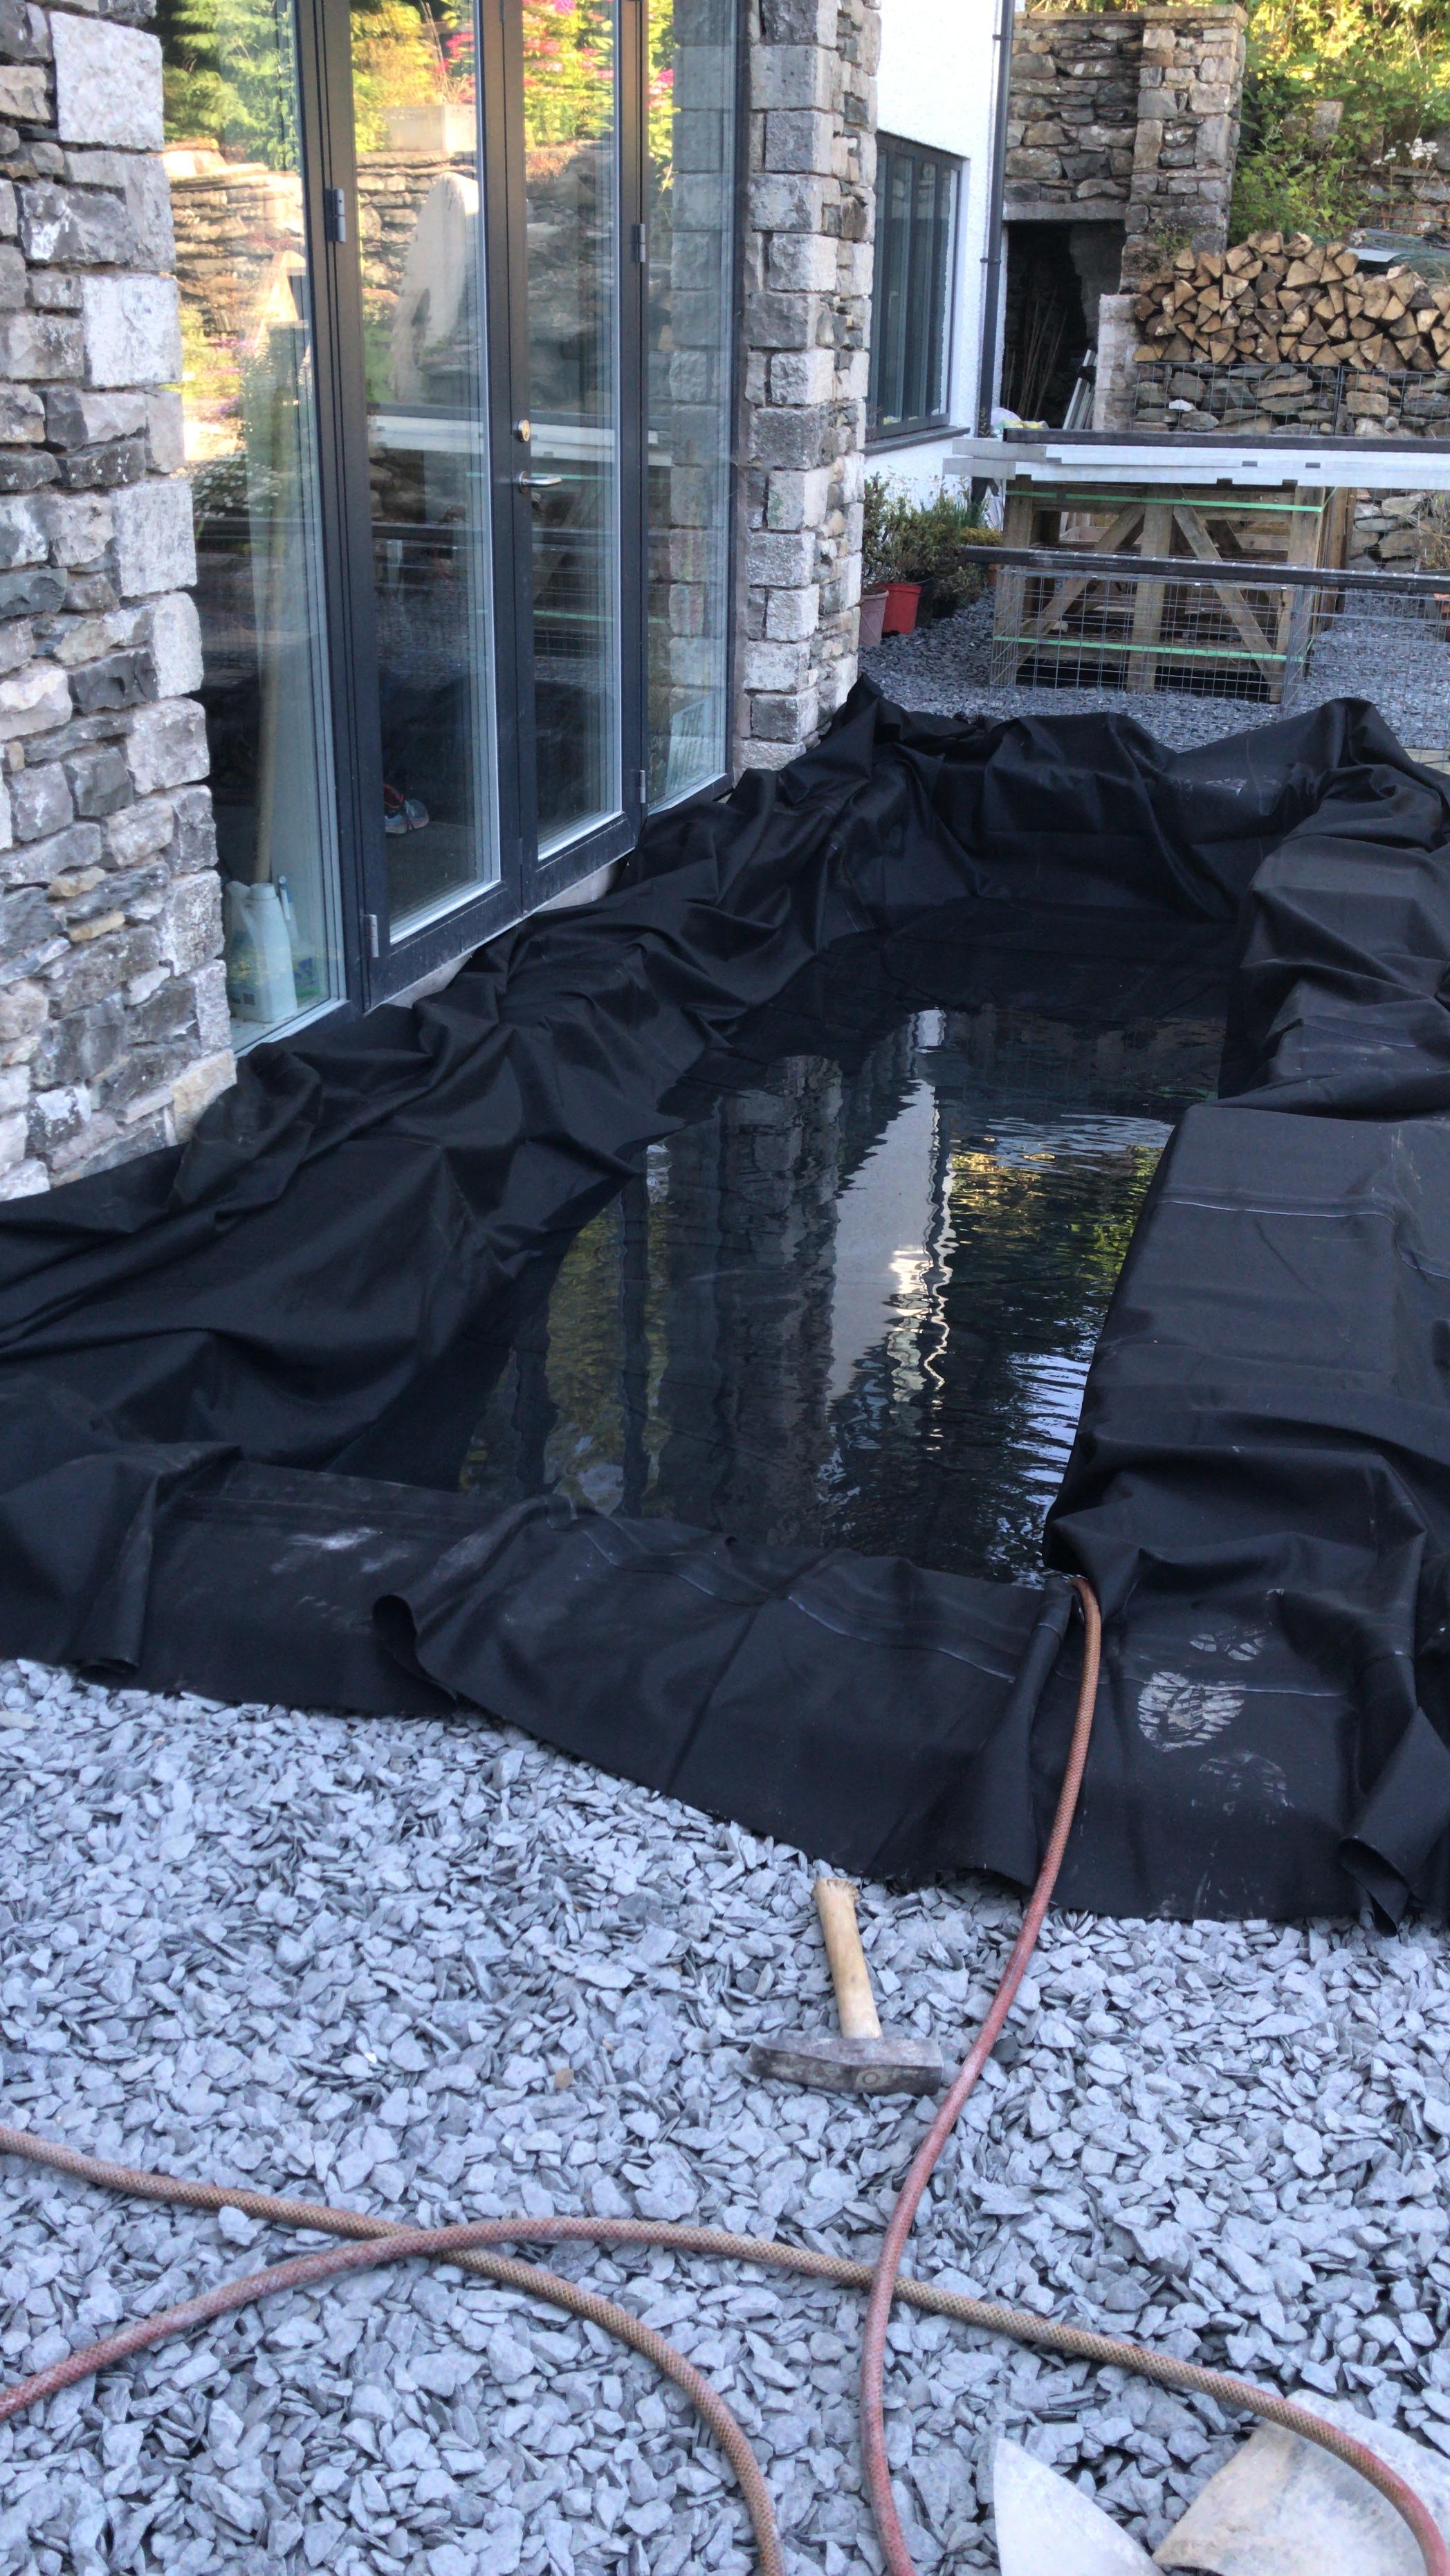
The moat cometh. Slightly concerned that the Tories may arrive shortly if rumours of a duckhouse persist
 2 points
 -
I am told that at one time, the ICF Durisol was made from recycled telephone cable drums. Not so now. Too much demand. But Hell folks, let's all pool all our waste pallets; mince them up, boil the minced wood, drench the mush in Portland cement , shape it into a nice block and leave to dry. And then pop a bit of recycled PIR in half of the hole - sell it. ?2 points
-
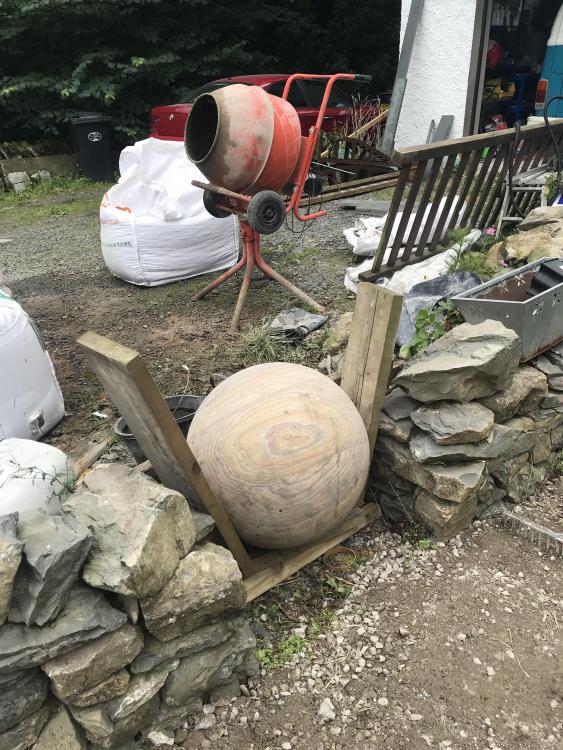
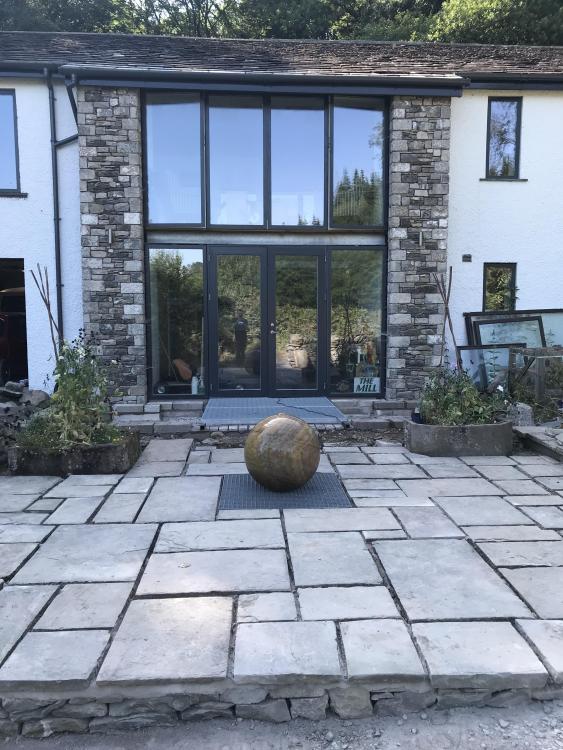
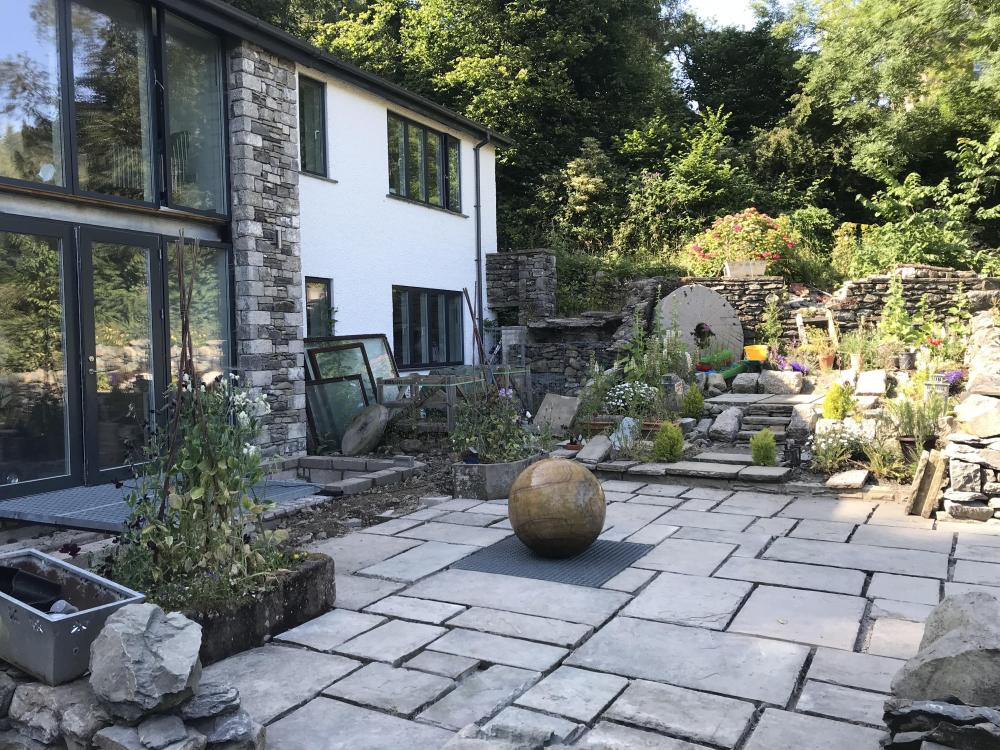
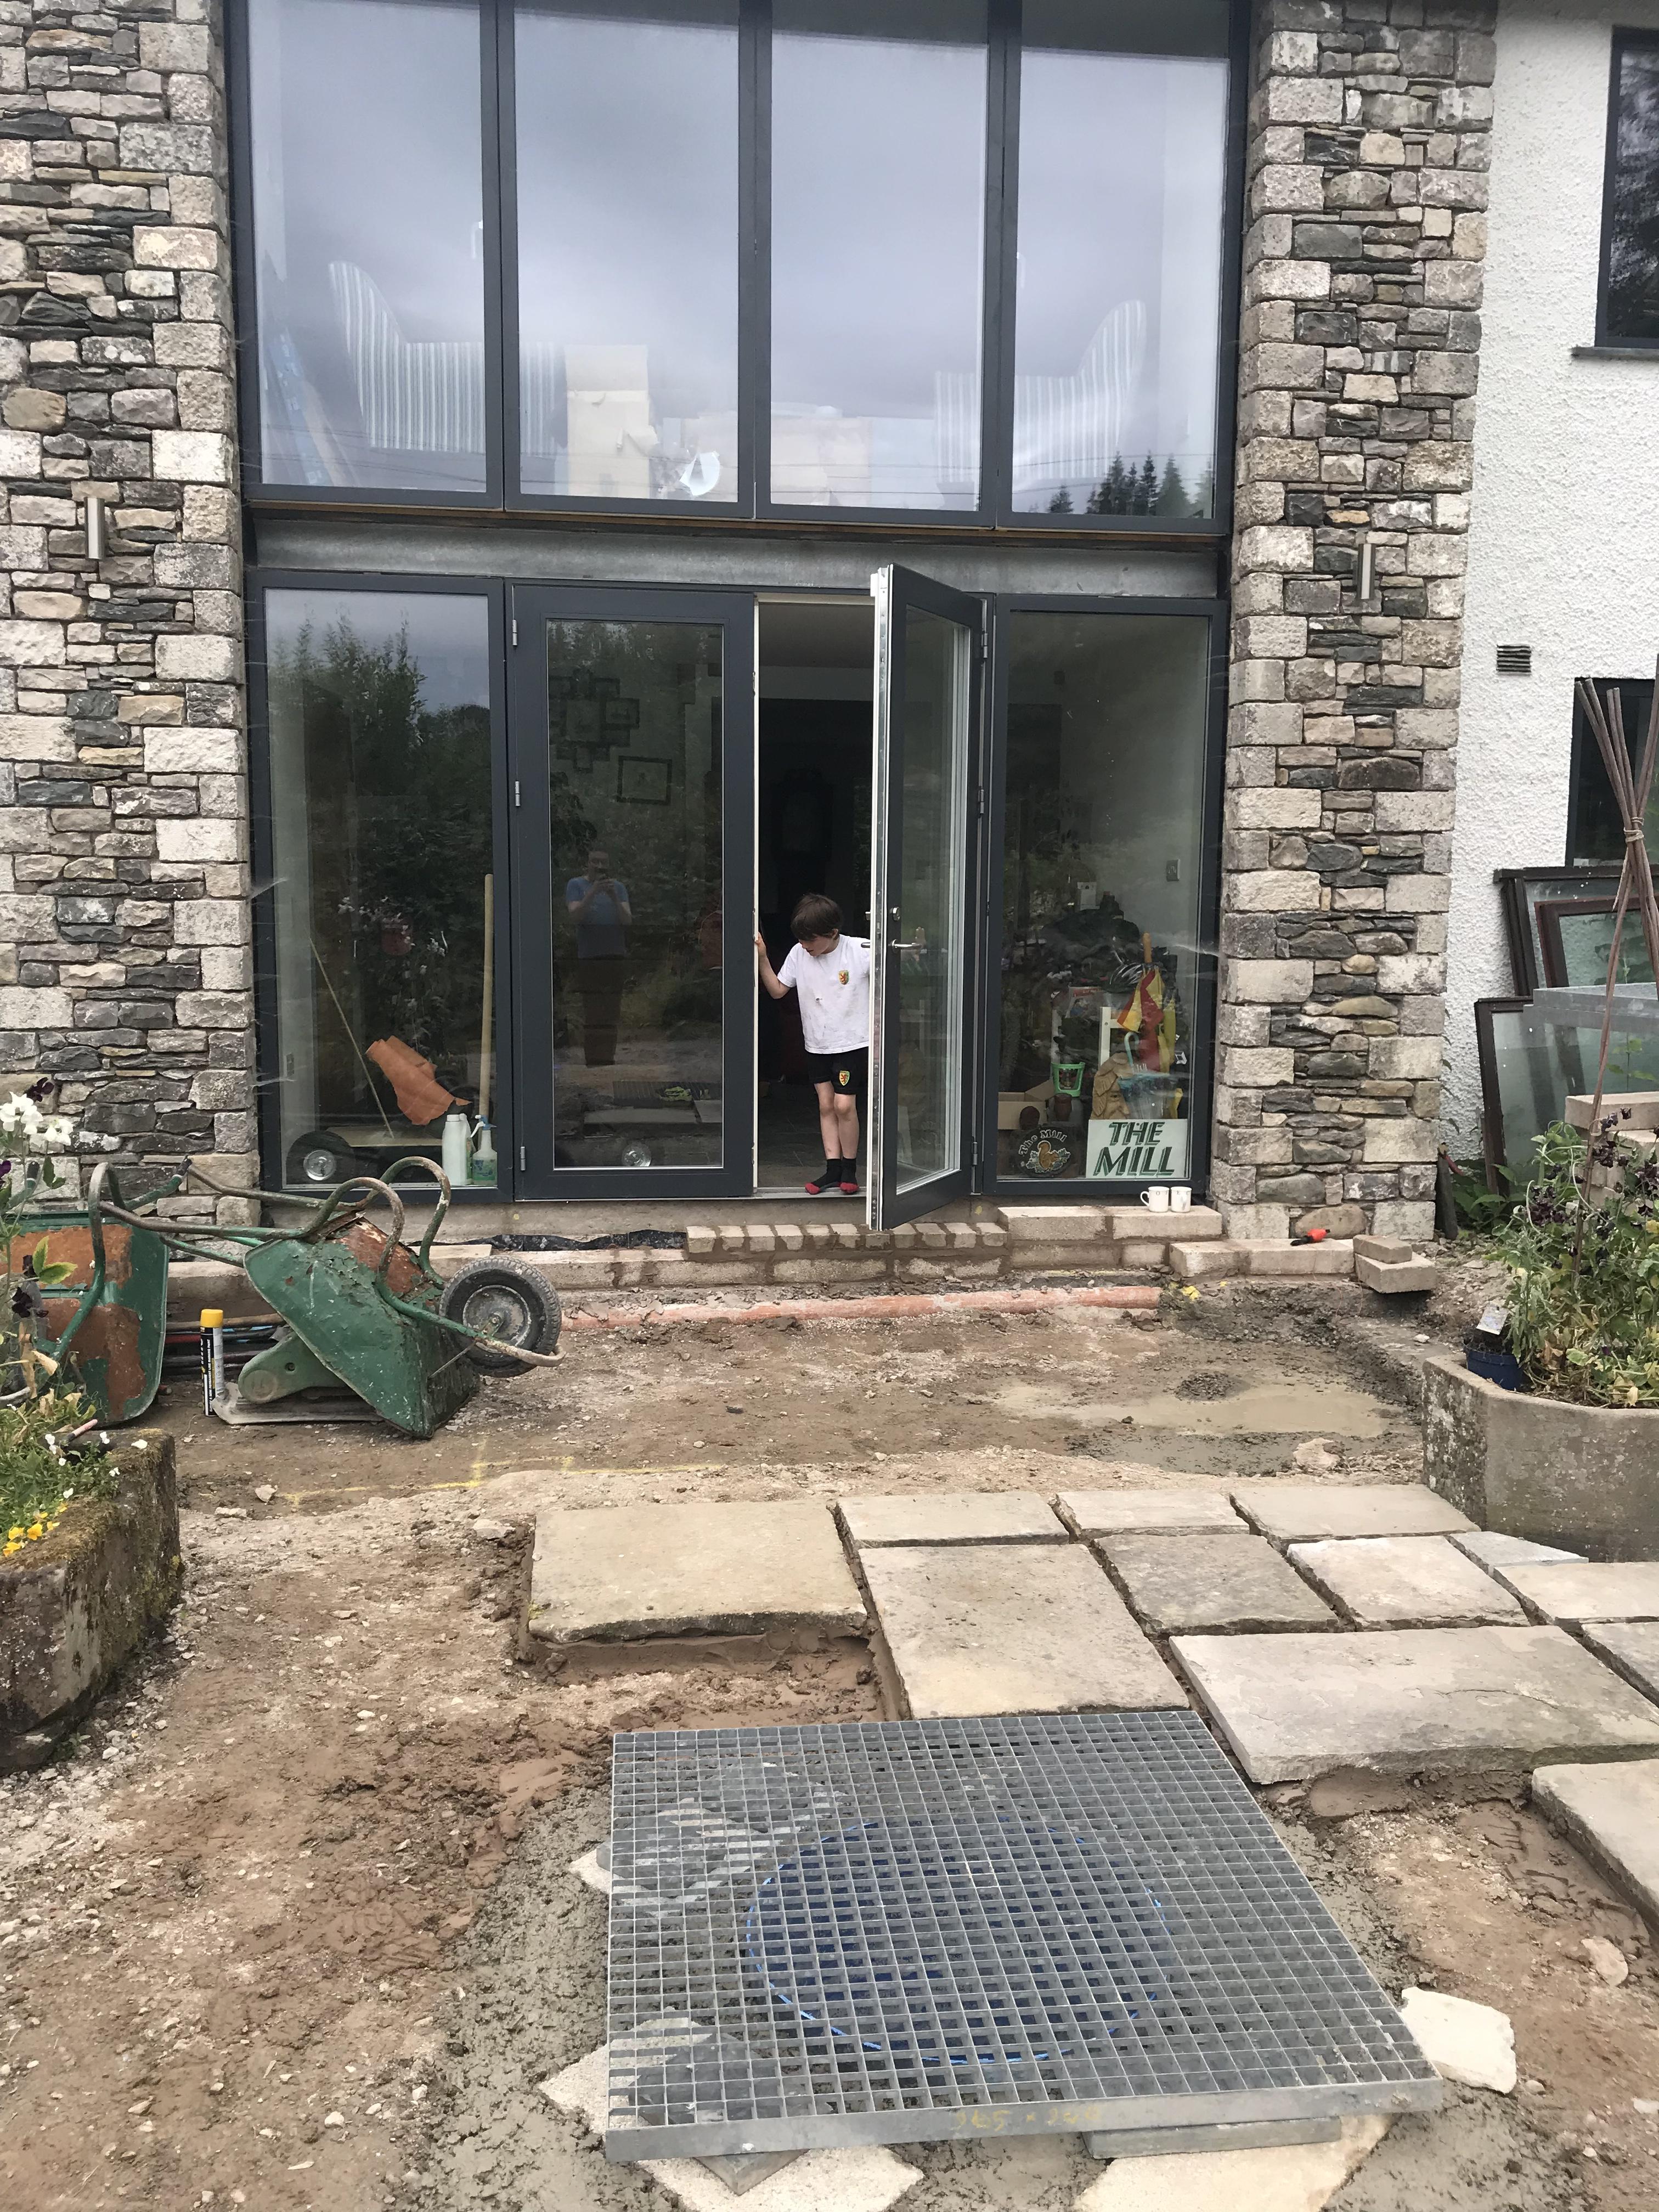
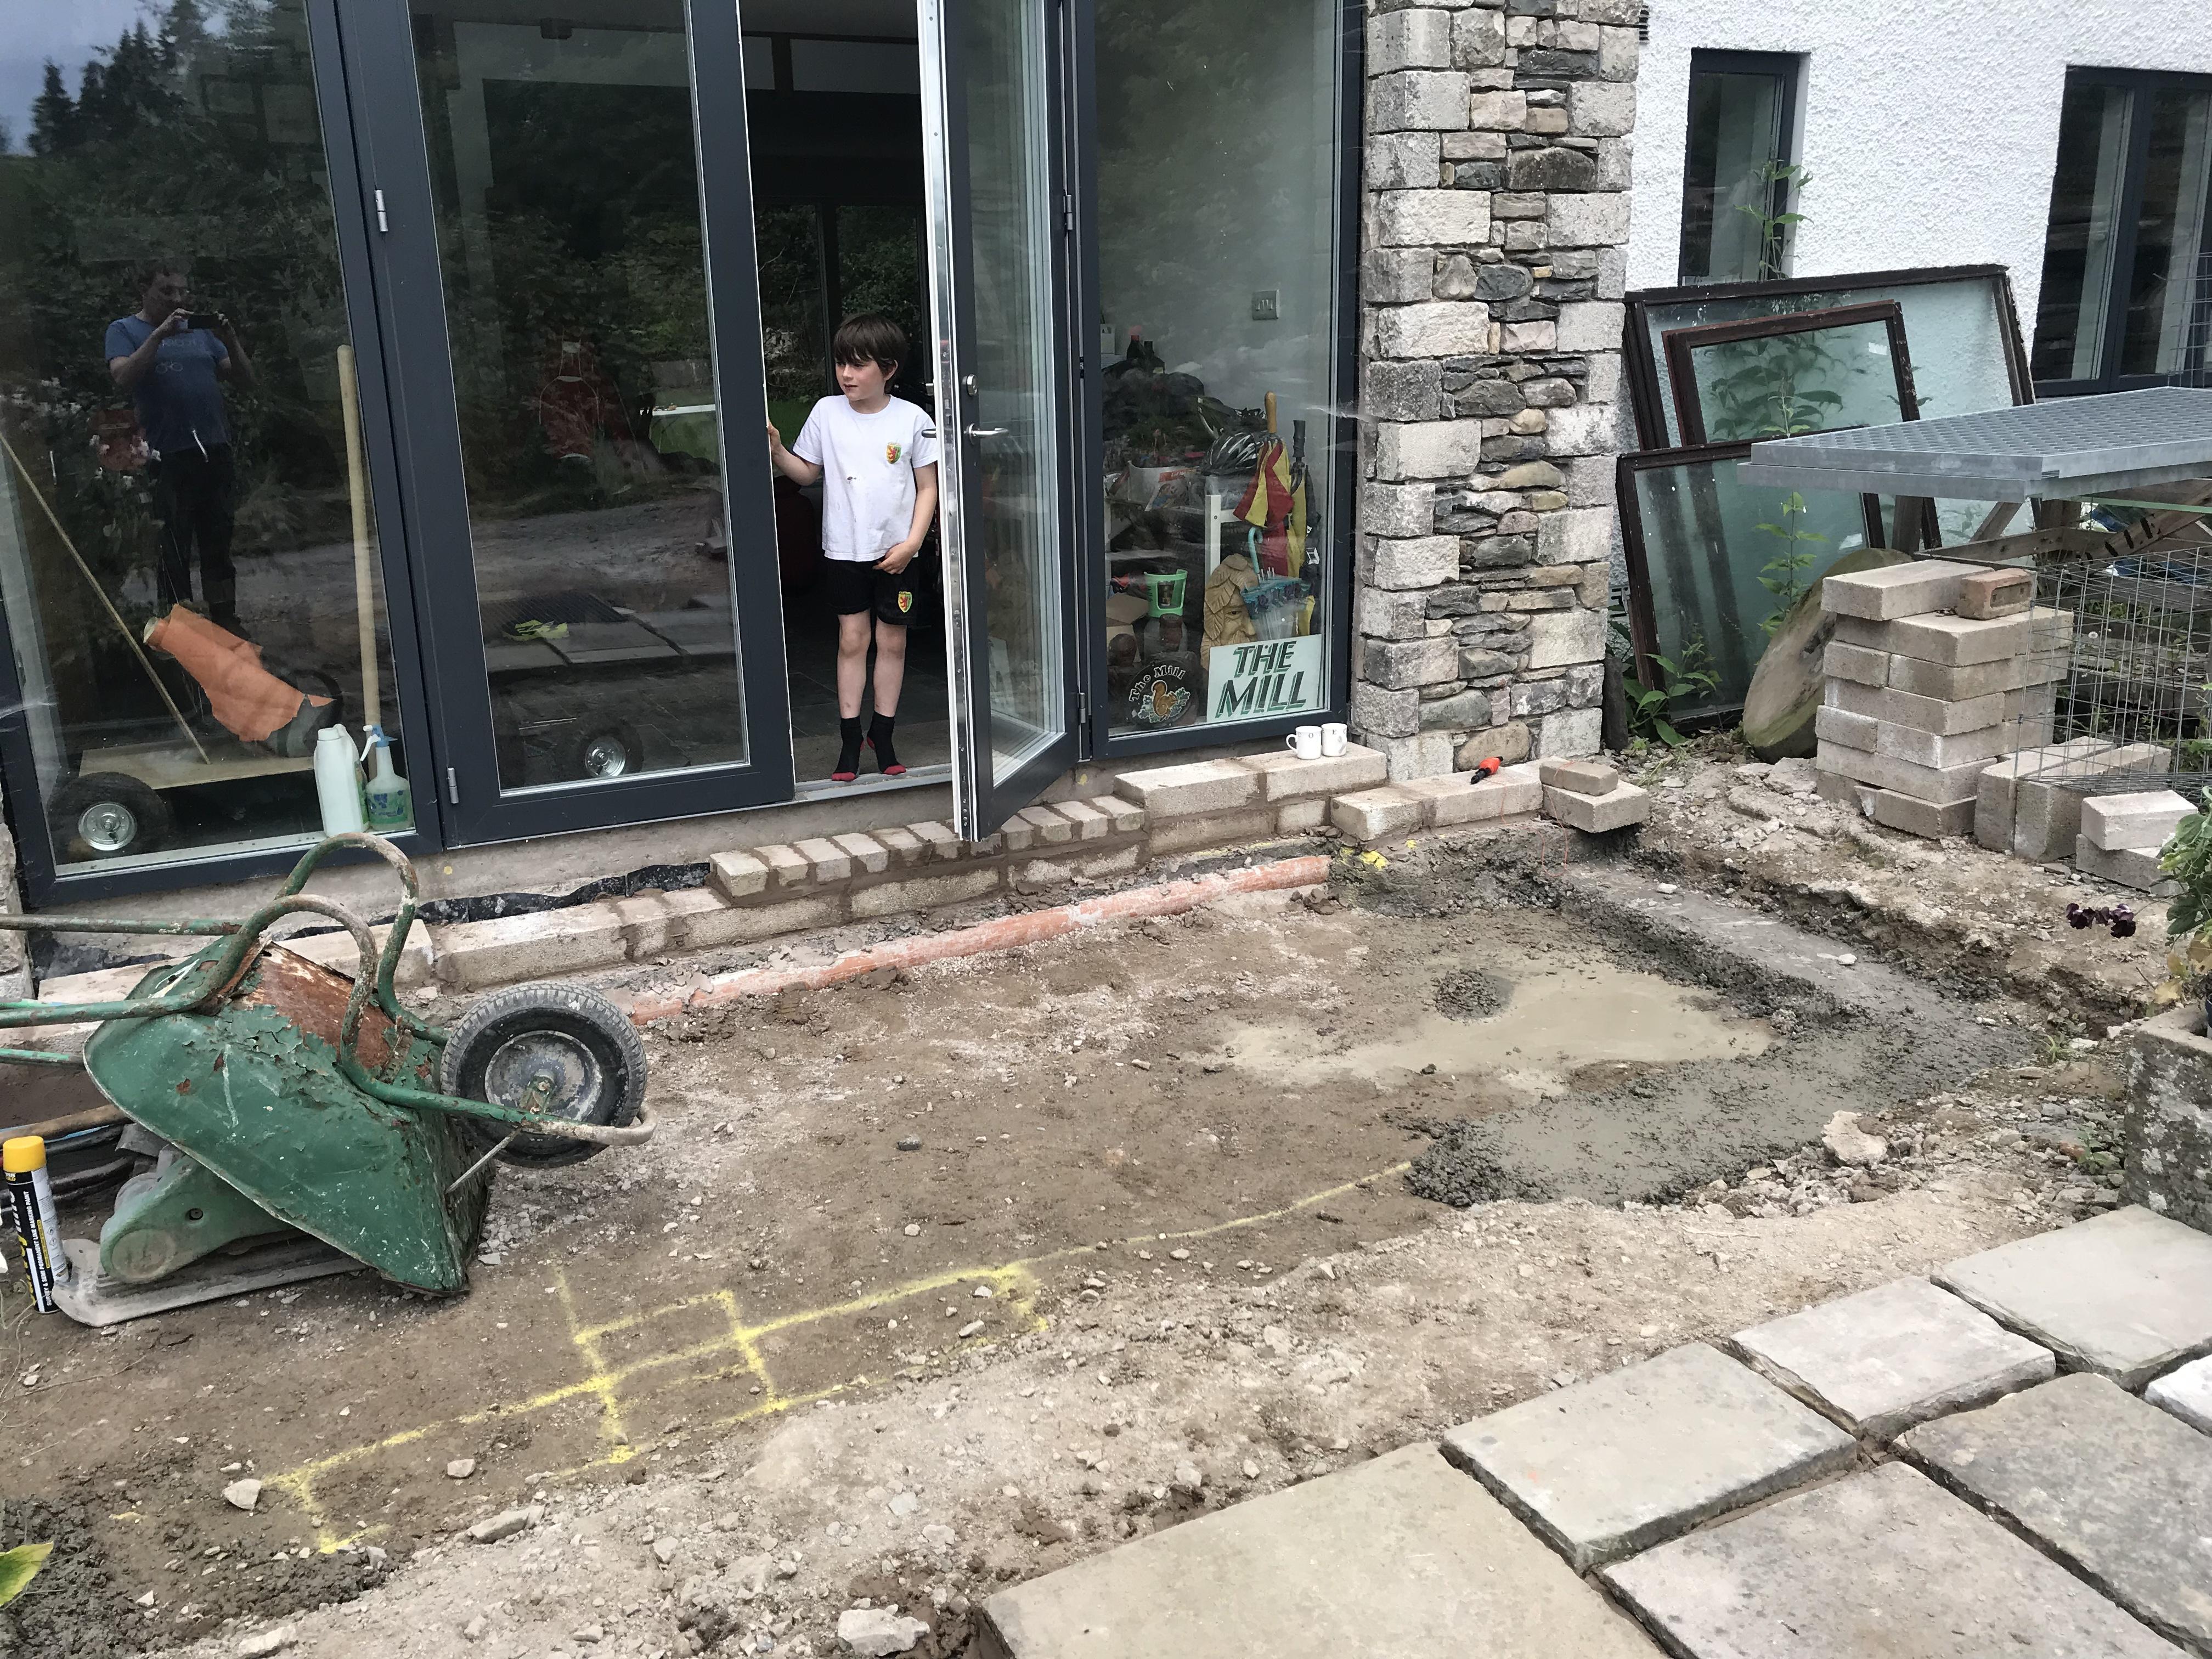
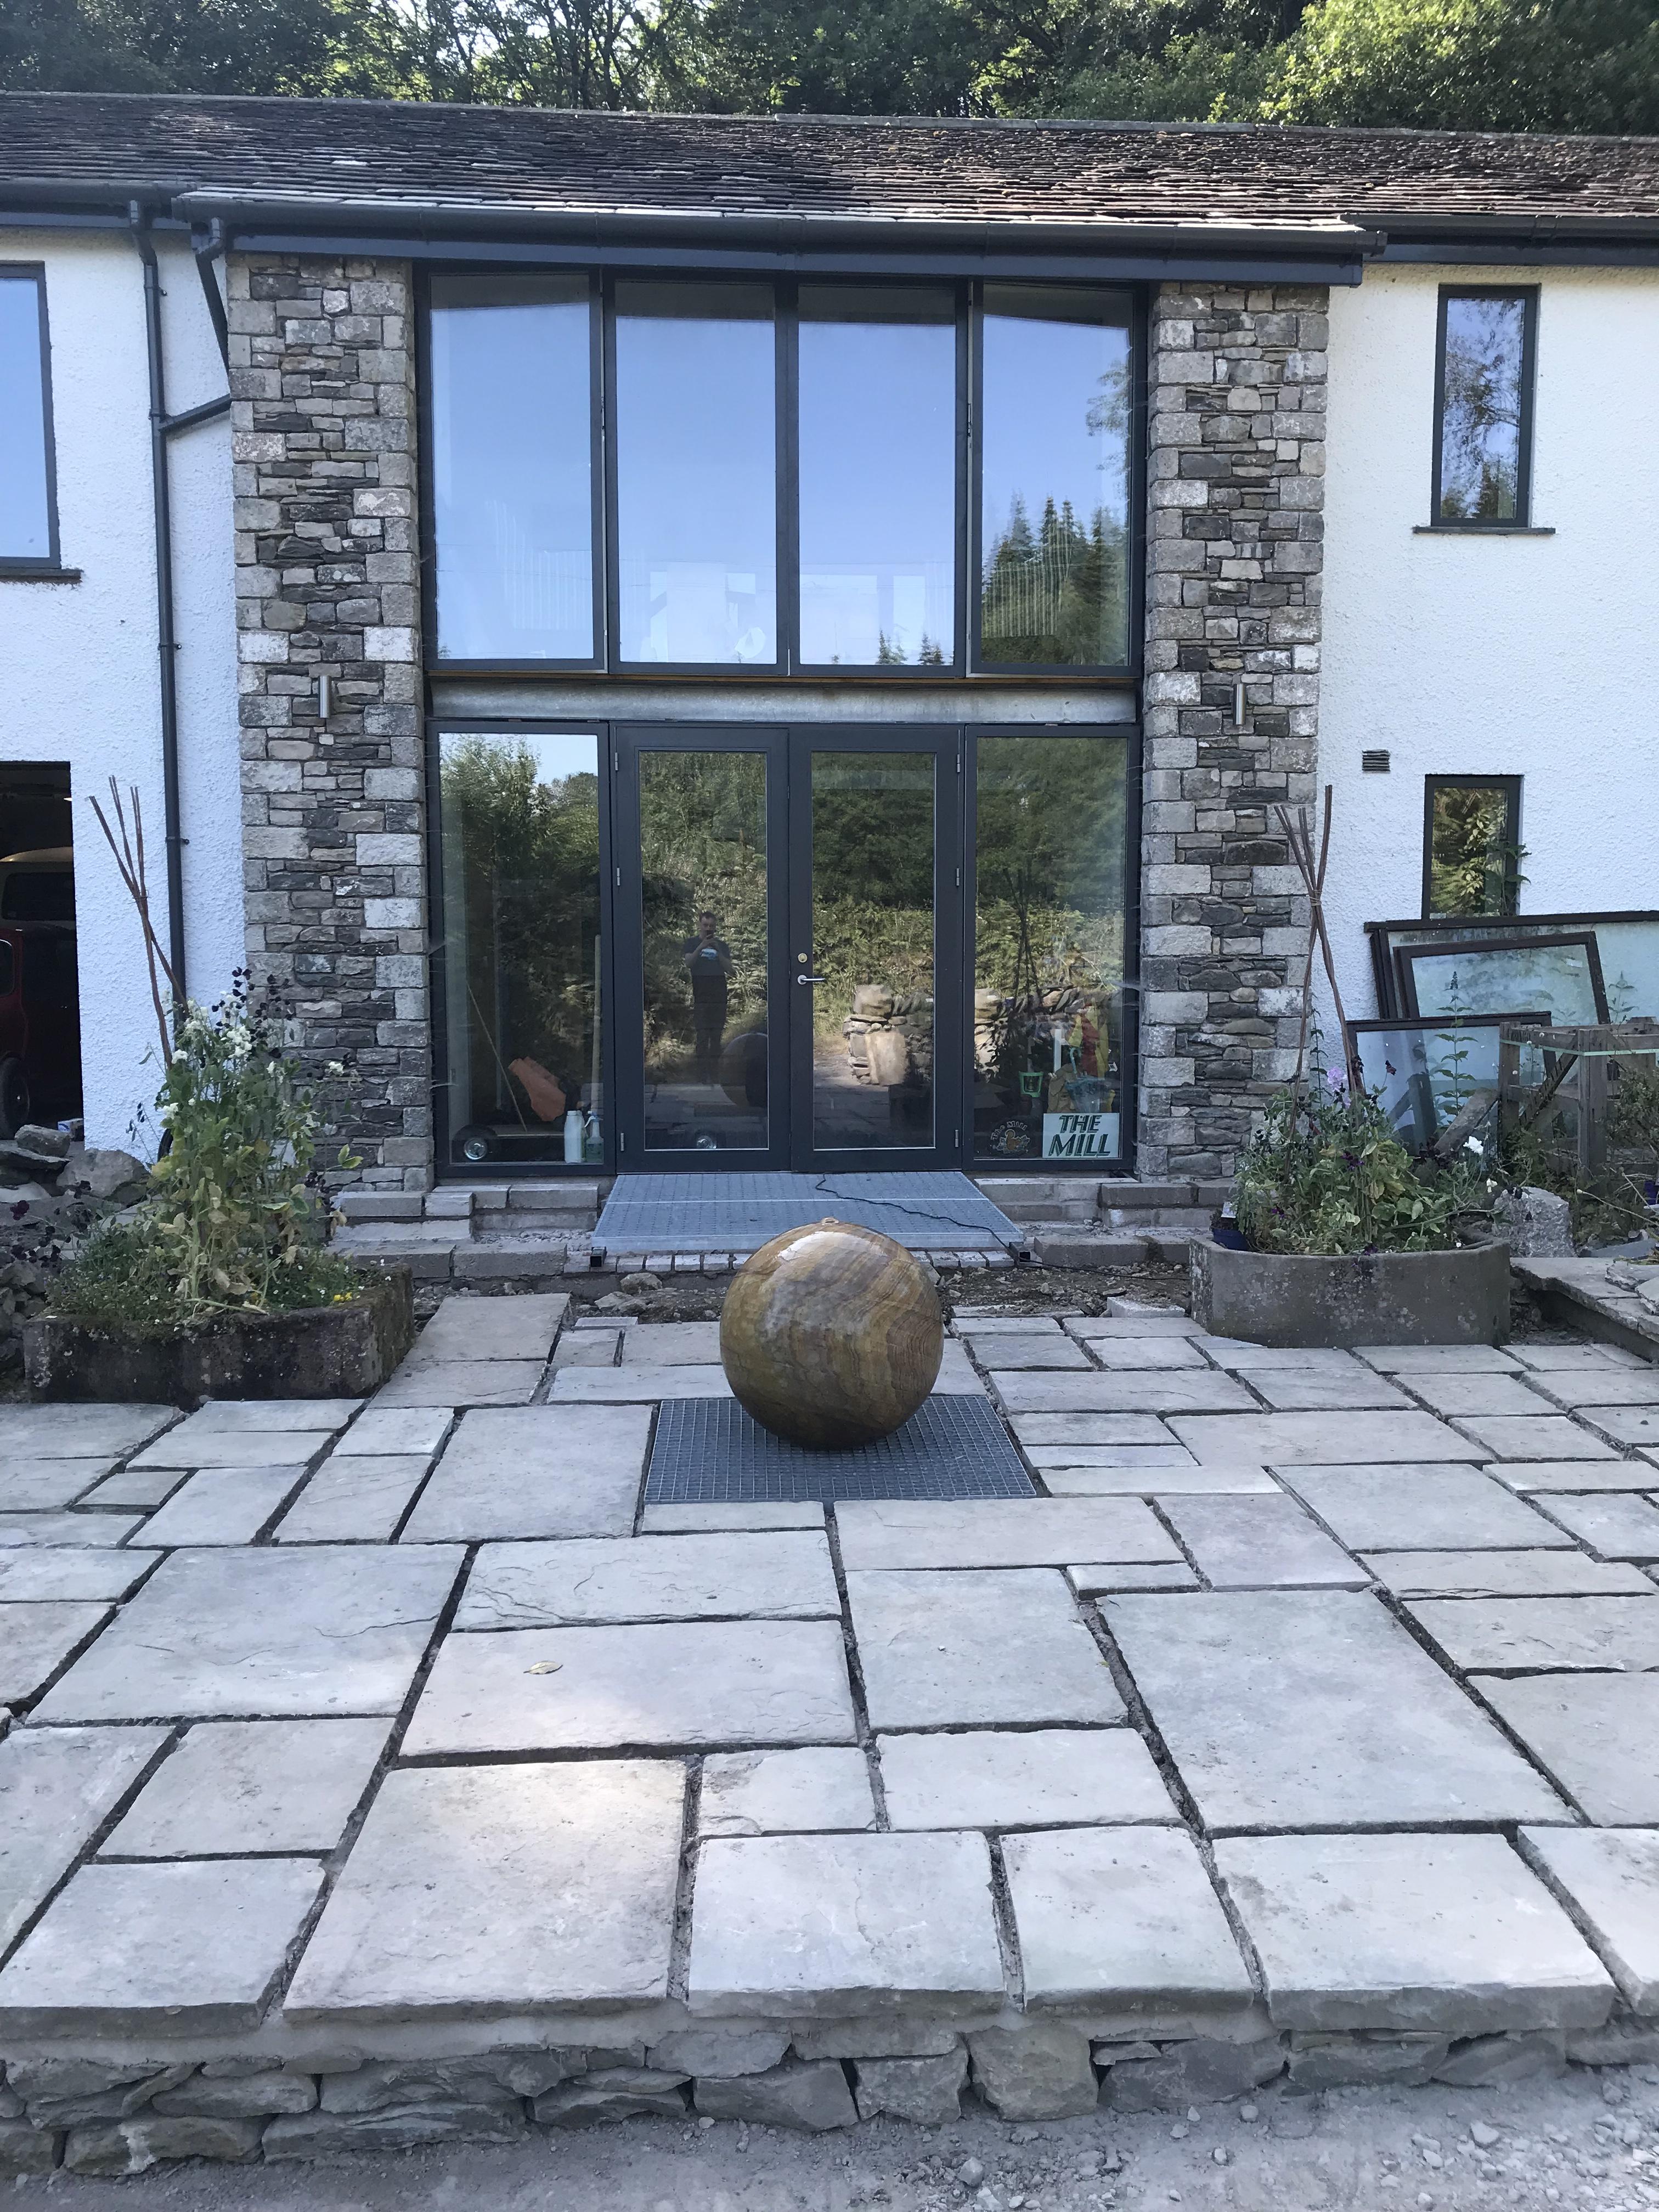
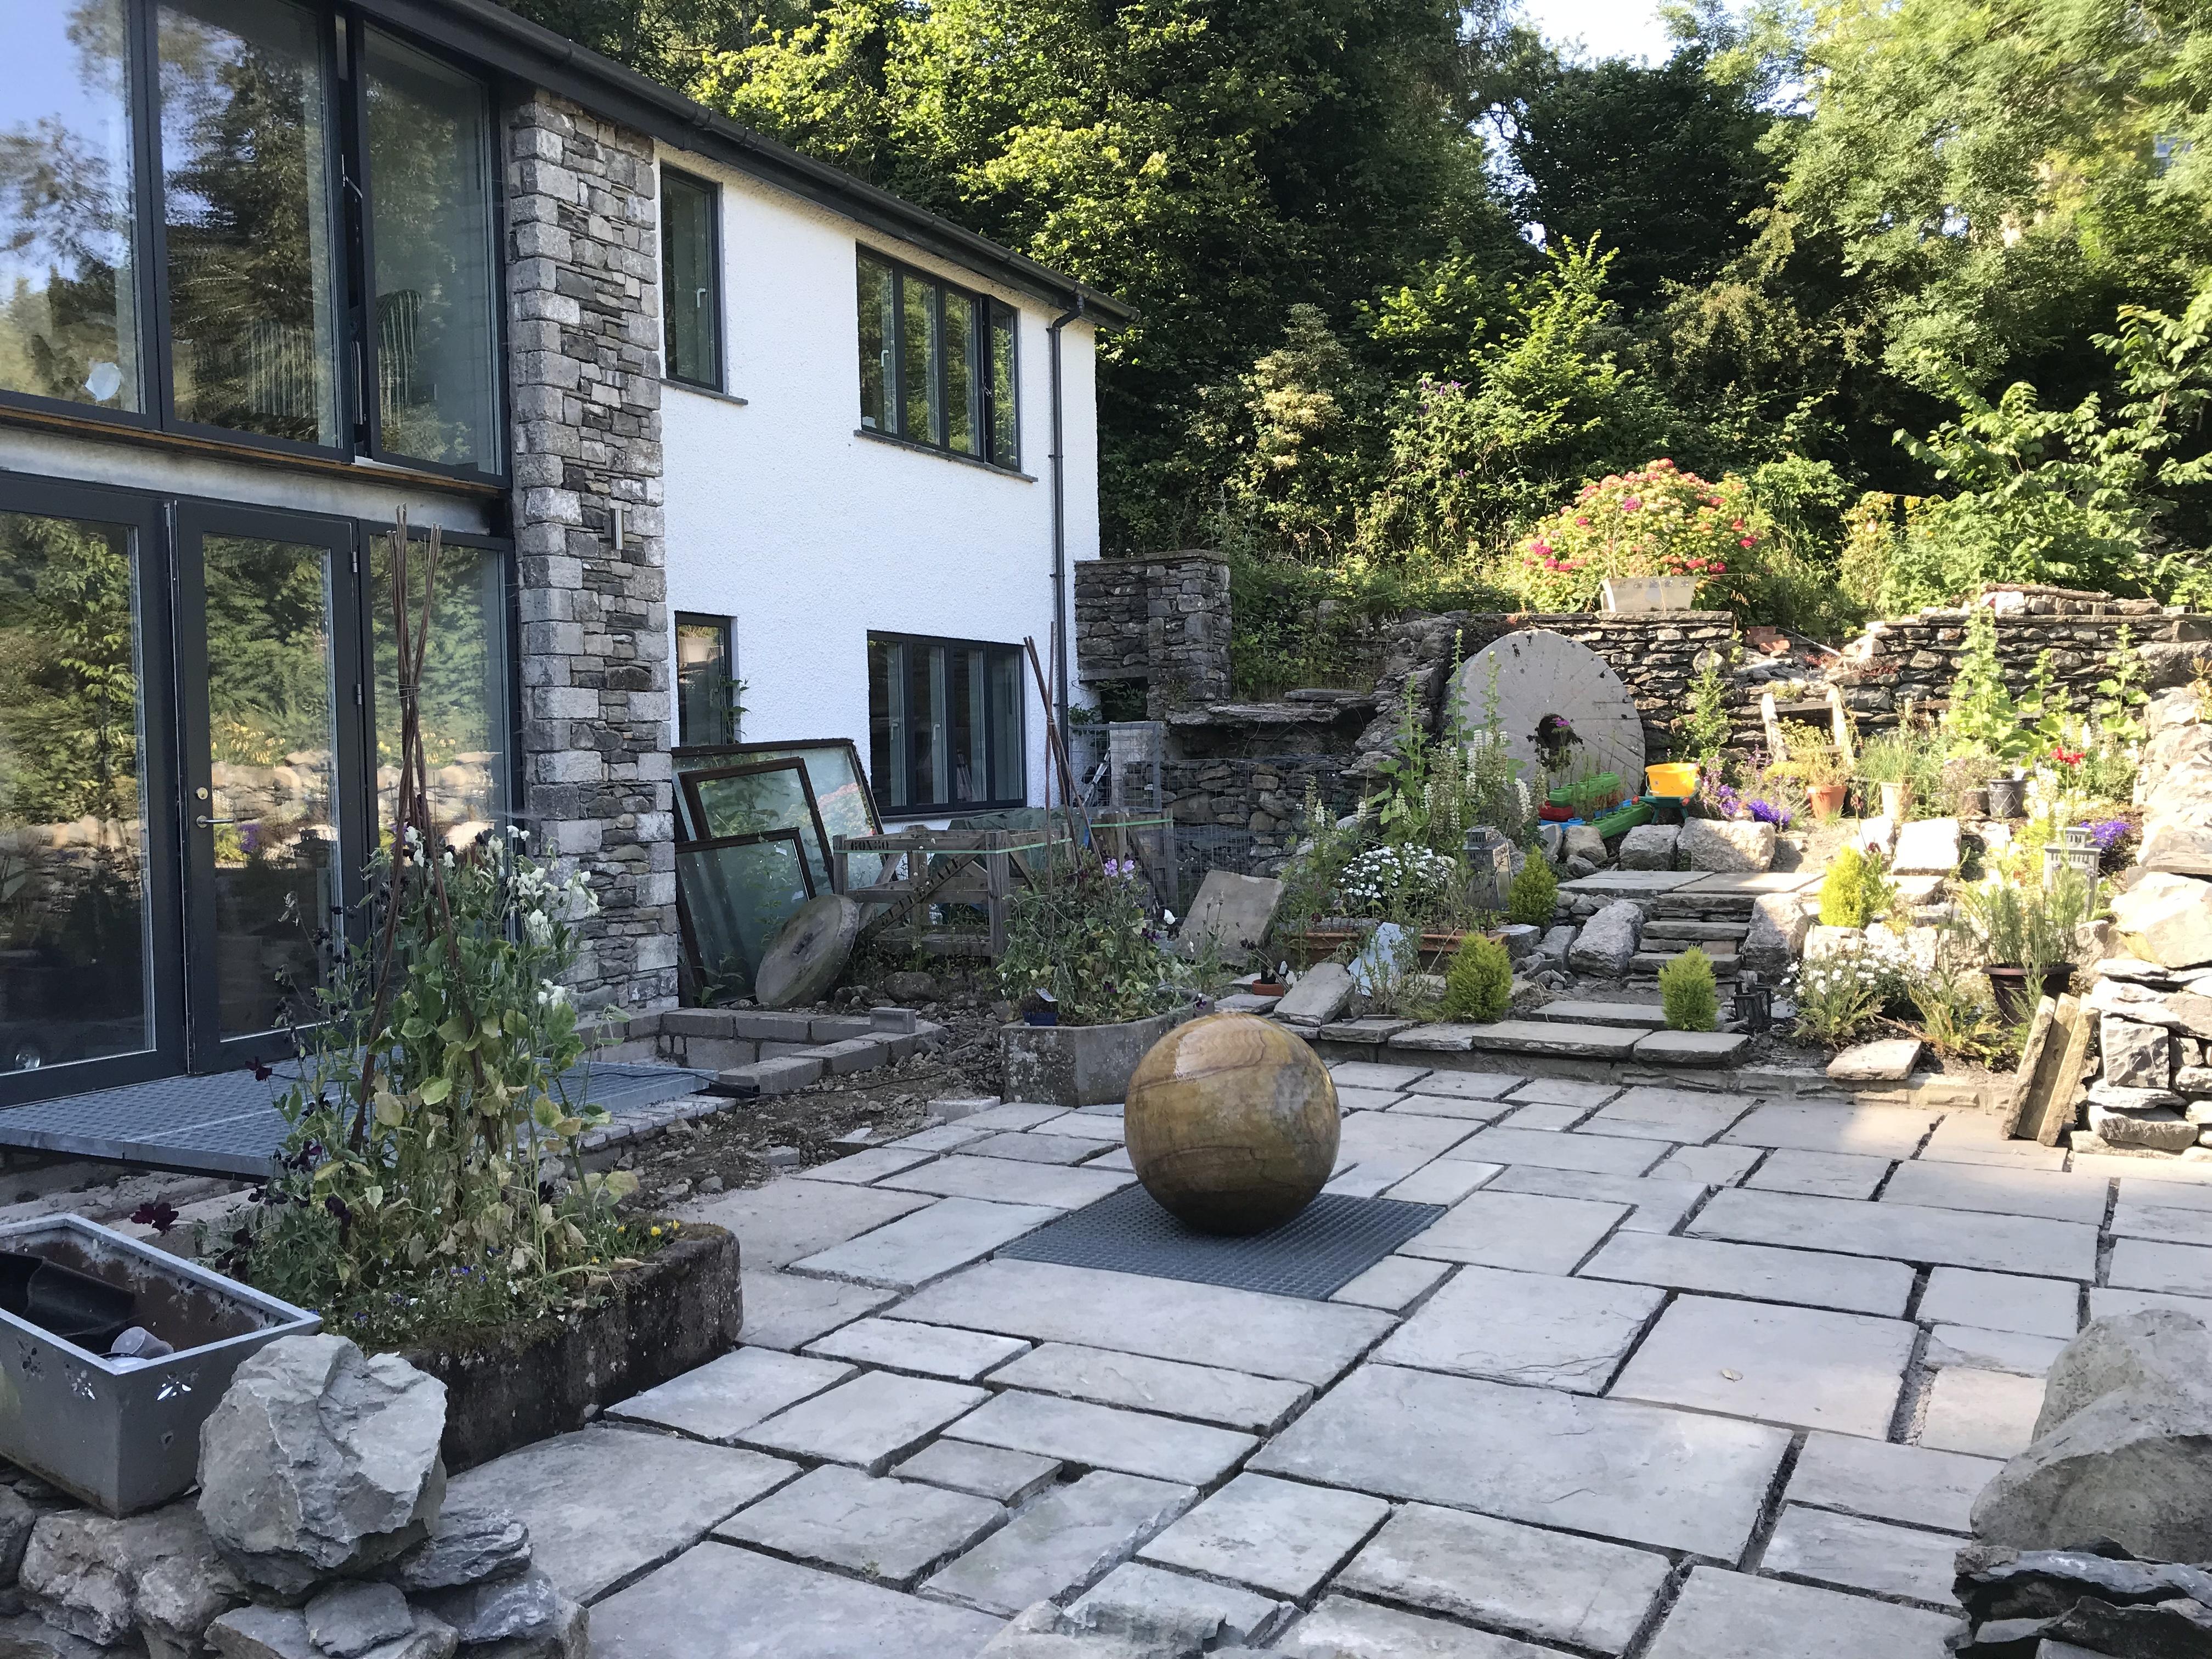
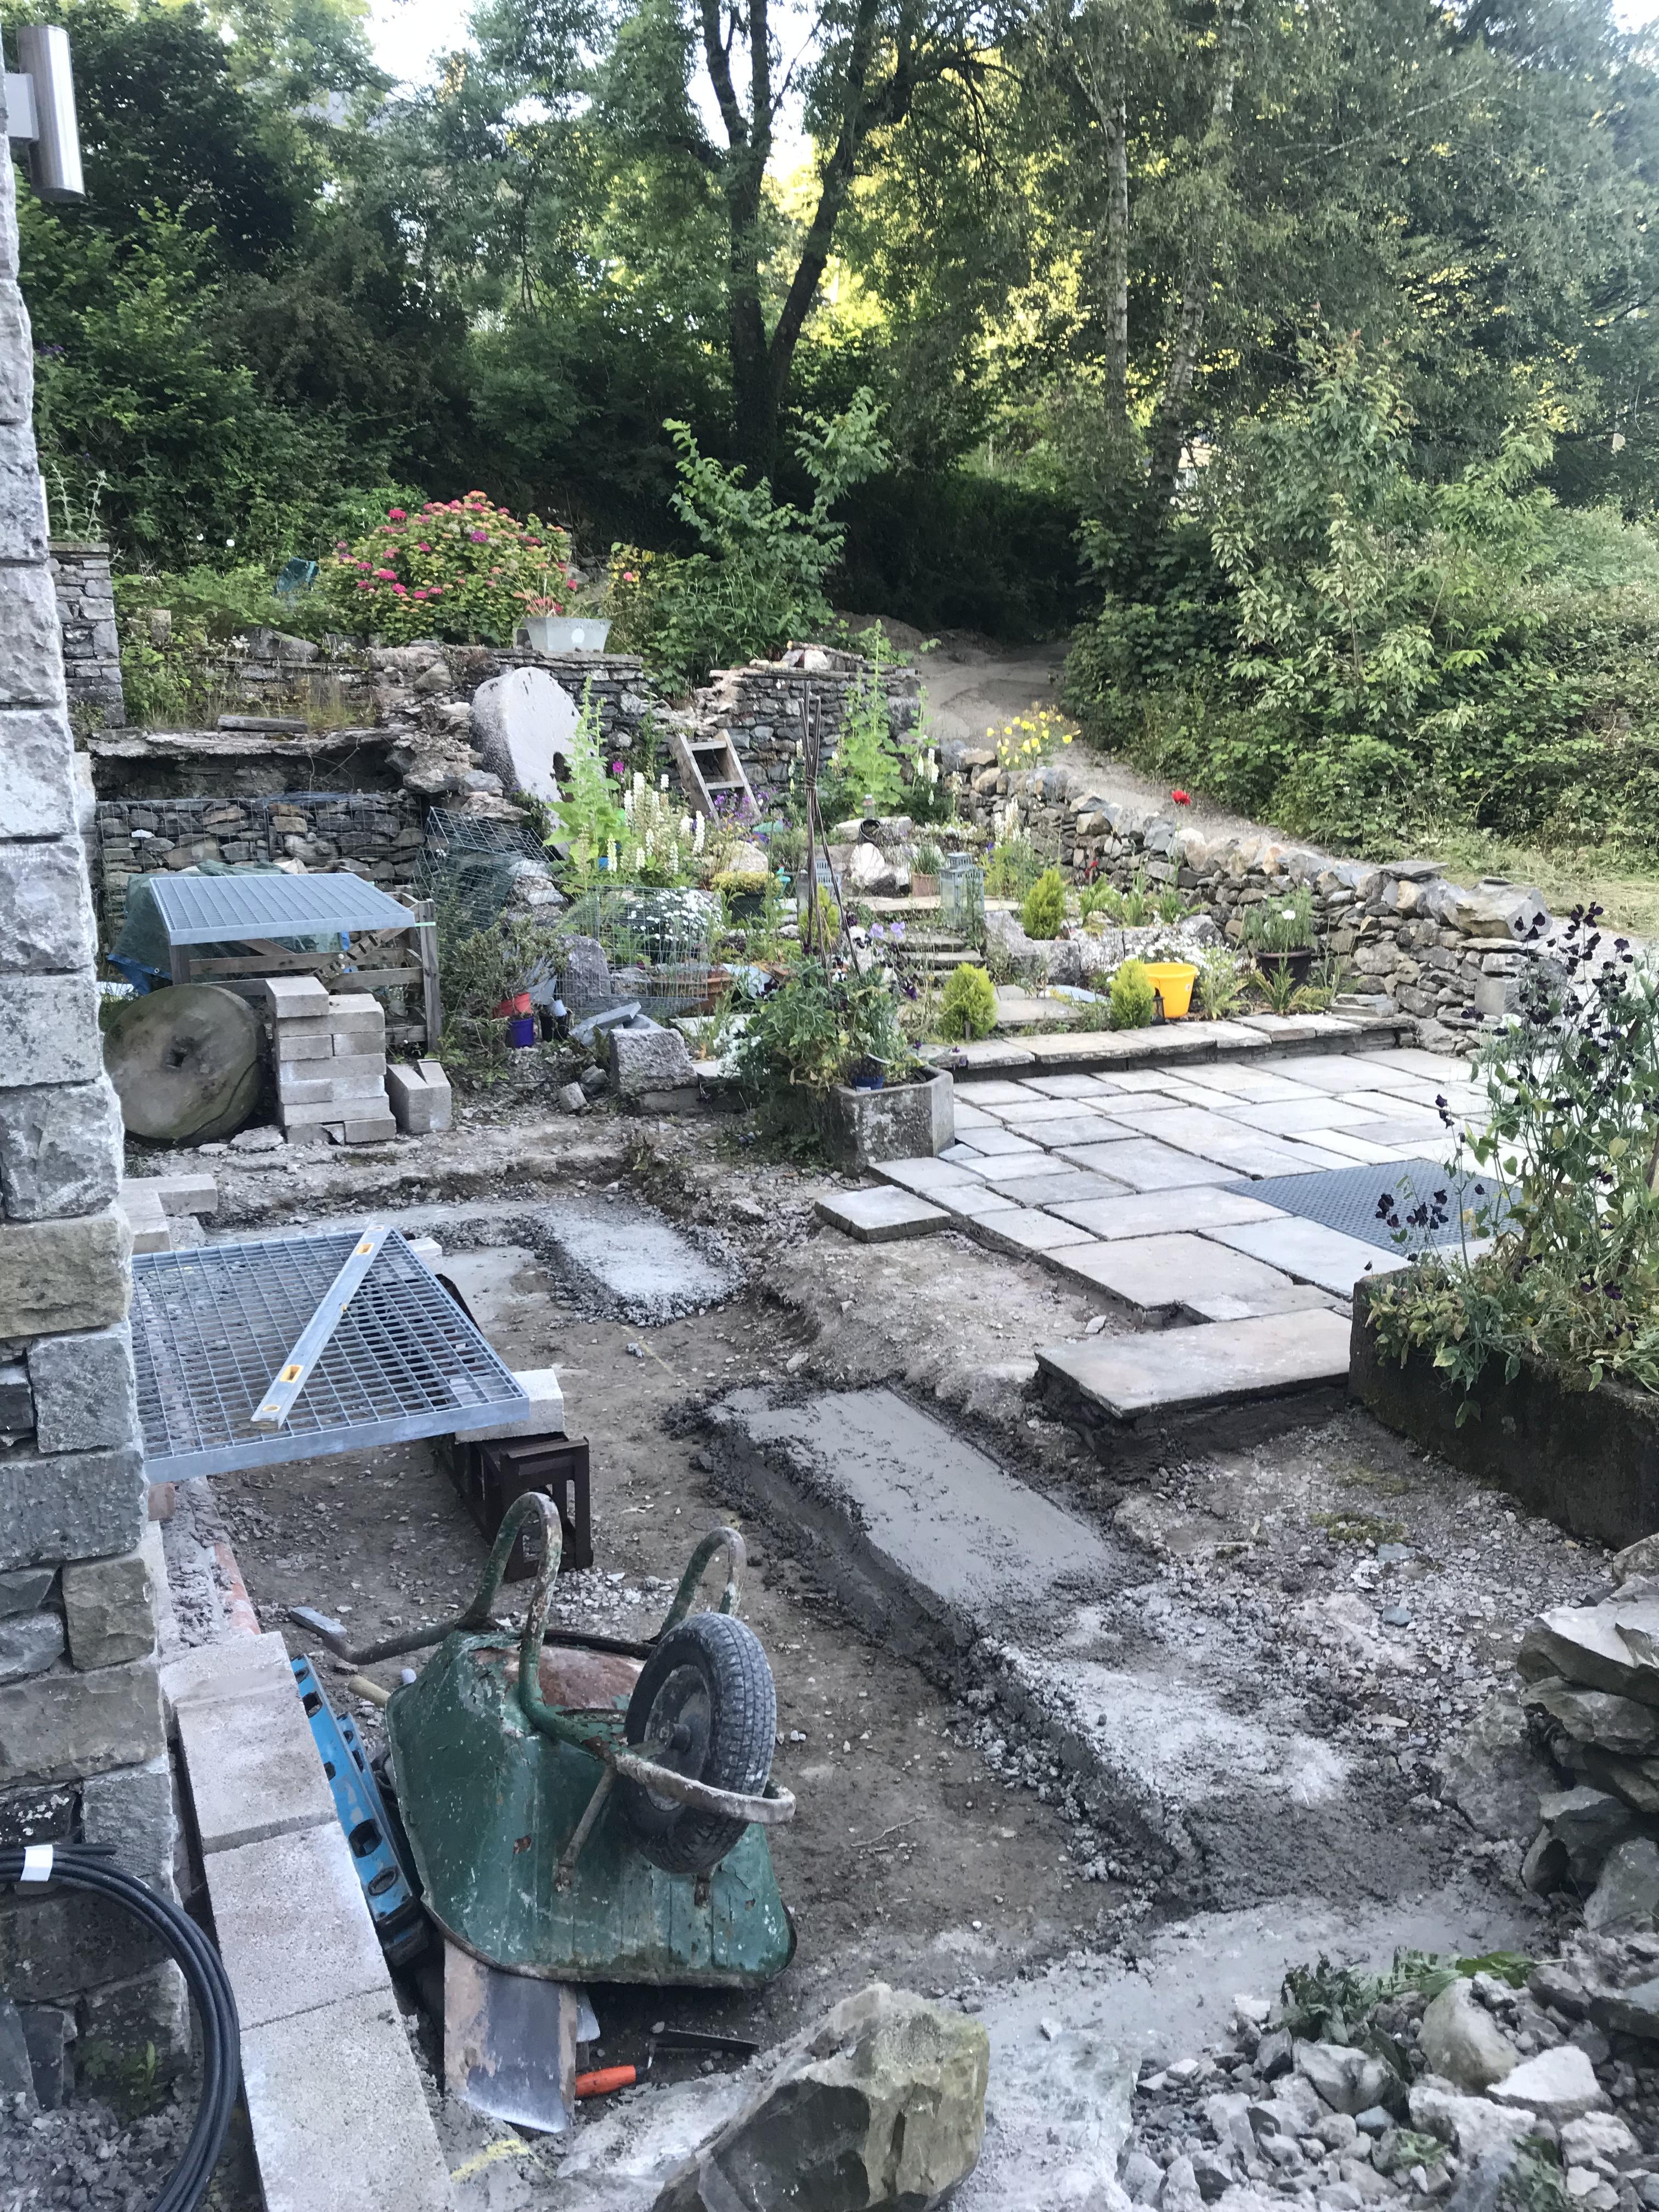
The slabs on the patio are probably the most expensive possession I have right now.2 points
-
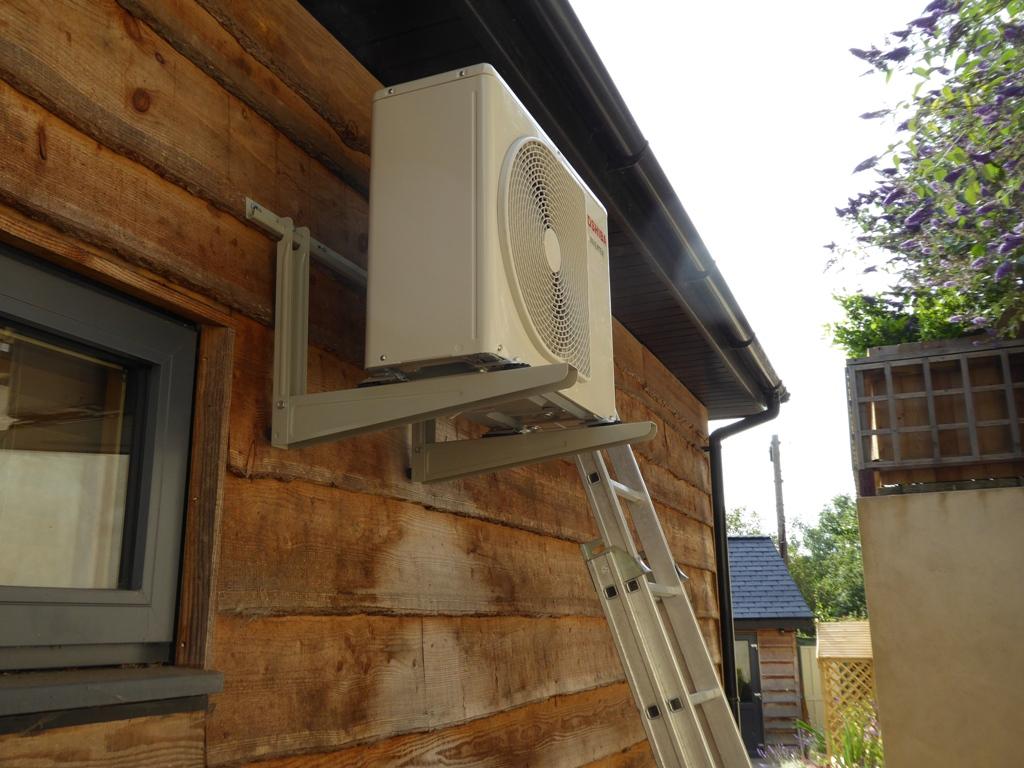
The H&S fanatics would have had kittens a short time ago, watching me up a ladder, manhandling a 23kg air con outdoor unit on to a set of brackets under the eaves... The bastard is up there now, though, and I'm never getting it down.2 points
-
Interesting spin on the cause of the demands by insurers. My take on this is that the insurers have become aware that building inspection has been a sham for years now, with poor/inadequate inspections that have allowed vast numbers of defects to go unchecked (not just Grenfell, there are stacks of examples of construction defects in housing that should have been picked up had there been a competent inspection regime in place). The private inspection companies only have themselves to blame for this situation, IMHO. Had they not been so eager and willing to sell new build sign offs with minimal inspection, in order to compete with each other for big developer business, then they would not be facing this problem. Trying to blame excessively stringent public liability insurance premiums seems to be just a deflection technique, aimed at masking the underlying problem that exists with the inspection system.2 points
-
HikVision have wireless cameras, still need a decent power cable. Once you've run power you may as well go for POE cameras as you get power and comms on the same wire, and no issues if your wifi router fails.2 points
-
Inserts... buy a boat load of inserts! The packet always runs out just when you need them...2 points
-
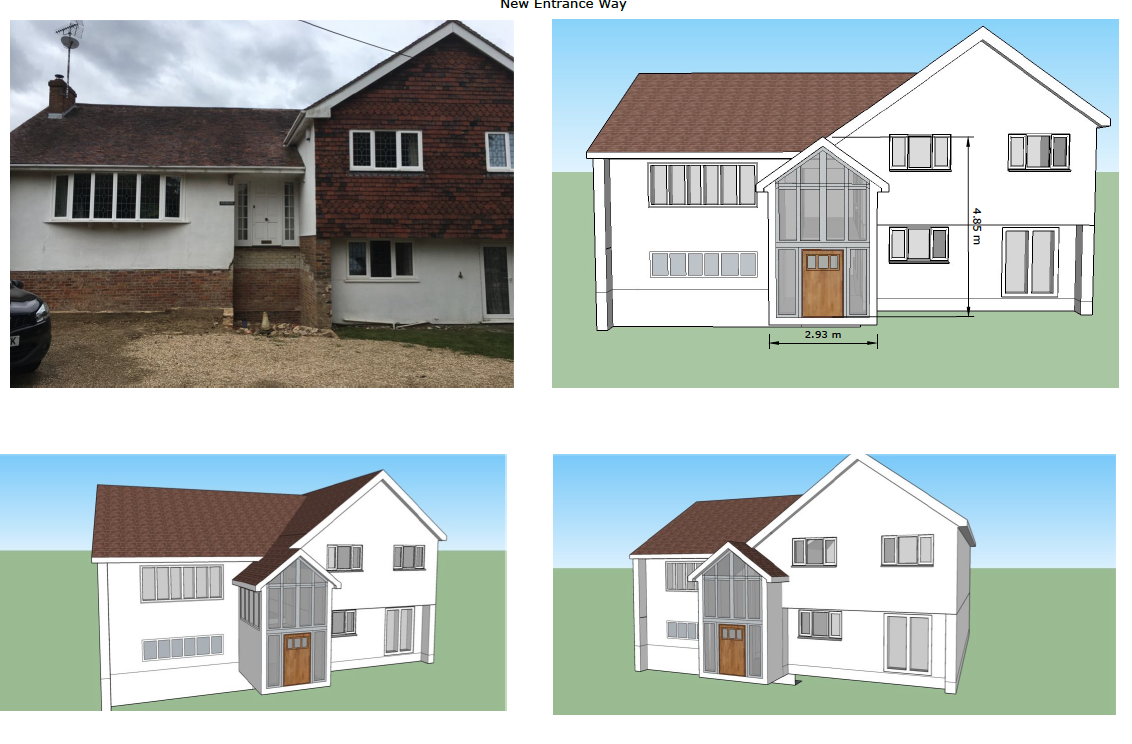
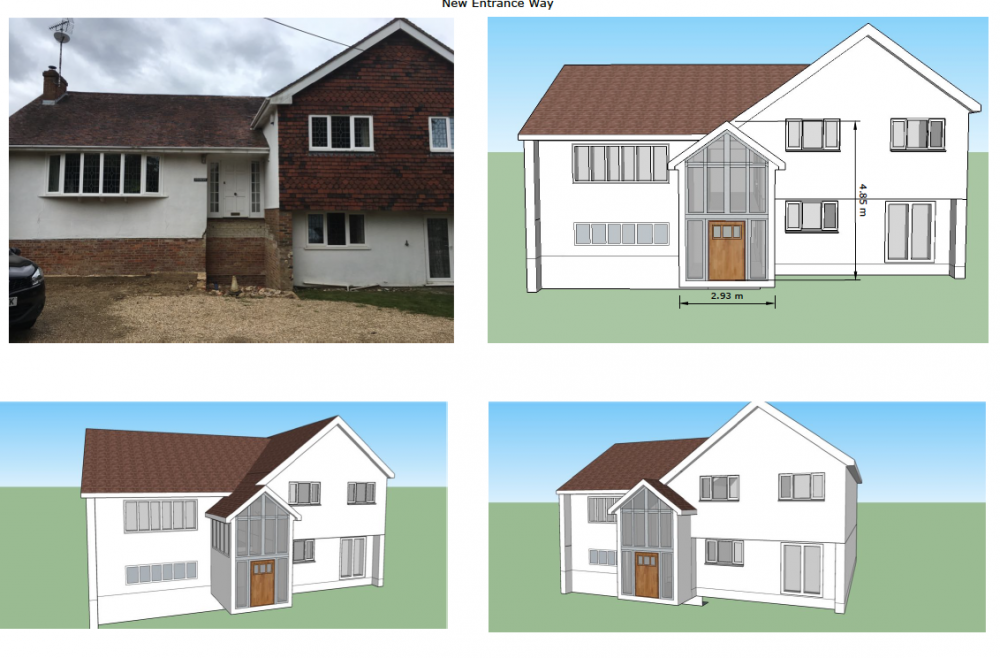
Hello all, We have a split level house with an ugly front which is in need of a re-design. The entrance way was originally via external steps up to the first floor. The lack of any proper membrane resulted in a lot of penetrating damp so I've removed the steps plus earth and rubble that was against the house and now we are damp free. I'd like a double height entrance hallway with lots of light. Attached is an idea I've had for a completely new look. What do people think? Although it looks like a bungalow the left side of the house has two storeys also as the bottom floor is sunken at the back. The entrance way would step down into this level. FrontJan2019v2.pdf1 point
-
Scaffold down and windows in...big dose of euphoria....feels like a real milestone. We can now get a sense of the completed project. With the scaffold removed the house now looks far more suited to the plot and we hope our neighbours will be as relieved as we are. The window install went well. Our windows are Velfac and we opted to use an approved installer as it extended the warrantee to six years. It cost a bit more but the standard of install was good with great care being taken. A few grubby hand prints on the render but nothing we could not clean of with soapy water. One aspect of doing your own build that we had not considered, is the fact you start out with something perfect and new. It will slowly age and degrade. It’s akin to the feeling of the first mark on a new car. Pat and I have restored a couple of cars in the past and avoided going the whole hog of a concourse restore as it can spoil your willingness to use and enjoy the car. We just need to keep the same mind set with the build. With a house we can lock, our intention is to let the dust settle. We’ll come back to the project with fresh enthusiasm in October.1 point
-
"That was mega Joules!" - Jamie Oliver1 point
-
As in Confucius said?1 point
-
You may be surprised, I have had 6-7 different visitors to my place and they all came from under 15mins away theres probably more than you think.1 point
-
So there is: https://en.wikipedia.org/wiki/One_Watt_Initiative Thanks! Hmm again looks like I'd need to disable the useful features I bought it for, I might just have to suck that up though, the current £60 a year it is costing is silly. "Remote power on" completely defeating the low-power standby mode (to the tune of 50W) really doesn't seem in the spirit of EC Regulation 1275/2008 though.1 point
-
It needs to be slightly wider for better performance - go with 150mm cavity. And yes, clear cavity, use proper cavity closers on the openings and then it’s pumped in through 25mm holes. Can’t recommend anyone down there to do it, sorry1 point
-
Porcelain is great for outdoors render the block work whit sand and cement then tile Or you can even tile directly onto the block If the BW is perfect1 point
-
Sadly not, and if I had it'd have been a long one, given that it took me several goes to get the thing up there. It's fixed now, just needs plumbing, wiring and testing.
 1 point
 -
Graphite EPS has a slightly better uValue to ordinary EPS bead. Both are blown and bonded as there is a glue sprayed onto them as they are installed.1 point
-
I went into this question in detail. Conclusion? It's one for the professionals Cost for a 10m by 10m house: £5000 flat. No rental for a year.1 point
-
Controlled fitting so comes under Appr Doc L as well - FENSA or Building Reg application needed. Min standards for U-values apply.1 point
-
Yes, I have my own system. Most of the work happens on a Raspberry Pi. Basically, various sensor inputs around the house get flung into an MQTT broker then some Python code reads it from there, stores it in a SQLite 3 database and serves it via HTTP (and websockets though I don't use that except for experiments, yet). Sensors talking via Wi-Fi are a few ESP8266 devices made by VAir (http://shop.vair-monitor.com/) who doesn't seem to be coming back from the break in producing these devices, unfortunately. Two do temperature and humidity in the study and kitchen. Another does temperature, humidity, CO₂, pressure and light level in the bedroom. There's also an ESP32 which I coded myself in the living room measuring the temperature there and a Sonoff TH16 in the kitchen (again running my own firmware) logging the temperature in the fridge salad tray and controlling power to the fridge (because its thermostat seems poor). Directly attached to the Pi is a DS18B20 1-wire sensor on the study radiator flow pipe and the desktop part of a CurrentCost meter which measures the current into the house (clamp round the feed between the main fuse and the meter). Part of the Python code queries checkwx.com for data from the nearest airport (Wick) once an hour and adds that to MQTT to be logged. There are also a couple of associated Python programs which query the database via HTTP. One (houseplot.py) takes the data and feeds it into gnuplot to produce the sort of plots I show on here. Normally I have an instance of this program running in the background showing the main data for the house, updated every 30 seconds, on my second monitor which is handy for lots of things, like seeing what the heating's doing or when the washing machine's finished. The other (httpreader.py) gives a more numeric output, typically a CSV list of one or a few sensor topics which can be piped into ad hoc code for more detailed looks at particular subjects (e.g., for this: https://edavies.me.uk/2019/01/continuous/) but it can also do integration, averages and so on producing a JSON result. It all just grewed and I think of it as the prototype to throw away. I like Python but it does get a bit unwieldy as code evolves and I'm currently thinking about a re-write in Rust but I need to get a bit more familiar with that language before diving in.1 point
-
The whole plot belonged to us so we just drew the line on the plans, forwarded it to our solicitor and she then forwarded this to the LR together with the necessary forms. IIRC this was pretty straightforward.1 point
-
FENSA only applies to installers, not manufacturers, so it's the installation that is getting building regs approval as being compliant via the FENSA contractor. The main issue will be compliance with Part B (fire escape provision through windows), Part M (width of openings, thresholds etc) and Part N (glazing safety).1 point
-
For anybody following this. I uploaded the timelapse to my Blog now .1 point
-
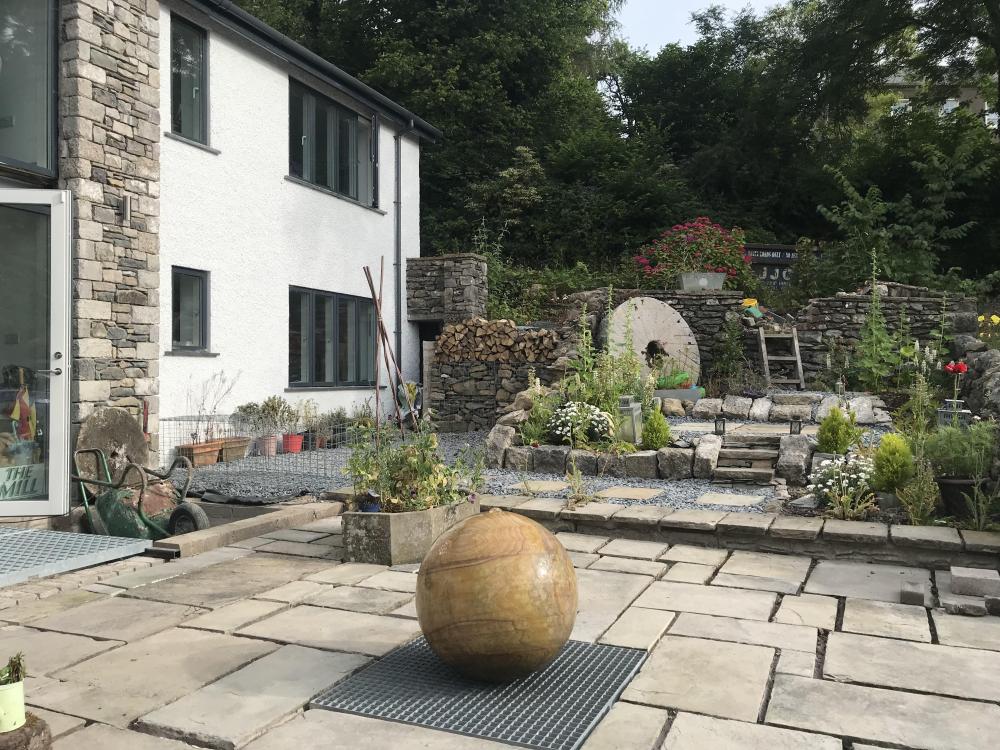
I love using second hand and up-cycled materials I get a lot from various Facebook sites but I have good contacts at various builders merchants and they send huge amounts of stuff my way after stock takes, building a staircase out of old whiskey barrels and recycled wood at the moment. I love the challenge of using mismatched stuff and trying to make it look good. My property consists of 3 buildings and a cabin so i have plenty of places to use stuff. Got given gutters the other day, they are galvanised and no rust but I expect they won’t last for ever so I painted them black with car body under seal / wax oil. Had to hand make all the brackets...... well I did not have to .....but had some brackets from another type of gutter so put them in the forge and re bent them on the anvil just because I can........ yes it all takes a lot longer and sometime cash savings are not there but you end up with a bespoke job. People love my cabin I build as it is very quirky and the attention to detail is always remarked upon. For me it’s a way of life, I enjoy fluffing around making Stuff day in day out. I have the advantage that I live on site all the time as I make my money from tourism So I need an endless list of projects to keep me busy..... I have at least 5 years of non stop projects on the go right now !1 point
-
No, the system requires 3 kW of POWER input, so 6 kWh of ENERGY over two hours. He clearly meant energy. It's really not that difficult but I do wish we used MJ (megajoules) rather than kWh as they do seem to confuse people a lot. (1 kWh = 3.6 MJ).1 point
-
Well tbf the system does require 6kW of POWER input or 6kWh of ENERGY. He clearly meant power... +1 on the pedantic bit.1 point
-
I don't see why having some founds in the ground will help you cost the rest. Assuming you know your ground type and size of the founds then you will know fairly accurately what your founds will be then everything else just sits on top and can be priced easily enough. My worry would be starting it, then costing it and discovering I have poured a house bigger than budget would permit. Just cost it up.1 point
-
All this talk of people being safe makes me sick. At least branch could have caught one of you in the nads, just as a social comment1 point
-
If you are looking at an 80sqm footprint, on good ground and with just the founds, drains and slab then if you are above £12k you need a serious check on costs !! Foundations are a small part of the cost - with traditional build, most are hitting around 60/40 split on structure to fit out so you have a lot of challenges even when out of the ground. However.... If you start, the number of mortgage companies that will lend to you will decrease and you may struggle to get funding.1 point
-
As I see it a timber frame is going to burn, the way we just completed ours, to latest BS, I cannot see what will stop it burning down to be honest - that is obviouslt dependent on the location of the outbreak. The "fire-stops", as per our approved BC drawings, are 50x50mm treated timber - timber - give that a month or two and that will be bone dry. It depends where the fire breaks out to be honest - if it's in the plasterboard shell of the room then the PB offers 30mins (according the Gyprocc) now that doesn't really take into consideration things like penetrations that may not always be very well "fire sealed". If the fire breaks out in a socket (why I always use metal pattress boxes for that little extra protection) then flame could easily lick up the stud and ignite - heck knows what the 100mm of PIR will do. If a fire were to break out in our roof void I think the roof would be in flames fairly quickly, the fire would rage and quickly burn down through the timber fire stops at the top of the walls then the fire would then travel down the frame. Unless it was caught fairly quickly, and that time depends on where the fire breaks out, I think it would be a gonner. If the fire was stopped in its tracks, yet had managed to weaken timbers the building is still going to need to be torn apart and rebuilt anyway - so all these are about life protection. Ideas and thoughts - Build in block, concrete floor and concrete first floor - a false PB ceiling with 100-150mm void for lighting, ducts etc. then a twin sheeted Fireroc ceiling to protect timber above at roof level. I think that would be a good idea - then for other common sources - electrical, pattress boxes could be bigger metal boxes fastened between studs with fire rated glands then a smaller section which actually takes the socket - space for proper termination and not a crowd of wires, when correctly installed into a wall against PB any ignition sources are contained and the socket and cable ought not to self extinguish anyway. Just ideas and thoughts here but stop the fires in the first place is my thought. I watch a YouTube channel of a young Canadian framer called "The crazy framer" - he basically builds complete timber houses by himself - I note they use a product called DensGlass on walls adjacent to other buildings - it is a fiberglass/gypsum product used for, but possibly not limited to, external sheathing like we use OSB for here. They use it due to the fire-rating it can provide - I don't know how long it gives you but if say it gives you 15minutes before the fire breaks through the sheathing either way it will help protect. He also uses a lot of PB between lintels and where main floor supports meet etc. this is all to reduce fire spread and I like it. I think it is a good idea. The idea of using PB on an open timber frame might not work too well here in the wet but I have line rafters and under the loft floor in plasterboard around most of my downlights. I know you can buy hoods but I think my idea is better as I made a big box, sealed the wire penetration into the PB bulkhead I formed and that lets me pull the light in the future and pull out the tail to the junction box and I think A, it stops draughts via the light which causes that bad dusty mess on them over time and B if that GU10 LED lamp was to go pop and even blow hot material about it is not going to land on anything flammable - that is the theory. I keep meaning to do a test - i.e. get two pieces of 2x8 and make the PB bulkhead then set fire to it. I might do that when I have PB left over from the lining stage. When I do my electrical on my extension I am going to form fire-stops with PB in the wall - I will post it up at the time. My belief is that arresting the source of the fire is better than pointless stops - their inclusion is futile.1 point
-
The trick there imo is to make it accessible so that cleaning is easy. It needs to be easy enough that you do not bury yourself in the football waiting for someone to get a penalty awarded against Man U. 1 - From the ground with a window cleaning pole. As you may have for roof mounted solar panels. I have pro-kit for my panels, which gets used about once a year; it goes up to 26ft plus me. You need to budget £100-£200. Discussed at length here: The parcel was about 11ft long. 2 - Make it easily accessible from inside. That may mean putting it on the landing if you have a catslide roof, or near a mezzanine or bridge if you have one, rather than at the inaccessible end of the 6m high wow-void that requires a scaffold tower or mountaineering gear. Near enough that you can reach it with a sponge-mop (extendable sponge-mop?) whilst standing on a reasonable thing like steps or a hop-up-step. Velux window poles are very good for opening it so you can reach the outside side. 3 - Have a way onto your roof, such that you can reach your skylight. 4 - Have a "Scottish" skylight which reverses so that you can do it from the inside. If such exist. See 2. 5 - Put a patterned stick-on on the inside, of the sort used when Mr Planner says it must prevent overlooking. The filth and dead magpies will not be seen (by you !). 6 - Have a regular window cleaner. 7 - Use the direct approach like @Declan52: My choice would be to design in access or reachibility if possible. F1 point
-
Good luck. I will miss your comments, and highly valued contributions. Have some fun.1 point
-
Exactly - I have it as a default, for insurance and future resale. But I never use it1 point
-
6 kWh input Sorry, pedantic I know, but it's no wonder so many are confused on this subject when even the professionals who know better are sloppy about it.1 point
-
Have a good break! I subscribed to your blog.1 point
-
I thought WTF at first with my Geberit stuff (WC frame, flush plate, wall drain). (Still don't like the way they mix mm & cm). Takes a few reads but once you "get it" you'll be impressed at the simplicity and just bloody good design.1 point
-
What acoustic properties are you looking to achieve? What is the noise you are trying to insulate against? You will also need to consider ventilation requirements under the roof layer and U values, as acoustic / porous insulation doesn't perform as well thermally as PIR board, therefore you will need to add thicker insulation1 point
-
You would be better using acoustic slab 100 mil would be far more effective than full fill loft insulation1 point
-
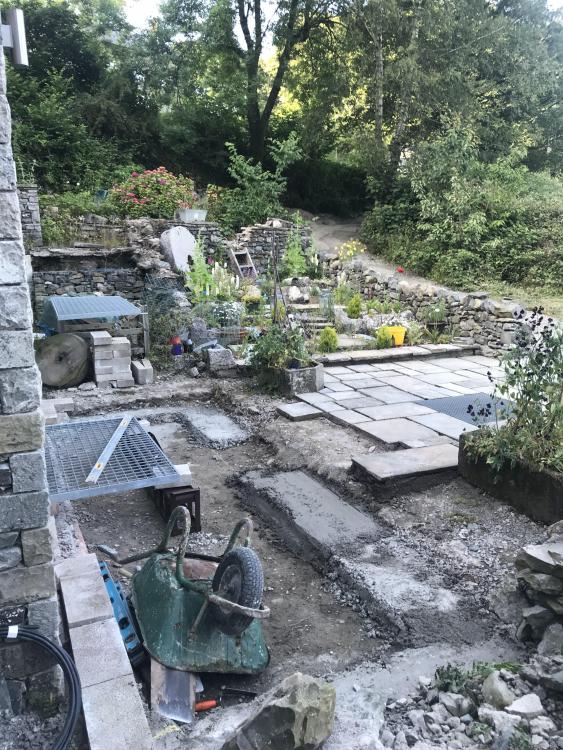
We are on with this at the moment, few images to whet the wheels of inspiration.


 1 point
 -
and may i add i have only broken 3 ribs on a tree stump and electrocuted myself 4 times over the years so i am uber safe. Oh and smashed my nose once, and broke a finger... No dont listen to me1 point
-
You plonker. And you met me the other day. Did you not know what I used to do for a living. Would happily have done it for you for a bit of exchange labour. Nothing else for it but get in and cut it up bit by bit.1 point
-
@dnb you might find this interesting: https://zeroenergyproject.org/2018/01/05/proper-integration-heat-recovery-ventilators-residential-air-handlers/ I should have thought of this, but North American passive houses (esp retrofits) will come up with this requirement quite often.1 point
-
There are two paths to take: Federated, delegated division of responsibility. Single point of trust to organize, do and deliver. The more you spend on advisers and experts, the less money is left over in the pot for the doers. A gaggle of part time advisers might provide reassurance in the early stages but who will be on your side for the whole journey?1 point
-
Yes, but it still has the problem of one roof merging into another: I think it looks strange, especially with the lack of symmetry as mentioned by @ultramods I think you may also struggle making it look as neat as this in real life. For example, how will you blend ridge tiles into the merged portion? I think it'd look better if the roof over the atrium were clearly higher or lower than the roof it presently merges with. It's achieving that without fussy joints that may be a challenge, and that's why a flat roof could potentially be a solution. If it's south facing, you really want to be thinking about solar gain control. Fixed or moveable slats might be an option. External would be best from a functionality point of view, but will likely be more expensive and visually intrusive.
 1 point
 -
I prefer this to this first idea you showed us. However I don't like how the roof on the main house gable is lower on the left side compared to the right. Can it not be symmetrical?1 point
-
Thanks for the alternative idea for the front. What I really need is these alternative ways of doing it! Ultramods, my first impression is that I don't like the boxy look. Looks a bit to office like for me. But it's a look I hadn't considered so that is good. I did come up the the look below as well with a dual pitch. Is that what you mean Jack?
 1 point


.jpg.c21f3ac78c9b7efd90cbdcb312744dc5.thumb.jpg.7adcad4c0e384f5ecd7d56b0618df6e5.jpg)