Leaderboard
Popular Content
Showing content with the highest reputation on 04/25/24 in all areas
-
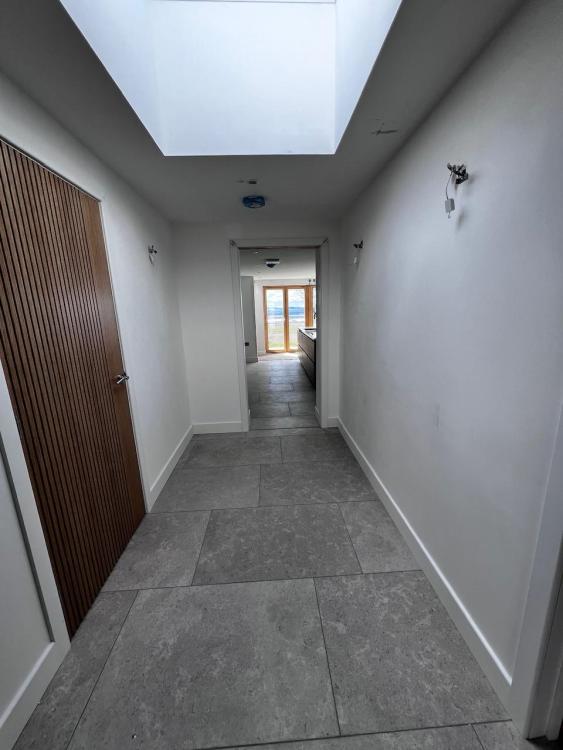
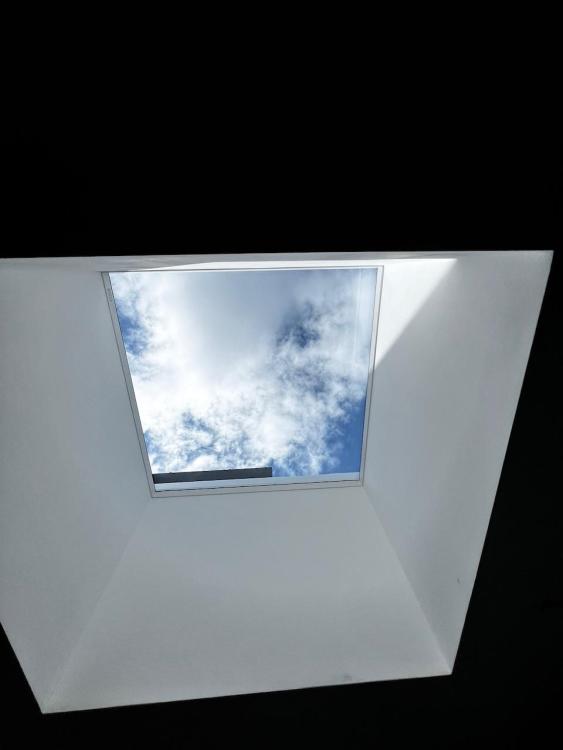
We made a last minute change and added a rooflight for the hallway. I considered a light tunnel instead but we decided that making a feature of the rooflight would add some interest to otherwise flat ceilings. It has a created wonderfully light airy hallway. I love the being able to see the sky when you walk in. There’s a glazed door to be fitted giving you a view to the hills beyond.4 points
-
After my horrid time earlier this year I am now going to post something more positive. As of yesterday, I was offered a job, not ideal (is any job ideal), rather than working from home I must go to the office which takes 40mins each way and hubby is disappointed that he will be left on his own all day. That said even with time out for funeral 250 miles away and wet, wet, wet we have progressed. Some pictures. hardcore & binding (take 2 after previous issues) now the expansion foam around the sides The heave protection next then taping next was the rebar here is the pour on top of the rebar - 200mm drying concrete slab with no hint of everything underneath, typical building, lots of expense and nothing to see. the first row of outside blocks added showing the cavity first blocks over DPC with all the rain we have created a bit of a swimming pool It was at this point that we purchased a puddle pump as hubby really didn't like having to kneel and build low in water going up with some windows & doors framed insulation going in joining the existing walls to the new part this is where some of the kitchen cabinets will be hung, so although internal we are using heavier blocks to take any necessary weight On the left hand side you can see part of the existing barn that will be staying. The roof is currently being held up with barrels and wood building from scaffolding is a real milestone, makes it seem like we are getting somewhere. To protect the insulation, we have the original insulation from the barn roof cut up to provide a 'roof' over the cavity. Having made the frames for the remaining to windows these need to be placed in situ for building around. This area will be our front hall and snug. Of course, the front door will only be used by visitors, but we will go through the hall internally to get into the snug. With all the cavities it is smaller than I hoped, but with all the insulation it will be much warmer than our single skin house. Hope you enjoy the pictures, next time I hope to be at lintel and wall plate level, but we would like the weather to improve. Thanks for reading Jill2 points
-
I just wanted to let you all know that this project is still pending. With rain every day for months and no time to do it, it could be another few weeks yet before it's done - but I will keep this thread updated with the outcome. Thanking you again for your help and contributions of ideas.2 points
-
Thanks to the relatively mild weather this winter i decided to start chipping away at the bathroom project, which is being extended into part of the extension which was finished over a year ago. This gave me the opportunity to install the bath, sink and toilet in the new bit, at which time I’d totally disconnected the old bathroom allowing me to strip it out and that’s worked really well for my as I struggle to do more than 4hours in a single day so I could keep doing a bit and stopping when I’d had enough. didn’t fancy tackling the ceiling for plastering in the new bit so got a pro in to do this bit for me, all done in a couple of hours which was nice. and made the most of the space and got the painting done after putting a layer of 10mm marmox board down ready to accept the underfloor heating mat Next job was to start making a frame to hold the toilet frame and the sink and cabinet Decided on making my own cabinet rather than paying silly money for an MFC one, got pine furniture boards, a pocket hole jig and a new router and came out with this which I’m pretty happy with that all got painted and the sink installed, wall mounted tap and the wet room panels that I’m using both for this and for the walk in shower area all installed. got to work cutting the OSB backing and wet room panel for the toilet in prep for the final big push to disconnect the old and commission the new, that was a hard days work! And then bath and toilet all installed once the shower area is complete the bath will be disconnected again to lay the underfloor heating, self leveller and the flooring before being put back in place, and eventually building the wall and plastering it. Made a start on stripping the old bathroom out Next job is to patch up the loft insulation where the old spotlights were, new wiring in place for a single light fitting this time, airtight membrane adhered to the walls and then battens before reboarding it ready for plastering. Floor is coming up also to be replaced with 22mm chipboard to match new bit.1 point
-
If your DNO is U.K. Power Networks then you/your electrician can apply with their smart connect portal. Very easy to do.1 point
-
Put your sparks details in the installer section and include the inverters reference off the ENA type approved database in the inverter section. Include a single line diagram of your house electrics with the G98 form. Job done Do your sums for getting export payments from Octopus remembering that the 15p/unit isn't guaranteed.1 point
-
How hot is your hot water? Normal temperature or scalding hot? That energy has to have gone somewhere.1 point
-
100kWh in 24 hours and something is going to get hot. VERY hot. Was your hot water normal temperature or scalding hot? Any sign of discharge through the tundish. That's over 4kW continuous over that 24 hour period, i doubt the HP would / could consume that much it sounds more like the immersion heater with a failed thermostat and boiling the water in the tank? Keep the supply to ASHP and immersion isolated until you have a proper chance to get it looked at. Electrician is more likely needed than plumber.1 point
-
I reckon it will do the job fine. 100mm isn't thick. but give it plenty of whacking because type 3 has voids in it and may joggle into place after a few whacks. A very heavy roller might even be too heavy for this, and form itself a hollow. or skim a bit of the top and do it in 2 layers.1 point
-
You warranty provider would want certification, so not DIY. The manufacturer of the blown in cavity wall insulation must operate an approved installer scheme where the installers are approved, registered and regularly reviewed or demonstrate they are competent to carry out installations of the product in accordance with the third party product conformity certificate. Evidence of the installer being approved by the manufacturer should be made available to the Warranty Surveyor upon request.1 point
-
I would recommend FAAC for the automation kit. Most of the kit knows when there is an obstruction and will stop. I wouldn't get a builder to fit it unless they have done them before. Will you have a keypad and intercom as well?1 point
-
No there wouldn’t be BC don’t get into brands and is unlikely to ask for certification As always Plenty of pictures1 point
-
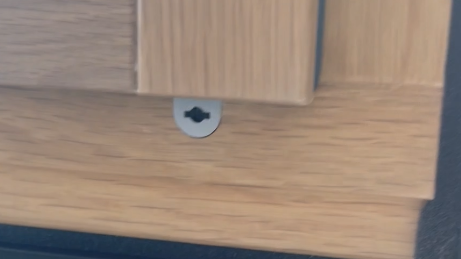
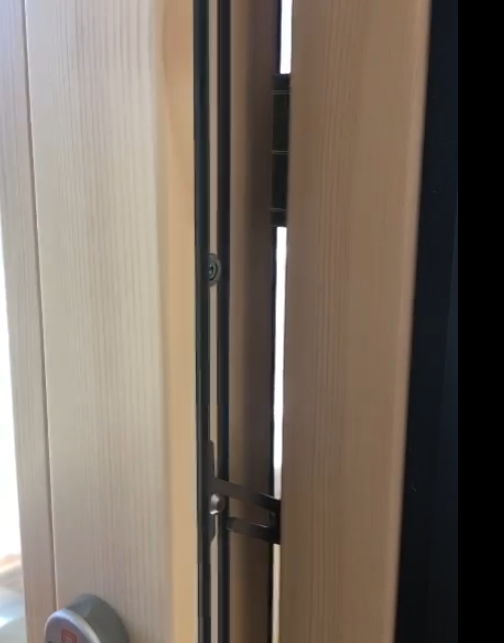
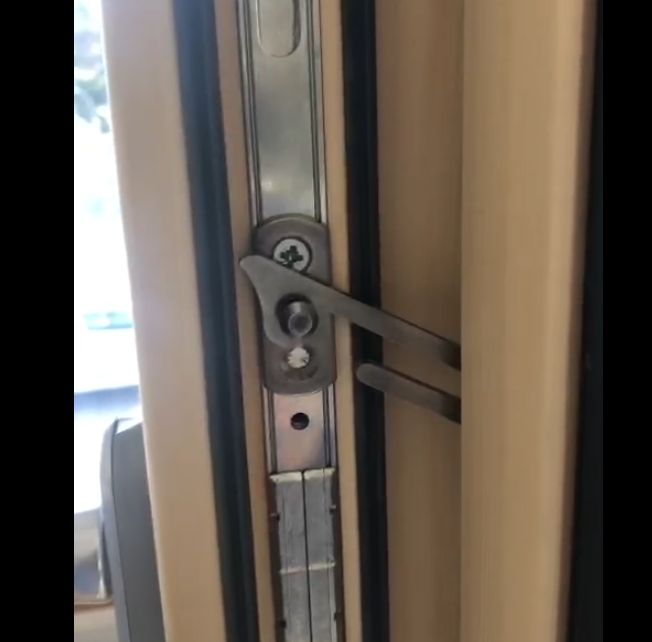
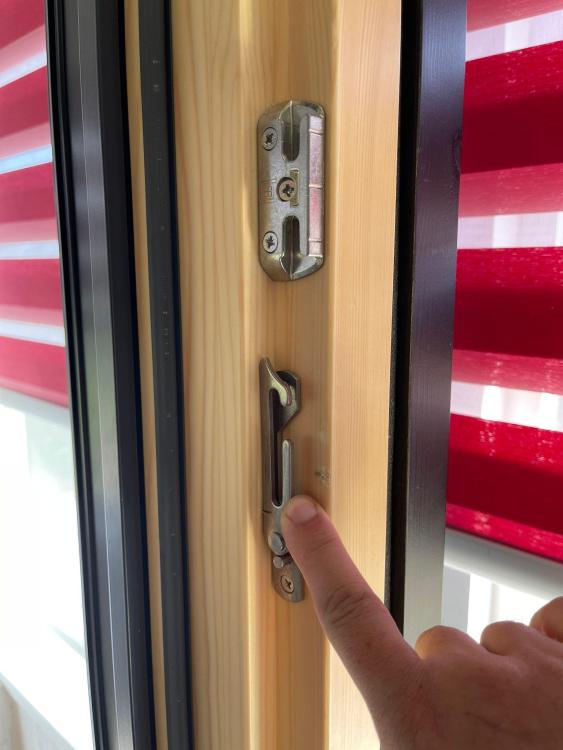
Concealed turn lock (it's not concealed but flush mounted) this is from a different supplier of course. Child finger restrictor The picture below shows the space available from the restrictor to the locking keep, you'd be able to judge easily if it fitted in place or not. Restrictor arm in the closed position.1 point
-
Photo cells on the outside are a good idea to prevent gates closing before you get out of the way. A gate stop in the centre gives the gates something positive to close against and reduces rattling and wind movement. sensing loops are not needed at home, they are to auto open gates when you approach from the inside. Crush sensors are used in public areas but I’ve never had them on my gates. a beacon is an easy fit even afterwards and I always use because it gives a positive signal gate is or should be moving … easier to see as you leave and especially at night.1 point
-
I had some indicative quotes for 3 x 100m boreholes for GSHP a couple of years ago, they came in at approx £20k. The economics just didn't work vs ASHP.1 point
-
Pipe length from ASHP is about 8 to 10m to UFH manifold, each way. Cooling from ASHP Flow at 15 degrees on a 20 degree day the EER (CoP for cooling) is about 8. Dropping to 6.5 on a 25 degree day.1 point
-
I didn’t want the compressor in the house nor did I really have the space. Trying to find a reliable company to install the equipment was harder than I expected which put me off. ASHPs are increasingly more common so, in theory, should be easier to maintain. The spare borehole is close to our primary water borehole and I didn’t want any risk to that. I’ve had ASHPs in previous houses so familiar with them. Overall I couldn’t see any significant benefit in using it.1 point
-
Does drop a little, and you need more heat anyway - you still get a CoP of about 2.7, for the day you are down to that level. At -2 you are mid 3 and at 7 degrees, 4.5 for CoP. Noise don't really notice as the heat pump is behind the shed.1 point
-
Suggest yes, because (a) the drilling will be done by a specialist company anyway, there will probably only be a few in your area, (b) we should all have the discipline to get multiple quotes, especially for big items, (c) the local drillers will have experience in the ground in your area which may be super useful info. Sounds a deep hole. Know what kind of ground you're on? Looked to see whether there are any BGS records close to your area? I think the BH hive mind generally doesn't lean towards ground source. Someone will be along shortly to ask why not air...oh, I see I'm too late already.1 point
-
Why? ASHP simple to install zero issues at -10 this year. We have a water bore hole about 45m deep, due to us being on a sand hill, nearly all the drilling money went on steel liners for the bore to stop collapsing. So really depends on on what they find - once you start you can't stop and you just have to pay the bill. If your rock for 10m they could be drilling for weeks1 point
-
1 point
-
Oh I see there are some quite cool-looking panels around. What kind of panels have you chosen? On the original question, I wouldn't worry to much. Maybe make the two end panels the same? I bet you won't notice after 5 minutes. I had fibre installed in the flats where we are now which involved running some 1mm white cable around the corners where the white walls met the white ceiling. Despite the fact they were going from an unusable 5-10Mbs to 1Gbs, the neighbours kicked up a right fuss about the 'sub-standard job' and 'atrocious workmanship'. Not a peep since and I never notice either and I'm quite picky. It all just blends into the background...1 point
-
Thanks all for your replies on this. I think the DIY route is most likely for me. For info, the two quotes I've had back so far are £695 - it seems steep given the simplicity of the work, but then again I don't know what commercial rates they pay for disposal. I've also sent of a sample of the roof for analysis just do double check that it's definitely asbestos - a friend round the corner recently did the same job on his garage, but the roof looked a lot older than on mine, so a glimmer of optimism remains. However, given my general luck so far on this project, it's safe to assume that it will come back as a positive 😃1 point
-
Love tidy insulation install with the full fill batts. Keep up the good work.1 point
-
Someone comes out to view the system physically, including the meter once every 2 years, guy came here about 2 weeks back1 point
-
Mainly because they are a lot further South than us. Crescent City, about as far North as you can get is 8.5° further South than I am. Most of populated Canada is South of the UK. I think, because of our mild climate, we forget how far North we are and that reduces the solar intensity.1 point
-
My reading is if you are not changing the total installed capacity you don't have to do anything. So new panels of broadly similar size to the old and operating with the same original inverter I would just do it.1 point
-
1 point
-
Just give them a call i had a nice lady from the council come round, she could clearly see we didn’t live in it. and has also offered us advice on another issue we have.1 point
-
Public liability now then, then add £100,000 rebuild to it every year you renew it. I’ve upped the rebuild cost of mine three times now. have renewed it 4 times.1 point
-
That’s quite a bit of progress despite everything you have gone through. 👍1 point
-
Sounds like you'd be better off with electric floor heating directly below the floor tiles. Or a wall-mounted fan heater for a really quick warm-up. But do still pack insulation into the void you've dug.1 point
-
i went with https://www.selfbuild.uk.com/ not sure if they are the cheapest / best. I didn't have to claim1 point
-
Hi, Not sure if this exists but I'm looking for an air tight wall vent for our planned log burner. I'd like to have something that I can open when the stove is in use and then close off to an air tight standard when its not in use. The stove will have direct ventilation but I understand that when you open the door smoke can spill out if you don't have enough air supply in the room (house is airtight with MVHR). Thanks1 point
-
Is your balcony proposed to be concrete or wood? Both are possible, personally I’d do concrete for long term. Based on your picture with columns from foundation to underside of roof this will all be quite simple for the engineer to design connection and support details price - you’ll need design first and then go for pricing1 point
-
Lots to learn indeed, every day is a school day for me too! These jobs require careful thought, not just the engineering challenges. When you come to sell is a potential issue. Who want's to buy a house, part of which could be potentially demolished at the owners cost for the water board to access the drains? You may get build over permission as discussed above but it comes with a caveat as you can see from other posters. If something goes wrong with the sewer then you will suffer disruption and possible high costs! One way to mitigate this is to look into taking out an indemnity policy to cover yourself now. It would be worthwhile researching the cost of such a policy. They tend to be a one off payment and the policy gets tacked onto your deed paperwork.1 point
-
As above. Why would I want a split unit that requires an F gas engineer, so I could not fit it myself, and why would i want the noisy bit with the compressor inside the house?1 point
-
I think I'd want the cladding cut shorter to leave a 10mm gap to let the end grain dry after rain and reduce the risk of capillary action. As above; wall build details would be useful.1 point
-
After obtaining planning, i got my building controll aplication under way. I had 2 options - Pay £1100 for Building Notice - Pay £900 for Full Plans. Everyone on here recommends full plans, and it was a cheaper fee. I knew i'd have to either pay for the plans or do them myself. I opted to do them myself after loads of research on this forum (particiularily inspired by @HerbJ ) Here's my version of Herb's spec. Building Regulation Specification Redacted.pdf I paid a structural engineer to do the calcs. And then I did all the details, layouts and thermal calcs myself. EWIPRO-A025.pdfnwtc.01.pdfnrtc.pdfnftc.01.pdfewtc.01.pdfeftc.01.pdfDRTC.01.pdfDCTC.01.pdf1 point
-
From bitter experience... if you use a hot air gun (on low!) wear gloves. If you get it too hot your fingers will break through the oter layer into the molten hot butyl. It sticks and it burns. Can't tell you how I know.0 points
-
0 points


