Leaderboard
Popular Content
Showing content with the highest reputation on 12/10/23 in all areas
-
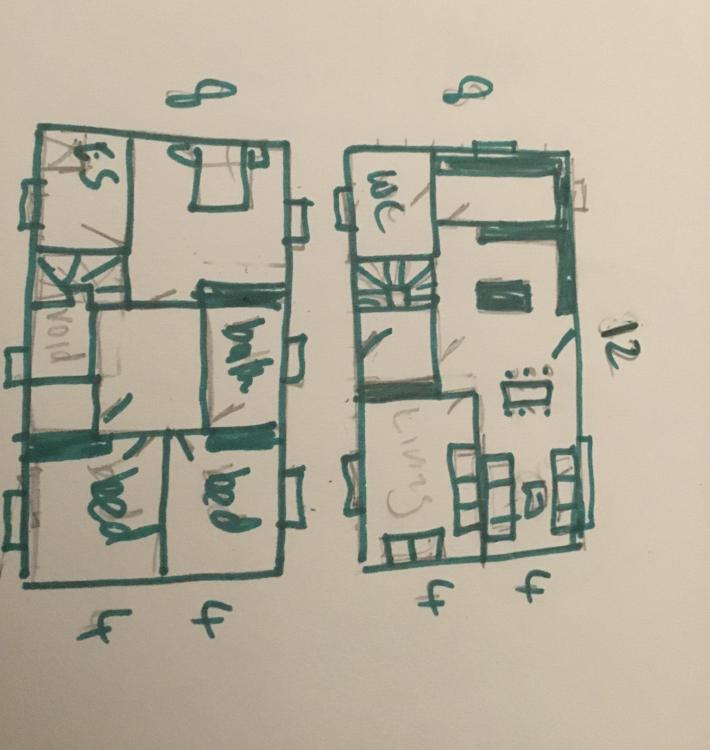
Ok so if you’re trying to have it matching the houses left and right and presumably want the living space to the rear this sketch took me 5 mins to throw together, based upon a 12m x 8m house as an example, so a circa 150 sqm house as is. Very approx. It makes the bedrooms all around 4x4 m, and the kitchen diner 4 or 5 m wide. Livingroom 5x4. your current design won’t match the neighbours as what windows you do have are all over the place. The adjacent houses are balanced and symmetrical. Your house would stand out externally and not in a good way. I think you know what you want but are struggling to convert it into a feasible design. You need to think about looking online at numerous house designs then tweak the best one to your needs, or get an architect. a good house designer or architect would never for example have so little natural light / windows or a toilet off a living area. Youll spend a small fortune building your house, if you’re struggling with house design get a pro in.4 points
-
On all my jobs a continuous line of adhesive does happen I can’t believe we are the only ones doing it right It’s poor management when it doesn’t and really easy to check at any stage afterwards A gentle tap around the perimeter Velfac arnt the best quality windows They are a contract window that most of the big players use and cheap Ive said before on I visit different sites each week and haven’t seen an air test being carried out in the last five years It’s supposed to be 1-7 which is a joke in itself The major house builders get away with it Because the can Most of the new builds that I work on achieve a 2 on the air test Which must be done via a desktop2 points
-
When I gave my 3 minutes worth at committee, I pointed out all their errors, as politely as I could. I had, a few days before the Committee Meeting, hand delivered a package of supporting documents to each of the Committee Members. I won unanimously much to the intense annoyance of the Head of Planning.2 points
-
Agree with @SimonD regarding being antagonistic. Make your case for approval, citing planning policies to support it. Address each of the 4 proposed refusal grounds in order and how your scheme responds to them. Ground 1 (design and form out of character, failing to enhance the landscape) is subjective and there are should be several planning policies to briefly cite that will support your approach. Ground 2 (loss of non-designated heritage asset) is not dissimilar to 1 but references different policies. Again there should be enough about your scheme to outweigh this. Make the point that without viable redevelopment the existing building will be lost to decay. Ground 3 (car use / sustainability) emphasise the sustainable features of the scheme, work from home, knit your own yoghurt etc. Regarding ground 4 (ecology), don't use the phrase "patently false". Instead state that the report was submitted on xxx and you can provide copies if required. Have copies with you for inspection. Don't try to 'prove' that the planners have made errors. They are just doing a not particularly well paid job. Perhaps redraft, maybe using ChatGPT.2 points
-
But, there is no “attention to detail” box for an EPC, I would be more interested in “cost to run over a 12 month period” (difficult for a new build) which would be much more accurate. My recent sale of my passive “esk” build took no account of the fact it was a self build which we all know means we care about how it’s built.2 points
-
I would get a reputable cavity wall insulation installed to come and survey to drill holes and determine the cavity (if any) width. If wide enough, fill with EPS beads, if not leave it. I would also explore using EWI along the back and sides of the property and possibly IWI on the front elevation as it does look a nice house. First though I’d get a cheap thermal imaging camera to identify cold spots to investigate and block up holes with appropriate materials (mortar / expanding foam etc.). Also make sure you’ve got plenty of loft insulation, it’s cheap and super effective.2 points
-
You won't be able to re-use the bricks as the mortar joints looks strong and not a lime mix. Demolition, new footings with rebar and clay boarding, engineering bricks, face bricks, sand, cement, creasing tiles, labour, skip hire, plant hire. = £1000 / per metre2 points
-
1 point
-
I don't understand this statement. I thought you had a good 4 or 5 years left to go?1 point
-
Not sure if these comments have been made before. Accessibility toilet - missing TV room is tiny Utility just looks wrong and is plain daft in scale, really long and thin. Entrance hall looks a waste of good space. As @Thorfun says, get the professionals in and do a proper job. Worth every penny if you choose well.1 point
-
But two other issues I see, and why - again - you really need to draw in all of your furniture, are: 1) where does your sofa go in your lounge area? Not much use having a lounge you can’t lounge in. 2) are you sure your drawing is scaled correctly? the window at the bottom of the kitchen is detailed as 1.2m wide. That would suggest the width of that room is about 2.1m. But if the area of that room is slightly more than 40m2, then the dimensions of that room are 2.1m by 20m??? You really need a professional, or at least someone who knows how to use a tape measure.1 point
-
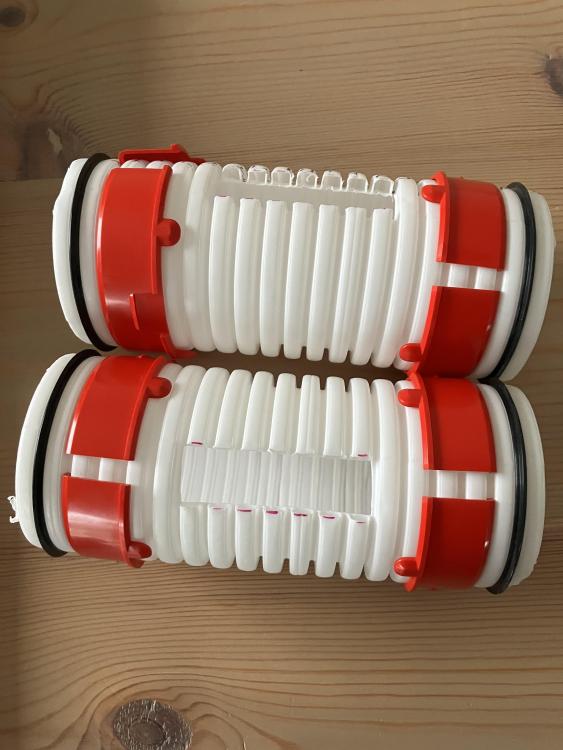
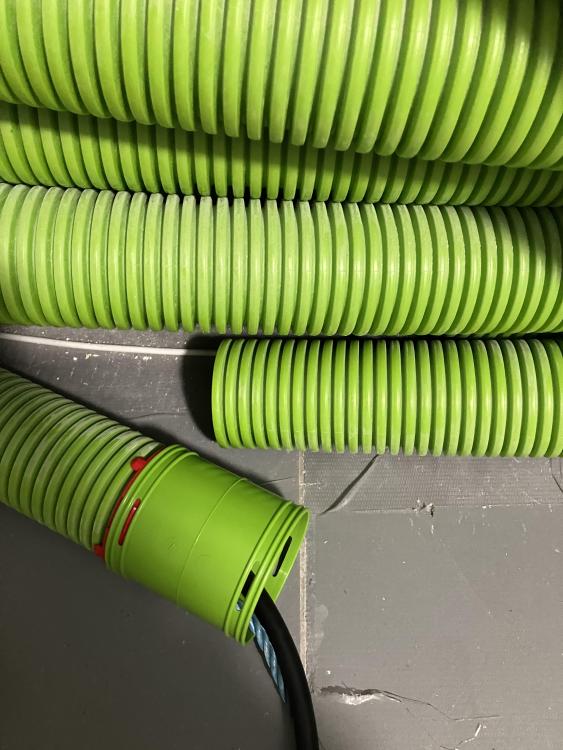
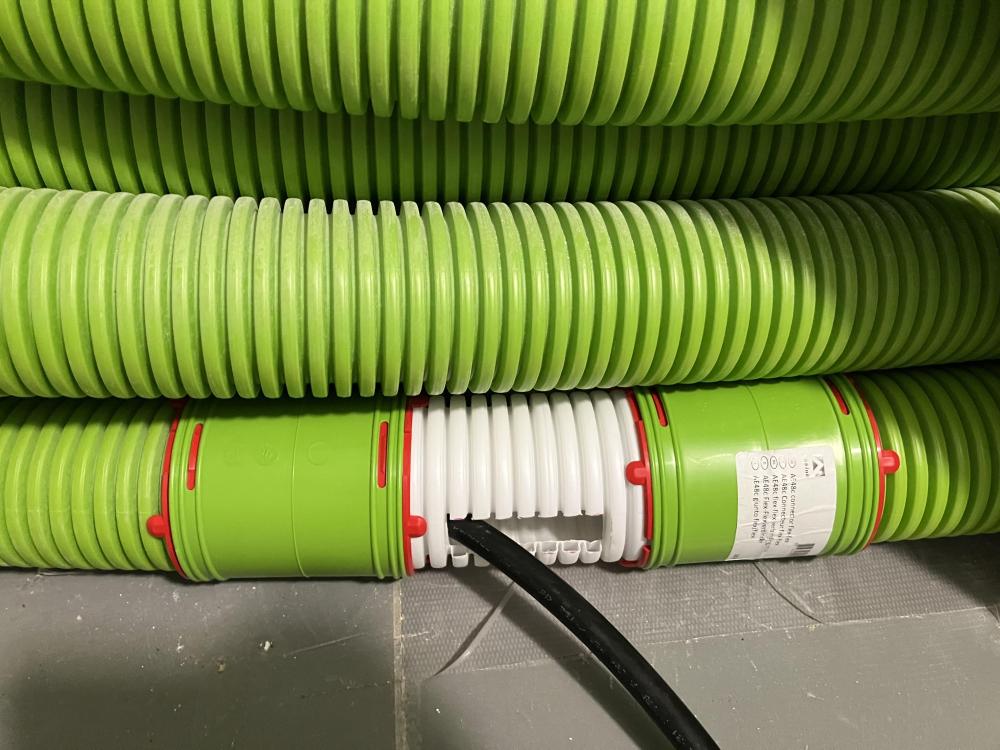
Slight modifications to the plan and the MVHR duct and the 6mm2 is in situ, exiting the duct in both rooms via a slot in a short piece of white duct I had left over and inserted into the main duct run. I’ll make the slots airtight once the battery is in situ and the cable doesn’t need to be moved any more. The modification is easily reversible should the need arise by just removing the smaller sections of duct that I inserted into the run. I pulled a small torch through the duct to make highlight the correct one. Smalls sections prepped ready for inserting into the main duct run. I wish I’d had the foresight to make provision for getting cable etc from the utility room to the MVHR room, but I didn’t so out comes the Stanley knife. Utility room MVHR room in the loft. Battery won’t arrive until early in the new year but I’m ready for it now. One bit of good news, the interior of the duct was as clean as the day it was fitted.1 point
-
1 point
-
Well insulation should stop the warm air hitting the cold surround that causes the condensation. 🤷♂️1 point
-
Suspended ceiling tiles get water stains really easily. Is there any way you could help prevent the condensation forming in the first place? Celotex?1 point
-
We have a democracy in our house. It's just that Jan has 1.1 votes. 😉 What she hates about the SunAmps is their unreliability (due to control board failures): we are both in our 70s now, so reliability is becoming more important than ever. TBH, if we were in the situation of @Cooeyswell and only had one unit then we would have given up on the SAs long ago. We have been looking at our utility room and we can fit an OSO tank opposite the toilet; a job for next summer, maybe. This needs more mulling time to refine options. @MikeSharp01, I really like the idea of the SunAmps and the physics behind them, but they seem to be really let down by the engineering implementation. 😪1 point
-
Good luck. With my planning committee meeting my then wife spoke (as it was her plot left her by her father) and concentrated on the family history in the area (in hindsight a wrong tactic) however the neighbour from hell then spoke and trotted out numerous lies, councillors then trotted out inaccuracies in our application and we were not allowed to challenge any of this. The councillor that supported us would not look me in the eye and voted against us……with all the others. However I won at appeal so 🖕, yes I agree, but not the end of the world and I found going to appeal easier than applying for planning (I did my own).1 point
-
So, a over a full year after making our planning application, it's finally going to committee on Thursday 14th December. My request to speak has been accepted. Firstly - any advice that's general to all planning hearings? I'm watching YouTube videos of my local council's hearings to swot up on the characters and opinions of people involved. Is there a published list of rules or processes that councillors need to adhere to? My prior experience of watching recorded meetings gave me the impression that not all councillors are terribly familiar with planning policies. Secondly - what should I do when the planning officer's report contains inaccuracies? Of four arguments they've proposed against our scheme, one is that we didn't provide a valid Preliminary Ecological Appraisal. This is patently false, as the PEA is listed on the planning portal! It was valid when we made the application a year ago, and we have since had an updated one sorted that they've never asked for. Third - any thoughts or opinions (I might live to regret this) would be appreciated on the arguments of the planning officer and my draft speech. I've got an appointment with a planning consultant tomorrow to see if I'm barking up completely the wrong tree, and a county councillor is also in favour of the scheme and so might be a good source of advice. Here's the report's recommendation: Here's the first draft of my speech, which I can get through in 2m 50s, before getting any professional feedback:1 point
-
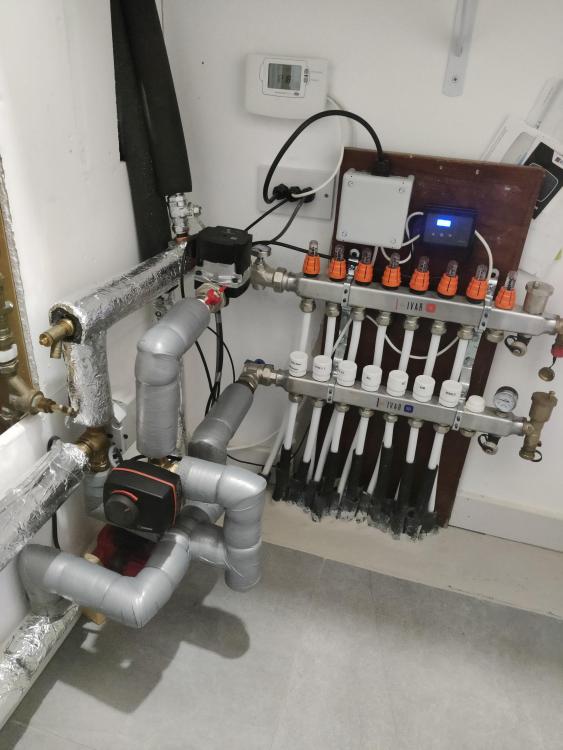
I used cable ties at regular intervals to keep it a tight fit all along. all my stuff came from psw trade suppliers, the eurocones (brass coloured) have just one external sealing ring, making it a perfect fit for a TRV - https://pswtradesuppliers.co.uk/brass-compression-fittings/92-117-16mmx34-eurocone-adapter.html#/39-pack_of-1 another bonus is no press fit, it’s all compression but works an absolute dream.1 point
-
1 point
-
The full horror is exposed in https://eur-lex.europa.eu/legal-content/EN/TXT/HTML/?uri=CELEX:32013R0812#d1e32-123-1 In particular Annex VIII - Section 4. It is calculated from a load profile given in Annex VI and may have no relationship whatsoever to your usage.1 point
-
Welcome. Don't be put off by the anti-architect stance on here, it is a self build forum after all and a lot of the people feel the same about what is available on the housing market. As for cost, we'll not paying an architect/PM 20% is going to help. And you can be a rare architect/builder and exceed the building regs.1 point
-
Mine is cold to touch and its only a C rating, piping losses will exceed any cylinder losses.1 point
-
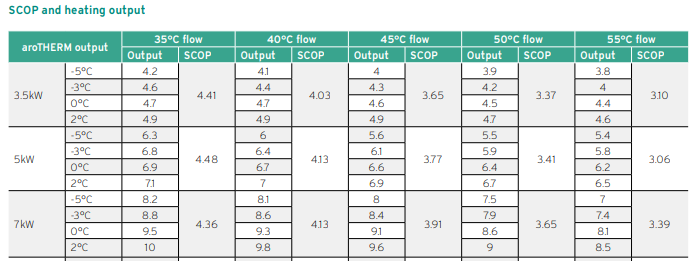
Heat pump sizing is simple enough. you need a heat pump that can deliver your required heat in about 22 hours, this leaves 2 hours for DHW heating. Other other thing to look at is output at your flow temp temperature and lowest outside temperature. This where you need to start looking at different datasheets. Some manufacturers quote the best output figure others the minimum, so headline 7kW doesn't mean the same thing, when comparing products. So you looking for around 8kW output at say -3 to -5 A 10kW Grant heat pump at -7, has a rated output of 8.1kW. So is fine, the next size down is 6kW and is too small. A 7kW Vaillant for example is fine until flow temp required at -5 goes above 45, at 50 it will struggle and outside temperatures below -5 would struggle also.1 point
-
Oh please come round Gary, and shout that really loud for the rest of the family to hear. They'll believe you. But, wimmin; - They will do what they do do. Phhhhhhhhhh.......1 point
-
Glue (probably a PU would be enough - it's pretty good in shear) would help as well but perhaps too late now.1 point
-
1 point
-
Unless there is a planning condition requiring a wall, a cheaper way is replace it with a fence.1 point
-
Personally I’d use chrome press tails with the joint below the floor .1 point
-
I’ve used twetop brand and geberit, both on 16x2 pex/pert-al and regular continal pex (no al)… No leaks on any of it. I figured if the o-rings seal on the inside and the stuff squashes down, you’re good to go. I generally use WRAS approved UFH pipe for everything… I usually buy end-of-rolls off Facebook 🤣1 point
-
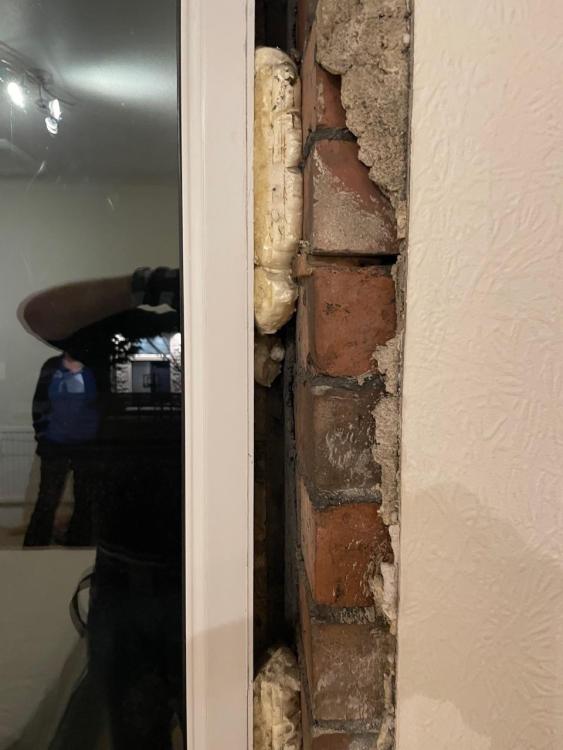
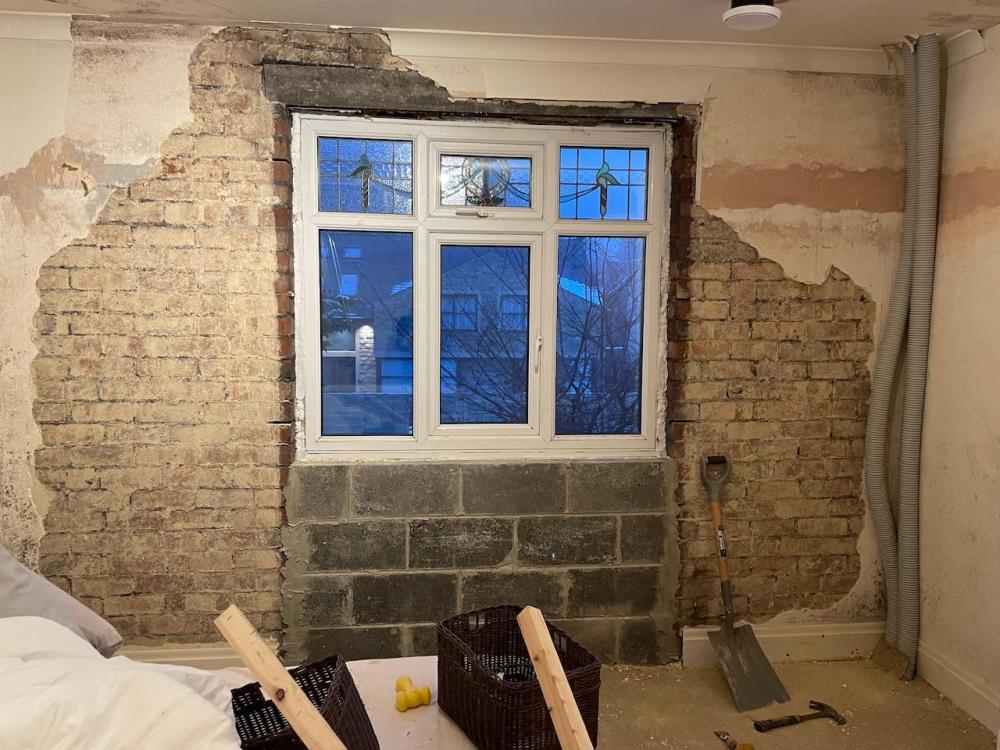
I had a similar problem, don’t have the money to upgrade my windows for a few years but pulled all the reveals off during my renovation, finding large gaps with gushing cold air everywhere and the existing plaster just falling off when you touch it. I also had to have a wall under the window rebuilt now tied to existing walls, as it was weirdly sat closer to the external skin with a tiny cavity basically freestanding with huge gaps. I don’t know what they were thinking when it was built (1930’s). Illbruck FM330 to the rescue!1 point
-
@DRM Just to avoid you disastering this project: 1. To support a sliding door, the beam will be much deeper. 2. There's a lot more to this than compiling a list of materials. 3. That's enough from me. It's time for you to engage an Engineer or it will go horribly wrong. 4. Good luck though.1 point
-
In our case, all of our services are in a small cupboard off the utility room toilet. We would have difficulty fitting in a cylinder and the hot losses would turn the toilet into a sauna. And @MikeSharp01, I will talk to SunAmp first.1 point
-
1 point
-
Thanks both - that's really helpful. So, going off @ETC's point then from the above if the building was just used for periodic storage then DPM may not apply. However in this case, the building will be used extensively (starting at 1000 hours a year and moving up towards 2000 hours as I hit retirement and contains a lot of expensive machinery. It really is an obsession of mine. As such I'd really like to have a good level of protection against moisture ingress so would stick with DPM. @Roger440. Mate, I owe you a pint. The lift manufacturer I had planned to use (TwinBusch) specified 200mm of C20/C25 concrete. However you are quite right, most alternative manufacturers specify 150mm (granted, as a minimum) even for higher capacity lifts. As such, you've just saved me a 25% of my concrete costs simply by picking another lift. Thank you!1 point
-
1 point
-
Might go with these for converting to copper... https://www.thefloorheatingwarehouse.co.uk/product/compression-fit-to-copper-adaptors/1 point
-
That SunAmp PV of mine has failed again, so I am down to 1 × SunAmp PV again. It looks like the safety thermostatic cut-out has tripped again. No good reason. I had a DS18B20 on the heater wall and it never got near a cut-out temp threshold. I like the unit but the control electrics board is crap. I am seriously considering replacing it by an off-the-shelf ESP32-based control board, and reimplementing to control myself.1 point
-
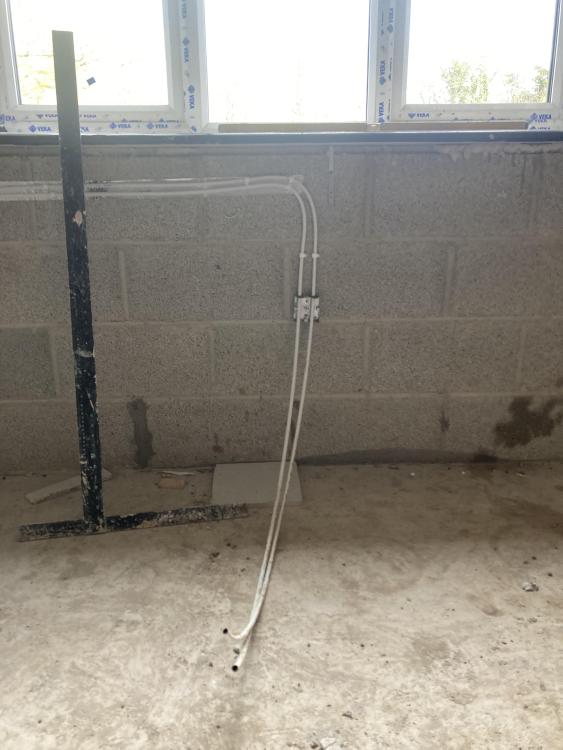
I've gone with a 6 port manifold from Wunda with their eurocones for 16mm Pex-Al-Pex/Pert-Al-Pert for about £160. Not cheap but it's apparently good kit. I need to source some ball valves for the inlets from somewhere yet. https://www.wundatrade.co.uk/shop/home/quick-shop/wundatherm-quick-shop/manifolds-quickshop/6-port-premium-manifold-2/ For some reason a lot of online sellers now seem to prefer Pert-Al-Pert over Pex-Al-Pex, but am probably going with the Pex-Al-Pex from these guys https://www.thefloorheatingwarehouse.co.uk/ I suspect the missus won't appreciate feeding plastic pipe directly into the rads (visually). I might try it out as a test - running the pipe up through the floor at the centre point of the radiator and looping it round behind the radiator. Alternatively I'll go with something like this under the floor https://www.elementshop.co.uk/16mm-x-15mm-coupling. As you can probably tell, I've not nailed down much yet. But I've decided where the manifolds can be located that will work well.1 point
-
Have swift box elsewhere. This is a detail which is going to happen, I'm just looking for advice on a sheet product which might be useful. Thanks!1 point
-
It worked very well for 5/6 years with no problem. Then it started to get issues. My guess is that Sunamp realised that the Sunamp PV was overly complex relying as it does on multiple sensors, a modulated water pump and a control board with relays etc. Such a system may have been viable if sufficient debug information had been made available but it wasn't - at least not to the end user. My understanding is that the current systems have been simplified but that an immersion failure requires a return to base. So the question is what do you do for hot water while your Sunamp is on a trip to Edinburgh. There may well be a place for a Sunamp in size constrained locations. But if you are just looking for a low thermal leakage solution then a hot water cylinder such as the OSO unit I have just installed may be a better long term solution. It uses vacuum panel insulation just like the Sunamp (so low loss) but has built in redundancy (two immersions) and very low complexity so can be fixed by your local plumber - A feature I feel will be important as I continue to age1 point
-
Yeah I’d fully fill the depth of joists where you can, otherwise do what you can. In terms of breathing, using a breather membrane and breathable insulation like mineral wool should be fine. Any moisture can flow over time through the mineral wool and out through the breather membrane. I have around 0.8m from the bottom of the joists to the ground below. In terms of cost, it was around £700 excluding insulation (entire ground floor of my house). I bought the materials from Latzel in Germany (there’s a thread about it somewhere) and it’s massively cheaper for the Pro-Clima stuff. Knowing what I know now, I’d probably skip the Pro-Clima membranes for this job, and get the equivalent but cheaper elsewhere however the tapes and primers etc I would still absolutely recommend. I hope that helps1 point
-
You are wise to ask all this - good call. My thoughts, which also extend a bit beyond your questions. You can get a rough check on date of build by looking at versions of old maps (various online archives eg https://www.oldmapsonline.org/ or https://maps.nls.uk/os/), and seeing when it first appears. Are there any with a data plaque - it was common in that period? Looking at the pics 1890-1910 seems reasonable. At that date cavities are unlikely, but some were using experimental partial 2" cavities if a well built house. I have a 1910 ish house with some cavities, and well built out of *very* hard bricks. Such cavities will be useless for CWI. I'd suggest drawing a carefully measured inside-outside plan, getting thicknesses of walls - which should tell you something about your wall cavity widths vs standard or measured-in-situ brick sizes. You can also learn by looking at the brick pattern - is it headers or stretchers, where and how mixed? Extra skins may well be stretchers. You could do like a CWI contractor, and drill 12mm holes through mortar joints and insert a camera ("borescope"). How does it compare with any other "detached semis" in the area .. eg at the other end of the row? Has it been extended sideways? Roof angles the same? Symmetrical with yours? What is in the planning file? Try a visit to the Council Office to read all of it, or an FOI. What about the BCO file (a bit more difficult to get hold of)? Anything in the Local History Archives at the library? Can you see anything by reaching into the edges of your loft - either with a head torch perhaps with inspection mirror, or a cable-cam plugged into your mobile phone? Can you get down the gap to the next house? If not, you are somewhat buggered by the lack of access. At least it looks too wide to terminate, through trapping, a tumbling tabbycat. Are they all rendered at the back, or just yours? If it is only a few rendered, it is potentially hiding something. I suggest that you decide on drylining-over-insulation (or not) before pouring your hearts into decoration. Aim for as close as you can get to newbuild u-values. What are your floors? If suspended (ie wood) then consider insulating underneath, and perhaps more on top or just on top if solid - it is a big benefit. My way is 100mm or so rockwool and a staple gun through raising about every 3rd or 4th floorboard, addressing underfloor ventilation / dampness along the way to protect joists and a membrane on your floor to block air leaks. If you are air-tightening an old house, then ventilation needs as much attention as insulation as you are preventing it "breathing" in the way envisaged. Wishing you all the best. Ferdinand1 point
-
As an experiment I installed 2 Salus auto balancing actuators, one for each loop, on the garden room manifold. Reset the WC curve with a start flow temp of 34 (normally 29.6 deg). And it started to heat the floor, so left to run overnight, the summer house settles at 14.7 degs with an outside temp of 5 degs. A result - No need to have electric heater on all the time. The Salus actuators go fully open for a long time (hours), then start to set the flow rate. The other mod I made, was to remove all outside control from the ASHP, the only influence is the WC curve. So it starts and stop as it wants. Moved the house thermostat to control the two mixer valve set points (via a volt free switch on the controller), instead of when the heat pump runs. Mixer valve control set point T, is set to a flow temp of 27 and T2 set to 38 (so it goes to a fully open position). Used the thermostat timer to have a target of 19.5 for 07.30 to midnight and 20.5 during E7 time period. So running regime is, no call for heat - UFH pump stays running and mixer valve modulates to keep flow at 27 degs, call for heat - mixer goes fully opens take all the heat the ASHP is delivering into the floor. Outside temp has been a steady 5 degs, from last year's monitoring, I found the calculation of house heat loss to be very accurate. So for the last 24 hrs the CoP including DHW has been around 4.5. Maybe a little fine tuning of the WC curve as temperature drops, but quite happy at the moment. Pipes now insulated1 point
-
1 point
-
Is it going to do your hot water too?1 point
-
With UFH you need lots of insulation, aiming for a floor U value of 0.15 (150mm PUR, or 250mm of good mineral wool) or better or frankly don't waste your hard earned money installing and then for ever more, paying for heating.1 point
-
I've switched plans from stick build timber frame to Polysteel ICF. I've got 40 linear m of external wall single storey. My budget is beyond tight, some would say no chance. When looking at the cost of timber, OSB (two layers for racking), additional structural support due to location ( 3 off steel sheer walls). The inflated cost of fibre insulation, costs of air barriers and tapes.etc ICF is working out a couple of grand more expensive. It's totally DIY. My location is also causing expense for delivery, so the idea of one delivery cost for the walls / foundation is offering a saving. My location is windy, so again getting this built once, and the insulation/ airtightness is all in one is a great positive. I just need to worry about airtightness at ceiling level and obviously doors and windows. Blocks are ordered and shuttering for the footings start in two weeks. Time will tell, but I'm quite confident, as the costs for the walls are fixed now.1 point
-
Hesitantly, I offer this checklist because the subject matter is often deeply sensitive: there's so much at stake during the meeting and the build up to it may well have been fraught. Indeed, this blog entry is a pen-portrait of a recent Planning Committee Meeting in my area All the more need for a rational, carefully structured checklist, therefore. This list appeared originally on the ill-fated ebuild site. Each comment was referenced to multiple threads, thus adding greatly to its validity. This list is offered as a help to those who are considering going to Committee to make their case. I am almost sure that -since many of the ebuilders are now here at buildhub- that any questions you may have about this checklist will be answered promptly. List the facts, assemble the evidence. (Basic procedure for problem solving) Councillors may ask for applications to be called The process in a nutshell Scottish Regulations differ to those in England Dig out the NPPF read it, which paragraphs refer to your case? The value of an accurate drawing Conservation Area? Other local decisions Scale model Size matters, (footprint) but you need evidence Micro-politics: architects - planners - county councillors - parish councillors - neighbours; strategy for dealing with each Is needing to Appeal so bad? Going to Committe or Going to Appeal Manage your Planning Consultant Check the fees situation in relation withdrawn applications What is a withdrawal? You may withdraw DURING a meeting Manage your emotions: don't show people how upset you are What to say and how to say it If you're worried about that, employ a professional to present for you. Going to Appeal needn't be as bad as it may sound1 point


