Leaderboard


Popular Content
Showing content with the highest reputation on 09/20/23 in all areas
-
Can I check what I appear to be seeing? I seem to see a split straight across a slate (slate?), which is mighty unusual. I also seem to see a lap pattern which is very unlike the one I laid last year. Yes, we need 'top pictures'. The crack looks quite uniform, suggesting (?? - we need pics!) that it might run all the way across - ??? Would strongly recommend that you do not 'gob it up'. Find the real problem and fix that. Look fwd to seeing the pics - I am intrigued!2 points
-
So this government has gone from the 'Greenest Ever, with the then lead, Dave, putting up a wind turbine on his home, to one that is happy to pollute rivers, reduce building standards, allow some houses to carry on burning, can't auction off a wind turbine site, and will let us buy ICE vehicles for an extra 5 years. Same government that is backing Tata to build a Giga factory in Somerset to make batteries. (expletive deleted)ing shower of shit they are.1 point
-
Fourth week are our house sale Around 20 viewings Four offers on the table I’m still waiting for someone to ask about Airtightness and levels of insulation All but two have been Doctors One being a conveyancing solicitor Not interested EPC etc The second is a form let joiner who has a chain of businesses I ran through the spec He simply wasn’t interested Is there anyone out there Other than us lot that cares about these things1 point
-
The two roofs are pretty simple A-Framed gable roofs. Airtightness I suppose would be achieved with membrane wrapping around the perimeter down onto the inner leaf ICF wall. Good carpenters are hard to come by but I do have a friend in mind who I think would be happy to put up a standard trussed roof for me. Noise is not an issue and as I'm in Ireland, heat waves are fairly uncommon! Not easy to make a decision for sure. Think I'm leaning towards a pre-made truss with a simpler cold roof detail. The attic space is not going to be used for anything other than storage so reckon might make more sense for cost reasons to go that route.1 point
-
Just install a flexible cable conduit over them and tape up the joint. It’ll be fine, as there’s actually very little actual movement, ask people who’ve tiled over ‘expansion points’ and not even had so much as a hairline crack. If the slab is of a reasonable thickness with anti-crack mesh etc then it’s just going nowhere, and if it’s a low energy home the slab should see big temps shifts anyways?1 point
-
It’s what we as self-builders do.1 point
-
As "in" Richard Hammond? 😬1 point
-
It’s probably easier to install a new DB and join the tails together that way your installer doesn’t have to touch the original db and comment on its existing condition in a certificate manufacturer will specify type of RCD so that may not necessarily fit the existing space.1 point
-
Try a sequoia, it is pest resistant, might be electrically resistant. Good for making chips as well.1 point
-
For the most part, not every house has vde pliers.. But most have a potato. It's why it's a great life hack1 point
-
The savings would cover an additional circa. £35K on the mortgage, and that's without lenders starting to offer preferential rates or cash-back for EPC A & B properties. It's taking time, but Banks are slowly coming round to better lending options for higher performing homes.1 point
-
Can you put some compressible insulation around the pipes where they pass through the 2 layers?1 point
-
No I have renderers working full time Summer is more of a problem1 point
-
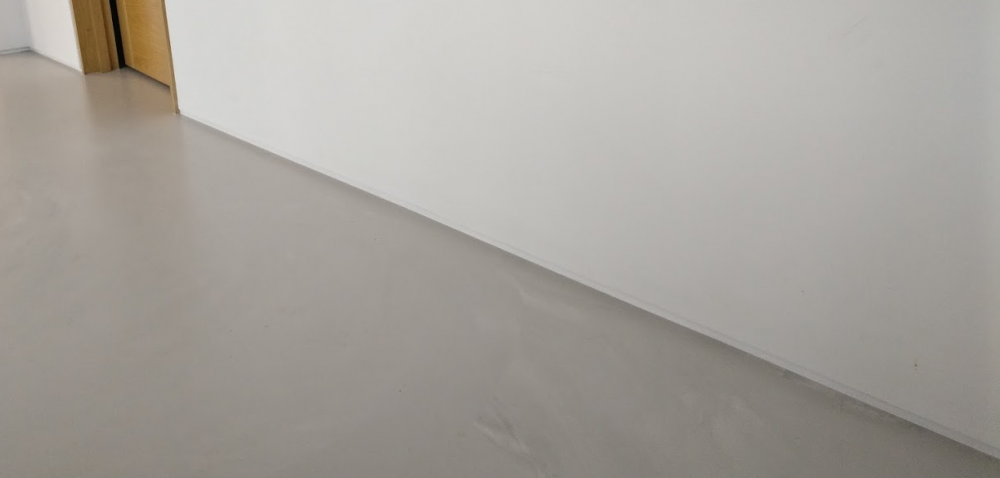
We put this on yesterday Hammered it down all day
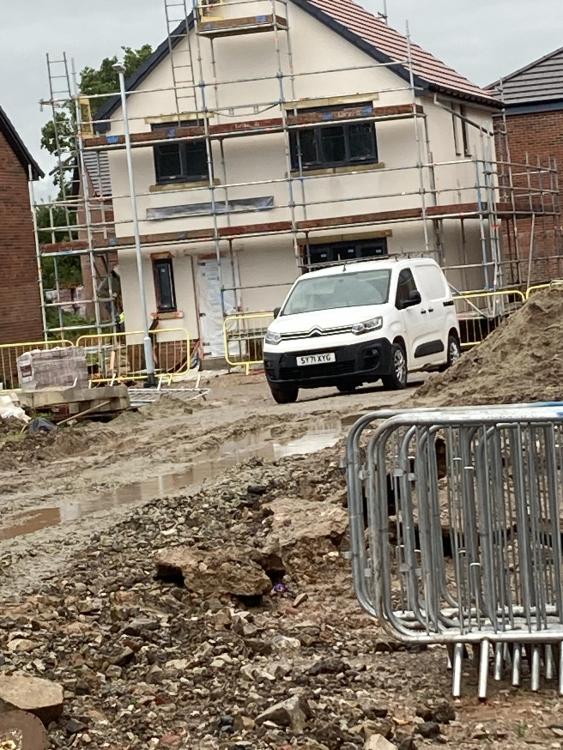 1 point
 -
Are you just trying to do things too quickly? Low and slow compared to quick and high. 45 degree flow temp to UFH, says you are trying to heat it up quickly. The result is the heat pump is too small to keep up. Run everything at a lowered temp for longer is likely to fix this.1 point
-
Aye. My plan at the moment is to try to get the bales up on a single dry day, then protect them with tarps and/or vapour-permeable membrane. As long as I size, dress, notch and dip the bales that need it, and keep them organised, raising the walls should go quickly - and I've got a few helpers I can call on ^^. It's OK if the side of the bales can get wet, as long as they can also dry out - but water from above is death.1 point
-
Hi @Gary68 The fact that the flow temperature drops and won't recover suggests that the amount of heat coming out of the system is more than the ASHP puts in. If there was something with the pumps or valves, the flow temperature would reach temp but the house would be cold. I would insulate to death any external pipes from the ASHP to the building thermal envelope. Otherwise home looses more heat than expected / calculated. In the winter airtightness is a BIG heat loss factor. Without knowing your building design etc one can only guess.. Good luck M1 point
-
You’d like to think it goes without saying that anyone messing around with electrics will make sure it’s off first. Although I guess it could be a form of Darwinism in action. I’ve removed loads of these in seconds with pliers, but might try a potato next time - if I’ve got one in the van! Should it be a baby new potato, or perhaps a Maris piper?? I wonder what the difference in conductivity is between them! On second thoughts, perhaps not, as at least my pliers are 1000v insulated 😉😆1 point
-
https://www.automationdatabase.com/products/siemens-5sv3314-3?variant=14325568967¤cy=GBP??1 point
-
Yes keeping the bales dry during building is a big problem, when I was planning building a bale house years ago I thought of building a scaffold outer with tin roof and sheeting first and effectively building “indoors”, I even priced up buying the scaffold (second hand) and was told as long as I kept the put locks oiled I could sell it afterwards with little loss. I know this is not possible for yours but keeping it dry during the build is very important IMO.1 point
-
Look for a wash off - also if they are an approved applicator for K rend their work will be warrantied. K rend will also tell you the required conditions if it was OK.1 point
-
Once it’s been on a couple of hours it should be fine If the rain is heavy it can wash around the beads We normally add accelerator and rub it up the same day If night conditions are cold or wet1 point
-
I think it's a great idea @Nick Thomas as a project to do on a budget of 2.0 k.. quite a challenge for the walls and founds, with the roof extra over. Have not dug out my book on bale building but keeping the water out of it is a biggy. That means things like a big eaves overhangs to shelter the top of the wall and mitigating spashing up of rain.. @Nick Thomas mentions 300mm to the bales which is well above a normal spash zone. Also you want to get plenty wind circulating round about to dry things out.. not sure about how close it should be to the retaining wall for that reason. The vertical loads on the bales are not huge.. they will compress over time but it is not like a house designed for 50 years with more onerous loading from say floors, tiled roofs. If it was me I would make sure if the bales start to misbehave then devise a way you can prop the roof / jack it and insert a more traditional timber frame instead so you don't lose your shirt or do the bales again.. tricky as they need to settle in as you build. Normally a garden building like this could cost 15 - 20k (if you went to a turnkey outfit) once serviced with the slabs outside / drainage etc and that would be for a square box. But here we have a bit of character in terms of the shape and form.. and for that you could pay a lot more! Keep posting Nick!1 point
-
I've done the same in the past & agree - it is a good solution. And, at least with some water companies, a larger ongoing standing charge.1 point
-
Well done for giving this a go, thanks for posting as very interesting. Fair enough the walls are light in weight and I assume so will be the roof. How are you going to tie it down to stop the roof and walls lifting up in the wind? Are you going to use the long spikes to pin the roof wall plate down a good bit into the bales? Bit of house keeping on the maths mainly for all in case they use the same sums. 5 tonnes = 5000kg. Convert to Newtons 5000 x 9.81 (just say 10) / 1000 = 50 kN (not 5). If you have 2.5m^2 of pad area then roughly the pressure at the bottom of the pad will be 50 / 2.5 = 20 kN/m^2. If it is a temporary structure (say snow loading with a return period of 20 years as a ball park figure add some 0.35 kN/m^2 to the roof loading unless you are at a high altitude UK wise. A good bit of that soil you see next to the wall will be backfill (made ground).. ask how are the founds for the retaining wall formed. How far do they protrude into your garden? Is the soil you see just well compacted fill? The main thing here to watch out for is that if you are digging next to a retaining wall is that they are designed for two main things. One that they don't tip over and two that they don't slide into your garden. The sliding is important here. The sliding forces are resisted often by the friction under the found and also by the soil on your side and this can make a big contribution towards sliding resistance. I would avoid disturbing more of the soil close to the wall on your side or lowering the ground level on your side close to the retaining wall. I would give the OSB a swerve as I have my doubts about it performing well in this application.. it is thin and you have fixing issues.. and any long term moisture is not good for it. What about using cheep fencing slats with some 3 -5 mm gap between that are treated, these are more breathable than say OSB? Anyway it keeps the ethos of using more natural rather than highly process materials (lots of glue) such as OSB. If you have doubts get a bit of OSB and leave it out in the rain / in a bucket of water for a while and see what happens to it. As the thing is light weight how are you going to stop it blowing over sideways in the plane of the retaining wall? I assume you are going to make the roof like a stiff beam that transfers the sideways wind load to the rear wall? In high winds you could easily get 100 kg/m^2 wind uplift on the roof unless you live in a very sheltered spot. At the same time you get the wind blowing on the sides of the building wanting to push / suck it over sideways. I think it is these wind stability issues you need to concentrate on rather than the founds, although they are important.. settlement won't generaly hurt anyone (unless left unchecked) where as the thing collapsing or bits blowing off and hitting folk in the wind is a concern.1 point
-
Good example of brickwork spalling, spot where the cement pointing was -1 point
-
There are very few use cases for NHL5 now, you may as well use cement. It doesn't want to be anywhere near your stonework. You'd be better off going weaker and repointing often, then going harder and watching the stone start to spall.1 point
-
Sharp gritty aggregate and well rammed in or even MOT type 1.1 point
-
I’d go with 3.5 make sure it’s a good sharp sand nothing too fine1 point
-
If you use NHL5, it'll be relatively impermeable, so the water you currently see in the voids will be more likely to stay higher up. Is that desirable in your case? Same if you added a bit of cement to it - the water will be slower to move through (if at all), so it'll end up going elsewhere. Into the house?1 point
-
Ultra light weight aerated blocks. Usually 600 x 250 x 200 mm. Foam or thin joint mortar for assembly. Why? mortar doesn't set when it's below zero whereas the right foams can. 🙂1 point
-
The best books I know and use on general construction are very old ones. Building Construction, by McKay in 3 volumes I use them for reference on refurb work. Some procedures have changed, plastic wasn't around, but much is is the same.....dig a hole, pour concrete. They are probably available second (or n times) -hand A member of staff who had been through college swore by 'Chudley' and it is still available. Perhaps others on here have used it. I'd then suggest following all discussions on here, and delving into the interesting ones. Plus binge watch grand designs etc. just to watch construction in action, then ask remaining questions on here. The more specific the better.1 point
-
@Apprentice I think these days very few books get written. You tube seems to hold all the answers, but you have to plough through the bulls41te one's to try and find the decent information.1 point
-
this subject has been debated quite a bit on here and i don't think there is a perfect solution! you could absolutely go overboard with insulation, resilient bars, soundbloc etc but then you need a gap at the bottom of the door to let air in/out for the MVHR! so sound will escape that way. in the end we decided to use resilient bars in certain places where we wanted to reduce the sound transfer, e.g between my study and the kid's bedroom above and we used 100mm Rockwool in the ceilings between the joists and 50mm on internal walls. we haven't used soundbloc anywhere and are using 12.5mm standard plasterboard. was that a good choice? ask me again once we've actually finished building and have lived there for a while! my conclusion was that we'd never eliminate the transfer of sound without spending a lot of money and detailing every wall to ceiling to floor junction with sound sealant etc so we just tried to take the edge of it all.1 point
-
Yes that can work. If you do hips.. it does soften the roof. Well done you sorting that out. You can do a Dutch type hip.. but sometime SE wise they are "hard to do".. but there are work arounds if you want to preseve the floor space in the roof.. you can do some cranked steels for example if you have a big house and have plenty money... that said it works fine in say in Surrey ( added property value ) but less often in regional parts of Scotland or Wales.1 point
-
With my appeal it went down well with the inspector that rather than have dormers I designed a double hip roof (no gables) to reduce the mass of the build.1 point
-
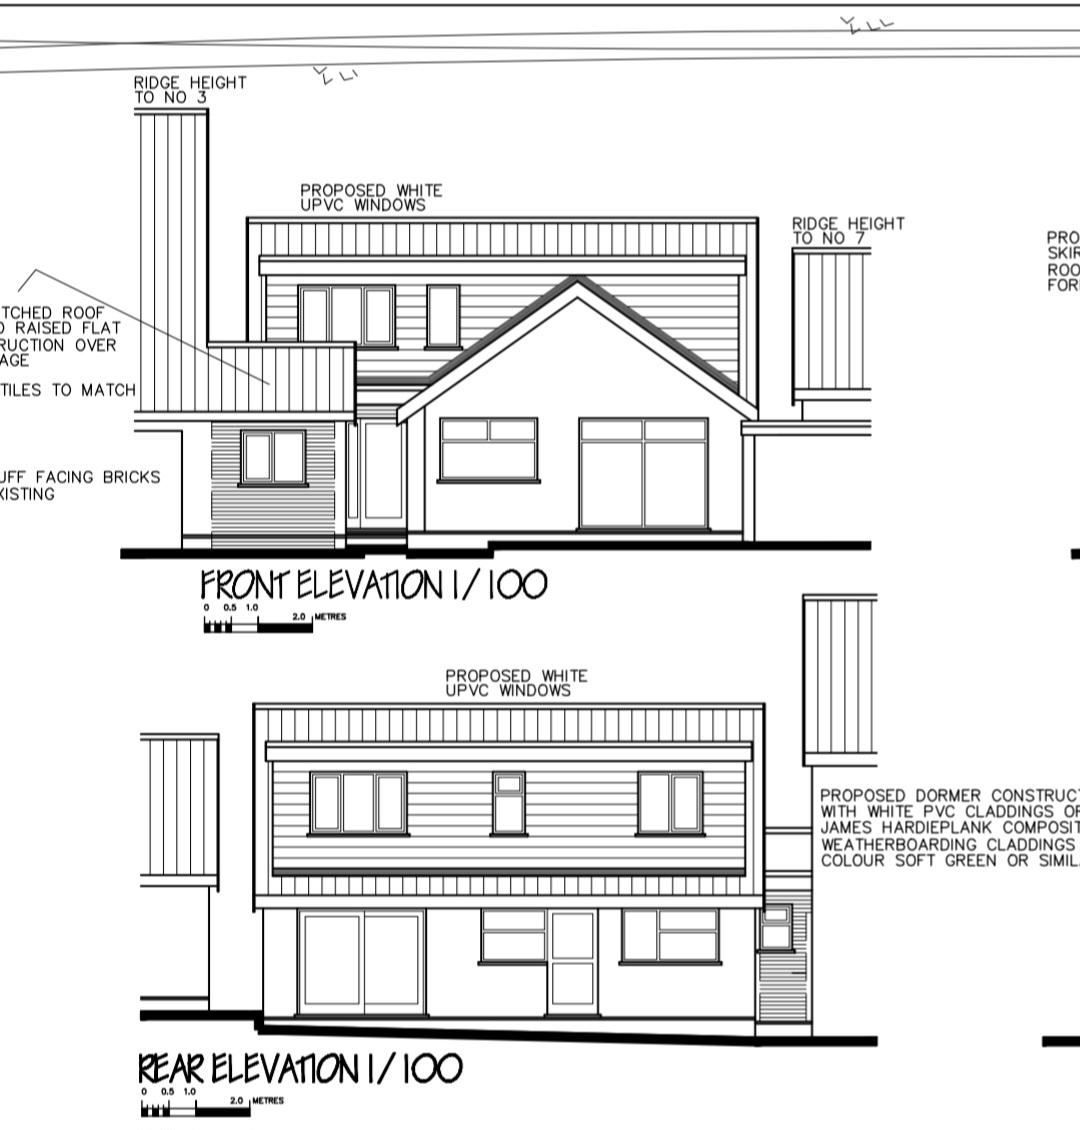
Ok to go back to the original post and what @Kelvin is discussing. The process at our design end is logical. Your starting point when you encounter problems is to review what you are doing. You look again at what is within you permitted development rights and identify where you are breaching those. You make a list of the breaches. I know it is a new build we are discussing but I always go back to the very beginning on every project and review what we know and PD rights form part of that review. Next you look at what is round about in terms of what has been built. If you live out in the country it's different from being in a town... but you still can't have a crap design that looks bad. Ignore the technicallities for now, just look at what you see and how different things have been introduced to the built environment. Use your eyes and remember / photograph what you see. This is important as it will form the basis of a planning application... it will also help you to not build a house that does not fit in.. think .. who wants to buy a house that does not fit in? Think about when you come to sell. Is a surveyor going to clock that too and reduce the value? I mentioned massing earlier (too much of one building element for example that dominates the overall look) but there is another aspect to this which is proportion. The different elements need to be propotional to the rest of the building.. your common sense will help you a lot here. If you think about it.. at the moment you want to maximise space / reduce complexity.. but in a couple of years time you may come home and realise that your house looks ugly. Another thing is how you use and introduce different materials. You could for example build a new house that has a part traditional farmhouse look and then add on an "annex" with say a Zinc roof and timber cladding. You may find examples of this locally where you have old 17 centuary houses that have modern parts added to them. Here what we do is to say.. we have the old and "a distinctly different but complimentary style". What we do here is to say.. we are appreciating the traditional design but adding something more contemporary but sympathetic to the 17 centuary ethos. I think you need to do more work on this and look at it in the round as your forever home? If you do this then there is a good chance you'll get what you want within you budget. Now if you can satisfy the above or something along these lines then you stand a good chance of getting the planners to agree.1 point
-
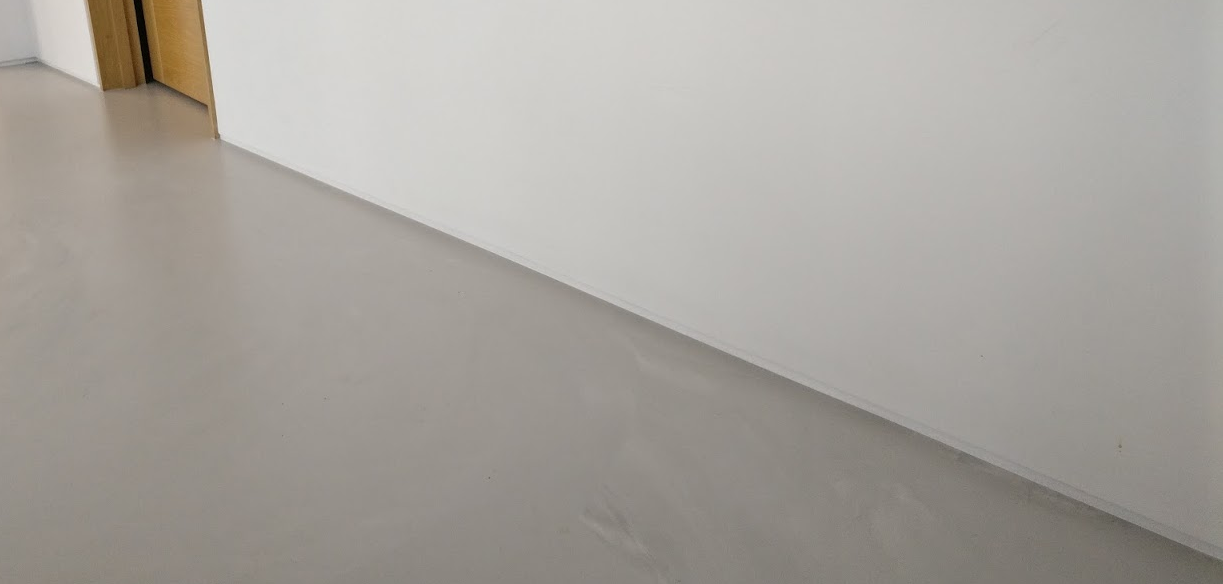
Doesn’t give the view justice. But when finished you’ll be able to see straight through from the hallway to the hills in the distance
 1 point
 -
We’re still building. I’ll take a picture from the doorway to give you an idea but it doesn’t give the view justice. I also rendered our house in 3D to give us a rough idea of how it might look internally.1 point
-
Mine, for reference..
 1 point
 -
Planning specified a traditional looking dormer only on my loft conversion.. After a few back and forths, they accepted a full width Dormer on my bungalow, front and back. In reality, it's entirely new warm deck box on top on my bungalow with a artificial (non structural) ridge and a row of tiles down the sides. I had to adjust the pitch of the gables to accommodate the raised ceiling height, but planning went with it, because it 'looks'. Like a traditional dormer loft.1 point
-
+1, lots of knowledge here on planning applications, also photos of surrounding houses to see what the “street scene” is like.1 point
-
Maybe share plans for the replacement dwelling might help identify some improvement or line of defence. The existing house clearly lacks any merit, why would the planners want something similar?!1 point
-
you want a planning consultant not an architect. You already have the first hurdle jumped, planning in principle so its down to plans. Find a good consultant to look over the plans, they will know the local planning inside and out (probably worked there as well). May be the case of put in what you want and appeal it. You are in the position of having 2 bites of the cake so refusal isnt a show stopper. If the appeal is unsuccessful you havent lost anything apart from some time.1 point
-
Architect should be able to write flowery stuff about the "local vernacular."1 point
-
Having fought planners a few times I don’t see why they want a dormer, apart from the existing house is room in roof with a flat roofed dormer, as @ProDave says dormers are difficult to detail, and to give enough insulation to meet regs the cheeks are ugly thick. (I used to like dormers but I am better now 🤷♂️). Don’t be afraid to fight the planners and even go to appeal like I did. Going to appeal I found easier than dealing with planners. Part of my appeal was photos of surrounding houses creating a “street scene”. If you compromise too soon you may never forgive yourself.1 point
-
I agree. Hardie or Cembrit cement planks have the advantage that they stay looking like they do on day 1 - no colour change/fading (in my experience at least with paler colours). They also have a very low thermal coefficient of expansion (from what I can tell from specs, about 1/3 compared to composite plastic and 1/10 of uPVC. )1 point
-
We've put shadow gaps at all floor-to-wall joints and around all door linings in the living areas of the house where we have hard floors. We haven't used them in carpeted or tiled areas. We've used them for their aesthetic. We have minimal steps/rebates/shoulders etc. around any features and have tried to keep that theme running throughout the house. We have used a very simple skirting/architrave in carpeted areas. Our logic to this was that the more hoovering required in these areas would risk damage to the bottom edge of plastered walls if we used a shadow gap against carpet. We also wanted a slightly softer look in the bedroom areas. Some thought needs to go into how it is best to deliver shadow gaps around door linings. Two schools of thought: 1. temporary ply liners in to board and plaster to, then remove ply liners and fit final liners, or. 2. fit final liners and mask/protect then plaster up to them. We went with 1. and found we got some cracking around the liners as we fitted the final door liners. As the liners were screwed in they pushed against the edge of the shadow gap trim and the plaster cracked behind it. This happened on a couple of doors and required chipping out the cracked area and filling. If it was a painted or varnished finish to the door liner I'd try 2. next time, but natural, lacquered or oiled finish and I'd stick with 1. to avoid staining on the finished door liner. We used Qic Trims https://www.qic-trims.com/product/type-r/ After decoration you will need to mastic the gap from the edge of the shadow gap trim to the floor/door liner. There will always be gaps that need finishing. Shadow gaps do seem to mean different things to different people. To me they are a small rebate at wall-to-floor and wall-to-frame junctions that disguises the actual joint in a shadowed area. I know they are also used in conjunction with skirting to create a rebate above the skirting, but to me that's not a "shadow" gap. Our version of a shadow gap:
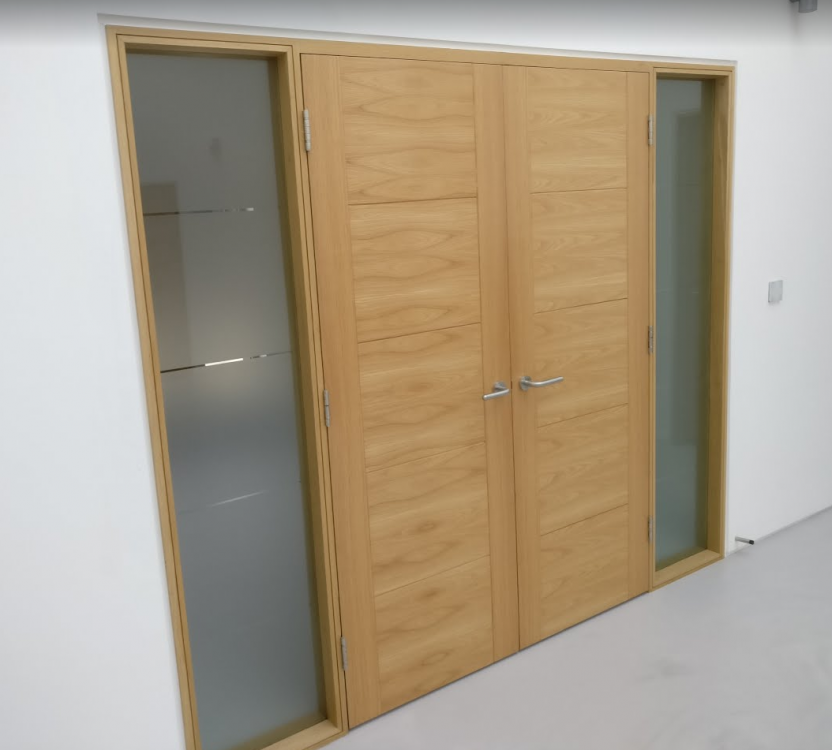
 1 point
 -
If the threaded bar is a bit feeble you could ask if you can change the spacing to match the spacing of the concrete pads inside the blocks. How we fit the wall plate without struggling, mark its location on the wall and ping a chalk line to give you the bottom height. Fix a temporary timber roof batten screwed into face of block, you can now sit your heavy wall plate (rim joist) correct word in my book on top of the batten it will help support while you mark and drill all the holes. When all tight remove batten and use it on the other side.1 point
-
Mark the holes with the pre drilled wall plate, make sure you drill the plate and then the wall square, blow the dust out of the holes although pull out is not a major issue here you won't tighten the plate if the studding (threaded bar)is not tight you can enlarge the wall plate holes afterwards if needs be, then mount the studding in the holes in the wall with the resin, let them dry, put the membrane on the studding then silicone around the studs, then mount the wall plate and do up the nuts. Bingo1 point