Leaderboard


Popular Content
Showing content with the highest reputation on 08/08/23 in all areas
-
I can recommend Norrsken which we had and they handled installation as well. not sure if they have any to view in Scotland though! but give them a call and ask as there might be a customer up there who's ok to visit. otherwise, check out @craig at Ecowin as mentioned above. He offers a few price points for triple glazed alu-clad windows. (at least he did when I spoke to him a few years ago!)2 points
-
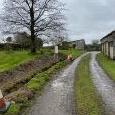
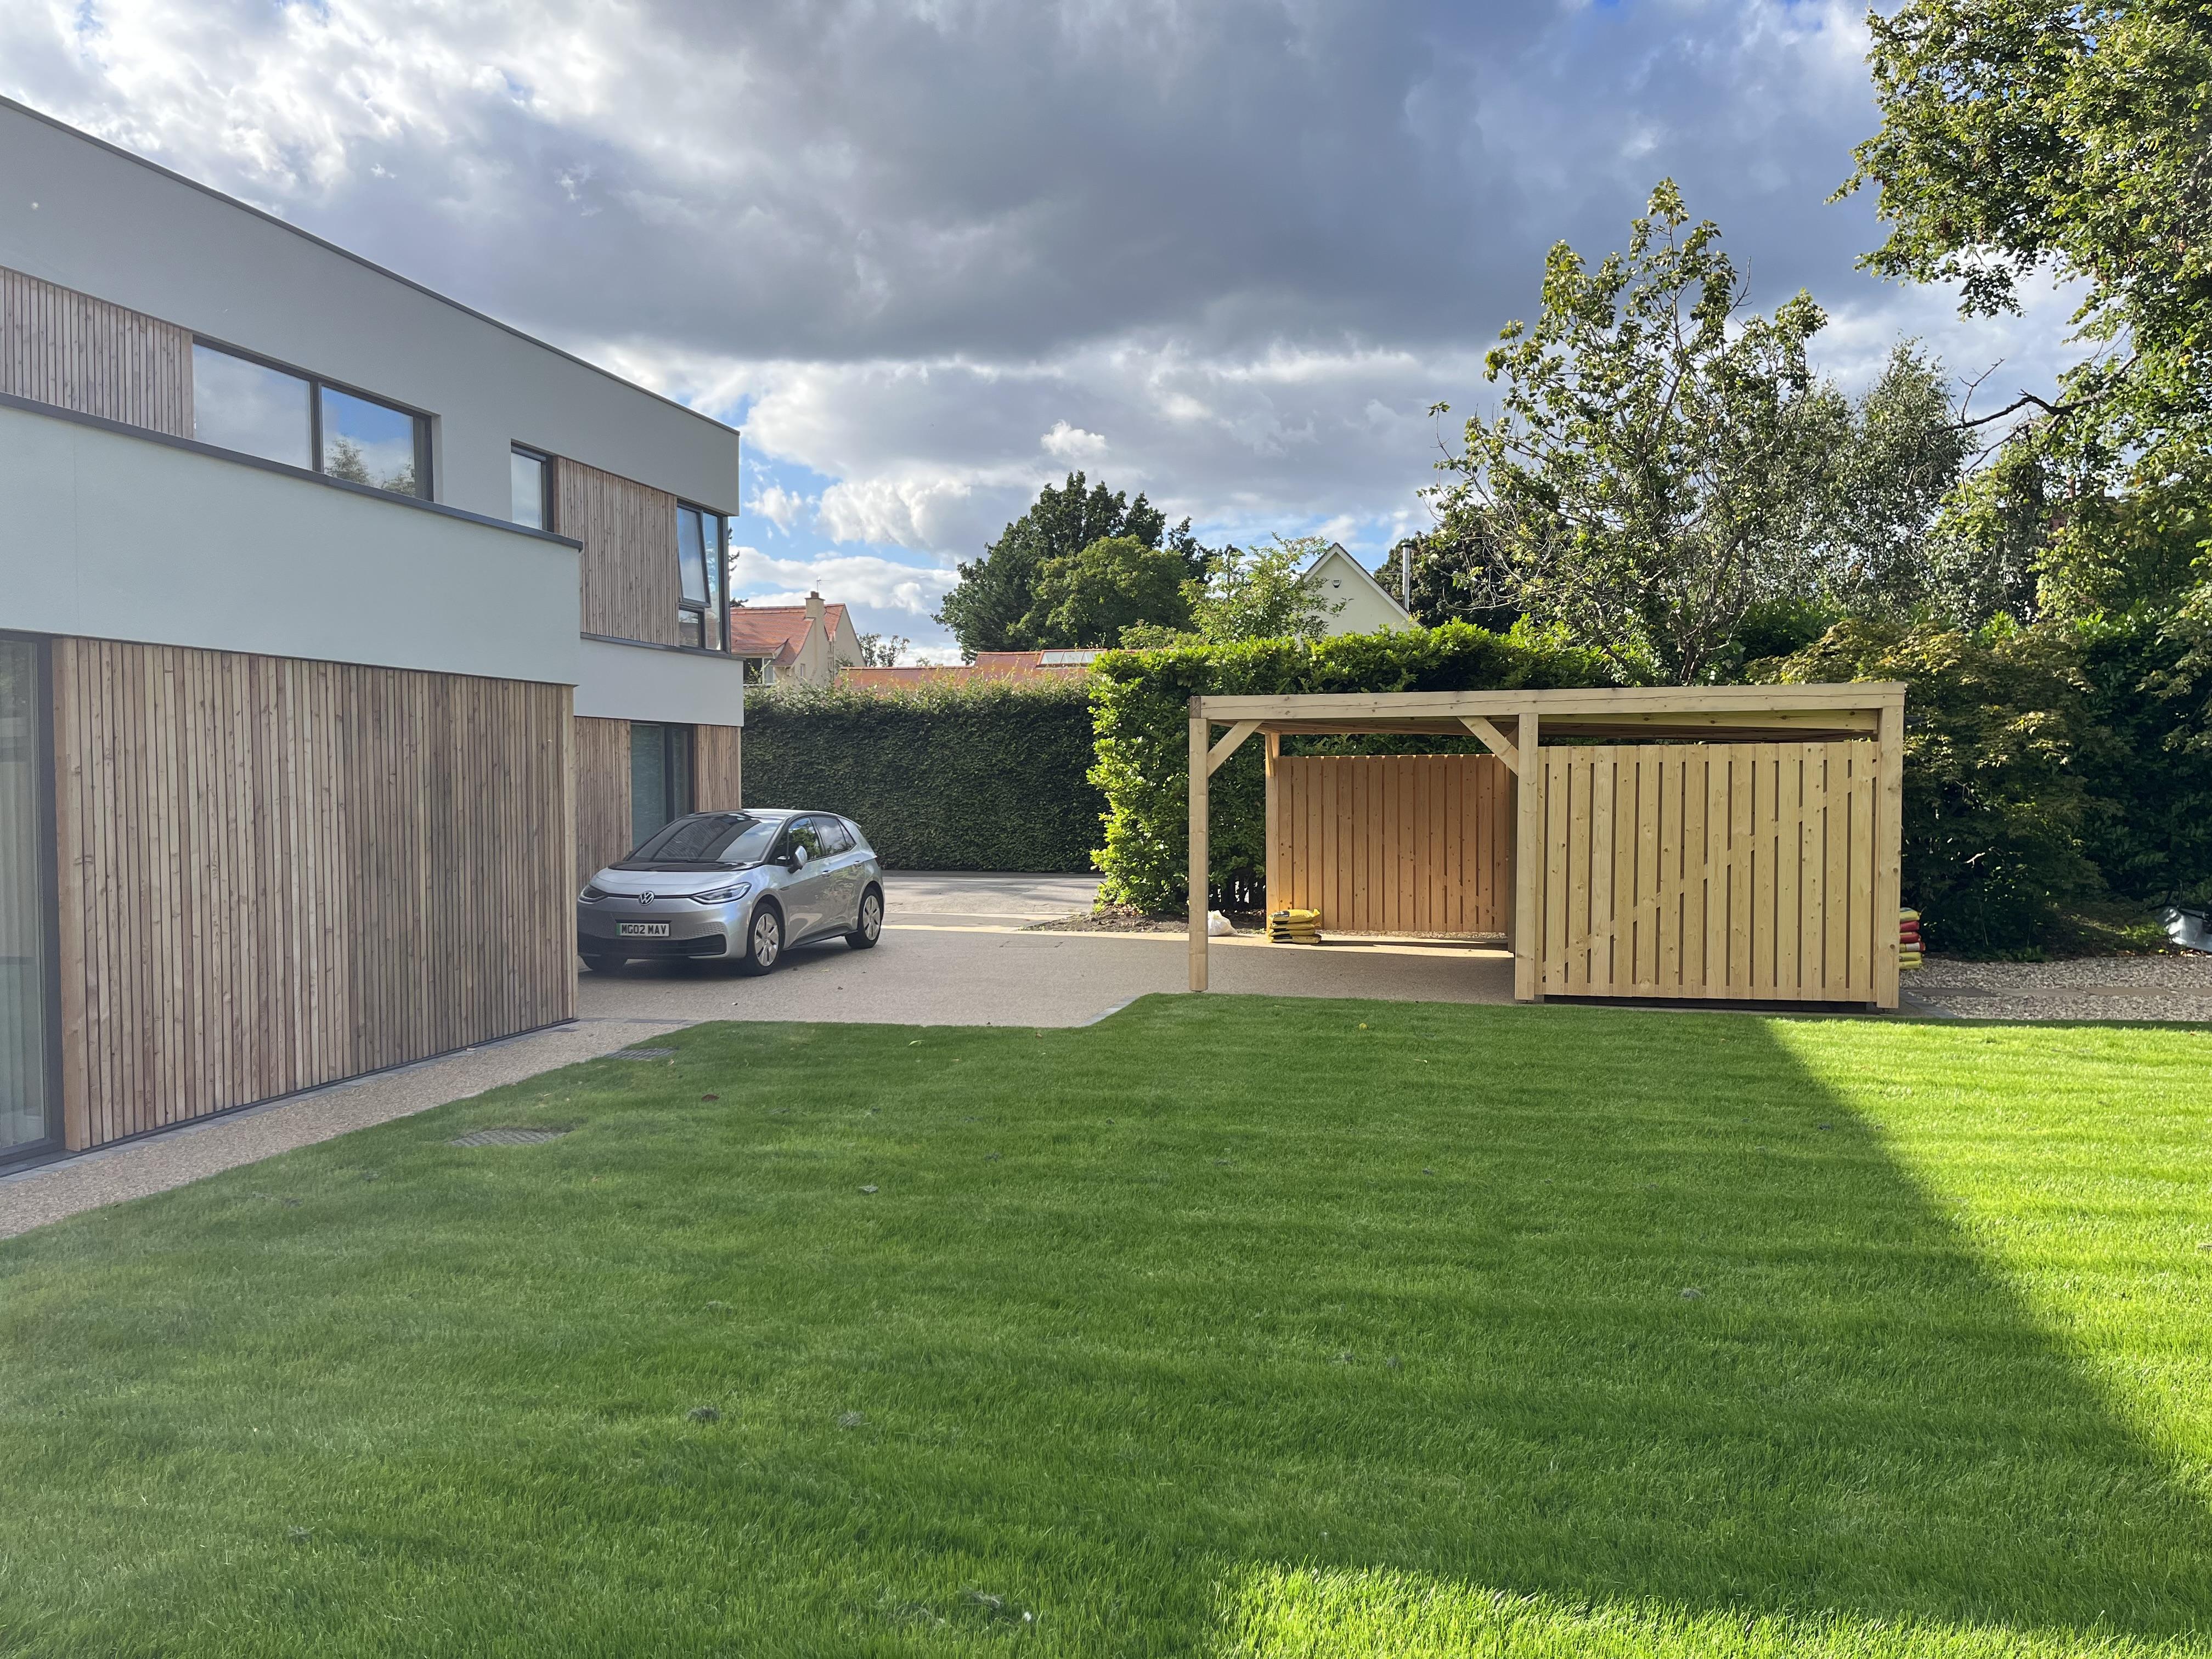
My previous blog entry ended at submitting the building regs in March, although they were not validated until 5th April and then refused on the 31st May. I believe my architect had complained on them taking too long so I am guessing when they found he had not included a turning circle for a fire engine they refused them as giving the architect extra time would have hit their own time targets. We resubmitted 1st June and finally had approval on the 5th July. A few conditions but nothing unexpected. In the meantime we submitted our amendment to planning for our window changes this was to increase the airflow through the house to pass Part O more on this later. This was submitted to planning on the 21st March and approved on the 12th May. When the BC plans were initially refused I decided not to contact our architect as he obviously had something wrong and as it was all out of my hands, I just presumed it was not my Part O spreadsheet as he never contacted me. You can not rush anything in Cornwall it will all be dealt with dreckly, (eventually no time limit). Instead I got on with jobs I could do, mainly starting a new vegetable plot as the old one is in the way of the new build for plant access and will eventually become garden. My potting shed is only a few years old so it will be dismantled and stored indoors until we have walls and roof on and can position the shed close to the new build. My netted tunnel is also now down and will not be going back up instead I will create new smaller structures to cover individual groups of crop and re-use the larger netting just for my new strawberry beds. We have had a hosepipe ban on here in Cornwall for a year now so it’s not been a bad year to not be growing anything new and instead concentrate on the soil and new beds. Top photos are the early days of my vegplot and below as it is now, looking a bit sad but better things will come. Before it sounds like I’ve lost the plot and writing a gardening blog I’ll return to our build progress. We advertised our existing barn as free locally and received many offers to remove it. A local couple will be taking it down in October and rebuilding it on their land. I’ve sold a lot of paving that I had kept just in case we wanted it in the future but finally decided it’s not required. The problem with having land and outbuildings is it’s difficult to get rid of things we just move it to the cow shed but that has to stop. So all the wood in the old cow shed is moving to the old pig sty. We started keeping the wood because we wanted a stove but eventually decided our listed barn was never going to have a wood stove so a few trees that got cut down were given to neighbours but now the new build is going to have a wood stove so we’re saving wood again. Emptying the cow shed also involves giving away corrugated tin roof sections that have been saved just in case, moving a pile of nice small stone I was going to make a rockery with and finding a new home for our Christmas wooden reindeer. The cow shed is now nearly empty. We also hired some plant and shifted some spoil full of weeds from around the cow shed and took down two more trees, the Ash tree had Ash die back and it had been allowed to self seed much to close to the fir tree that had grown one sided. They were also in the way of the new field access that we are making wider for easier machinery access, and will also now provide a hammerhead turn for a fire engine. The spoil and tree stumps were moved to the lower field, the useable fire wood stored in the old pig sty with a few large pieces left as temporary seats for the builders. Top row left cow shed surrounded by weeds, right new wider access cow shed on the left with stables in the distance. Middle row clearing in progress and the better access. Bottom row me in the sun and heat while husband is in the Air Conditioned digger, some of the larger stone put to one side no boulders so far. We still have not got our ground-workers or builders sorted out, a few have been to look, some you never hear from again others give a quote that’s ridiculously high with so many provisions. Some will do this and that but not that, they suggest somebody else who is not interested. I think it's partly because we want an ICF build and also to dry shell stage only, excluding windows. We still hope to start next year but are now thinking to just get the groundworks completed as that is the most unknown quantity, and we are still saving up. The build is being partly funded by the sale of a Jensen FF but we have only just got round to advertising it last month and finding the right buyer could take a while. Part O Unfortunately my architect did not think ahead and design the house with Part O in mind and it took quite a while for me to work out what I had to change to pass the simplified method. A local company was approached and discussed the simplified method and the dynamic method but from what they told me there was no guarantee in passing either and to pass the dynamic method more changes to the building design and further dynamic modelling could be required so no set fee was offered. Instead I designed my own spreadsheet that initially proved our ventilation of just opening windows would not be enough to pass Part O but after reading up more and few window swapping ideas I got a pass on my own spreadsheet. I also stumbled upon the future homes site which has a spreadsheet that can be downloaded. As I’m a Apple Mac user it meant using MS Excel online but it was a far prettier version than my nuts and bolts spreadsheet and one that I thought my BC would be happier with. I input my window measurements and how they opened, and obtained a pass. Anybody reading this and wanting ideas on how to pass the simplified method first depends on what you fail on e.g. too much glazing or the free flow of ventilation although one can impact the other. I don’t think anybody looking at our plans from the first blog would think we would not pass as the southerly view is not overly glazed but by removing 3 windows on the northerly side and adding 6 roof windows that open 50 degrees and slight changes to bedroom windows meant the northerly facade was the most glazed and we had better air flow. We also changed all windows that open to open inwards to meet the arms reach criteria, enabling a wider opening. The spreadsheet is not perfect though as my bedroom windows are tilt and turn but you can only have the same hinge for day and night on the spreadsheet e.g. side hung. I could have adapted the spreadsheet but that would mean its not as trustable as I was hoping it was going to be or I could have created two one daytime side hung and one for night time opening when the windows are top hung. I decided to make the one spreadsheet work as explaining to my architect who would then have to explain to BC would be like learning and then teaching a foreign language. Happily we passed the simplified method with a condition about night time security when I get my own named BC I will be able to talk them though the spreadsheet quickly change the side hung to top hung and get a pass and if I still need a security grill it will only be for the lower half that opens at night and this can be made to measure by my talented husband out of rebar. The changes to windows did mean we had to make an amendment to the plans but as it was due to my architect not thinking ahead about the new regulations I suggested to him that I shouldn’t have to pay for this and he agreed. https://www.futurehomes.org.uk/library#Guidancetoolsandtemplates SAP When you start out on this journey there are so many new things to learn about and discover the pre build SAP being just one of them. Unfortunately this area seems controlled by a piece of software probably not much more than a spreadsheet but no free copy for us self builders to play with to see if we change x how does it effect y etc. I was in the hands of my Architect and if you haven’t worked out by now I am usually in charge of everything so taking a back seat I found very hard. The initial SAP needed a few tweaks here and there but Im happy with the result. For those of you who don’t know what one is I am attaching mine and if anybody wants to dissect it feel free to do so but the pages long report is quite boring as they all are and it comes down to insulation, air tightness and your chosen method of heating. We plan to have a minimum of 11kw of Solar on our virtually perfect south facing unshaded roof in Cornwall. This and together with an ICF build and good window air tightness with lots of added floor insulation hopefully will mean low running costs. You will not find a ASHP mentioned I’m not having one. I don’t like them for my build. I’m near the sea where everything rusts, and if I need a plumber because its broken it will be 6 weeks before one would be available who knows enough about ASHP to fix it. In the 6 years I lived in Cornwall I have seen the lack of trades people first hand in waiting for returned phone calls that never happen, quotes that take ages and waiting lists for the good people. In winter when you most need good heating then all the trades are busy working in the holiday homes out of season and are booked up. We have no mains Gas so are going to be a mainly electric home. To ride out the peaks and troughs of solar we will have as much on the roof as we can fit and rather than export to the grid we will export to our other working barn and lower some of those summer electricity costs. In winter we will have to buy some electricity but hopefully very little at peak costs. Quick guide to the SAP The first 3 pages are our planned u-values, expected Air permeability results, space heating, hot water etc and MVHR. The following 30 pages look very similar but have different headings and figures. Calculation of dwelling emissions for regulation compliance Calculation of target emissions Calculation of fabric energy efficiency Calculation of target fabric energy efficiency Calculation of energy rating Calculation of EPC costs, emissions and primary energy page 18 perhaps the one to read first Calculation of energy rating for improved dwelling Calculation of EPC costs, emissions and primary energy for improved dwelling Finally the predicted energy assessment on page 33 (96A0 and the estimated energy cost for the property over a year £103 That’s all for now, my next job is getting a full online estimate of the build now we have all the building regs and SE calculations completed. Build Costs b/f from first blog £12660 Building regs submission £345 Hired in plant and fuel £890 SAP £300 Part O Free VAT element only on building regs, and SE (Not included in first blog totals) £430 Total to date £14625 SAP.pdf Part O.xlsx2 points
-
You have one alternative to the above. Do nothing How was the request phrased ? - could / should / must / have to by [...date...] / failure to apply will [.... penalty...] . Could you copy and paste the key wording from the letter (email?) please. In the absence of a direct enforceable instruction that has significant financial consequence to you, I suggest you do absolutely nothing.2 points
-
Just checking the electrics to my new workshop and I came across this in an outhouse, wiring to the workshop STARTS in a socket, then it’s fed from an existing socket in the outhouse and connected by this…… beggars belief. Trust me I am all for DIY as long as you have some basic knowledge at least. No wonder there are regs. It stops people being killed.
 1 point
 -
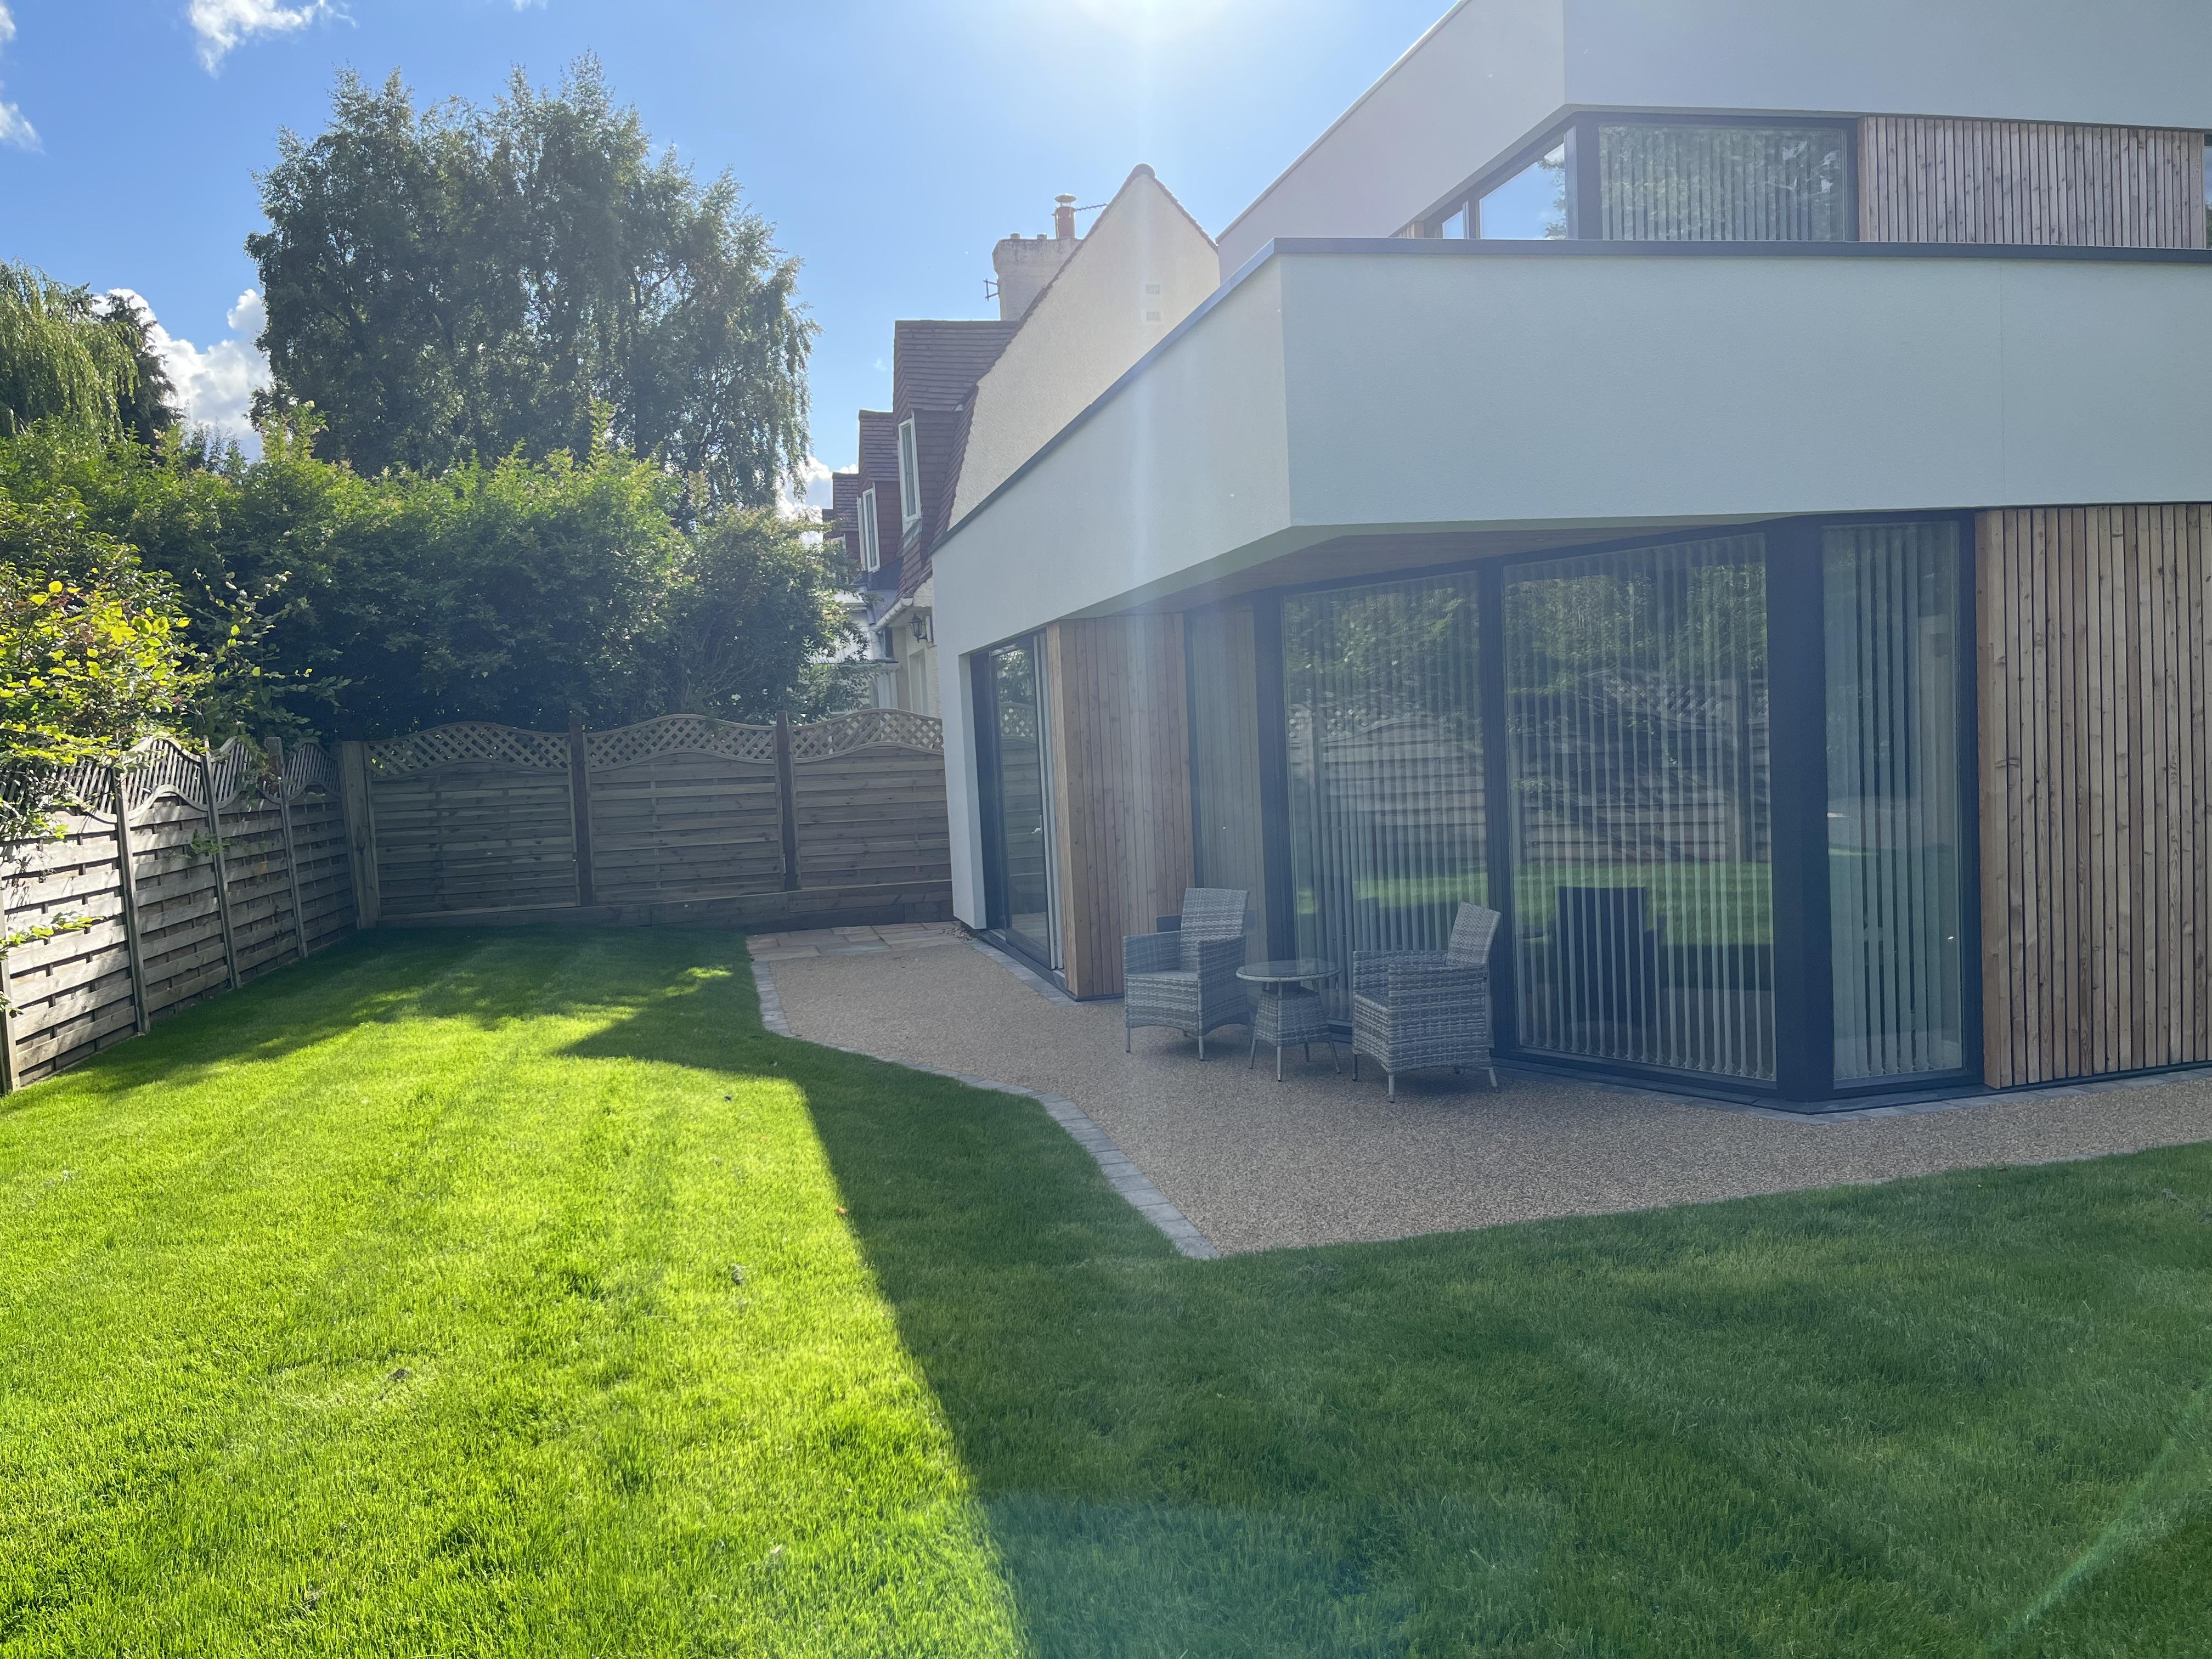
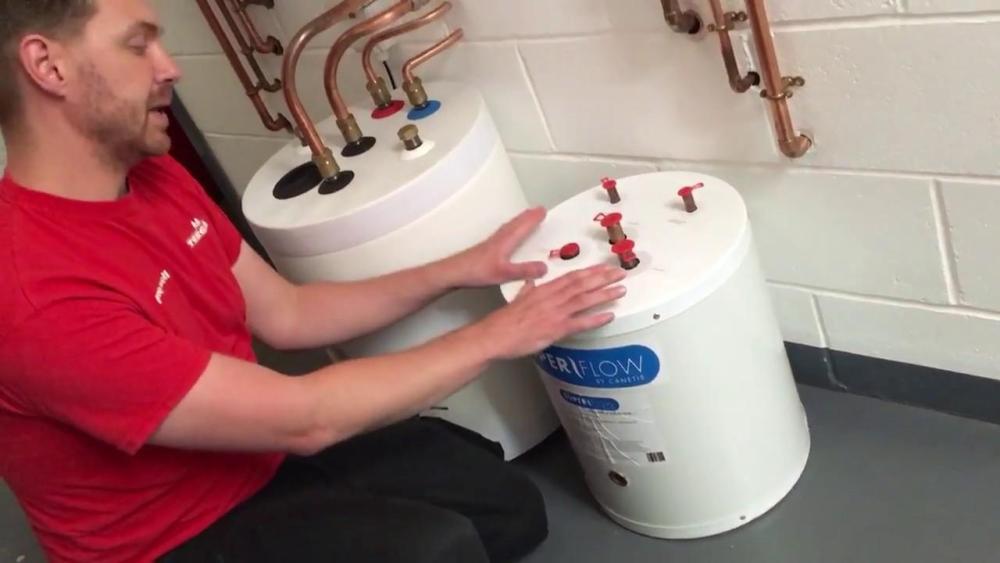
Item 4 is the concern. The flue is called “coaxial” as in the products of combustion are blown out via the inner 50mm or so section whilst outside air for supply to the combustion chamber gets sucked in via the larger outer ‘ring’ of the flue. There’s an air switch that needs to see equilibrium between these pressures or the boiler locks out, thinking that one or other is compromised. Safe in that respect, but the way the original installer left this, especially without the cage, is just horrendous. Glad you’ve seen a positive outcome, and I still share the same concerns as you over the pump, but the MI’s will always take precedence over BCO or GSR. The difference between good, or OK I guess!1 point
-
Spoil yourself lol.1 point
-
An update to this tale. In summary, a gas safe engineer came out around 10 days after I reported a concern, spent a few hours at the property and found several problems. He wrote a 10 page report (boiler was classified as “At Risk” but not “Immediately Dangerous”), which was passed on to the plumber (I didn’t have to do anything), who was given around 3 weeks to fix all defects. There was no followup inspection. Overall I was satisfied though I am very surprised that the PRV discharge into a condensate pump is to spec. A few observations: 1. I wasn’t around when the inspector came around, but apparently there was quite a bit of checking manuals and so forth to see if the installation follows the manufacturer’s specifications. 2. The main things that ended up being changed/fixed: area around air brick where flue exits was sealed and tidied (including adding a “cage”); plastic PRV pipe replaced with copper and tundish added (though still discharges into condensate pump); insulation added to all pipe work; thermostat connected; benchmark commissioning checklist completed and local authority notified. 3. Some of the complaints are quite picky (inspector admitted this verbally), for example flagging a filling loop that was left connected, and an old uncapped gas pipe. 4. The report had multiple complaints about the flue—termination at both ends not to spec, and also insufficiently supported. Plumber did fix a few things, but assured me that the support was actually fine (it looks like two sections but is actually just one internally or something?). Mumbled something about going back to gas safe to argue that it was correct. I don’t know how this part of the process works. 5. Defects need to be fixed by the original plumber free of charge, but if you want someone else to do it, you have to pay for this separately. Gas Safe won’t help you get any money back from the plumber. 6. The inspection process was fairly swift, clear and (IMO) serious and competent. I’m glad I went through with it, and thanks to everyone here for encouraging me to do so in the face of some pushback from my builder.1 point
-
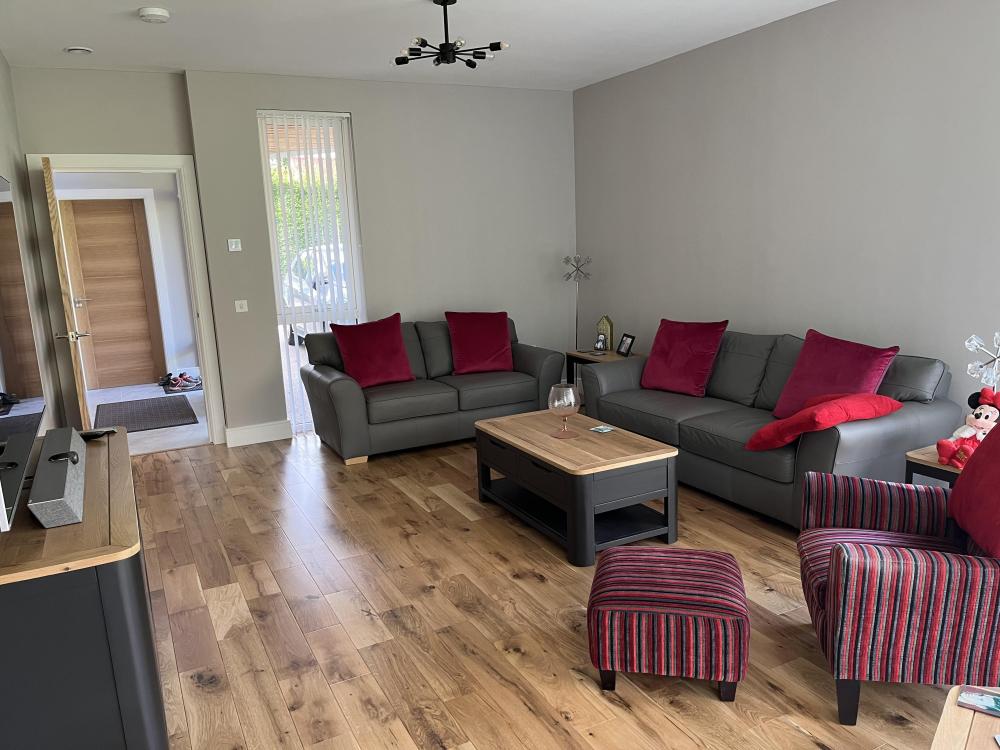
Wow! Centreparcs going the extra mile to make you feel at home1 point
-
See, can’t leave it alone can you 🤣1 point
-
More pictures as promised


 1 point
 -
At least my own one has a switched plug at one end. (cough)1 point
-
>>> They are located using a length of 20mm stainless round bar sticking up into a hole in the bottom of the post. Yeah, agree - I think I used 10mm last time. A4 rather than A2 SS would be good. This kind of relies on the structure being heavy-ish and stiff-ish in itself i.e. it is expecting to resist shear (crosswise, parallel to the ground) forces only. It looks to me like @machtucker 's structure is light-ish and not very stiff-ish, so maybe buried posts would be good after all. Being oak, they should last probably our lifetimes (making some BH assumptions here ) anyway. Whereas, I found recently that a treated softwood post with no other protection and in waterlogged soil gave up after 5 years.1 point
-
Also known as a generator power cut adapter1 point
-
We have MVHR and opted for an extractor hood. I figured its not running a high percentage of the time and when it is it probably just gives the MVHR incoming fan an easier ride. It doesn't seem it affect our wood burner either.1 point
-
Try Ecowin in Fife, https://ecowin.co.uk/1 point
-
Get in touch with Archital, they should be able to help you.1 point
-
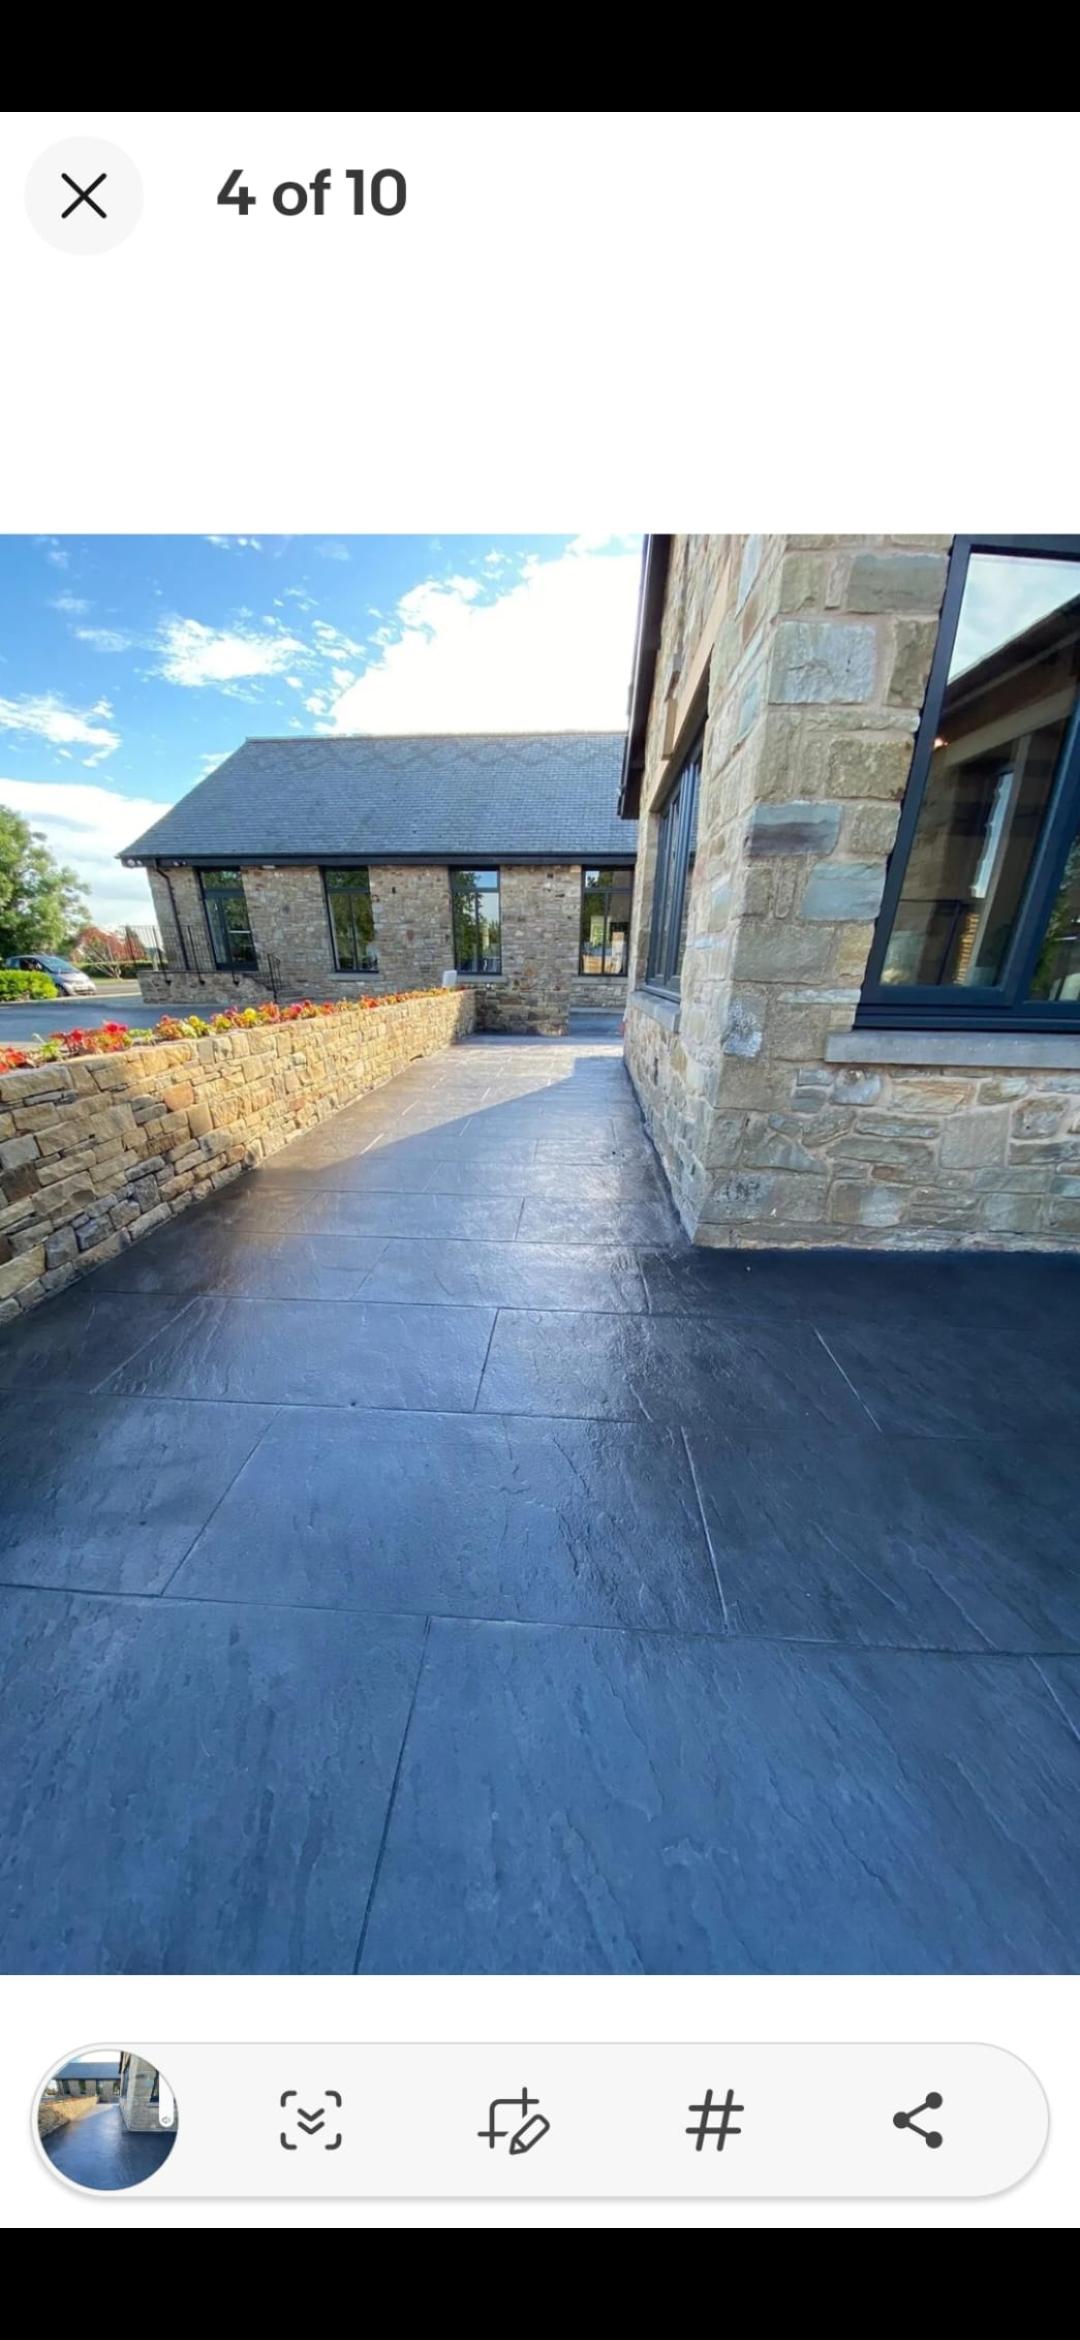
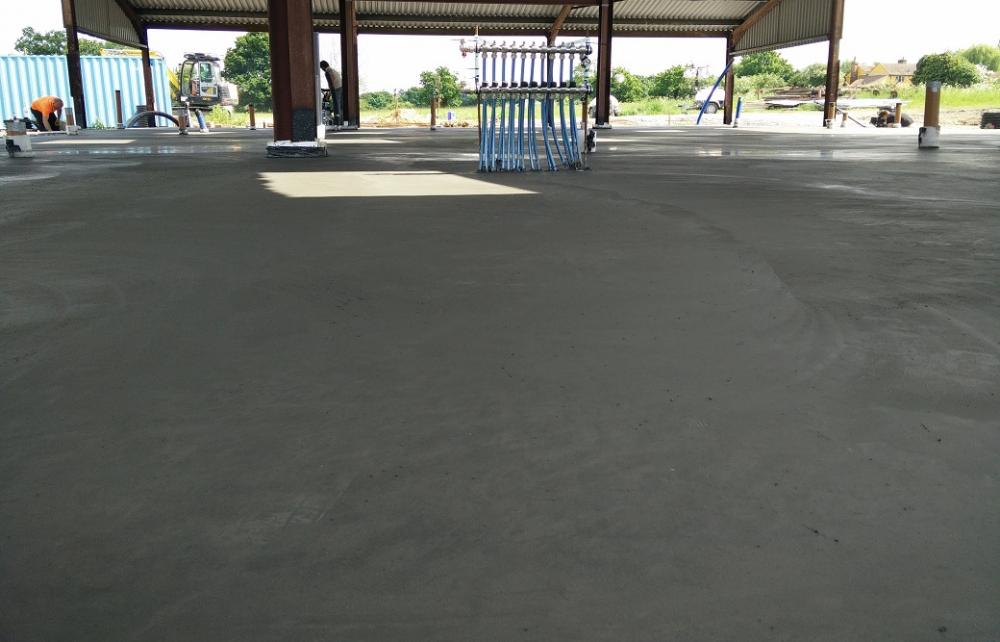
They should be teaching mostly about concrete laying and crack control in general. The imprinting is important but not the biggest issue in the long term. I've seen cobble effect so well done that it took a real effort to see it was concrete. Also some very bad, mostly with random cracking. I'd have fibres in the mix. Let us know if that is standard please?1 point
-
There would be a thermal bridge at the wall/floor joint. The 60mm insulation should drop past the 80mm screed to be touching your 100mm floor insulation. (Called a perimeter upstand). Neither wall nor floor insulation is that great, I'd recommend going thicker whilst you're going to all this trouble. 150mm floor (just dig deeper?) and 100mm on the walls. You need to pay careful attention around things like floor joists, are they pocketed into the existing solid walls? If so they're a thermal bridge and at high risk of condensation and rotting. Best idea would be to remove them, insulate and refit the joists inside the new thermal envelope, this is a lot of work, so an alternative could be to repoint around the joist pockets in lime, to reduce any air leakage, and use a more breathable insulation within the floor void. For your services, do you have space to batten out the walls by 25mm to allow you to run wiring wherever you need? I did similar; adhered PIR to the walls, mechanically fix 25mm battens through the PIR into the wall, run services, plasterboard over.1 point
-
No Solutions - just a few questions. How does the solid brick wall breathe ? The mains wiring is questionable. you will NEED to run vertically as well.1 point
-
Edge insulation to stop cold bridging at the perimeter of the slab would be beneficial. Agree with Dave 150mm minimum pay for insulation once, pay for energy every month!!1 point
-
100mm of celotex is definitely a good start, bump it to 150mm and you will be exceeding new build regs.1 point
-
if it was England, all they grey shite needs ripping out and replacing with underground drainage to a proper fall with a chamber on any change in direction.1 point
-
Alpha boilers make/made such an animal, but for preheat to a gas boiler. Alpha Flowsmart 25 and 50. Designed to go in the heating circuit and has a DHW coil.
 1 point
 -
Masses of info here. Honestly go nowhere else. https://www.aerialsandtv.com/site-contents To find your likely transmitter: https://www.aerialsandtv.com/knowledge/atv-transmitter-map Those houses that do have traditional roof top aerials in your area, look at which way the majority are pointing, that should give you a good idea. If in a fringe reception area go for a band specific aerial rather than a wideband. They're very helpful on the phone too.1 point
-
Parents laid a printed concrete driveway in the early 90's so it approx 30 years old. It in amongst trees so there's a bit of roots close/underneath. It has lasted brilliantly, no cracks and still looks decent/good. They where debating in doing a imprinted concrete again or a reisin bound driveway on newbuild (approx 600m2 driveway and patio) but my sister is having a few major problems with the reisin bound so have decided on imprinted concrete. I am going on a two day training course in October to way up the possibility of DIY. Looking at a cobble effect for the driveway and a large tile effect for the patio * see picture below
 1 point
 -
With only 100mm of insulation under the UFH you are going to loose a lot of energy to the ground. Can you increase the wall insulation to compensate for it? We're is the vapour control layer? What is being done to improve airtightness?1 point
-
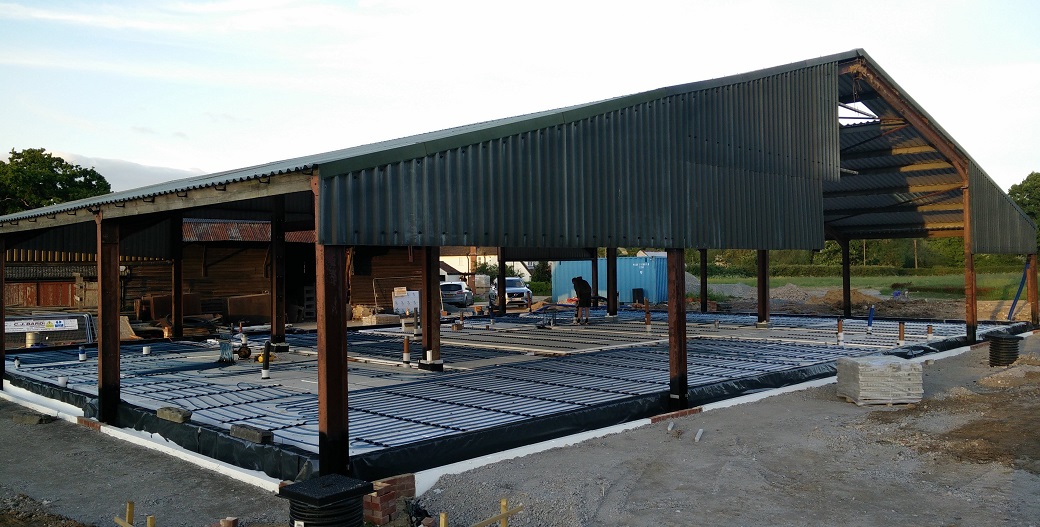
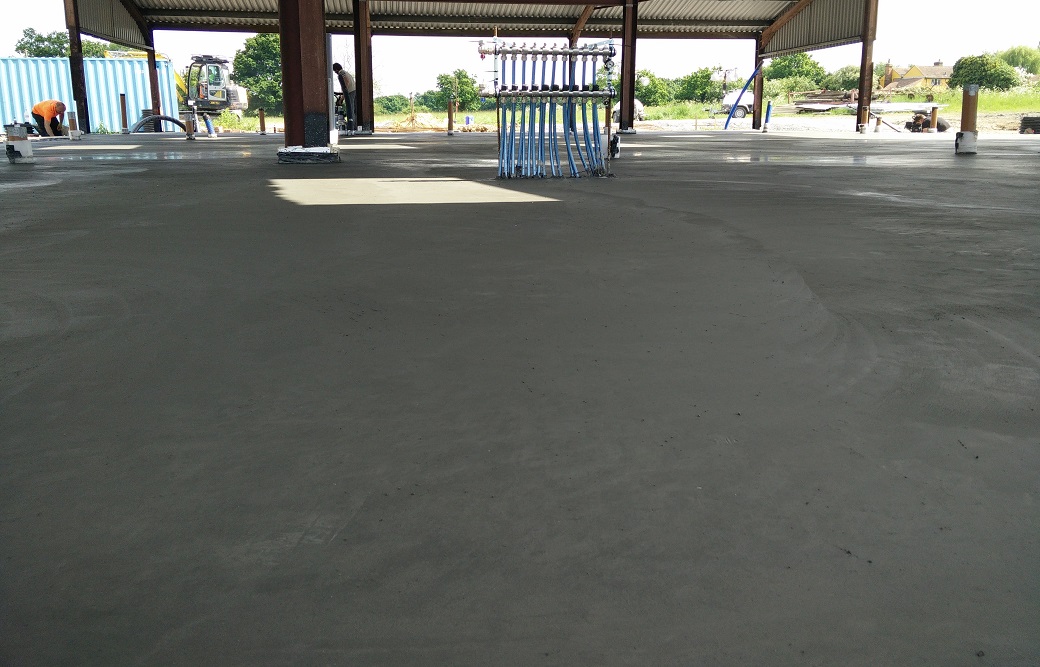
I have an AFT raft, and can thoroughly recommend them. Engineered and supplied via Springvale, UFH Design and Supply included. They'll help with the Install if you wish to self-build or support your groundworks contractor. There's more on that list than when I was researching, which is good to see. I found a number of companies were over-Engineering their rafts though, and specifying much thicker rafts than were required. Here's mine

 1 point
 -
Have some of these as fall back. Has anyone had experience of the best supplier for getting a meter installed....1 point
-
This where you need to get decent data. https://www.eurovent-certification.com/ Note if the unit is made by company A and supplied to company B C D etc to put there own name plate on it, then the data is for company A (the original manufacturer).1 point
-
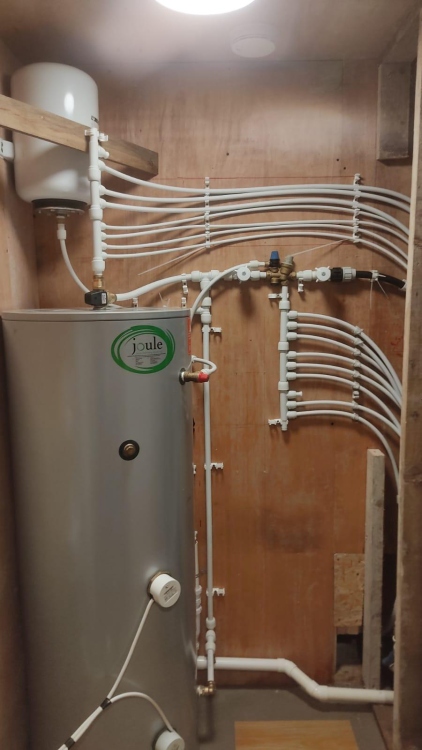
Here's a diagram of mine.. And a Pic. Things I would change..... On @Nickfromwales advice avoid compression fixings of Hep2o pipes although I've had no issues yet. The Multiblock heats via convention from the thermostatic control valve (screwed directly onto the top of the tank) as it is higher than the top of the tank. This should be lower. Note the hot manifold and the 10mm pipes with the first draw off. It is preheated via convection and there's super speedy hot water to the basin taps. I only insulated the hot manifold as the Hep pipes contain almost no water and it cools instantly once switched off in any case with or without insulation. I should have tanked the floor and put in a floor drain too. I could have ran 10mm cold to the W/C cisterns and the basin taps too but fittings and manifolds were cheaper for the 15mm.

 1 point
 -
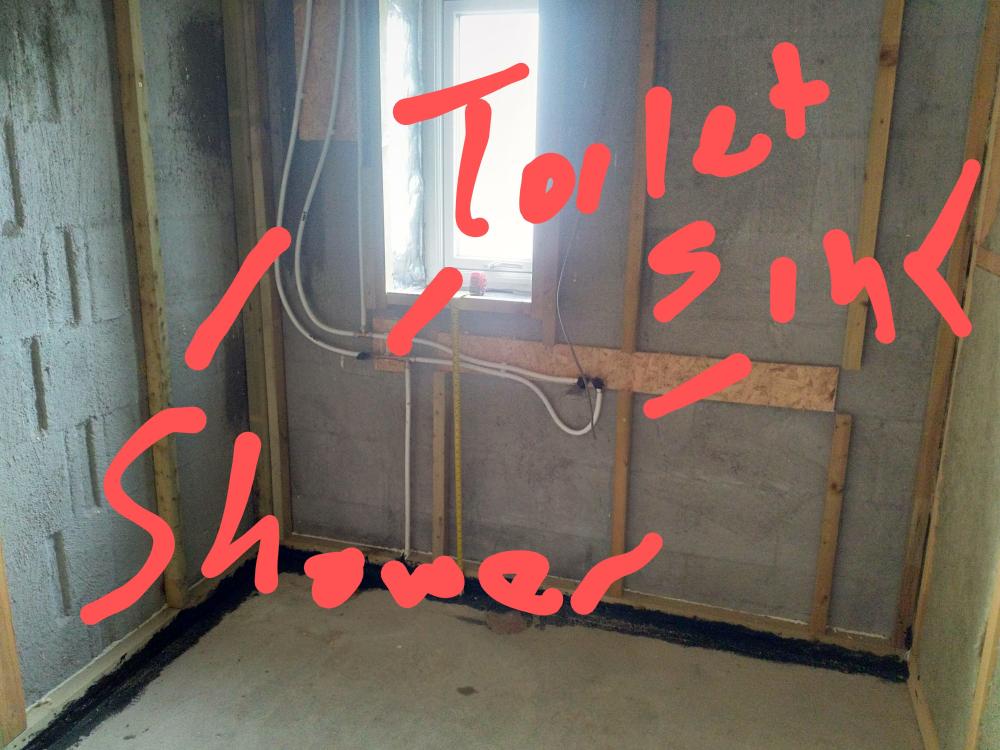
I kept it simple just 15mm everywhere. Image of shower room, no bath in this room. Hot water pipes come from cieling cold out of floor. Two curved vertical pipes are to shower.
 1 point
 -
I put in manifolds for hot and cold, lets you isolate a single room, without isolating everything. Good at the end of the build for doing rooms and bringing them online with others isolated. You can also run 15mm from manifold to the room. Insulation, I did insulate or run within insulation for the most part. Do you have long runs? if so consider hot water circulation, if you go this route, hot water pipes all need good insulation.1 point
-
What I did my BSc Dissertation in.1 point
-
Is the month tested included in the period mean it is tested against. This is really a problem with using a statistical mean as it includes the extremes. It is why the median is often used. When looking at sunlight data, it is usual to create two sets of data, one that includes the night, and the other that excludes it.1 point
-
To add a bit more to @George's comments. Often folk think that masonry walls can carry loads of load... but sometimes a lot less than you think. A masonry wall well braced with piers / return walls on a good founds does often carry a lot of load. But if the applied load is not in the centre of wall (an eccentric load) this eccentricity introduces a bending effect in the wall top to bottom..and this can significantly reduce the load bearing capacity. Common case is where roof trusses and joists bear / are built into the wall so the load is not applied to the centre of the wall. External walls also carry wind load which introduces another bending effect.. and again this can significantly reduce the load bearing capacity of the wall, especially if the roof is lifting up and you are using the walls to hold the roof down. I do mean significantly.. not just a little! Now the stength of the wall is derived from partly its effective thickness. What you have here is a collar jointed wall.. the codes allow us to take the effective thickness of the collar jointed wall as being the actual thickness = say 215mm. But introduce a cavity and the effective thickness is now 2/3 of the two leafs (100 + 100) = 133mm.. a very big reduction in stength! For the mathematically minded the bending strength of the wall is partly a function of the wall thickness squared so the reduction in strength is exponential... 215^2 = 46225 (collar jointed) compare with 133^2 (cavity wall) = 17689.. now 17689 / 46225 = 38%! of the strength of a collar jointed wall.. oh dear! Maybe your SE has a point here and while it may seen a bit "odd" maybe your SE is saving you a load of cash? For a collar jointed wall you need to build both leaves at the same time and use the correct wall ties specifically designed for collar jointed walls. You don't need to fill the 10mm gap as the ties are thick enough to resist the small amount of bending. But you do need to make a good effort to reduce the eccentricity of loading. See link below for an example of wall ties. https://www.ancon.co.uk/products/masonry-reinforcement/ancon-amr-cj On the practical side if you are cladding the wall in stone often you will get coursed stone. To make life easy you want the coursing to match up with the blockwork say 225mm. But if you lay blocks on the flat you end up with an average mortar bed of 12.5...or some other nasty derivative.. starts to get messy. Also you use more mortar as the blocks are 100mm laid flat but you need to achieve 225mm. A normal bed is 10mm. Please think carefully before changing the SE's design.. best just to ask them first before carting on.1 point
-
Get the electric immersion on, and turn the gas off. Better to be safe than sorry.1 point
-
As a gas safe registered engineer it makes me so mad when you come across installations like this. They need to be strung up on the city walls! And have the nerve to ask for more money to set the stat up as well! I fit viessmann boilers alot...the stat is only working in the mode you have it in as he has not selected the right tick box during commissioning! Also viessmann flues are not meant to be screwed, they are designed to allow expansion in the pipework. They just need to be fixed with an appropriate bracket at every joint...not hung off one zip tie. If I was inspecting this boiler from just that picture it would be classed as At Risk and with your permission be turned off. Go straight to Gas safe. Highlight the issues that people have raised. Then take issue up with plumber and builder. If he installs like this for you then he is doing it to everyone and his work needs to be got on top of. It doesn't matter if you have that certificate or not...its completely worthless if its certifying something that is not certifiable!1 point
-
Why do you try and force the ASHP to heat the cylinder so hot? We have ours set to 48 degrees which the ASHP does comfortably, and that still leaves plenty of capacity for surplus solar PV to heat it further. The ASHP is timed to only start heating the DHW at 11AM by which time there should be a reasonable chance of using a lot of solar PV power to contribute to it.1 point
-
Fair enough, I've got a shed ton of 50mm left anyways. Thanks my good man, might even have heating in time for winter, who knows!0 points
-
Hopefully you have not had as many similar moments as our recent prime minister but one may have had!0 points
-
Oh yes, when I bought this place (re wired a few years before) separate upstairs and downstairs rings .. great! Pity the ends were swapped over so the ends of both rings went into separate fuses … took some working out.0 points
-
Fool proof, 1 black plug, 1 white plug follow the SOP and away you go, it’s even got new fancy sleeved pins! I should rip out my changeover switch😁0 points
-
Looks good too me 👍0 points
-
Move her to Amersham Old Town, the butler can hand deliver the TV signal. This is an aerial, can see it from Bodmin, and Penzance, and Helston, and bits of Falmouth and Truro. Luckily not St Awful, it is to discourage theft of TVs there.
 0 points
 -
Easy... I spent all day fitting a huge aerial on the back of my daughters house when we bought it. After i finished the old boy across the road said i was wasting my time, only able to get 5 chanels with an aerial round here. It was true. Right down in a valley, (Chesham town centre, Bucks) Signal so bad that the repeater that was fitted on a distant hill, only re-broadcasts 5 chanels.......So, cable T.V is was then. Waste of my £150 quid.0 points