Leaderboard


Popular Content
Showing content with the highest reputation on 06/25/23 in all areas
-
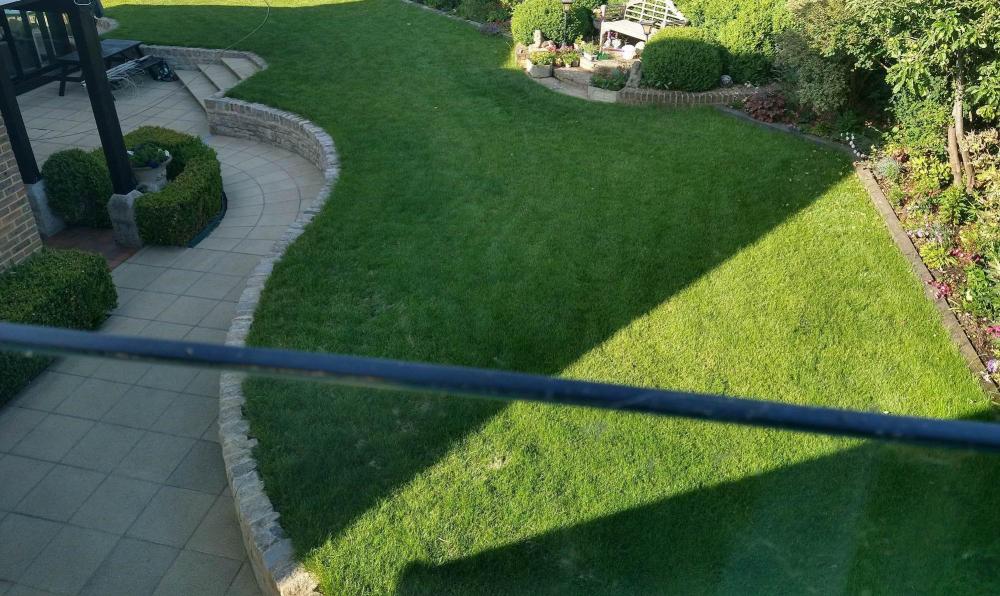
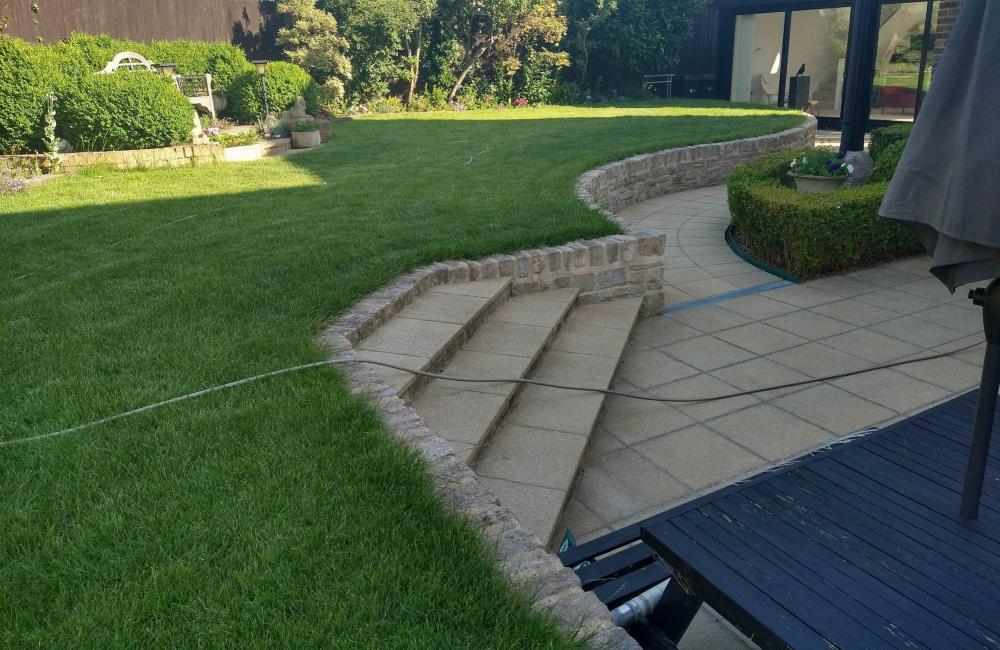
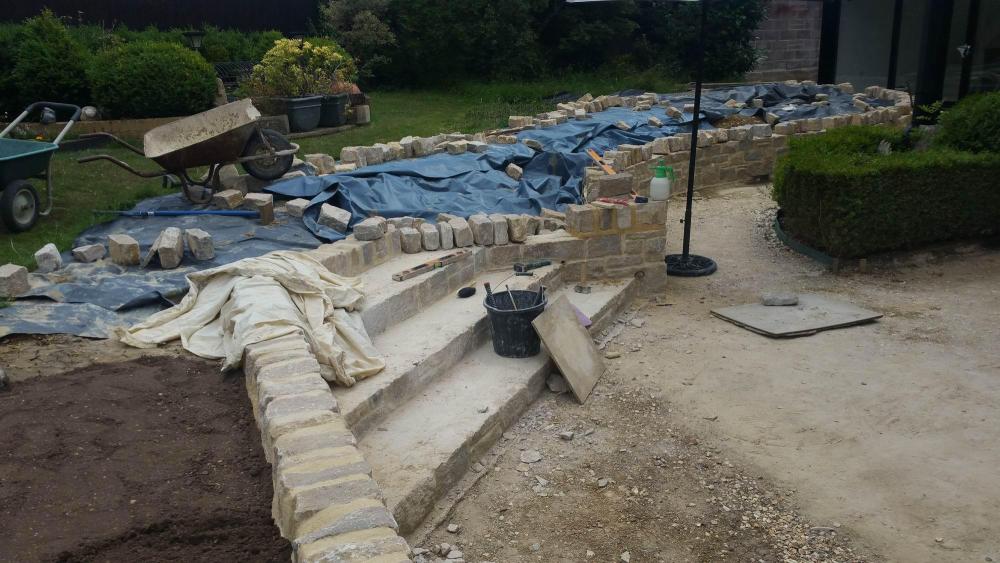
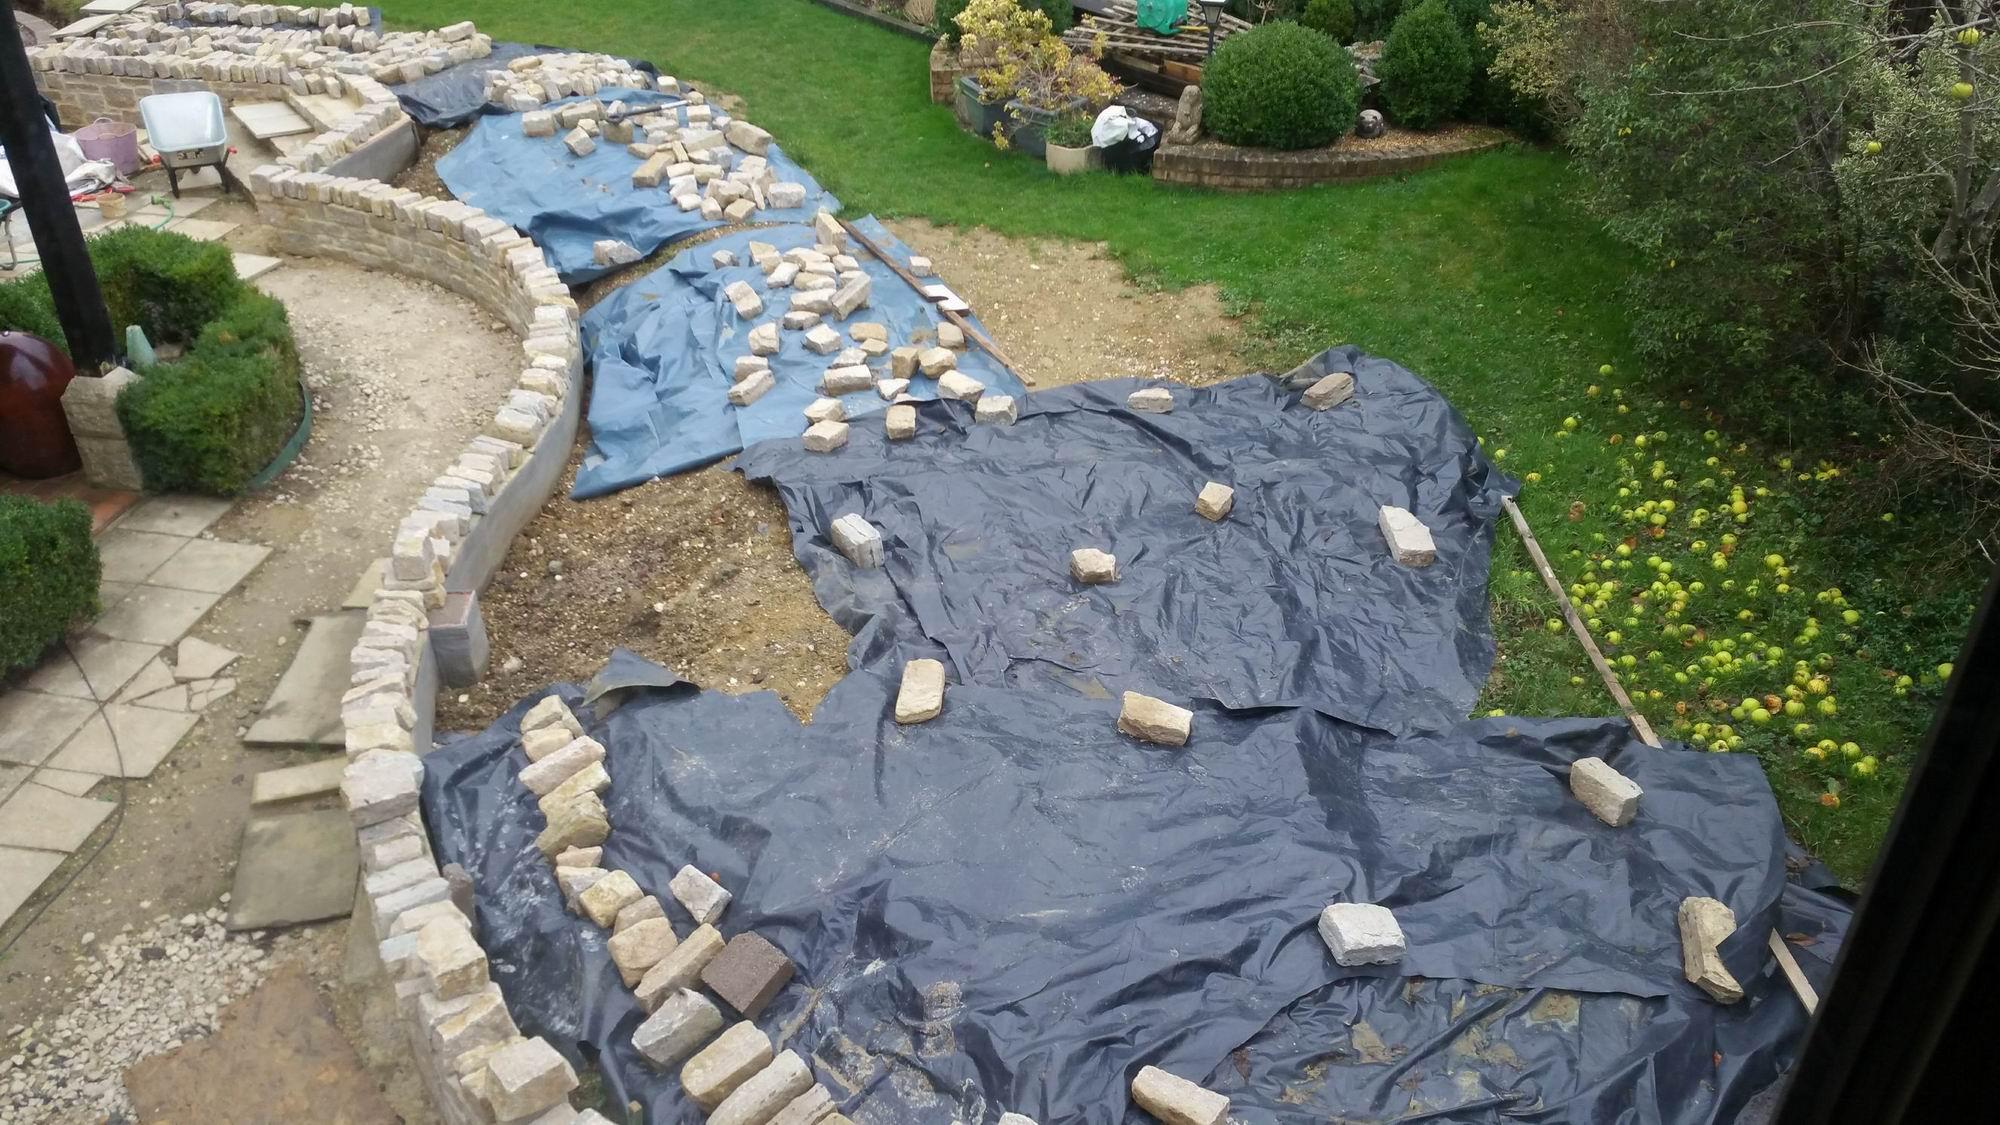
I had never built a stone wall before but decided to give it a go. Stone IMO is way more forgiving than brick or block - by its rustic nature! Think I got away with it...
 5 points
 -
Telehandler but a small one 4 - 6 m . We use small Manitous, JCB's etc. Cost is around £200 - £250 PW UK Forks have been good to us in the past . https://www.ukforks.com/product.php?id=1 Don't forget the golden rule though ! Get the materials delivered on pallets.2 points
-
So when you decide to start, do a dry run without glue pushing the pipe in the fittings and orientating as required. once happy put marks across the pipe and fitting so when gluing you have a reference mark to align..2 points
-
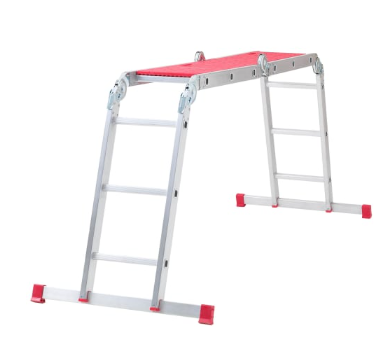
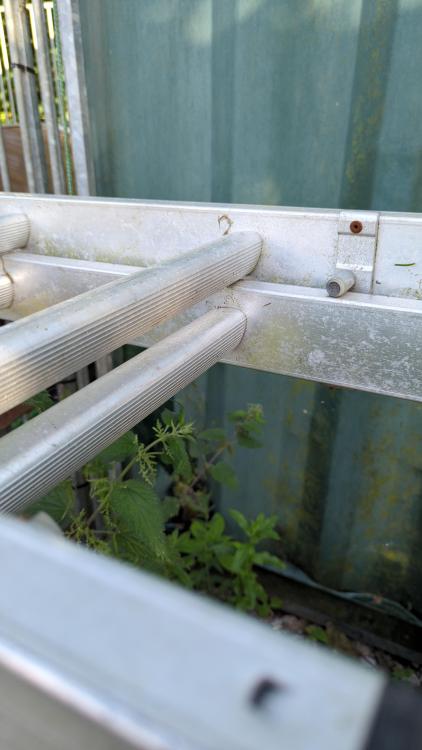
No ........... Yes, an A Frame is likely to be a more stable platform on which to work. But it isn't if , standing on the A frame, you work to the side of the ladder - in other words push across the line of the ladder. Your weight , leaning in line with the ladder, makes the set up much more stable. And thus safer. Try it. Stand on the first step of the ladder, in line with the ladder. And push against the wall. Next make the ladder into a A frame, set it alongside the wall. And push against the wall at the same height as before...2 points
-
For a drain point you can accept a compromise here. 21.5mm o/f pipe will actually seat quite nicely into a 22mm push fit connector. So 22mm pipe into one side, and 21.5mm into the other will work. Tbh, you could even use a 22mm compression coupler, with a 3/4” olive in the 21.5mm side. None of this would be anywhere near the chat if this was either a potable or a heating circuit, but it’s to save you using a hosepipe so we can allow a pinch of “it’ll be fine”. Go with a push fit coupler is my advice, but when draining just go easy vs tap wide open at max wallop. For belt and braces you should go into a 22mm x 22mm tundish, and then into a suitable waterless trap (eg so you can see when it’s finished draining off).
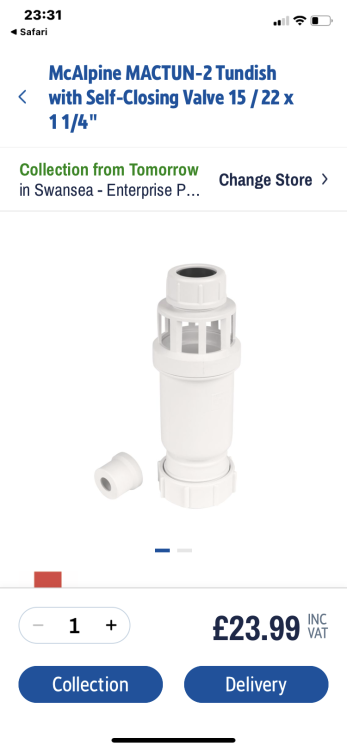 2 points
 -
If your loading out the floor don't skimp on the acrow props. For an all terrain forklift the ground has to be fairly level as they don't have the front jack legs to level them out before you lift anything high. If it's on the outside on scaffolding you can double up the plank on the scaffolding box you can get the best access to and set a pallet with a double lift off blocks,88, on to it. But as above make sure you see his ticket and he knows if he pushes to far with the forks and wrecks something he pays to fix it. It's very easy to move a wall if your not careful.1 point
-
Don’t need a bull float - At 4m you can get a roller striker which is much quicker and easier than both tamping bar and power float as it skims the top surface flat.1 point
-
Bumpa hoist I have used one on the last two builds Cheap to hire You can clear a pack of blocks and slates in minutes Ask to see his license and insurance before you let him loose on your build1 point
-
In this case I would go for a power float. There is a knack to this though.1 point
-
Sketch and plan looks ok to me. I'm not sure you could make it any more efficient. I try to think of a main spine for the heavy volumes of water, then branches for the smaller volumes, but then I don't make a living from this so take with a pinch of salt!1 point
-
Looks good to me! I don’t think you can have too many clips.1 point
-
The extension doesn’t need a SAP. If you can’t get your glazing below 25% of the floor area (minus the area of glazing removed) use a calculated trade-off or get a SAP done to do an Equivalent Carbon Target calculation. Most companies shouldn’t need plans - they should come to the house and take a few measurements and ask you a few questions about what insulants you used.1 point
-
I know my sister is getting some me allowances, which is strange as she only visits, no shopping, cooking or cleaning. Maybe I should ask my Mother for a £700k unsecured loan.1 point
-
Ah ok. In that case many manufacturers have u-value calculators. You enter details of the wall construction and thickness of insulation and it works out a u-value for the whole wall as that's what matters for building regs... Kingspan.. https://u-valuecalculator.com/gb Celotex... https://insulation-uk.com/technical-services/tools/online-u-value-calculator This one might include aerogel blanket but I haven't tried it.. https://www.proctorgroup.com/u-value-calculator If you have a particular wall make up in mind post the details and I'm sure one of us can run the numbers for you.1 point
-
You can run whatever you need. I can't remember the current ratings of the different extensions, but I vaguely recall that some are physical relays and some are solid state. I use some for zero volt switching and others for mains switching. You can also use low them to switch low voltage DC and use that to drive a chunky relay if needed.1 point
-
Depends what you are trying to achieve. You can vary U-Values a bit, as long as the overall value meets building regs. But if you have a specific problem like condensation, then you may need a better value than BR stated. You also have fire ratings to worry about. Steel does not fair well in a fire. You can, but it will cost a fortune to get it certified, so not worth doing. It does give an hour indication of how much normal plaster can be ramped up by adding the word 'nano' in the brochures.1 point
-
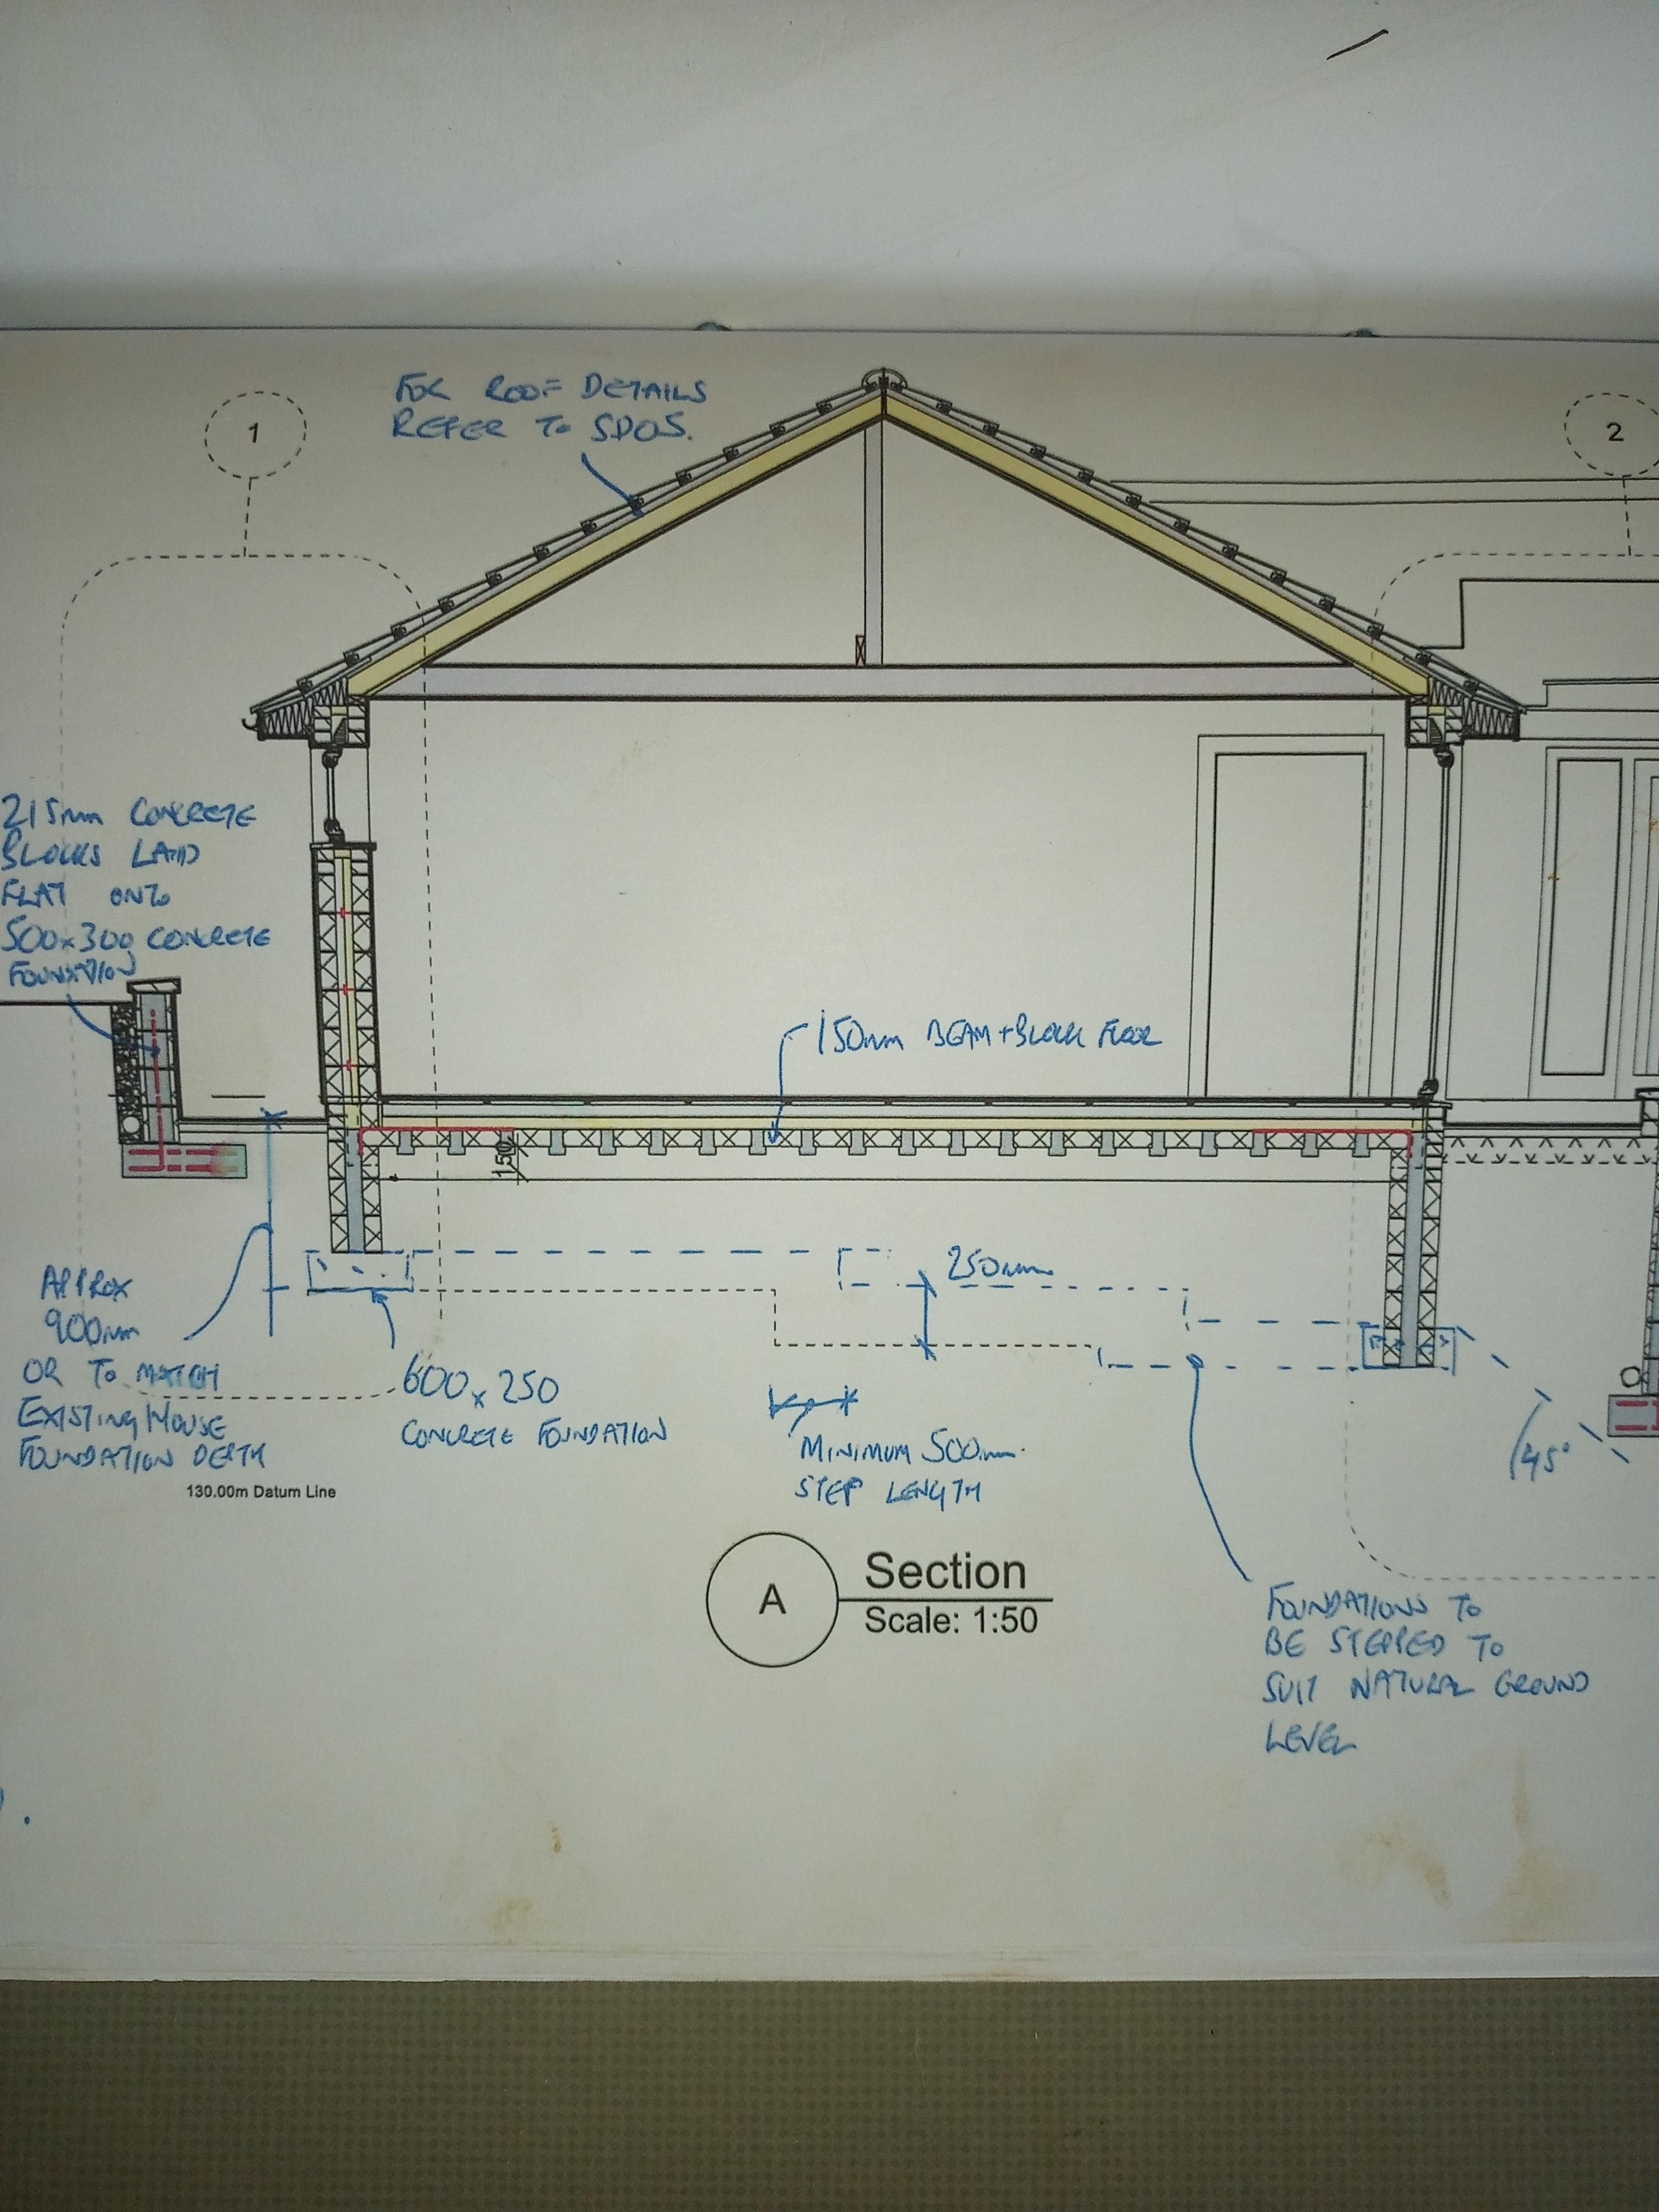
Thank you all for for taking time to reply.. It's reassuring to hear the voices of experience. Happy to hear that it's more about pushing it into position, rather than it flowing and finding its own level.. Iv poured straight from the mixer into a strip footing before , but this is first time for pumps and steps..going to have those blocks to hand tho! Will be back when pour is done, just to let you know how it went.. Many thanks, and sorry if it was a daft question...1 point
-
I was hoping for a simpler reply as it’s a bit too technical for me, but I will dig deeper.1 point
-
Very approximately... The thermal conductivity of a material is the U-Value of a 1 meter thick layer of the insulation. So you can work out the U-Value of any thickness using.. U Value = Thermal Conductivity * 1000 / Thickness (in mm) Manufactures data sheets give more accurate data because they take into account surface effects such as that due to foil covering on PIR. In some cases manufacturers include the effect of air gaps one or both sides specified in the installation instructions!1 point
-
If these are low temp slabs, passive levels, then cracking is really not a big concern tbh. This only becomes a thing IMO when you have thin screeds vs a constructional slab with mesh / fibres etc. For external doors, the wood will still be a cold bridge plus you should have something for expansion. At the doors this only needs to be something thin such as the foam expansion strip. Have you looked locally on Gumtree etc to see if anyone's got some going begging? For emergency measures you could just bond a couple of layers of bubble-wrap back-to-back I suppose.1 point
-
My pet hate is stepladders that make the very top step look just like any other step, but make it out of weak plastic, and then in small writing state "no step" Of COURSE people are going to use it as a step. If you don't want them to step on it,make it so you can't step on it, otherwise make it strong enough to step on.1 point
-
FWIW hl.co.uk does an Active Savings thing that puts everything in one place to reduce admin, and has enough participants at the moment that you can spread over several separate banking licences.1 point
-
A couple concrete blocks thrown on top after you do the lower pour. What's the concrete volume? I'd reccomend using a team with wheelbarrows as you get away with a thicker mix. I helped a mate with his, 3.5m³, with three barrows in about 45mins. Good workout. Sounds like there's four of you on site so doable.1 point
-
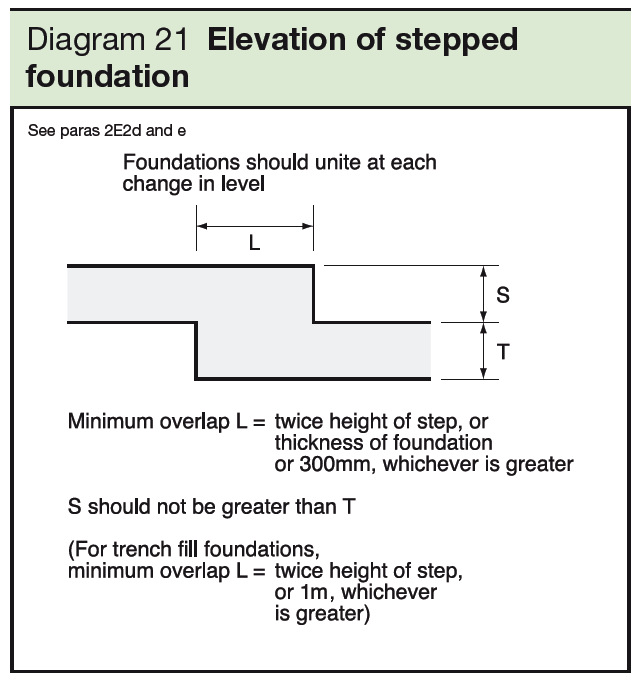
Hi, many thanks for the quick and clear replies.. To answer some questions. 1) myself and three other on site , 3 are family builders. I am householder and acting labourer 2) the builders have experience of pumped concrete and the pump guy they use is doing a site visit before pour. Not sure builders have done a stepped pour before. 3) footings are min 250, so we have two steps at 500 ( min ) 4) SE design and full plan approval for BC 5) building control have visited site We are using 18 mm ply with 90x40 mm bracing to hold sides.( Photos to big to upload).. I think it's a simple (?) job .,but my engineering background questions why the wet concrete doesn't find it's way under the step shutter and become a equal height throughout the trench.. Thanks again for your time and help..
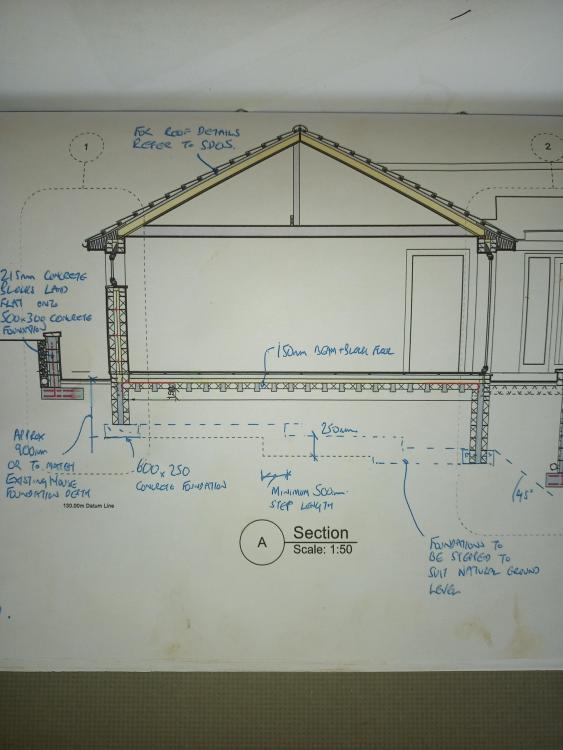 1 point
 -
What Nick says. Clear to the footings. Not having to redo services and groundworks will be a huge saving, time and money.1 point
-
One cheat is to build new, over existing foundations. If you can live with the current layout then a TF or ICF build atop would be a money-saver. Feasibility needs doing by the lorry-load though, so consider your choices. My 2 cents is knock it down as you'll spend the same amount on lipstick for a pig as you'll spend on new (taking into account your zero VAT status with a new build). Just be mindful that a new build with new foundations would need to specified for 'made up / disturbed ground' so you'd likely be better off with an insulated raft at that stage, which is a very good option indeed. Good luck either way, but trying to retro-add airtightness and insulation during a hybrid build is a massive PITA. I'd just stick with masonry at that stage, and observe one discipline throughout, as long as the foundations could take the second lift of masonry. Knock it down1 point
-
We’ve had premium bonds for many years and consistently win something each month A couple of £1000 wins over the years also Pretty good option with low returns elsewhere1 point
-
I looked at this product myself but couldn't find third party verification/certification of the claimed conductivity. At 10mm thickness, it has a U-Value of 0.32 W.m-2.K-1 You can buy a bag of Aerosil and make your own. https://www.silmid.com/specialties/fillers-thickeners/Aerosil-300-Hydrophilic-Fumed-Silica-Flour-10Kg-Bag/1 point
-
Brilliant, thanks. These beers are adding up!1 point
-
My mum does this. My personal view is that I would not worry about it for a large reputable bank. If banks start to go bankrupt with no coverage for depositors then the whole country will likely be in dire trouble. In the recent bankruptcy of First Republic in the USA all US depositors were made whole over and above the guaranteed deposit coverage. If a bank gets into financial difficulty first the shareholders should be wiped out, then the bondholders, only then would depositors take a hit. Something absolutely catastrophic would have to happen to wipe out all the equity of the bank and all the bonds then eat into deposits. I'm not saying this has never happened but it would be very very unlikely. So I would balance the low likelihood of this versus the hassle of multiple accounts. As mentioned NS&I is a safer option but their rates are very poor nowadays. They were quite competitive a few years ago. Personally I like TescoBank for a combination of safety and decent rates.1 point
-
I looked at this product myself but couldn't find third party verification/certification of the claimed conductivity.1 point
-
Completely different and irrelevant example. The GSR’d installer is the only person on site that can comment / be approached / be held accountable. HSE wouldn’t go and wake the builder up, they’d go straight to the address of the chap who commissioned a lethal device, as the builder is not qualified or competent. Ring GSR Inform builder by writing see point 11 point
-
Thanks for the detailed response. Yeah I think the sill is concrete but I'm not sure if it goes through to the outside of the wall. I'll check later.1 point
-
Hi. Get a synthetic slate, break off a couple of small pieces and then tap them in gently as packers, to hold the bricks in place whilst you make good. I’d use a dot & dab adhesive to patch this in, and make sure the wall is wet when you do the patching in (50/50 mix of SBR and water as a primer) so it bonds nicely to the bricks etc. Leave to dry and then you’re good to go. The wall will need priming with neat PVA for plastering and that needs to be still tacky when the plaster is applied. If you’re paying a plasterer they will already know to do this. With dry mortar and loose brickwork you should expect some hairline cracks to appear after plastering, which would be dealt with by filling and painting again, after this has ‘settled’. Is that a concrete sill above that goes through to outside?1 point
-
I have this one from Wickes. https://www.wickes.co.uk/Werner-Aluminium-12-in-1-Multi-Purpose-Ladder-with-Platform/p/250167 The stabilisers, like a kids bike, can be removed, and I have long ago lost the platform insert. It is heavy, but that makes it flex less, which is nice, none of that leg shaking vibration. Have had it over 20 years, think I got it in a sale for £25. As if folds up small, it fits in the boot of a small car. My stairwell is similar to yours, I stand on the banister when I paint the top corner. Put some grippy shoes on, one hand on the wall for triangulation, and make sure the paint tray is in reach of the other hand. (caveat, like @joe90, we have both done rock climbing, so are pretty confident, but cautious about it, and we don't put our fairy dancing shoes on).
 1 point
 -
I have, and it works. But it wouldn't run my Makita charger- not enough oomph. Of course for charging a laptop from 12v you really want a dedicated PSU but that will cost you £20. Considerably more efficient.1 point
-
Buy a set where the treads are set so your feet are comfortable. In other words where the tread has a bit of grip, but most of all where the treads are flat when the ladder is in use. Makes a huge difference....
 1 point
 -
Yes. It is the particles that are the problem, though at the nano metre scale, odd physics occurs between other chemicals. We used an aerogel based filler, which is similar to that used in the blanket type insulation (which I think is what @DamonHD had fitted), physically the properties are different to the solid form of aerogel, which is the one with the fantastic thermal properties. This Is not this

 1 point
 -
Exactly. The other key point of aerogel is that it is vapour permeable, making it suitable for retrofit in older buildings. Having looked at aerogel for wall looking, we're now making use of an insulated plasterboard with just 17mm of PIR bonded to 9.5mm of plasterboard.1 point
-
We use an EPS rasp and a leaf blower or handheld vacuum on each opening as required Refina do a tungsten carbide rasp with the awesome name of TigerClaw.1 point
-
Had something similar in a previous house, double the thickness and add the front edging strip set back slightly, rock solid. It was, by chance, replaced with 18mm ply as a snagging issue which was horrendously saggy. That went in the bin and it was replaced again.1 point
-
……and nobody gets hurt. 🤐0 points
-
Now you know why my ceiling looks a mess 🤣👍0 points
-
But you sing sweeter than the young Aled Jones.0 points
-
Will have to open the windows to let the fumes out, but at least the carpet will be blown clean. Reminds me of the racing harness in my old Golf. I can tell you that after an 80MPH shunt, a quick death would have been preferable. The todger may be safe, but the nads ain't.
 0 points
 -
It’s the most expensive insulation out there!0 points


.jpg.c21f3ac78c9b7efd90cbdcb312744dc5.thumb.jpg.7adcad4c0e384f5ecd7d56b0618df6e5.jpg)