Leaderboard


Popular Content
Showing content with the highest reputation on 12/21/21 in all areas
-
I'm not sure I agree with any of that! For our new build, £14k for a full plumbing + ASHP installation vs £11k for Gas boiler from our builder. Have mains gas as an option but both builder & architect strongly encouraging ASHP, hoping with the £5k grant to smooth the transition. My research suggests they are entirely appropriate for certain properties, entirely inappropriate for others - our new build being an ideal case for ASHP. Whilst no expert in heating systems, I am a Mechanical Engineer with a career in Energy Sustainability - long term Electricity is the answer -vs- Fossil fuels, from a political point of view (Russia & OPEC) from a sustainability point of view (cheap Renewables & self generation). Throw in storage & Nuclear and 'green government taxing fossil fuel' vote winning its a no brainer over the next several years. Hydrogen is a laughably hopeless cause for anything other then large industrial equipment.3 points
-
Fault finding by substitution rarely works. You are suggesting replacing the most expensive part, that requires an FGAS engineer to degas the system, swap the compressor, leak test the reworked pipework and re gas it. And all that might prove is there was nothing wrong with the compressor. Please seek out a better electrician first, someone that has experience of machinery / control systems would be good.2 points
-
A self build constructed to a good standard needs very little heating. Eliminate the need for space heating and you just need hot water. We run our hot water from exhaust air source heat pump, cheap capital cost and cheap running costs. Our total electricity consumption is 10-11 units a day for a family of four. I use a centrally placed wood burning stove to provide a boost in the evening. This winter, I'm burning sticks I collected in the summer, my space heating are £0. A unique set-up for us and probably not for you, but my suggestion is to build your system around the availability of local resources, your skills/experience and budget.2 points
-
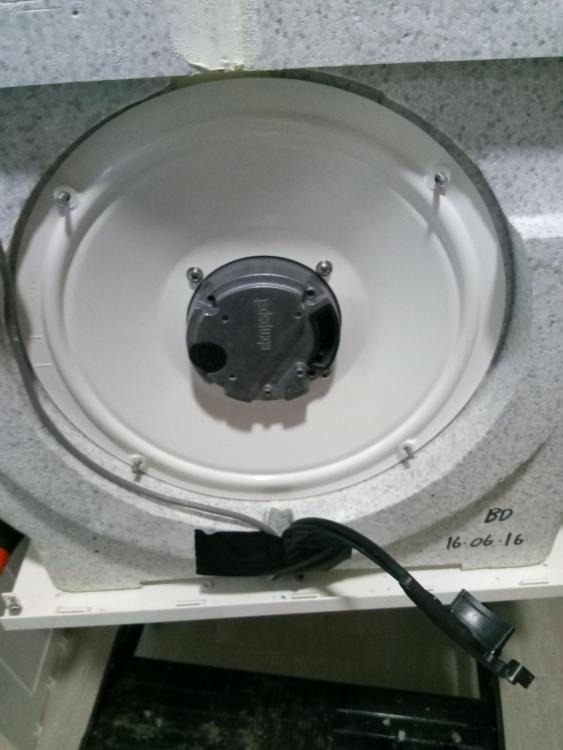
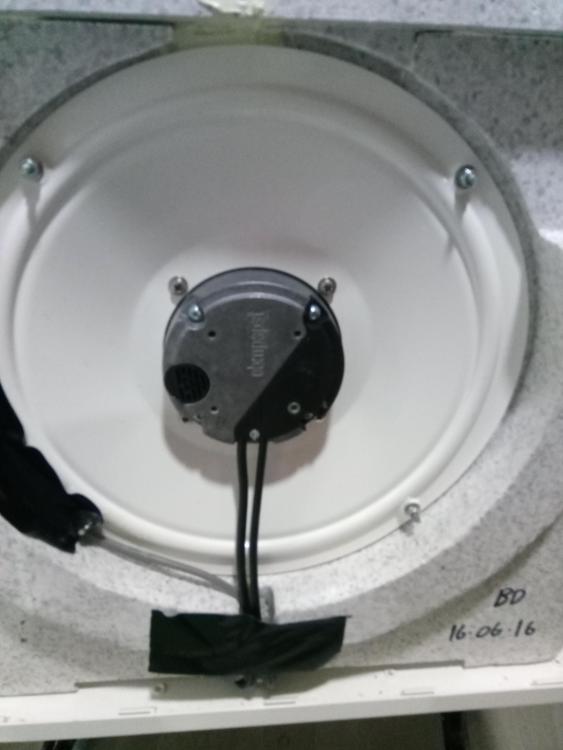
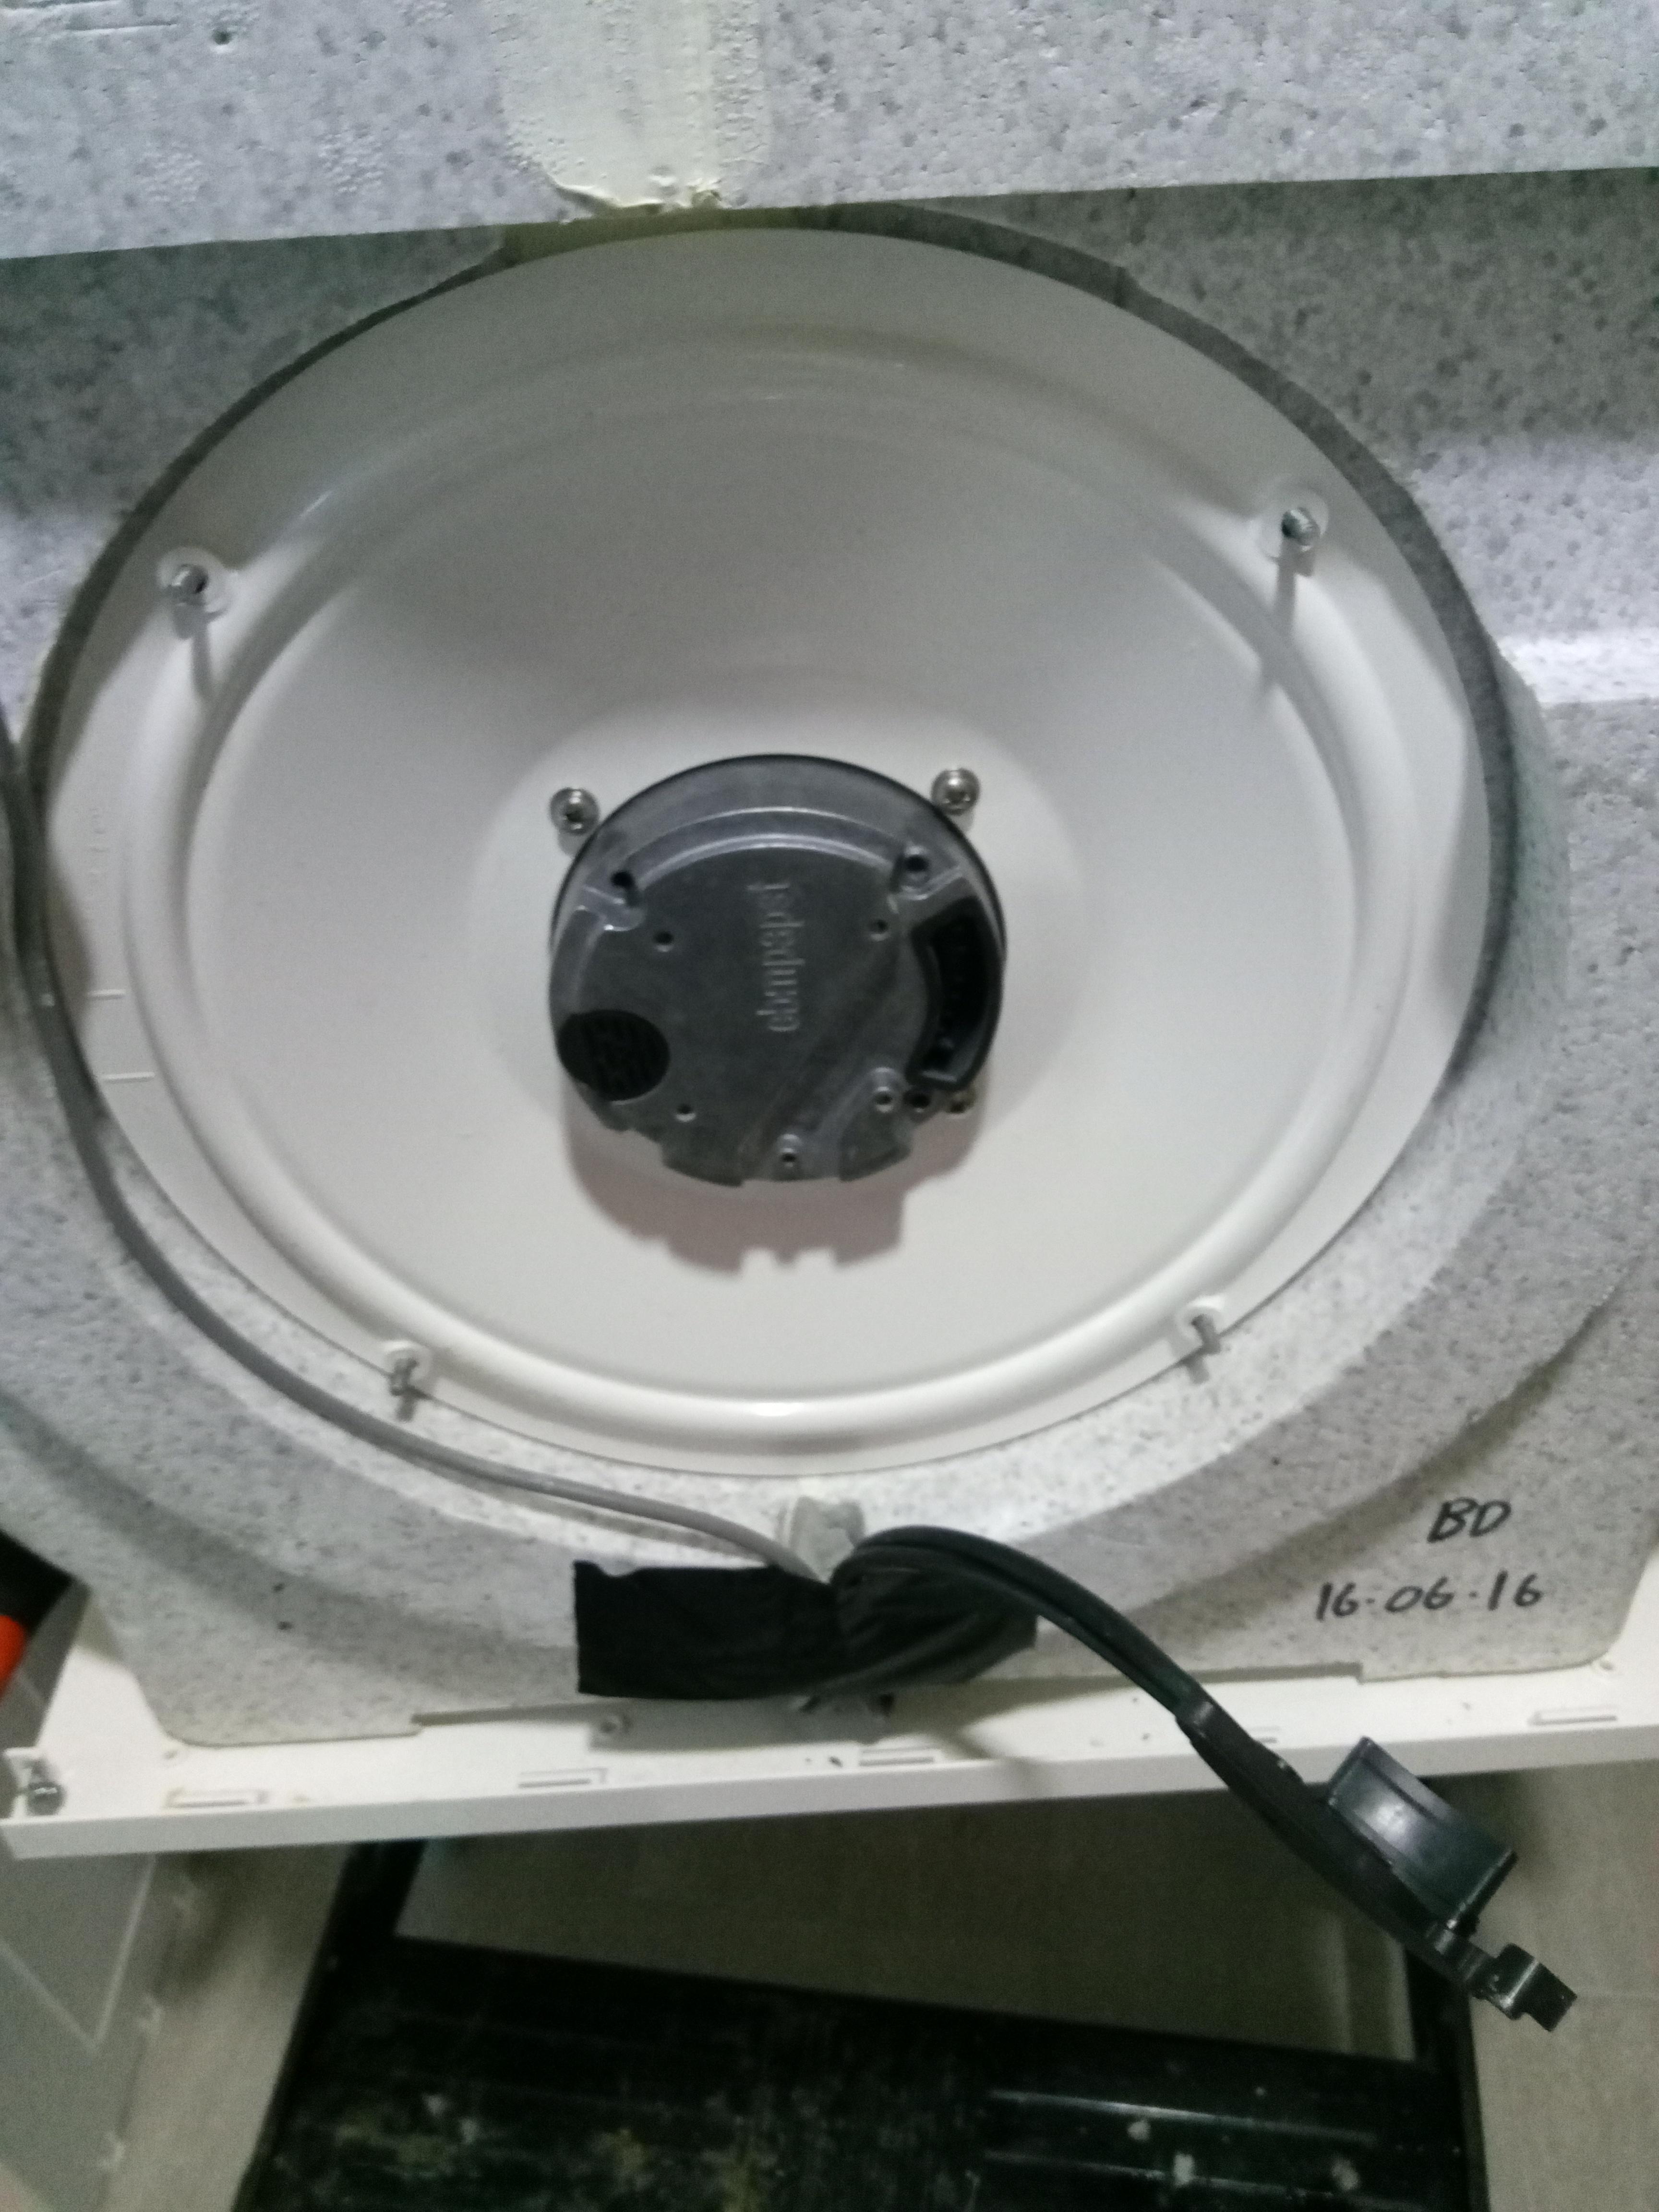
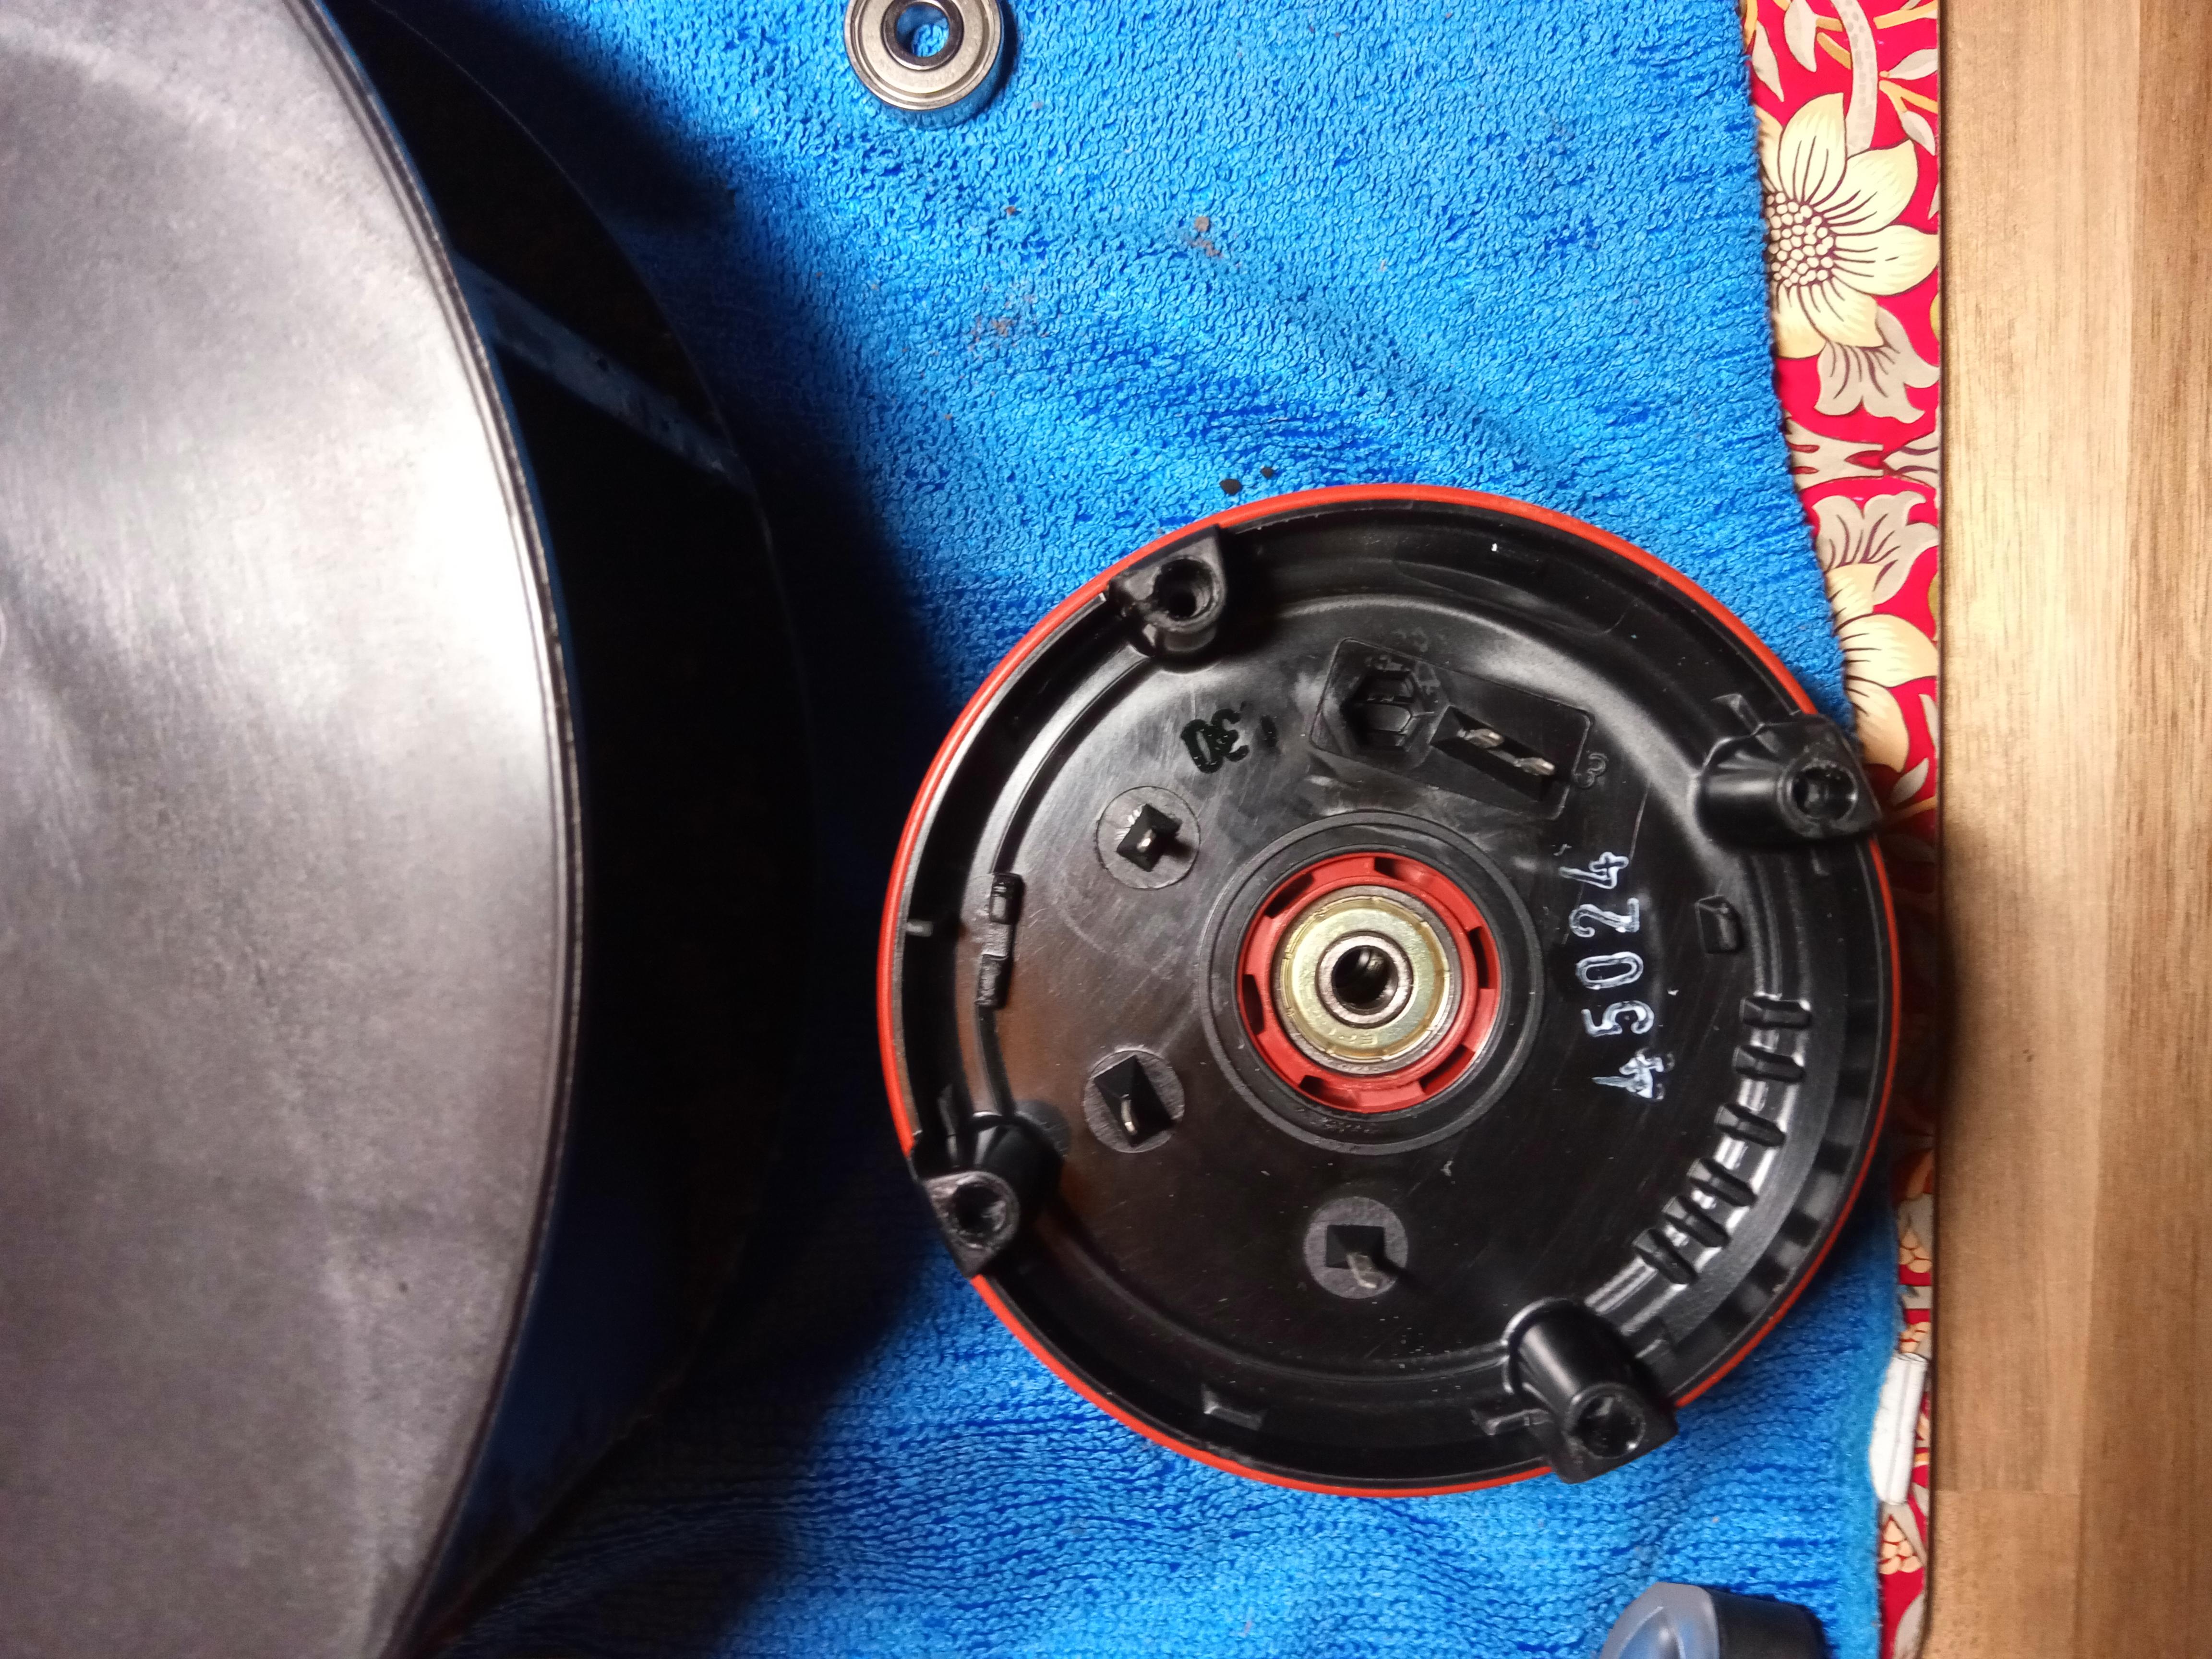
Following on from the excellent post by @DOIGAN where he replaced the bearings in one of the fans from his MVHR, this is a short post to detail the steps to replace the bearings in the extract fan in my Vent Axia Sentinel Kinetic Plus B (being a slightly different model and fan to that of the link below) The process I followed is basically the same as laid out by @DOIGAN in his original post. I've added a couple more pictures and descriptions below. To get at the fans, the unit has to be stripped down. First the duct spigots and blanking plates are removed. Both the back and front covers are then removed, allowing the top and side panels to be taken off - the side panels slide/interlock with the top and bottom panels. You should then have access to the fans on either side which are bolted to the poly core: I then disconnected the power connector to avoid having to try and unplug from the motherboard / cause any other issues. From this point I followed the process as per @DOIGAN Removing the circlip was a bit challenging, as for some reason the hub assembly would not depress, it turns out because the spring beneath wasn't seated properly. I managed to get the circlip off, but naturally it pinged up into the air and I spent several minutes searching for it until finally finding it some distance away. The bearings themselves (one on either end of the hub) popped out easily. I used the same bearings as @DOIGAN Reassembled and back into the MVHR unit. Cost - my time and £7.99 for a pack of 10 bearings vs £298.43 + VAT + shipping charge for a replacement fan from Vent Axia. Vent Axia were unable to give me any detail of the bearings used when I emailed to ask.

 1 point
 -
We have a passive-class house where the net heating requirement to keep the house warm in the coldest winter months is approximately 1kW. The only heating system for doing this an underfloor heating (UFH) system base on 3 ~100m UFH loops buried in our passive slab. That's it; no upper floor systems; no towel rails; nothing. The reason for this is that our timber framed house is super insulated and air tight so there is very little temperature variation throughout the house, but that's all been covered in earlier posts. What I want to do in this post is to provide a simple explanation of how I am going to heat my house and how this works so that John (@joe90) and other forum members understand my approach. This basic heating strategy was first evangelised by Jeremy Harris (@JSHarris), but variants have been adopted by other forum members and their consistent experience is that it works and works effectively for this class of passive house. However, what I am doing is a slight variation on Jeremy's approach: I am using the slab itself as my main heat store, so no buffer tank. I will be heating it by circulating warm water through the UFH loops and this water will be heated by a simple small inline 3kW electrical heater element. The heating charge will normally be done as a "chunk" once per day during the E7 cheap rate period to take advantage of low tariff rates. However, I am also including in the design provision for the later addition of an ASHP, should the heating data collected over the first year show that there is a 10-year payback in doing this. As I said, Jeremy's approach has been well documented by him in his blog and by others. He has recently described that his system settles down into a repeating pattern over the colder winter months winter where his heating comes on for a few hours once a day in the early morning, and the heat in the slab is topped up during this period. This is broadly what I call "chunk heating": unlike a traditional house central heating system which is turning on and off pretty continually, the heat losses in our type of house are so small and the house has such a high thermal inertia that you can heat the it practically with a single daily top-up to the slab; this heat then "trickle feeds" into the house over the day. Yes, there is a slight residual ripple on the temperature in the house, but this is less than a 1°C undulation over the entire day and so this isn't really perceptible to the occupants. I am adopting this same approach, but shifting my heating period earlier so that it ends at the same time as the E7 low rate tariff ends. The main difference in my implementation is that I am heating the slab directly without a buffer tank. I wanted to get my head around this before committing to this decision, so I modelled this in some detail and covered all of this physics and modelling stuff in my Boffin's corner thread. This modelling has persuaded me that the mechanisms and dynamics of heating are pretty simple, and so in this post I want to cut out all of the equations and stuff (with one exception) and focus on describing what happens in plain terms. First, I am using a small 3 kW electric element to heat the water circulating in the UFH loops (the same type is used as a hot tank immersion heating element). Just like an electric shower this heats the water stream a step in temperature. Sorry I am a boffin, so I will call this temperature change ∆T. (BTW, the triangle is just the Greek letter D and is short for difference; blame Isaac Newton for that one.) Just like an electric shower, double the power and ∆T doubles; double the flow rate and ∆T halves, and if I do the sums for a typical flow throw my UFH loops, and for a 3 kW heater then ∆T works out at about 1.6°C for my system -- a lot less than a typical gas-boiler fed UFH installation, but my heater is puny in comparison. So if I start pumping 3kW of heat into my slab, then the system settles down after about 10mins and the heat output is pretty much the same along the entire 3 × 100m runs of UFH pipe, pipe work, that is each 1m of pipe dumps about 10W of heat into the concrete. This lifts the temperature of the concrete, and at the same time cools the water in the pipe pretty steadily along its length so it comes out at 1.6°C cooler than it went in. But cooler or hotter than what? The heat flows radially away from the UFH pipe creating a thermal gradient. [Boffin bit warning, and the only one] this gradient is pretty close to what is known as the steady state radial solution to the 1-D heat equation, which has a formula Tr = Tp - A.log(r/rp). where T is the temperature and r is the distance from the pipe centre, with the p subscript relating to the pipe/concrete interface. The A term is a function of the amount of heat flow. The main thing to note here is the general shape of this gradient: the temperature of the water ends up roughly 4-5°C hotter than the slab average for this sort of 10W/m value, and the temperature in the concrete falls away rapidly as you moving away from the pipe towards the average slab temperature. Since the volume of concrete goes as r2, the actual proportion of the concrete more than 1°C hotter than slab average temperature is small. So the overall effect of the heating is to slowly lift the average slab temperature. There is also a general heat gradient along the water in the pipe but once you get more than a few cm from the pipe centre the concrete is all within 1°C or so of the slab average. There are also local hot regions around the UFH pipes up to 5°C or so hotter than the overall average slab temperature. However, this is factors less than you will get with a conventional UFH system. A key difference of Jeremy's approach is that the water continues to recirculate after the heating is turned off, and now the water flow acts to redistribute the heat rapidly along the pipe levelling the previous 1.6°C gradient; at the same time (without the heat being pumped from the UFH pipe) this central warmer region rapidly flattens out as the heat flows outward, and within an hour or so hardly any heat variation remains and the entire slab is within ½°C of the slab average temperature. A good analogy here is pouring water into a bucket: the surface level steadily rises as you pour it in and the surface itself is a bit churned up by the act of pouring, but as soon as you stop pouring, it rapidly levels out to flat surface. OK in a real slab this is also complicated by the deep elements (the unheated ring beams in my slab are over a third of the total volume) and the heat does flow into these largely thanks to the high thermal conductivity of the rebar. But overall, the slab is acting as a heat battery soaking up the power that you pump in. The trick is not to put a somewhat arbitrary limit of the maximum input water temperature (say 25°C) as this will limit the amount of power that you can apply. This heat gets quickly spread uniformly throughout the slab. By the end of the heating period, the slab is 2°C (or whatever) warmer than the room temperature, and is starting to transfer heat into the room fabric at ~15W/m² whilst itself slowly cooling. This is more than the external heat losses in the house, so this heat both warms the air and the rest of the wall fabric. This creates a very slow rise and fall in the room temperature over the course of the day -- of roughly 1°C. But so long as you put in enough heat each night, the overall house temperature remains stable. So how much is "enough" heat? In my case I use a very simple strategy. I am using the UFH circulation temperature at midnight as my test. If it is less than the previous night, then I add a bit more heat than last nigh and v.v. Simple really.1 point
-
If you are feeling adventurous, unclip the trunking lids and follow the wires from the now removed relay to see what they connect to. Something won't be working as it should, so don't think it is fixed just yet.1 point
-
Were you only expecting this to be a temporary supply and you were expecting the DNO tomove the supply head somewhere else in the future? Yes they seem to have supplied a PME earth terminal as they did with ours. You will need that if keeping the supply head there and yes it would then be a private submain to the house eventually.1 point
-
The only reason I can see fir hinges to stick out more is to allow them to open further. I specified parliament hinges to our outward opening doors on the conservatory so they could open 180’ past the cills and be clipped open in summer.1 point
-
Something that comes up a few times is drying times I dropped a couple of these off this morning at a job that we are trying to get the vinyl down before Christmas Really simple inexpensive fans As Nick correctly pointed out It’s all about keeping the air circulating We use these for clay plasters and Venetian also Simple but effective
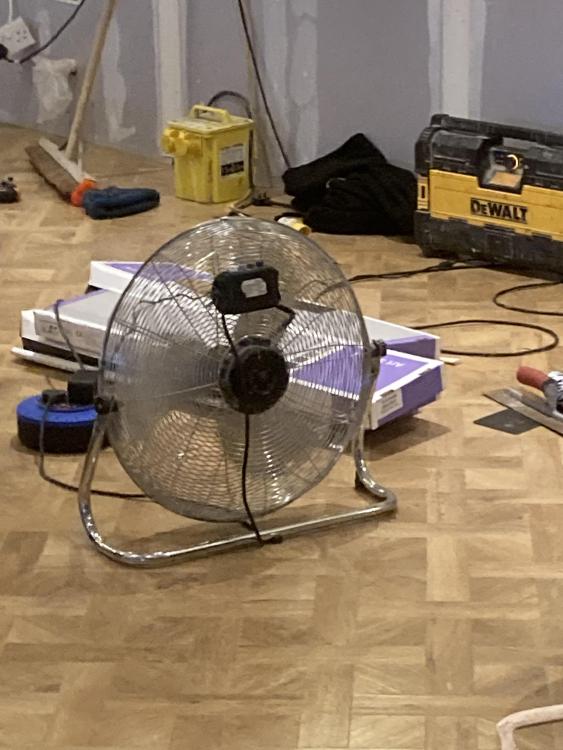 1 point
 -
I have spoken to the planning consultant I had out in March just after we bought the house and as long as we don't attach with emphasis on attach, to the rear protrusion it is not a side extension but classed as a rear extension and then width of the extension restriction falls away as that is only applicable to side extensions.1 point
-
We were looking at reclaimed parquet blocks on eBay on and off for a year leading up to the build kicking off, but it always seemed like a lot of work and a fair bit of risk. They were generally stuck down with a bitumen based adhesive, which is an absolute pig to deal with. You could buy stuff that had been cleaned etc, but that was always crazy expensive for what it was. Edited to add: we did consider the best of both worlds with porcelain wood-effect parquet, but I don't remember why we chose not to go with it in the end.1 point
-
I nearly bought a shed load of old wooden blocks from a school to lay herringbone style but they are thick and would have insulated our UFH and not matched other floors in height, I thought of sawing them all down in thickness but the work was too much on top of all the build work so settled for engineered oak flooring (much easier).1 point
-
It worked fine for 12 years so unless a motor has seized or about to die, which I don't think it has/is, then I cannot see the current suddenly increasing above the rating of the 12 year old MCB. If a higher current breaker was the fix then I would be more concerned about what was actually wrong further down the line and could the associated cabling then handle the increased current. As the OP said it ran longer with the earth pulled off the RCD this indicates leakage due to a failing components or moisture ingress. This fault, therefore, does not appear to the current related. Current and earth leakage are two different things.1 point
-
Our DNO is UK Power Networks, they have useful info on their website (even giving outline costs for certain upgrades like moving power supply, going to 3-phases etc) as I’m sure others do. My PowerVault battery has 2 inverter settings; 3.68 & 5.5kW. I wanted to have the higher (which is set by the PowerVault mothership) so I had to make a G99 application to the DNO. They gave me permission so long as I fitted an export limiting device (£££s) so the battery can’t export. That’s a bit useless as I got £1k off the battery if I allowed EDF to occasionally force discharge it to help balance the grid. As far as I understand you can only have a single battery per phase. I think it was Robert Llewellyn from Fully Charged who had a Tesla and got a second, free Tesla due to the number of referrals he had but couldn’t put it on until he had 3-phase. I think it’s because it would be a complete nightmare for 2 independent batteries to read your main power line to decide whether to charge or discharge. You could find that one is discharging to charge the other up! I have a kind of experience of this where we have a Solar iBoost as well as the battery; they really don’t work well together. When the batter is discharging, it tends to discharge about 200w more than is needed, presumably so lights don’t dim if we switch something on. This 200w is usually exported but if it’s on, the iBoost sees the 200w, so uses it to heat the hot water tank. The battery thinks “oh, I need to provide another 200w” so increases it’s output and the iBoost soaks it up, so the battery increases by another 200w yada yada ending up with the battery just heating hot water! We’ve had to switch the iBoost off at least until sunnier times. Edit: I suppose I should qualify this by saying you could have multiple batteries behind a single control unit per phase, but as you have a PowerWall I think you can only have one per phase.1 point
-
As Dave says it could be heating on a resistance heater so you'll need to check carefully for clunks and hums from the compressor1 point
-
This isn't an ASHP issue. The less insulation you have the greater your heat loss. The greater your heat loss the higher your running costs and the greater the output capacity you need from your heat source.1 point
-
The House Builders Bible calls these incidental heat source gains. The book's model 1600 sq ft house requires 5 or 6 kWh of energy to maintain a 20 degree delta but in practice incidentals brings down the theoretical energy demand by 30% (humans are a useful heating energy source apparently). The @Jeremy Harrisheat modelling spreadsheet does not account for incidental gains or heat loss via air leakage. People say the spreadsheet is accurate so I assume for many air leakage heat loss and incidental gains tend to cancel out.1 point
-
+1, I have a large south facing conservatory and believe this heats the house a lot of the time. I did no modelling at all, just finger in the air (using knowledge from many members here).1 point
-
Subsidies, grants, incentives etc are there to help the transition from fossil fuels. They are really designed to help the manufacturers and installers, not the end user. It is, and not in hindsight, a shame the the original FiTs was so generous to the end user. This has had a negative affect in future purchases of not only PV, but also micro thermal generation. So linking grants (or whatever) for HPs only if another renewable technology is installed will kill the market dead. The biggest problem is that the general public still think that solar and wind farms cost several times more than the equivalent gas generation. This was true 15 years ago, but they are now the cheapest options (UK windpower would be even cheaper if we installed on land, but our new agricultural policy has stopped that, as did the previous policy with the moratorium on land based windpower). What will change people's minds is legislation. When you only have the choice of electrical, the choice is resistance or heat pumps.1 point
-
The current draft regulations seems to specifically include self build properties, see regulation 7 in the DES’ draft legislation for the boiler upgrade scheme: Requirements for new-build properties 7. A property meets the requirements in this regulation where— (a) any building that forms part of that property was built principally with the use of the labour or resources of the first owner (including where the resource was a loan which the first owner was liable to repay), and (b) the property has not, while the building was built or at any subsequent time been owned wholly or partly by a person who is not an individual. from: https://assets.publishing.service.gov.uk/government/uploads/system/uploads/attachment_data/file/1040470/Draft_Boiler_Upgrade_Scheme__England_and_Wales__Regulations_2022.pdf so it does look like 5k grants are available for self builders, just not property developers. Would welcome anybody else’s interpretation of the regulations!1 point
-
We spent £500ish a (6 bottles) year for heating and hot water, easily measured each year for 3 years. But now we have an ASHP, and I would not change back. The PV, ASHP, MVHR and electric vehicle combo works for us. Its especially good on the heating because the ASHP runs at a low level in the background. The boiler needed 60C ish to run at best efficiency and so when the heating came on we got over heating as the TRV take about 20 mins to respond and the rads were full of 60C water which is an overkill in our home1 point
-
But bottled gas has always been more expensive than mains gas!1 point
-
I recently visited the build show at Harrogate The HP suppliers seemed to think the grant for new properties would be reduced to £1500-2000 Which is a shame Accompanying us was friends who have recently completed there third self build They are on tanked gas and bitterly regret it They think that running costs will be at least a third more than piped gas1 point
-
Your feedback on heating demand and the insulation thicknesses you provided earlier indicate a high spec build thermally speaking. If powered by mains gas you would get a B EPC rating I assume. I pay £64 per 47kg LPG bottle = £0.098 per kWh (92 litres x 7.08 kWh per litre). EPC is a cost per sqm rating. The cost per sqm difference between B and F is 100% or a doubling in heating cost. Bulk LPG is about 30% cheaper than bottled. I know new builds on bulk LPG with slightly better insulation than building regs can get a C EPC rating. Based on actual heating costs you should get a C or D EPC on bottles and a B EPC bulk lpg. The EPC rating formula must use a daft kWh unit price for bottled LPG.1 point
-
If your build is insulated and airtight enough, you might not need to do either. A lot of folks on here find direct electrical heating (Willis immersion heater with wet UFH, or plug in radiators) is sufficient. 280m2 is fair size - how many people will normal live there? If a large family, with all the bodies and cooking and XBoxen, not a lot of extra heat is required. If it's 2 people you'd need more. Overall, the lower the annual heat demand, the less financial sense there is on investing in higher efficiency heat sources. There is a new £5k grant on ASHP coming in in April, but seems unlikely it will apply to new builds. But at least you get the VAT saving1 point
-
I think that ASHP's should always be paired with Solar (or wind/water). I cannot understand the Government pushing ASHP's without subsidising solar panels alongside them.1 point
-
I think most people discount an ASHP because of the high cost, and then compare the high cost of an ASHP with a £2K boiler. I think most are looking at prices installed by an "ASHP specialist" at £10K or more.? But before you dismiss that as too expensive look up the actual cost to buy an ASHP and pay a plumber and an electrician each a couple of days labour to install it. You might find it is a lot cheaper. Several of us on here have bought them cheap and DIY installed them. Can't comment on likely running cost without knowing what you are building? Something that just scrapes through building regs? or a passive house? or somethiing in between. There is no doubt ASHP's work best with UFH throughout upstairs as well, and are better suited to low energy houses. Don't forget the cylinder maintenance or standing order costs when working out the cost of LPG.1 point
-
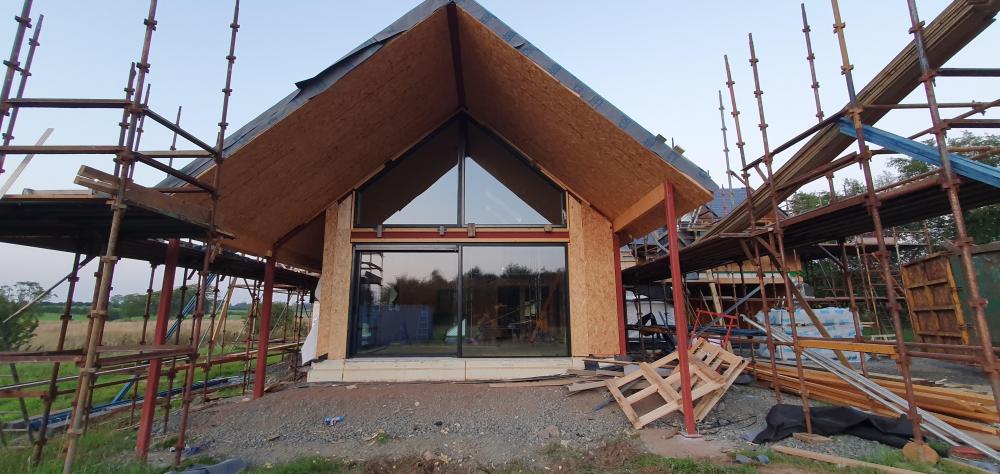
could be a trick of the photo but the window above porch doesn't look central over it ? amtico flooring karndean clone a lot cheaper. shame you didn't opt for 2600 ceilings would have looked great, one of my bug bears the roof touching the top of windows.1 point
-
Maybe put down some porcelain tile or hardwood. It is too late to grieve about the mortar colour. I am considering using silver sand, white cement and lime on a project but I may just go with whatever is cheapest. I would need the brickies to use the special mix for the external brickwork only. Odds on they just use it everywhere.1 point
-
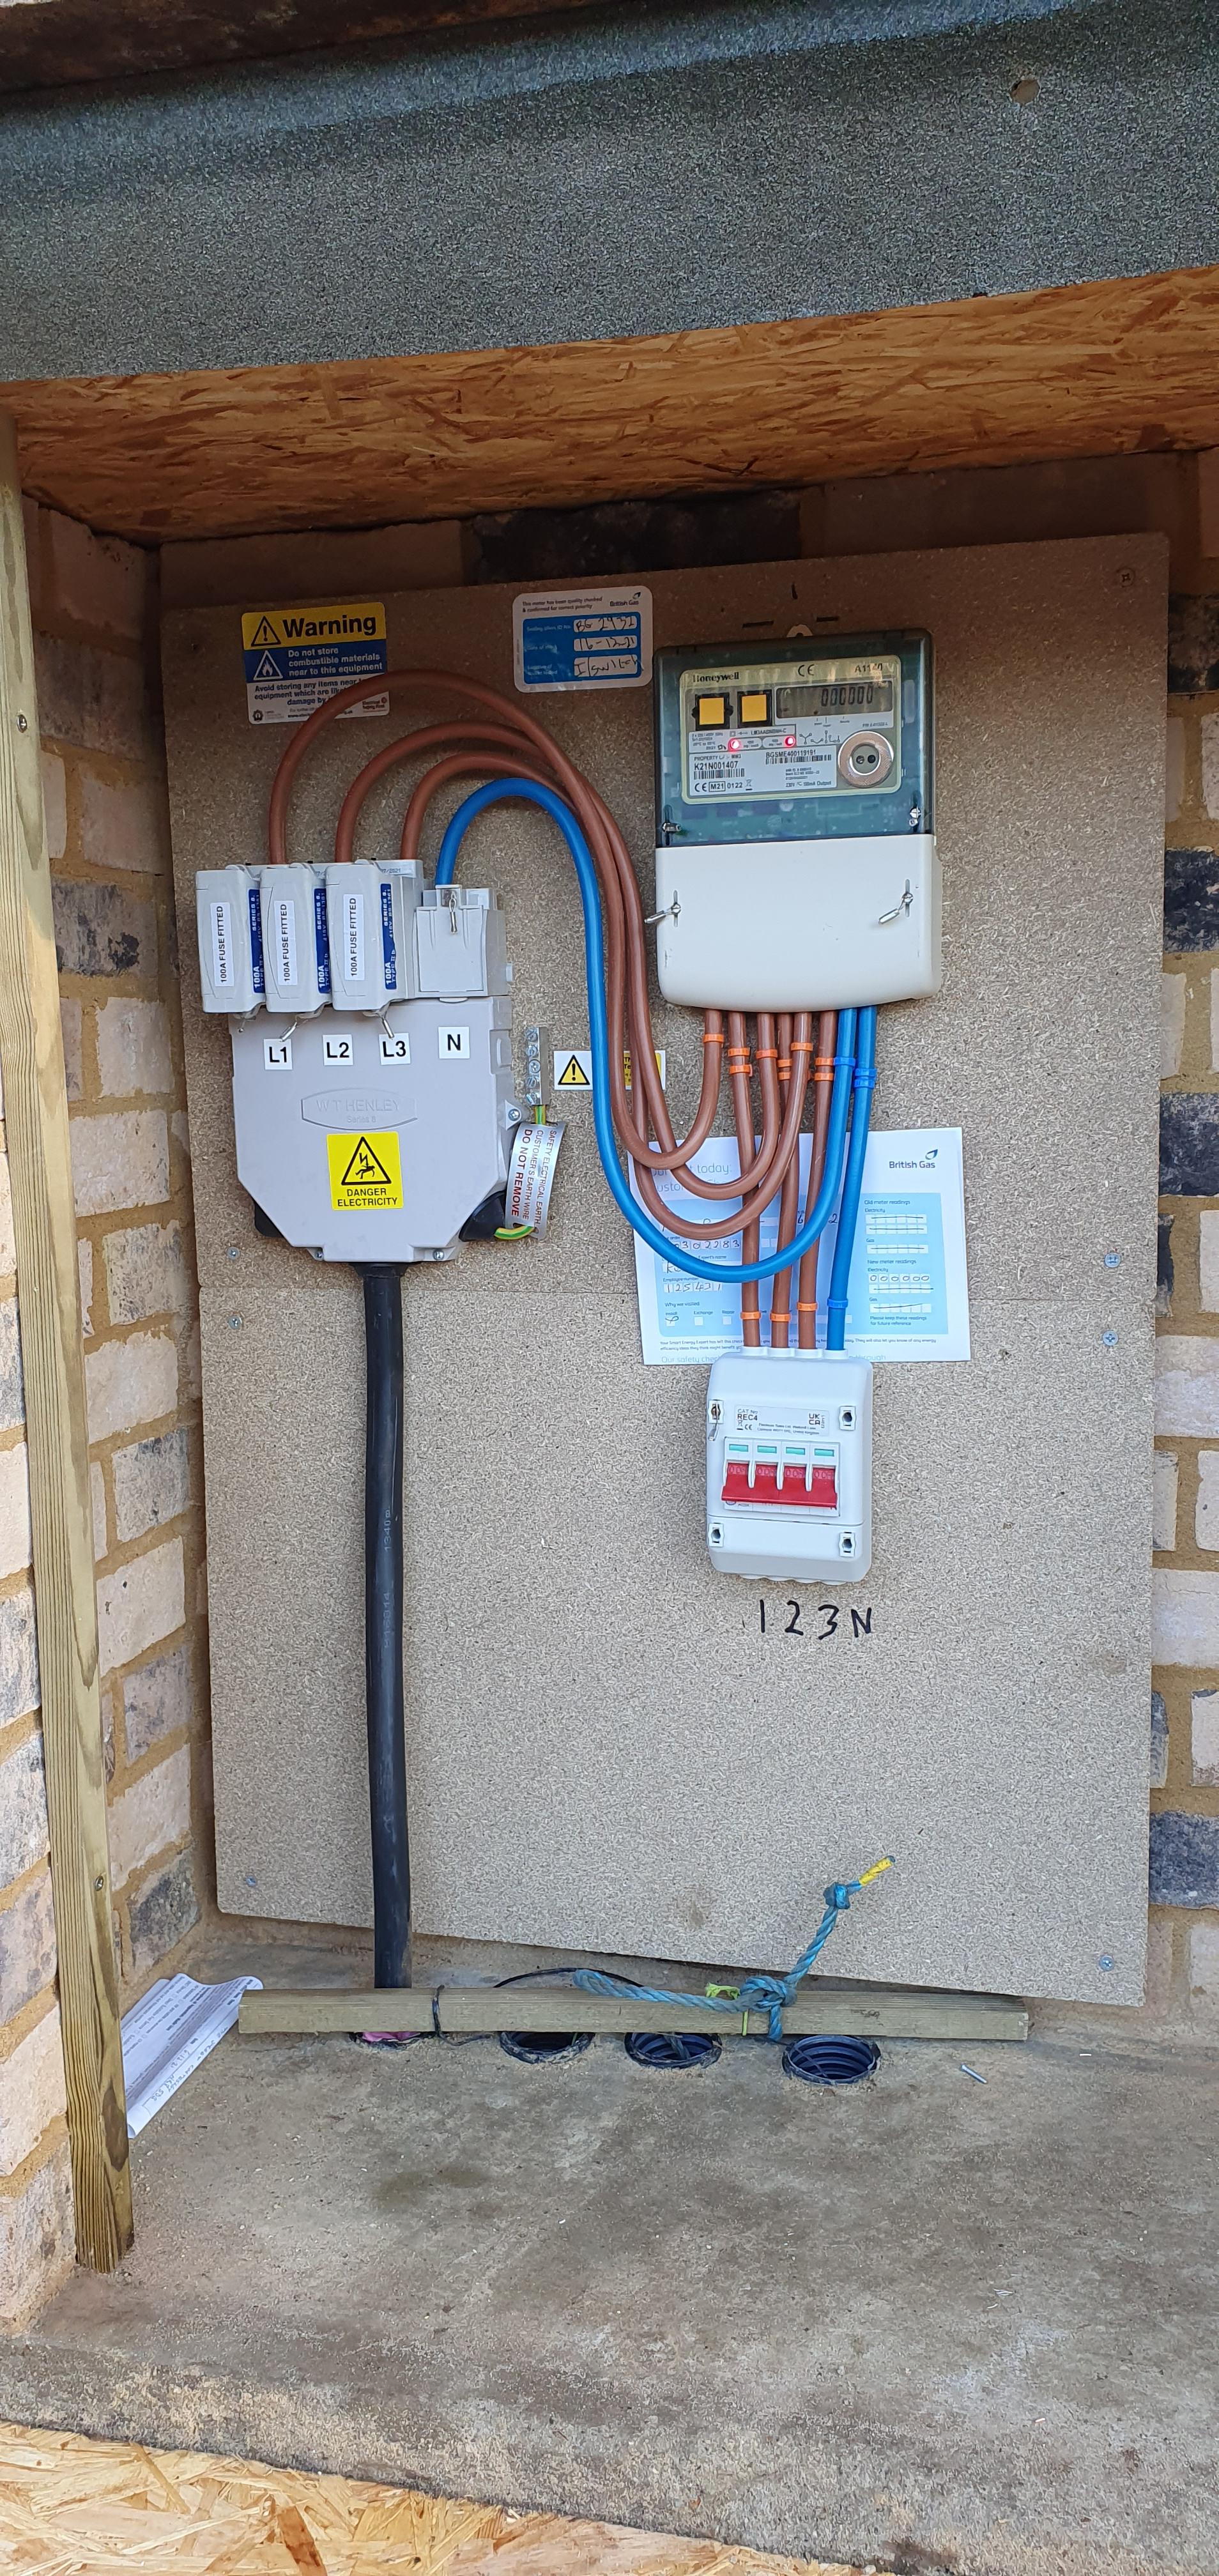
So, here's what British Gas installed... I've bought an Earth Rod with which to provide a TT earth at the Caravan. I've pulled 45m of 10mm 2-Core SWA Cable. I have a metal-clad 40a Switch Fuse Disconnector on the advice of my sparky for the sole supply of the caravan, I presume I can earth that to the PME? Assuming I'm only using one phase for now, which I anticipate will need to feed the Caravan and maybe a TBS for the house. I might want to fit a consumer unit in the Kiosk, but none of that is decided yet. Should I split the live of Phase 1 with a Henley Block, then split the Neutral with a second Henley Block? This would allow me to connect to the Switch Fuse to supply the Caravan and be able to add further loads to that phase later on if required. What size gland kits for the 10mm SWA? I've got both 20 and 25mm here. I have a plastic junction box to terminate the SWA in the caravan, isolating it from the TT earth that I'll have installed. As a reminder, my sparky is one of my mates, as I said above, he will be round at some point to check this all over, but I don't want to keep bombarding him with questions!
 1 point
 -
Sounds a pain in the arse. ? I have different roof overhangs on an elevation. No hip though mine ends as a glazed gable with big overhang. But you could do a angled soffit to make it work, that's what I have but mostly for the look, I didn't want pork chop soffits box ends.

 1 point
 -
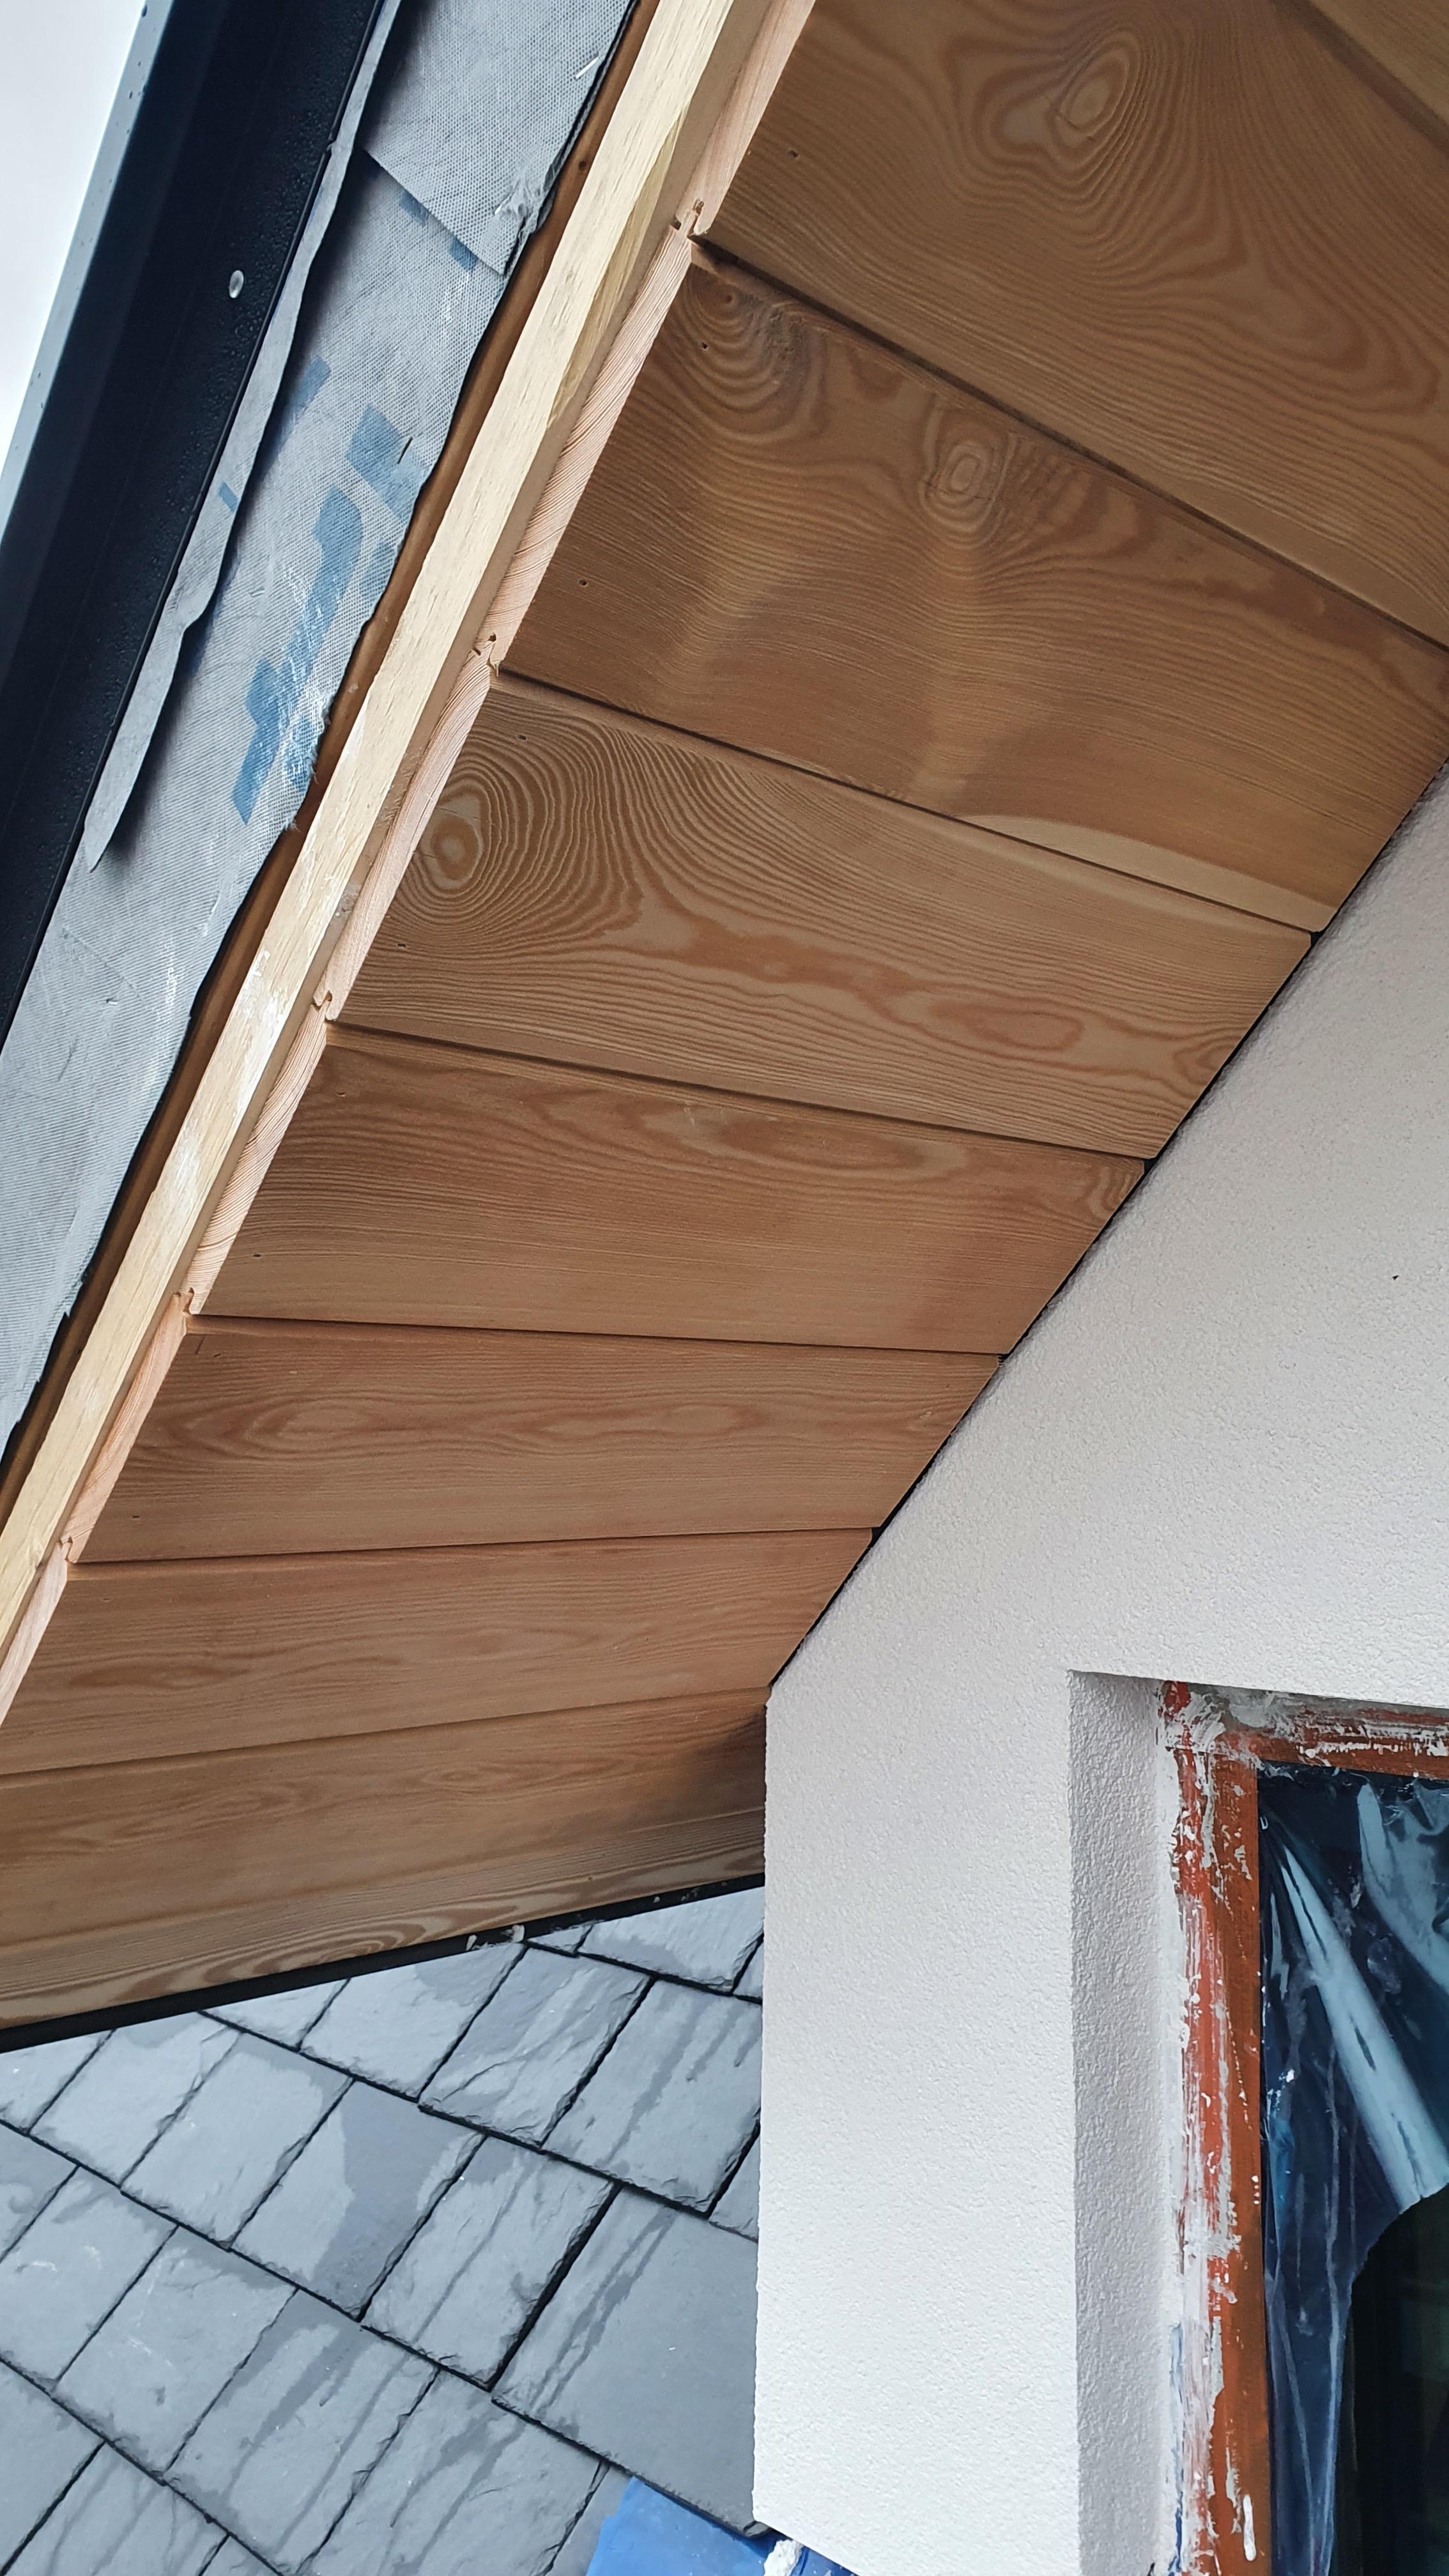
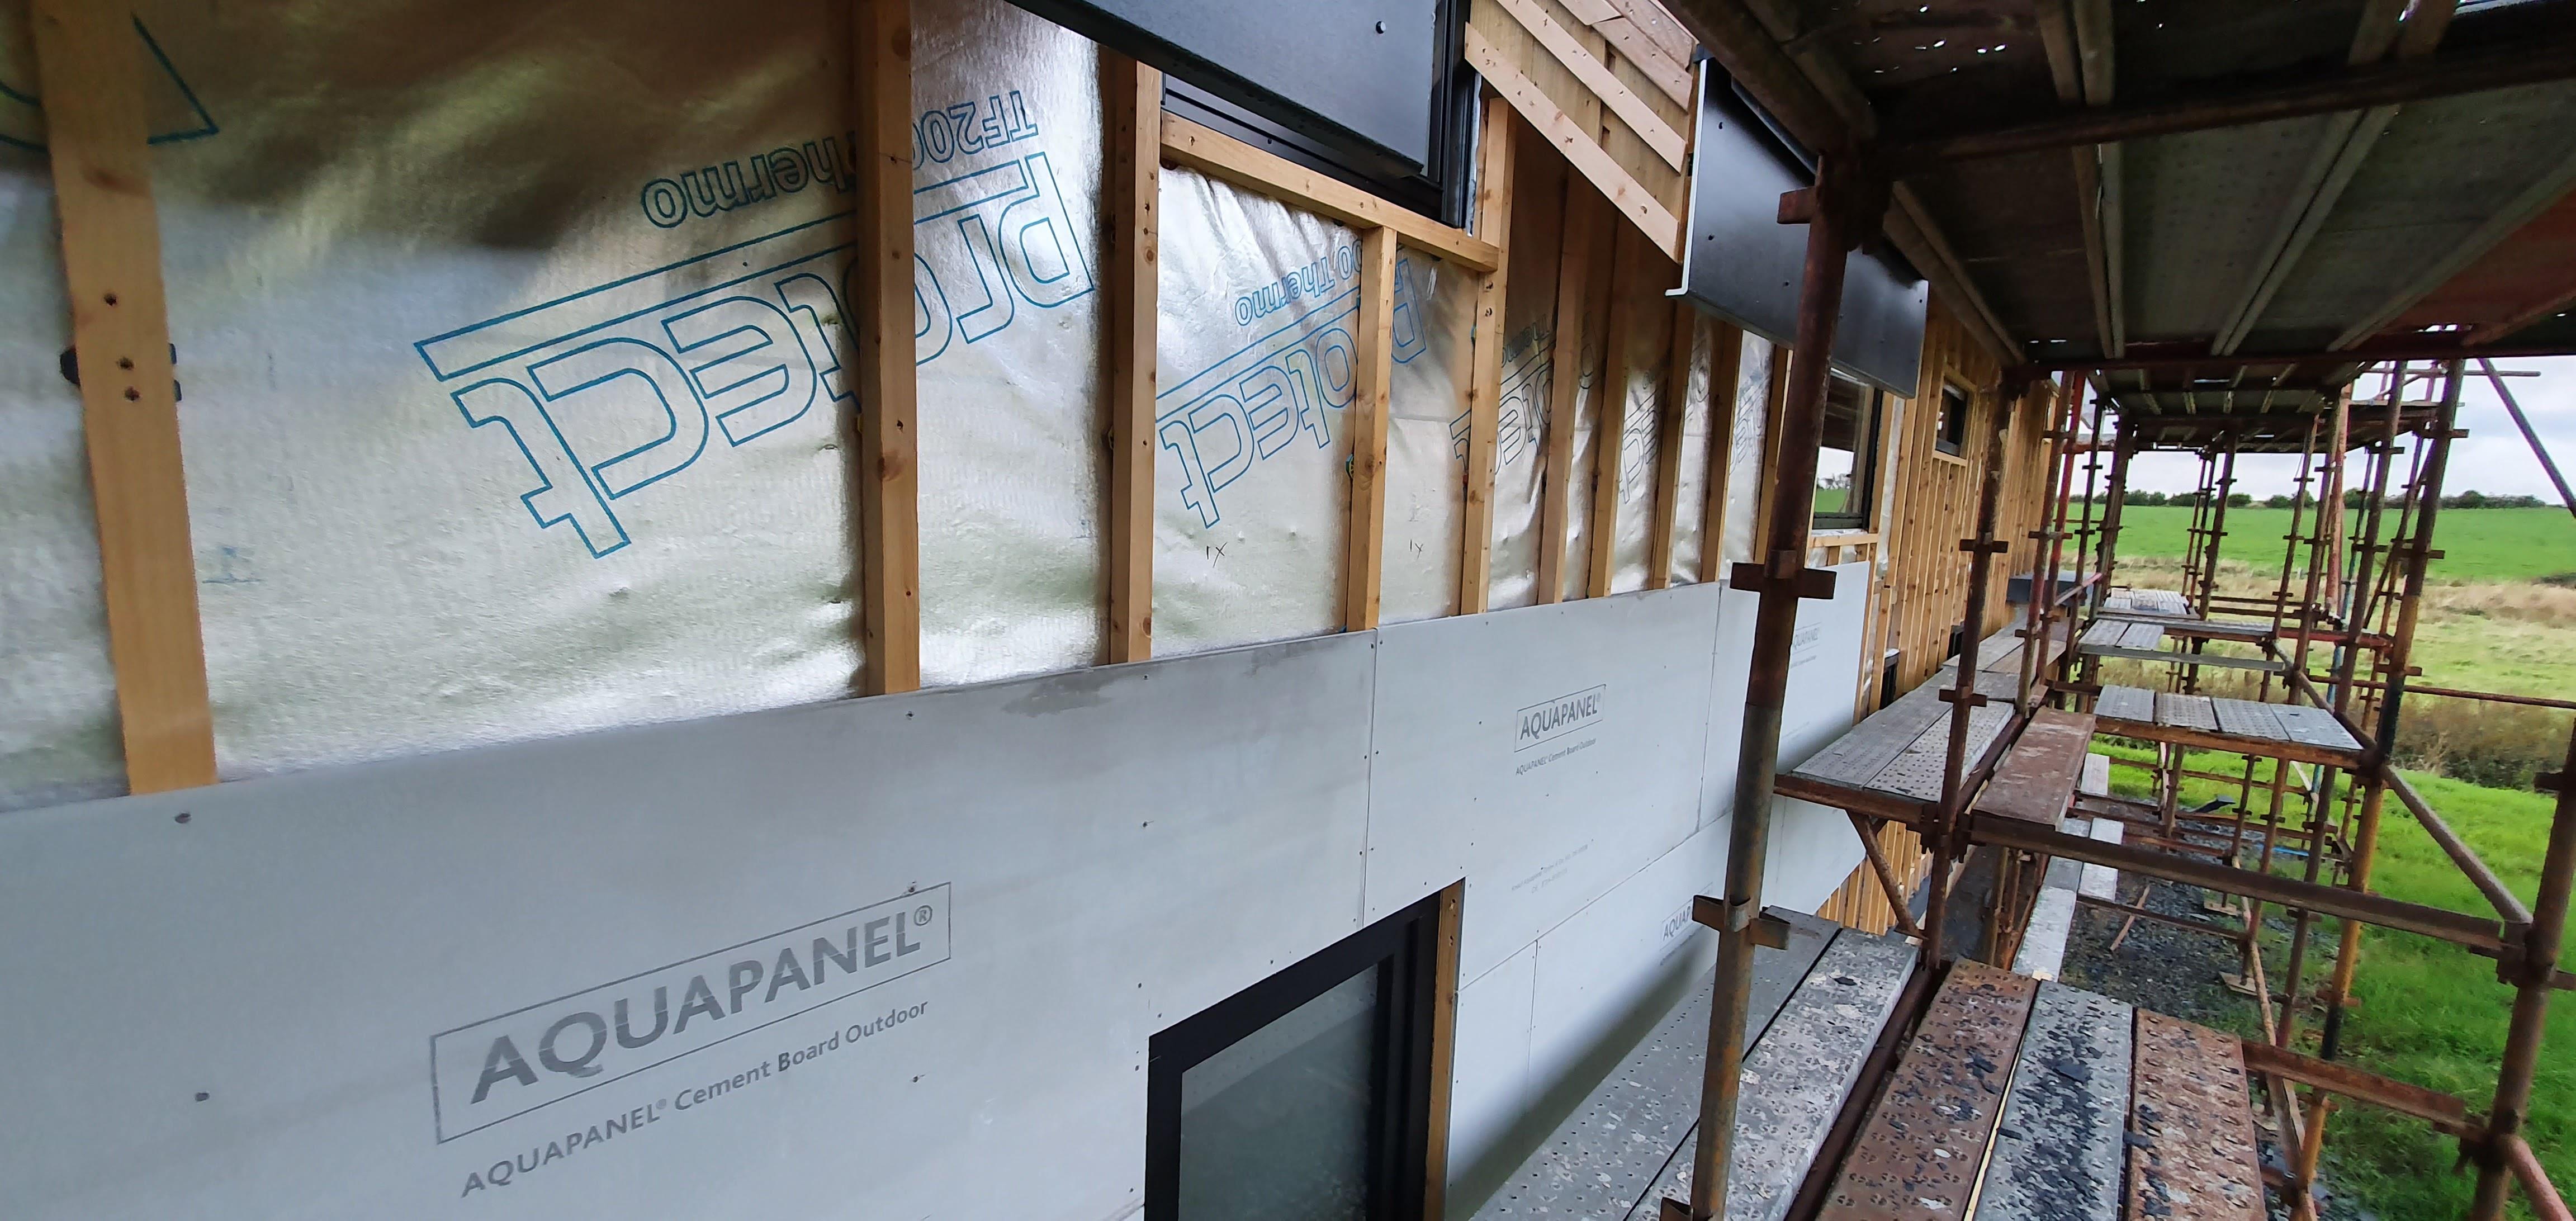
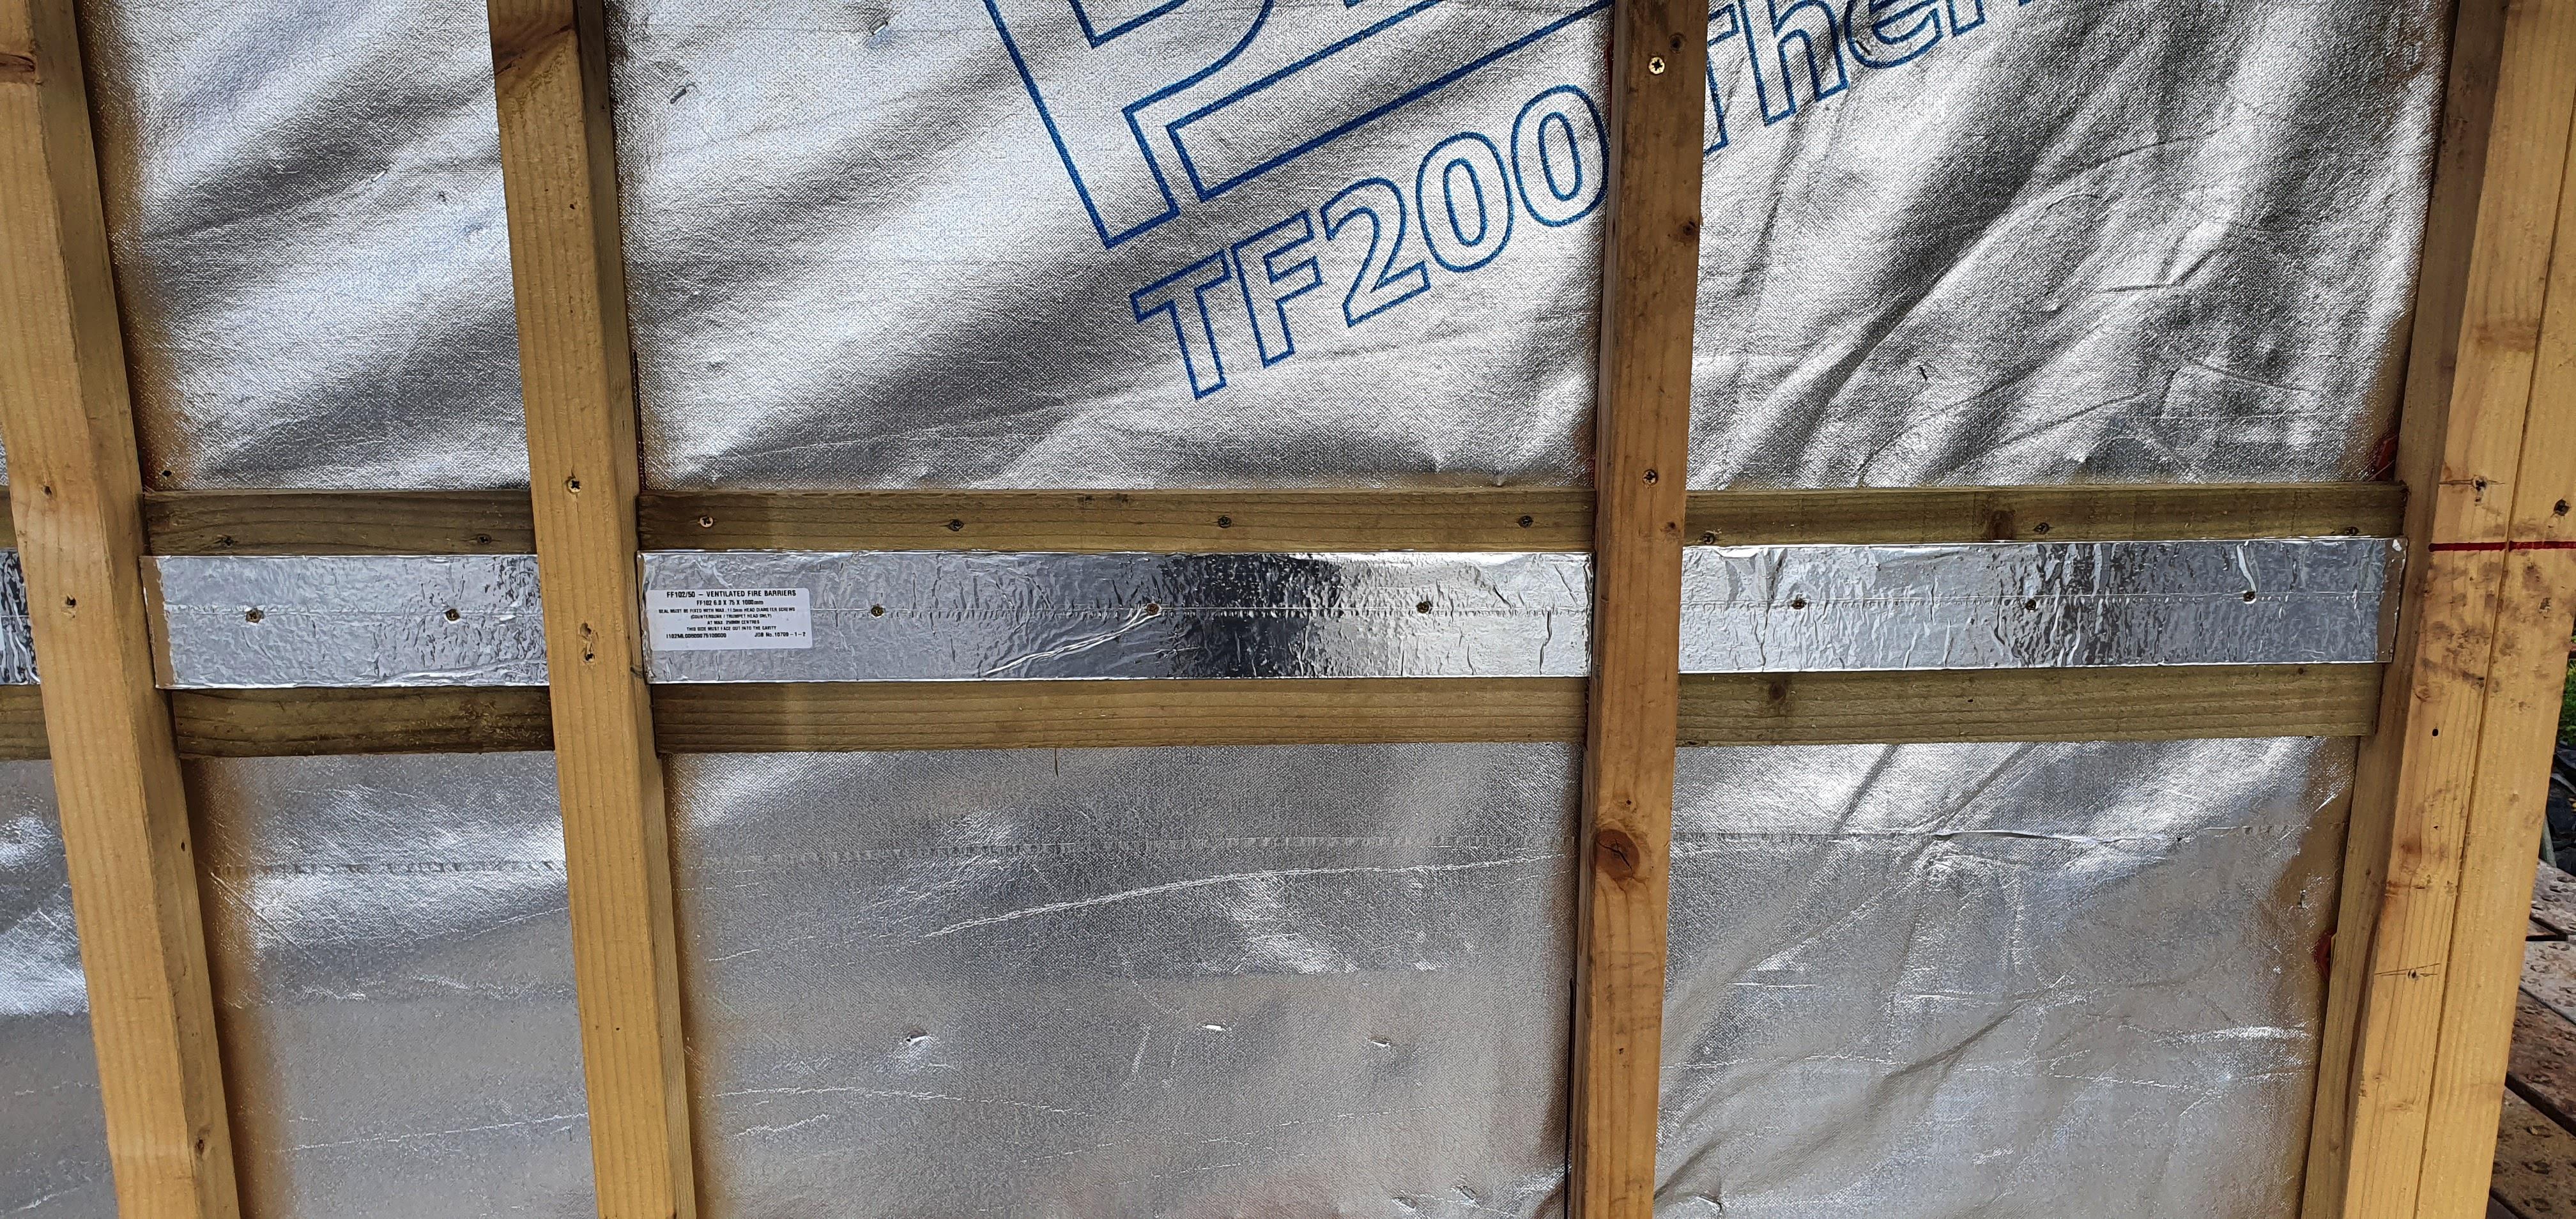
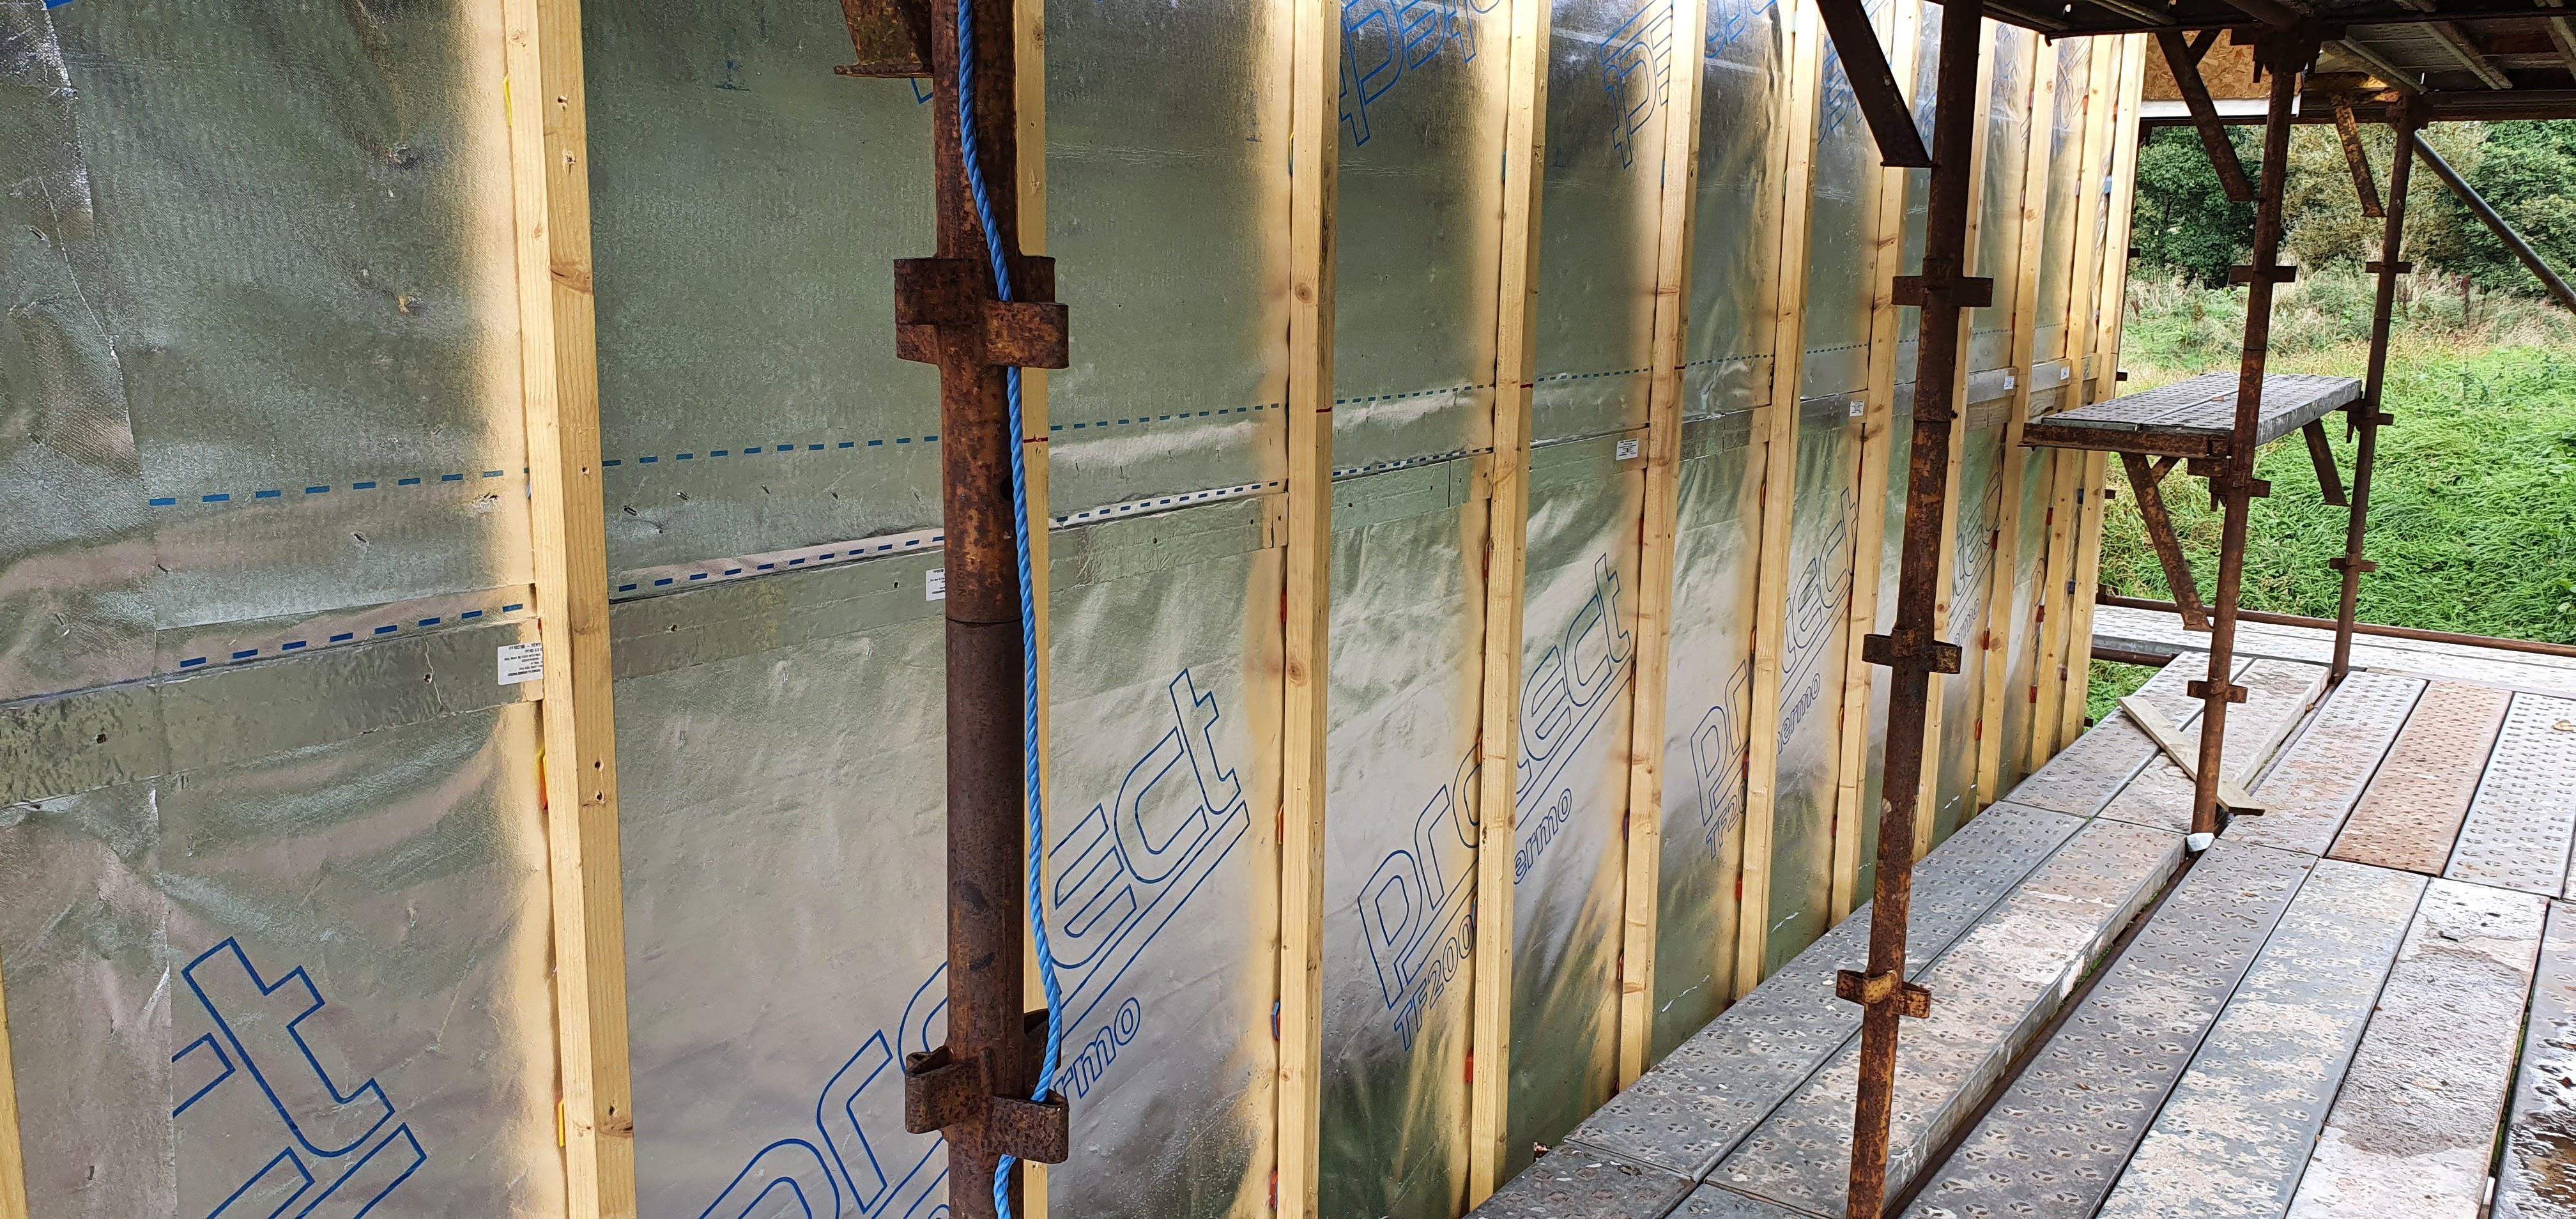
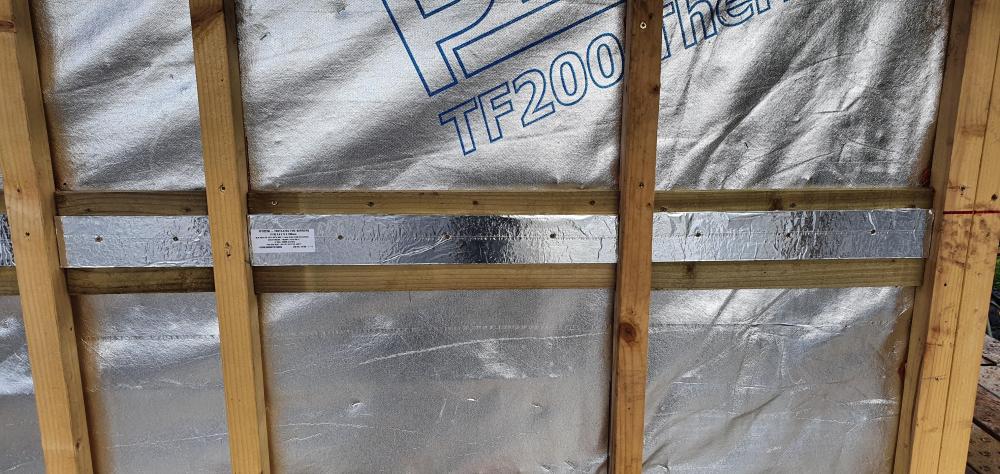
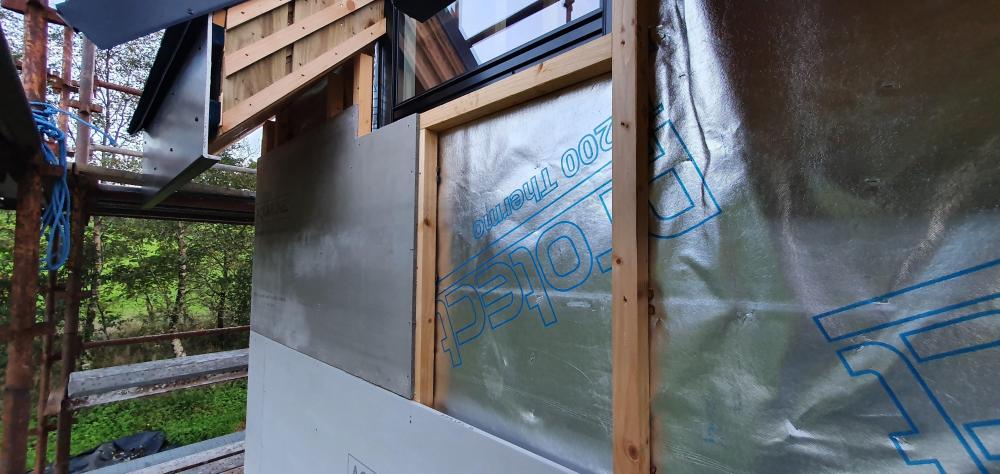
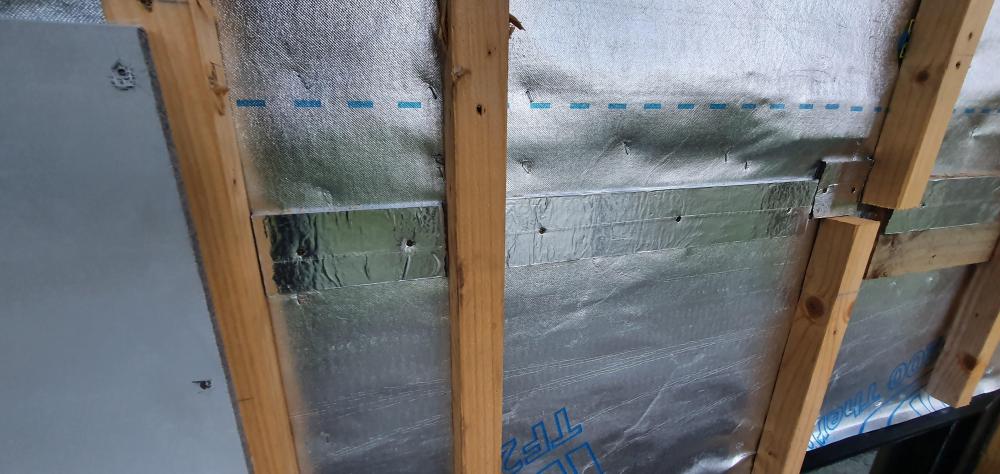
I spent considerable amounts of time trying to rationalise the rules as both the handbook and the images in it are not very clear. I'd visited others and found they had cavity barriers actually at the base of the cladding, between floors and also at the top of the ventilated gap- which seemed insane. In agreement with my BCO I have one single strip around my main house between ground and first floor, which would stop a fire in the ground floor reaching upstairs through the cavity theoretically but should also be stopped by the window firestops from coming in the cavity. I didnt need at the bottom as it's a slab and the didn't need at the top as it's a SIPS kit and I have fully vaulted ceilings so no loft space. I did add it at a point where I added loft space over the kids rooms as technically it's a new compartment. I didnt add anywhere the top of the cavity I don't need it as I dont have standard eaves where it could get into that loft space as its a SIPS overhang and solid. I didnt add anywhere around on my single story vaulted space as its double height but the same space so no compartment to transfer into. Of course all around the house horizontal travel is stopped by battens and where the battery wasn't straight I used Firefoam to fill gaps. I mounted the intumescent barrier straight on the kit where the void was small enough, but some areas the void was above 44mm and that was its rated width so I mounted on 22mm sarking to close the gap to within tolerance but maintaining the ventilation gap. some pics to help. You have to look close to see the barrier as it's silver. It's not in some pics, just battens.


 1 point
 -
BRegs give stated max lengths for ‘small bore’ waste runs, iirc max length 3m before upsizing to next pipe diameter etc. For showers I never run anything less than 50mm, as the air break in that size pipe allows free flow from the bubbles / foam creating an air lock, which happens in 40mm. The difference is quite significant tbh, where the water etc travels in the lower half of the pipe and air is free to travel over the top keeping things flowing very well. Its an odd phenomenon but it makes a big difference in my experience. Smaller pipes do slowly clog up from the soap etc coating the inside of the pipe, layer by layer, over many years of use. 32mm waste pipes from basins and 40mm waste pipes from kitchen sinks are the ones that suffer most, with pipes eventually blocking completely. What is found in the cut out sections of pipe are evidence of this. Quite unbelievable how bad they get. If you are burying / boxing any of this then upside by 1 in every instance. 40mm replaces 32mm - 50mm replaces 40mm etc. For wash basins I run 40mm up vertically and fit a 40mm bend with a 40x32mm reducer in it to come horizontally into 32mm pipe and then to the trap of the basin. Makes a huge difference in discharging water away from the basin.1 point
-
Make sure you have specified an exact model for MVHR/ASHP/Hot Water Cylinder etc. so the assessor can use actual efficiencies instead of just the defaults. Doing only this lifted our SAP score from mid-eighties to mid-nineties.1 point
-
The UK is pursuing a "green energy at all cost" strategy. By that I mean it looks almost certain the Cambo oil / gas field will not go ahead "because it's not green" so as the North Sea reserves continue to decline, we will increasingly be bidding higher to import foreign oil and gas in a diminishing supply market. But it's okay, we are not the ones causing this as we refused to take any more out of the ground. Imho we should push ahead with Cambo on the "energy security" principle, while still pursuing the drive to cleaner alternatives.1 point
-
You will need a switch fuse to connect to the caravan, you need one with a metal enclosure to take the gland of the SWA cable. Terminate the SWA at the supply end but at the caravan end, insulate and do not connect the SWA (use a large plastic stuffing gland) and connect the caravan to a TT earth. Get a door on that cubicle, the meter and it's connections are not waterproof and it would not surprise me if BG refuse to connect a meter without a door on the cubicle.1 point
-
So all of the ICF quotes are in. I've tried to standardise them as much as possible, but some have interesting notes which I'll detail below. Putting this up for others who might find it useful in deciding their supplier or working out costs, but also for any feedback or thoughts from the more experienced (that's all of you!). Our build is approx 220sqm footprint and 260sqm of wall. Durisol includes a 22% discount that they put on without negotiation Beco Walform have quoted for the 375 but say the 313 would save around £8K (inc vat) and only increase the U value to 0.165 (though the published value is 0.18) so much better value Nudura say that a U value of 0.24 is plenty and anything more gets really expensive Velox includes the steel that goes inside the wall. I've included a price of concrete at £100+vat/cbm. This is a little on the high side, but it gives comparison. None of the quotes include rebar (if required [except Velox]) - would have to wait for SE calcs. Can anyone suggest an amount (in £ or quantity) that they used on their build? I know that we'll be able to reclaim the VAT on a new build but were costing things as a worst case scenario. Labor to construct I'm guessing at 9 days for 1+1+me: 2 days build, 1 day pour (lower ground). 3 days build 1 day pour (upper ground). 1 day build, 1 day pour (gables, finishing off etc). Hope that helps someone and thanks for your thoughts!
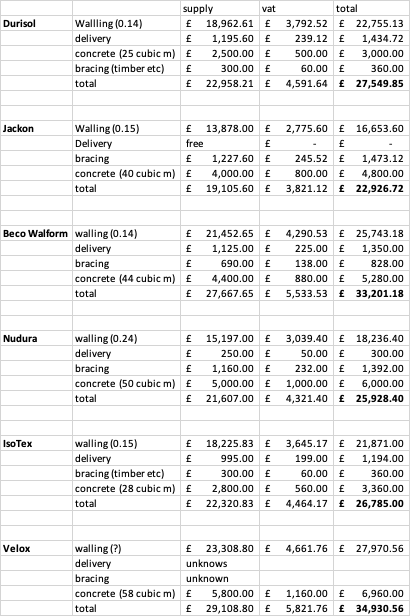 1 point
 -
Killer wot our0 points
-
I carefully avoided those words so as to keep the thread on point.0 points
-
My house is the the same as my neighbours house. Asked how many rolls if wallpaper they bought to decorate front room. 12 was the reply. Bought 12, decorated and had 4 rolls left. Told neighbour this and he said. So do I0 points
-
Your right. 7kwh. I'll try to be more of a pedant in the future....0 points
-
6 lpg bottles = about 4000 kWh annually which is excellent even for a mid sized 120 sqm house. Many here build much larger. I wonder if you would get an A EPC rating now with your improved PV, ASHP, MVHR setup?0 points


.jpg.c21f3ac78c9b7efd90cbdcb312744dc5.thumb.jpg.7adcad4c0e384f5ecd7d56b0618df6e5.jpg)