Leaderboard
Popular Content
Showing content with the highest reputation on 04/28/21 in all areas
-
3 points
-
3 points
-
Alpha e-Tec and Protec boilers are good for the price. They have also brought out one with a thermal store add on which is a combi with a gas saver and buffer if you can’t site a cylinder and still want large flow rates.2 points
-
2 points
-
We went for a self adhesive bituminous system that was laid under the slab and then lapped over the footing and stuck to the ICF walls all the way up to ground level. Comes guaranteed. 100mm perforated perimeter drain and back filled to ground level with clean stone and geo-membrane. We didn't do anything else. The best waterproofing is keeping water away from the building. Drainage around and under the slab is essential. You just need somewhere to drain to....2 points
-
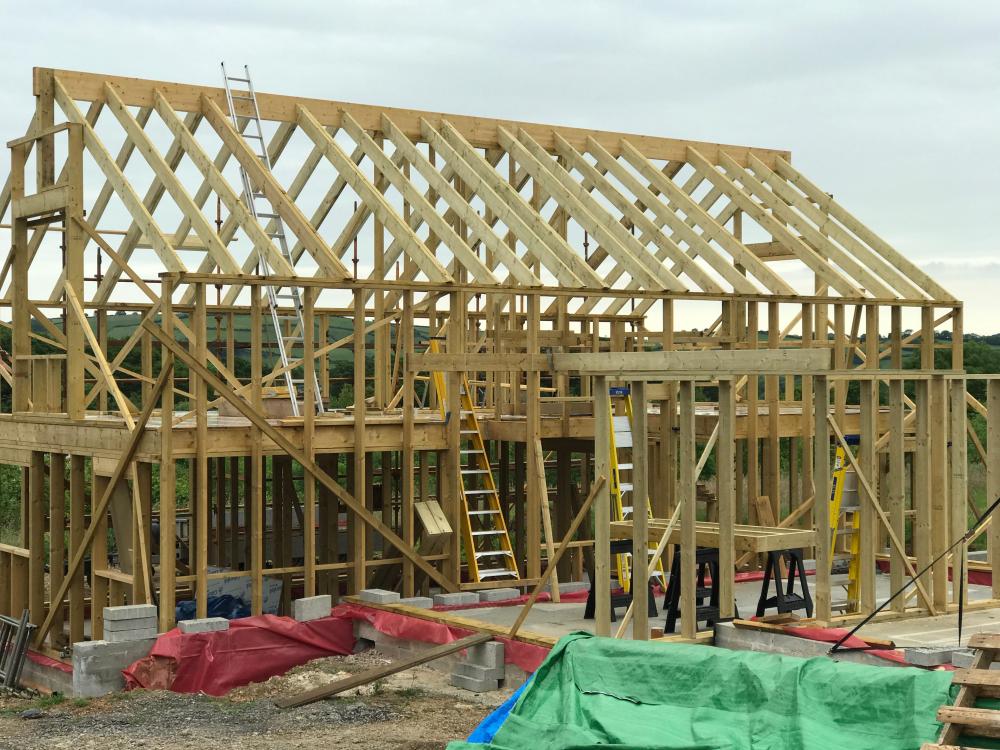
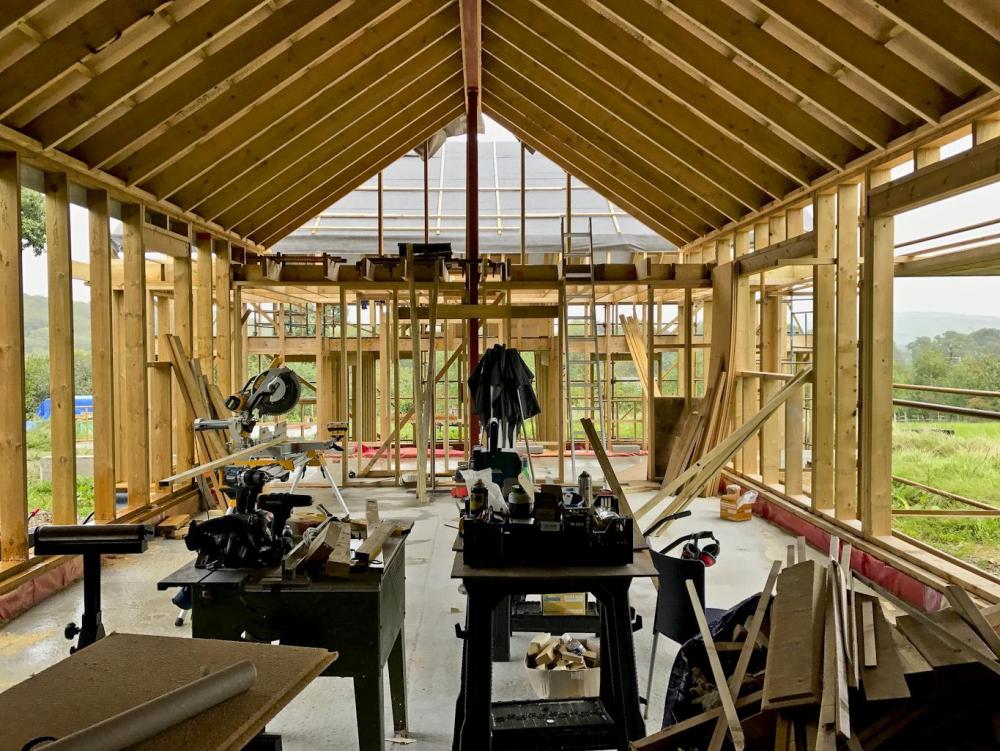
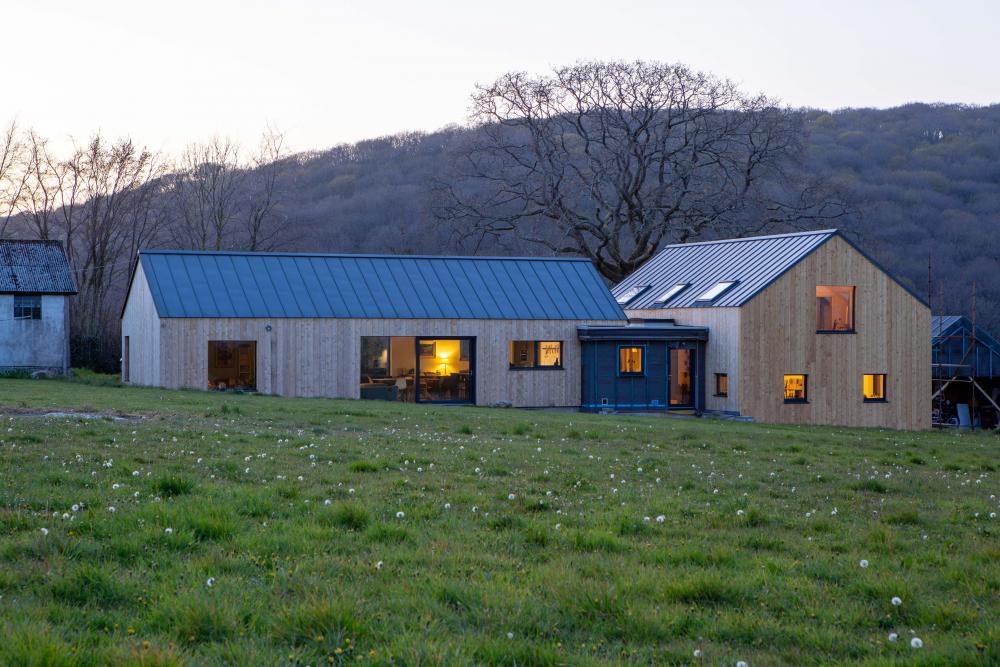
Hi @PeterTweeter Glazing we used Internorm for the slider and Kastrup for all other doors and outward opening top hung windows. All triple glazed, timber and aluclad. Velux 3G roof lights.The fitters were awful and a lot of the glazing was replaced because of roller marks. PM me if you want the suppliers name. Tools were Dewalt DWS780 Mitre saw, 305mm. Makita 18V power tools, impact driver, drill, grinder, jigsaw, multi tool and the best one the DHS680 circular saw, just brilliant. Also purchased a Senco DS5525 for fixing OSB and plasterboard. Great tool just a bit too heavy. Whole building just screws except nailing strip on metal roof. Finally a table saw, ancient but with sharpened blades has been really useful for the Cedar cladding. All tools faultless. Tata was straightforward for me though many others had difficult communications with them. At the time the product was about £25 / sqm which suited our budget. Over 300sqm required. The workshop became the kitchen - dining.2 points
-
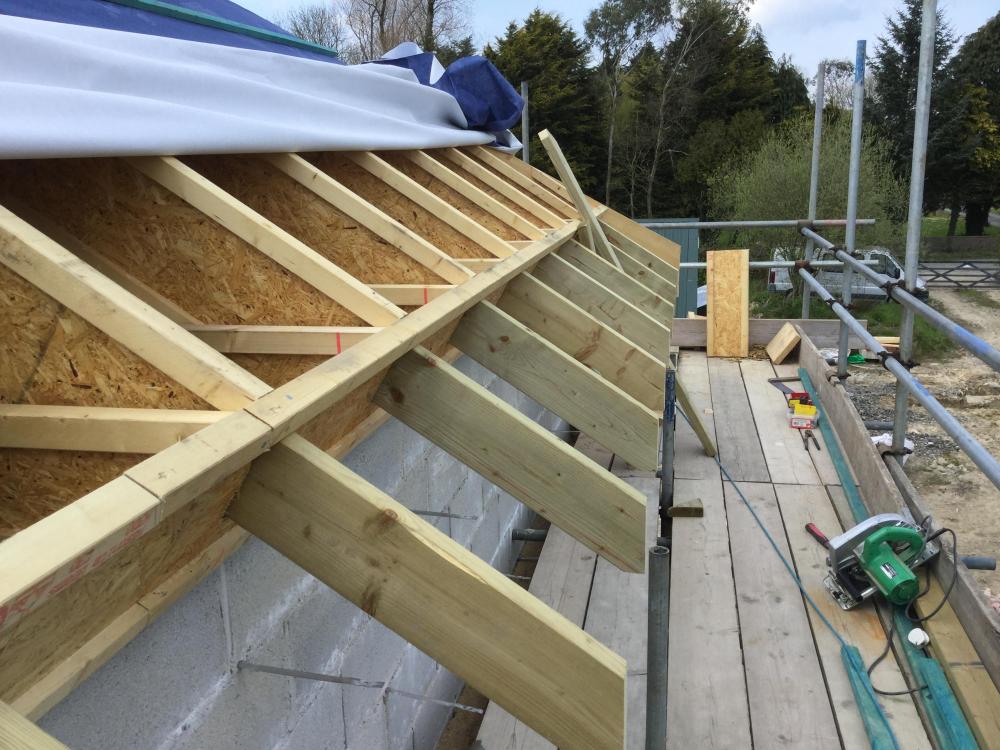
Over the last month we've spent our time removing bits from the barn that will either be returned, replaced or disposed of depending on there condition and the LPA requirements. This means that the yard is filling up so deliveries and other storage is now being put in the fields. That's okay with a very dry April, might be more tedious if we have a very wet spell. I removed the roof from the barns where there was a low ridge height, but that also included the insulation (lucky piggies), rafters, joists, wall plates, lintels (angle iron), gutters and fascia boards. This resulted in a number of bruises from hammers, crow bars and wood. All when they moved unexpectedly, luckily being a weak woman the crowbar was not much bigger than a pencil so only gave me a small bruise. If it had been one of the big ones I would possibly have ended up in A&E. I don't think I've ever seen so many nails. Being rural we've been able to burn wormy wood and the rest I have chopped up for the wood store, the insulation has been stacked along with the roof sheets ready for the future workshops and garages. Once hubby has a dry and insulated workshop he will never come in the house ? I'm also very glad of my work factory boots with steel toecaps with the number of times I've dropped things. It certainly looks very different now, lovely and light. We have left the shed at the end intact as we are going to use if for secure storage and tea room for as long as possible. Ultimately that will be our utility / plant room so we won't do anything until we have to. The back of the barn had an overhang which has been removed, this was pretty low so although it was included in the dwelling dimensions we decided not to bother as we were not allow to increase the ridge height enough to make it useful. This is where all the drainage is going to go, the internal walls have been set up to fit with the current window openings, not always central in the room, but good enough and easy and meets the LPA requirements. We do need to create one more window opening for the family bathroom. This back wall is to go up 1 block to allow for lintels, although the first window is quite small so the lintel is only the thickness of a brick so it will be pushed up so that the top of the window is as high as possible. This side of the barn is the south side, unfortunately, as it faces a 45 degree 12' bank then the end of our land so it doesn't have an exciting view. I'm planning on gabions, but at 24m long the cost might be prohibitive for now, a future project. In the meantime I'm clearing the bank of weeds, dead trees, shrubs, rubble and a number of tennis balls lost there over the years. Hubby has been working on the L part of the barn which had a cement fibre roof, which possibly contained a small amount of asbestos, and a metal frame. The roof sheets are now cleared, double wrapped and stacked ready for the company to collect. The metal frame had to be cut up in situ as it was fixed so firmly, but that is now down, cut up and gradually going to the tip. It is much easier to destroy things with crow bars, saws and grinders, when we rebuild we shall have to be much more careful. During May our plan is to start work on rebuilding the external of the ensuite / wardrobe room. We will level the existing blocks, then add another block to the top as well as the window lintel. As we won't be replacing the roof for a while we will leave the wall flat until we can measure the new pitch accurately. The unwanted internal wall will be removed and the floor dug out. This will be done in 2 stages, firstly the floating floor to level with the rest of the barn floor then the lower floor. The floating floor is all we are doing at the moment as the whole barn floor needs to be dug down to install insulation and UFH and we will do that dig out in one stage when we are ready. We will then follow the same process with each 'room' on the low side of the barn. How long this will take really depends on all the other demands on our time. Once this side is done and all unwanted walls knocked down then we will start on the other side and follow the process all over again. So far progress has been pretty obvious, and as we have a nearby footpath we have provided lockdown entertainment for many of the locals who like to question us and comment on what we are doing. Since last week and less restrictions the number of people has reduced by 90%, something that I'm pretty glad about. I've had problems with images today so I've just added them all together. I'm still chasing for Building Regulation drawings, something that will soon become more urgent. Thanks for looking and feel free to ask questions. Jill2 points
-
Hello I had the Viessmann 200w installed recently and, as I wasn't able to find out loads from the forums in advance, thought I'd post a few initial impressions and 'gotchas' here that tripped up the installers a little as part of the installation. This was the most recent version of this boiler with the colour touch-screen (B2HF/B2KF). First gotcha, it doesn't come with a 'fittings pack' - there are several types you can get and whilst it states this clearly on the Veissmann direct website, this seemed to be news to the installers, and also the merchants who supplied the boiler. So our first install left us with a boiler hung on the wall but not connected whilst we waited for the fittings pack to arrive and then be installed. Second gotcha, it doesn't come with opentherm. I thought this was surprising as I believe the 100-w does, and I was hoping to use this with the Drayton Wiser system that we have installed (which I think is excellent, also). Third gothcha, there are three 'modes' of operation that have to be set during the commissioning process, and if you want to change the mode you have to recommission the boiler. However, you can do this fairly easily with the app (ViStart for the installer, and ViCare for the user - you can download both from the Google Play store). The three modes are 'weather compensation' mode, 'continuous operation' mode and 'room temperature dependent' operation. The second and third modes don't seem to make any use of weather compensation - and if you set it up in weather comp mode and then connect a stat, the stat won't talk to the boiler at all (lots of head scratching here from our installer). So, to get this to work with our Drayton Wiser system we currently have it connected on 'continuous operation' mode; there is then a setting to turn off continuous pump operation when there is not a call for heat, though oddly in this mode even if there isn't a call for heat there is a minimum flow temperature setting (default at 20'c). I am going to try and switch it over to room temperature dependent operation at some point to see what this does (my guess is it'll only work with a Viessman stat), but for now it is working fine - the boiler is firing when there is a call for heat and not where there isn't. Fourth gotcha, we've got a fairly large detached house and had previously had an older Baxi boiler which clearly had the pump turned right up to maximum. The Viessman has a variable speed pump, but I found that I had to adjust the minimum pump speed setting upwards somewhat to get the far-out radiators warm at the same time as the rest of the house. Fifth gotcha, Viessmann had apparently specified not to use inhibitor with the boiler at all. Our installer thought it was something to do with rubber hoses perishing. At first I was so surprised at this (as was he) that I checked with Viessman technical who confirmed this was the case. Apart from this, it seems a good boiler so far - it is keeping us warm, seems pretty quiet, and the App has a few nice settings e.g. being able to see exactly how much gas (in cubic metres) you use on any given day. Quite astonishing seeing this over the recent snowy weather we've had over the last couple of weeks. It's also nice seeing the modulation stats, as that was the main draw for us for this boiler, that it modulates very low. An interesting setting seems to allow you to limit the amount of time the hot water runs before cutting off (and then I think set a minimum wait period).... potentially handy for anybody with teenage daughters?!!1 point
-
So Series 10 Episode 1 was shown tonight. Below are my show notes. Location: Hertfordshire (Potters Bar) The Self-builders: Bob (retired firefighter) & Wendy (chartered accountant & writer). Experienced with renovations & an extension. Eight children. Setting the Scene: Oct 2016 – Charlie visits to meet the self-builders & review site and plans Secured planning permission for four bedroom chalet bungalow on back garden plot. Nominal value of plot £350k. £350k build budget. £950k expected value for completed house. Targeting completion in 12 months Eco-features: Solar panels and rainwater harvesting Impressive westerly views towards green belt – Charlie suggests changing ground floor layout to take advantage of this with a large kitchen diner with bifolds in west elevation. Suggests replacing two small dormers with large, long dormer clad in zinc The Build: Aug 2017 – Groundworks underway after approval of revised plans. Ridge height too high so site lowered by 2m. Piling and groundbeam (£30k) required. Muckaway cost £10k. Total groundworks cost £50k. Block & beam floor installed. Timber frame (standard 140mm with OSB sheathing) erection commences. Posi-joists. Kingspan Kooltherm insulation, Protect VC foil air-tightness layer, Protect TF200 Thermo external membrane. Sept 2017 – Roof timbers erected. Windows (look like Aluclad uPVC) being installed. Oct 2017 – Charlie returns. Expecting completion June 2018. The Visit to Another Self-build: Larch clad four bedroom barn style home in Loughborough. Double height hallway. Power floated concrete floor. The Build contd: Dec 2017 – Roof tiles & solar panels (12No) installed Feb 2018 – Brick skin has been (miraculously as we never see a single brick being laid) installed. Plasterboarding ongoing. Apr 2018 – Polished porcelain floor tiles being laid. Decorating with help of family & friends (to save v £6k quoted) May 2018 – Plumbing. Kitchen fitting. Self-builders move in in late May. July 2018 – Charlie visits completed home (called Luxton Lodge). Double height hallway with skylight above. The final figures: Actual build costs £350k including VAT but with some landscaping incomplete giving total cost of £700k. Bob put in a lot of work himself (shown fixing cladding and doing plumbing).(However, why does this figure never include design or the other project costs? Actual valuation of £1.2M (2018 prices). Impressive figures but as usual with these backgarden plots, the reduction in value of the original house never seems to get mentioned.1 point
-
Ask him to put flexible hoses from the unit as @dpmiller rightly pointed out. They will make a big difference. Make sure they’re suitable for the application though, eg full / large bore not the ones for hot and cold water which you won’t get a pencil through1 point
-
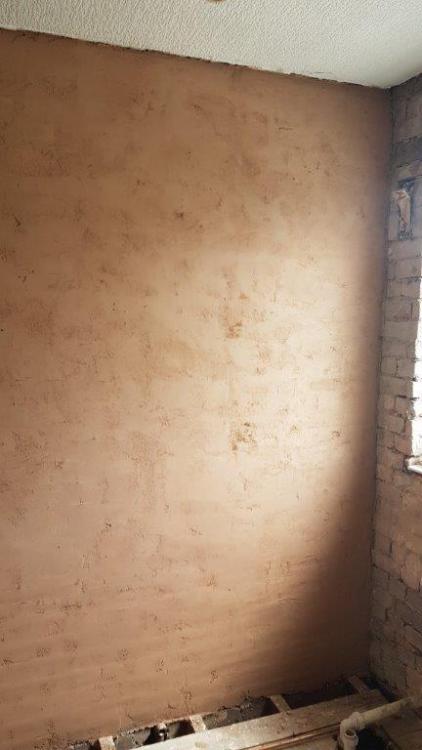
Don't need to skim but should use a primer. Do not use PVA because it can soften if it gets wet. Normally the adhesive co will recommend their own primer. BAL adhesives have a pretty good rep.1 point
-
I build using feel, instinct and my eyes. Understandably that leads to many cockups, so any kind of buffer is of high value to me!1 point
-
1 point
-
1 point
-
Hi Bruno I would insulate the pipes as much as possible. It will do no harm and only help. I wouldn't worry about industry standard, only a better standard. The only thing I would say is to avoid insulation around electrical parts like the box on the port valves next to your tank. Marvin1 point
-
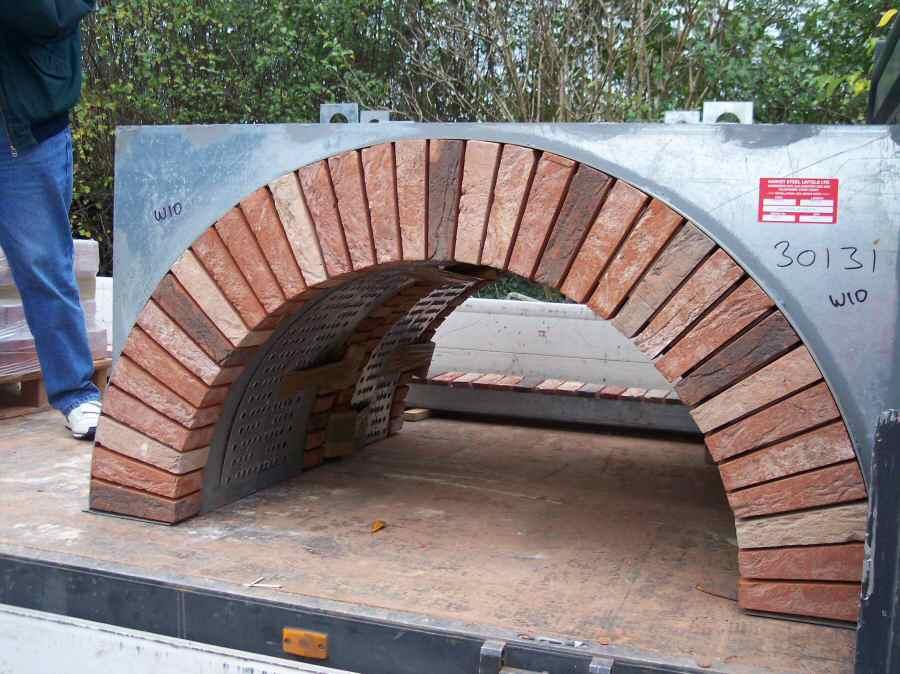
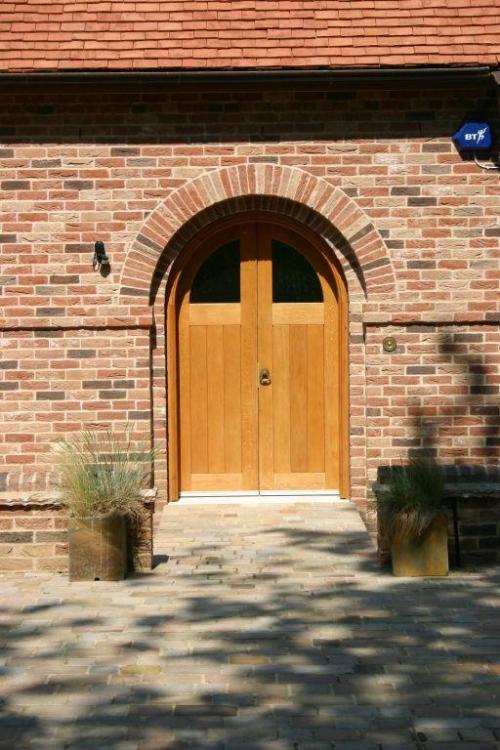
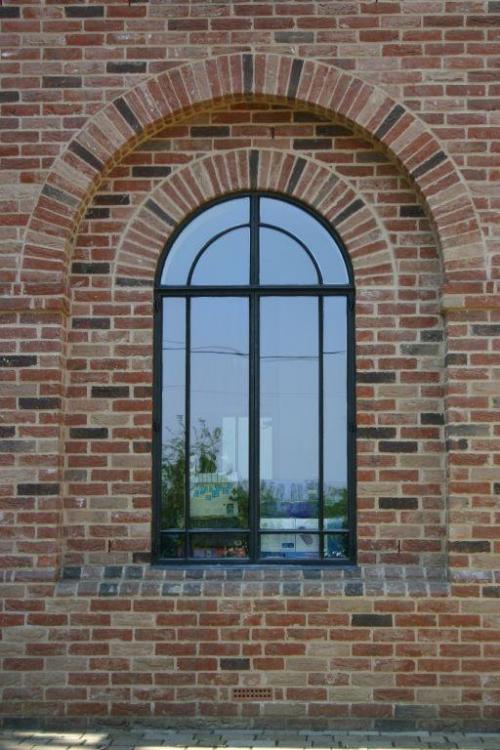
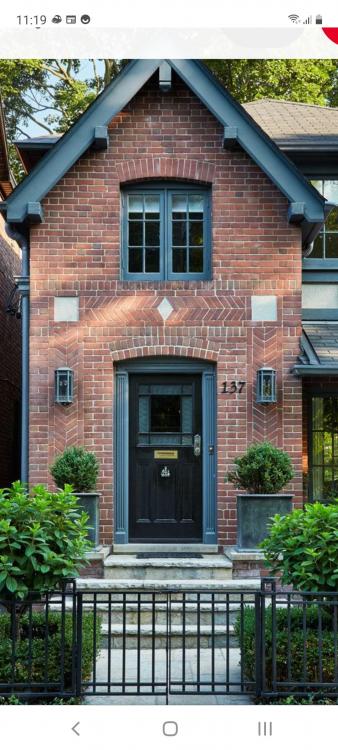
Personally,I quite like a bit of dental and dog toothing,in the middle course of a 3 course projection,in a contrasting brick.1 point
-
Sadly no digger on site. But today’s rain might soften it so we can dig a small pit to see how deep the problem is.1 point
-
I have a jcb with toothed 600mm bucket which I raked the ground with, on really hard ground I reversed with the front bucket, teeth down and front wheels in the air. No rotovator would have touched it.1 point
-
1 point
-
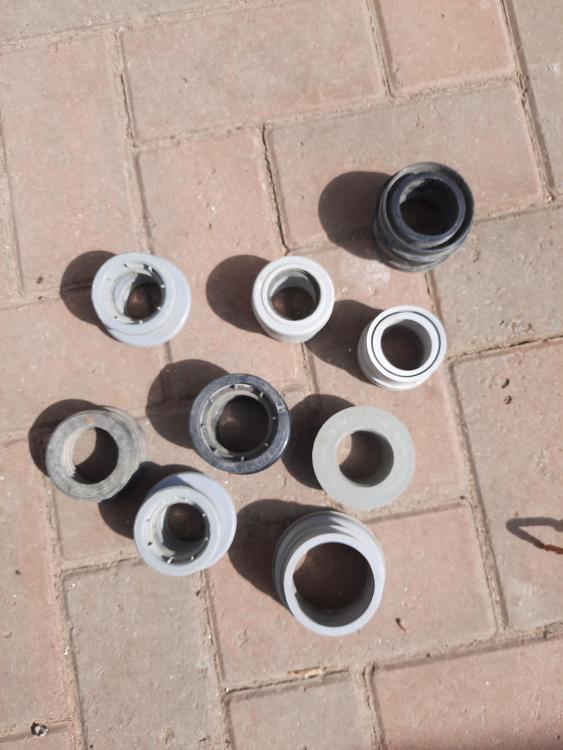
Yes you can, you just need a 40mm boss adaptor. You can use a rubber boss or a solvent weld boss.1 point
-
I inherited a similar size petrol rotavator. Useless, it just skips about on a hard surface. I'd rent something bigger. If you still have an excavator on site use that to dig up the top layer.1 point
-
Andy is quite right! And rubber (or what ever they are now) seals, perish over time (ok over a shorter time than solvent weld pipes would) and would leak first. Embarrassed to say but remember the waste pipes suspended under floors will sag unless properly supported... ? Marvin ( I know I failed)1 point
-
Solvent where you can't access is what I did - it's so easy to use. Just make sure you know that the pipes for push-fit and solvent are a different size. Then where we have a sink or whatever it's standard McAlpine waste fittings which couples onto the solvent weld that's behind the wall.1 point
-
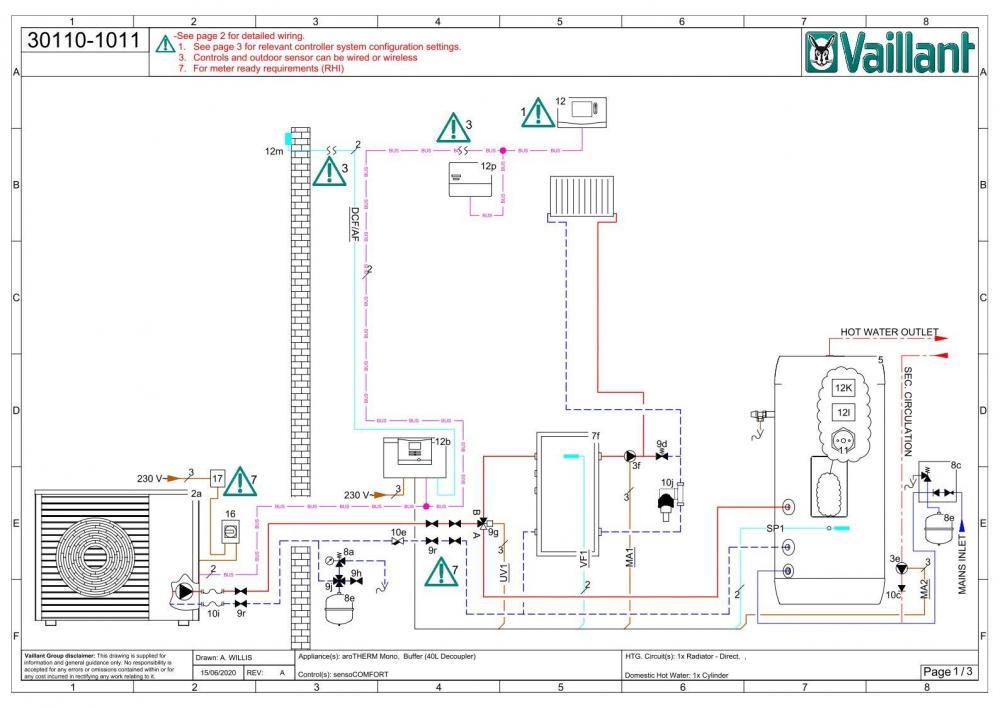
Assuming the heat pump is bolted to a frame, and the frame is bolted to the building? Then; These for each of the 'feet' of the heat pump and go from there. If that reduces but does not solve the problem, then look at similar to separate the frame from the building. and; This stuff for insulating anything that doesn't need any regular disassembly.1 point
-
Thanks for the heads up, that is very valuable information for the masses For me a relatively complex, not cheap boiler which dictates that the rest of the system can just literally sit there and rot away minus the presence of an inhibitor chemical......? Not a chance!!! After 5 or so years the primary water will be like gravy, and then comes the likelihood that the subsequent high concentration of waterborne debris start to cause other early fatigue.....? Again, not exactly a strong selling point, sorry. Have you asked if there is a consequence of putting an inhibitor into the system? Warranty void etc / other?1 point
-
a couple of comments on this thread as I've done a lot of research for our basement that's being dug out as I type.... 1. sounds like you're only having 1 form of waterproofing and that's Type C (Internal membrane and drainage channels). Although that is possible to adhere to some BS number that I can't remember for a habitable basement you require 2 forms of waterproofing (although I believe @Bitpipe only has a single form so it is obviously doable). We decided against ICF for our basement as we feel that RC is easier to get waterproof as you can use Waterproof concrete and see the pour when the formwork is struck (Type B) and we're also going for an external tanking system (Type A) to get the two forms. When the basement was originally planned it was with Type B and C waterproofing but our groundworks company said that the Type A and B system is perfectly good and they're offering a 25yr warranty so I'm happy. also means we don't have to worry about internal drainage and gain a small amount of internal space (not that the basement is small) without having to have that drainage channel in the walls. having said that, the Type C waterproofing is highly regarded and for ICF it should work nicely. 2. our civil engineer also specified a foul water chamber for our basement toilet. this would've had to be 4.5m deep and the cost for just the chamber and pumps was over £5k and then there was installation to consider! after I found that out I asked them to redesign the foul water to make it all gravity fed and the toilet in the basement will have a macerator. a LOT cheaper! and macerators can also be fed by showers so maybe this would be another option for you instead of a deep chamber. one thing you didn't mention is if the basement is open on one side or fully underground as if it's open to one side then you should be able to use gravity as you'd be on a sloping plot.1 point
-
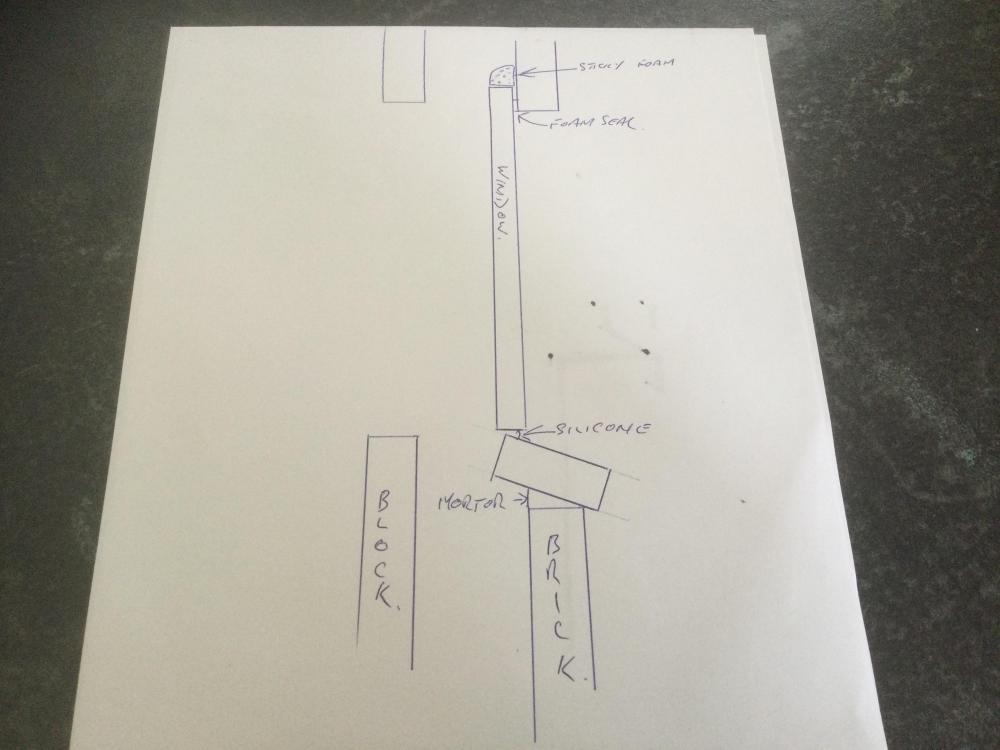
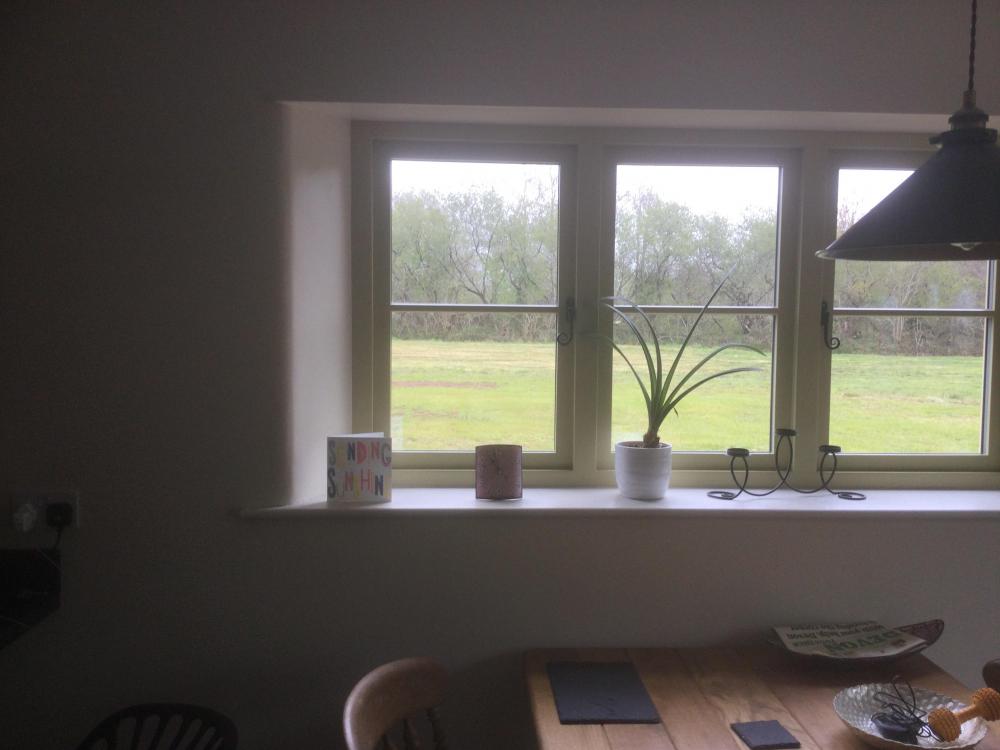
@crispy_wafer my windows are in “check reveals”, this means the windows fit against the back of the brick skin with a foam seal and held with stainless brackets and screws to that brickwork. The brick cill was built on an angled bed or Mortor then the window sat on it with a silicone seal to the outside. I also foamed the joint between window and brickwork. I also had angled reveals as the cavity is 200mm deep, this gives a nice cottage feel to the rooms sand makes the rooms lighter. Excuse the CAD drawing (crayon assisted drawing!!!).1 point
-
Made one of the best decisions of my life when I renovated a 1970's bungalow to incorporate disabled access throughout and whilst doing this insulated as much as I could at the time in anticipation of our retirement. We have lived here now for a couple of years with an MVHR system. Now with a grey water system feeding loos and/or garden and a solar hot water system - presently on trial - both run on photovoltaics. Please be aware I have designed and installed all these myself sometimes following convention sometime radical. I have been in construction for over 30 years. Happy to share my experiences if it helps. Hope to gain further knowledge about the ASHP system I am designing. Marvin. Oh and we have an electric car and happy to discuss the results of using that.1 point
-
Also I'd recommend getting a silencer for the extract side of the system, before the MHRV unit. I found it quietened down the vents to near silence.... it also provided another convenient flexible joint!1 point
-
We only had 68mm as the chap and no did it advised it and it only cost a few hundred quid more. It was more due to the flints in the ground and farm traffic over the top and not wanting to get a leak I the future1 point
-
32mm is more than sufficient, unless you planning on filling a swimming pool, running sprinklers and having a shower at the same time.1 point
-
1 point
-
1 point
-
1 point
-
The key thing about having an island in a kitchen is segregation of functions and a clear traffic route. In our house we had the business end down at the gable- oven, hob, prep area, later. The everyday stuff, fridge sink, kettle, toaster etc were at the other end. This meant if you were doing a cook up, nobody would be heading down that end of the kitchen. For fear of being given a job. If there is a through route to another room, leave at least 1200mm on that side of the island and don't have any busy areas, e.g dishwasher. We had the plates and glasses units on the "traffic" side of the island along with tow stools and was never an issue. Post your floorplans.1 point
-
1 point
-
1 point
-
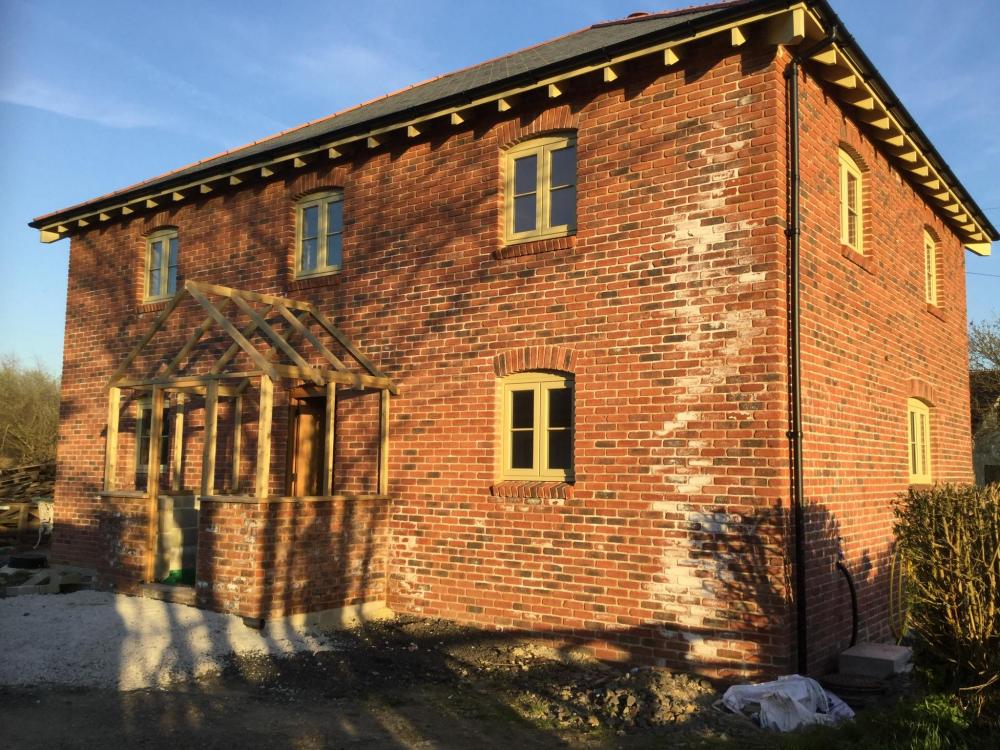
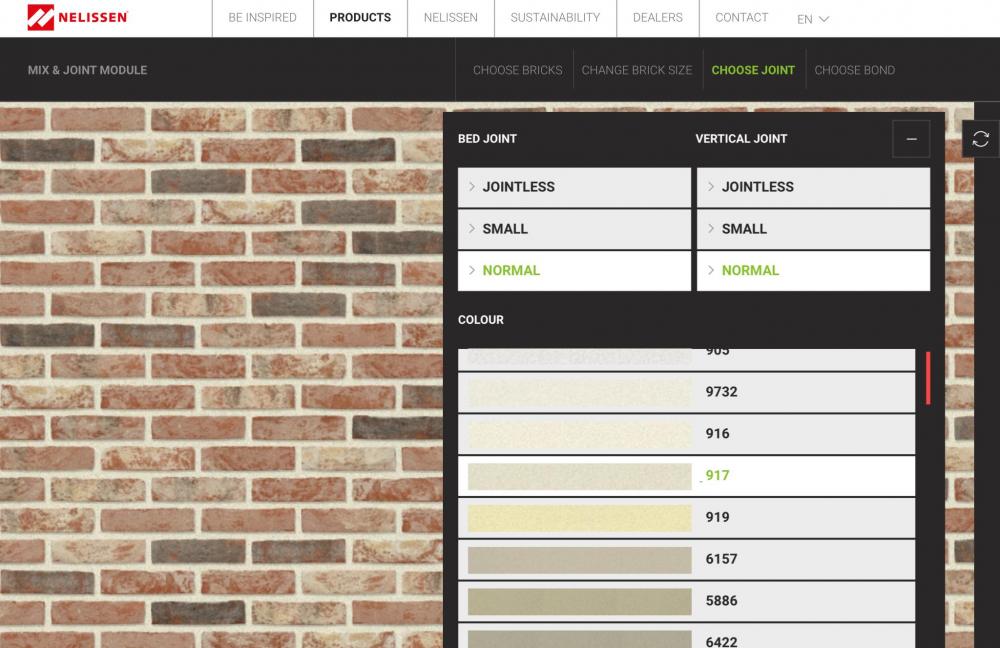
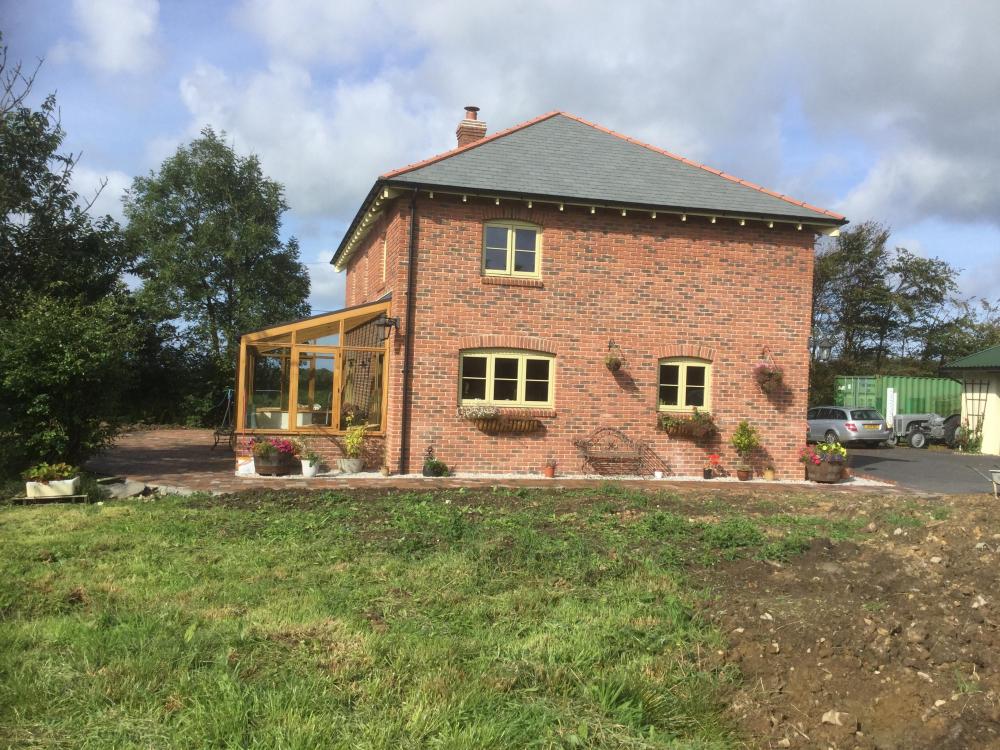
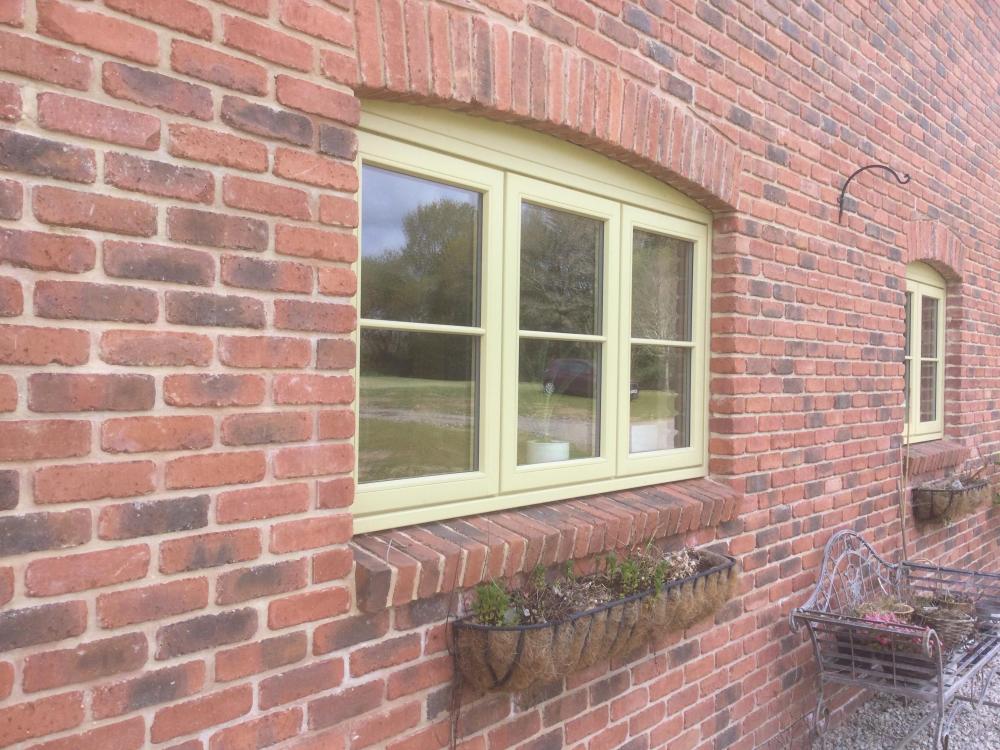
No idea, I found them in the internet and my builder ordered them (he commented that they were a good price at the time, three years ago tho). They did send brick slip samples x 4 and the missus picked this one (so it’s not my fault ?♂️). just to add, as I am OCD I got the bricklayer to use whole or half bricks only and had the windows bespokely made to order (I hate little bits of brick).1 point
-
1 point
-
We have an island in a similar space, and like it. BUT our kitchen is not a through route. I have seen a similar kitchen with doors in opposite corners and when just "passing through" it is an irritation to have to dogleg one side or other of the island, particularly if there are stools or other items in the way.1 point
-
We have “antique” bricks (tumbled so the corners are knocked off), we had mixed sand and lime to replicate old lime Mortor and we think it looks really good. I specified brick cills and the colour of the windows was completely wrong ? we wanted “national trust olive green” but there is more than one shade. We chose RAL 1000 on the iPad (big mistake) windows arrived on site bright yellow and I had a fit!!! But now the house is complete we love it and everyone says how nice it is (too late to change it).1 point
-
1 point
-
The first week of the build is over and I've collated our time-lapse footage for the week and made a 2 minute video, hosted on Vimeo we're a little disappointed at the speed of the dig but the boss has only given us one driver to do the digging/dumping/lorry loading so a lot of his time is spent moving the spoil around. but I've been told that more hands might be on-site next week and a bigger excavator so fingers crossed that happens and we see more progress next week. The basement contractors are due in a week so they need to get moving if they want to hit that deadline! Anyway, I hope you enjoy the video.1 point
-
1 point
-
0 points








.jpg.063f4d831294375de240a32d7a628f28.jpg)
.jpg.c12a88131d405e867bfe09b2d0a142d2.jpg)
.jpg.475c4c3daae364f7721c5cc86de591ed.jpg)
.jpg.670e9f53e1995acf33c697ff7a5639ca.jpg)
