Leaderboard
Popular Content
Showing content with the highest reputation on 02/24/19 in all areas
-
One of my favourite jobs when it's going well. I even used up the scraps to gain some brownie points when I was doing my step flashings.5 points
-
3 points
-
Just knocked this up. Cut some left over plywood and biscuit jointed some ripped down left over larch cladding on the front edge. SWMBO approves so I can crack on. Treated with Osmo UV oil and a top coat of varnish. Next on the cards is DIY larch archatrave and skirting board as I over ordered about 40m2 of Siberian larch ?3 points
-
I present here my ideas / design for my home built solar PV dump load controller, based around an Arduino microcontroller. It is not presented as a "design" but rather ideas for you to use or adapt as you see fit. This is my MK 2 design. For background, my Mk1 version was based on a design by Eric Ward in Jan 2011 which used a single current transformer, and sampled the ac waveform a number of times per cycle to determine if the measured current was being imported or exported. This worked okay to an extent but some house loads, like the washing machine really confused it and made it think it was importing when it was exporting and vice versa. I now believe if adopting a single CT solution you should base it upon one of the electricity meter chips which are far more sophisticated to make this measurement accurately. So my MK2 version operates by having two current transformers. One measures the power consumed by the house loads, and the other measures the power generated by the solar PV. I am able to easily make this split as there is a convenient split at my outside meter box where both the current transformers reside. I now take the current measurement from the transformers, rectify it and filter it so I have a DC voltage that is proportional to the measured current, filtered with a time constant of about 1 second to smooth out transient currents. I use this type of current transformer, available from many suppliers, the cheapest being direct from China on ebay These come supplied with a load resistor built in, so as presented they provide a voltage output. But because I am sending the current signal some distance over twisted pair telephone cable, I removed the load resistor and fitted that inside my dump controller, so the twisted pair cable is conveying a current signal, not a voltage signal. Now onto the dump controller itself. In essence it measures house load current and PV generation current. If PV generation current exceeds house load current, it sends power to the immersion heater, switched by a Solid State Relay. Now a bit about switching and metering, Most electricity meters, measure imported or exported power based on an "energy bucket" and I believe they will only meter whole watt hours passing in either direction. So if burst firing a 3KW heater, to match say 1KW of surplus PV, you would have to ensure the duty cycle of the immersion heater burst does not allow more than 1 watt hour of electricity to pass before it turns off, and then lets the surplus PV flowing the other way empty the "bucket" again before it is metered. Based on a typical 3KW immersion heater, that will consume 1 Wh in 1.2 seconds. So you want the immersion heater on/off cycle to be shorter than that. So I have based my immersion heater on a half second period. Within that half second the immersion can be fully on, fully off or on for part of it, depending on how much surplus PV is available. To achieve this, and enable some program timing, you need a reference. The Arduino as standard does not have a real time clock, though you can buy add on boards to add that function. However, as a hangover from my Mk1 design, I have a "phase reference" input, which is basically a raw 50Hz ac input connected to a digital input pin. By sampling the rising and falling edges of that, I can time program operations in 10mS steps for any period that I want. This in effect creates an accurate clock signal for everything. So my Pulse Width Modulation for the immersion heater cycles once every 1/2 second, or a total of 50 10mS program cycles. This means I can divide it's on / off period into 50 such 10mS time slices and it can be on or off for any number. So that sets the resolution of different "power" levels that I have available. Other program functions run much less frequent. The basic sums that calculate the import / export power operate every half a second, and there are some display functions that show values on the screen if hooked up to a PC operate once every second. I also do some data logging that keeps a running total of the immersion heater on time, converted into watt hours. This gets stored to eeprom once an hour and recovered from the eeprom on program startup. The once per hour eeprom write is because they have a finite number of write cycles. Also using the eeprom.put() function, this only writes to the eeporm if the value has actually changed. I estimate this eeprom write regime should be good for 30 years eeprom life. I have a moving coil meter hooked up, and depending on the position of a switch on the unit, it will either display total import / export as a centre zero meter, or it will just display total PV being generated. Lastly a bit about how to calculate how much power to send to the immersion heater. You can't just measure the available power and set the immersion heater to that much, otherwise next time the calculation is done, it will measure no power as being available and turn the heater off. Instead the heater power is incremented if any spare power is available and decremented if used power exceeds generated power. So it ratchets up and down relatively slowly to obtain balance at which point all surplus is being sent to the immersion heater but no more. And now onto the code. Pick it apart but please don't be too critical of my programing style, some of the purists will be ashamed at my use of some global variables to save passing values back and forth between functions for example. Remember this is still under development, if I make significant changes I will update this thread, The code is posted as a .txt file, just paste it into the arduino programing environment. This is written for the little Arduino Nano board, you may need to change some I/O designations if using a different variant. arduino_pv_dump_controller.txt2 points
-
Most of the internal work to date has focused on insulating the suspended timber floor and with this completed our joiners could come back and put down the sub floor. We considered two different materials for the subfloor: 22mm OSB or 22mm Chipboard. We decided to use chipboard as it was 25% cheaper then OSB. Plywood would have been another option but this would have been more expensive than the chipboard as well. To do this job we needed just over hundred sheets of chipboard, 2800 Spax screws and 6 bottles of expanding PU foam glue. Whilst our joiners were on site they also attached some ply and osb boards to the internal load bearing walls. This will provide additional racking strength to the house. As I can walk around all part of the house here are some photos: The porch and utility room The kitchen/dining room Living room which has a part vaulted ceiling and the eventually the French doors will lead onto a decked area. When this is framed it will be a bathroom, hall & stairs Master bedroom and en-suite And upstairs: Two bedrooms on the gable ends. A key feature of these rooms is a PK10 top hung velux. The middle sections between the gable bedrooms will be a wardrobe, WC and a storage cupboard. This area has three PK10 veluxs. Having a floor down feels like a big step forward for us. One of the benefits for me is that I now have space to store materials within the house, as previously it was very awkward as often these had to be shifted around numerous times to complete a single job. The next job is back to insulating, this time in the rafters.2 points
-
I still lead weld using my dads old stuff - iron must be 60 years old at least ..? Roofers wanted a whole roll of 900mm lead to finish a dormer peak and I pointed out the offcut they had left would cut and weld to size .... suffice to say I ended up doing it and they couldn’t work out how you couldn’t see the join..!2 points
-
a light spray of red diesel just prior to rolling, especially on a hot day will help bind them all together as the diesel softens the tar.2 points
-
So... if you had the builder build with brick piers at the 2m and 4m points - just a brick depth, to give you some strength then you could use the 6x2 as rafters. They will be about 3.7m long, depending on the rafter tail so plenty of length. Will need to make at 600 centres, so 10 sets of rafters goes through 20 lengths. The ridge board will need to be an 8x10 so that is another gone, and I would pair up the ones over each pillar to make an A Frame at ceiling height, and then put a 2m offcut on every pair 1/3rd way down as a collar truss Should keep the joiner busy..!!2 points
-
Hi They are called road planings - if you're getting them in bulk, £7-10 / tonne delivered on 20 tonners is going rate around you. Give Carl Wright Haulage a call in Hucknall as they are usually shifting them2 points
-
I’ve a simalar one to start this week Whilst the external walls arnt Stone There is no cavity So very cold We have decided to gypline frame these and use a 100 or 65 mil insulated plasterboard No possibility of causing any damp issues and will make a very warm house when finished I can post some pictures later in the week if this method is of interest to you1 point
-
I don't think there is a clear-cut answer, it depends so much on the details of the wall make up and the type of insulation being added. Perhaps your local building control department will have some experience of what's worked (or not) on houses like yours. The concrete floor slab will probably be a relevant consideration as it'll affect the way moisture in the ground moves. Is there no possibility of external wall insulation? That's usually considered safer from the condensation point of view and better from the point of view of avoiding cold bridges and problems with cold ends of joists.1 point
-
Whatever you do, the BIG problem most people create with these old houses is the "plasterboard tent" It is normal to line the insides with a timber studwork, some insulation of you are lucky and then plastteboard. The problem people create doing this is they leave this gap open to the loft and hence cold air. As an electrician it is normal in such houses to remove a light switch or socket and be greeted by a howling cold gale. So whatever you do, the effectiveness will be down to the detail.1 point
-
1 point
-
If he’s good then he can rip and 8x2 down to two 4x2 wall plates and that is something else sorted ..! I built a temporary staircase from rafter offcuts and spares - was more solid than the proper one ..!!1 point
-
Oh he’s used to that, every time he thinks he’s finished we come up with some other idea! We just haven’t run this one past him yet!1 point
-
Never had the nerve to try lead welding, i have been soldering my joints and they are still 100% after six years. Hats of to you for getting in about it.1 point
-
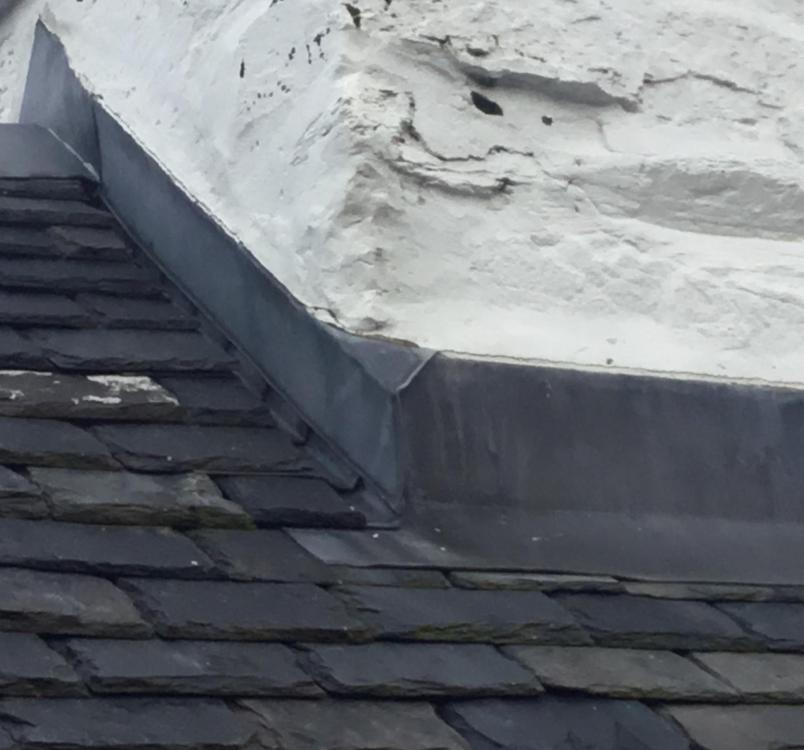
Russell’s description is right. However because I am using very traditional slates they can be up to 15mm or more thick and when you’ve got them all overlapping it can soon add up to a thick layer of stone.... I also live in a very windy location and if I did not have a malleable material there would be a big old gap below each soaker and therefore I use lead as I can form it up and around the slates and then run it under the slate to beyond the next slate joint or wherever I feel is appropriate. The Lower part of lead you see in my photo is the chimney breast skirt as shown in the photo below. I like using lead as it’s fun to work with, I have learnt to solder it with very good results, clean joints that have not failed in 6 years so far. On a modern build I really don’t think you would need it as there are great alternatives that and cleaner and will give a much more crisp finish.1 point
-
They don’t really work like that they don’t need to conform to the slate at all. What thay basically do is put a right angle on your slate. Imagine you where hand forming fake slates out of tin, you would bend a right angle in the ones that sat against the wall to prevent water running down the gap, well that’s what the soaker does it sits on top of the slate to make a right angle, the next slate sits on top so the soaker is not visible, you then place another soaker, they are laid in a bond type configuration just like your eaves slates, by having one below another you create a bond pattern and remove the straight gap that you would have hope that made sense.1 point
-
I have used 40 odd tons of road plannings which I got near me for £4 per ton!I need another 20tons and guess what, they are surfacing the road outside our build and they will let me have them fir nothing if they can put some plant in my drive overnight ?(they have just had a load of plant nicked recently). They are great and if rollered well give a very solid base.1 point
-
That's a bit steep... Have you tried Brauncwell Quarry at Sleaford..? Other option is ring National at Wragby and find out where they are working locally. MOT1 is just a grading - its basically 40mm to dust so anything that will go through a 40mm grid. There is a really good link to what is included here1 point
-
What's the definition of "clean hard core"? Into any of mine I'll put: Brick Celcon Breeze Flints Roof tiles Ceramic, porcelain & quarry tiles Broken crockery Broken glass I avoid: Stuff I assume makes it "dirty": Timber, plastics, asbestos, rubble sacks, brick ties etc.1 point
-
They will be fine. He is just using it as a cheap sub-base material. He says he needs lots so use cheap stuff. Roller it in going no more than 200mm at a time and it will compact and stay together lovely. Then top it with whatever you want for your finish, quarry dust and paving slabs for example.1 point
-
What a cop out. Build a wall-of-death bicycle window or up-and-over-backswards backflip window. Make it happen or they are not walk-on windows ! (Update: Or a bridge over a pond as the only route to your door)1 point
-
I hired a drive on roller Droped at 8am Picked up at 12 £50 Great bit of kit1 point
-
If there are any roadwork schemes going on near you call in and ask will they sell you a few loads.1 point
-
And don't forget that the borehole is VAT zero rated, whereas legals are all plus VAT.1 point
-
1 point
-
@Jude1234 as @Cpd says, compaction is the key and a whacker plate may not work so hire a roller for a weekend and you'll be fine.1 point
-
+1 I have used quite a lot f plantings to repair my road, cheap and when “properly” compacted and tidied up will look presentable.1 point
-
I just bought a new Lidl multitool for £25 (the last one died after 10 years use) I can confirm that tne present offering DOES have quick change. I was pleasantly surprised.1 point
-
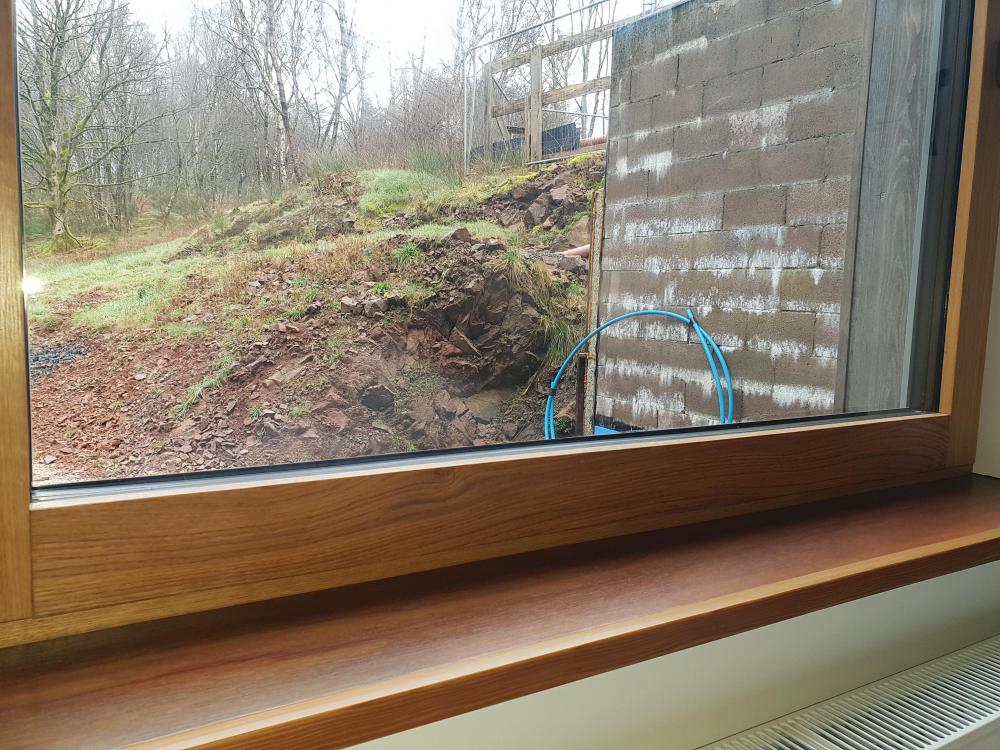
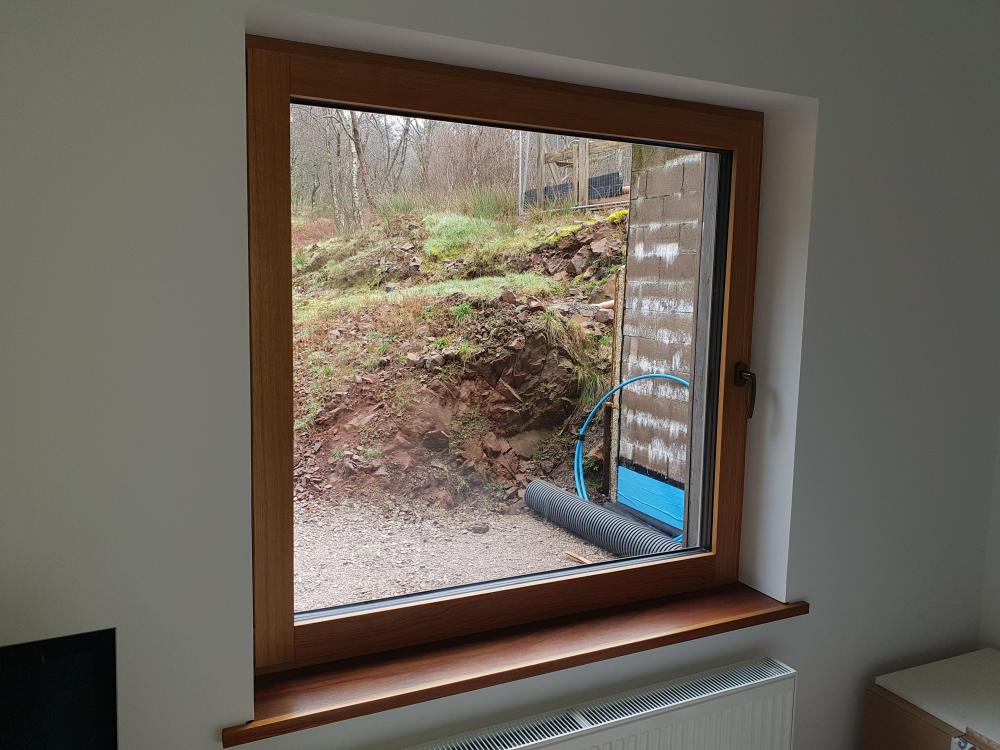
We have at least three windows open8ngs that are smaller than the drawings and one window has been eliminated due to a structural issue with a beam above it. The style has also changed from that shown on the architects drawings. Also the Bi-fold doors have been changed for lift and slide.1 point
-
1 point
-
no trees nearby for us and a good 30mm of an open gully, the way the tiles worked out. If that gets blocked I'll be very surprised!1 point
-
Wunda sell their pipe pre-pressurised and cap ended. I don't know what pressure they do it to, but I cut into one and nearly followed through. Good idea.1 point
-
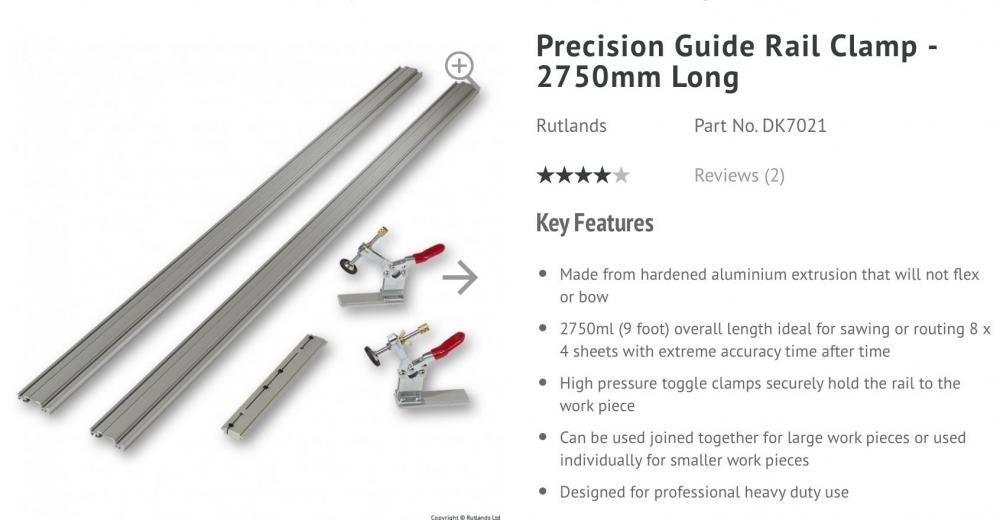
Like others I use a aluminium rail, I use it with my jigsaw and circular saws and it doubles up as my “long” straight edge for levelling and marking. I got this bad boy for £30 ex demo but new they are over £60...... when breaking down sheets the clamps are great as it’s quick and easy. It will outlast me if I don’t do anything stupid with it........1 point
-
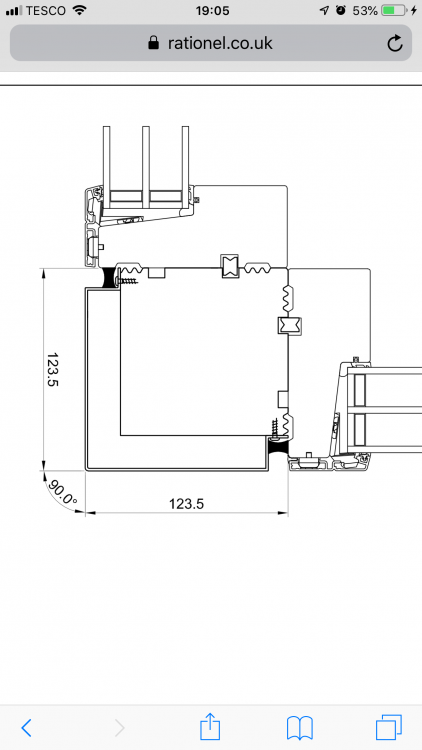
Ignore the fact that the drawing shows a supplied corner post, the priciple is the same. I’ve assumed Auraplus? It doesn’t have grooves on the cladding and this detail shows a return on the cladding creating a shadow gap. The principle would be the same for using your own post. If your not comfortable with the depth, rather than returning back onto the post and fixing, you could return it behind the cladding of the fixed jamb. You could also have it sit slightly prouder and then fix it ontop of the fixed frame cladding.1 point
-
Jeez it's been windy this week. Nevertheless we've most of the verge trims on, the first two GSE trays installed (with lots of fiddly setting-out done that will carry over to the other two and eight) and tiling has started in earnest on the leeward side. I think we made a great choice with the Snowdon tiles even if they are pretty heavy.1 point
-
Why not use 100mm ducting instead of underground pipe and bends, cheaper and it’s what it’s meant for. ?♂️ I found a heavily insulated 32 mm pipe fitted nicely in a 65mm duct, even cheaper than 100mm.1 point
-
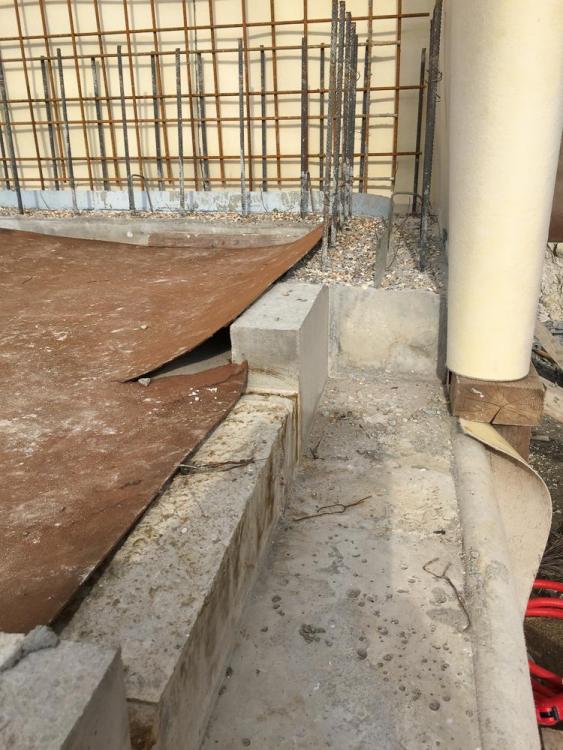
Look beyond swellable water bar and there should be something viable. Attached is a pic of my slab with rebar rising out of it ready to tie into the concrete walls. There just so happens to be an upstand in my design but thats neither here nor there for the purpose of this conversation. The top of the upstand has aggregate exposed as a result of retarder being applied to that surface at the end of the pour (to me it makes sense to do this to the area you'd pour your icf walls onto but i've not seen it mentioned much amongst 'ICFers'). Rising out of the centre of that surface is a flat metal strip, as much of which is buried in the concrete. This was placed before the slab pour along with the rebar. It's a Sika product but right now I cant find it's name. I have the Sikaswell red bars at vertical joints so maybe it's because of the pre-wetting risk that they don't use it on the longer exposed slab. While mine wasn't icf I see no reason it wouldn't work, except if the plastic icf webs might crush it.1 point
-
I've had a look through my emails for some info. I contacted these guys a while back - found them very helpful. http://www.scpwaterproofing.com/index.html I may still use the Dual Seal membrane on the underground section of the garage walls - and a combination on the join between wall and slab. I also contacted another firm up here that specialised in this type of thing - they had suggested a special DPM that was laid and would effectively bond to the concrete and lap up round the edges of the slab. I was too late to use that, but that was their business and they said if you don't prepare early enough, then the other options are all second best (they would say that?!). You can see on this website that the water bars are not really suitable for a slab/wall join - I doubt any builder in the world could lay the seal, build the ICF to the required heigh and have it all poured in the dry. Waterproofing - it's a world of its' own!1 point
-
Just looked online and I think it was “rollerdor” https://www.rollerdor.net/ may be wrong but the site and drawings etc look very familiar. They do from DIY kit upwards. Hope this helps. ?1 point



.thumb.jpg.bac90f3bbf6868cf2118d010d936c99d.jpg)

