Leaderboard


Popular Content
Showing content with the highest reputation on 06/25/18 in all areas
-
Just to conclude this, the new replacement unit arrived today. I will start a new thread about comissioning and putting that into use. I was pleased to see it came with the "sanitarty water kit" (hot water tank kit) I had noted in the manual that was an optional extra. And I put the old faulty one on Gumtree and that sold and was collected yesterday.4 points
-
The morning after the day after the night before. Monday morning translation: After a Saturday spent online cogitating the finer details of my foundations. Swmbo and I made a last minute decision to walk down the lane to attend the last hour of our local villageFest. It pulls in around 2000 people for a genteel music festival, the profit goes to maintaining the village church and it must be the only such event in England that starts off with a 20 minute peel of the church bells. The church overlooks the festival ground which is next door to the graveyard. We got a discounted last minute entry of 2 wristbands for £5. On the way out I encountered a pillar of the community starting to dismantle the stage power supply while the last determined revelers were still hanging out post-music making the most of their ticket, at this point I volunteered for some litter picking. I was rewarded with £2.20 during my litter pick near the bar which led to a moral dilemma debated at 10:30pm in a field with a gaggle of septuagenarian church wardens. I handed over my gains to a higher authority and headed home. Swmbo poured me a G&T as a reward for my community service. Then the evening became a bit fuzzy and apparently I posted on here.3 points
-
I did a City and Guilds manicure course Long story, but I was the only bloke on it.2 points
-
Mitre bond is a 2-part glue and imo far superior to the little tubes/bottles. I've NEVER in my life has any success with traditional one component superglue but the mitre bond is magic. Like this: https://www.screwfix.com/p/no-nonsense-mitre-adhesive-200ml/41795? Careful that if sticking upvc trim you get one that won't "yellow". I first got the one above then another make...this one I think: https://www.toolstation.com/shop/p47409? Claggy I thought was a term coined by Sarah Millican whuch I'd rather not dwell on!2 points
-
I would only run drainage under the slab where it was not possible to do otherwise. If you can achieve a min 1:80 fall by running outside, do this. You can change direction with an IC. The biggest financial risks in housebuilding are foundations and drainage.2 points
-
Base drawings are in (finally!) so marking out and digging begins on Monday. In the meantime, here's the view from the top of the world (ok, topsoil bing...).
 2 points
 -
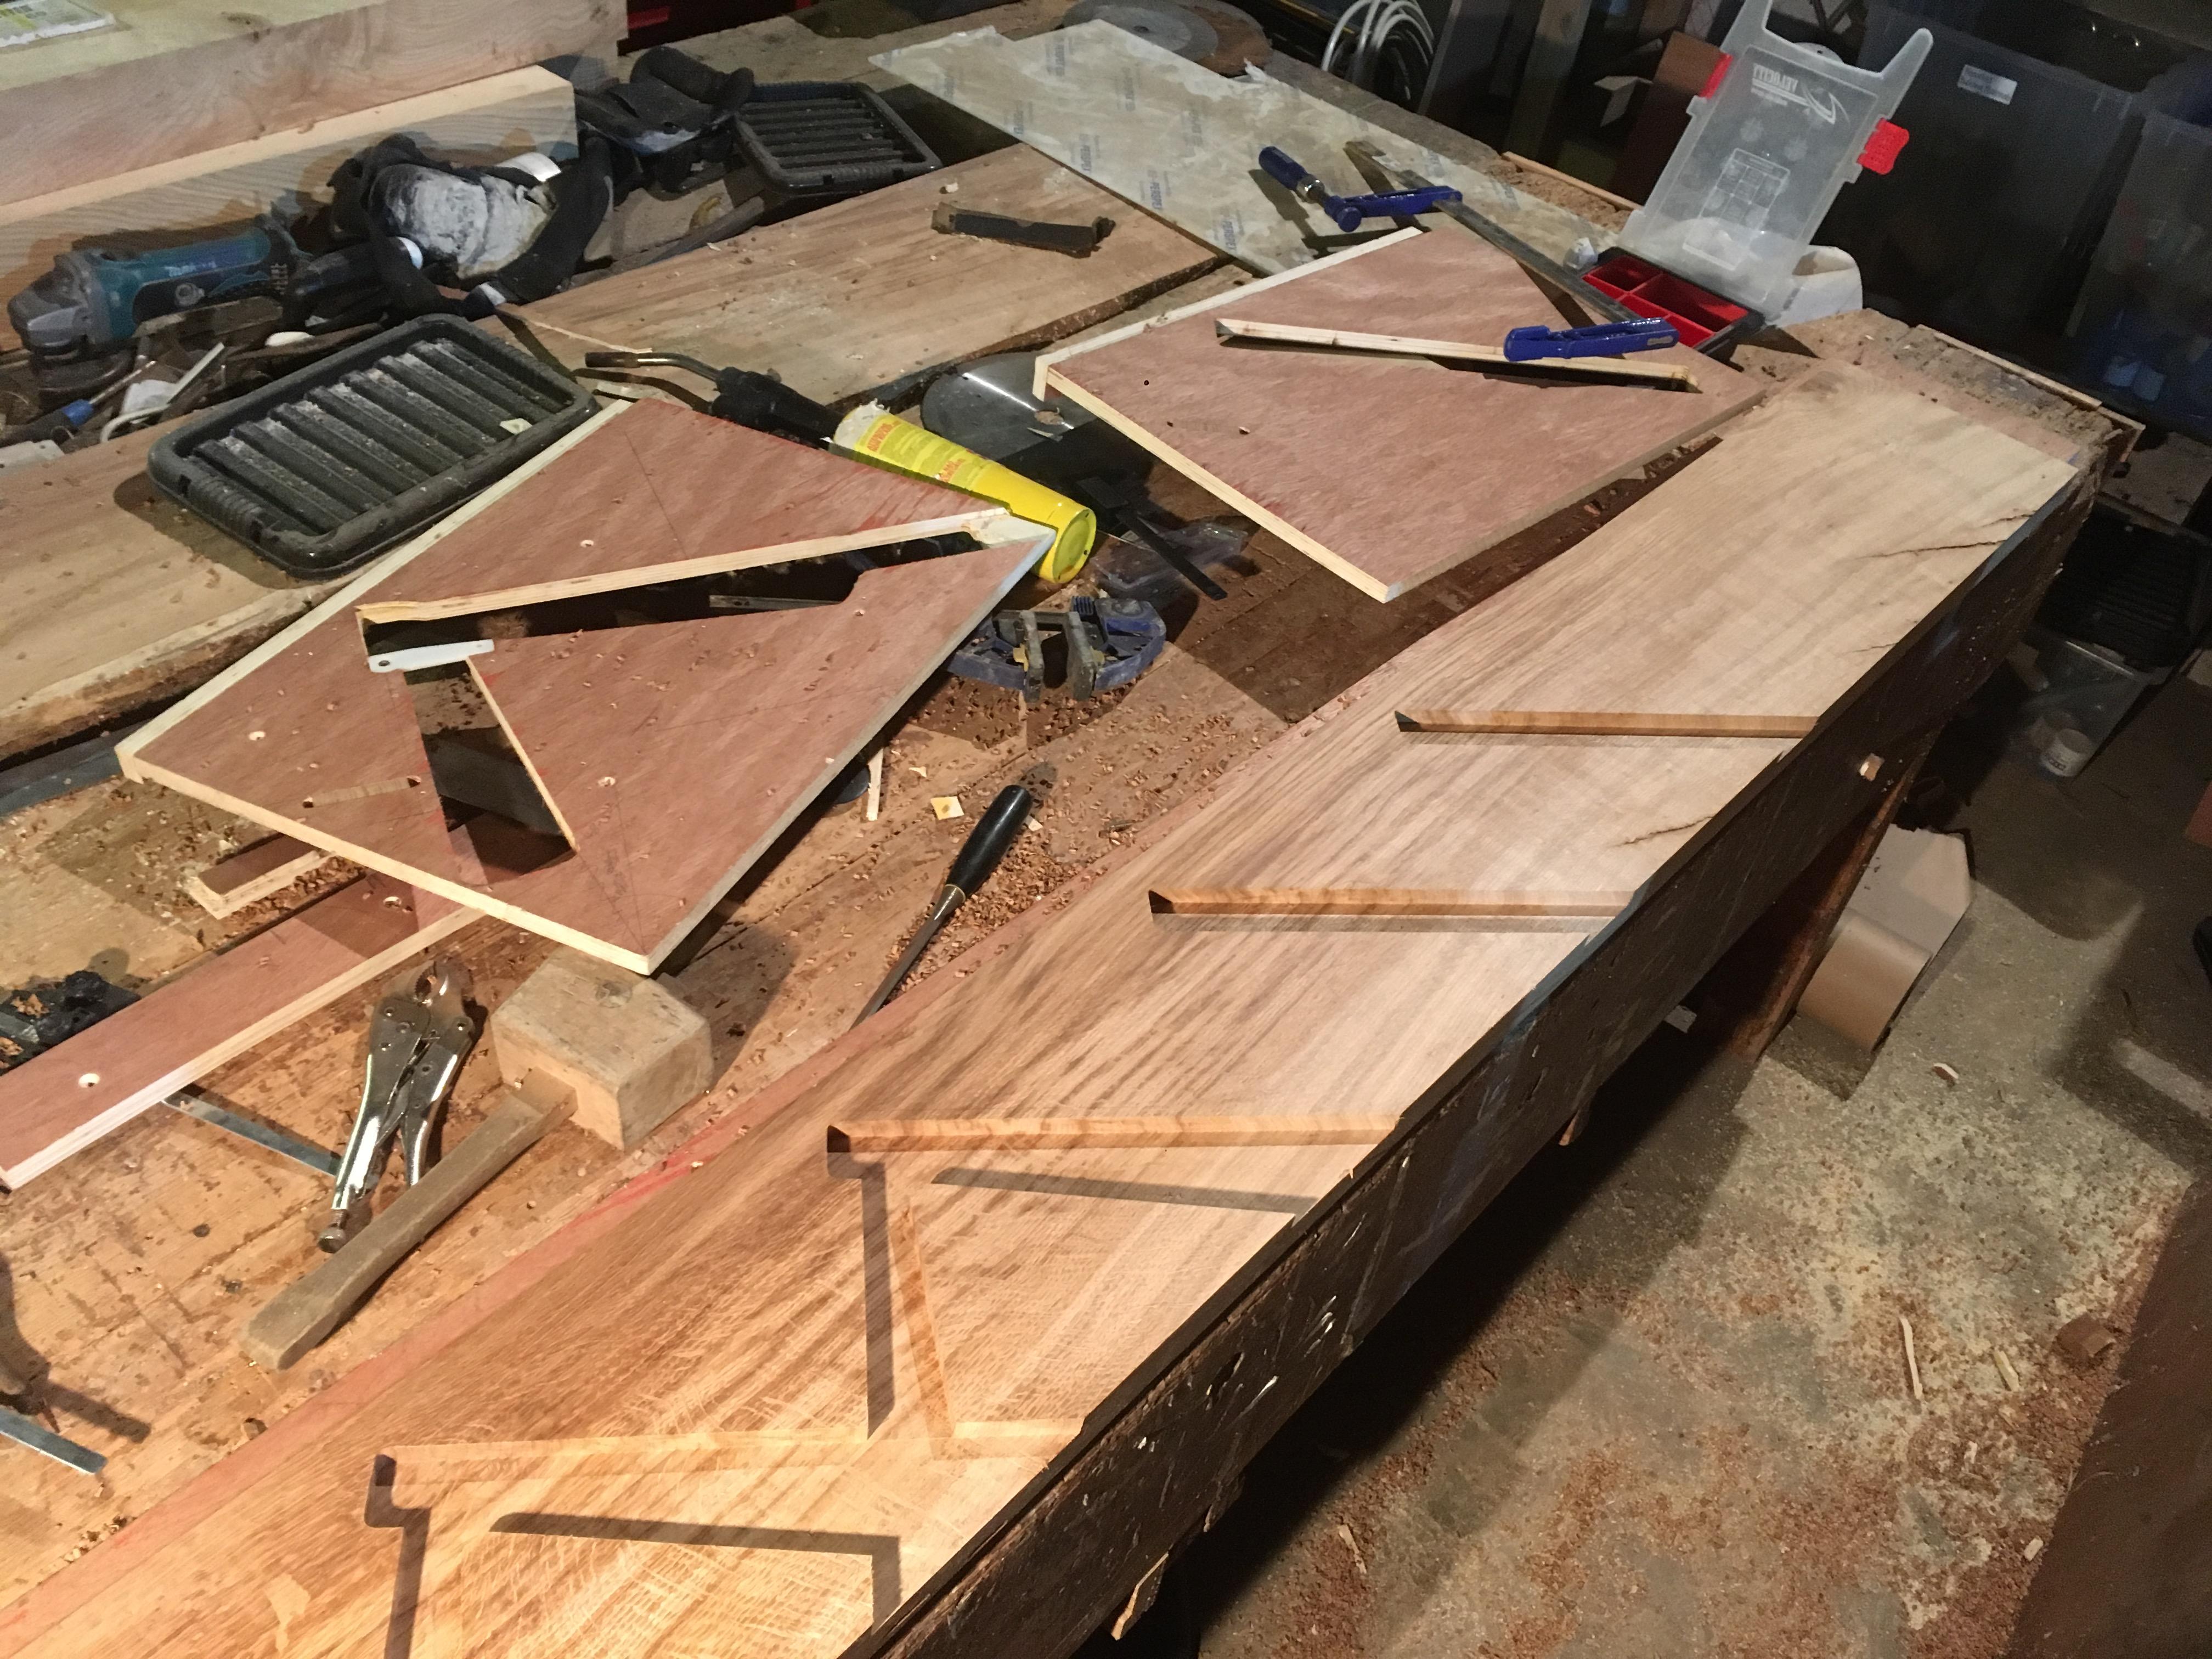
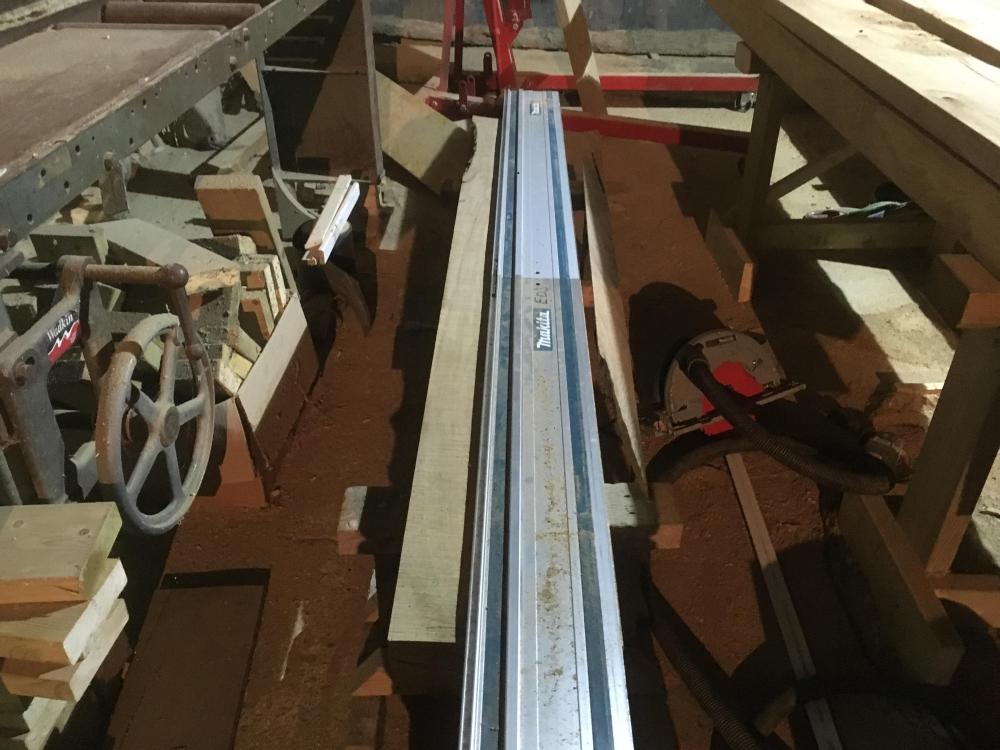
Well Iv started. The little plastic bit is fantastic. Now to choose and machine up the other side.....
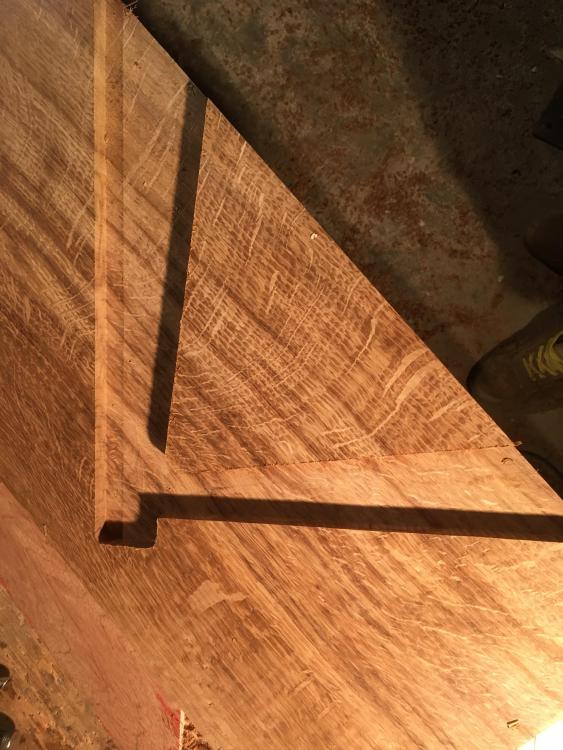

 2 points
 -
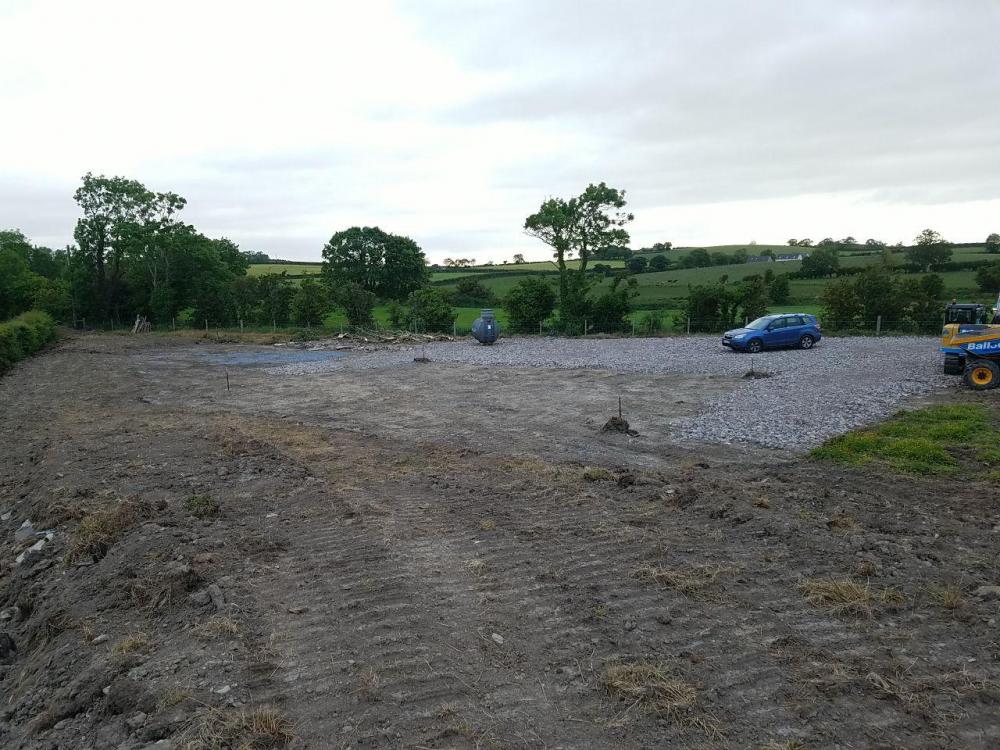
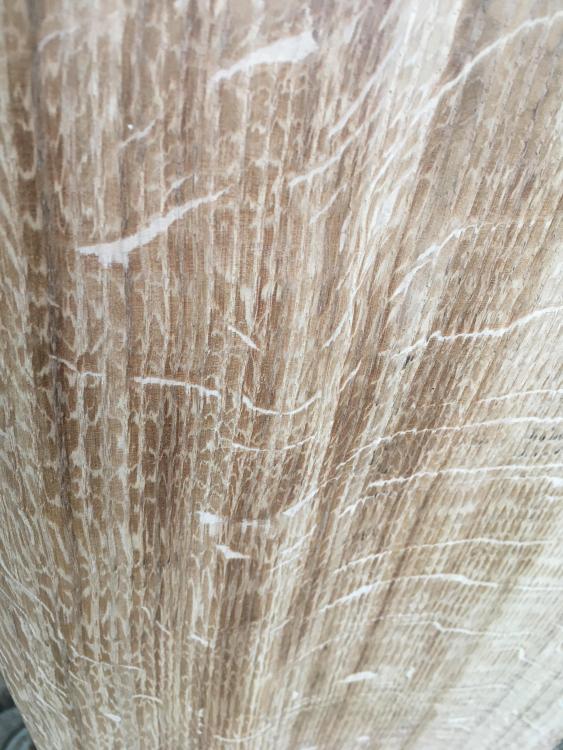
No, really, there's nothing to see, it's all gone! A great deal has happened in the 2 weeks since the last blog entry meaning that the planned update and photos never happened. First off, very sadly, my father in law died 2 days after that entry which although not entirely unexpected, still comes as a painful shock and means that there's a lot to do at a time that isn't the best. I was very fortunate with my in laws and my father in law was a lovely man and will be greatly missed. On with house matters. Over the last 2 weeks, all the demolition has been completed and debris removed. We kept plenty of the timber from the roof, which we will use to make raised beds for the kitchen garden - there's no way I'm going to dig that clay over, no-dig all the way for me! We also salvaged some bricks that formed an outbuilding, but the rest is gone. The concrete floor of the garage block formed a really useful hard standing area and that will stay pretty much until everything is done, including a lot of the landscaping. Shortly after this, the portaloo and site cabin arrived, along with the security fencing. After the demolition, work started on reducing down. We've gone down 800mm from a point set by the surveyor but this may need to change slightly as there is still some debate over what the finished floor level will actually be. There are 3 different levels floating around at the moment, but this will be finalised once MBC have come back with the designed foundation. In the end, I used a surveyor for setting out the levels then had a play around afterwards to see how everything works. I'm glad that I used the surveyor as time was limited in getting the setting out done and it only took him a couple of hours once he had found the previous survey points; I'm pretty sure it would have taken me days and I would have lacked confidence in the final result, so it was money well spent, if only for the peace of mind. One by-product of reducing down was that we found out where the water main was running, which was nowhere near where we expected it to be. Of course it wasn't. How naive to expect it to be in a sensible place rather than running through a neighbour's garden then through a field. I've got some people coming out tomorrow to do a survey and give me a quote on running the main under the verge parallel with the road, but in truth, I'm bracing myself for a very expensive quote that I'm not likely to take up. On the face of it, the current water main route does seem stupid, or at least inefficient, but in terms of what will go where with the finished build, it's not that bad and I could easily live with it. It will run close to where I'm having the kitchen garden en route to the house, and I want a tap there anyway, so it doesn't seem such a bad route now. I also plan to get the electricity cable buried and that will run a similar route, so I could have both in 1 trench and save digging up more than I have to. The weekend after my father in law's passing, I had a bit of a hissy fit with the architect, but one that I think was thoroughly justified. I wasn't in the best of humours anyway, but it happens that the 11th June marked exactly 6 months from getting planning permission and instructing the architect to do the building regs plans and details and I felt overwhelmingly frustrated that no matter how close we seemed to be, we were never quite there. I was highly conscious of the timescales for MBC to swing into production and for my glazing delivery, and greatly concerned that I wanted the building to be watertight before the onset of autumn. I shan't go into details, but I left the architect with no uncertainty about how pissed off I was and that there would be financial ramifications if I wasn't in a position to sign off on drawings with MBC very soon. The upshot is that I did, indeed, get my final drawings and these were signed off with MBC last Thursday; I also made the next stage payment to MBC and everything is rolling there, with confirmed dates. So, my schedule is as follows: 17th July, piles go in 30th July, MBC are in for the foundation 14th August, MBC return to erect the timber frame If any BH members want to visit and see things in action, let me know and you're more than welcome to come along. Bring your own hard hat because I have none to spare. A word here on piling, as I've had my final quote in for the mini piles, which stands at £14,870, all in. Having done muckaway on a reduced dig of 800mm, I now have full knowledge of the cost of that, and were I to have gone down the route of a reduced dig to 2m (this was the depth MBC reckoned it would need to be to overcome my clay), I can confidently say that the option of piles is cheaper by a good few thousand for me. Nobody wants my clay soil so the whole lot has to go to landfill and it ain't cheap! There will be more spoil once we've dug the pond in the field, but I reckon I can lose most of that on the site. The site is now 'energized', as the electricity suppliers say. Basically, this was just a case of getting a meter put onto the fuse in the box that runs down from the overhead supply on a pole, but it took a ridiculous amount of time to get through to any supplier that I had a MPAN number and just needed to get a meter installed and sign up for supply. I truly hate bureaucracy, it's the work of the devil, I'm sure. So here are a few tedious photos - like I said, there's really nothing to see now! Photo 1 - if you needed any visual proof that we have clay. Photo 2 - demolition done, getting ready to reduce. Photo 3 - reduced dig to 800mm from finished floor level. Plus a view of the neighbours' cottages.1 point
-
You've used 5 in 10 years?! Not big on nail repairs then?1 point
-
Last time I bought them from Poundland there were 10 in a pack for a £. Must be at least 10 years ago and there are still five or six left - some of them have already set though.1 point
-
Yep - quick plan and they should be fine. How long have they been built ..? Quick trick is to swap the rear roof tiles to the front so the look is the same, and then just put new ones on the rear.1 point
-
Welcome ..! If it’s a new house on a new development just check : - permitted development wasn’t removed by the council en masse when they approved the development - the developer doesn’t hold an approval covenant for the first x years Other than that it should be PD..!1 point
-
Welcome. Here is what you need. Ian1 point
-
Planners can be a law unto themselves. When they are claiming overdevelopment a useful thing is to have a plot plan showing the house as a percentage of the total area. I would be hard to argue that this is overdevelopment if it is less than 20%. Some rough calculations for other houses nearby would also be useful. As far as I am are there is no rule that says houses in an area have to be a similar size, although I know others have had this issue. Other smaller houses may be on smaller plots. If the house is not covering a large percentage of the plot then I seriously doubt that this arbitrary size limit would hold up on appeal.1 point
-
Yes the brush makes it much easier. The tubes are god awful things. Press it and nothing comes out, press it again and it goes everywhere!1 point
-
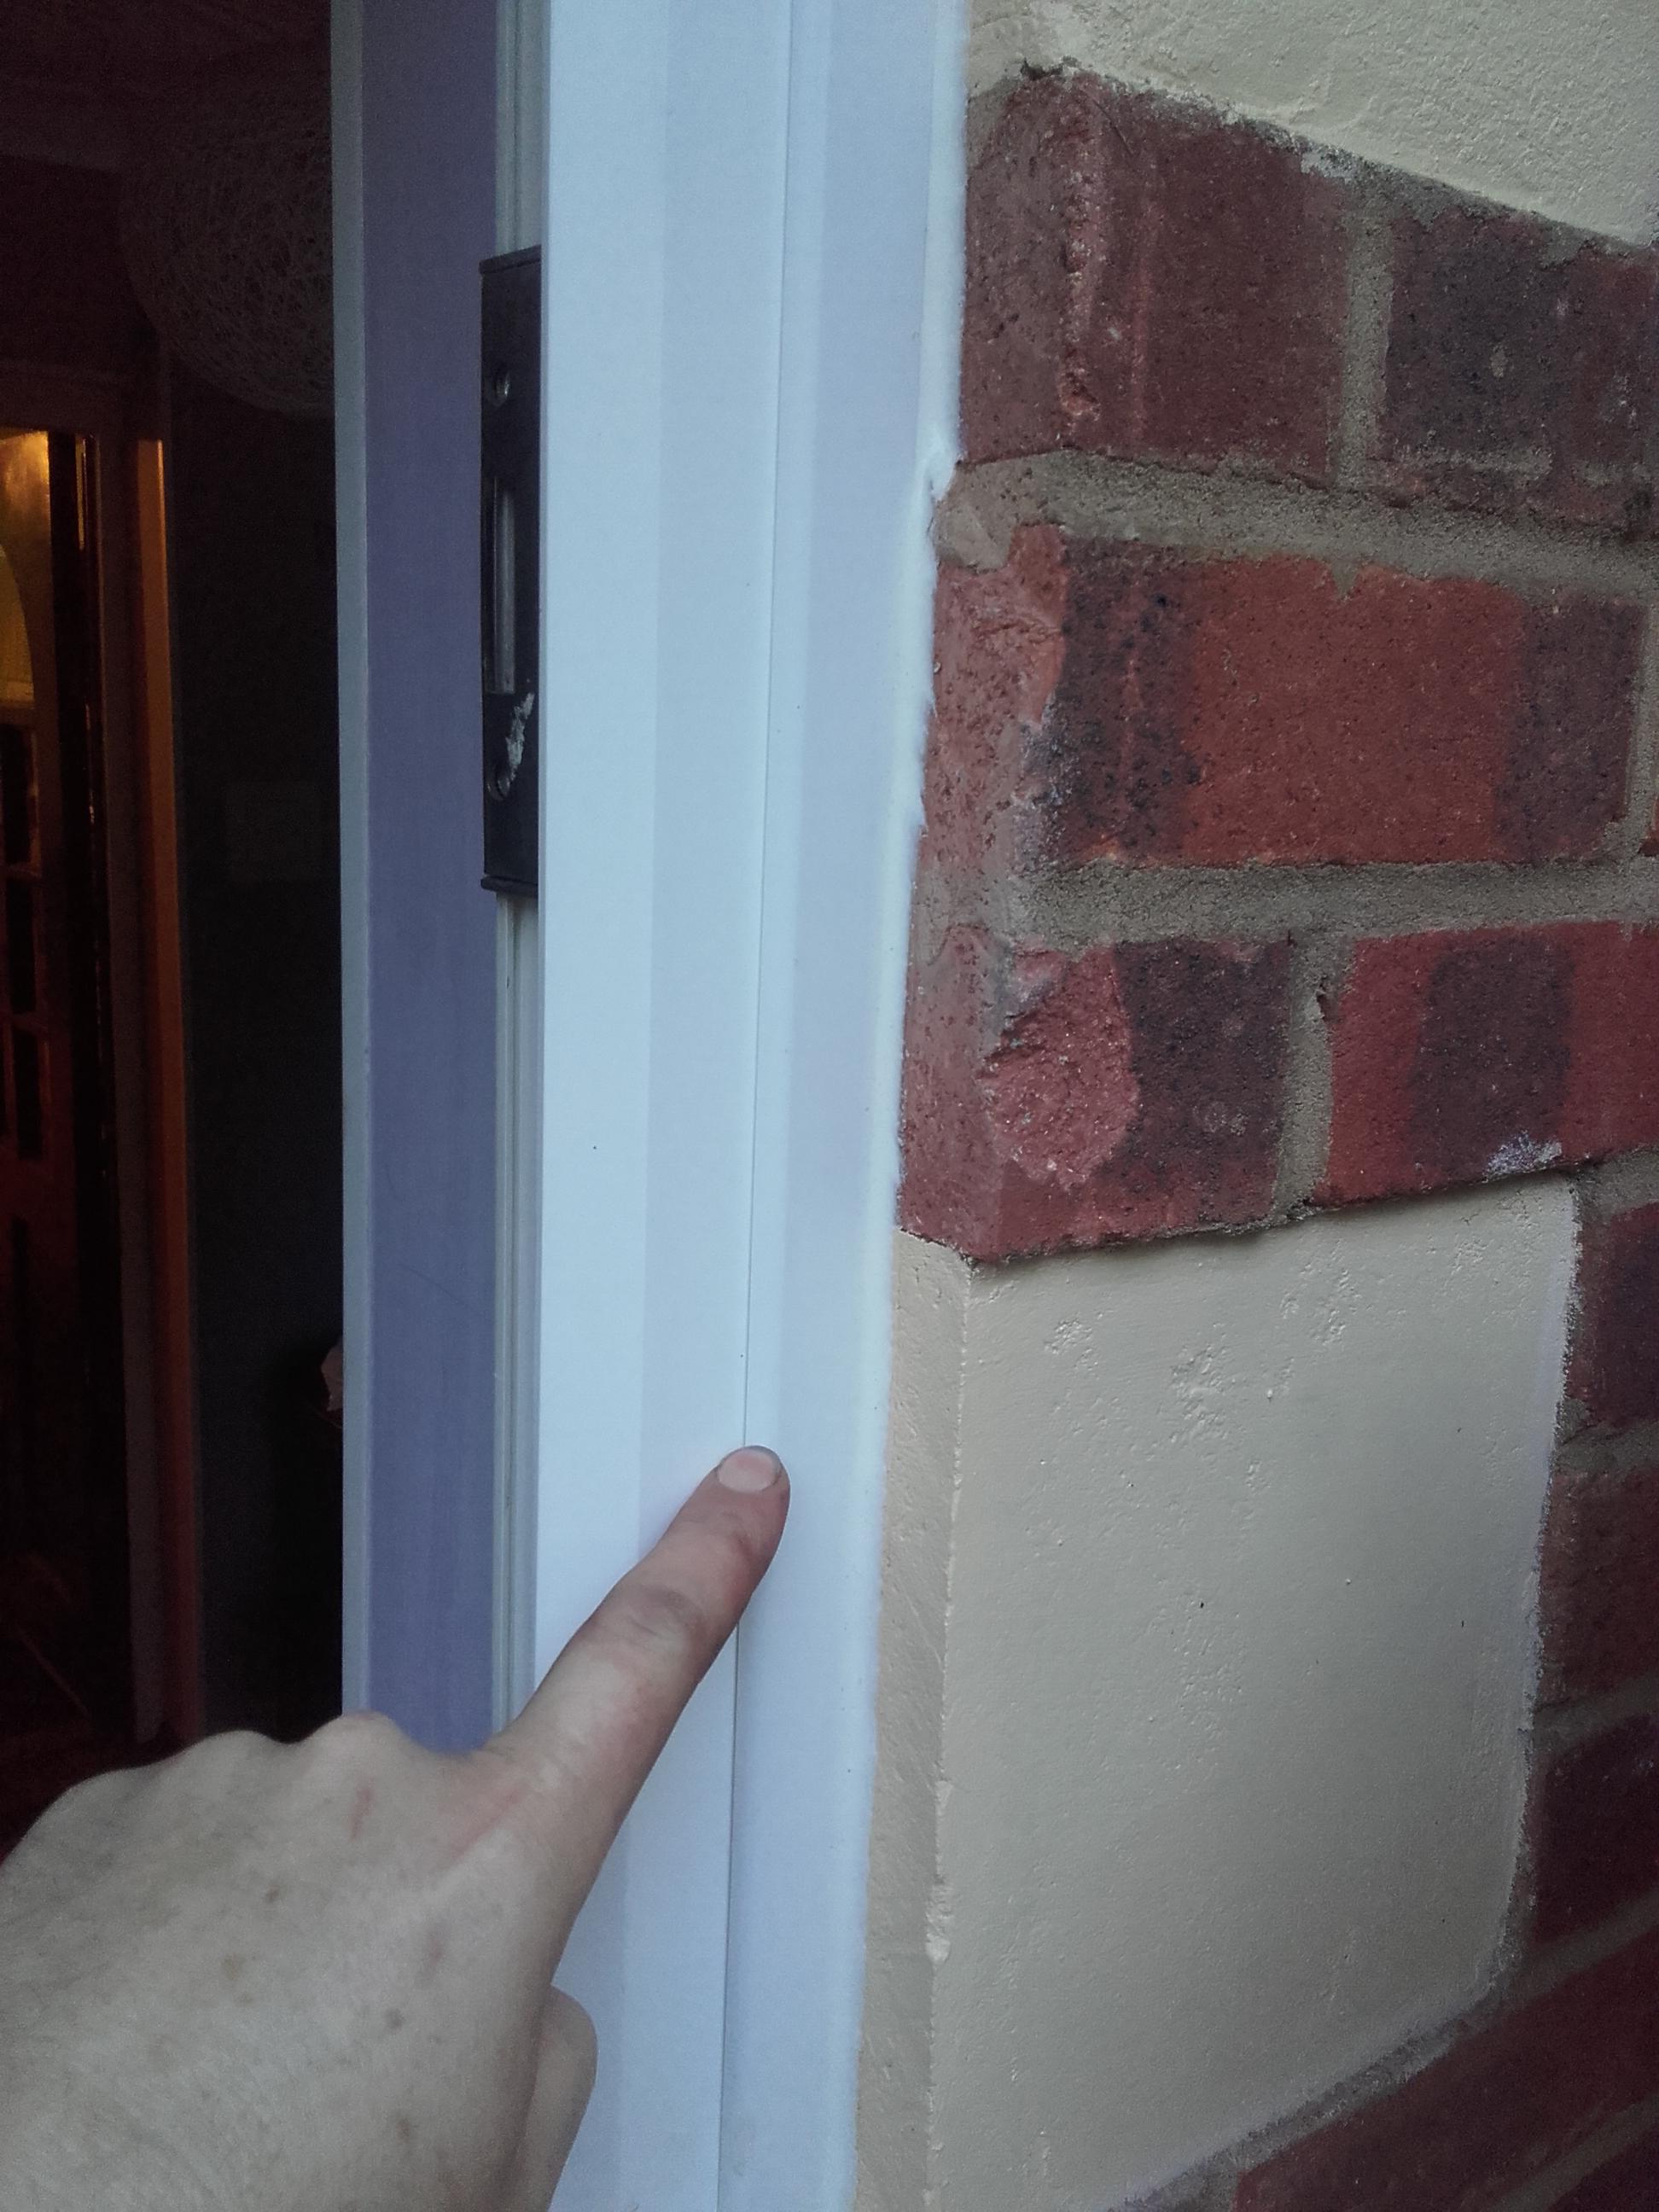
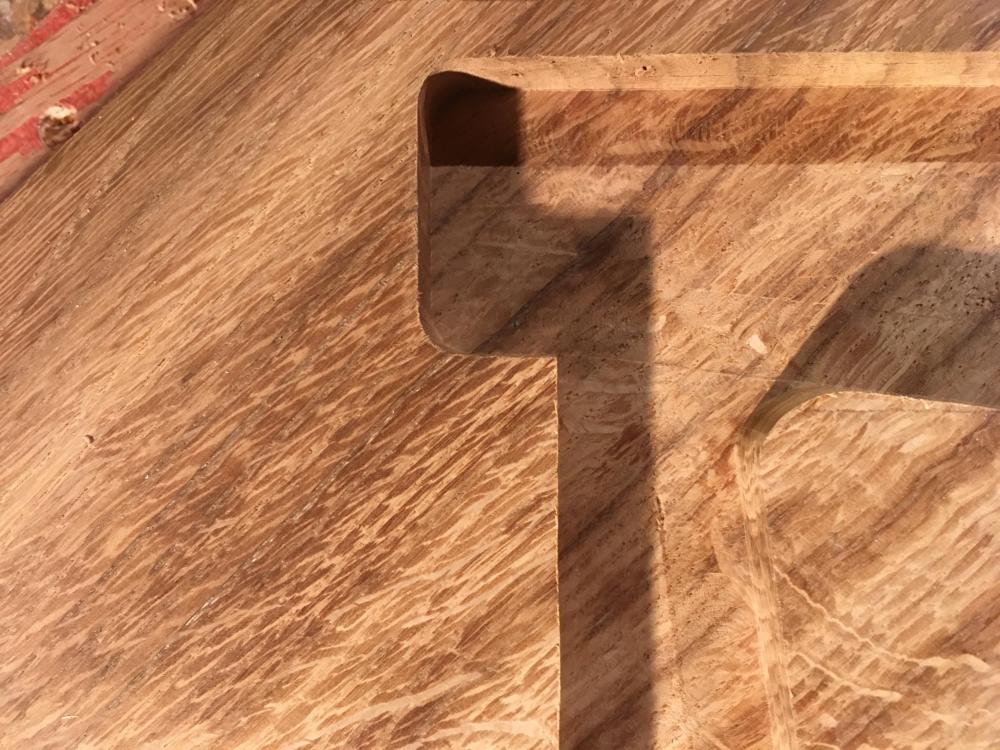
I first saw window fitters use it. See this bit of trim I've fitted to a freebie 2G door I scored. The trim covers the slightly ragged edge where the walls been cut out for the upvc frame. WITHOUT the trim (bit I'm pointing to) you spray activator up the height of the door. You run a bead of glue up the back of the trim piece and push on. Instantly stuck. @Nickfromwales reckons it for sticking tile trims on too. And kitchen cornice too:

 1 point
 -
Put the glue on your nail, spray the activator on the false nail and place carefully ...... it will bond pretty much instantly ..!1 point
-
Was wondering with the 6 bar !!1 point
-
Its not 2 part - it’s just an activator in the can. You can use it to accelerate ordinary superglue. The TS stuff is the one I use, normally on offer for less than £5.1 point
-
If you are using the mitre glue make sure the two pieces go together dry first as the glue goes off really quick when the glue and activator mix.1 point
-
@newhome ditto same problem for me!1 point
-
Superglue is best kept in the fridge.... and I buy the packs from Poundland that have 5 small vials in them and chuck them after one use. Mitre bond is also cyanoacrylate (ie Superglue) but seems to not clog as much.1 point
-
If you look it up on the planning portal you will find its £401 per dwelling. There answered your own question you lazy monkey...1 point
-
Are you planning to have a path/hard standing around the house? It's worth considering doing it sooner rather than later since this makes an acceptable base for the scaffolding. Some companies won't put scaffolding directly on earth, so it worth checking now.1 point
-
Microinverters often have a monitoring system built in that reports back to a data collection unit, so you can check performance and health. For the sort of shaded conditions you describe then microinverters are a good choice, but equally good, and perhaps more reliable (the jury's out on that) might be to fit panel optimisers, like the Solar Edge system. Optimisers don't have the high voltage switched mode inverters built in, so are a lot simpler internally. All they do is optimise the output from each individual panel using a maximum power point tracker (MPPT). This deals with partial shade every bit as well as a microinverter system, but means that you still run DC down to a conventional inverter. The advantage is really that the primary cause for concern in the microinverters (and big inverters), the high voltage commutation capacitors, aren't up on the roof, but remain in the main inverter. Commutation capacitor life is the primary life-limiting factor in an inverter, and is proportional to temperature - the cooler you can keep the capacitors the longer they will last.1 point
-
I got all mine from Porcelanosa, fab stuff but very pricey buy it in the 40% off sale pay 50% deposit and they will keep it in their warehouse until you need it. Check your water pressure/flow for shower head as someone else said. I have a 300 square rainfall head and a hand held in my wet room. I'm running that from incoming 6 bar pressure and I get a really great shower.
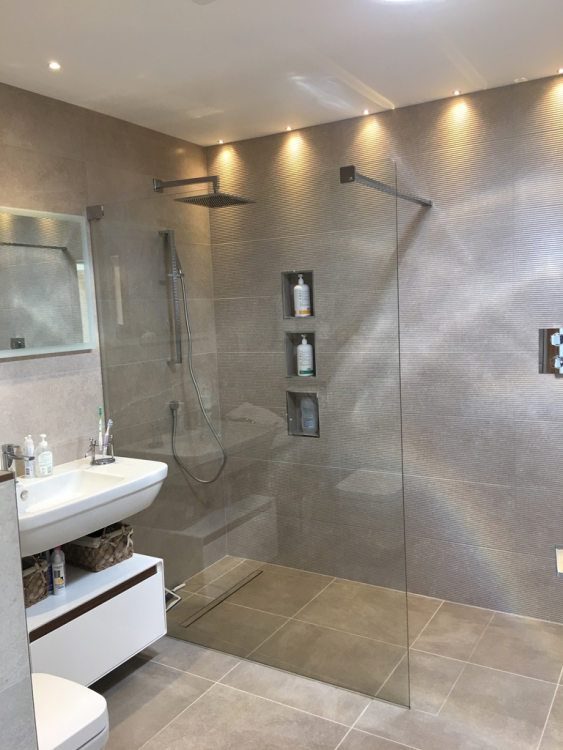 1 point
 -
I think one shall be wear a large mannappy with one's 'leccy blanket. Now where was I.. kitchens yes. Ive harranged Homebase to ruddy well pull their finger out & get 3 of the acacia wood tops into breacon store pdq > then post to me @ £20. Great/ progress- 1st step! does mean I'm going to have to paint the damn doors etc tho... to much wood make me go crazy in the heat already. So Im think cream doors w' new handles/ wood tops/ cream-white tiles (those nice slightly reliefed 'brick-shape' ones) ~light green side walls/ racing green opposite ends.. all white-walls in house at mo. New hood/ redo lino.1 point
-
Make sure you have a starting point for negotiation, such as a request for the supplier to fully refund you and (if you want to try it on a little) additional damages for delays and project prolongation. Stick to your original claim and then wait for the other side make a counter offer. Don't start with offering to re-purchase at cost, or you will have nowhere to go. The mediator does not look at the merits of the case or report to the court if mediation is not successful.1 point
-
Heard talk from the older guys I used to work about the summer of ‘76 (my memories of it are only of being a 3 year old naturist in the garden,with embarrassing photo evidence still around.) Apparently they had to soak hessian as Jeremy says to cover the walls,or they would dry out too quickly & crack.1 point
-
Worth remembering that concrete needs a lot of water to cure - water gets incorporated into it as it hardens, it doesn't "dry out" as such. If the top surface of the pour dries out too quickly, then it won't cure properly, and will end up weak and perhaps a bit flaky. It's a good idea to have some hessian sacks around that can be soaked in water and put over the top of any areas that are getting direct sun, or just cover it over with a bit of tarpaulin to prevent it drying too quickly. As your bloke says, a wet mix will tend to settle with a bit of excess water on top, and that will often be enough to make sure that there's plenty of water around for the stuff to start to cure properly. Because it was really hot when our wall foundations were cast, the blokes covered over the concrete with anything they had to hand, sheets of board, tarpaulins, whatever, just to keep the sun off a bit.1 point
-
That is a potential embarrassment I have evaded so far, maybe tomorrow or next year.1 point
-
Sounds like one of my husband's G&T's. Teetotallers have no conception of what constitutes a "measure". Eye watering.1 point
-
Our work here is done .1 point
-
It is a very difficult and overwhelming process. So, make a cup of tea/coffee (fully caffeinated!), sit down with a large notebook and pen. Step1: Buy Chocolate digestives. Step 2: Get on Amazon and order The Housebuilders Bible by Mark Brinkley. Step 3: Read the whole book at least 3 times, accompanied by said chocolate digestives. Step 4: Read every post and blog on this site. Step 5: Read them all again. Step 6: Work out how much money you can reasonably spend. Step 7: Assess your own skill set - are you going to be able to complete any of the work yourself? Be honest. Step 8: Assess how involved you want to be in the process. If you just want to be handed keys at the end, your extension will have to be smaller than if you are willing to pitch in and can actually be useful. Step 9: Ballpark figures - £1000 (low end finishes) to £1500 per square metre of finished home. Use the figure from Step 4 to work out how big the house might be. Time invested now is cheap - delays and poor decision making whilst mid-build are expensive and sometimes not possible.1 point
-
The times I've thought exactly that! Mind there's probably a few on here wish I hadn't!1 point
-
My only concerns with microinverters are that they most probably run pretty hot, as they are under the panels, so must get a fair bit of heat from the sun, and the need to erect scaffolding to replace any faulty inverters. Inverters are bound to have a shorter life than panels, so although microinverters seem to be a really good idea, it's the practicalities that bother me. A failed microinverter could easily cost a couple of thousand pounds to replace if a full scaffold has to be erected in order to gain access. Replacing a wall-mounted inverter would be a lot cheaper, just isolate it, unplug the cables, unhook it from the wall, hook on the new one and plug it in and switch it on.1 point
-
@newhome There was such fun when deciding on the domain name for this site. Much of it was down to @Construction Channel suggesting the 'hub' part and knocking up a quick logo. I thought that it looked a bit like the Halfords logo, but others saw it for what it was. A complete rip off of the better known 'hub' site. Oh happy days they were.1 point
-
Ask your wife which she would prefer eh @CC45 ?1 point
-
Got my black arm band on ready for the sad death of a Black Sheep. Somber day.1 point
-
as opposed to ... ?1 point
-
is that the left over muck?1 point
-
I never doubted you for a second1 point
-
That old trick ! 2 random guys off the street , offer them 20 quid to pose for the photo . Done that many times - never get arrested ???1 point
-
Ta. No professionals involved! I got the first set on the ceiling and wall with my lad labouring. I put one sachet of CoT in to a full bag of multi, should tbh have put two in. Did the ceiling first then the wall. When it came to finishing the first set on the wall it was getting a bit thick in the bucket. Probably a big no-no but I brought it back to life with a dash more water and another sachet of CoT. Cleaned all tools thoroughly and did the second mix about twice as runny as the first but with two sachets of CoT from the off...it retards things a treat for a newbie like me. My boy and I then put the 2nd set on, me the ceiling and he the wall. I then started polishing it and my nephew turned up and helped finish off. Seems to be drying off nice. Nothing paint won't sort! A good father and son bonding experience! (Get the plastering themed joke? )1 point
-
I can't critique it but looks great to me. Well done for giving it a go. Not sure about the Top Gun reference - wasn't that the supposedly homoerotic scene?!1 point
-
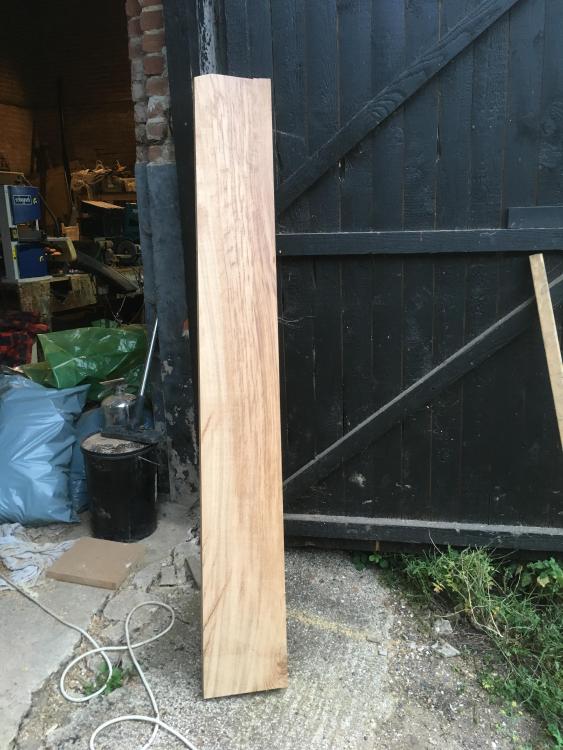
#progress. I hope they all turn out like that

 1 point
 -
LPG can come through a wall - if you have a buried tank then the main regulator will be wall mounted outside so work out where you want that to be. Water needs to be planned but it can be as simple as a piece of 110mm underground pipe with a swept bend on it and you can shove the MDPE down it. What are your invert levels on the drains ..??1 point
-
Hi - Nickfromwales / Mod team. Re read T&C's - no problem...I'm simply offering to help and learn at the same time, and have no intention of generating payable work through this hub. Happy to chat directly offline and answer any questions to clarify things - if you feel this would help. Regards, Brad1 point
-
Very impressed, top shelf stuff right there. Even a can of wife beater, to aid thinking. ?? in my mind I can do stuff like this but I’m really just an amateur wood butcher.1 point
-
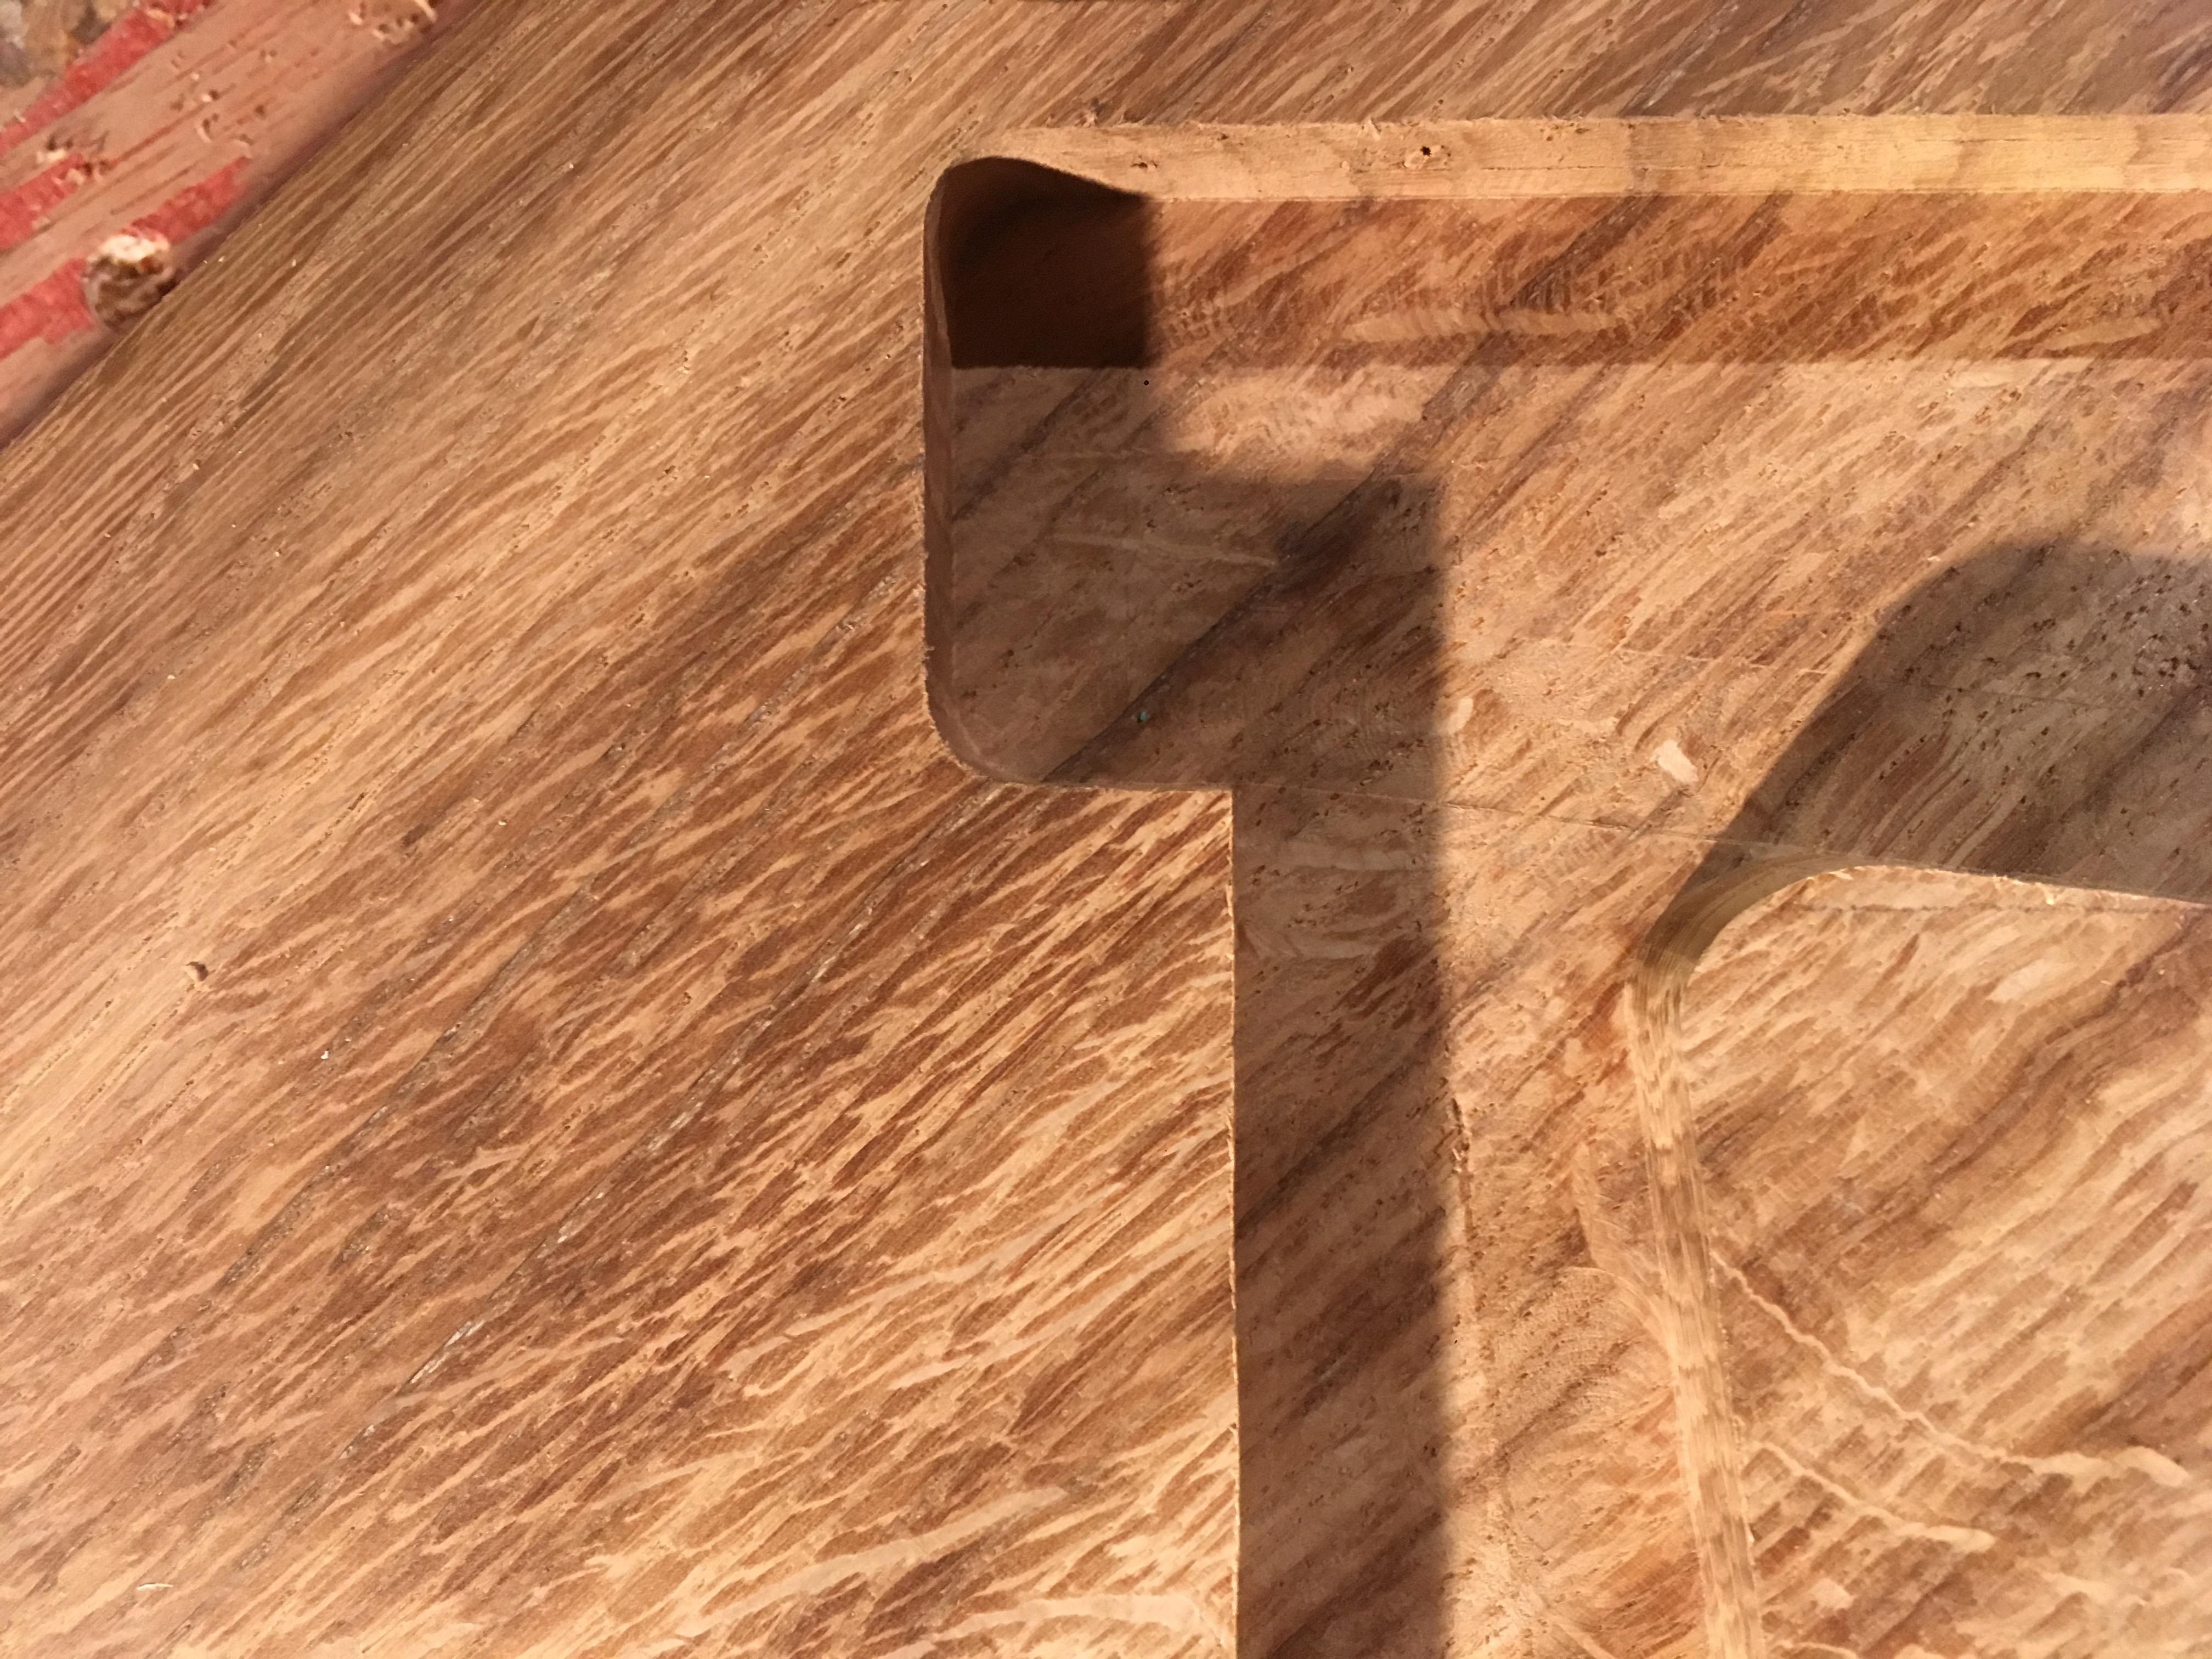
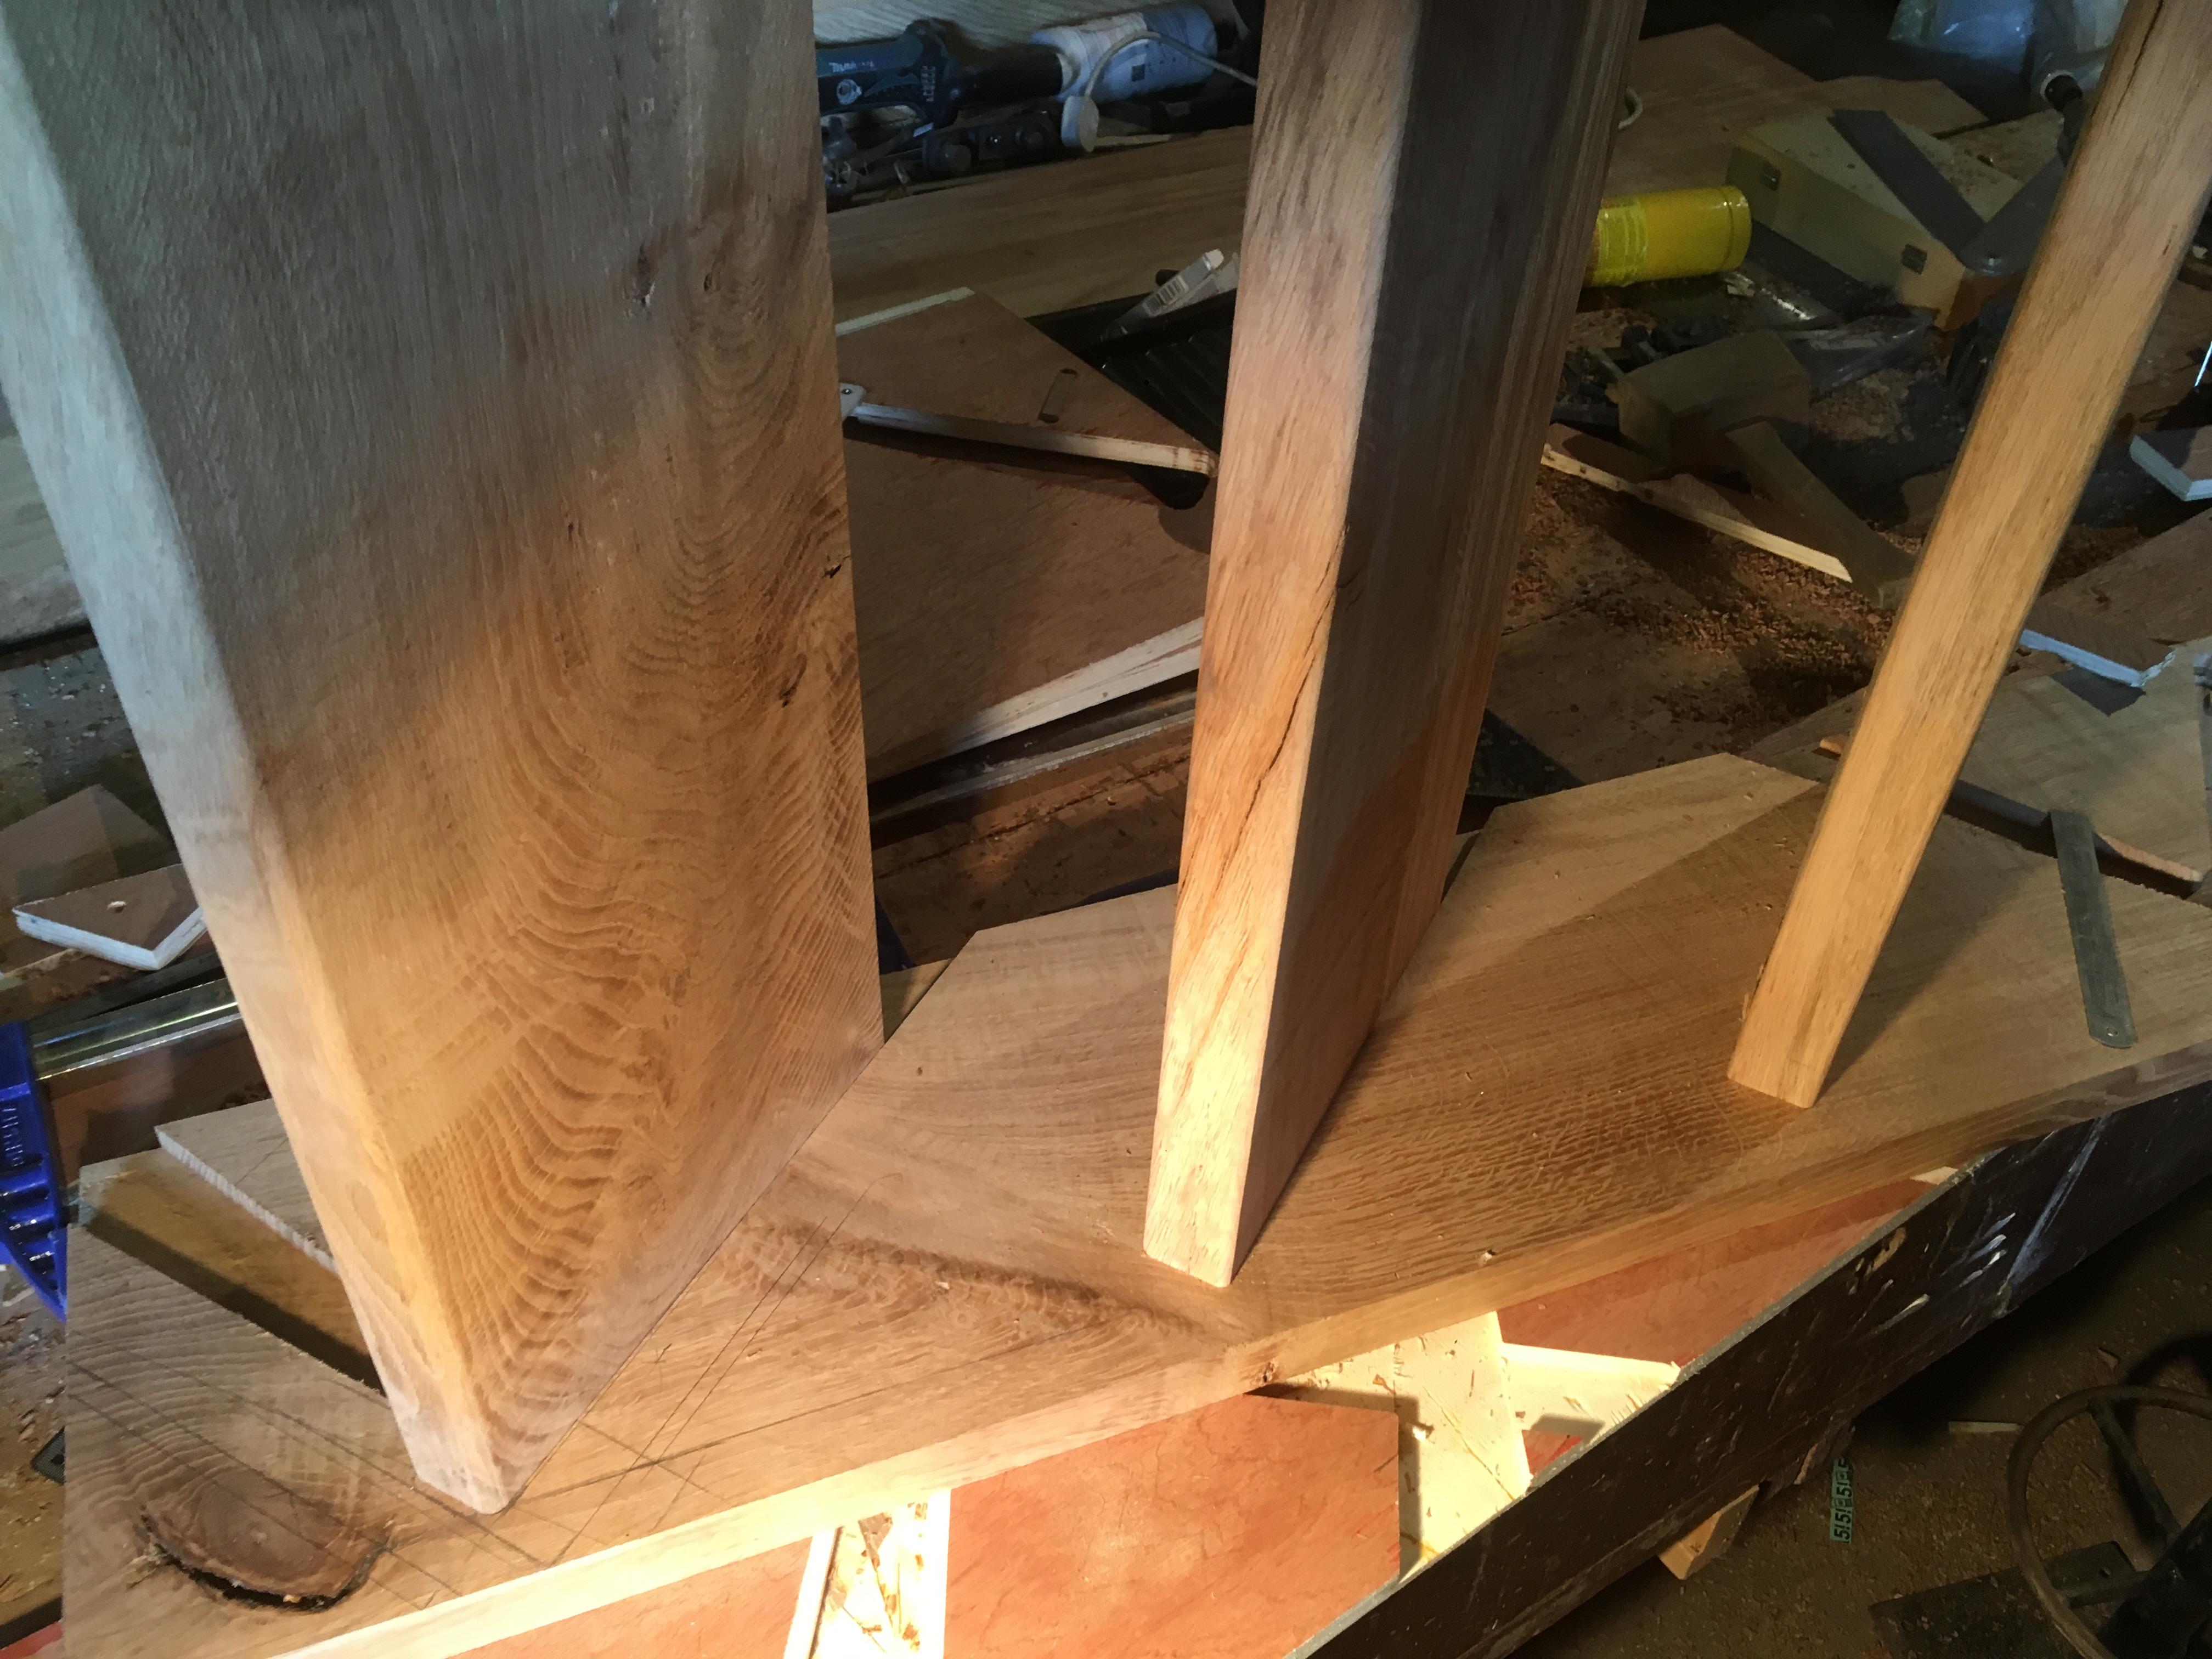
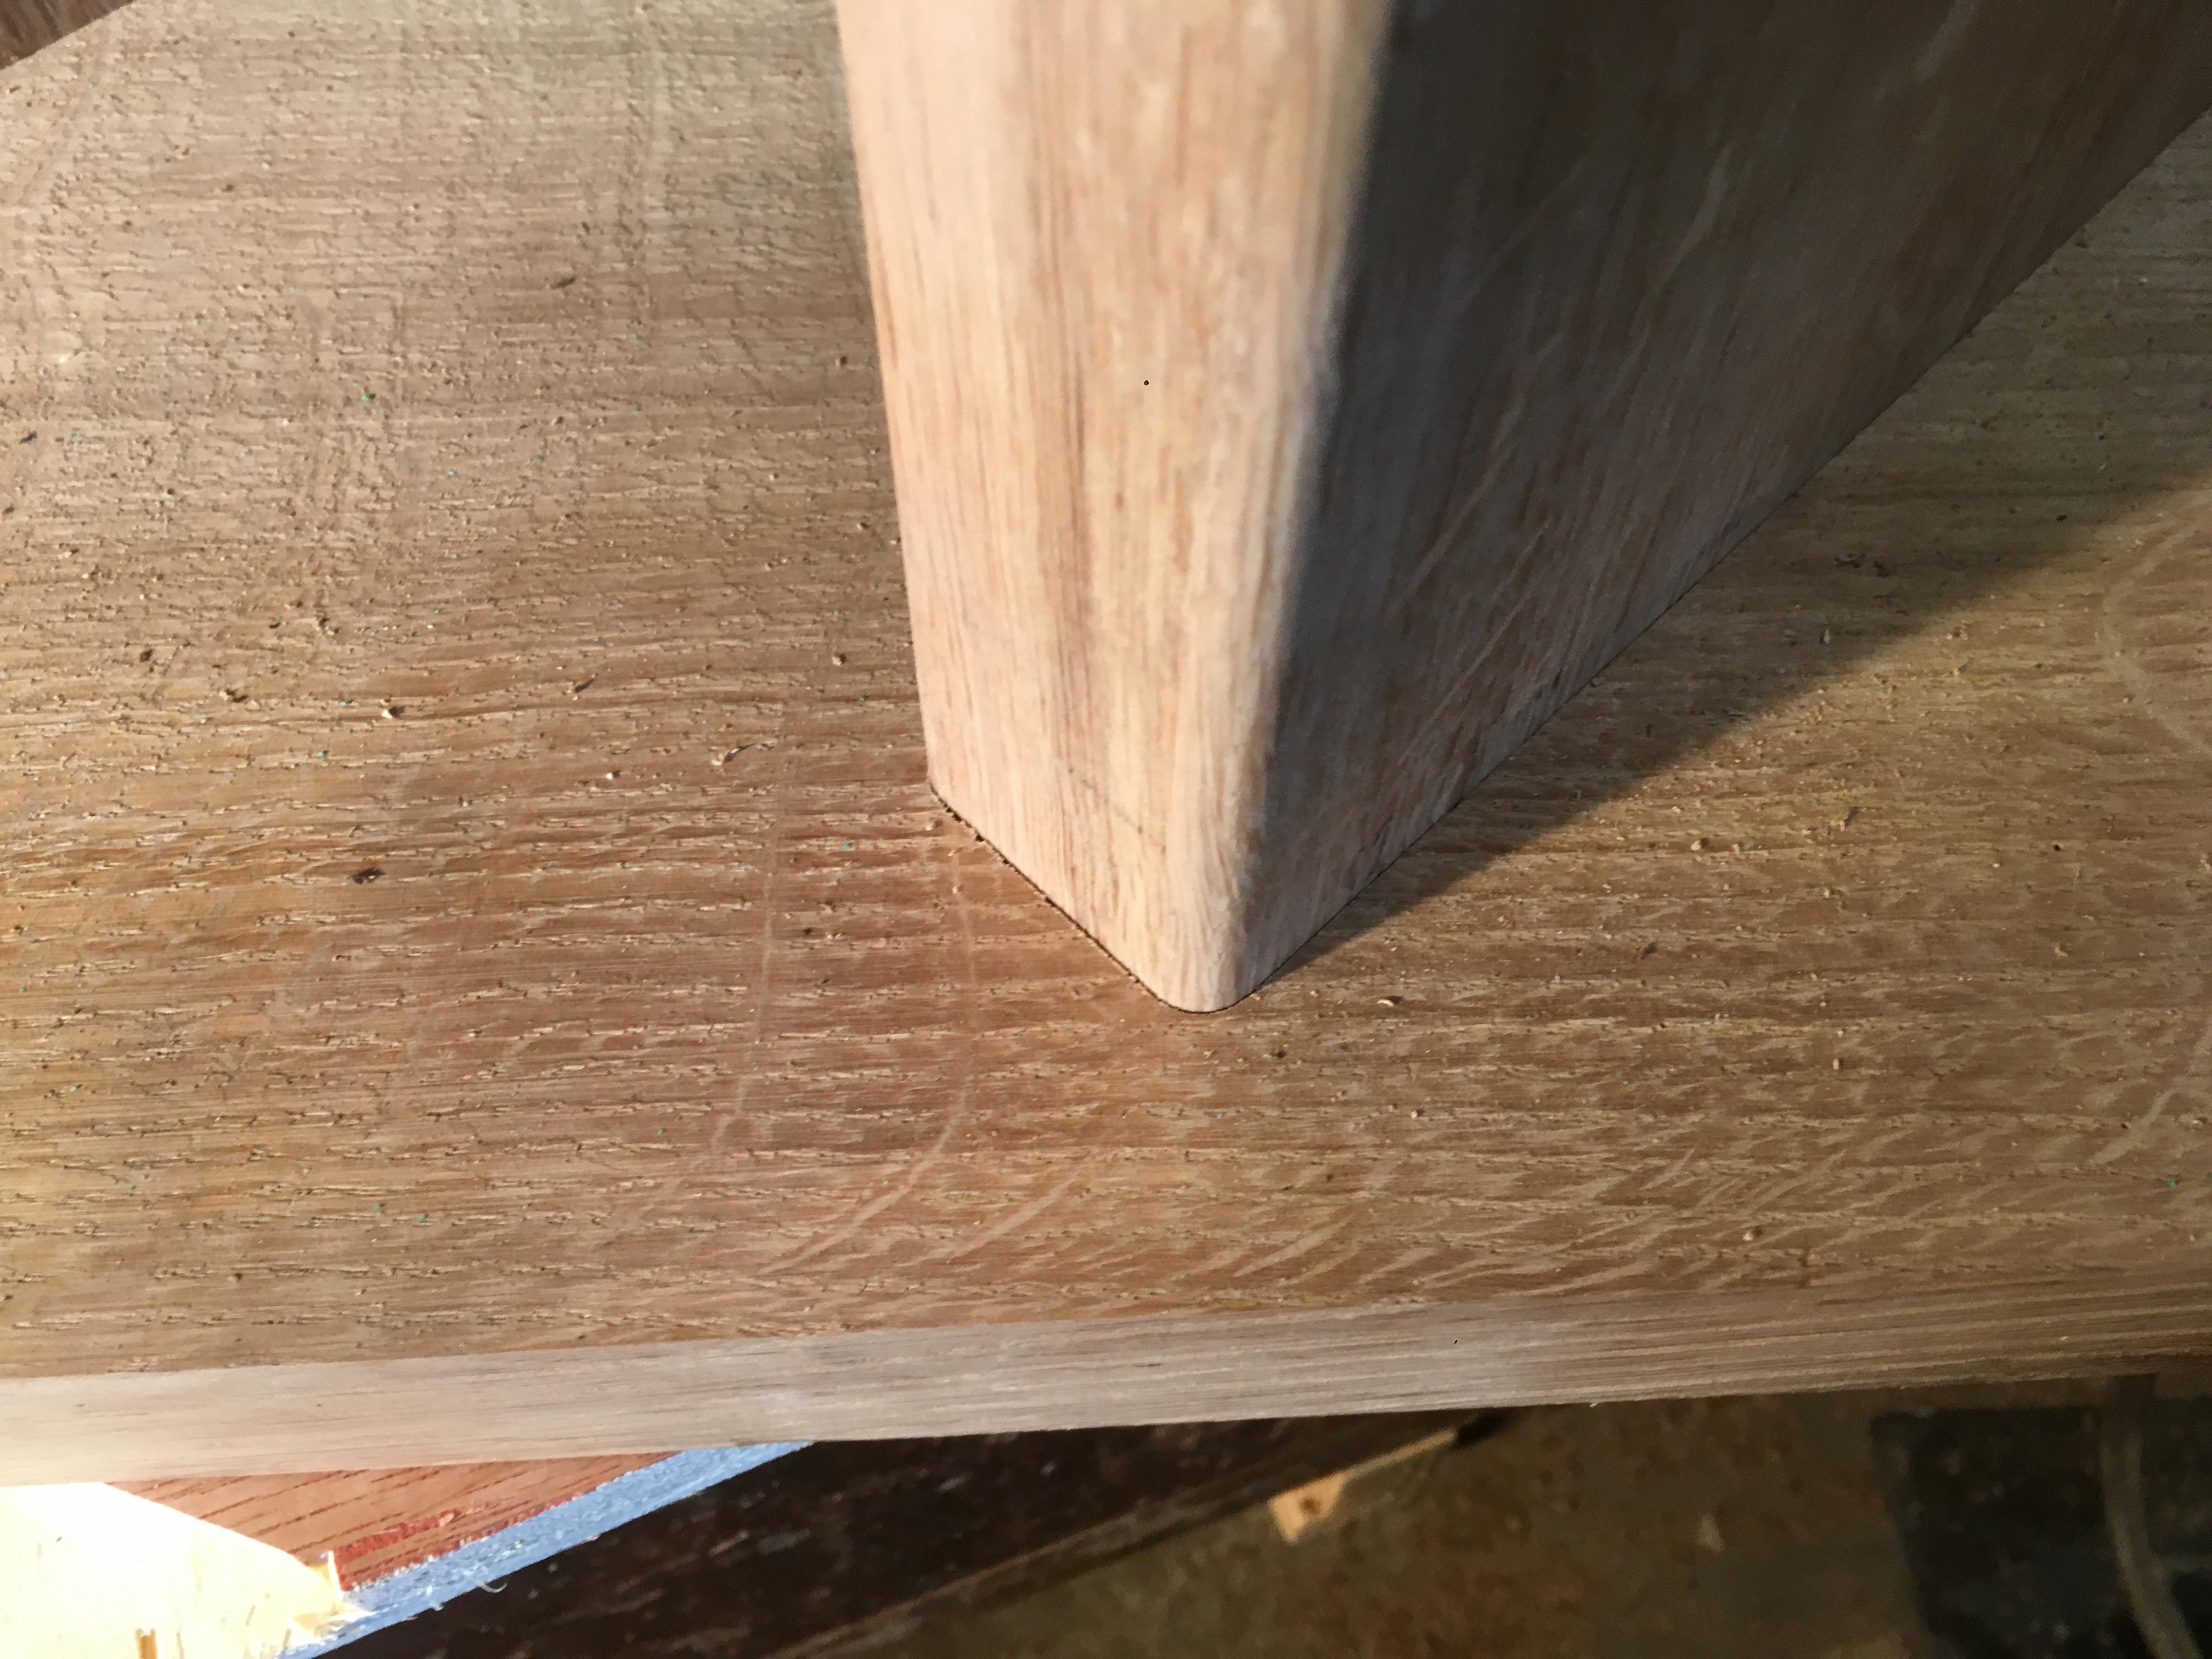
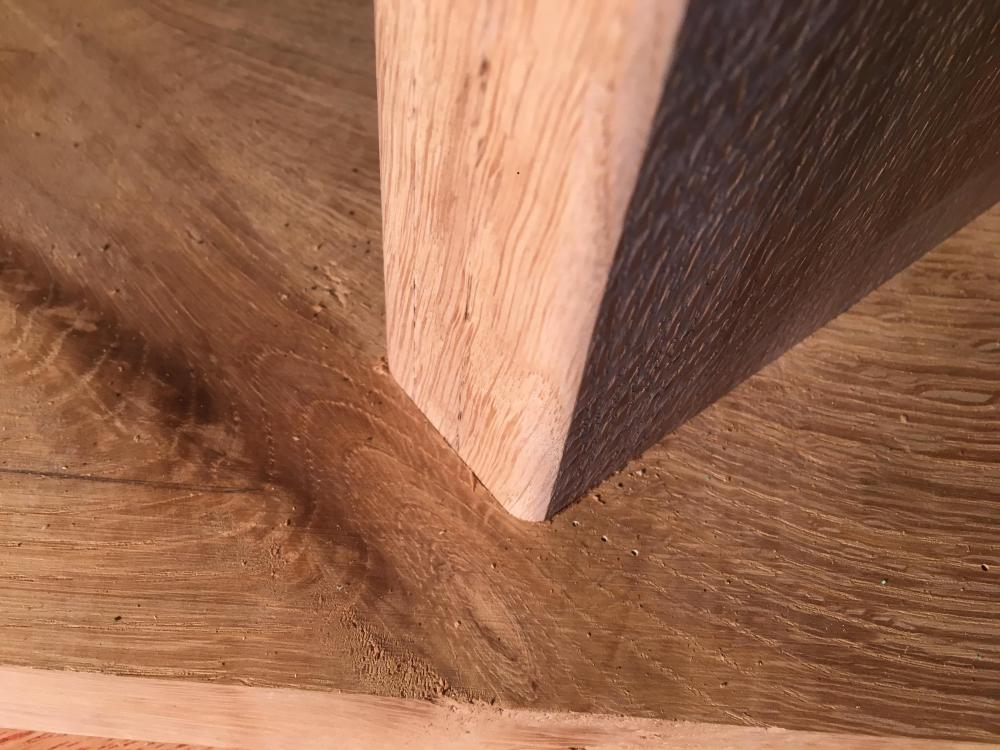
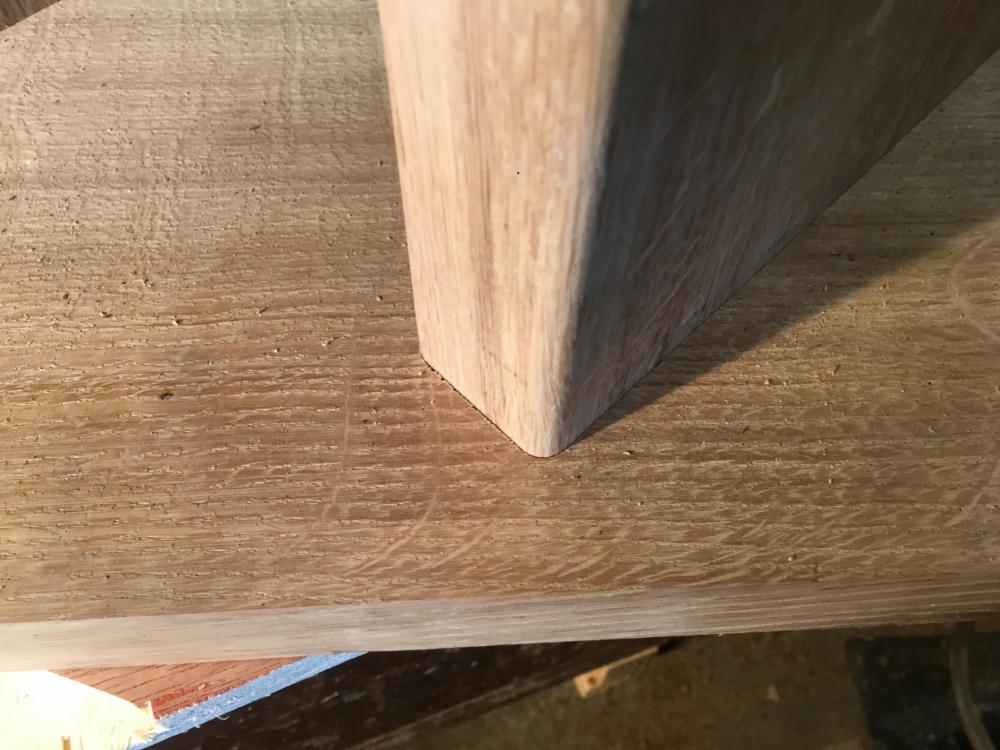
Having spent the summer months pottering in the garden, and generally ignoring the list of outstanding things to do inside, I finally summoned enough motivation to get things finished off. Fortunately, the list was fairly short so once started, was completed in a reasonable timescale. In the kitchen we tiled the splashback, fitted a decor panel underneath the bridging units (rather than having to see the underside of the units) and fitted a breakfast bar. Picking the tiles was probably the most challenging part, but we finally found something we both liked and agreed upon, and seems to work pretty well as a contrast to the units and worktop, as well as matching the colour scheme of the wider room. The decor panel has nicely finished off the underside of the bridging units. Ideally, this would have been done at the time the kitchen was fitted, and although was something I raised in the kitchen showroom, it was decided that it wasn't required... The breakfast bar was formed from 450mm deep lengths of worktop, the uprights specified as shelves so they were finished on all sides. A very simple construction secured to the back of the island by means of small brackets to a batten, and fix-all to the wall and floor. The height is set at 1000mm, which although taller than a standard breakfast bar, does give more leg room when sitting at it. I have to admit I wasn't keen on the idea of a breakfast bar, but have been won over, and it is a really usable addition to the room, primarily as a place to sit and chat when someone is working in the kitchen. I think solid oak worktop would have been preferable, but the final choice was down to asthetics, and again colour contrast was desired. In the utility room, I built a bench / shoe storage. A very simple but sturdy construction, I used oak worktop off-cuts for the uprights, and formed the shelf and top, using off-cuts from our oak door frames and door stops, glued to an off-cut of plyboard, all finished with Osmo. From a cost point of view, the materials were all free as they were scrap. The only cost was my time, a little wood glue and a few sanding pads for the orbital sander. Having built the bench, I had a couple of pieces of oak worktop left which I used to make a couple of little side tables. I had intended these to be only temporary, but like them so much that I plan to keep using them rather than replacing them. Elsewhere we had a couple more spots on our oak floor where it hadn't bonded to the slab. These only became apparent as we moved furniture around. I've previously relayed the reasons for this issue so won't repeat them. We used the same method of 'repair' using this product: http://www.fixafloor.co.uk/ but instead of drilling a larger hole and using a plug of timber flooring to finish, I drilled a hole of 4.5mm, injected the adhesive, then once cured 24 hours later, finished the drill hole flush using melted furniture repair wax. This in my view is a better method of finshing, looks less intrusive and was less time consuming compared to plugging. See below for comparison pictures. Filling all the nailheads on our oak skirtings and facings was not a task I was looking forward to, but in the end only took a couple of hours. Using a tip I picked up many years ago from a decorator, I used linseed putty, mixing 50/50 some natural and mahogany coloured putty for a final filler that was pretty well matched to our oak. Very easy to use, the putty remains flexible with the only finishing required being a wipe over the filled area with a dry cloth to remove any reside. Other than that, it's been settling into a routine of annual maintenance - servicing our MVHR (filters and cleaning the core), renewing the white silicone in our showers and servicing the treatment plant air pump. Next entry - Heating and DHW - How our ASHP based system has performed over the last 12 months.1 point