
Leaderboard


Popular Content
Showing content with the highest reputation on 02/14/18 in all areas
-
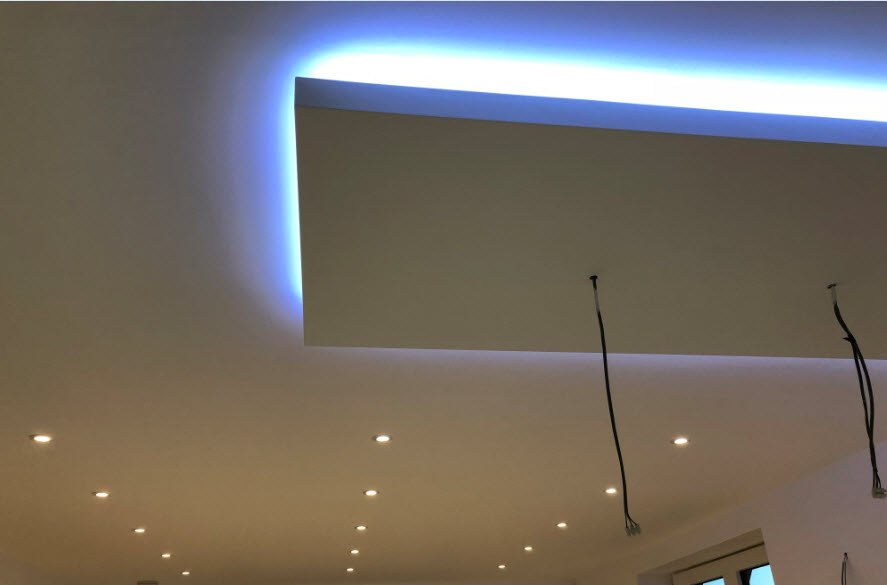
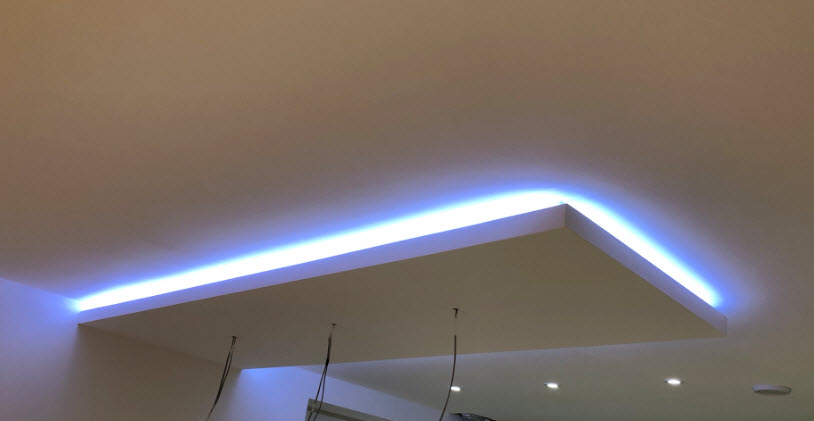
Looking pretty now its plastered and painted.
 3 points
 -
Clear it. Wait. Watch. Think. Ask. Act Ian2 points
-
Herding pandas...you'd hate Linux then! I've tried Photobucket, Tinypic, Imgur, Postimage etc. Just think Flickr.....is well, slicker!2 points
-
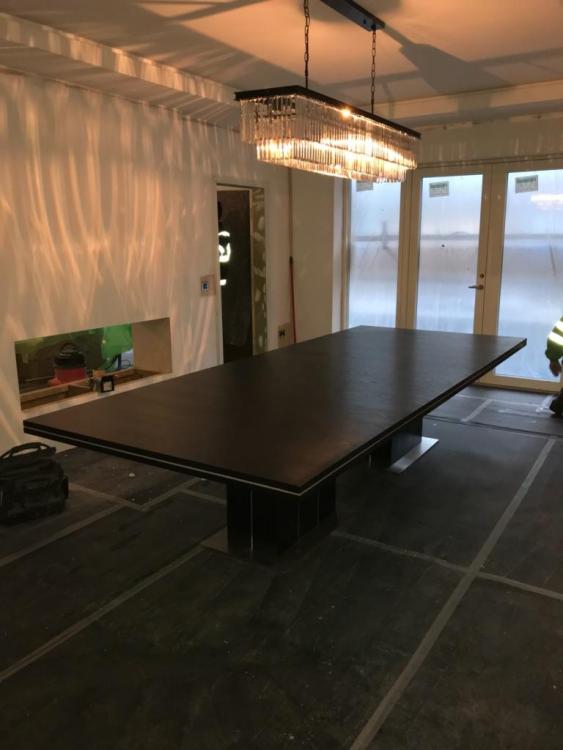
I am trying to hold off pictures until we are finished, but I think this is useful for other members. We bought a light from Aliexpress for $760, the same light at Restoration Hardware in the US is $3896 for a member or $5195 for a non member. It looks the same to me! The lower picture is from Restoration Hardware, the upper is our light and table just delivered today. Oh and most importantly on Valentine's Day, my wife likes it and the table, she was particularly unsure about the table.
 2 points
 -
We have a passive-class house where the net heating requirement to keep the house warm in the coldest winter months is approximately 1kW. The only heating system for doing this an underfloor heating (UFH) system base on 3 ~100m UFH loops buried in our passive slab. That's it; no upper floor systems; no towel rails; nothing. The reason for this is that our timber framed house is super insulated and air tight so there is very little temperature variation throughout the house, but that's all been covered in earlier posts. What I want to do in this post is to provide a simple explanation of how I am going to heat my house and how this works so that John (@joe90) and other forum members understand my approach. This basic heating strategy was first evangelised by Jeremy Harris (@JSHarris), but variants have been adopted by other forum members and their consistent experience is that it works and works effectively for this class of passive house. However, what I am doing is a slight variation on Jeremy's approach: I am using the slab itself as my main heat store, so no buffer tank. I will be heating it by circulating warm water through the UFH loops and this water will be heated by a simple small inline 3kW electrical heater element. The heating charge will normally be done as a "chunk" once per day during the E7 cheap rate period to take advantage of low tariff rates. However, I am also including in the design provision for the later addition of an ASHP, should the heating data collected over the first year show that there is a 10-year payback in doing this. As I said, Jeremy's approach has been well documented by him in his blog and by others. He has recently described that his system settles down into a repeating pattern over the colder winter months winter where his heating comes on for a few hours once a day in the early morning, and the heat in the slab is topped up during this period. This is broadly what I call "chunk heating": unlike a traditional house central heating system which is turning on and off pretty continually, the heat losses in our type of house are so small and the house has such a high thermal inertia that you can heat the it practically with a single daily top-up to the slab; this heat then "trickle feeds" into the house over the day. Yes, there is a slight residual ripple on the temperature in the house, but this is less than a 1°C undulation over the entire day and so this isn't really perceptible to the occupants. I am adopting this same approach, but shifting my heating period earlier so that it ends at the same time as the E7 low rate tariff ends. The main difference in my implementation is that I am heating the slab directly without a buffer tank. I wanted to get my head around this before committing to this decision, so I modelled this in some detail and covered all of this physics and modelling stuff in my Boffin's corner thread. This modelling has persuaded me that the mechanisms and dynamics of heating are pretty simple, and so in this post I want to cut out all of the equations and stuff (with one exception) and focus on describing what happens in plain terms. First, I am using a small 3 kW electric element to heat the water circulating in the UFH loops (the same type is used as a hot tank immersion heating element). Just like an electric shower this heats the water stream a step in temperature. Sorry I am a boffin, so I will call this temperature change ∆T. (BTW, the triangle is just the Greek letter D and is short for difference; blame Isaac Newton for that one.) Just like an electric shower, double the power and ∆T doubles; double the flow rate and ∆T halves, and if I do the sums for a typical flow throw my UFH loops, and for a 3 kW heater then ∆T works out at about 1.6°C for my system -- a lot less than a typical gas-boiler fed UFH installation, but my heater is puny in comparison. So if I start pumping 3kW of heat into my slab, then the system settles down after about 10mins and the heat output is pretty much the same along the entire 3 × 100m runs of UFH pipe, pipe work, that is each 1m of pipe dumps about 10W of heat into the concrete. This lifts the temperature of the concrete, and at the same time cools the water in the pipe pretty steadily along its length so it comes out at 1.6°C cooler than it went in. But cooler or hotter than what? The heat flows radially away from the UFH pipe creating a thermal gradient. [Boffin bit warning, and the only one] this gradient is pretty close to what is known as the steady state radial solution to the 1-D heat equation, which has a formula Tr = Tp - A.log(r/rp). where T is the temperature and r is the distance from the pipe centre, with the p subscript relating to the pipe/concrete interface. The A term is a function of the amount of heat flow. The main thing to note here is the general shape of this gradient: the temperature of the water ends up roughly 4-5°C hotter than the slab average for this sort of 10W/m value, and the temperature in the concrete falls away rapidly as you moving away from the pipe towards the average slab temperature. Since the volume of concrete goes as r2, the actual proportion of the concrete more than 1°C hotter than slab average temperature is small. So the overall effect of the heating is to slowly lift the average slab temperature. There is also a general heat gradient along the water in the pipe but once you get more than a few cm from the pipe centre the concrete is all within 1°C or so of the slab average. There are also local hot regions around the UFH pipes up to 5°C or so hotter than the overall average slab temperature. However, this is factors less than you will get with a conventional UFH system. A key difference of Jeremy's approach is that the water continues to recirculate after the heating is turned off, and now the water flow acts to redistribute the heat rapidly along the pipe levelling the previous 1.6°C gradient; at the same time (without the heat being pumped from the UFH pipe) this central warmer region rapidly flattens out as the heat flows outward, and within an hour or so hardly any heat variation remains and the entire slab is within ½°C of the slab average temperature. A good analogy here is pouring water into a bucket: the surface level steadily rises as you pour it in and the surface itself is a bit churned up by the act of pouring, but as soon as you stop pouring, it rapidly levels out to flat surface. OK in a real slab this is also complicated by the deep elements (the unheated ring beams in my slab are over a third of the total volume) and the heat does flow into these largely thanks to the high thermal conductivity of the rebar. But overall, the slab is acting as a heat battery soaking up the power that you pump in. The trick is not to put a somewhat arbitrary limit of the maximum input water temperature (say 25°C) as this will limit the amount of power that you can apply. This heat gets quickly spread uniformly throughout the slab. By the end of the heating period, the slab is 2°C (or whatever) warmer than the room temperature, and is starting to transfer heat into the room fabric at ~15W/m² whilst itself slowly cooling. This is more than the external heat losses in the house, so this heat both warms the air and the rest of the wall fabric. This creates a very slow rise and fall in the room temperature over the course of the day -- of roughly 1°C. But so long as you put in enough heat each night, the overall house temperature remains stable. So how much is "enough" heat? In my case I use a very simple strategy. I am using the UFH circulation temperature at midnight as my test. If it is less than the previous night, then I add a bit more heat than last nigh and v.v. Simple really.1 point
-
Hi, Tom here. New to the site. I am a passive-house enthusiast, already planning designs for a new build but I have not even found a plot yet, so I am probably letting my enthusiasm get ahead of me. I aim to build a small home in the South East of England, probably around Hertfordshire or Buckinghamshire. I have no experience in building but have been reading intensively for a few months now and have learnt a lot from this site and many other blogs, including Jeremy Harris' and podcasts, including Ben Adam Smith's House Planning Help podcasts and by visiting houses on the Passive House open days. I am fully convinced that Passive House is the best way. And have been persuaded that SIPs above a floating concrete slab might be a good construction approach. For DHW and heating, my latest best guess for internal services is an ASHP, UFH, SunAmp with E7 and PV. Best regards, Tom1 point
-
It's starting to feel like the finish line is in sight now. Since my last entry, I've largely finished the interior including all the flooring, the doors, most of the kitchen, the windowsills, and the huge and daunting task of the bathroom (big thanks to @Nickfromwales for answering my hundreds of questions on that one!). I got a plumber in to install my UVC (sorry Nick, forgot to get a photo of that). I've also done a bit more of the cladding, but the exterior work has been on the back burner. I've also gone back to work full time since my last blog post, which is why everything has slowed down so much. Still managing to get a bit done in the evenings and at weekends. You'll notice some furniture has appeared, some of this was given to me by a neighour and was very handy for storing all my tools etc; the bed and sofa were in storage with family and eventually I exhausted their goodwill and had to take delivery of them! The shower has had a couple of test runs, and SWMBO reports that it is very nice indeed. The plan is to be open for business in April, which should be tight but doable. I expect that at that stage I'll still have some outside jobs left to finish but the inside is only a few days away from completion now. Sorry for the crappy image quality- will have to do a bit better when the time comes to do the proper marketing shots1 point
-
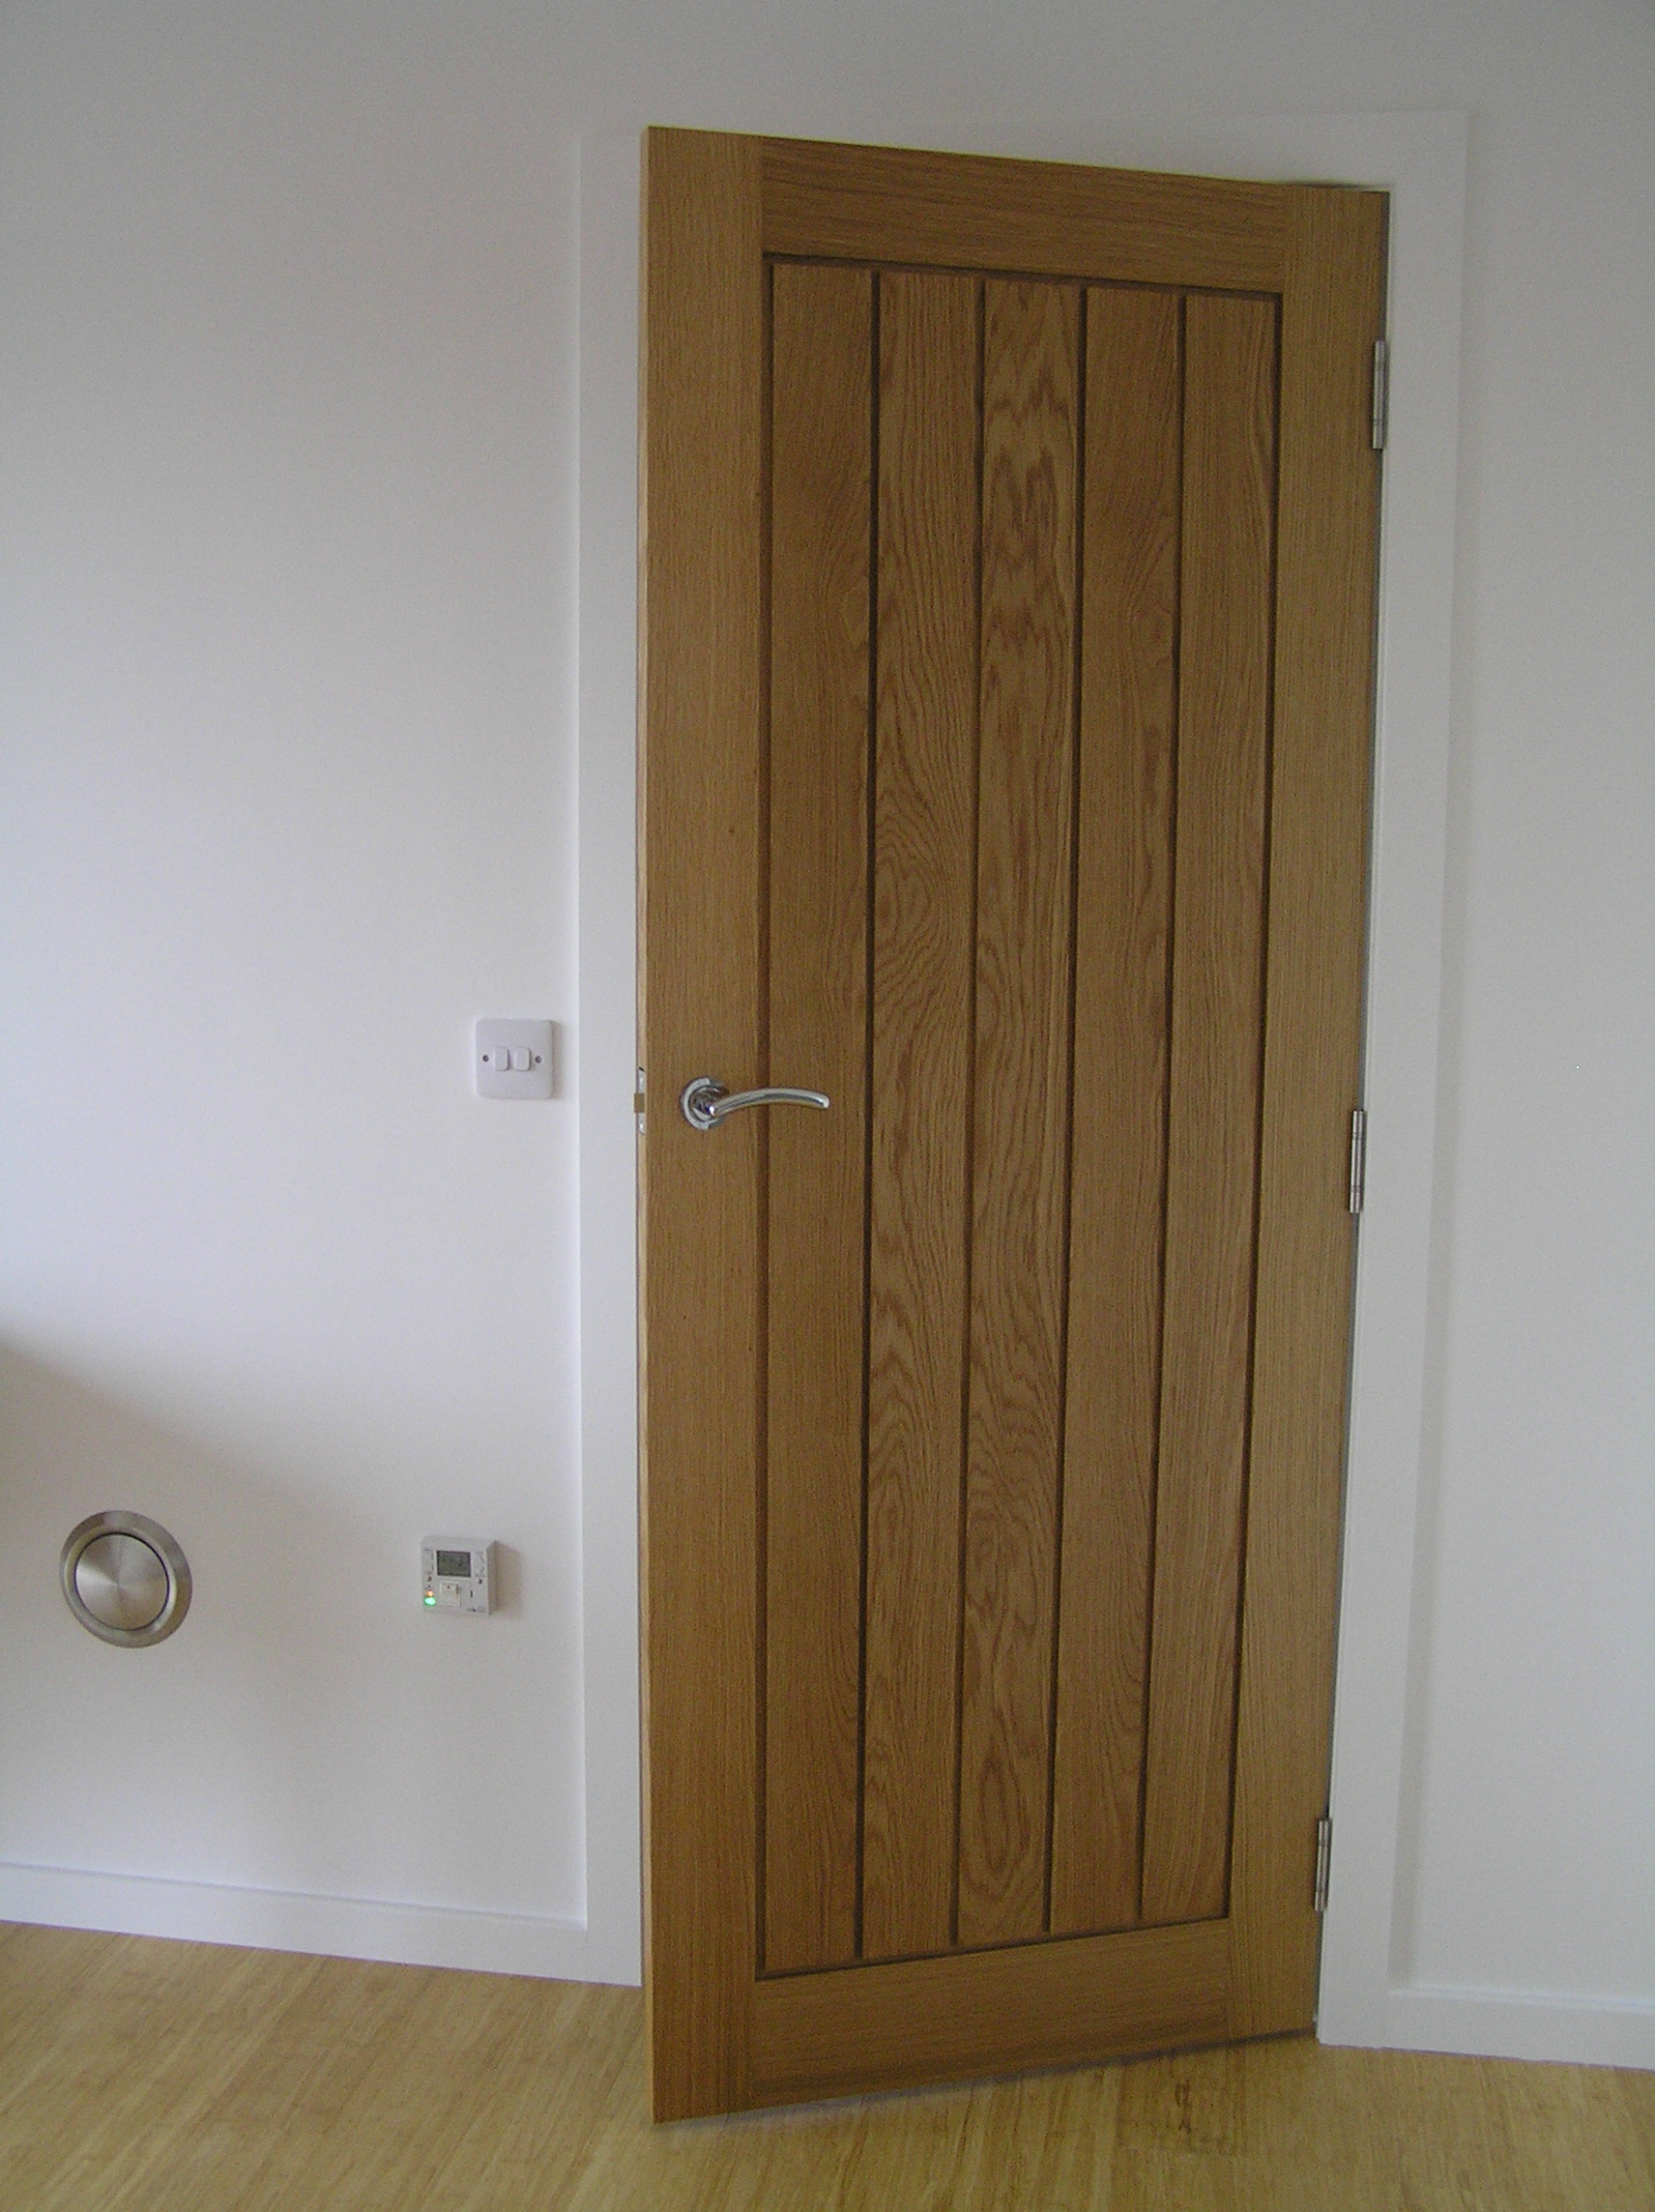
I've started hanging the doors upstairs which are oak Mexicano design. I have been using Osmo Polyx Clear Satin and the finish is excellent. I have never used it before but it was really easy to paint on even in the grooves down the door. I would certainly recommend it.
 1 point
 -
Excellent! The place looks a million dollars. Bathroom looks great too, you'll have people fighting over that place soon. One last push, and then your done. Tres bien Rodney1 point
-
I'm thinking that looks very very nice for a wee holiday home...1 point
-
if it is dry rot a few more days won't make any difference1 point
-
I'd be looking under the floor. Can 'o worms maybe! Looks like that wall has maybe repaired before...1 point
-
Dry rot occurs where there's damp. Fix any damp sources for a start. A house full of stacked crap for many years will likely have had ventilation problems too.1 point
-
I don’t think you should tile it i could look at those neat screw lines all day long.1 point
-
@nod, you are booked for my place later this year OK?1 point
-
No if you just let the line just catch the edge you will be accurate Some of the MF ceilings I set out can be 20 meters plus I use exactly the same princeible The line on my green Hilti is about 5 mil once the distance is greater than 10 metres1 point
-
it ain't woodworm, they can't suck it that dry! is there any mycelium ( long white stands) or rusty dust? it does look like dry rot, what condition is the floor in? any bounce in the floor if the boards are running parallel to that wall?1 point
-
Ideally you would have a bracket with your laser But matching it to the SAME datum each time will work fine Use a sharp pencil to mak your datum have your laser line nipping the bottom of any tile line or batten You will find it much easier to work from a batton It May help you to put a pencil line along the top of your baton the width of your tile plus adhesive So you can keep everything straight Setting out from a focal point is a good idea1 point
-
Faffing poo farts that took far too long to sort out!!! (and I'm a web bloody designer!!!) Hearding bloody pandas? wtf lol ok here's the video... (I hope) SKIRTING CRUMBLE1 point
-
Might have been an idea to foam around the edges before squirting in the slurry, perhaps...............1 point
-
Depends what he uses .... 20m x 3m wide scrape off of 200mm of top soil is around 15 cubic metres or a Lorry load of muckaway top that with a 150mm layer of MoT1 compacted is around 10 cube or 18 tonnes of MoT1 muck away £180 JCB half day £120 roller half day £65 MoT1 £235 Value..? £600... however I would say it’s worth a lot more in terms of a clean entrance and access to site.1 point
-
Hi Thanks for the advice,I fully appreciate what you say about the friendship,we were best men at each other’s weddings and I’ve known him for nearly 40 years! Unfortunately the landowner is a property developer who I’ve done work for in the past. I’ll get a lawyer to look into my friends existing ROW and the implications of any new ROW to the new plot.1 point
-
Reminds of my first doer upper, had mushrooms growing in the carpet. Took my 11 year old son with me to cut the carpet up to dispose of it, he has never forgotten the experience although I do remind him of it when I visit him at Uni!!1 point
-
My missus reckons it looks like our kitchen on a bad day!1 point
-
I use Flickr for my photos and videos. https://www.flickr.com1 point
-
Sympathy. I only ever had one really bad experience with a tenant, and the house was left like that.1 point
-
@Luckylad Also, buying from friends mutual clarity of communication and understanding, and equitable outcomes, is *really* *really* important; it is so easy to put a spanner in your friendship by mistake - one misunderstanding and offence that does not feel able to be mentioned and one party may just let the friendship drift.1 point
-
Check with the lawyer. ROW can often be restricted to just the existing property and so a new one would not enjoy the same rights.....without negotiation with landowner and no doubt a good few £££’s changing hands.1 point
-
Drill the hole with a 0.5mm smaller bit than it recommends. That's all I done for my door frames.1 point
-
Is the septic a concrete one or fiberglass one ..?? If it’s concrete and properly cleaned and suctioned out can you not just crush the lid and edges off it and bury it ..??1 point
-
I'm in talks with @AndyT at the moment and more information should be publicly available around the beginning of March. Will be worth the wait me thinks. ?1 point
-
@Dreadnaught Id reconsider the Willis heater and await the arrival of the 3rd generation Sunamp heat battery if I were you. . DHW and space heating in one box with zero Willis-associated external pipework / pumps / losses, and you won't need a Sunamp ( PV model ) then either so none of those internal wet components either. Near 100% efficient for electricity to PCM ( Sunamp storage ) and loads less complexity.1 point
-
I agree that its would be 'possible' however it would be a really bad idea to render directly onto the outside surface of any SIPS system or timber frame wall construction, even ones faced with a cement based board. It's a much better idea in the wet climate that we have here in the UK to use a rainscreen in front of the SIPS. The rainscreen should create a ventilated cavity between the SIPS and the rainscreen layer. In British Columbia, Canada between 1985 and 2000 approx 50% of all buildings that were rendered directly onto timber framed external walls have subsequently failed. The repair costs exceed $4 billion. They subsequently altered their building codes to make rainscreen construction mandatory for timber bulidings. Google link: https://en.wikipedia.org/wiki/Leaky_condo_crisis1 point
-
Riding on the shoulders of giants me! I was inpired by advice from @Nickfromwales and then @PeterStarck's bathroom build. Tbh Peter's whole place screams attention to detail. I like to know that even what lies beneath is clean and tidy. Mind, I could never make a living doing it! ...but then it's not why "we" do it!1 point
-
Plus modern loft fluff (recycled plastic?) is so easy to work with, not itchy or irritating that you shouldn’t let it put you off. Suitable job even for completes novices, like me. Disposable mask, gloves and covered up is sensibly adequate with no worries about getting fibres up you sleeves or worse...1 point
-
They are likely to be getting a referral fee. Not sure whether that reduces the total amount available for insulation, or if it is a price reduction somewhere.1 point
-
Excellent tips thank you all. I think I'll take photos of everything I am unsure about first and post it here for the expert eye before I wade in with my DM's!1 point
-
When faced with an extortionate demand for an extension to our site insurance, I found a broker who went through exactly what sort of cover we really needed. As there was no more "building site" as such, no scaffolding and none of the outdoor risks normally associated with building (diggers, other plant moving around etc), and as the house and garage was secure and almost complete, they found an insurer who was prepared to provide unoccupied buildings cover that met our needs and was around 1/3rd the cost of a normal site policy. I took great delight in telling Buildstore to stuff it. Their fees are so extortionate that I'm surprised no one has come along to seriously undercut them, as they don't seem to add any more value than a good broker.1 point
-
I showed that to SWMBO. Explained there's most likely no phone signal there so she won't be able to talk to me about "her day" for a while...1 point
-
If you are messing .. literally .. around with plaster, or anything else, we (me plus handyman) tend to lay building polythene or similar over the floor. Just for ease of sweeping / clearing up. We use one or other of the wide versions from Wickes, sometimes even the heavy duty weed membrane. All are occasionally on 3 for 2 or cheap anyway.1 point
-
We have got our completion cert yet, even though the house itself is done and we are living in it. We have some groundworks outside that are covered by the planning application and want to do this zero-rated -- which we can't if we've "completed" our build. I did ping my BCO, about a certificate of temporary habitation, but he didn't even bother replying, so we just moved in, and took out normal insurance.1 point
-
Same thing in many ways Out exposed, in the cold of the winter, they save your life. In the summer, you and your community build/maintain/improve them for when you might need them. Free, open and honest What's not to like1 point
-
ripping the paper off the ceiling could/probably bring plaster down. if you're careful and it starts to come down cut through it prior to the cornice to save that. skirting, if cuboidal cracking, then probably dry rot1 point
-
I can give a thumbs up to the ZN Shine - I have had my 20 x 195w mono's since 2011 and they have over performed by about 30% on SAP2009. When i told them at an Exhibition in 2015 had them with data going back to day one they were amazed and asked if they could use my home as a case study, which I agreed to. All the data is on my dashboard http://wattson.energyhive.com/dashboard/AndyT it goes back days, months, years - enjoy.1 point
-
My builder has used a grabber for my land clearance. £180 for an 18 ton removal. The grabber can also pack things down on the lorry. Depending on the price saving might it be worth getting a big roll of something (maybe weed suppressing fabric but there is possibly a better solution) to cover and prevent the visual and wind powered sharing. Could always finish with a skip at the end1 point
-
#12footlongpole1 point
-
I got in touch with http://superiorsippanels.co.uk/ They got back to me pretty quickly . Their SIP's are cementitious (I think that's the right word) so apparently you can render straight on top of them?1 point
-
If you want to add any further insulation underneath your completed roof it will be critically important that you install a complete VCL layer on the warmest side. Any area where the VCL is compromised will lead to a major condensation risk - the warm moist air will get through any gaps in the VCL and condense on the OSB underside of your completed roof build-up. EDIT I did a quick (Glaser type not WUFI) condensation risk analysis and using the software's default temperature and humidity settings (internal 20 degC and RH 50% and external -5 degC and 80%) it showed that you 'should' be okay adding up to 100mm of mineral wool below your completed roof build up without an extra VCL but anything more than that produces a risk of condensation. If I then alter the values of the internal temperature and RH to 22 degC and 60% RH to make them more onerous (eg above a bathroom) then it shows damaging levels of condensation.1 point
-
This is what the kitchen looked like when I first entered.. Then I saw light!!!!
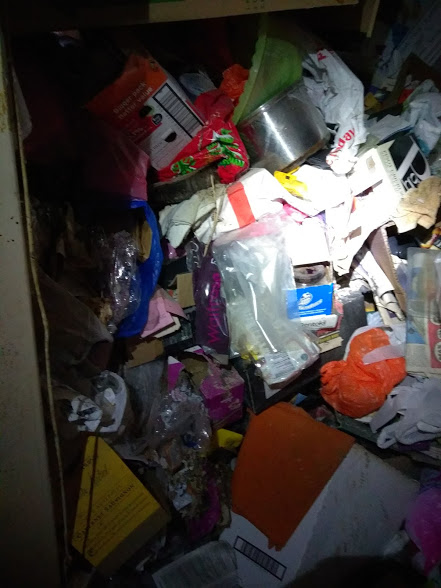

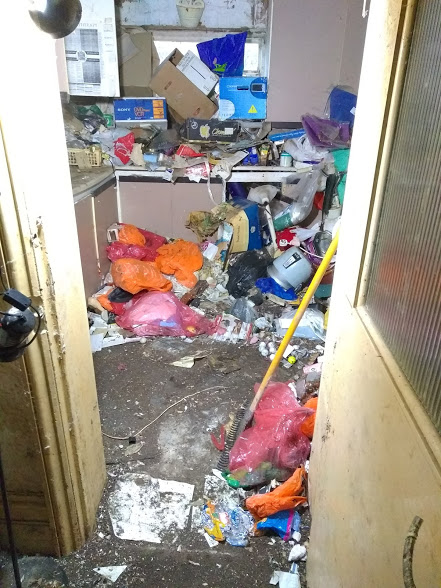 0 points
 -
Hope you didn't mess it up like I did....0 points


.thumb.jpg.bac90f3bbf6868cf2118d010d936c99d.jpg)


.thumb.jpg.84720b9262bdfdd639b2257471fce9e7.jpg)

