
Leaderboard


Popular Content
Showing content with the highest reputation on 11/22/20 in all areas
-
For future members who may be looking to purchase Intello Pro Clima membrane, Tescon Vana airtight tape etc, cheapest place I managed to find is a company in Germany. A search for Latzel Dammstoffe should find them. My order was with me within a couple of days, very keen pricing when compared to UK companies.3 points
-
I think if the builders attitude is as reasonable as yours He will sort it out quickly and as cheaply as possible Good luck2 points
-
They will tape all the trickle vents chimney fans etc1 point
-
@Moggaman my builder sourced the wall ties so I do not know their cost, I went with stainless as the total area deemed a cold bridge with stainless was very small and IMO fairly insignificant and basalt are very expensive. PIR is only any good if no gaps are left, this usually means foaming it in place which would be difficult. Rockwall is a more natural material and not a petro chemical product which I try to avoid. Rockwall can be stuffed into odd voids during the build making it easier to use. As my build is very “cottage”, thick walls are “in character”.1 point
-
Don't use the concrete versions as they will fade in the sun. Buy the real stone cladding.1 point
-
Stone and render looks nice - brick and stone looks 1970’s stone cladding IMHO...1 point
-
Roofers been round and he agrees with the GRP route, we’re going to leave it all to him. We do want some lead so probably the up-stand and hopefully lead coming round the front part if it needs to be on show, not sure how it’s going to look yet. You mention the weep holes as per drawing, your right no you can’t see them because the stupid bricky has put them below the roof line, so we’re just going to grind them back and fill them in, not sure if this is right but it’s a little late now. Thanks for all your help. Regards. James1 point
-
I agree with your builder, it is telling him to apply 18mm plywood that will then receive interior finishing, i.e use a nice plywood not sheathing ply, it is also a bit strange that the type of ply is not mentioned there are many different varieties of 18mm ply availiable. The spec could have had more detail,how do you expect him to quote for an interior finish if you havent specified what it is you want? As has been said you could have wanted a really expensive finish or a really cheap coat of white emulsion1 point
-
Look on the bright side. At least now you can get the pipe falling away from the pan. Now I am not usually a betting man, but I will wager this will NOT be complete before Christmas. I am not yet convinced this thread will rival the length of the "boxing in" thread. BUT. Looking at all that space in the loft. I would fit a back to wall pan and concealed cistern in the loft.1 point
-
I normally use the tap on type of edge bead I buy by the box from BG But Travis Perkins should be able to order you some in
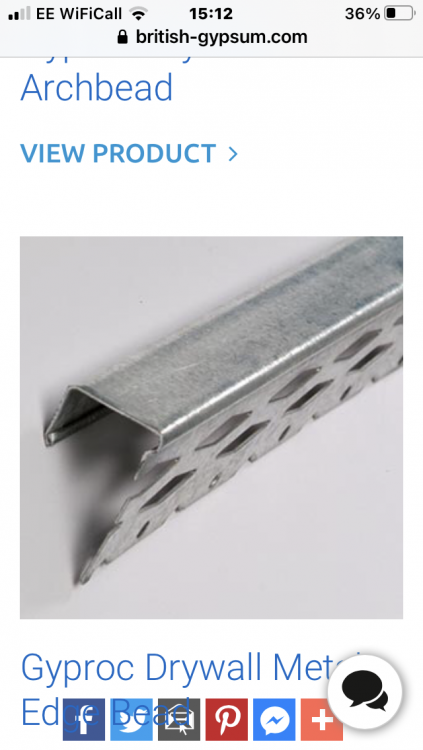 1 point
 -
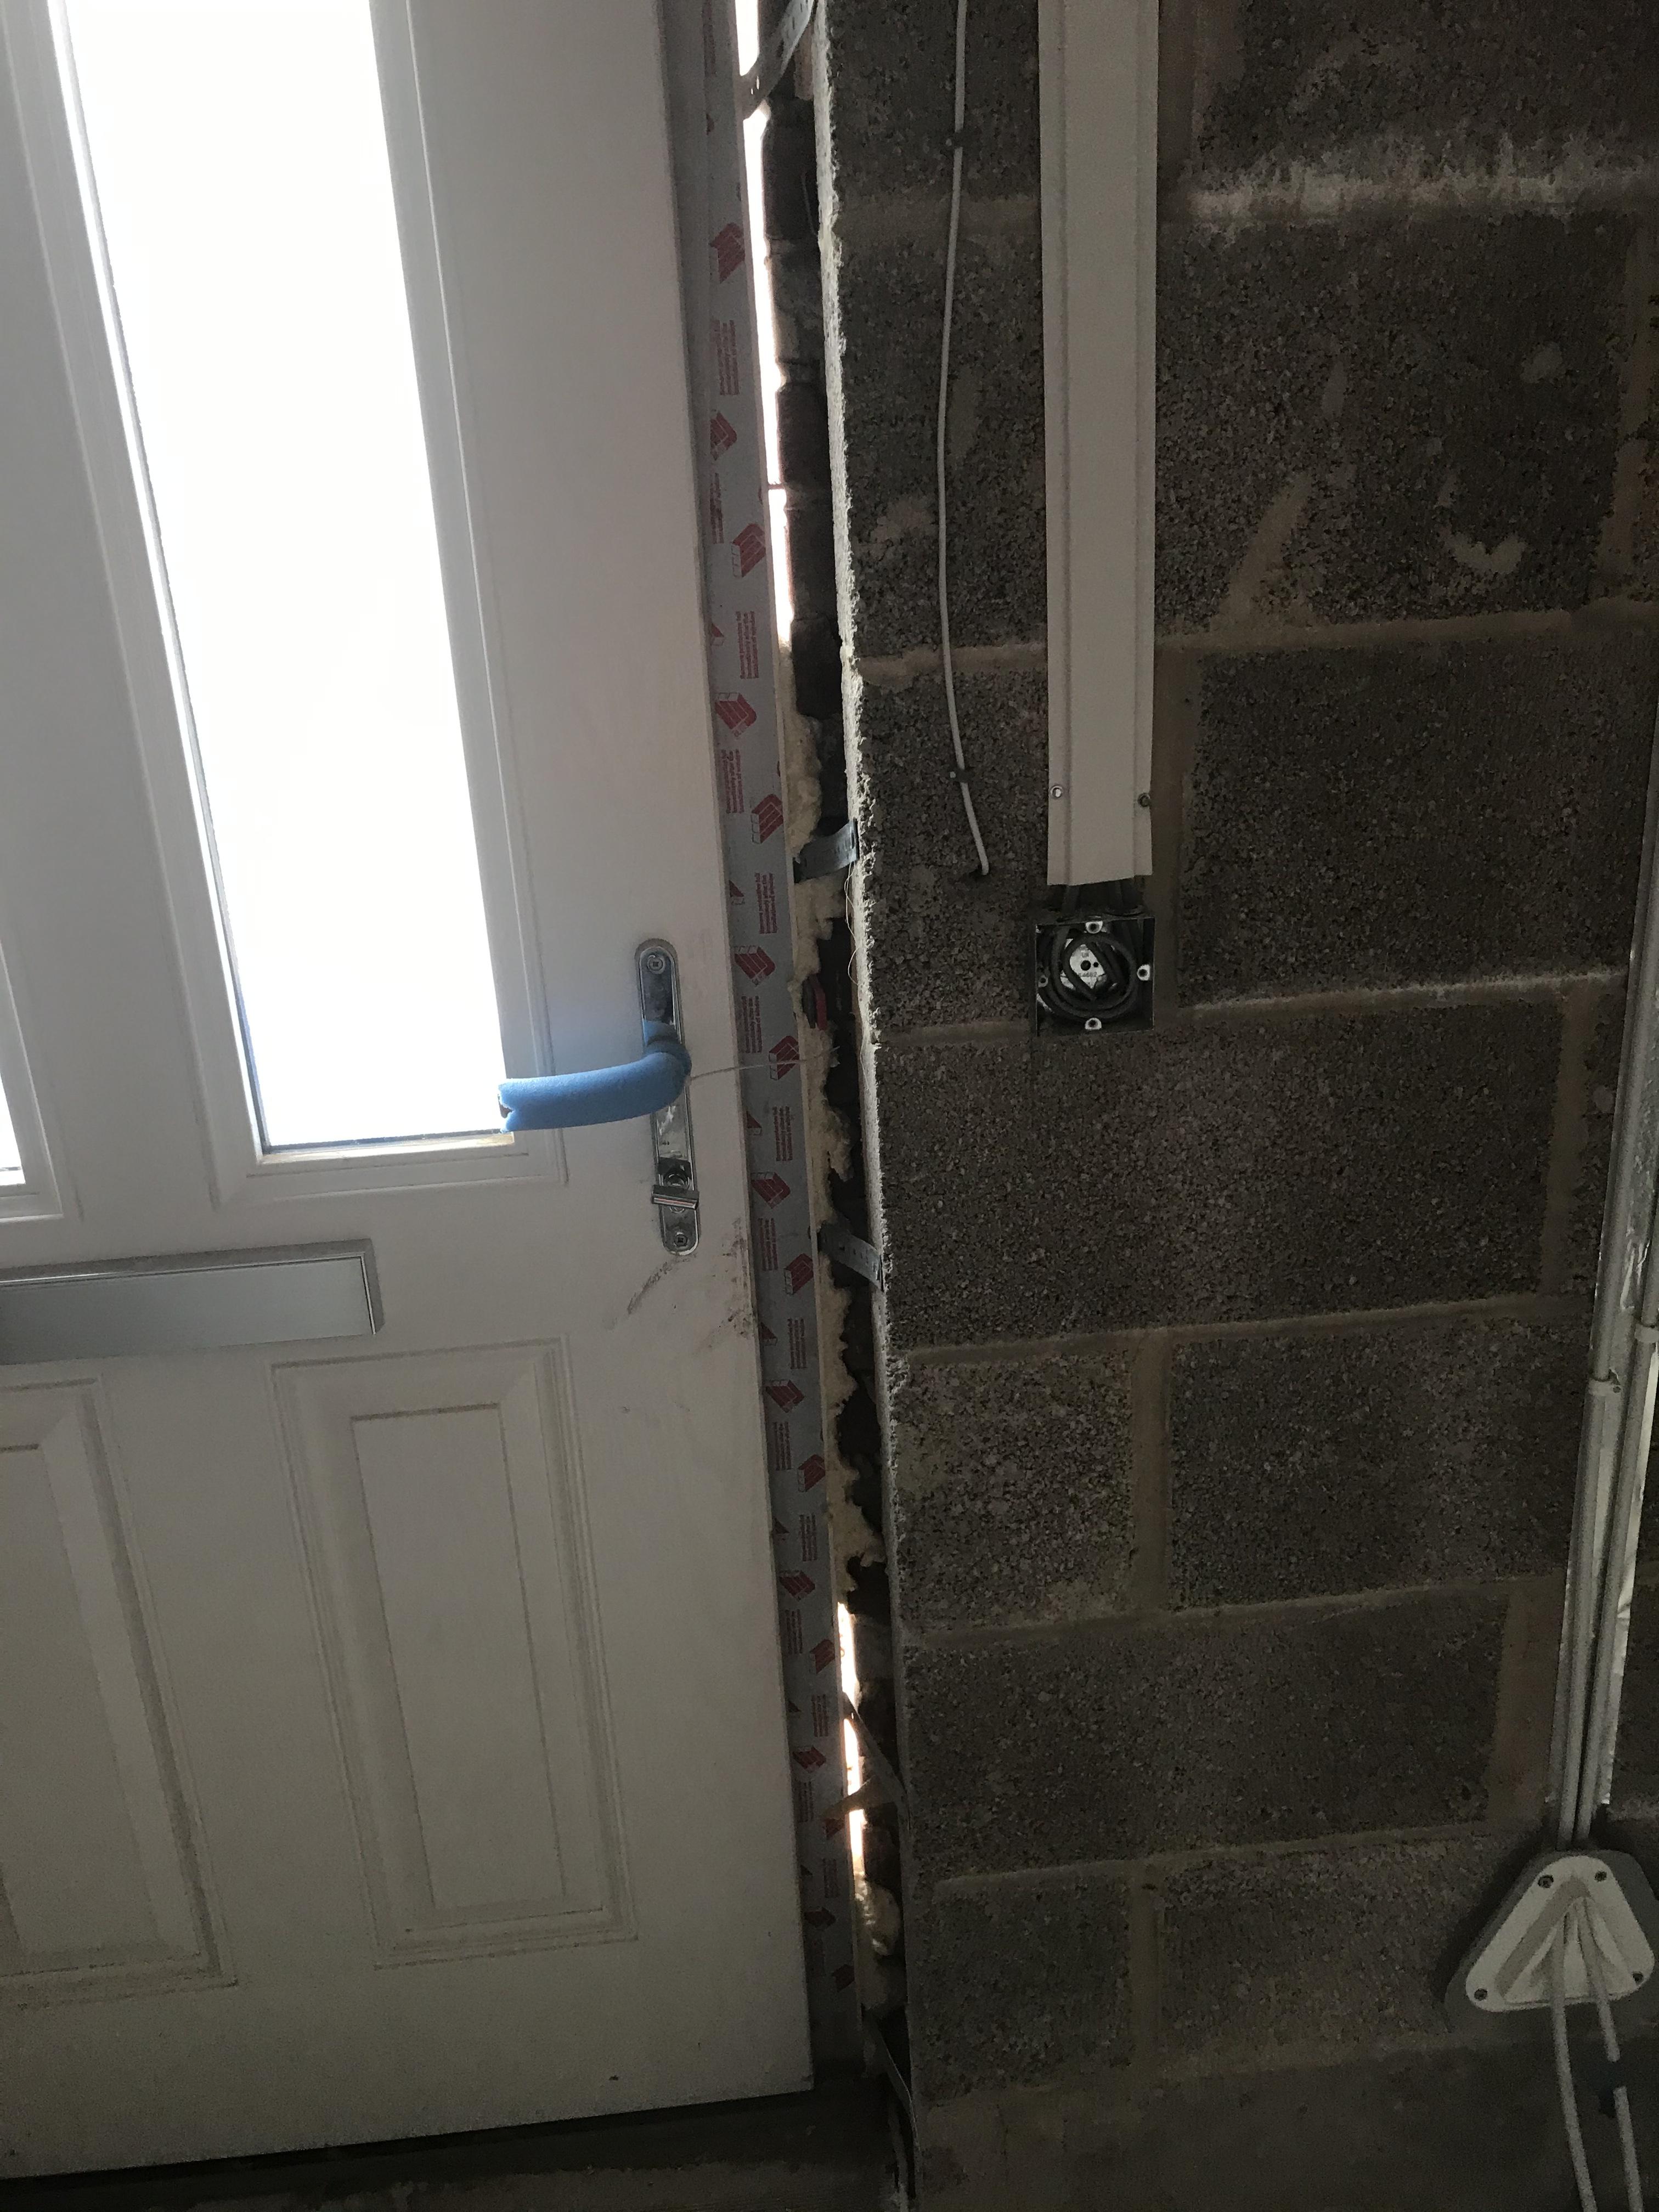
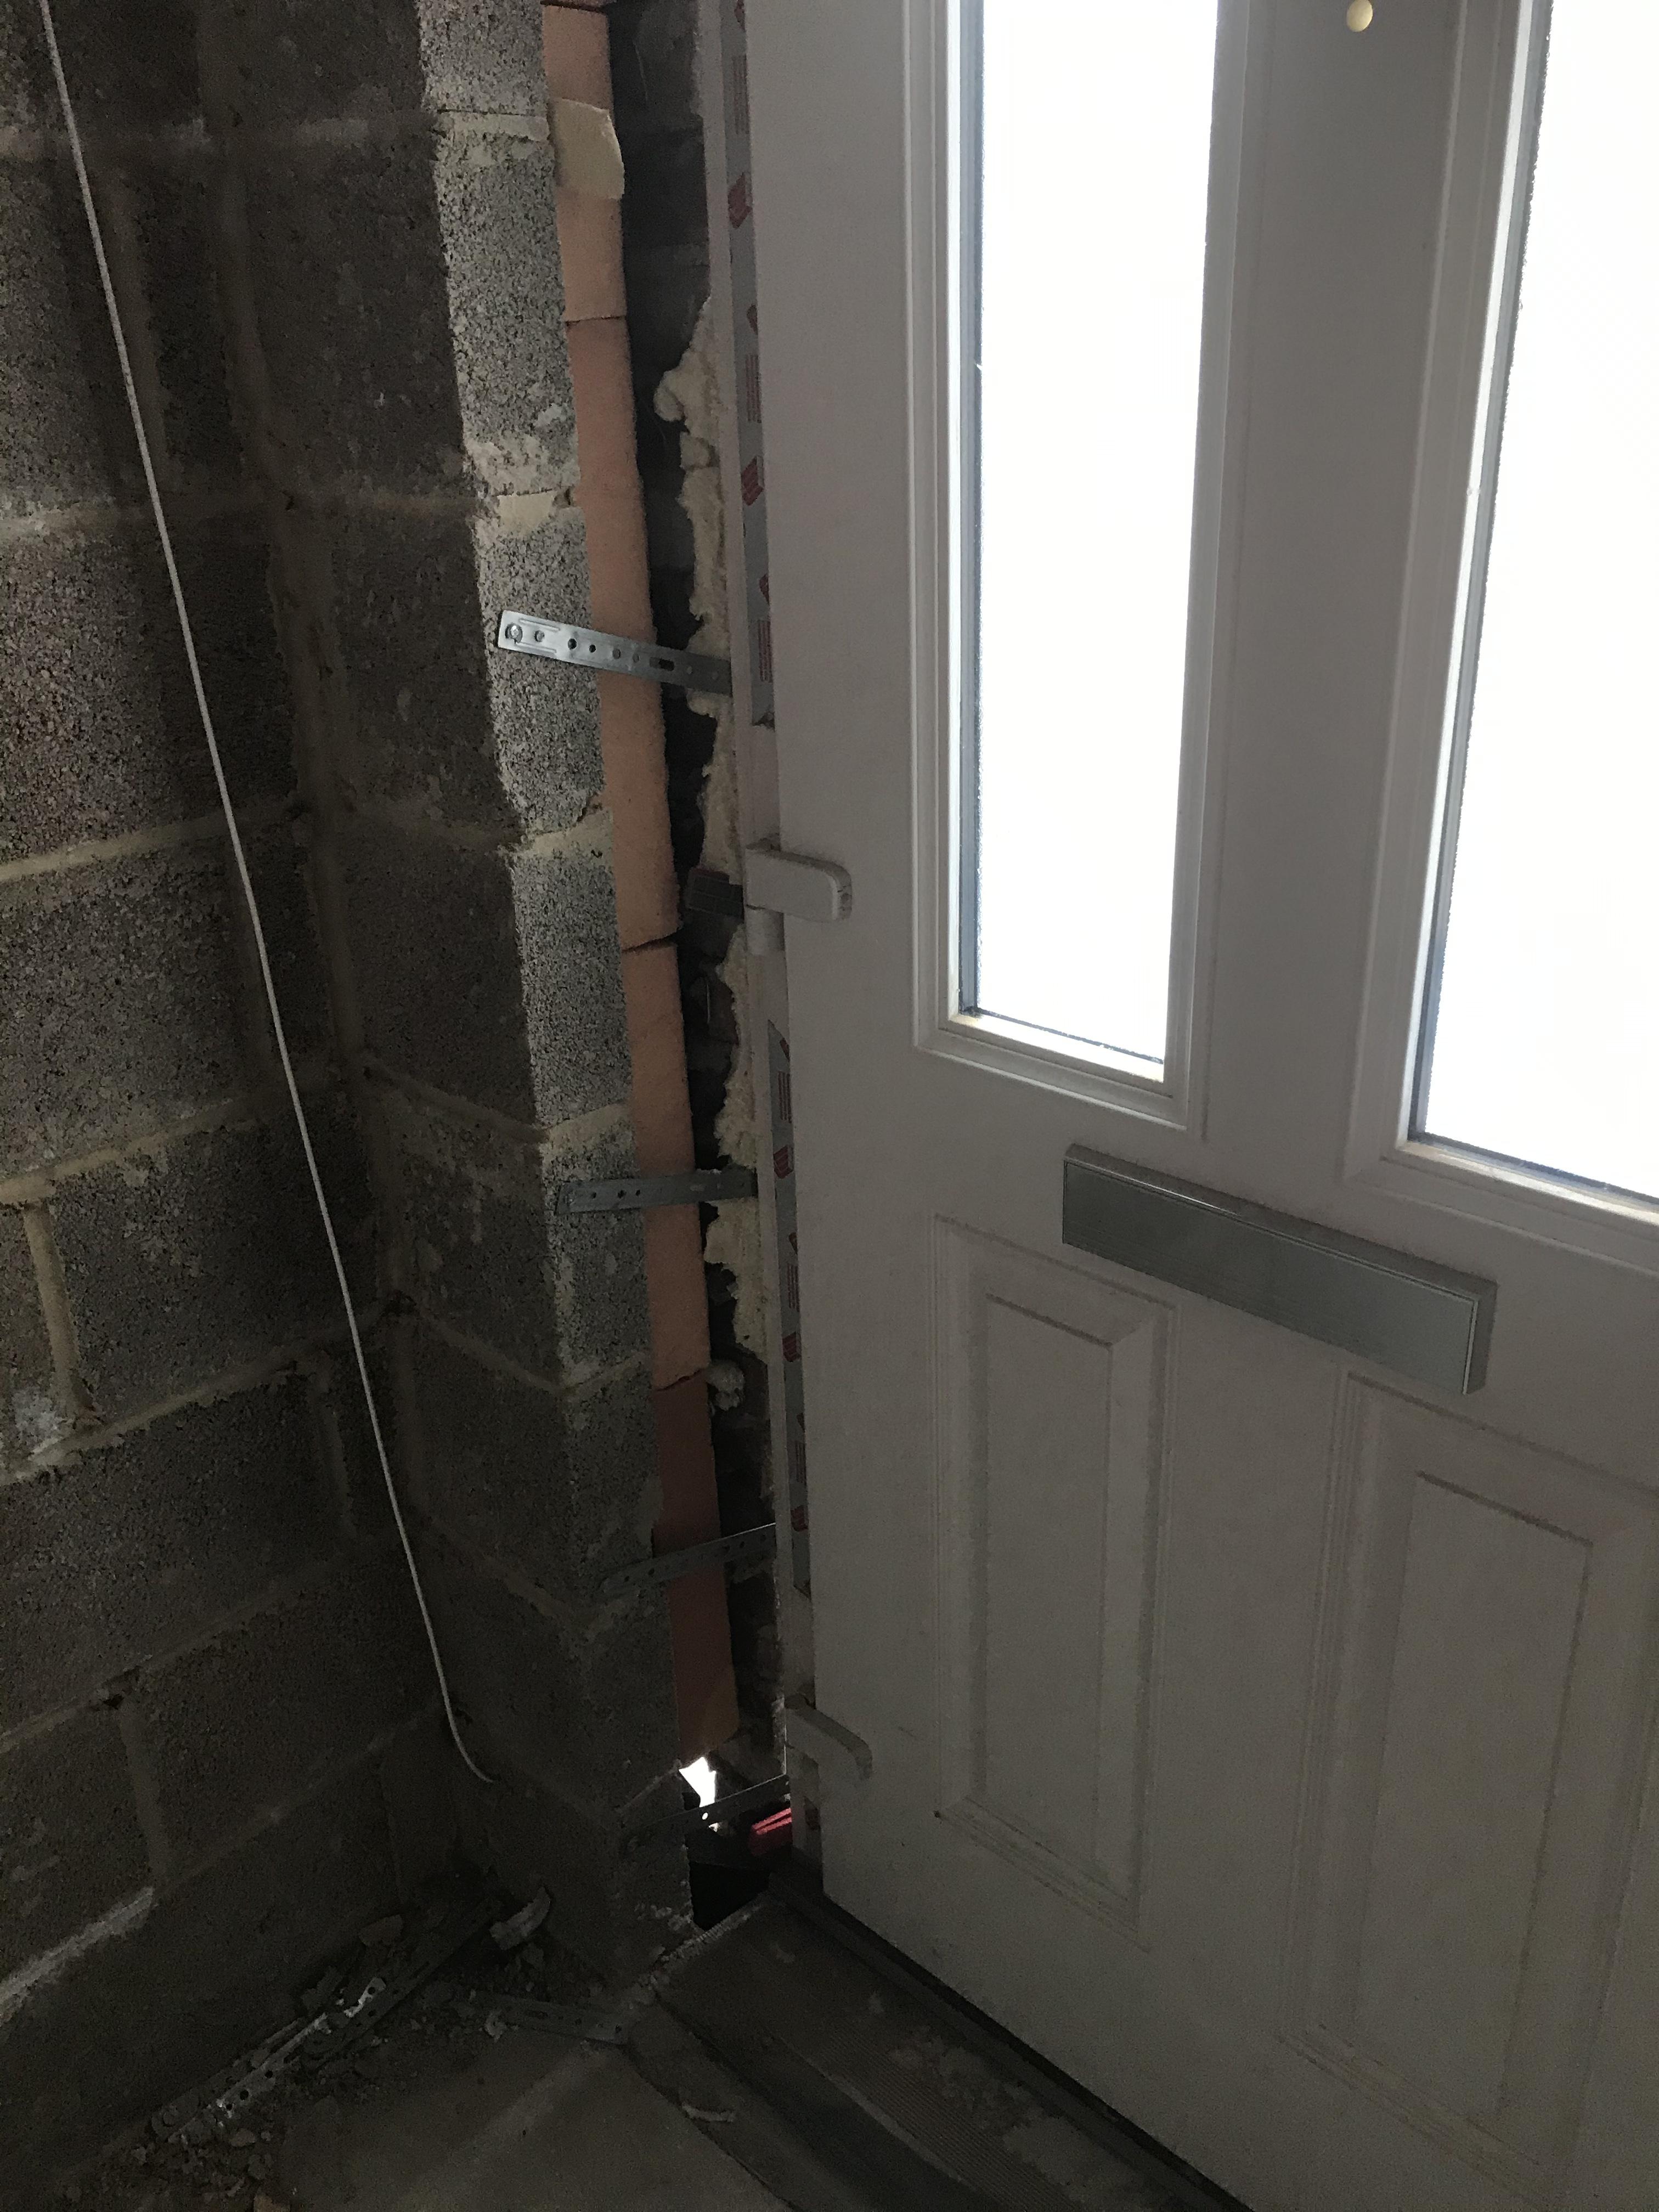
@ProDave I think it's less to do with the structure of the building more like the frane of window expanding and contracting. It's bound to happen having two extremes of temperature either side1 point
-
I did it on all Windows as @joe90 advised how he did in porch. Looks good when it's done bit more of a clean line than skim straight upto frame.1 point
-
First step in the dance is to move the shed to survey the area properly. If it’s like usual the ground will be full of tree roots and organic matter1 point
-
Sorry but I agree. Its ambiguous but "ready to receive" would be by interpretation as well. No insulation mentioned?1 point
-
I seem to suffer very little plaster cracking anywhere. I am convinced this is because there was quite a long time gap between the frame going up and getting to do internal finishings like plastering? I have just been round all the downstairs window reveals and they are all as crisp as when they were plastered and painted about 3 years ago.1 point
-
Plasterboard skim stop bead is what you want. http://www.contractbeads.co.uk/beads/upvc-beading/3mm-white-upvc-stop-bead-2-5m.html1 point
-
Voice of reason again Peter It would be madness to go near it the following day I would leave it to cure for at least a week1 point
-
I would delay a week and get it all up properly. I would be more concerned about putting the steel beam in place than the trusses - that needs to be done carefully and I wouldn’t want it onto green mortar especially 2.2m columns. They can’t be built in a day either as they will just rock over - are they a single block wide at the back ..??1 point
-
Agree with @Bozza, I know it looks like a waste of space but you will appreciate more space on the landing!1 point
-
A few basics. Most of the actuators used in UFH manifolds are hot wax rather than a mechanical motor. The picture above showed a UFH manifold without a temperature blending valve. Make SURE you include a temperature blending valve to regulate the flow temperature in the UFH and a manifold pump to circulate the water around the UFH loops. It is normal to have a control box with each manifold. this reads all the room thermostats and it's job is to turn the manifold pump on when any room calls for heat, open the actuator(s) for that room, and provide the "call for heat" to the boiler when any room is asking for heat. In a new system use 2 port valves to direct heat to manifold(s) radiators and DHW as required. Do not use 3 port and especially 3 port mid position valves, they are the work of the devil imho, I have individual room thermostats in my house. What is very interesting from that is the utility room takes very much longer to heat up and keeps asking for heat long after the other rooms are satisfied. This is a general finding I have found that rooms like our utility room that use aluminium spreader plates put less heat into the room than the rest of our ground floor that has the pipes set in dry sand/ cement pug mix.1 point
-
Other than the Salus auto-balancing actuators Clive, they tend to be wax-expansion rather than solenoid. Bit like a TRV body with a heating element integrated. As the actuators only take a few Watts it's no problem paralleling them, or instead you can link the inputs in the wiring box. And you'll probably need one of those, to get pump and boiler switching, delay tiing etc...1 point
-
Table saw, but make yourself an 8x4 table drop a sheet of ply over the table and then make some legs up for it. You can then screw a timber down as a long fence for cutting multiple cuts. Forget the extraction and set up a leaf blower pointing directly at the blade, any dust extraction gets blocked quickly, better to blow it away from you. Sod the neighbours.1 point
-
Then it’s a no brainier really one of the protected chipboard floors, all glued and screwed, get it 99% finished and then a nice engineered wood board on top. Gives you the chance to change colour scheme, and also if your budget gets tight towards the end you can wait a while and fit the finish floor later, just leave the skirting off.1 point
-
Why is the porch roof not running in line with the garage roof. Walk away, will be a valuable life lesson.1 point
-
Probably because it is wired as 2 zones, upstairs and downstairs. A lot of systems are done like this so they can use the zone valve micro switch as a call for heat to the boiler. For yours I would go straight in with the Salus self balancing actuators as they will control the return temps better as you have a more “leaky” house. Are you keeping Rads upstairs ..??1 point
-
TI agree 1 is better. Remember that in your dressing room you really want space for a full length mirror and room to stand back very slightly to admire your outfit. I would treat it as 2 sides with the end of the walkway as a mirror. Or alternative provision. F1 point
-
Or wasn't. I can think up better terms, and use a special character set to publish them.1 point
-
Correct me if I'm wrong... In a new, purpose designed, low energy house you would have a limited number of UFH zones? As in the roof/ceiling, walls & floor fabric is the same detail room to room. In a dodgy old house like mine with different room constructions I'm thinking there's benefit to having each room as it's own zone? Each room then having its own stat.1 point
-
Nope!! The saving of load shifting via batteries is NOT an economical choice at all. The difference in cost of electricity vs what you’ll spend on a decent sized ( 9.6kw ) battery system, and if A/C retrofit then add 15% losses for conversions to / from D/C > A/C make it worse again. Then factor in having the drive the arse off the system JUST to make it sensible to own, plus some systems have a limited throughput so you’ll wipe the warranty out early ( Powerwall for one ) and then the fact that the batteries will be out of warranty in 10 years or less and then deal at 13 years........... List goes on. Also you can’t empty or charge the battery quickly, so imagine having a soprano singer with huge lungs to store loads of oooomph for belting a tube out, but then only a tiny drinking straw for a windpipe, and you get an idea. EG; a 6kw hob would still see you pull from the grid if connected to the same sized, fully charged battery system. Too many probs unless you spend 5 figures on a multi BMS / multi battery trio of parallel stacks. Then you’ll need the batteries to last 30 years to get your money back as you’ll be into the big name German stuff then, with matching big budget. ?1 point
-
If it doesn’t state what it is to be the coating how would he know how to price it. You might want to coat it in gold leaf. Sorry not included in my opinion.1 point
-
You can build over this but it needs some thought and also will need permission from your sewage provider. Assuming this is a terrace, how many houses upstream of you location ..? if the pipe is 240mm below FFL then it will just be below your insulation level assuming a standard build up of 100mm MOT, 100mm PIR and 100mm of concrete as slab. Couple of ways to approach this, neither are “fun” but can be done in a couple of hours if you have a couple of good friends ..! Assuming the manhole is downstream of your extension (given the depths) you need to make friends with your upstream neighbours. First job - expose the whole of the top of the pipe (assuming this is clay) and measure the distance from side to side of your extension and add 300mm each side. That’s your replacement length. You need enough UPVC pipe to do the length you’ve identified. Mark the points you’ve measured, and ensure you have 150mm either side of the mark to put a connector. You’ll be using clay connectors so plenty of lube on the pipe and they will go in easy. Dig carefully around the pipe where your marks are - you want 4-6” below the pipe clear. It is nicer doing this now rather than later. Now get the jet wash out, and get it in the pipe from the manhole and jet the whole length as it makes the next job much nicer ..! This is where you need friends ...Ask the neighbours nicely and basically you need to block the drain for an hour. In the upstream manhole, on the upstream side of the manhole, insert a bung in the pipe, lock it up tight and put a couple of bits of timber in the channel to wedge the bung and stop it sliding.Tie a loop of rope onto the handle on the bung - this stops it getting lost if you do get a release. Tie it to a bit of timber and leave that outside the manhole. Chuck the hose into the manhole and wash down the pipe to make sure there is nothing nasty lurking in the pipe. Now on the marks you’ve made take a Stihl saw and cut through the top mark. It needs to be a clean straight cut so take your time. From this point, Mate #1 can start digging out the old pipe, just pull it out and clean the trench as you go. Keep going and make the second cut on your second lower mark, try not to disturb the connection into the manhole. Dig out the remains of the pipe, get the trench as flat and clean as you can but don’t panic too much. You need to get 2-3” of fine gravel under the pipe but don’t worry too much at this point. Mate #2 now needs to do a semi dry mix of 3:1 ballast and cement. You need 2 or 3 buckets full. Drop a shovel full every 3 ft along the bottom of the trench, this is for bedding the pipe onto. Now put the clay connectors onto each end of the uPVC and drop your uPVC pipe into the trench, and slide the connectors over the clay stubs. Do up the bands and using a string line check the new pipe is flat if it has a join in it, and use a level to make sure you have a fall from one end to the other. if you need to move the pipe about, just bed it further into the concrete or add a bit under the pipe. Once you have your levels, hose back in the upper manhole and check for leaks. Drop the rest of each bucket of concrete over where you’ve bedded it, and then it’s the fun job ... Take your prop timbers out, and then slacken the bung. Chances are it will wash out so be ready, and just pull it out with the rope. You’ll get a surge down the pipe but nothing that should cause issues. Time for a cuppa and a chocolate hobnob.. Double check your joints are still dry, and now back fill below the joint and the pipe with 10mm pea gravel. You only want to go 1/3rd of the way up the pipe as you’re going to be encasing the rest in concrete as this will give more protection to the pipe, the joints want to be only in pea gravel as it can allow a little movement then. For the concrete around the pipe a 4:1 mix will do, just pack it round the pipe then over the top, just don’t go mad and make sure it’s below 220mm of the FFL. when you come to do the rest of the founds you can dig round this and cast under with the concrete, just put a lintel over the top where brickwork goes over it. When you’re laying the MOT, don’t run the whacker over the pipe but just cover that area with sharp sand. Photos would be helpful btw..!1 point
-
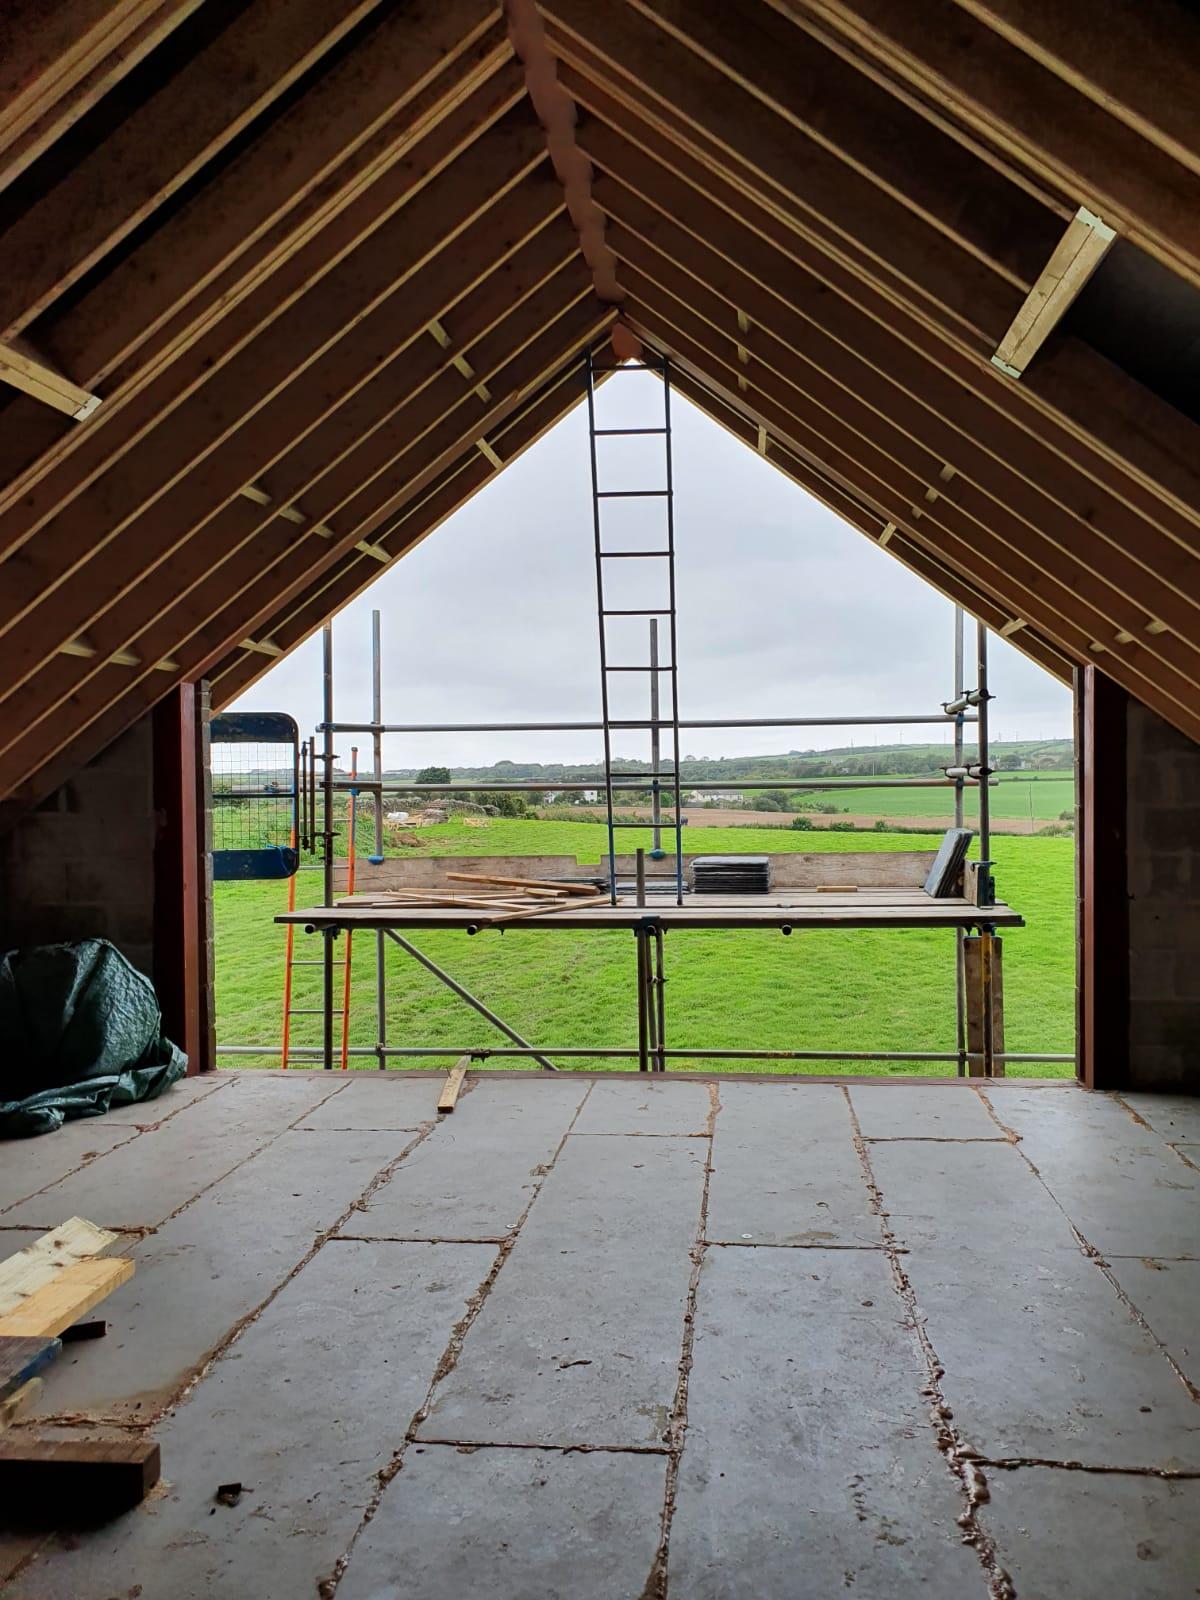
Its all about the gable for me! ?
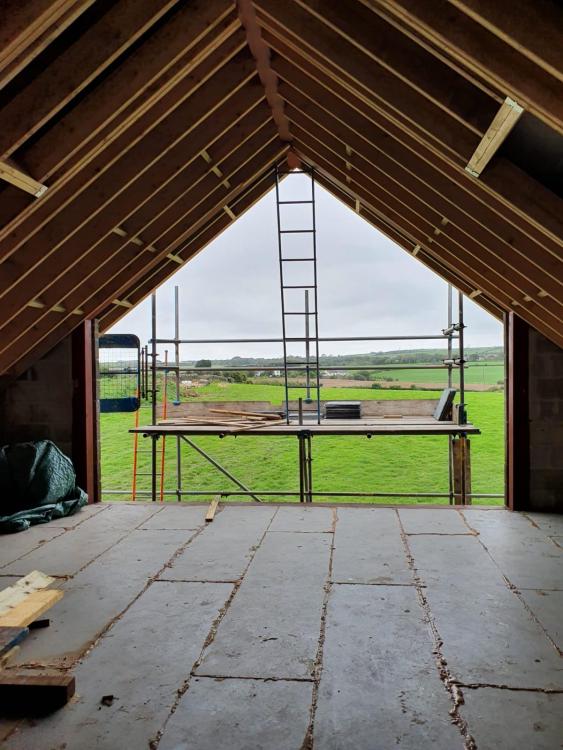
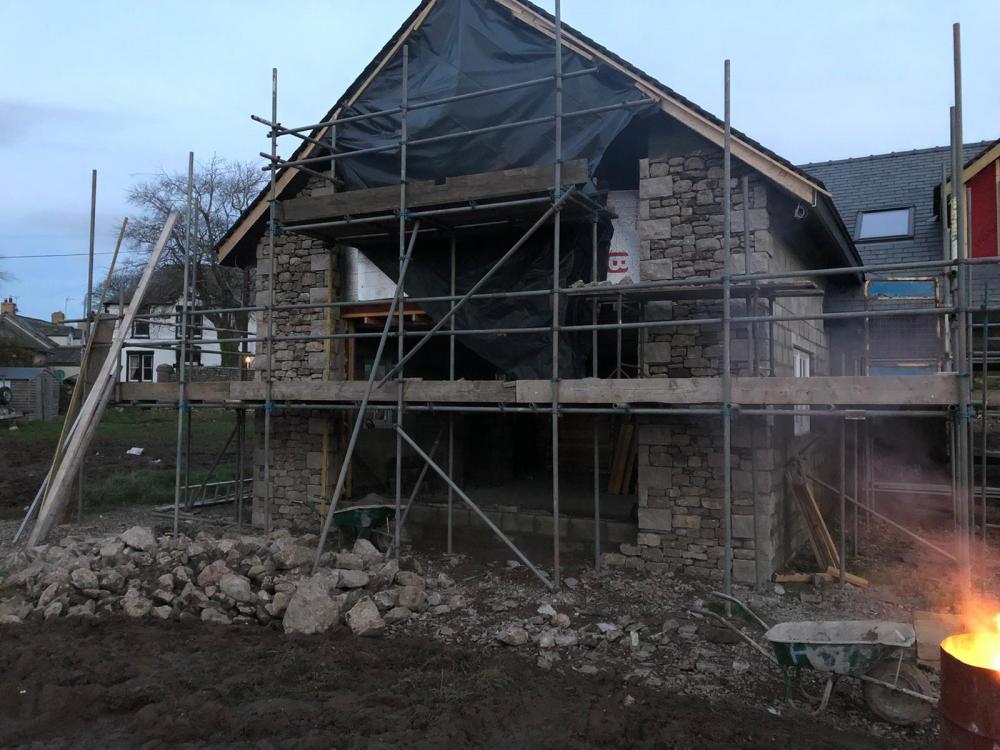
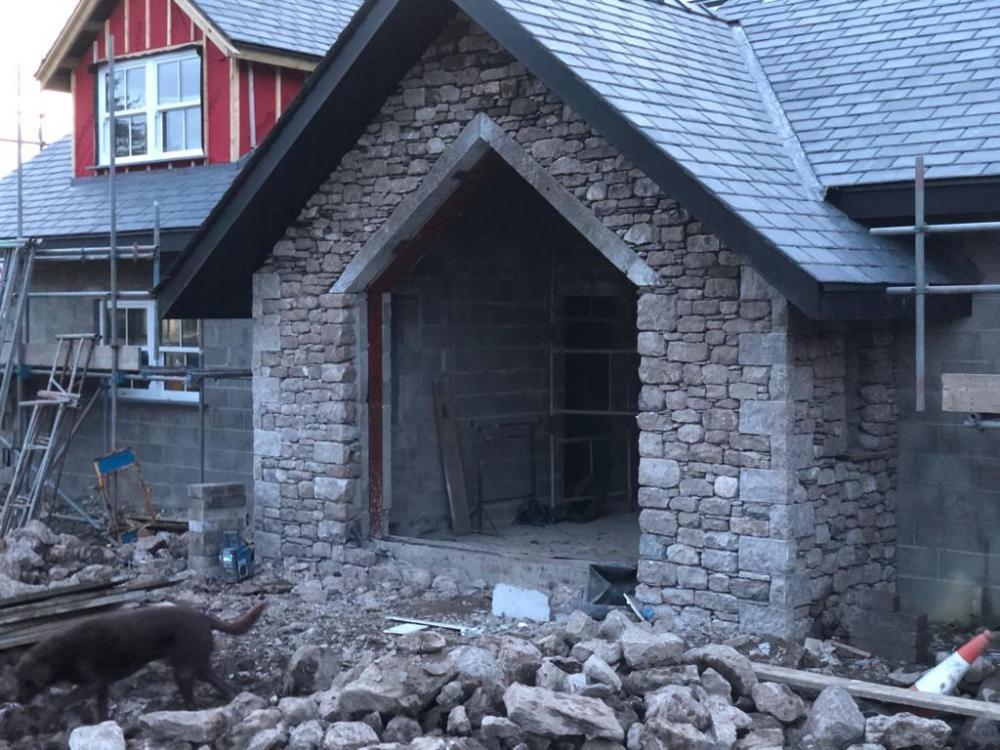
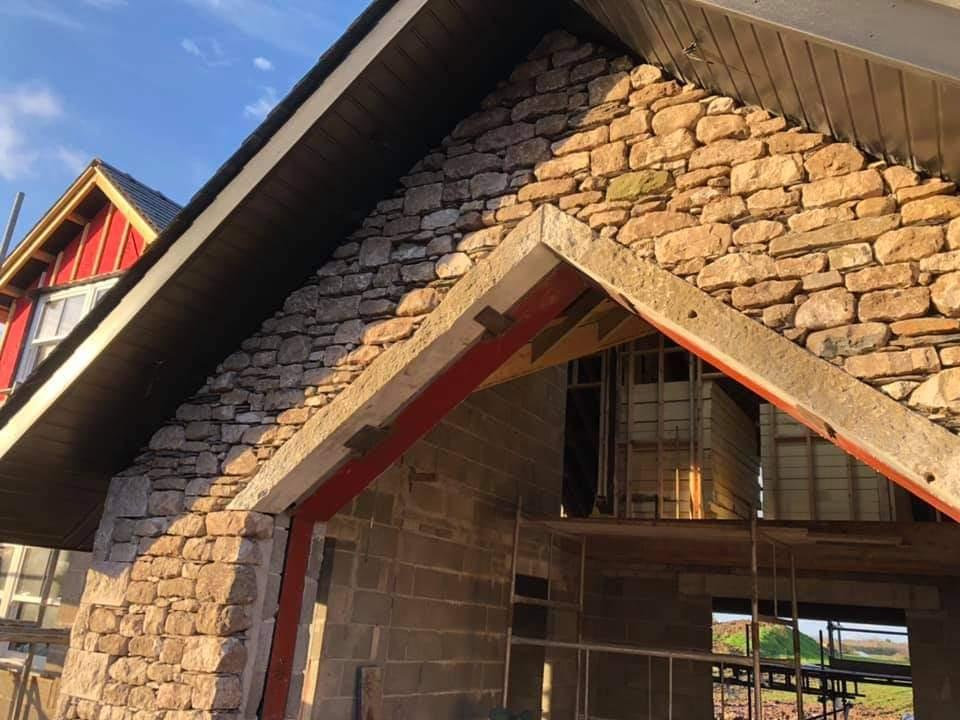
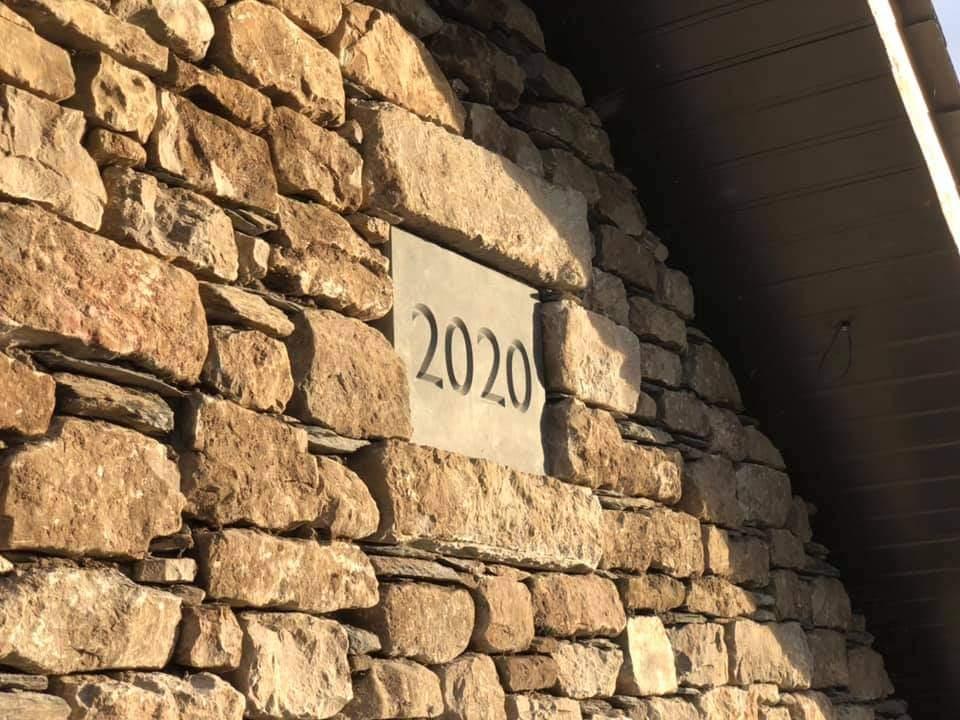
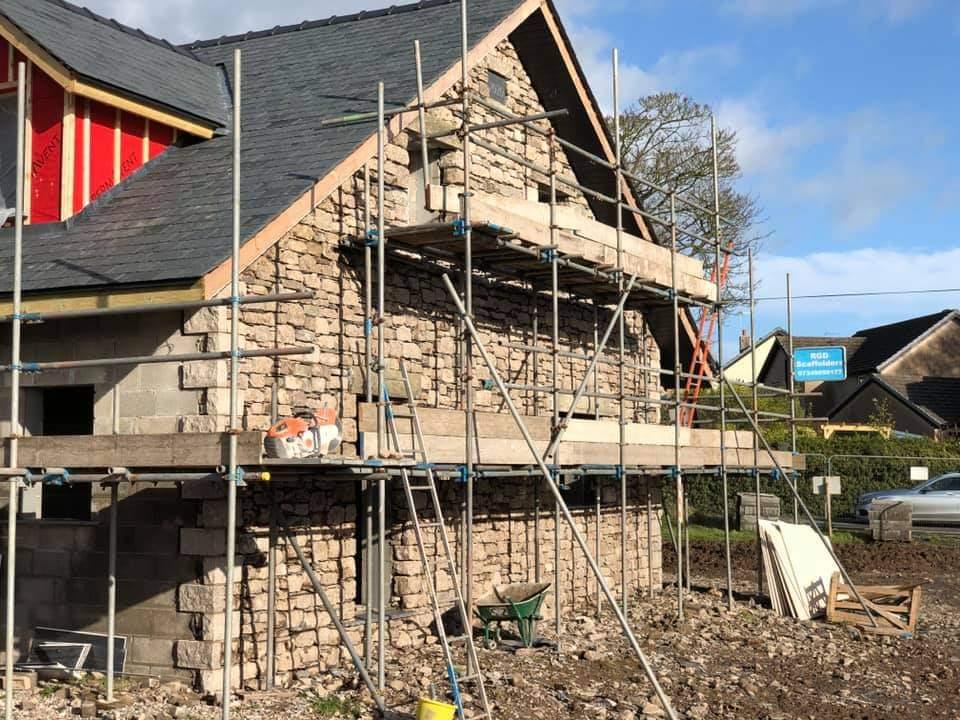 1 point
 -
ASP6 Here it is going into the ground One thing I liked compared to some others is the legs for it to stand on when you lower it in the hole,. and that "ring" around the base, you concrete in to above that level to anchor it into the ground. And this is what it looks like all finished. The big green lid with the vent is the housing for the blower pump. the small screw on green lid at the right is where you insert the hose to pump it out.

 1 point
 -
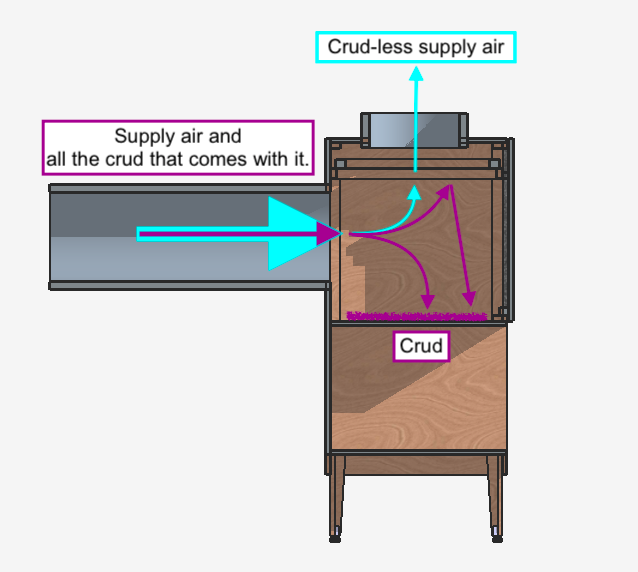
So, a year and a bit on from my initial thoughts on this I've been at it on SketchUp again. The plan is to make these boxes out of ply or MDF, any suggestions as to which would be best, and why? Sealed with airtight tape and closed cell foam for the removable door. My filter material will be, in the first place, unladdered stockings (if I can get them off without snagging them). The design will allow me to rip the box out and replace it with a standard Ubbink 180mm 90° bend if it all goes a bit Pete Tong. I welcome your comments and advice.
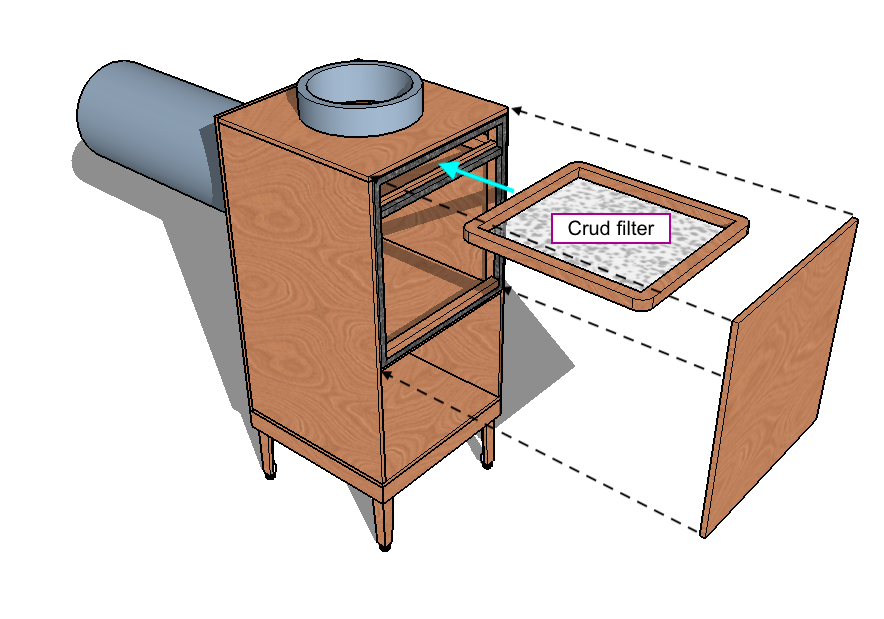
 1 point
 -
No chance that is a legit score @nod When I told the site manager where I'm working what mine scored he genuinely thought it was impossible. OP the test company should tape everything up.1 point
-
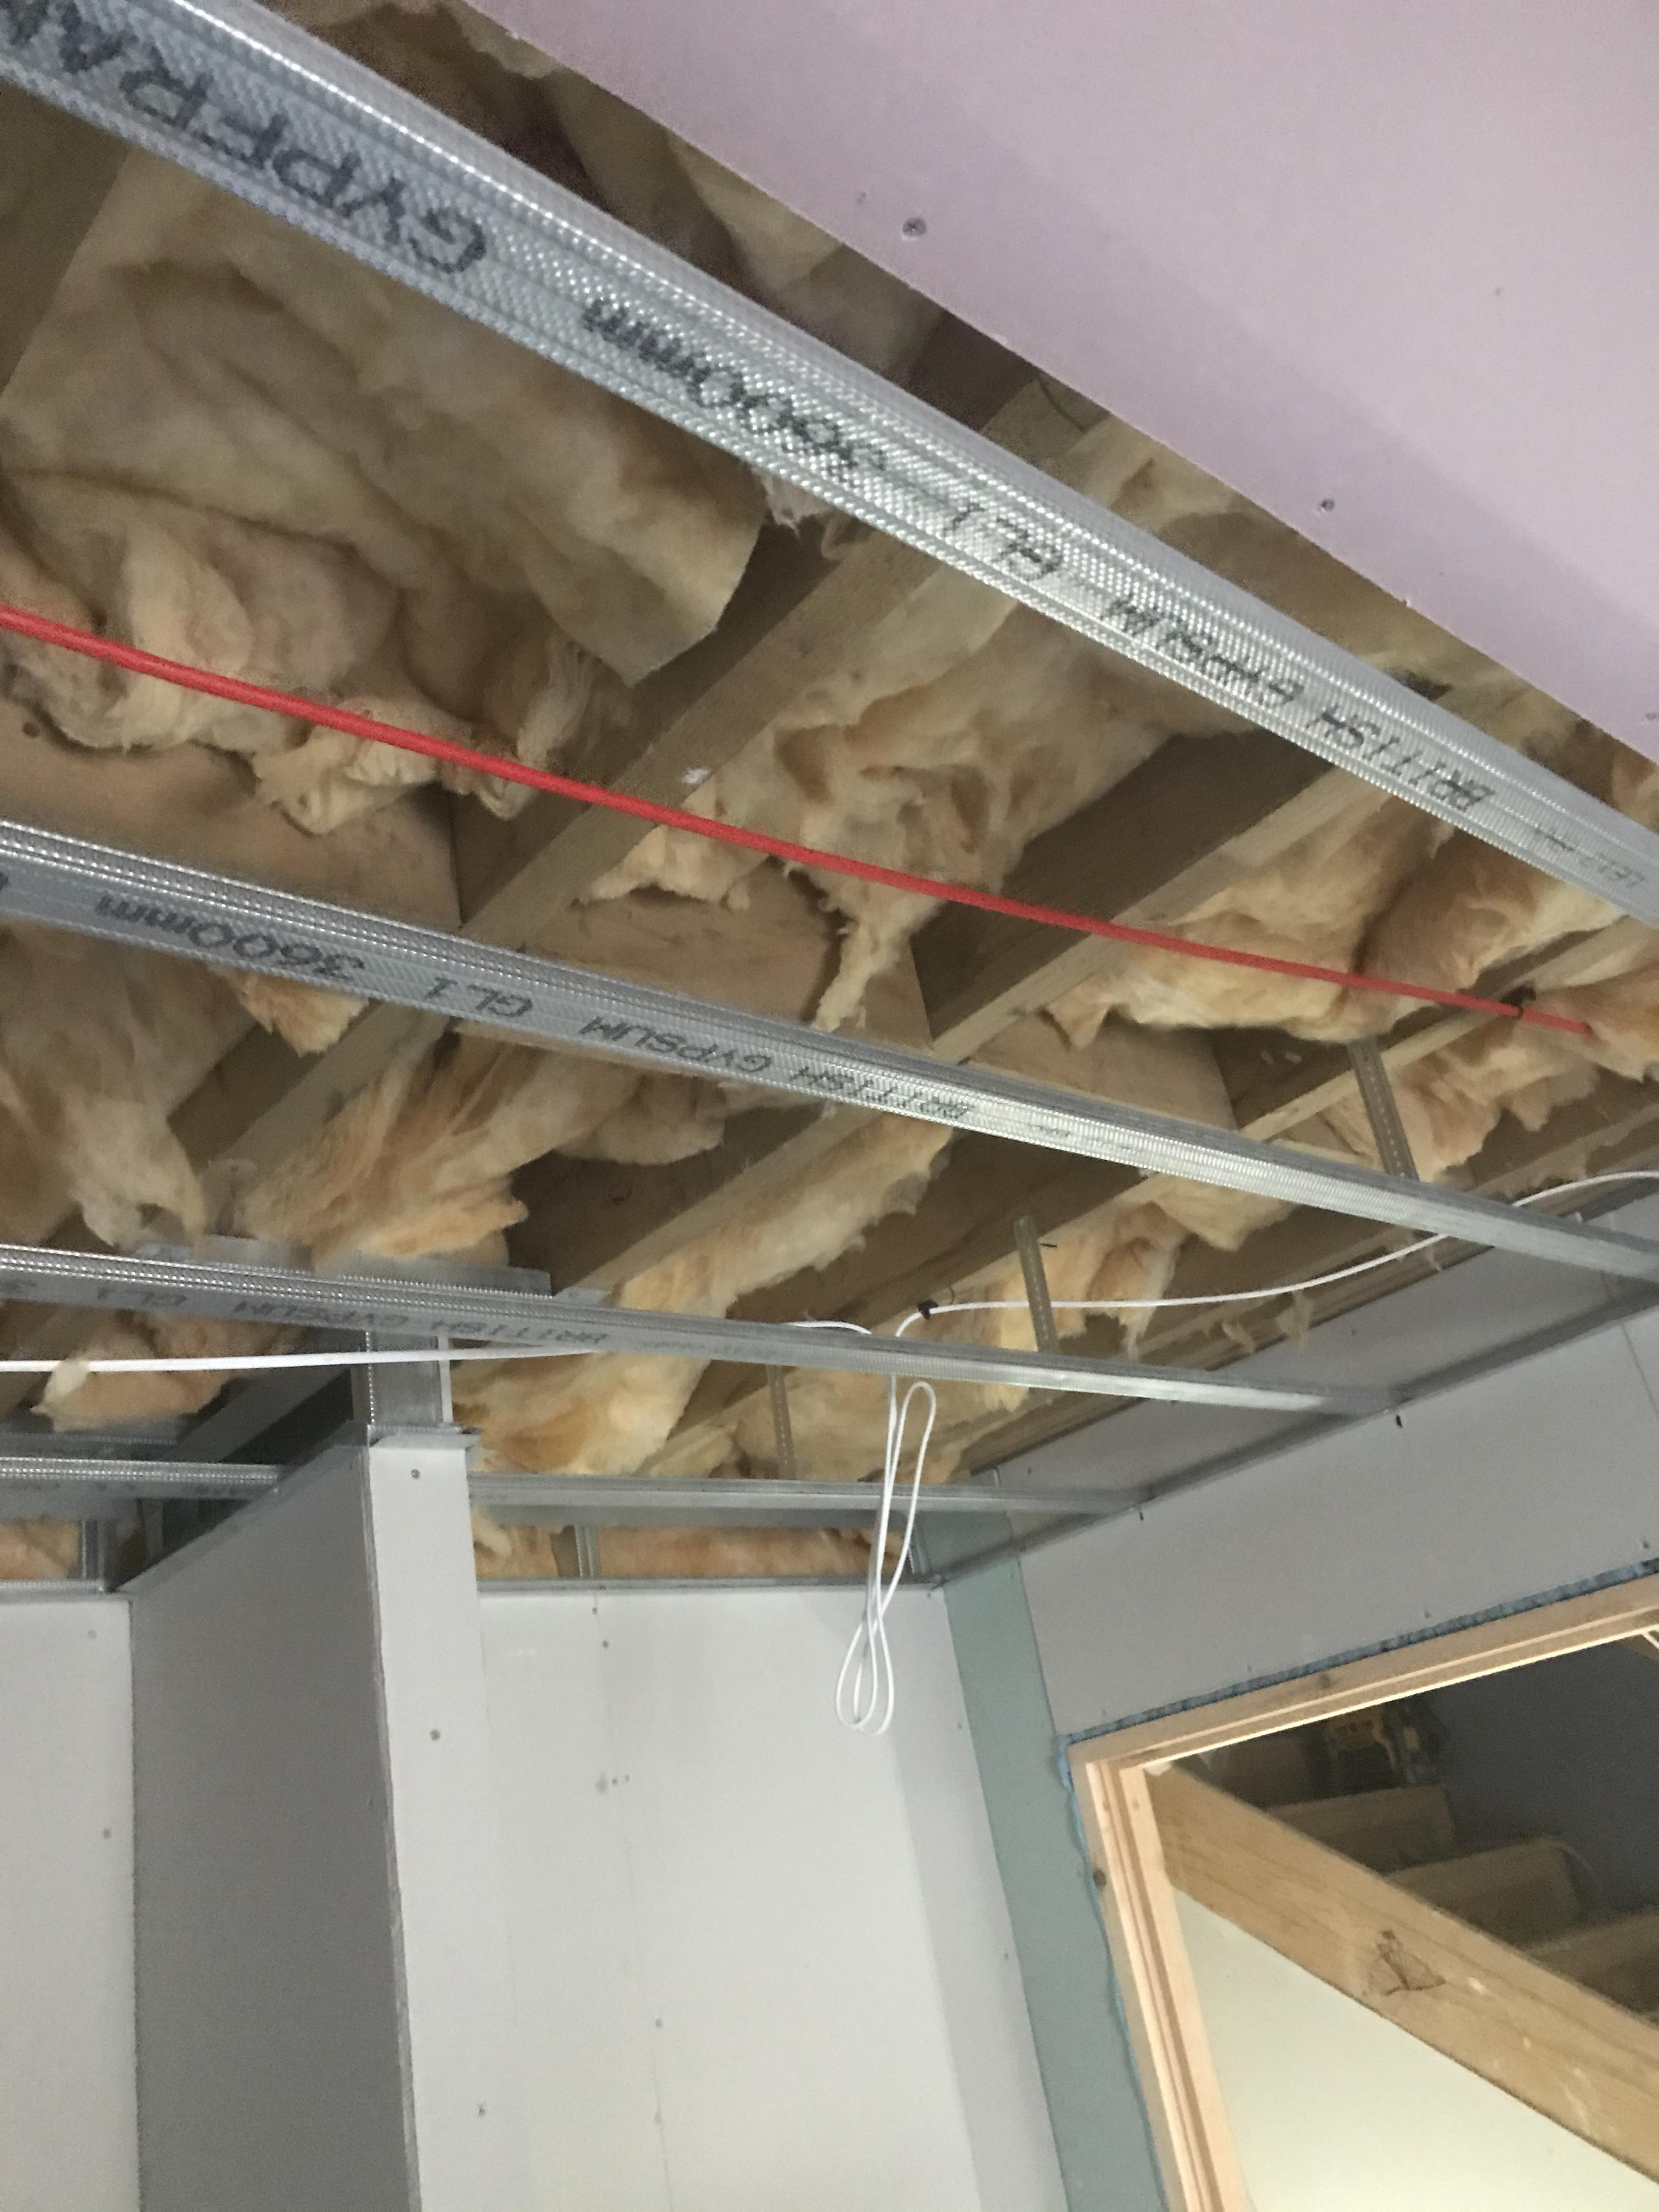
I wouldn’t worry Ive never heard of a air test fail They normally work around the number you give them pictured is a site that we are doing at the moment The houses leak like a civ But ALL scot a 2
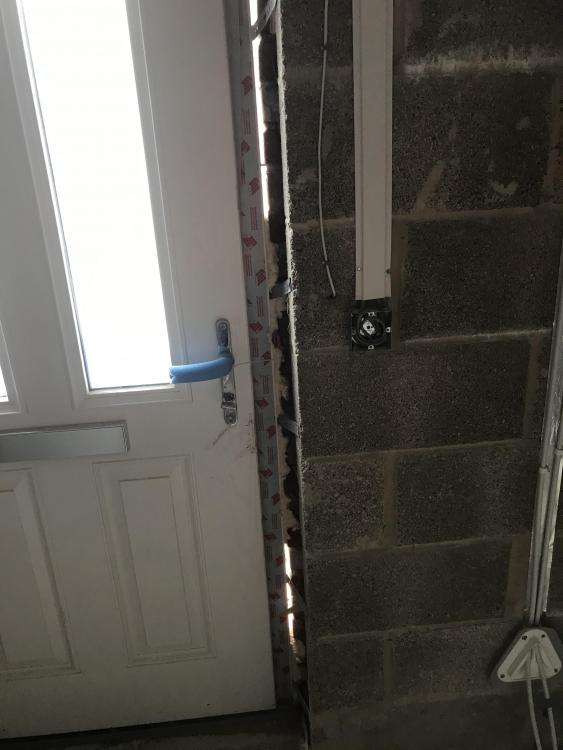
 1 point
 -
Trickle vents get closed but you cannot do anything more as they are designed to leak - hence why you have to have them or have MVHR. Plugs in sinks are a good shout, extractor fans just get taped over from the outside.1 point
-
@SteamyTea helped me do ours, we went round with joss sticks looking fir draughts.1 point
-
Block up fans/ fan ducts, i.e. try to make them air tight, window tv’s should be air tight when closed, I would foam them up permanently ? Best plan is get it ready the day before and get the biggest fan you can borrow and depressurise the building and go round listening and looking for infiltration, under window boards, under skirtings, behind archutraves, through sockets and light fittings, ducts, consumer unit pipes and wires, airing cbd, under bath, under thresholds. Rectify, reenergise fan and look again then do the test1 point
-
During our test the guy sealed all MVHR vents, and any other bits which looked suspicious to him. We plugged all sinks and showers, sealed the extraction hood over the hob, and sealed the loft hatch. Dont have any trickle vents but would probably close them as well. They normally take a preliminary reading, just to see how bad it is, and then three proper readings which go into the paperwork, and apparently select the best result achieved.1 point
-
What score were you looking to achieve? Are you referring to trickle vents in the doors and windows?1 point
-
Here is mine. Height is 4 .5 meters to ridge. Bi folds at the bottom. I didnt want a chunky steel splitting the top and bottom section horizontally and it would have made the portal frame design redundant. The horizontal piece of steel used was as thin as possible and had a vertical piece of steel added in the centre to tie to the steel at the top and prevent sagging. This was clad in black aluminium by the window manufacturer to disguise it. Glazing was from a place in Middlesborough, and was 10 k less then my next quote. Happy to share details if required.
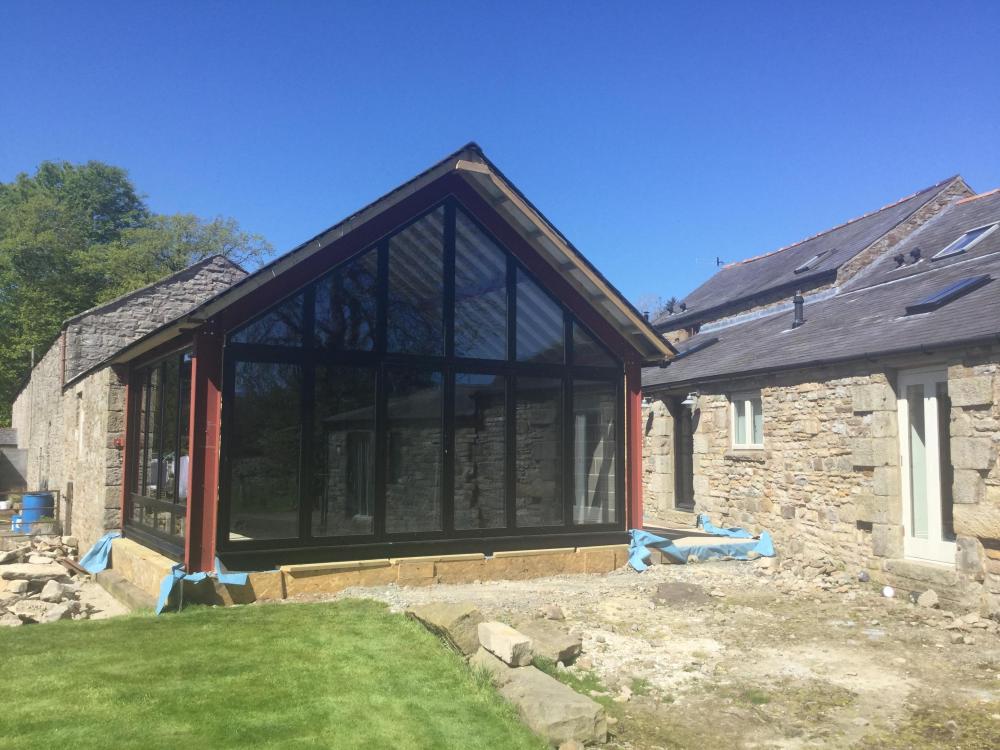 1 point
 -
Constantly interrupted by many comments on buildhub ?.0 points
-
Regarding no.4 how long has it been since you've fitted a toilet. While I agree with the sentiment of the post I may have a revelation for you...0 points
-
Laddo's at uni and I sit down to wee. Must be one of the girls! ?0 points
-
Because you know who has "splashed" on the towels.0 points
-
Without doubt the most unpleasant job, bar none, during our build. We ended up cutting on a table saw, outside backs to the wind, dust extraction full on , masks and face visors and still coughed and spat the whole time. Dreadful job. You have my sympathy.0 points
-
had to look that up, FAT ?0 points
-
Thanks DevilDamo. Jilly, you are allowed to write something.0 points


This leaderboard is set to London/GMT+01:00