
Leaderboard


Popular Content
Showing content with the highest reputation on 11/05/19 in all areas
-
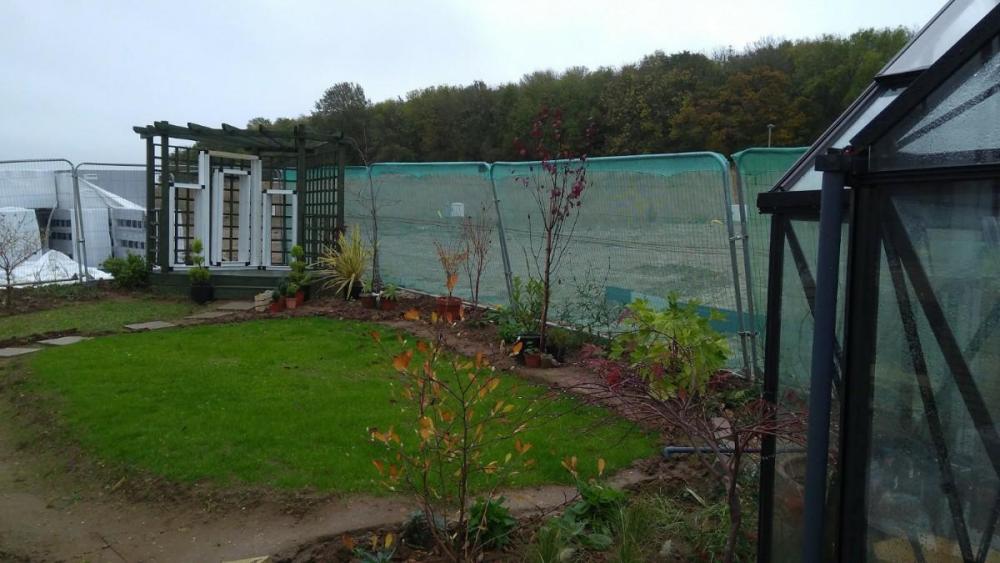
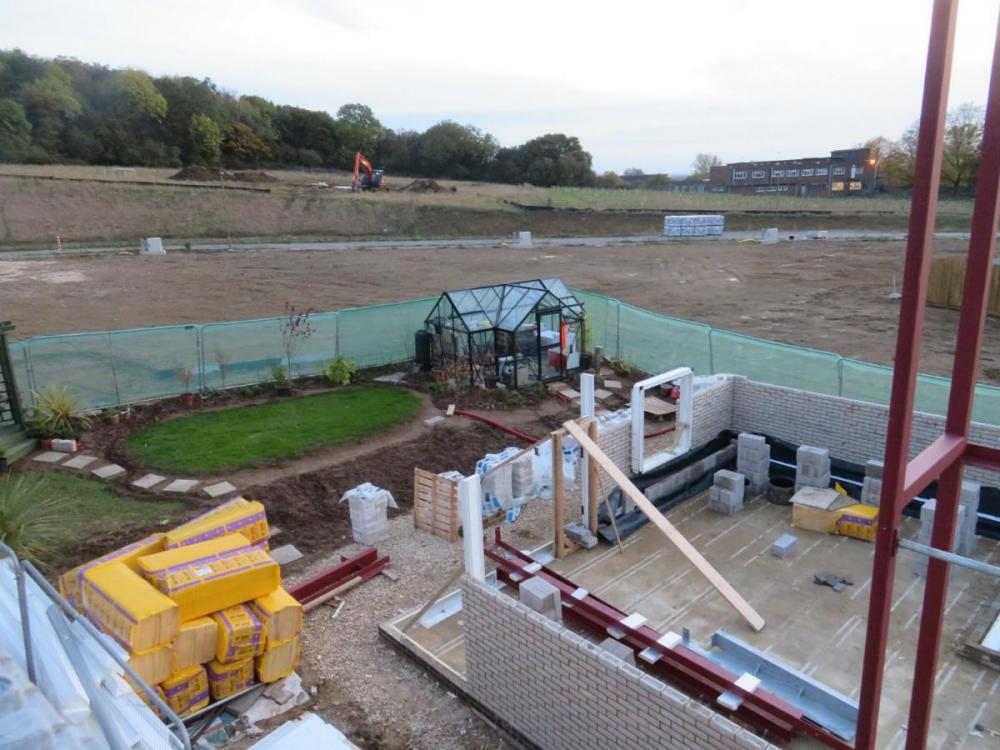
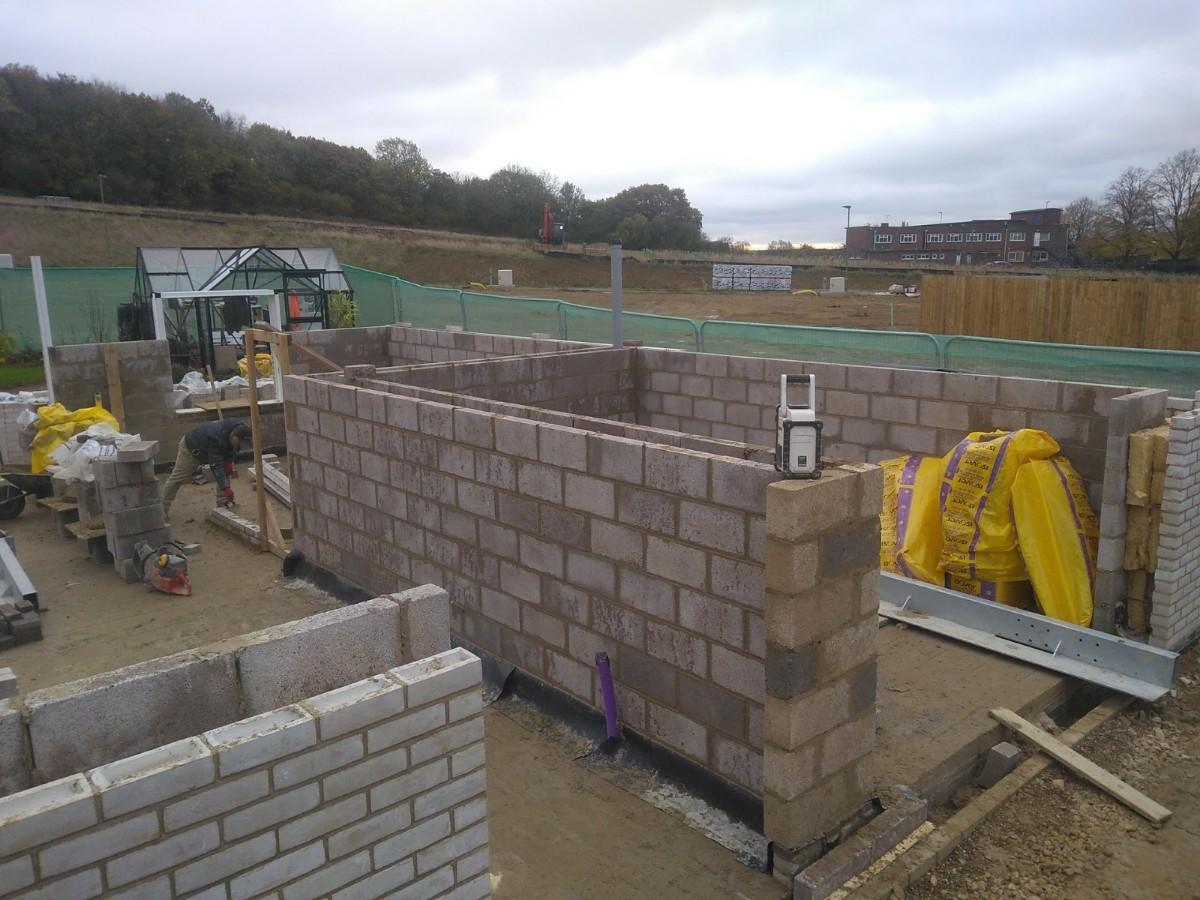
We've been on site for 2 months now. Here's the original introduce yourself thread. Introduce Myself It's been mostly quiet while we waited 6 weeks for our bricklayer who was delayed on his previous job. We think we put the time to good use by doing the garden. The grass seed has turned into a very healthy lawn, the wildflower area is growing something, probably weeds, we have a greenhouse that doubles up into a very comfortable welfare area, a fully plumbed toilet in the garden shed and a gazebo for project meetings next summer. However all the professionals who have visited the site laugh and say they've never seen a garden before the house site. Our bricklayer has been on site for 2 weeks and we are ready for the first scaffold lift. It's going very well, the bricklayer is a perfectionist, the weather has been tolerable and we are very happy with the layout of the house so far. The white bricks are very easily marked and we will end up with a more natural white house than the toothpaste coloured cube we were expecting. That's probably for the best in hindsight. We took the advice from here to use a lime mortar mix to keep the colour light and that's going well so far. Scaffolding arrives tomorrow, joists and first floor next week, crane to lift the steels soon after and then we can think about ordering the windows. Current decisions revolve around whether to go with single ply rubber or fibreglass for the flat roof and terrace and what cladding to use. I'll start a new thread for those.

 4 points
 -
Told ya he who dares son.3 points
-
Yes, make sure you can gat the CAD files and that the architect is OK about the IP (they should be). Regarding IP, the principle I have encountered is that it is OK to use the design from your architect for the purpose intended without their further involvement (i.e. building that house in that location). Its not OK to then sell it on as a generic solution to others. That would breach the architect's IP rights. Getting the CAD electronic files can be trickier. I have them for my build. Added: I agree with @Sensus. Ensure your agreement with the architect entitles you to receive the CAD files. Some architects may baulk at this, in which case move on.3 points
-
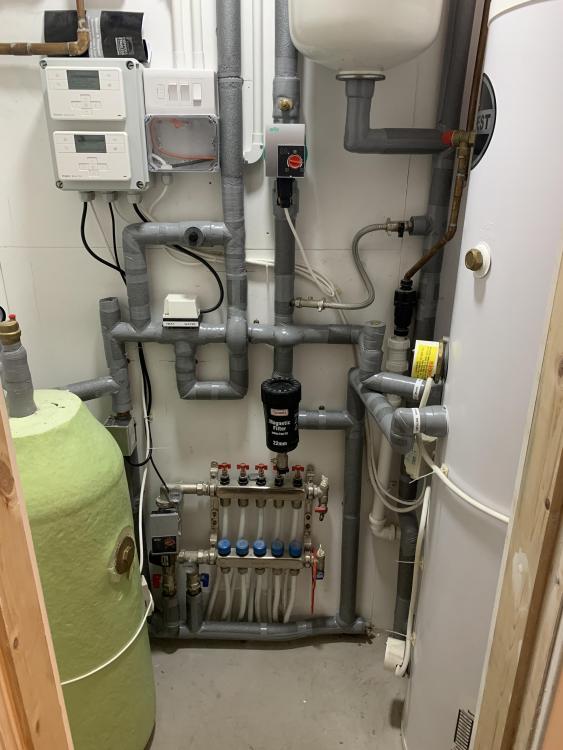
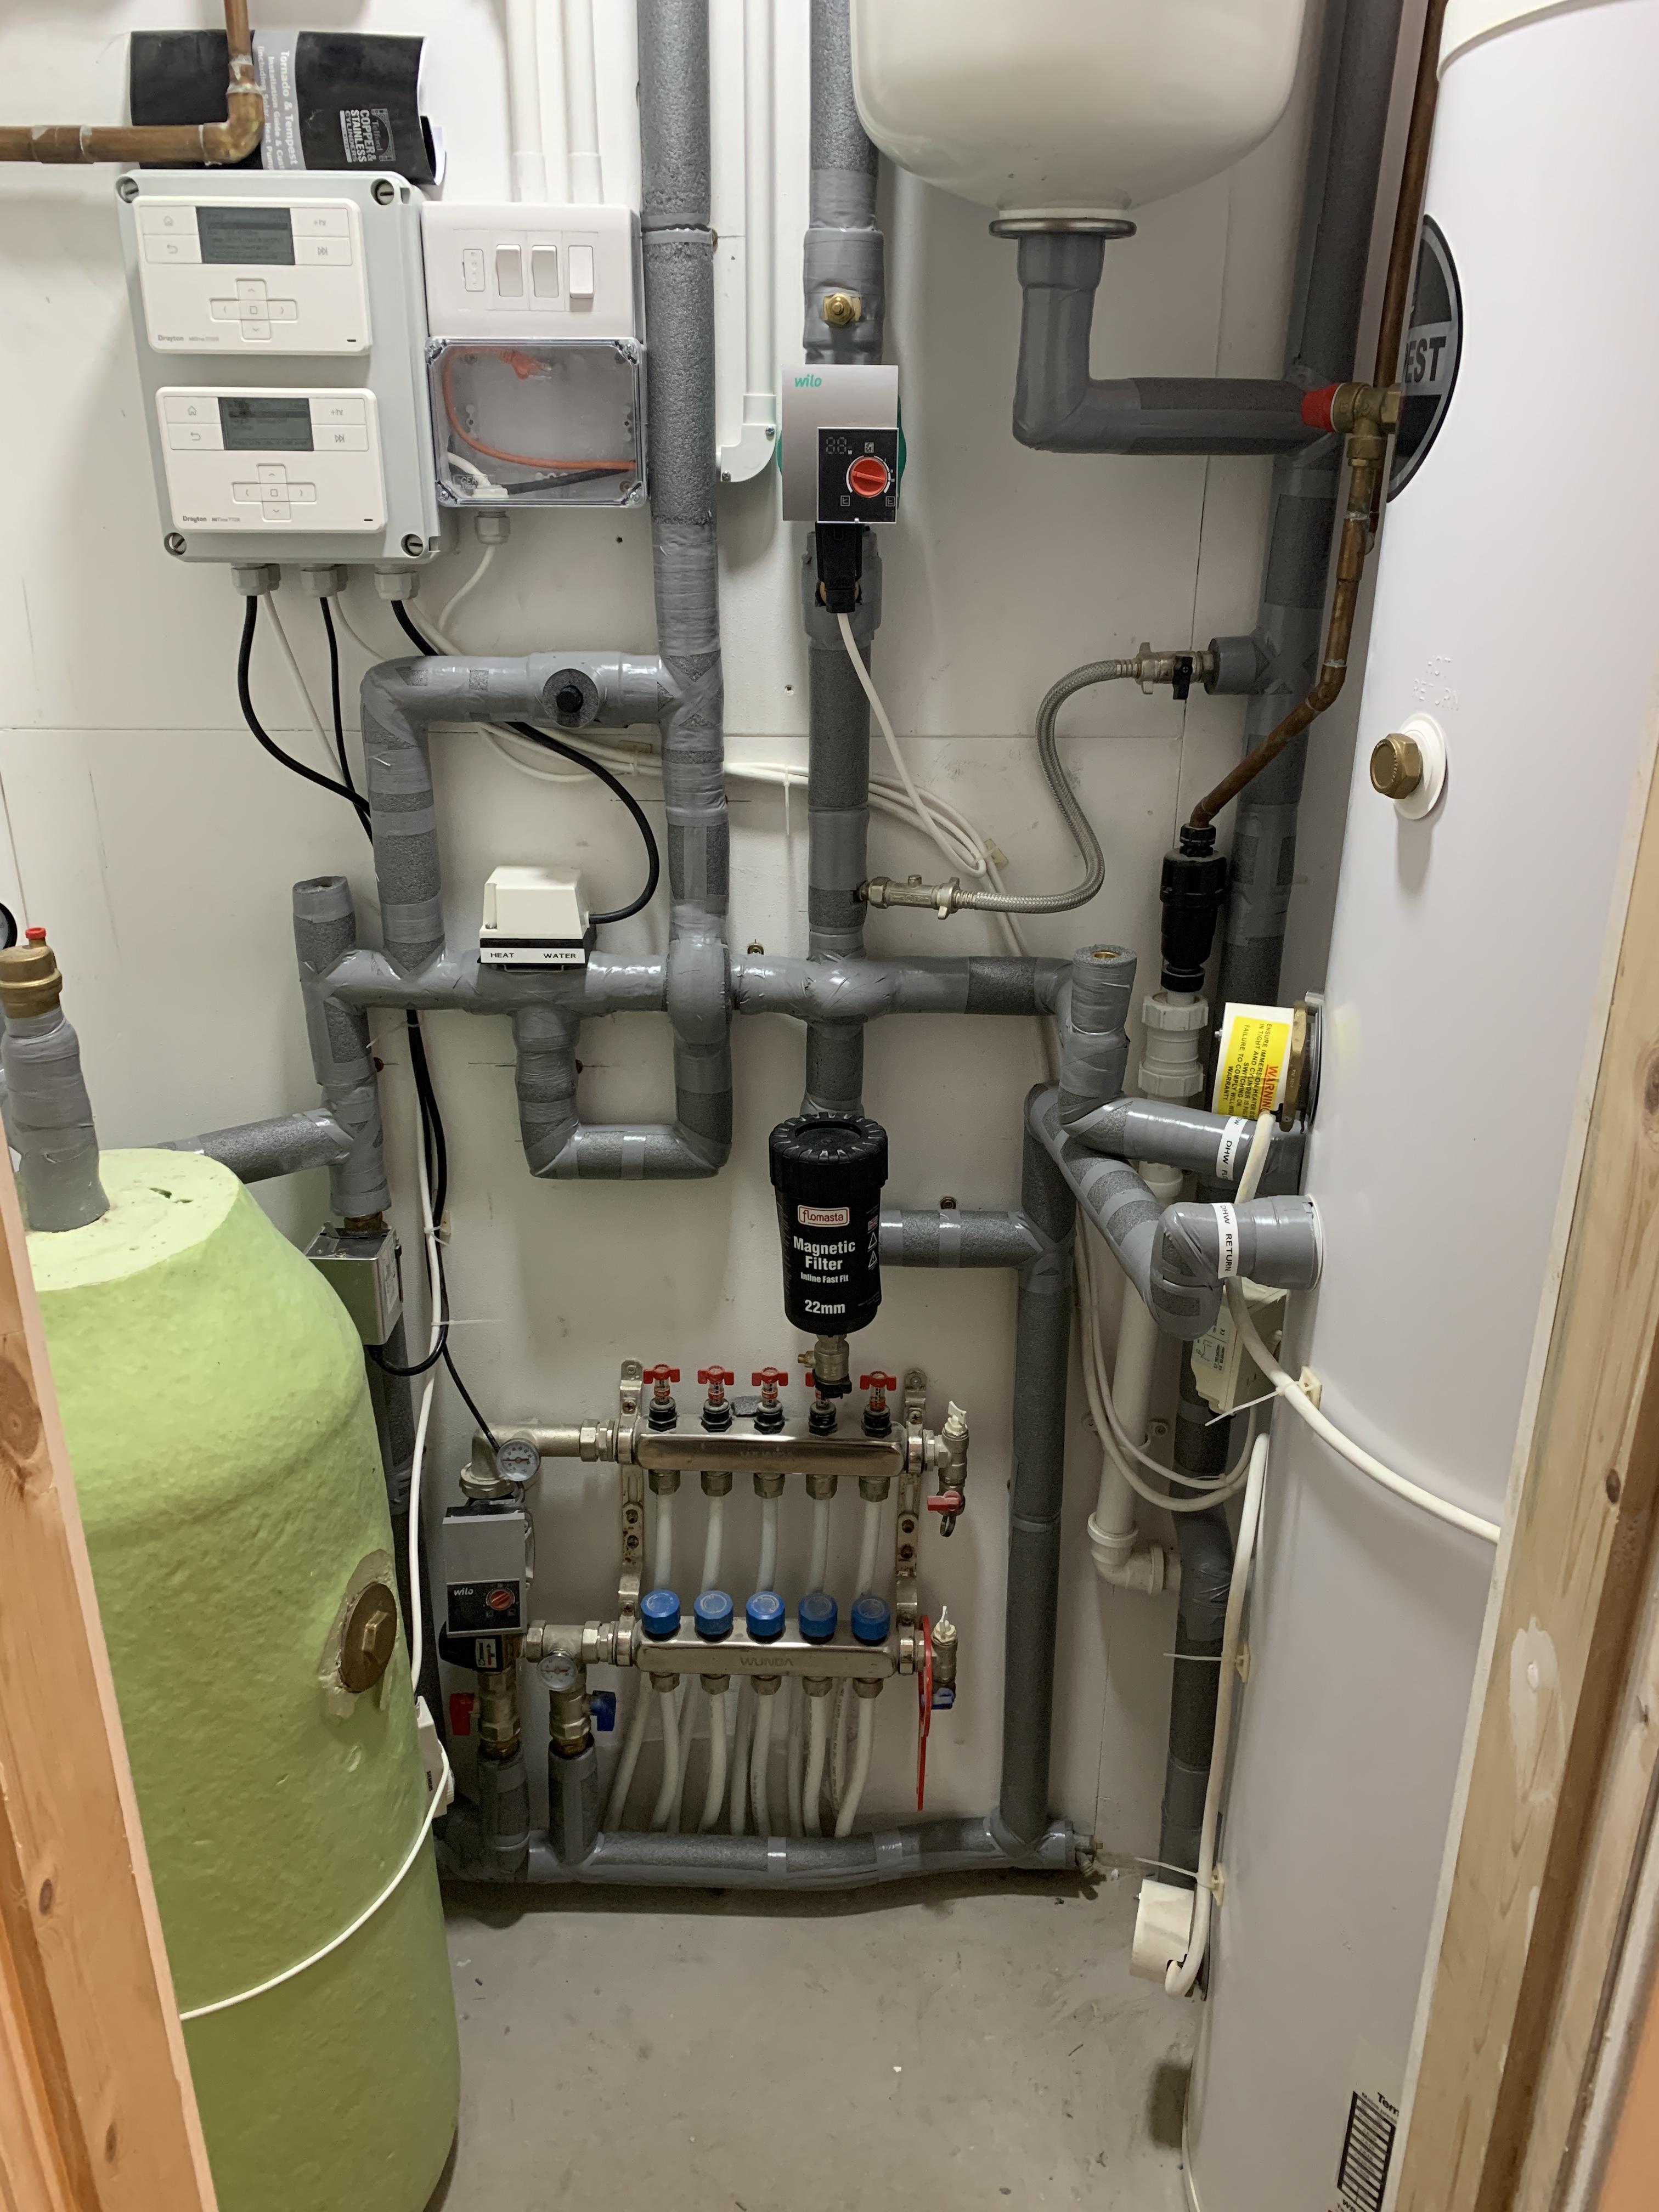
You will need as a minimum all the primary pipe work within the vicinity of the UVC lagging, it’s a BRegs/Part G requirement. Not difficult to do tbh and shouldn’t take long. Use Climaflex from Screwfix, and tape all the joints with 3M Electrical tape.
 2 points
 -
I use an architect who is very good at getting planning consent and is happy to pass over the CAD drawings. They are good at working out what will fit on site, look good, sell and finance well and help make me a profit. I would always expect the scheme they come up with to be buildable. I get others to do the building regs, planning conditions, amendments and detail drawings. If there is not enough information on the planning drawings, they can email each other. I often find that architects are more interested in producing attractive elevations than considering costs, building performance, H & S and so forth. On some LA planning websites you can search by Architect and work out who has the best success rate, which can be useful.2 points
-
It is your money and you can do what you like. Make it clear to the architect that you will only be engaging them for the planning and you will require the design in electronic format for the detail and construction stages. If they are expensive, haggle for a better fee.2 points
-
The more I learn about the hydro-brake (time spent wildly out of proportion with other build aspects!) the more I think the hydro-brake is a commercial solution mis-applied to a domestic requirement. There is good video here which implies its a solution for large developments, but also shows how it works https://fpmccann.co.uk/product-category/stormbrake-gb/ . @Jeremy Harris looks like you are right, the cost starting at £950 is because each one is custom made according to the head, volume and outflow requirement. I was thinking - whats wrong with a small diameter outflow pipe to limit the flow? Pressure will increase as the head rises, and debris needs to be dealt with, but a vortex brake seems like an over-engineered solution. Sure enough I received a much better quote for an all-in-one grp attenuation tank, proprietary outflow limiter, rainwater harvester and pump from https://rainwaterharvesting.co.uk at just over half the cost of the concrete manhole and hydro-brake. All I need now is to gauge installation costs.2 points
-
They are flipping heavy!!!2 points
-
A week ago or so I finally made an abode for our hedgehog. I made it a similar design to yours but used old wooden gravel boards. A hedgehog went into it the first night to investigate and last night spent an hour or so taking dried leaves in. At 6.23 this morning it went in and hasn't come out yet so I guess it's content. I'll put the camera out early this evening to see what time it comes out.2 points
-
I am no expert but the brickwork and the site looks very tidy. No point on trying to save a few quid when this is so focal so I think you have done the right thing going with him. I also approve of the Makita radio.1 point
-
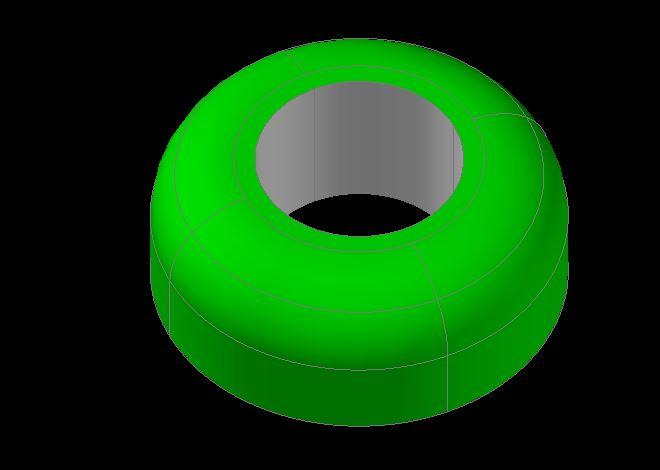
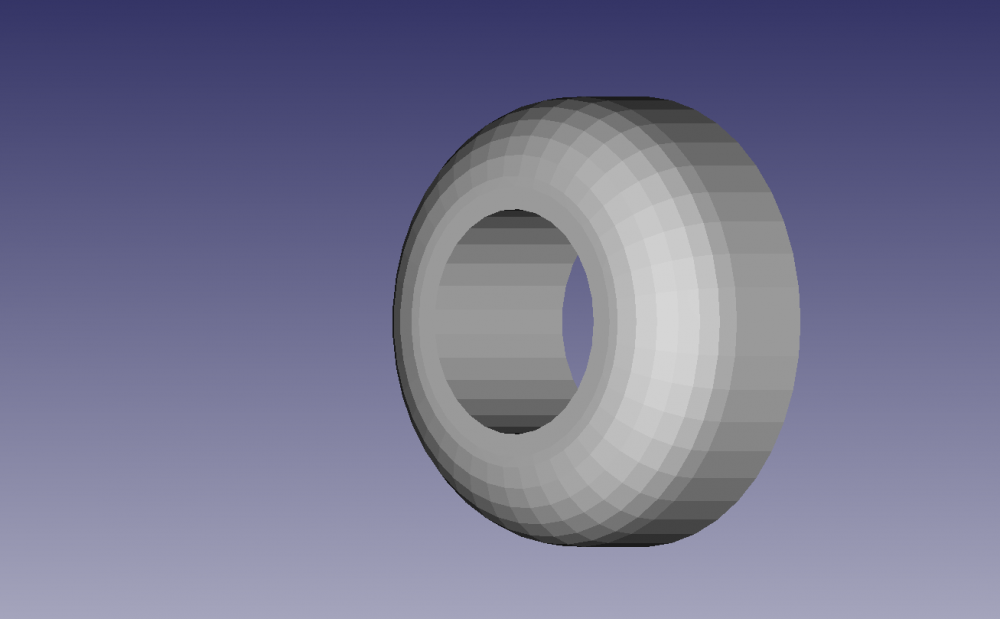
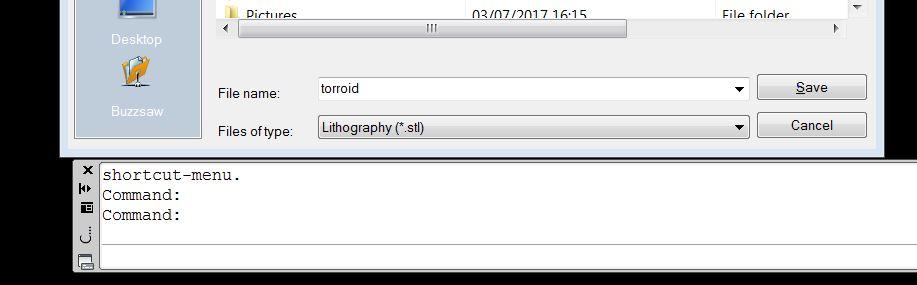
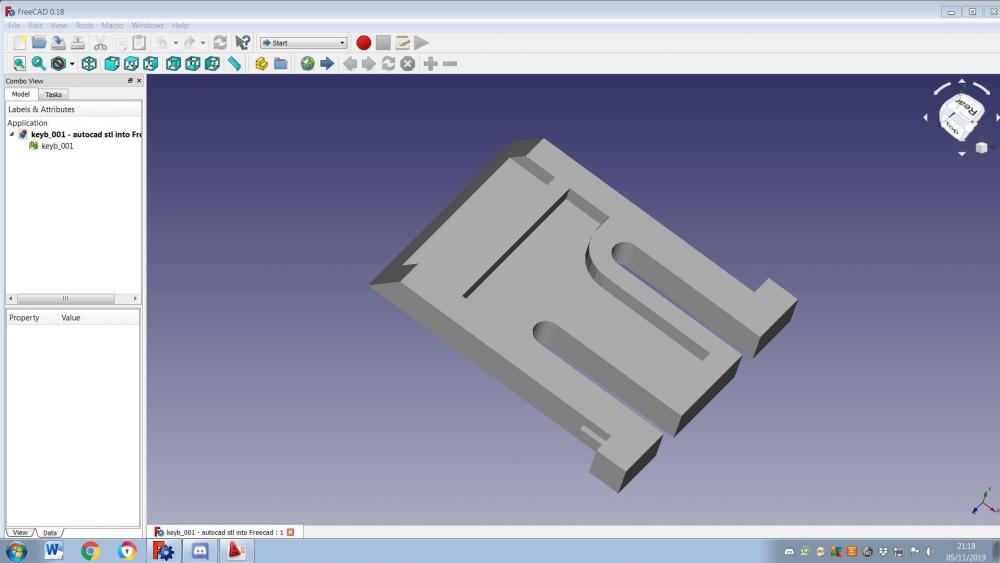
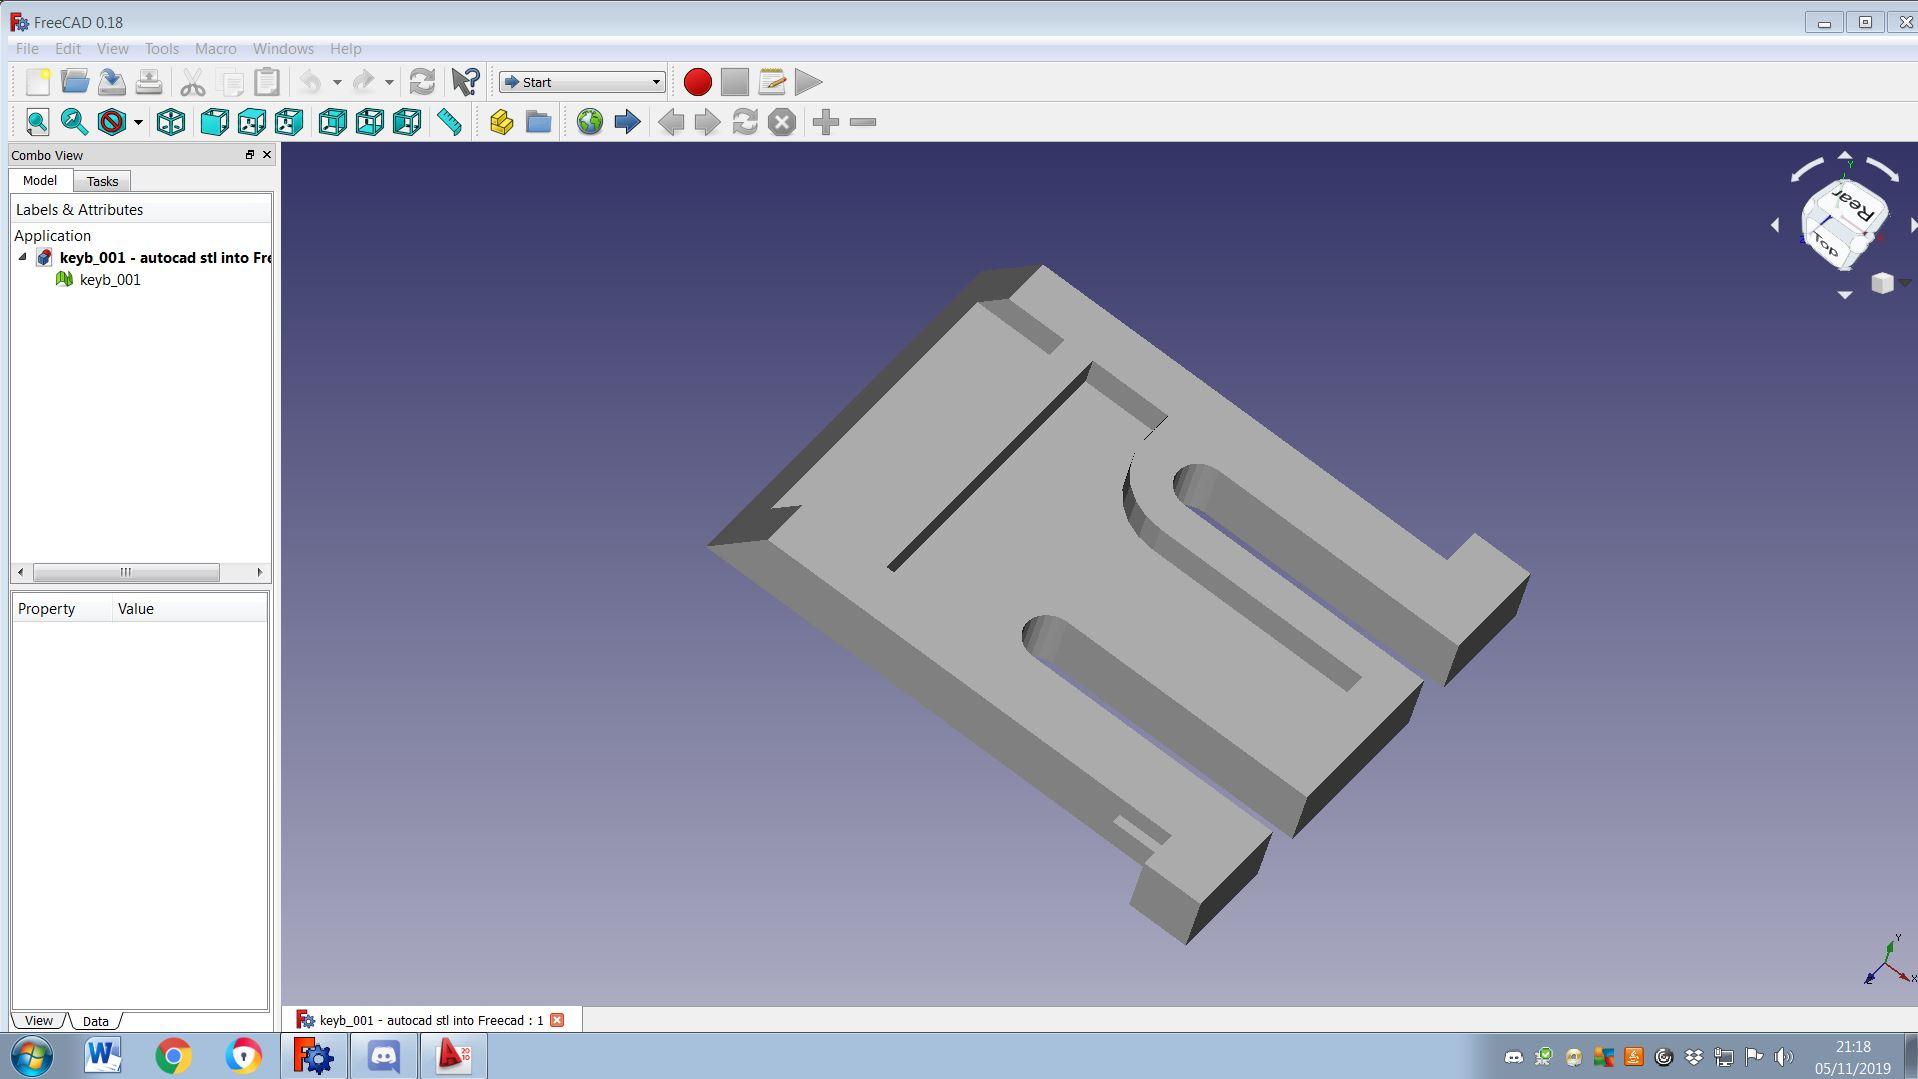
Create your solid in AutoCAD, a couple of circles in this case, extruded into cylinders then the smaller one subtracted from the larger one: Render it to make it look pretty (don't think this step is essential): File, Export, changing to an stl from the drop down menu with whatever destination folder you want: Simply click on the solid when prompted, it auto saves to what folder etc you've chosen: In this case I saved to the Desktop: Open FreeCAD and Open the stl:


 1 point
 -
Calm down gentlemen please. The moderators are watching this. some of you have been warned before. No personal abuse please.1 point
-
Success I think. Managed to export the AutoCAD 2010 .dwg as an stl file into FreeCAD. Jeremy, I'll send you the file.
 1 point
 -
The bricklayer is expensive. A fixed price of £23k for around 13000 bricks and 3000 blocks. But this is the one we wanted and didn't really shop around for other quotes. I wouldn't take this as a useful indication of Oxfordshire rates. We have a 200mm cavity and are using Cavalok BigBlok. I made the frames on site from 6m lengths (around £30 a length). I'm fairly impressed for the price. We're having separate concrete and catnic lintels above the windows. The brickie thinks the closers will be in the way in which case I'll take the tops off. But they were useful for keeping things square.1 point
-
that’s the maximum value where you don’t need dedicated air.1 point
-
We have a WBS. Ours is room sealed with combustion air direct from outside. Ours takes both primary and secondary air from outside, not the room. When not in use it appears to have no aparent impact on energy used to heat the house. It does not create draughts or in any way make the house cold. We do use it a couple of times a week (it is burning now) With the very open layout of the house it does not over heat one room (room with the stove currently 23 degrees) Obviously burning the stove shuts down the ASHP and saves a bit of electricity. It's on tonight as it's damned cold here for the time of year, just 5 degrees today and a hard frost expected tonight. Most of the wood we burn is from our own trees that I am gradually thinning, and local wind fall. I don't buy wood to burn and if I did not have access to free wood, I would not have a WBS. The air quality here is about as good as you will get. Prevailing wind is from the SW and if you look on a map, there is only Dingwall 12 miles away, then next population is Fort William or Ullapool. There is not much in between. I have twice checked the MVHR filters and they are very clean indeed. So anyone with respiration issues, I can recommend this as a place to come and live. No Major roads either, the A9 being our trunk road. If you have MVHR and a room sealed stove there is no need for air vents in the room. In fact our stove is rated at 4.5Kw so even if it were not room sealed you would not need an air intake vent.1 point
-
It can also help reduce/remove heat transfer from hot to cold if they are running close together.1 point
-
You can buy Anycubic printers direct from Anycubic - they usually ship quickly from their EU warehouse: https://www.anycubic.com/ The Chiron is currently $399, so a bit cheaper than Amazon. I bought my Anycubic Photon directly from Anycubic, arrived within about 5 days, IIRC.1 point
-
The Internet. The place for shared ignorance.1 point
-
its pretty easy to use but brutal on tools. Buy cheap ones and you’ll need the warranty a couple of times but will do it. If you’ve got timber studs then an air stapler with 40mm crown staples is much quicker and easier. FST is the weirdest stuff ever - only needs a squeegee to apply it ..! Looks like it’s not gone on but dry in minutes and perfectly flat.1 point
-
You don’t need to plaster any of the plasterboard products @Dreadnaught if you don’t want to, my last house had no wet skim plaster and this one won’t either.1 point
-
We had same conditions Welsh would have been our first choice But a good compromise was grade 1 Spanish Ive a friend who sells large quantities of slate She earned me off Chinese & Brazilian1 point
-
Yes.1 point
-
Took the screws out - this revealed a bolt (similar to those in door handles) which appears to have slid back into the frame preventing the window handle from working. Pulled the bolt out and fixed the window handle in place and it’s all working again. Phew. Thankfully, the gears inside the window are working perfectly.1 point
-
Thanks... I'm well beyond punishing myself. Thats long gone - firmly in the past. I posted this thread because I thought there might be some mileage for those early on in their build : I hope that this thread might be seen as a wry look at a bit of a cockup, and how, even when it does prove to be one, then there are normally ways round the problem. A few years ago, I would have gone into a proper Teutonic strop about it. Not any more.1 point
-
Hmmm, yer right ... next thing that @Russell griffiths will be along and tell me that I'm over-thinking it again.1 point
-
No, the gap stops at the concrete. The wall is still solid concrete. A Dursiol block - imagine a block in plan, 500 wide, 365 deep, the front 220mm is insulation, the rear 100+ is concrete. The balance is the wood-based form encased in Portland cement. Sometimes, when blocks need to be cut (because the wall is not an exact multiple of 500) small bits of insulation need to be cut to fit the cut block. Or not fitted into the cut block as the case may be. I did a double take myself. No, its definitely the insulation missing. In four places that I have dsicovered so far. Bless 'em, they couldn't have given a stuff: and while inside the heated envelope it doesn't matter. But, as I say, when (if ever) little black mould blobs occur, it'll be out with the SDS, quick look with the camera, and a squirt of foam. Here's hoping that its only happened four times .... ?1 point
-
@Onoff 's 'creative' suggestion aside, that does make sense! Is your electric ducted in from the main supply and will meter termination be in your house or are you taking SWG from a kisok where the meter is terminated? Reason is that some DNOs want to see the trench open with the duct in it before they pull through, which may complicate things for you. If its SWG from your own kiosk then that's not an issue for them. Also, fouls need a fall, (services don't obv.) so that may further complicate things depending what the inverts are between you and the sewer. Rainwater should be going to a soak-away (or harvesting tank) which would not necessarily be in the same direction as the fouls?1 point
-
@Mike_scotland Remember it not just about what the cost, it's about having a design that you can build within your budget. Make it quite clear what your budget is from the outset. If an architect is unable, or willing, to design to a budget - move on.1 point
-
Thanks for the feedback guys! As always this website is brilliant. I think we may just have to find extra cash or another architect who's slightly cheaper. Mike1 point
-
Plus 1 on that. We parted company with our architect and went with a new one (funnily enough in Angus). We ended up essential starting from scratch which does feel like we've pissed time and money down the drain. The difference in the two has been marked, we're getting great service from the second and are happy with everything so far. We've gone for full service but staged based on the RIBA work plan. I think it's been pricey but not when compared to the 11% of build cost that I had been quoted elsewhere.1 point
-
That must be a quite recent change then,1 point
-
Similar to what I did, but I did the PP drawings and sent the .dwg files to the TF supplier for detailed design. Worked well, as the TF supplier sent their detail design .dwg's back, I checked them, made a couple of minor amendments and then sent them back. Probably not an option for someone not used to working with CAD files, though, as it was very much a DIY approach. I did find this approach useful in many other ways, though, as I was able to produce detail drawings for BC easily, and also do specific drawings for things like the electrical installation, ventilation installation etc, using the master drawings that were being used for frame manufacture as the base.1 point
-
We used our architect to pp stage and then worked with a separate SE for basement design and the TF supplier for detailed design. Architect was happy enough to give us the DWG files but to be fair, at PP stage the detailing was very light and both subsequent teams recreated the drawings from scratch, however they probably saved a bit of time using the original model. Site plan was probably most useful and this was itself based on a topo survey that we paid for and had rights to.1 point
-
Thanks gents. Much appreciated. I did change the wiring on the isolator in the loft, but as mentioned by @ProDave I now only have one isolator for DC isolation, so I'll get another DC isolator to do it properly. My multi-meter goes up to 1000v DC so was able to prove it was dead. However, I did take the precaution of doing the work at night!1 point
-
Some great suggestions @Cpd, I wish I'd thought of that for ours!1 point
-
Just going back to your last thread about your roof, something I did that I didn’t see you do was actually dry, warm the roof I read that you checked with a moisture meter but when I did mine I actually used a large blowtorch and heated the ply until I could see all the moisture steaming off it, I got it so it was so warm to touch it was too hot to put a hand on it. I did this all over very quickly, then went over it again before I made a mix, then laid on the resin whilst the boards where warm, did mine in January with 4-5 hour dry windows in the weather.1 point
-
Not sure if you have talked about securing it but I have found that the best way to secure tarps / plastic is to clamp the lower edges (screw batten to batten) between long lengths of timber and then screw / clamp the timber into something solid, it’s best to roll the bottom of the plastic over itself so it does not pull out. I would also buy a large roll of cheep string, bailer twine is fine and create a web over and between the scaffolding on top to prevent pooling, you can add to this as required afterwards. Pooling water was always the biggest problem for us and even with a GOOD slope you would get problems at the lower end with water pooling behind the tension of the tarp or cross memberS, as soon as the water starts to pool it pulls all the spare tension out of the tarp into that one area creating a bigger pool, very quickly it becomes very heavy and without somewhere to go will put a lot of tension on the weakest link and something will give, if using greenhouse plastic it will split under these conditions as it’s just not designed to be load bearing, a good tarp would be stronger. Also green house plastic will damage much quicker and again will not stand up to being tensioned for long periods over anything sharp like a bolt head without splitting. I used to have to tarp our jobs in Australia to enable us to work power tools in the rain...... they always failed at some point if not constantly tweeted and maintained. I think your plan could work but it’s going to need to be very robust if it’s to be up for any length of time.1 point
-
£500 for the entire scaff setup you can see in the photos. Cash deal with labour to install and strike down 2 months later. They had us for the scaffold for the whole house, so I had some leverage of future business with them. Key point of note was that we were warned not to tie the tarpaulin to the scaffold itself, but to weigh down the tarp as best we could independently. You can see we did what we could, but in some cases we did tie it to the scaff.1 point
-
Would it be worth actually concreting in the posts which are going to get the "up" vertical wind load, using a block with the top slightly below ground so you can just saw it off and cover later? Would that be of any material benefit? Depends on whether your wind direction is relatively constant (?) Empahsize: I am not experienced at this, but I have seen a scaffs blow over.1 point
-
Take those screws out and have a look he who dares Rodney1 point
-
You are just posh.... Toothpicks.1 point
-
The key to a condensation free house is insulation and lots of it. I am willing to bet your old house has very little insulation hence cold wall surfaces where moisture condenses and mould forms. If you build with a decent insulation level then the next thing is make it air tight and coupled with that an MVHR ventilation system That will give you a warm house free from condensation with low heating requirements. Which lends itself to heating by under floor heating at low temperature from a heat pump. There is no doubt a ground source heat pump is slighthy more eficcient than an air source, but when you properly cost it, there are a lot of additional costs and ongoing maintenance costs. Most of us who have looked into it decided the sheer simplicity of an air source heat pump wins hands down. An ASHP will do domestic hot water, I have a 300 litre tank. The key is you store your hot water less hot that you would with a gas boiler. Ours is set to 48 degrees which is plenty hot enough, but the lower temperature points you towards a larger tank. And hot water distribution and careful pipework is the key to quick delivery to the taps. Also some logical thought to the layout so all hot water usage points are close together, and the hot water tank central between them. Lastly solar PV. The FIT has gone, so anything now has to be self financing. That probably means forget paying an installer to fit it. I installed my own earlier this year for a cost of £1500 and we are on target to self use £250 of electricity in the first year giving a payback time of 6 years. Our generation is lower than it should be due to shading from trees, which I am gradually addressing with a thinning / felling program so I hope that will increase over time as I gradually reduce the shading. You need a different mindset for near 100% self usage like use all big appliances one at a time in the middle of the day, and a solar PV dump controller to put surplus power into hot water is a must.1 point
-
I sooooo wish my system had your simplicity. Any one reading this who's at the planning stage....KIS (Keep It Simple).1 point
-
Demolition and Asbestos Very early on we had an asbestos survey done (which makes a real mess if you live in the house) and there were some nasties in the garage ceiling that were H&SE notifiable (i.e. not DIY!!!) and some rain goods that were pretty benign. So we decided to get one contractor to do both asbestos removal and demolition. Having the services disconnected first we then started and luckily we had a fantastic contractor: recycled 90% of the building, soft stripped and source separated on site, was neat, tidy and safety conscious and did a quick job. So quick in fact that we almost missed the final ‘push over’ and arrived on site just in time to see the final gable go over. We were fretting about site clearance and the jungle of a garden – amazing what a big digger can do! We arrived at 9:00 on the first day to find most of the vegetation stripped to ground level and loaded into a truck – perfect! Notice where the solar panels were – removed and carefully stored to go back on the new build . Having bought the bungalow with the intention of rebuild there were no regrets to see it as a pile of rubble – just relief that finally we were going ahead with no return path – a wonderful feeling. Having removed the bungalow the site looked huge – but the reality is that when it comes to building it is really tight with little room to manoeuvre.1 point
-
We did three months of research prior to getting ASHP installers to come to our property. In the end, we invited six installers from boutique, small installers to large multinationals. There were so many "cowboys" despite us doing our best efforts to prescreen them. It was an incredibly tough decision to select an installer, and we finally selected a boutique installer that we fired on the first morning because they had no idea what they were doing and they sent one guy, yes, one guy, to install the system which included him getting a 150Kg ASHP out of the van by himself. We then opted for a new installer, a British manufacturer of ASHP - the installation of out 18kW ASHP was outsourced to their preferred installers who were reliable and very professional. We have an overview video which we think is very useful.1 point


This leaderboard is set to London/GMT+01:00