Leaderboard
Popular Content
Showing content with the highest reputation on 11/15/23 in all areas
-
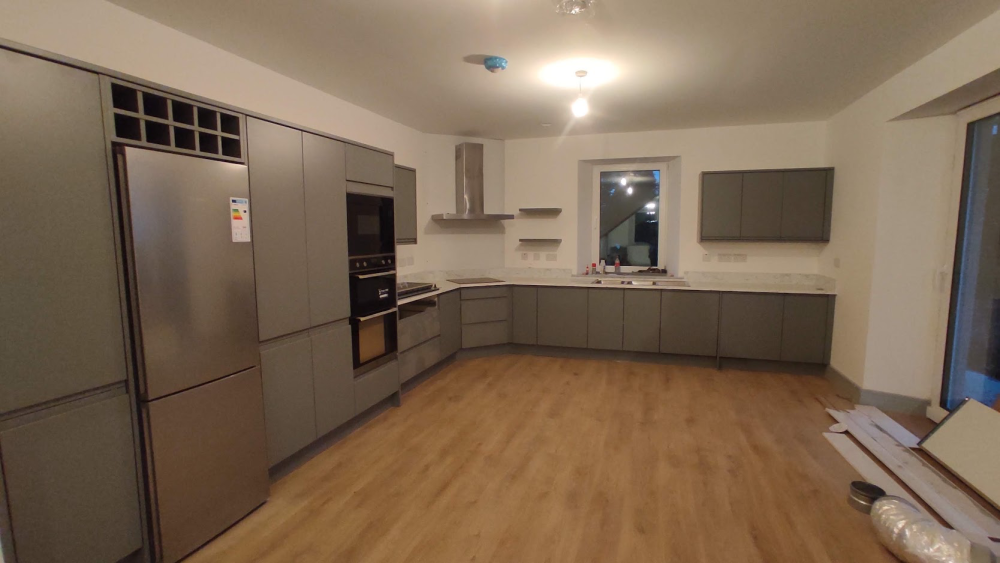
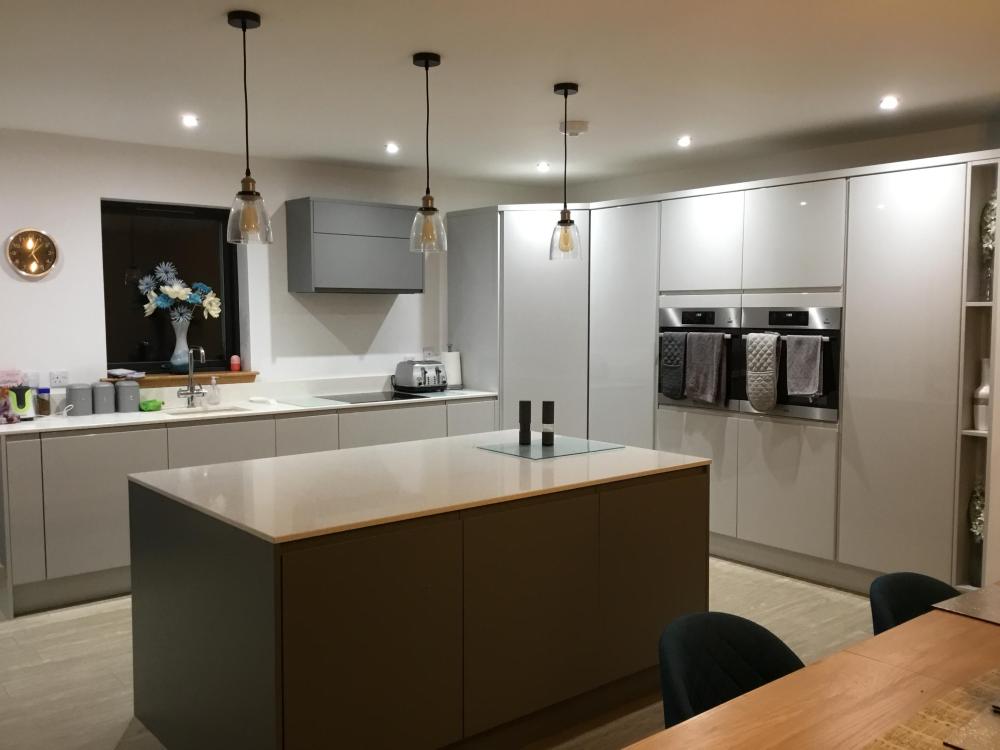
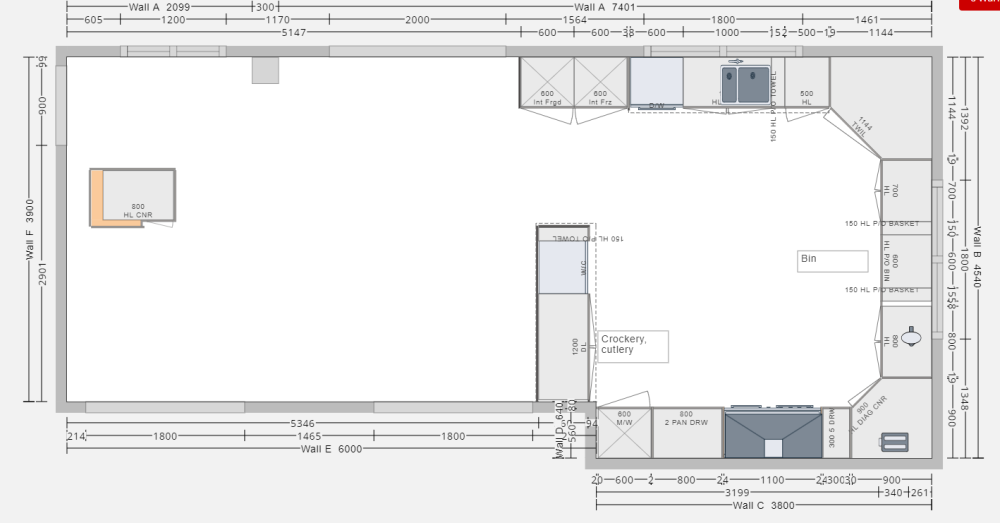
Thats ours just before we moved in. from the left, Here's a 2.5 year report. 1. tall sweeping brush cupboard. ( full of crap) 2. fridge and wine(cordial) rack. works well 3. 800mm pantry cupboard. about 60/40 split of useful food storage/full of crap. 4. double oven. top half used once a year. microwave, very good. 5. wide cutlery drawer. works well. other two full of crap. "Mrs Cupboard" on top. Full of crap. 6. 400mm cupboard, works fine. 7. 600mm induction hob in corner, very pleased, drawers for utinsels and pans work well. Extractor fan mounted on MDF diagonal across the corner makes a drumming racket. Not Ideal. 8. 300mm cupboard full of crap. Shelves for tea and coffee above, super useful. 9. 600mm pull out bin, very good. 10. Ikea 2 bowl and drainer SS sink. Very pleased. 11. 800mm under sink cupboard. contains shoe polish, bulbs and various crap. 12. Integrated Dishwasher. 13. Integrated Dishwasher. Above one cupboard full of crap and two for dishes and cups. 14. 400mm cupboard in the corner. Full of crap. We have too many cupboards and the compulsion is just to fill them. Free standing dishwashers would be better in my opinion. I had some issues with the integrated door on one not closing properly and had to dismantle the kitchen somewhat to fix it. Double oven is a waste for us. A boiler tap would have been nice I think. An extractor with the fan at the far end of a very long duct would be much quieter. We used a Laminate worktop. Quite Pleased with it. 600mm cupboards are too deep. The back of them is too deep to access properly.3 points
-
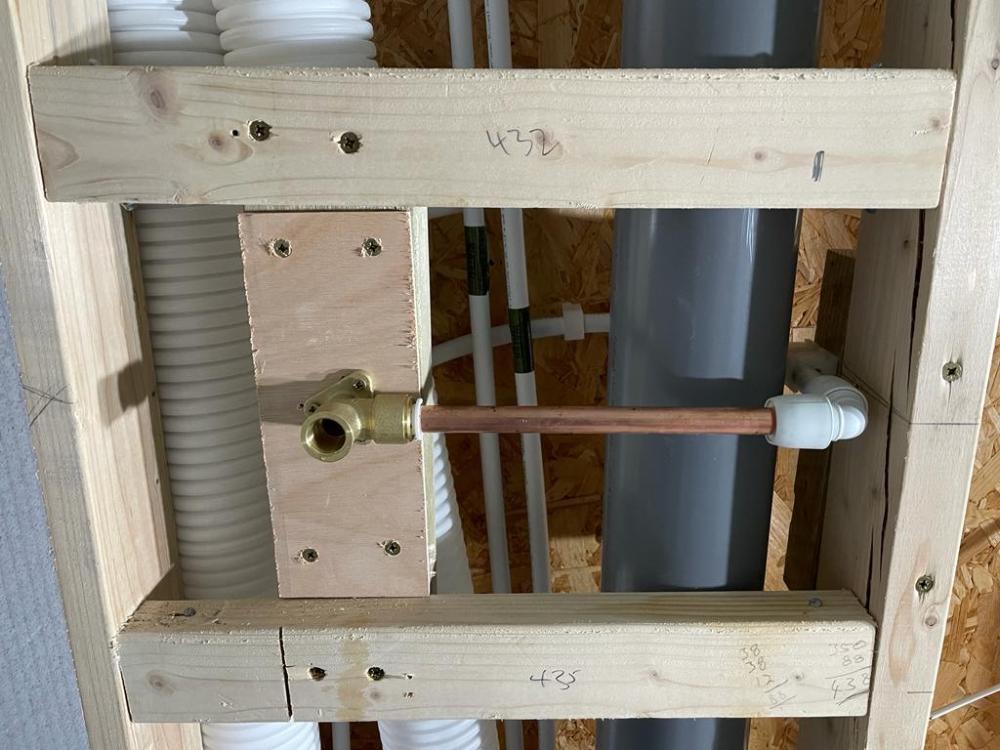
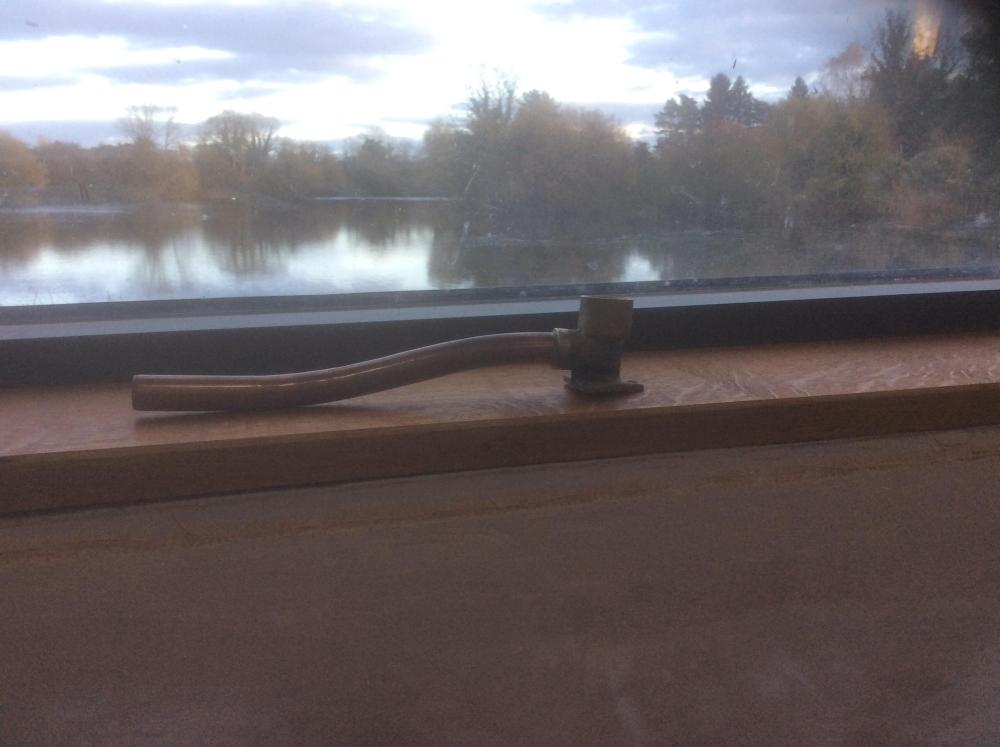
Read the tread about diy plumbing, I think this was covered in detail about a week ago. Changing from hep to copper and then to a brass back plate elbow. Its by @Thorfun I think.3 points
-
It's been a while since my last blog, but we've not stopped, the days are shorter and the weather skipped autumn🍂 and dived into winter with a few storms and loads of rain. Our windows are budget friendly triple glazed UPVC, and composite doors. The external EPS was sealed at the cill with EPDM airtight tape, the tape has reinforcement in it and can be moulded, it does crease but creates a water tight junction and sticks like the proverbial to the EPS. We created a cheek reveal with an additional layer of 50mm EPS and sealed the upvc frames against this, I then ran a bead of sealant against the face and edge of the EPS giving two seals. Then when clad a third seal. I used soudal air tight foam and I thinks it's LMA sealant, soudal's airtight solution. The winds gave good opportunity to test for air leaks when had several days of 35mph winds. This proved a good test with a smoke pen. The internal frame was sealed with soudal sf40 which adheres very well to the upvc and timber blocking, when cured it is like rubber. The cladding is larch boards in 2 widths 150mm for the bottom layer and 100mm for the top. We finished the top of the windows with a custom palistol coated drip The bottom of the EPS footing was finished with reclaimed slate. Inside we are having a cold roof. We needed to add 25mm pir under the truss cord to satisfy the tightened regulations in Scotland. We tapped the foil boards with foil tape, and the perimeter boards were pushed to touch the wall plate. Then used airtight foam between the PIR and internal IFC wall creating a seal. Under the PIR I used plastic membrane that I spray glued to the PIR, and this draped down the perimeter walls. The under ceiling was battened and counter battened, this created a service void for the cables and not penetrating the loft. The plastic was jointed with EPDM airtight tape on joins and walls. Cables were put inside Flexi conduit that was cut into grooves in the ICF. (All water pipes were run under the slab.) This picture shows the detail for the airtightness and the service void. MVHR ducts (7 plenums ) were run in the loft, and under 400mm of loft roll. The manifolds are also under the loft insulation. I made these airtight using the same EPDM tape. I made gaskets out of the plastic with a circle cutter and stretched it over the plenums, then air tight tape to seal everything to the plastic/ PIR. The walls also needed some IWI to meet the tighter regs, so decided to go with 25mm PIR. This also added another seal for the plastic airtight layer and walls. The poly steel ICF has these metal plates at 150mm ctrs that allow the cladding battens to be secured externally and the plasterboard internally, we used self tapping drywall screws and insulation discs to hold the PIR in place before installing the plasterboard. Picture for detail below. At this stage we've got a large airtight box. Now it's a case of installing the stud work. I lined the plant room with pre painted 12mm OSB, and the bathroom with 18mm OSB ( a Scottish building regs requirement needing the ability for future hand rails etc) Electrics are simple, a few Ethernet points and sockets and spotlights. One pendant over the dining( and if I get my way, and budget allows pool table). The only penetrations from the loft are a light, PV cables, TV aerial, and 4g antenna cables. These are in conduit and sealed both ends. All other cables run in the ceiling void or stud work. I've put a few sensors in the studwork for future Arduino projects to accompany the in slab sensors. The plant room is compact, and work in progress. The PV is up and running and to date produced just shy of 300KwH in 5 winter weeks With the first fix complete it was time to plasterboard, we got 80 boards delivered Wednesday midday, just as storm Babet hit, it was too windy to bring them in, I tried, I failed so it had to stay outside 😭, covered in plastic, tarpaulins, scaffold boards and the obligatory ratchet straps. 3 days of constant 35mph gusting 50mph gave opportunities to check for airtightness. I managed to install the flush shower tray during this downtime. Once the storm blew though we got the boards inside and cracked on, the open plan lounge, diner, kitchen was boarded first and as soon as it was complete I skimmed the ceiling, 11 boards was too big for me and my tennis elbow, that coupled with not plastering anything for several years. I split the room in two and used several layers of scrim tape to plaster up to, then remove the scrim tape and skim the 2nd part. It worked well, and it's painted and the join is seamless. The next few days we mixed it up skimming in the morning and boarding in the afternoon for the next day. Today is day 182 of the build, this is basically from the cleared site that was down to rock with the pecking already done. Currently the house is fully skimmed, most of the ceilings have been primed and painted white and we started the kitchen install today. All the bathroom is here waiting to be installed, and some appliances are here most arriving this week. This has been pretty much 7 days a week, with only around 12 to 18 days off to earn some money and pay off some labour debts. We're hoping to move in, in 2 weeks with a working bathroom and kitchen 🤞, the static has now reverted to ice box during the night🥶2 points
-
My parents moved to a flat which had a very small number of kitchen cupboards. They ended up throwing away half of what had been in their old kitchen and it all fitted. In their new place they have far more cupboards which enables them to keep empty boxes and so on that they will never need. This whole trend for pantries that you see on social media. I don't have anywhere near that much food in the kitchen and if I did stuff would just end up constantly going off before it got used. Kitchen companies must be sponsoring influencers to persuade people to buy far more kitchen than they need. Never ending videos of look at my kitchen. They always look like they have way more cupboards than necessary.2 points
-
2 points
-
I like the idea of two dish washers, saves moving stuff into a cupboard,.. energy saving2 points
-
Depends on the distances and load but yes the 10mm would be for an electric hob or combined oven and hob. Many Electric ovens (without rings/hobs) only need 2.5mm^2 and quite a few are supplied with a plug to suit standard socket.. 2.5mm is for sockets (ring mains effectively have two 2.5mm^2 in parallel as power flows both ways around the ring). The 1.0mm^2 is for lighting but some people prefer 1.5mm^2 as I think it can be covered with insulation without derating? However with LED lighting I don't think that's the issue it once was.2 points
-
2 points
-
Shame it’s too late to make the window taller. I’d have made it a bit taller as you could have added a blind to then cover up the top bit for privacy until your fence was up. Presumably you’ll add a nice dense hedge too. well done posting this up. It’s not easy presenting something you’ve worked on and it’s then criticised. It all comes from a good place on here though.2 points
-
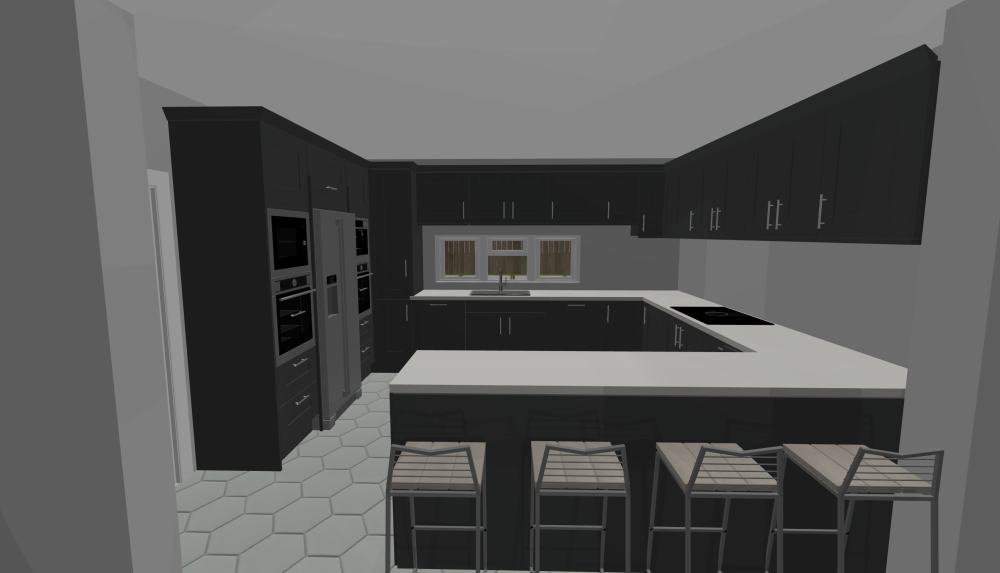
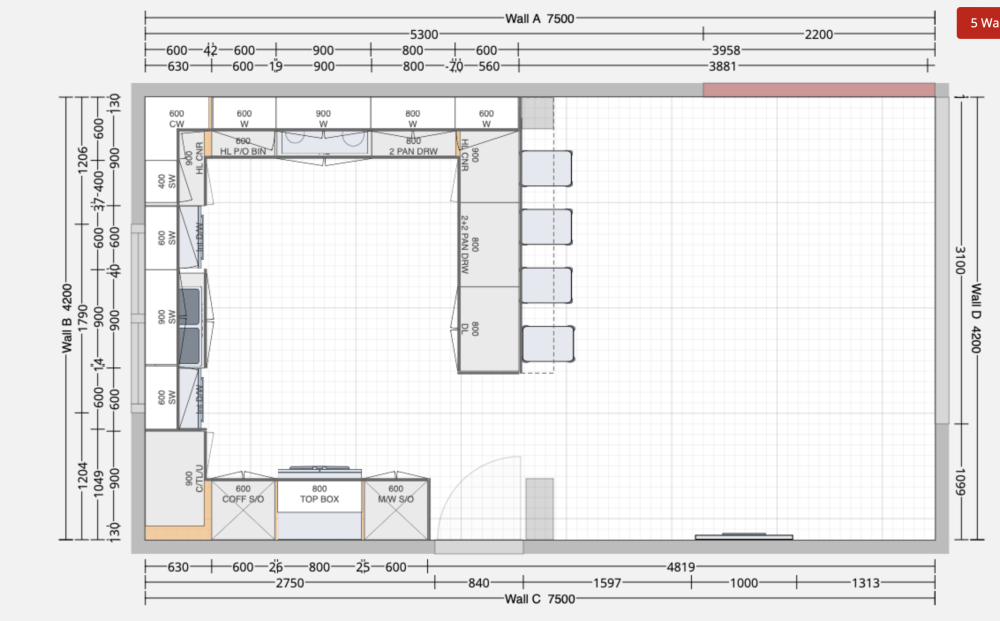
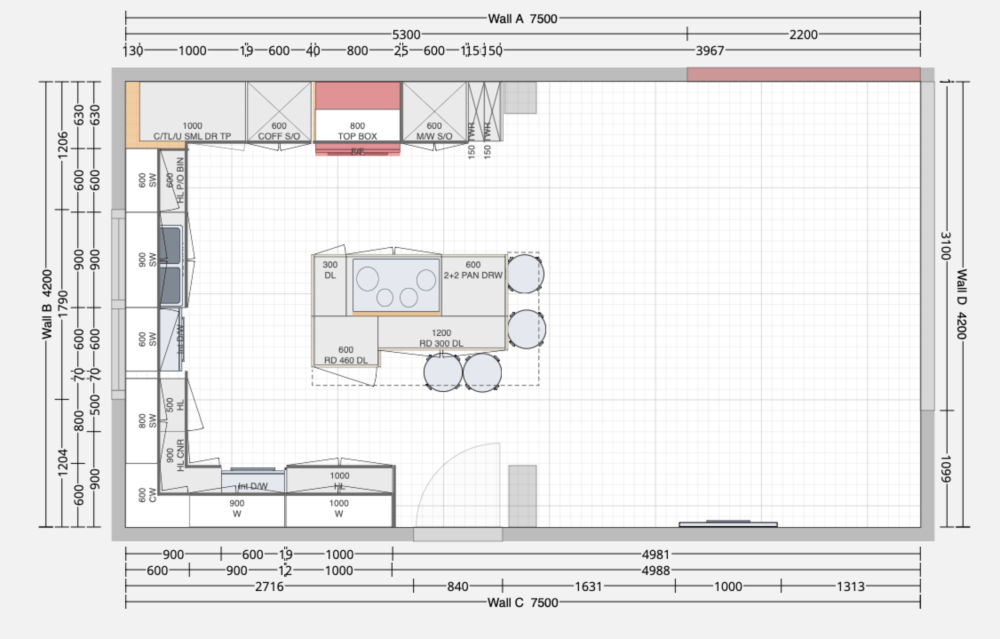
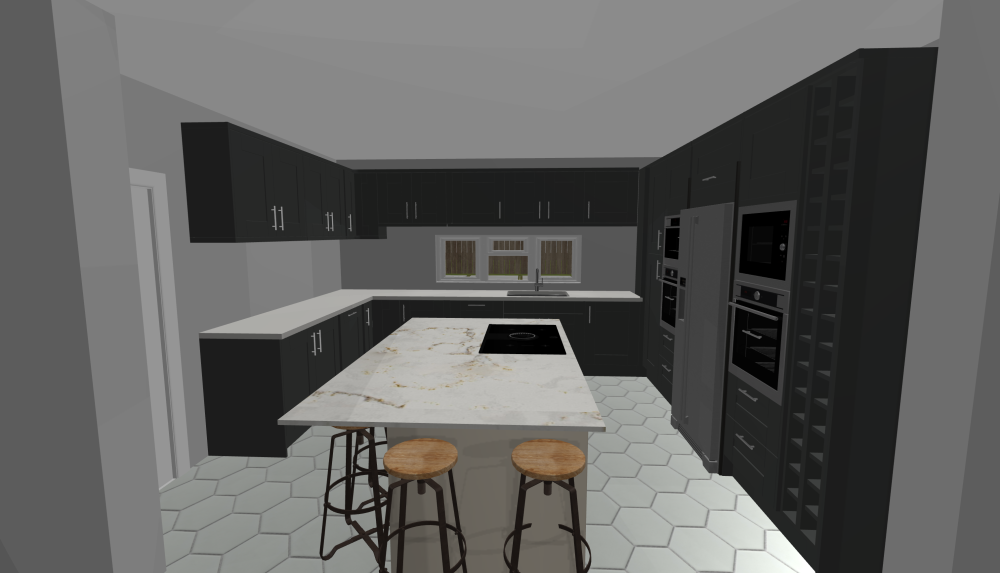
Layout looks good in that you have the work triangle sorted. I’d have a concern about having the fridge right behind the hob just because it might be a pia if you’re cooking and someone else wants access to the fridge but it’s a minor inconvenience. It looks like you have a lot of cupboards, will you fill them all? I get that more cupboards allows you to spread items out more rather than cramming them in. However most folk have a lot more kitchen stuff than they ever use. We went through every bit of kitchenware and were ruthless in what we kept. Consequently we didn’t need nearly as many cupboards. Does the island have drawers or cupboards? I realised that having a big island with drawers was more practical than cupboards and you ended up with loads of space. This and the ruthless culling of kitchenware allowed us to ditch a whole wall of cupboards. This saved a few thousand and opened the kitchen up more.2 points
-
2 points
-
Why on Earth would the OP want to do that? Great way to piss off your neighbour, who you then have to live with until one of you dies or moves.2 points
-
This is interesting. I also note that the Law Commission reviewed reforming this area of law in 2014, and that that document contains much useful detail about the current law. It is here, and attached: https://assets.publishing.service.gov.uk/media/5a7dac39ed915d2acb6ed74c/44872_HC_796_Law_Commission_356_WEB.pdf This has made me reflect on a Right to Light issue I may potentially face (2 story extension on a house face to face to an extension the neighbour built right on the boundary nearly 20 years ago). I might add a question here, since it is an adjacent point, or do a separate thread. Ferdinand 44872_HC_796_Law_Commission_356_WEB.pdf1 point
-
1 point
-
1 point
-
This I have to see! 😂 Generally 10mm2 should just come as a radial from your cooker / hob breaker and terminate in a 45A cooker switch. From there, again in 10mm2 to a cooker connection plate. You can get "double enders" so you can feed the hob and oven. Please go into the wholesaler and ask for such: https://www.tlc-direct.co.uk/Products/AA45DCOP.html1 point
-
Designed, installed and commissioned my own system. Have two units, partly to reduce duct lengths on a 25m long house, but also to reduce what boosts and when, I have used coanda effect supply terminals, to further reduce duct lengths. Nothing complex about MVHR, just flows and pressure drops and trying not to overthink stuff that isn't important. Not easy when you read ill informed info everywhere. Reality is you don't need to boost often, so why bother automating. If you have a shower in a cool bathroom and it's full of steam when you finish, hit the manual boost switch on the way out. If your cooking smelly stuff, hit manual boost also. That's about the only time ours boosts. My normal flows are now turned down well below (about half) building regs, and humidity floats around 42 to 45% over 24hrs. CO2 - living room levels average (24 hrs) 521ppm, and max out 630ppm. Our bedroom CO2 levels average (24 hrs) 556ppm with a peak of 665ppm. As I mentioned don't overthink it, keep it simple - let it get on with it. Check the filters every six months, give them a hoover, replace annually, have cone filters in the extract terminals, to keep duct clean.1 point
-
I’ve got 30 boxes of “ kitchen stuff” that has been packed away for now 7 years . Or “ crap “ as you technically call it . SWMBO is adamant it’s all necessary. I’ve thrown a few bits out over the years - but it’s hard to make 30 boxes vanish unnoticed. Once the kitchen is complete I assume some will migrate from “ box of crap “ to “ cabinet of crap “ - much like yours 🫤1 point
-
AIUI, but I could be wrong, eco only uses the heat pump, standard will use an immersion heater to top up, if you have one. Mine's set to 48C and comes on in the morning and afternoon for about a 50 minute window. Takes about 30 minutes to reheat.1 point
-
I think you have highlighted a common misconception about GRP. If you build a suspended walkway, you would expect a proper design. Something built from GRP that does the same job also needs a proper design. What it does not need is someone that thinks they can just mix a bit of resin and hardener together in a bucket, soak some chopped strand mat with it, run a paddle roller over it a couple of times, then think the job is done. I ran a composite factor in the Midlands back in the early 1990s. Half the workforce came from Reliant Cars. Reliant, with a glass manufacturer and a couple of resin makers had developed a system that was designed to make the manufacture of car panels easier and cheaper. The system worked well. Was used in the DeLorian as well. Trouble was, those Reliant worker were not using the same materials at my factory, so they used the same manufacturing technique as they had at Reliant. The quality was shit, absolutely hopeless, it lacked a decent finish, had high structural failure rates, and rejects that needed remedial work was over 90%. Why I always say, GRP has to be done correctly. It is not hard to do right, but it is very easy to do it wrong though ignorance.1 point
-
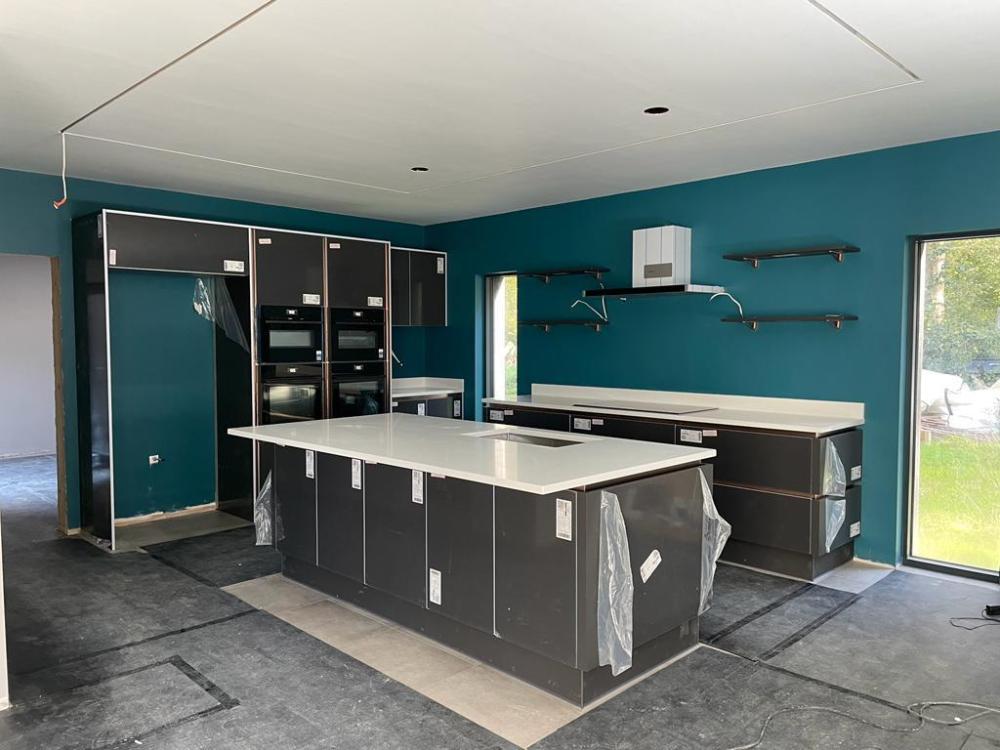
@jayc89 attached pic of my DIY kitchen, similar room dimensions, and also in dove grey but with darker island. For comparison reasons. We have 1.4m between units and island and that works perfectly. Also have boiling tap. Keeping the island clear of sink/hob has worked perfectly for us. only thing I’d change would be to have a short run of matching wall units off the corner larder unit, to take the extractor. as opposed to what I put in, which matches the darker island. we have plenty of storage in this design. The corner larder is amazing and the pan drawers the other side of the island take all the crockery etc.1 point
-
Our cooker: 10mm feed intended - until reality struck. Now there's 10mm to a hewooooge socket and a 13 Amp plug to a Bosch (natch) induction fingy.... 10mm - I could hardly cut it with an angle grinder ......1 point
-
My house, an ugly 1987 box is just inside the boundary of a world heritage site. I can't even change my timber shed without permission, or use a lighter, or darker tone of woodstain on the windows. (expletive deleted)ing nonsense, not as if every single place withing half a kilometer of a disused mine must be preserved.1 point
-
Do come and post pictures when you have done that. I will be surprised of you find a 13A socket that will actually fit two 10mm cables.1 point
-
I'm a big fan of two dishwashers, that is what we have. My mate had that Fisher and Paykel one and hated it. Costs about the same as two full size dishwashers. I think he said you had to put a tablet in each drawer.1 point
-
1 point
-
I think two single runs in 10mm one to the hob and one to the oven area would be normal. The 10mm^2 would be terminated at the oven/hob end with a accessible Cooker(hob) switch and a Cooker Connection Unit (faceplate/junction box thing). Run a 2.5mm ring to sockets as well so you can choose later if you want to hard wire the oven to the 10mm^2 or just plug it into a socket.1 point
-
1 point
-
1 point
-
I think 70cm gap between island worktop and cabinets on right in the "photo" is a bit small?1 point
-
1 point
-
1 point
-
Take a photo of the building, print it and hang it up in a museum. Then knock it down (the building, not the museum).1 point
-
We all see things differently and we all have our own ideas, which is great. Here's the layout we have settled on as reference. We didn't particularly want any wall cupboards, so have managed to get the space req'd with floor cupboards, and with two windows, cooker position was pretty much decided for us. Boring but simple, good amount of floor space, which we like. We went through our existing kitchen, listed out all the existing cupboards and just made sure there was a duplicate in the new...1 point
-
@Mattg4321 Use the planner on diy kitchens Online Kitchen planner | Free design software | DIY Kitchens (diy-kitchens.com)1 point
-
I have just set mine up I give it 1.5 hrs in the morning (cheap rate electric) it uses 45 min to reheat to 45 deg. I also heat at 12 pm til 1 pm again to 45.1 point
-
When you look at the benefits of anmdding insulation compared to an unventilated cavity, found it wasn't worth the effort or expense. From build desk The calculation method can sometimes produce the same result for a range of airspace thicknesses. For example, the thermal resistance of air layers (i.e. undivided airspaces) with high-emissivity surfaces and a horizontal heat flow (the case for most unfilled cavities in external walls) is 0.18m2K/W for all thicknesses from 20mm to 300mm. A mineral wool would give a 4 to 5 time better performance, a 25mm cavity with 0.032 mineral wool would add (excluding thermal bridging of wooden battens), 0.78 to your R value The unvented cavity around 0.14. Assuming your R value was already 8 Insulated U value ends up 0.114 (plus some for battens thermal bridges) Empty U value ends up 0.123 (note the thermal resistance of wood and the air space is very similar, so little bridging to add. So impact on U value is circa 0.01 or less1 point
-
We fitted a Quooker so no need for a kettle and use the grill to toast rather than a toaster although we don’t toast much. I hate clutter so everything has been about removing stuff off the work surfaces1 point
-
Nothing wrong with that . Just make sure you have backer board ( or whatever ) to hand , tiles and the final fitting . Because if you need to adjust the depth after it’s tiled it’s a pig 🐷1 point
-
Plumbing isn't just a trade. Its a language too. Nipples, irons, CT1, tapered threads, 92.5 degree bends, noggins.......... 'King nightmare.1 point
-
Has anyone seen @Pocster, probably got trapped in one of them kitchen cabinets! I think, as original plan, I'll set them on a noggin then use an male/female 1/2" extension iron to the correct depth.1 point
-
Agreed it would. The OP @DaveAF has posted several problems with works being carried out by his neighbours, hence the suggestion was in that context and included "Which would have annoyed the Neighbours". But besides that the building has enough social, industrial and contextual merit that it should be protected to some extent...... Hides Awaiting the Onslaught1 point
-
If you ever need high bandwidth to any particular point in your house then proper network cable is a must. Once we got fibre here it took me a bit of work to get all that bandwidth back to my study etc. You need a fibre router, 1 gig hubs, and … cable. Shared wifi will be fine for internet browsing etc but it won’t handle the full bandwidth of fibre. Cable also allows poe to cameras, access points etc and avoids you having to have mains power near them. Also wired doorbells, thermostats etc avoids all that BS with batteries and the spottiness of low bandwidth connections. I think dependence on wifi is short-sighted.1 point
-
Why use MR plasterboard in the first place, you won’t have high levels of humidity. Your MVHR will have taken that away before it gets anywhere near the ceiling, unless it’s a 2x2m room with a 5 ring hob boiling water constantly then your over thinking it, these boards where designed for older style houses to overcome a problem, you won’t have that problem. You dont need it on window reveals, they should be insulated enough to not be getting any condensation or damp, so sort that issue instead of fitting a board that doesn’t mind being damp. Dont fit a bandaid to cover a problem, design out the problem. Normal board or pink for fire rating or blue for sound, but MR not needed. In a bathroom you should be tanking wet areas, so it’s not needed there either, and there are better boards than MR for that also.1 point
-
1 point
-
1 point
-
As long as insulation is packed tight to the ridge board it will have a similar effect as all the other rafters. Timber is a poor conductor of heat.1 point
-
Having stressed over this lots a soil pipe it turns out is only a minor thermal bridge. Either internally or internally. There is an argument for having it outside too. Far more accessible in the event of blockage etc. I seem to remember one of the senior statesmen @tonyshouse prefers it. In my mind that plan for the ensuite will work. I'm not the most experienced though.1 point
-
Our BC officer decided on trench width and depth fir us as he was local and knew the ground (so cost nothing 👍)1 point
-
+ 1. There were one or 2 similar buildings in the suburb I lived in when I was young which had definitely been air raid shelters. There's a WW2 pill box next to a canal near us of the same sort of construction, but octagonal. I think it has some sort of protection, may be listed. It's in a conservation area.1 point


