Leaderboard


Popular Content
Showing content with the highest reputation on 08/12/23 in all areas
-
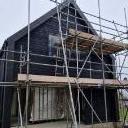
Leave them be, they are unlikely to do any structural damage. I had them in a previous property for 13 years without any issues. Masonry Bees are solitary and do not gather in large numbers although a few will choose the same patch of wall which suits them best.3 points
-
Kind of going back to the 19th Century that. Some on here will like that, what they voted to leave the EU for. Bring on the childhood illnesses.2 points
-
Makes me wonder if there is a market for a simple, repayment load, say half a % above BoE base rate. Variable, so not fixed, no set up fees. Say a fixed period of 25 years. Oh hang on. Maybe an insurance backed loan, borrower just pays the interest and the lender takes a small payment to invest wisely. When maturity comes, the lender cashes in and pays of the loan. Oh hang on.2 points
-
China is a funny one to watch . Usual government statement of how fab it all is - but ultimately some extreme issues going on . Really difficult to read any market sentiment at the moment . Lots of issues in the U.K. - can kicking only gets you so far . Mortgage rates have dropped a bit and will go further once boe base declines . Having said that I have never known lenders being so difficult to please for remortgages . Some of my properties are deemed “ unmortgagable “ ( even though been mortgaged for 20 yrs ) - as they find the most bizarre reason to reject you . Suggests to me they are preparing for downturn I.e repossessions increasing ….2 points
-
That suggests all insulation is equal and it's just a matter of choosing your product and appropriate thickness to meet your performance target. If that were the case then PIR/PUR insulation would be very competitive as few cost-effective insulations can achieve its U value within a given thickness. While I was investigating SIPs for my own build there were just too many unanswered questions with regards both PIR/PUR insulation and the SIPS themselves. I have a timber cladding rain screen and an Aluminium roof, so was concerned about decrement delay of the insulation and acoustic performance. I also had the experience of my existing home that had dormers with building regs levels of PIR insulation between the rafters and suffered from large temperature swings and very poor acoustics, even with a traditional tiled roof. When I got further into the detail of the build and started to spec for PassivHaus levels of performance, the real levels of performance for the "as-designed" SIP panels didn't meet marketing due to timber fraction and cold bridging, especially for the roof. Additional layers of board insulation were then required to mitigate these inherent shortfalls in the product. You also need to be comfortable with any potential toxicity and performance degradation related to off-gassing. While I was researching there was little definitive information and the distributors just dismissed any concern. One comment was "oh that was in the 80's", products are different now". Sick Building Syndrome is a real thing (although not only related to insulations), off-gassing, shrinkage and aging is a real thing and is to some extents accounted for with some performance specs. The choice I went with in the end was a blown cellulose fibre as its longer decrement delay is better suited to my choice of a lightweight rain screen, and good acoustic performance is a better choice for a vaulted ceiling, with the added benefit that its inclusion improves airtightness rather than needing additional actions to mitigate its short-comings. The reduced insulating properties though do mean I've had to give a away a bit of floor area for a bit of extra wall thickness to achieve the same U value.2 points
-
I have a kingspan timber frame house. Sound transfer and a solid feeling floor was a priority for me so I had the pozijoists at 300mm centers and put 50mm of cemflow screed upstairs. There is 100mm rockwall between joists. We haven't moved in yet but all tests show low noise transfer between up and downstairs and there are still carpets to go down. The extra cost for the joists was around £1500 and the cemflow £25002 points
-
Thought I'd do a short blog on the Polycarbonate tunnel we built. Our big field suffered with no storage, and location meant containers were very expensive to transport. so one option was to build a polytunnel, which we have planning permission for. again due to location, 500m from the coast 73M AMSL I wanted something sturdy. so looked at off the shelf packages. in the Highlands and Islands the PolyCrub is seen as the mecca. Designed in the Shetland isles, guaranteed to withstand 100MPH winds etc etc. due to the ability to get CROFT grant assistance on these, the price is, IMHO, artificially high CIRC 6K for 4M *6M.. this wasn't going to happen, so after looking at many photos I designed my own.. Basic principle is hoops of MDPE pipe secured to posts in the ground, then 3*2 timber used as horizontal support, with Polycarbonate sheets secured to this timber. the bottom sides are then clad. My design was to use 65mm Black MDPE pipe, and secure the timber with coach bolts and penny washers through the pipe. this way I get a guaranteed fixing that won't pull out , and it still allows for flex in the whole structure. 4m wide x 6M long, but this can be extended. My ground has bed rock close to the surface, 300-500mm below ground, so just knocking in post wasn't going to be secure enough to withstand the winds, also where I was sighting the tunnel its on sloping ground, so I couldn't get it level. I cleared the area to removed the top vegetation and a bit of the top soil. and dug 14 holes. then due to rock levels I then core drilled the rock to allow for the post to be deeper. We then set these in concrete, (at the same time as doing the slabs for the cabins.) The next day we had a look and I wasn't too happy with the security of the posts, so slight change of plan, we created a plinth. basically I used some 6x2 either side of the posts, with a slight angle, then filled this with concrete (again we used ready mix at the same time as back filling the treatment plant) this added about 300kg of concrete to each side, and joined all the posts together, and gave us a solid plinth at the side. No Photos of the next stage but we cut 7M lengths of 63mm pipe, this when placed over the posts gives approx. 500mm dwarf walls and a 6M polycarbonate sheet, giving a head height of around 2.3M. we used a plumb bob to get the centre line on each hoop and drilled an 8mm hole through the pipe and secured the top 3x2 treated timber to al the hoops. One thing we found was that the MDPE did not bend uniformly, this may have been due to slight errors with the posts being plumb. The resultant timber (which was not very straight), snaked from hoop to hoop. after head scratching and re thinking. I decided it was a poly tunnel and to get on with it. we used 7 lengths of timber jointed with half lap joints to extend the length to 6.5M. if using a clock analogy the timber was placed at 9,10,11,12,1,2,3 positions, with the 9 & 3 o'clock being 500mm off the ground, also ensuring the 9 & 3 o'clock timbers were approx. 5.8M apart circumferentially. Then it was a case of securing the polycarbonate sheets to the timber. each sheet is joined with some soffit H joint strip. (you can buy a clear joining strip for the sheets but for a 6M length it was around £65. the H strips proved extremely difficult to connect the two sheets together, or should I say impossible. so I cut off the back edge on one side and used some glazing sealant. this way we could attach the strip to the polycarbonate prior to bending over the tunnel. and each sheet 'H' strip basically lapped over the previously installed sheet. day 2 we had the basic structure. It was noticeable that the curve was not symmetrical, so putting the door frame header in by securing to timbers at 11 and 1 o'clock was not level. I overcome this by using a ratchet strap attached to the 11, and 3 o'clock timbers and tightening until timbers at 11&1 o'clock were level. I then put the two door jambs in (concreted at the base) and cut to the length required and secured to the header. This worked and the tunnel was now more cylindrical. I framed the rear by baring 3x2's off the horizontal timbers. Last steps were to clad the base, I used 4*1 treated timbers that were screwed into the MDPE pipe and wooden posts. then used strips of visqueen to create a more sealed dwarf wall, this will help prevent driven rain from the winds getting inside. over this I used Larch timber backs* to create a vertical cladding All in with hardware, polycarbonate, timber, concrete the project cost £1200. not cheap, but its solid as a rock. It withstood the first Autumnal storms this week with winds hitting 50MPH. Its also very warm inside, even now as the temperature is falling. Larch timber backs are the offcuts from the saw mills and are reasonably priced as scrap. we purchased a pack of timber backs, approx.40 lengths of larch timber with bark in 4.8M lengths for £100. these are not uniform and taper etc, but as i only needed 500mm lengths it was straight forward to make it work.1 point
-
There is no significant current, I wouldn’t worry about it.1 point
-
One day course was it? Qualification by attendance.1 point
-
I was being facetious, the complications introduced to the financial markets over the last 20 years or so has just confused everyone, including the lenders. My old boss, who was a clever bloke, always worked on 3 times, he told me that in 1981.1 point
-
I think to the 1920's or worse.1 point
-
This already exists and has existed for ages. I had such a mortgage with Santander a few years ago. It was a tracker with no break fees. Handy as I didn’t know how long it was going to take to sell the property, but I still needed a mortgage until the sale went through.1 point
-
Sanitary silicone. Ideally colour matched to your grout.1 point
-
No one can predict the future, but lenders are "preparing" for certain........ What the general public don't realise is how greedy the lenders are with their "fee's" - it's close to extortion .....1 point
-
What is that actually telling us? That they think a very serious crash is coming (if the borrower defaults then, I think, the lender has to step in and collect rent). If a serious crash does come, landlords will loose their customers as they will be buying. Going to be interesting.1 point
-
Yes it’s fine, flex still has to have a conductor size capable of handling the current like fixed wiring. https://www.tlc-direct.co.uk/Products/CA0dot75HR5.html Max 6 amp current Remember to fit 3 amp fuses in the spurs. Brown sleeving/ tape on any conductors used a switched line/live.1 point
-
Not always, I have found that you only need to check if it’s ambiguous. From the planning portal “you measure from the highest land adjacent to the outbuilding”, however in your case it appears your building away from, not on top of the retaining wall so I think you will be limited to heights from the highest piece of ground it actually sits on. So I would say “A”.1 point
-
https://www.bbc.co.uk/news/business-664358701 point
-
There comes a point where low temperature renders something useless though. Think having a shower, the bathroom may be at 21⁰C, but you won't enjoy a shower at 25⁰C (unless you are weird). Same with cooking, a salad at ambient temperature can be alright, but too much above it and it wilts, cooking a chicken needs much higher than ambient. I put swimming water into the latter group, needs to be 34⁰C or above. I hate shivering and goosebumps.1 point
-
Thanks for all the replies people. I have a meeting with one of the local building control officers to go over my plans and what exactly I'll need to do to meet all regs. From our emails he seems a really helpful guy and happy to guide me through each requirement. I'll let you know how we get on1 point
-
250mm cavity here in South West Ireland. Full fill with EPS beads, wet plastered both sides of the blocked. No issues with full fill. Infact it's the standard method for cavity walls here and believe me, we get our share of rain.1 point
-
I just noticed that my last entry was 1st June and now it's mid August. Where does the time go. Once again we've lost time on the build, HID did too much breaking and hurt his back and we got a new puppy who is a huge time waster. Although I WFH I also have to visit clients so quite a bit of puppy sitting going on. Then there has been the weather, total opposite of last year. So, down to what has been done. The first main wall is now up to lintel level. First all the door frames then the inside skin This one has the external wall on one part and the insulation so is covered. HID has found fixing the string levels tricky, hence some of the early blocks are not totally level, but improving as he goes through. We have also been breaking up the floor of the hall & snug to be Layer 1 already gone, now layers 2, 3 & 4 to break and clear as well as knocking down the 2 internal walls that are not in the right place being corridors to feed the pigs. Also lots of drain pipes and heavy duty foundation concrete. getting there done and digging on the other side to start prepping for under pinning, the current foundations are 200mm They need to be min of 500 and possibly deeper, until we get to good ground as agreed by BC The nearest soil is definitely showing hints of clay. of course we have an issue though, if you look just above puppy, you can see the drain culvert, totally buried in concrete. We knew that there was a drain, but how deep is it and how much effort to dig out The other necessary task was clearing the space for the water pipe trench. After booking the water they came and inspected and showed us where it joins us. That turns out to be behind the long shed so we had to clear. Not as bad as ScottishJohn, but a small area similar that I can't find the photo of, but completely covered in brambles and a sloping bank dug out to be level enough for trench digging. Anyway this is the after the pile of bricks turned out to be an old culvert, we dug out brick by brick to 1m then just decided not to go any further. It was solid laid bricks about 1m square, so not a well as solid and not foundation as nothing there, but laid properly so must have been for something. The sheds on the right are storage from the last 20 years and will need to go as that will be our driveway as we don't want to share the existing one . We are holding off digging the trench until we get and answer from OpenReach about their ducting as we want to lay that and both water pipes in one trench. NSW water are happy to see photos of trench and pipe and they realised that digging all 120m trench will probably collapse. When you note what you've done in a 2 month period it has changed, but it's not much for that length of time. If it does continue at that rate then I reckon about another 4 years 🙂 Thanks for reading. Jill1 point
-
looks like you have a nice project on your hands. im a very amateur bricky and i built a 'gauging stick' by literally drawing pencil lines on a length of timber at each course height, which i then use when building corners to ensure my gauging is correct. Build the corners up first as you go along and string stretched between line blocks. if its a long run use a twig/tingle to support it in the centre. or tear off a strip of cement bag and fold it over the line and plonk a brick ontop.1 point
-
Killing the Bees that are there wont stop them coming you need to encourage them to go elsewhere. Either make life a bit easier for them IE get a Bee brick ( or even a wall) or much tougher, IE see what the effect of washing the wall with waterproofing solution is or a weak mixture of peppermint oil and water - works for spiders.1 point
-
Very basic, but I just bought a load of these years ago. They were only around £2.50 each when I bought them. https://www.ebay.co.uk/itm/1344028381691 point
-
No. Crack on.1 point
-
If the doors are only 18mm thick you could use a piano hinge. Available in various widths and colours.1 point
-
Ditto, I was disappointed in sound transfer between floors despite sound insulation between pozi joists, i wish I had double boarded with sound bars. Sorry I meant PIR / EPS “type” rather than rockwall “type”1 point
-
Sorry cannot suggest anything directly. There was recent thread on different makes have a look in the ventilation section.1 point
-
Absolutely - anything from stick / brick to factory prefab can be done well, or indeed poorly, and all of the methods have their pros & cons. Stick/brick is time consuming and somewhat skilled but you get to make choices as you go along while factory prefab means making all the decisions up front and so is far less evolutionary (should you wish to evolve your build - we didn't, we wanted to follow the architects ideas as closely as we could.) Then its down to the range of technologies chosen and how they work together to create the home (house).1 point
-
I have a SIP build, I am not sure why folks who don't have one are dismissive. The one thing I have learned through doing a self build is probably the single most important thing to take into consideration....the method of build is irrelevant, you'd be splitting hairs and if you standardise the ask I.e insulation/airtightness then king becomes cost; it is the application of the chosen method which is key. A supposedly great system can be Total shite if cobbled together by a bloke with one eye and three digits missing off each hand.p You can achieve really tight specs with whatever method, it's the effort in monitoring that is essential.1 point
-
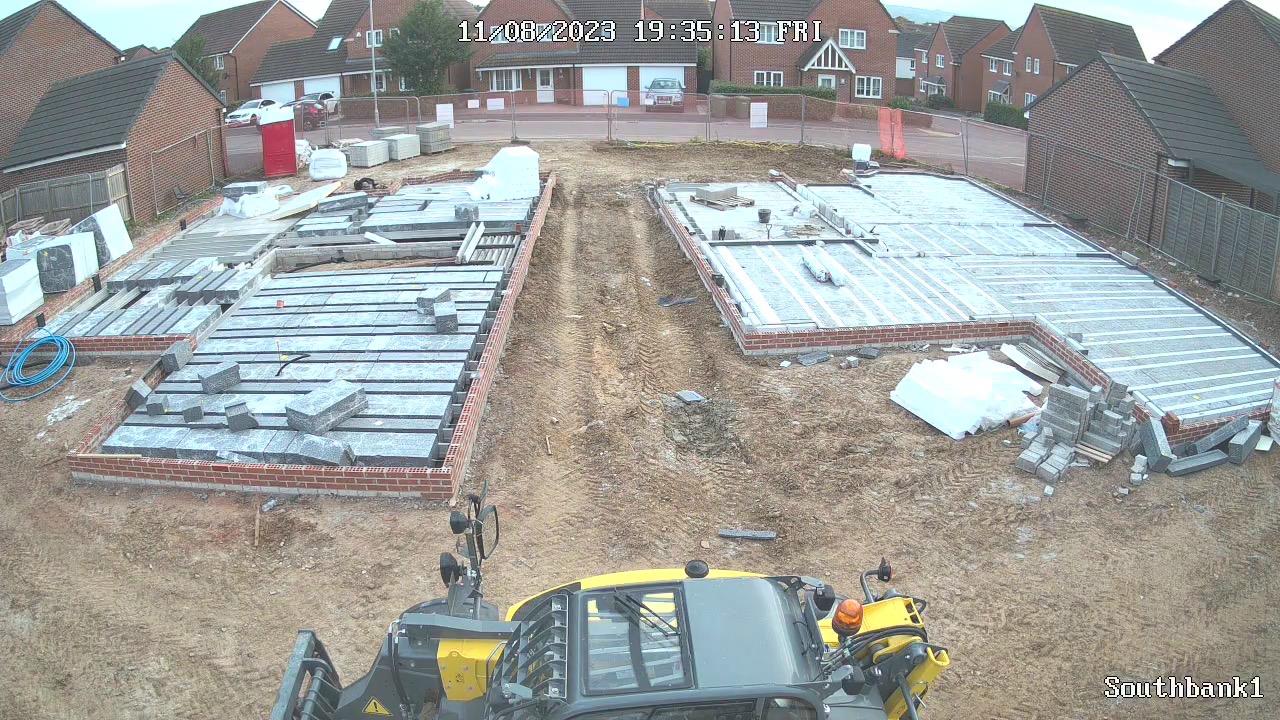
1 ready for UFH 1 to go. UFH going in on the first plot tomorrow and Sunday 🙄🙄 No church this week.
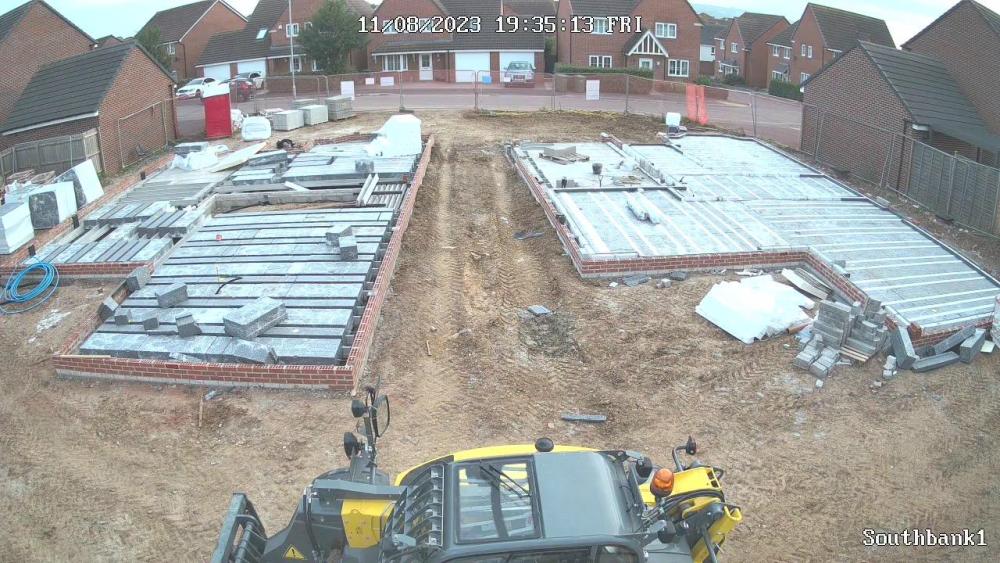 1 point
 -
Well I had that conversation with our BCO and when I showed him the bba certificate for full fill he changed his mind. Another example of no common policy throughout the country on these matters 🤷♂️1 point
-
Read up on passivhaus builds with block work, see how they do it. Also many on here have used blocks with wide cavity and say to steer clear of PIR; good in theory but in practice not easy to install with good results.1 point
-
Read the regs they are very explicit on what type of meter you need and placement. Look for CO2 meter Scottish building regs on Google.1 point
-
Don't believe what the SIPs companies tell you without fully researching. SIPs are liked by volume builders, when combing with a masonry rain screen and only wishing to achieve Building Regs levels of performance. If you are going timber frame, with a lightweight rain screen, on a one-off self-build there are better options than SIP with better U values, decrement delay and air tightness.1 point
-
There’s no reason for water to penetrate the outer skin. You’d have much bigger problems if that happened. Can you clarify what you think you mean by timber frame? Do you mean stick built on-site? Also are you talking about a timber kit company supplying the SIP panels or having them made to an architect’s design. SIP panels aren’t necessarily more airtight by design than any other timber framed building, it’s all in the details. My house is a timber clad space framed timber kit from a kit company. We are atop a hill and get the weather for sure. I have no worries about wind driven rain though. I’d still have no worries if we were on the Atlantic coast. Plenty of timber clad kit buildings dotted around the Scottish Islands. If I was to ever do this again I’d go with MBC and blown cellulose if building a timber kit. Stick built on-site if not. I’d also look at ICF as that is inherently airtight but again it’s all in the details.1 point
-
Google "socket lug fixers".1 point
-
Just sharing the experience I've had with some of these things to point over 100m2 of paving (512 off 450x450 saxons). I want to share this because I was sceptical of these tools having read many, many bad reviews on the likes of Sfix, Amaz etc.. So sceptical that I started out doing it with a trowel, tuck pointer and pointing iron like I've always done. But I got fed up with that because this job was way bigger than anything I've tackled before. OK, so I give in and try a gun. I figured one that operated like a sealant gun should have the advantage of some extra pressure to squeeze the mortar so I bought a Cox Solpointing Ultrapoint Gun: I Watched all the video's and followed all the tips such as the mix & additive to use but I just couldn't get decent results. It frequently jammed which was the general criticism I was seeing of all mortar guns. I even sifted the sand to remove any tiny stones as it always seemed to get hung-up on these. Then no amount of pressure on the trigger would 'push through' so the whole thing had to be emptied and cleaned. The enormous pressure often resulted in squeezing all the water out of the mortar and back up the tube! So I gave up and went back to the trowel in disgust. For about a week. During that time I had plenty of time to think about it, while troweling away, and realised that the relatively small nozzle wasn't helping so I had a look again and found some with a wide rectangular slot: Image removed at request of copyright owner. If you want to see it you might find it on the companies web site it is the one with paving slabs. I figure that if I could get it to work it would be worth it so I bought one of these too. This time it went better but I was still getting regular clogging. As before, no amount of pressure would shift it. But I could actually do ah few slabs before having to dismantle it - so I persisted. The usage tips for these made it clear that the mix should be thorough and that was better than just making it sloppy. So I began making the smallest batch of mortar I could in my cement mixer (a 14L bucket of sand 4:1). Leaving this running for a good 30 minutes, with plenty of plasticiser and the mix was super-smooth. Before I'd been doing it in a bucket with a paddle on a cordless drill. This smoother mix helped and I could get maybe 10 slabs done before clogging, so by now I'm thinking it out like crazy because I can see this being a great time saver. What I began to realise is that the clogging was always happening when the joint was shallower than the depth of the slab due to the bedding mortar having splurged up when laying. In this case the mortar was 'grounding out' too soon as it was extruded resulting in it not being able to flow sideways - bunching up directly below the nozzle. In this situation applying more pressure would just compress it until it clogged altogether again. SO the 'trick' was to always apply very little force and to move on quickly if it were to show any resistance because the joint was probably too shallow. I got used to pressing down on the plunger with just my fingers, not the palm of my hand, to limit the pressure. Of course raking all the joints before filling them is obviously a good idea but some would inevitably be missed. Now I could use the gun continuously (only stopping to clean it by plunging in a bucket of water at each fill) and made such a lot of progress that I was mixing batches of 28 Litres (with slightly sharp sand) and having the time to gun it all in (this is with SBR in the mix which makes it go off pretty quick). Still took a couple of weeks but I think it would have bee more than double that without the gun. Of course by the time I'd nearly finished I was even quicker at it! TBH I was quite sad when there was no more left to do ? Anyway, I wanted to relate all this because it could save someone a lot of time, money and effort.
 1 point
 -
Just an off the peg suggestion. 11M by 6M is within the size limit for a "caravan" so build it as a moveable structure and call it a "caravan" and no building regs needed.0 points
-
I slung a geezers hammer into the bushes at the bottom of the garden. Told him that when he paid for the granite, he could leave his hammer on it. Flung a painters radio and mobile out the first floor window. He had them sat on a £15k piece of furniture. I have calmed down a lot since those days. I'm amazed i never got the crap kicked out of me.0 points