Leaderboard


Popular Content
Showing content with the highest reputation on 04/13/23 in all areas
-
Yes but only ones that side of the frame, pairs are a must to stop frame cupping (IMO). yes woodscrews and rawlplugs and at least four pairs each side. yes your diagram above would put the left hand screw under (or near) the jam I guess. Never used concrete screws but the torx heads are brilliant. I do not like thermal blocks of any description and find trying to get a decent fixing into them difficult.2 points
-
Ah good on the diverter. The issue you have is that you need to set it up so it is more likely to heat from the diverter than the boiler. If your boiler is set to provide hot water in the morning for example, then the tank will already be hot by the time the sun comes out. There are two things. As discussed you want to set the immersion thermostat higher than the boiler thermostat. This way there should be some room to heat the water even if the boiler has been on. If you are going to get consistent hot water from the immersion during summer, you might set the boiler thermostat to only 48C as a back up if there has been no sun. The other thing you probably want to do is to set your boiler hot water to not be on during the day. It will depend a bit on when you have showers/baths. Assuming showers in the morning, you want to give the PV a chance to heat the cooled down water before the boiler kicks in. It might be a bit difficult to manage due to the small tank. Say for example you have the tank heated to 48C overnight by the boiler. Then two people have showers in the morning and the boiler is turned off. The water will be cool before you finish your showers. Basically due to the size of the tank, the boiler has to be on at any point two people might have a shower. But if you heat up the water with the boiler then you won't be able to use your PV. It only takes 2.8kWh to heat 200L from 48C to 60C. You cannot really set your boiler much lower as you won't have enough hot water. It is one of those, "I wouldn't start here" problems. Unfortunately if this was the plan you should have had a bigger tank.2 points
-
Also, make sure it's clear from the outset who owns the design and ask upfront for the DWG files to be part of the deliverable at each stage. Having these made our life so much easier as we were able to pass them to the TF and basement SE and also used them ourselves (using a free cad package) to take measurements, check site dimensions etc.2 points
-
I was asked the best time to plant a tree. "20 years ago. If you didn't, then today" PV is the same.2 points
-
Remember the electric immersion is only 3kW. your boiler ( depending on the size of it) could be putting 10 times that in the same time frame. even preheating the immersion with PV to reduce the gas demand is a worthwhile exercise.1 point
-
What are you building, single, two storey? plant room? avIlable size roof? location of potential equipment? gibe this some thought and get a quote from a local installer. you can always add cabling now, equipment later.1 point
-
Insurers quite happy to take your money and offer no help when you require it. get quotes for removal company to remove and store your possession for months, forward this to the insurers, get your MP involved too, document everything in writing with them, they are all arseholes… wanting to haggle over the works until you accept.1 point
-
Thinking about what you actually want to do. You want to divert PV electricity to the immersion. I bought an Eddi which does this automatically. Other similar PV diverters are available. Doing this manually will not work well. The immersion draws 3kW. Depending on the size of your solar array and other use of electricity in the house it is unlikely you have enough excess PV to fully run the immersion constantly. It varies a lot with clouds etc. As electricity costs 3.4x as much as gas if you end up purchasing electricity when the PV fluctuates it will offset the savings. Including higher efficiency electricity is roughly 3x the cost of gas for heating water. Also if you simply forget about it and leave it on it would be quite expensive. PV diverters vary the electricity sent to the immersion to only the excess so this does not happen. But they cost a few hundred quid.1 point
-
Instructions for your newer model- https://irp-cdn.multiscreensite.com/7d2b88c7/files/uploaded/megaflo he manual.pdf The red arrow is the main thermostat and the black one is the immersion. I would set the immersion to maximum and the red arrow to 55. Was the red arrow really set to the position in the pic you posted? That would be less than 40C.1 point
-
Here's another option. Lay 75mm PIR boards over the block and beam. Carefully foam all joints, trim and tape. Then lay 2 x layers of 11mm OSB floating over the top, joints staggered, glued and screwed. If you wanted to bump to Phenolic insulation you could lower the U value to 0.24 from 0.28 w/m2K but I wouldn't imagine it's worth the cost. You can still see the effect of the thermal bridge at the wall floor junction. Then use large radiators for the ASHP. Personally I think that you could fill the floor void as is with EPS beads nothing bad would happen. I can't under stand how moisture would magic it's way vertically through 300mm EPS beads.
 1 point
 -
It’s not a straightforward decision. In my experience of one timber kit company we were 90% into the process before I got the final price which was £10k higher than their estimate 6 months earlier which was £20k higher than their initial finger in the air estimate. If you get it architect designed and keep it straightforward and minimise steelwork then you have more build routes available to you. Most timber kit companies will have a selection of standard designs so if your plan is to build something similar they should be able to give you a reasonable idea of cost. Ours was £30k dearer because we made it bigger by 35m2 and changed all the windows to 3G.1 point
-
I couldn't see where it says it's 'dimmable'? The 12V-24V spec means it has a buck regulator inside that maintains a constant LED current over the 12-24 volt range. Dimming can only be done with a PWM drive signal but that's not necessarily going to be nice to the buck regulator. Generally these are non-dimmable.1 point
-
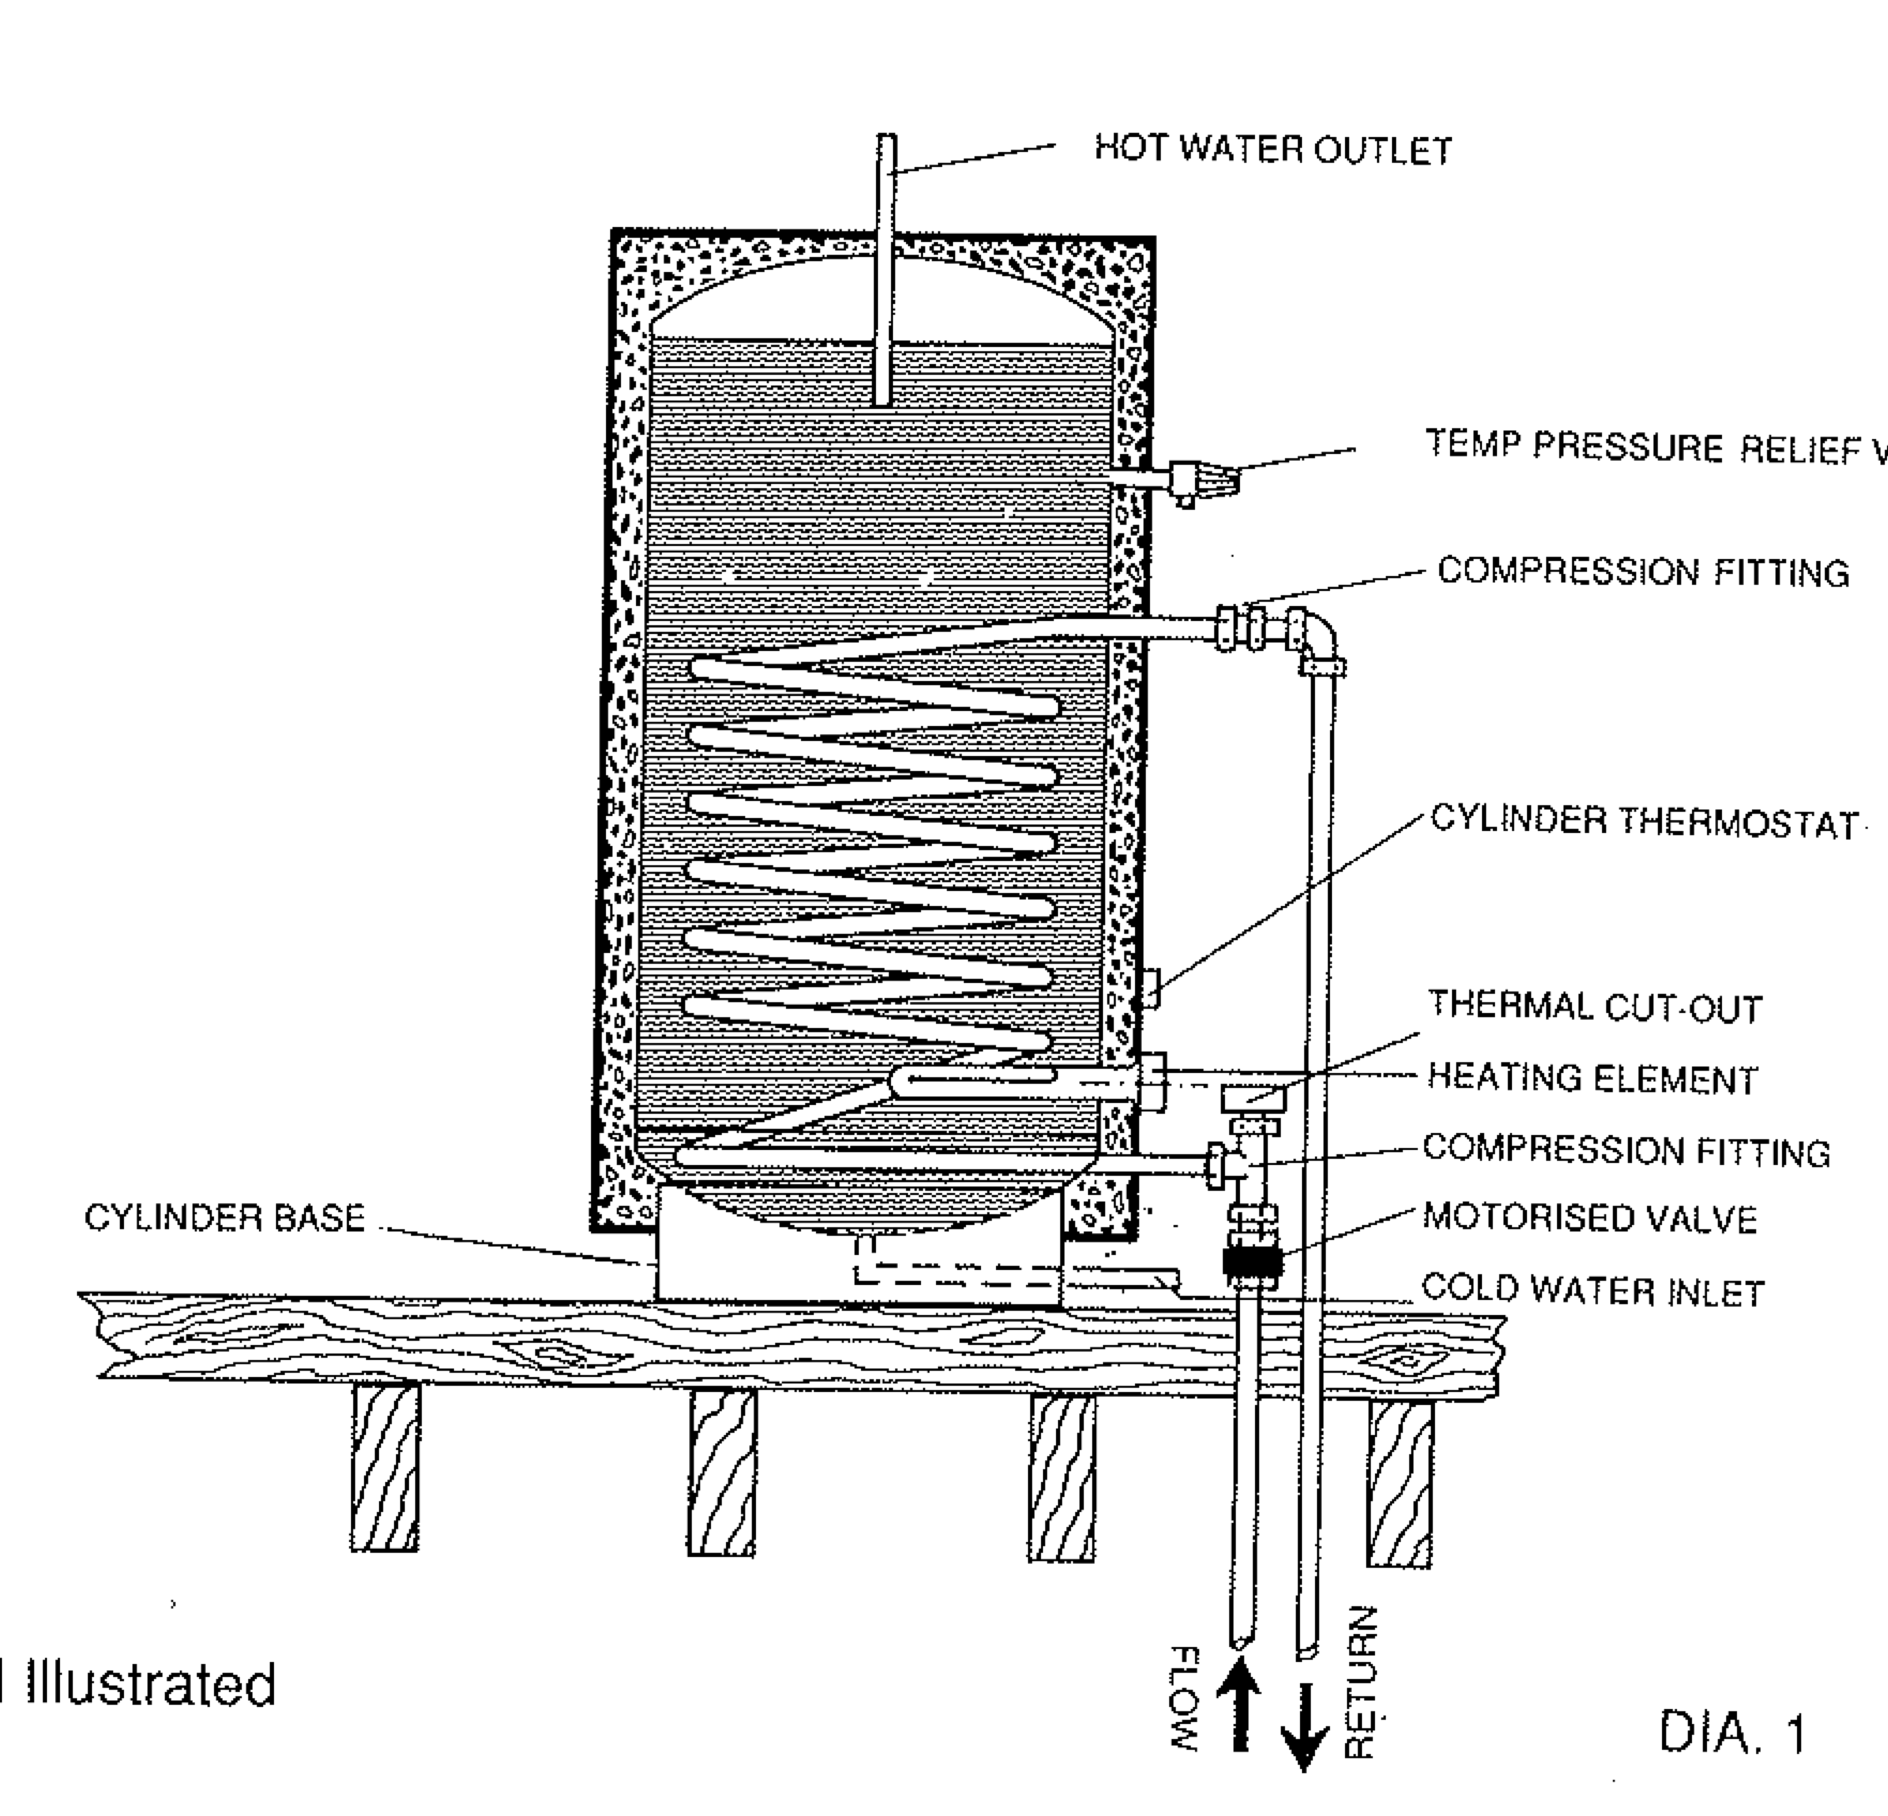
This is an indirect tank. The boiler does not send hot water into it. It sends it into a coil that heats up the water in the tank. However, the coil is around half the height of the tank so will heat up most of the tank. The warmer water will take a while to rise inside the tank so the immersion will cut out when only some of the tank is hot. A 210L tank is not very large. It could conceivably be cooled considerably by two showers. 2 showers could be 150ish litres of hot water and the tank would be filling up with cold water and cooling down. What you may be noticing is that the immersion can only heat up 50l of water an hour, but the boiler can heat up 400l. If you spent 10 minutes in the shower and used 75l of hot water, the boiler could almost heat the water as fast as you were using it. Thus the water will not cool down anywhere near as much when two people have a shower and the boiler is on versus the immersion.
 1 point
 -
As @Radianpointed out - A Megaflow cl210 has a 24.3kW heating coil connected to the boiler versus a 3kW electrical heating element. A 3kW element would take 2 hours to heat just 100L of water from 8C to 60C. So 1 hour on the boiler would put roughly the same amount of heat into it as 8 hours from the immersion. On top of that the heating coil will be much larger than the heating element. Thus the heating element will tend to heat a more localised area within the tank before cutting off when thermostat is tripped. I have a Eddi PV diverter and the same thing happens. It cuts off before the full tank is heated up as the water around the immersion has hit the thermostat temp. One thing you could check is the immersion itself has its own thermostat. This is a little arrow on e Megaflow element. If this is not at the maximum level it will cut out early. The maximum it can be set to is 60C which may be another reason it cuts out earlier than you expect. I would set the main tank thermostat lower than this so that it tries to heat from the immersion first.1 point
-
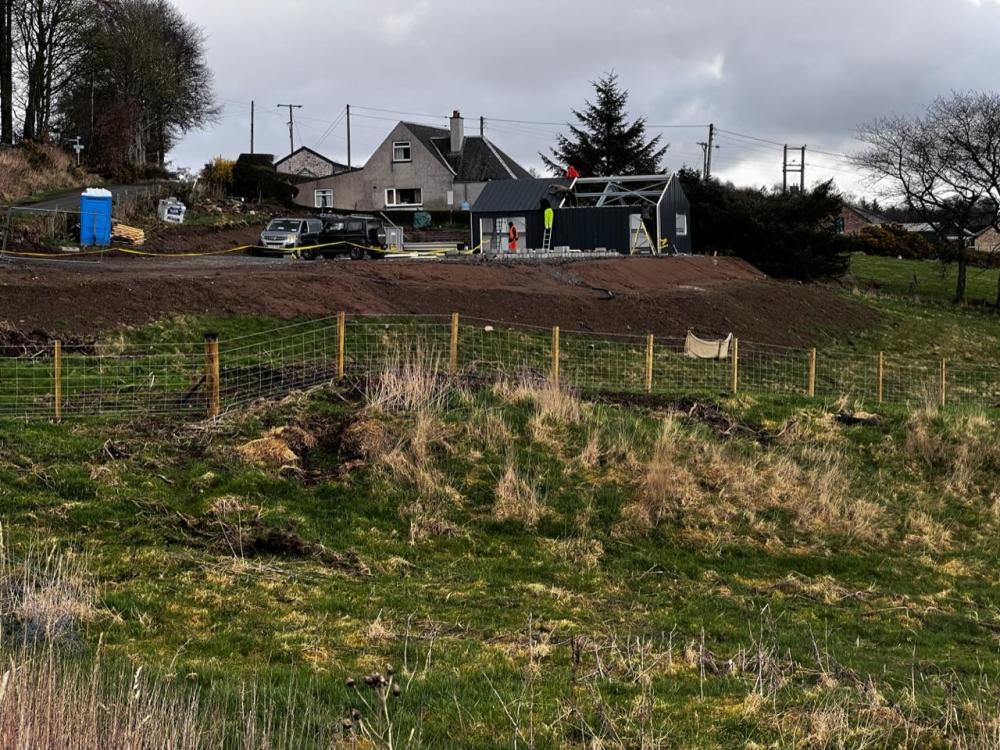
Cracked on with the garage.
 1 point
 -
Loss adjuster as suggested above. It’s what they do.1 point
-
All depends on how you live in your house. Some want UFH to operate like rads, because they are out all day, so thin is better. Steady room temp or batch charging floor, thick is better.1 point
-
Don't settle for a low figure and don't underestimate the amount of work needed to properly rectify this. I have worked on 2 similar jobs and both were stripped back to a completely bare shell of a building, properly dried out for some time with big dehumidifiers and then rebuilt. It is not a trivial job so don't let them fob you off. with a low settlement to fix yourself.1 point
-
Many contractors decline insurance work, because payments can be very slow. Therefore those who accept it quite reasonably charge more for the delays and risk and hassles. Insurers know this. Also this is the sort of work that can have nasty surprises for the contractor. Again they will add for the risk. Insurers know this too. 3 x their offer is probably about right. But we don't know the extent of works of course! The insurer is probably chancing their arm on a cash offer, and it won't take much to convince them it is unacceptable. Some insurers spend more money on resisting claims than in pay-outs. But they don't want to have a formal complaint to resist. I would write again and say that you have taken advice etc....you don't have to say where. Give them a deadline as their delay is forcing you to live in...'insert own term.' Ask them what is the next step in a complaint process if they don't agree. (Perhaps accept a cash offer of 3 x the current one, and then contractors can get paid direct by you.) perhaps even offer a lump sum settlement of 4 x theirs, and negotiate down to 3.1 point
-
I had this at my mothers house a few years ago. I got some quotes in from builders I knew but they couldn't get anywhere near what the insurance companies' contractors were quoting. I couldn't understand how they did it so cheap. Not a bad job either. I hope you get someone sorted soon.1 point
-
I suggest that you get a decent loss assessor on board. Check them out carefully and look at reviews. They will deal directly with the insurers.1 point
-
Yes it’s all a bit of a game. Some insurance reinstatement companies charge over the odds whereas insurers want to pay bottom dollar.1 point
-
There are companies that specialise in insurance reinstatement. Have you searched for those? e.g. https://sdm.group/who-we-help/ I have no knowledge of this company it’s just an example of what I mean. Covers Scotland.1 point
-
I misunderstood your comment about their preferred contractor being taken off the job.1 point
-
If the immersion boss is in the top rather than side (more common in older tanks) you may be able to replace it with a longer one that heats the tank lower down. Theoretically you can add a secondary circulation pump that agitates the water pushing it from the outlet back to the inlet connection (just be sure to have a non return valve), which you turn on after the tank reaches initial target temp. Maybe more hassle than a new tank tho.1 point
-
They have offered me a cash settlement figure which is inadequate to cover all of the work required. I have not accepted the settlement. I have obtained one quote from a multi-trade contractor which is about 3 times the size of the cash settlement. I'm trying to focus now on getting genuine contractors to quote and carry out the work at a fair (uninflated) price, then I will be happy to argue with the insurers about the costs.1 point
-
Have your insurance company accepted their liability for the costs? Check the policy and see if professional fees are also covered. If so, look at getting a building surveyor to assess what needs to be done and advise on how best to do it.1 point
-
It's exactly what they have done.1 point
-
Is it possible they measured the opening in the blockwork rather than the frame the windows are fixed into?1 point
-
The phrase "common sense" is a contentious one. I've only seen it used when someone self deprecates their level o knowledge,experience and application or someone else who is just guessing wildly and hoping things will work out. A scientific method might be as simple as drawing freehand some summer sun angles on a bit of graph paper and counting the boxes. There needs to be measuring and consciousness to get consistent results. Hence science. Almost all houses built everywhere ever have insufficient passive heat protection. Most rely on ventilation, active cooling or active shading so yes, almost nobody designs buildings is competent really. When windows are as insulative as walls it'll be a doddle. Just shade out the unwanted heat as needed. However at the moment they're relatively thermally poor and annual losses need to be balance with gains.1 point
-
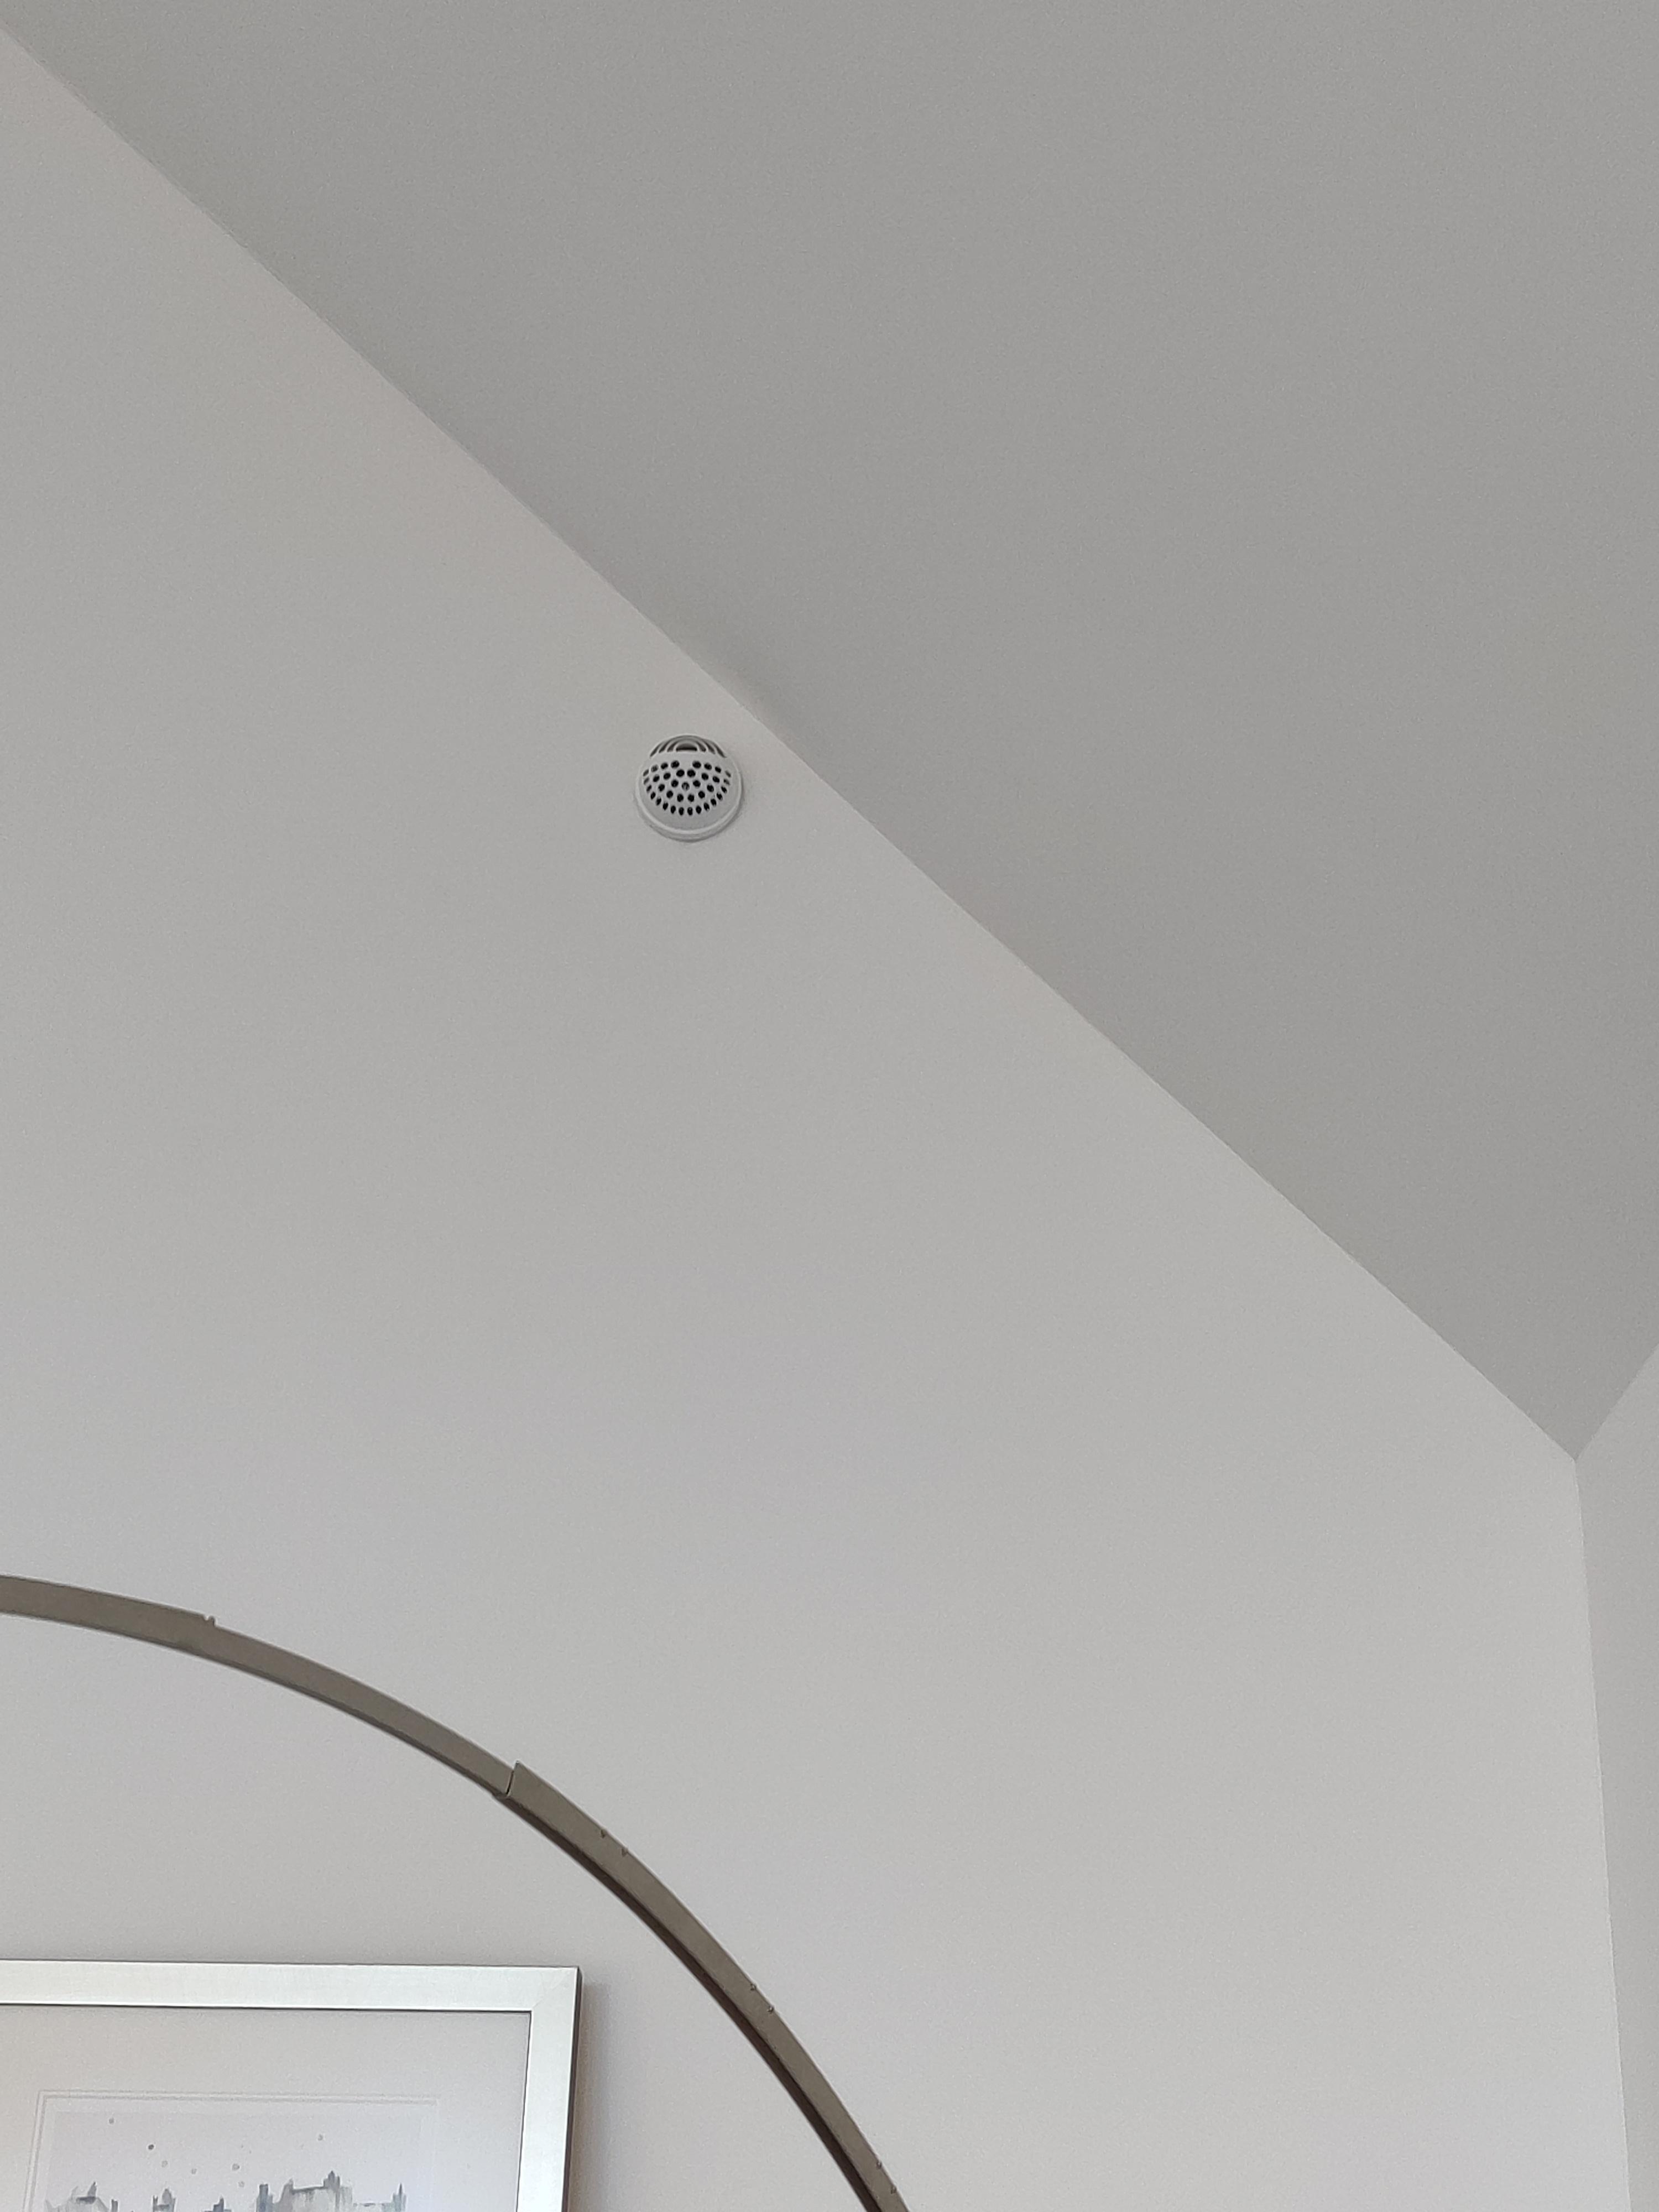
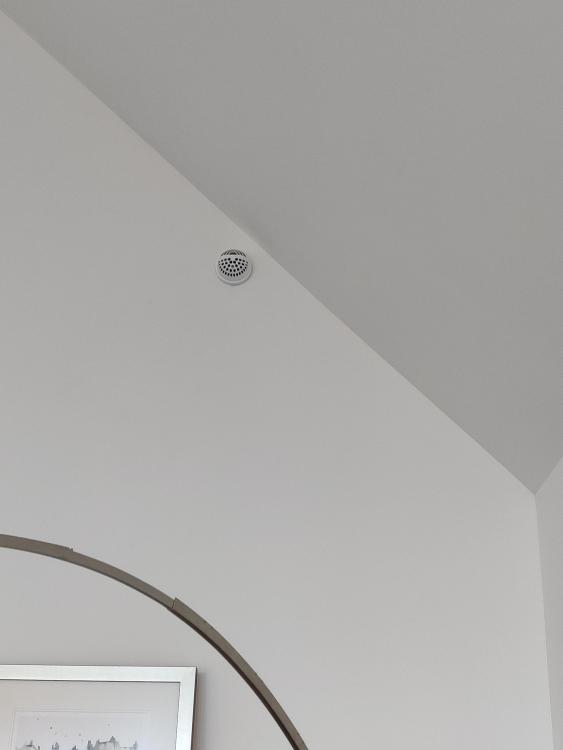
Keep it simple don't put them in the ceiling. Use coanda effect nozzles and put them in the wall. The coanda effect will cause the air to travel across the room.
 1 point
 -
1 point
-
There's no active 'stirring' being done by the boiler, it's indirectly heating the water - just like the immersion rod. The big difference is your boiler is probably putting anything from 10kW to 20kW into the cylinder rather than the lowly 3kW of the immersion.1 point
-
A labourer for an extra day is better value. Our boarding company provided one at the start and end of the job, something like £300 but he helped lift all the boards up and more importantly cleaned everything out and filled the skip.1 point
-
https://www.screwpile.ie/ These guys are in Cork. I have no experience of them however. I think screw piles were actually invented here. If you do end up with a 2.6m dig I would consider a basement. Otherwise in good weather you should be able to dig trenches that deep and simply fill them with concrete to ground level. It'll cost more in concrete but it'll be quick. I don't know what the engineering term for this is. Be careful of trenches collapsing. Typical reading on here has suggested that going direct to a basement company's engineer or a piling companies in house in engineer can save a small fortune as they are much more au fair with the specifics than a general SE.1 point
-
Hadn't realised prices had gone up so much in the last 2 years. I bought JA solar 345w panels for £90, I see they are now more like £140.1 point
-
I didn't add solar panels at the time as I had lots going on and I regret it. It'll never be cheaper than now, do it.1 point
-
Plan where the panels will go- roof/ground mount. plan route from above to inverter location plan route from inverter to mains position. allow for data cabling, plan for batteries, plan for running some loads from solar diverted, immersion/heater etc and future proof wiring1 point
-
Look up domestic technical standards thats the Scottish building regs1 point
-
High fuel prices will just make everyone poorer. Thats it. If you cant afford the capital cost of an EV, heat pump, insulation etc, doesnt make any difference what the pay back is. You will just be poorer People proposing that as a solution, are, invariably, in a much more comfortable position than those who will suffer the most. And thats before you even consider how you would do all the things required at scale. To meet Starmers objective of no fossil fuel burning in domestic dwellings by 2030, we need to install 77000 heat pumps. a week. From now until 2030. Not going to happen. Ever. Its impossible. Anyone that thinks it is, is, frankly, a moron. Increasing the fuel price, wont make 77k installs a week happen, no matter how high the price. Which returns us to my first sentance.1 point
-
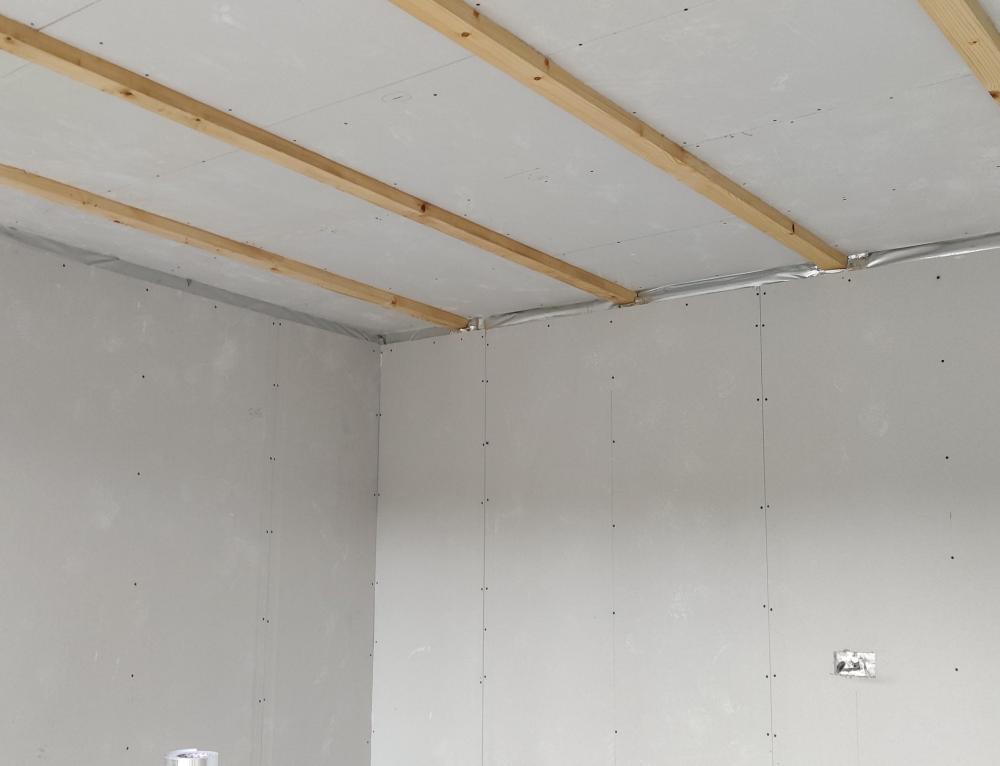
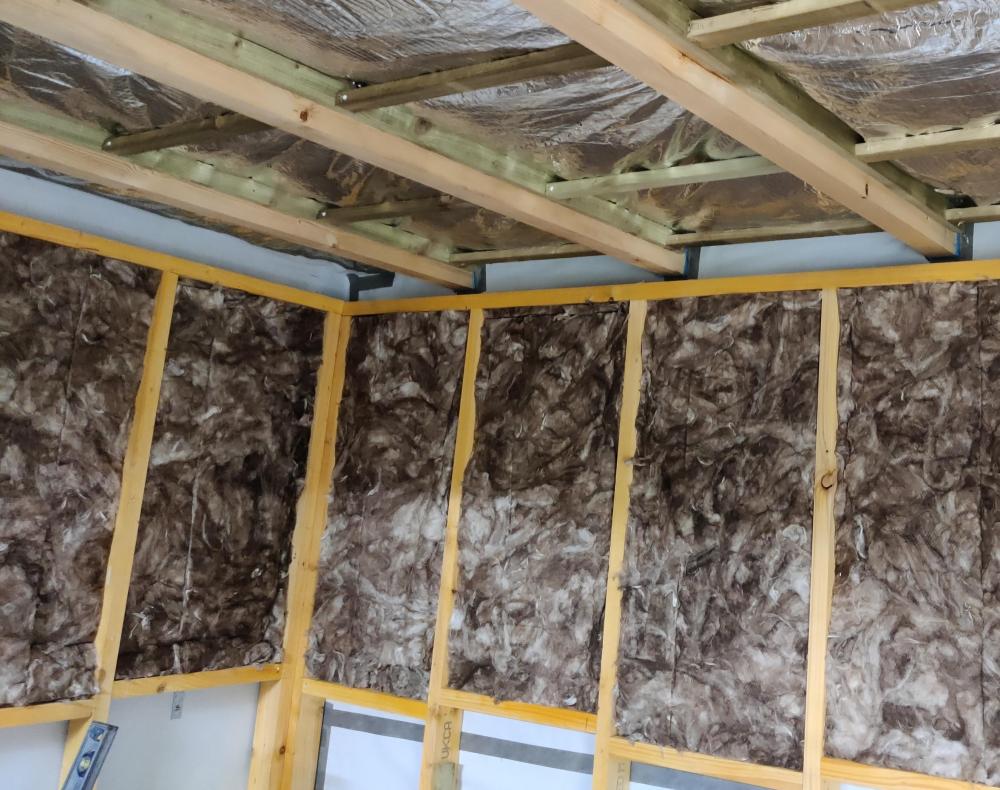
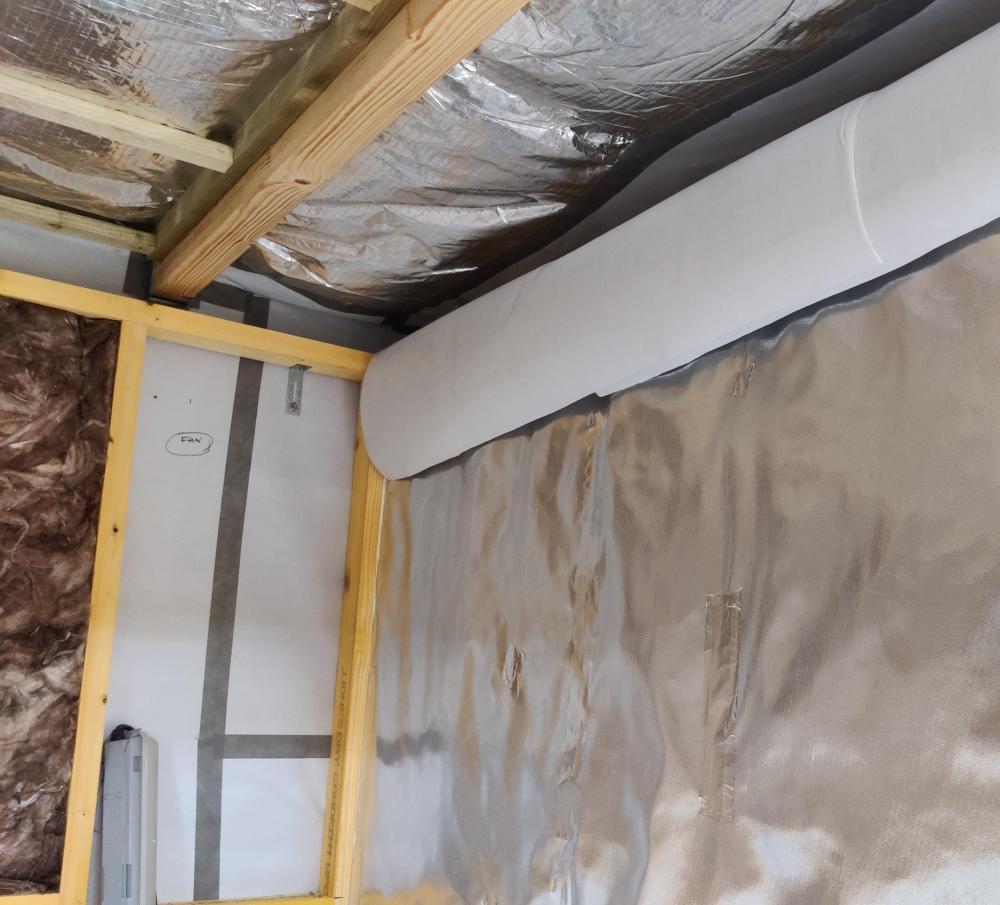
Comments to the above 1. There is a gap between the battens and wall. Battens on wall measure 100mm deep, insulation is 90mm deep. 2. Specific screws for dry wall are used, these do not require to be pre-drilled. Airtightness layer is the breather membrane on walls and superfoil within roof cavity, all joints are double taped per manufacturer instructions. 3. Timber frame specific insulation used, no fixing are used or needed. It is self supporting through friction. 4. No - log building expand and contract with the seasons, fixing battens directly to logs is a big no, no. The inner wall is fixed to the floor and sliding brackets are used to fix to walls. This allows the outer building to rise and fall and the inner wall does not impede that movement. Doing anything else will cause gaps to open up between the logs and lead to water leaks.1 point
-
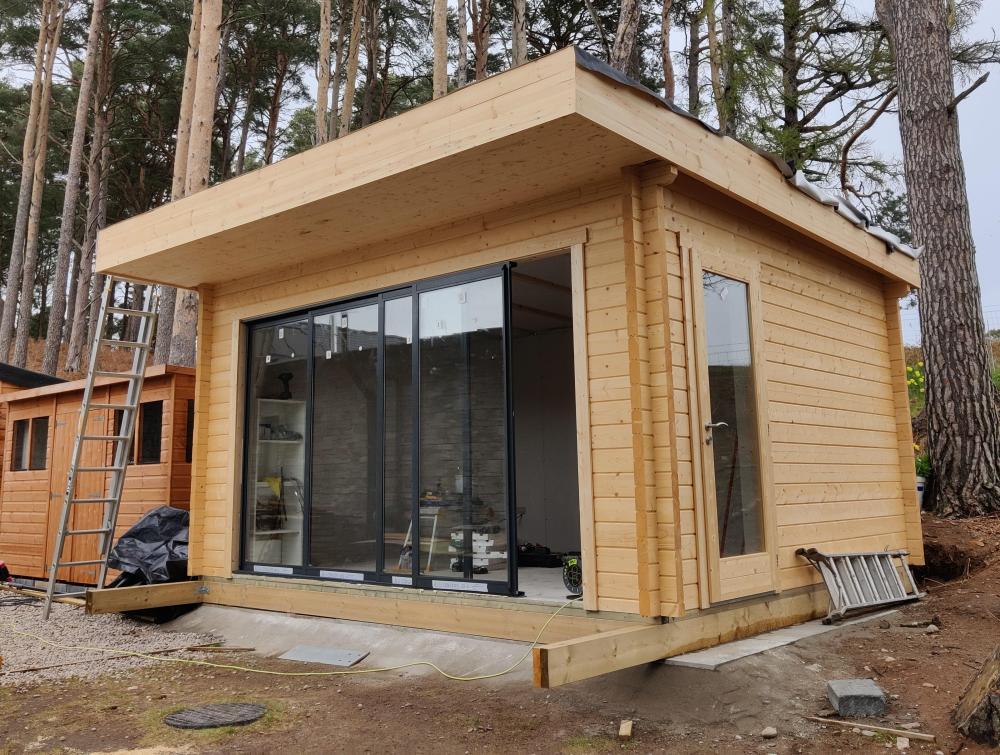
Update Walls insulated with 90mm Frametherm 32, vapour barrier, and then plasterboarded. Due to be taped on Monday. Expansion gap at top of wall, is to allow roof to move up and down in relation to the internal walls. Once the plasterboard is taped the gap will be covered with wooden boards (like a skirting at the top of the wall), this will be attached to the ceiling not the walls. Issues so far Roof membrane was supposed to 5.4x5.6, but arrived 4.5x5.6, so had to go back. Patio door sliders, rail for top and bottom slider rails was supposed to be 3.5m long, was supplied 3m long. Patio door lock hole in wrong position, so had to be redrilled in the correct place. Next jobs for me, build decking at front of building and to side door.
 1 point
 -
Here's a credenza I made for my daughter. It's solid, not veneered, (cos she's special) but has bookmatched doors and back panel.
 1 point
 -
We used local farmer with telehandler, seemed expensive at £40 per hour, but a lot lot cheaper overall than hiring one, as really its only need a few hours per week. Also he could drive it well, and no problem with it getting nicked.1 point
-
have the scaffolders make the loading bay wide enough for 3 packs so when you get a delivery they place them straight on the loading bay.1 point
-
I invested in a set of forks for our wee digger and it helped the brickies out a fair bit (one of them was an operator). It wasn't going to get a whole pallet up in one go, but it was a lot easier for sure...1 point
-
You can use a trestle and planks positioned at the staircase opening and load this out with 40-60 blocks then hop up on to it and then lift the blocks up onto the first floor and then move them to wherever they need to go and just repeat this until you have enough up there. This is the cheapest option but obviously the slowest. It will also depend on what type of house your building. If it's a bungalow then you will have only blocks for the 2 peaks and maybe a few internal walls so not that many. But if it's a 2 storey with peaks again then your going to take need something mechanical. Either a nice local farmer with forks on a machine or a bumpa like above will be your best option.1 point
-
Most sites use Tele-handlers Pricy for a one off I hired a bumpa hoist for the blocks and slates £110 per week from speedy
 1 point
 -
I would copper pipe through wall airtight expanding foam and the a bead of sealant between pipe and wall.1 point
-
I think with the ASHP being on the same wall as the plant room, a pipe connection through this route would be the more simple option. I have the 32mm insulated pipe under the foundation, and its bend radius makes locating it in the ideal location a real challenge. Air tightness is easily covered. You might even struggle to get the insulated pipe to fit looking at your floor plan.1 point