Leaderboard
Popular Content
Showing content with the highest reputation on 06/08/22 in all areas
-
Option 1 better for all reasons stated. Think about shower room access from boot room area looks like you have an outdoors lifestyle and would you come in needing a shower saves trampling through hallway. Regarding fundamental architecture of house - your house, your money, your choice. I think it is helpful for contributing members to support you in your choice and make suggestions to make your choice even better, perhaps with tweaks or amendments especially if they have similar style houses. As my house is very different style to yours I’m unable to assist with that. Good luck !3 points
-
Frame is up: Still printing lots of PETG plastic bits to screw the base down:2 points
-
2 points
-
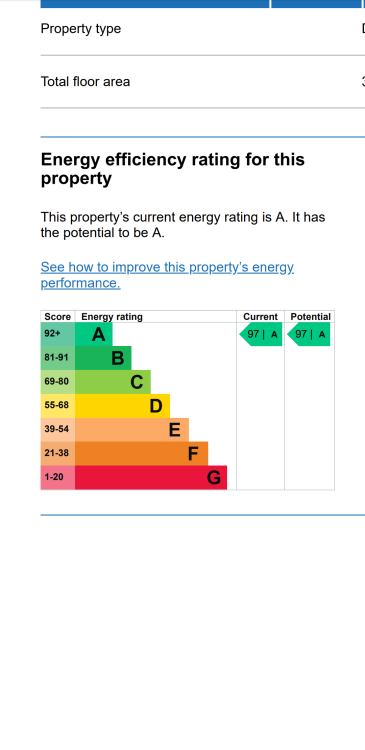
Even though I'm disappointed in the airtest result of 1.8 (the thermohouse roof panel system is NOT airtight, despite what they say!), I'm happy enough. First time seeing an EPC with no potential improvements! We hit the passive House heat requirement target but not the airtightness so certification not an option.1 point
-
Average 1.25 /hour, and you have 24kVA. 100A x 240V = 24000 VA = 24kVA. Sounds like plenty. Somebody else check please.1 point
-
Schneider Lisse White 1Gang 2x USB Charger GGBL70042 apx £15 + VAT1 point
-
1 point
-
Hi Modernista, good point. But A) I have no choice as doors open outwards (in retrospect daft, as walls fairly thick thesedays.. purely a novices decision ). And B) like so is on the plans submitted & agreed to. It will partially affect the view only, above handrail is the main view across valley 2m, & big sky, below isn't too much to squander: a road, sheepfield, trees. Glass... far too costly & not cottagey enough. But a keen point. Thanks.1 point
-
A fabricator would knock those out in no time. Couple of plates. Couple of holes. A weld. No need to try finding them off the shelf?1 point
-
I would think that the inspection is critical to the risk taken by the insurer, and is basically the only cost they have outside the office. The surveyor will have huge insurance premiums to pay to protect themselves in case of a claim, plus their time of course. So I can see why it is expensive. Would I want to be a surveyor for insurers? No. It wouldn't be very satisfying, has a lot of admin, and a lot of risk in spotting and judging other peoples' mistakes. So I can see why there is a shortage.1 point
-
I assume you mean whatever is triggering the lights on the front of the Sunamp that show how full it is? They're still there... at least they are on ours. There are only four of them so it doesn't give a detailed view of how charged it is but it's better than nothing. They're only on the electrically heated Sunamp. For the others you have no way of knowing how charged they are.1 point
-
1 point
-
Put sockets and light /lamp switches about 200mm higher than the typical bed site unit height at either side of the beds.1 point
-
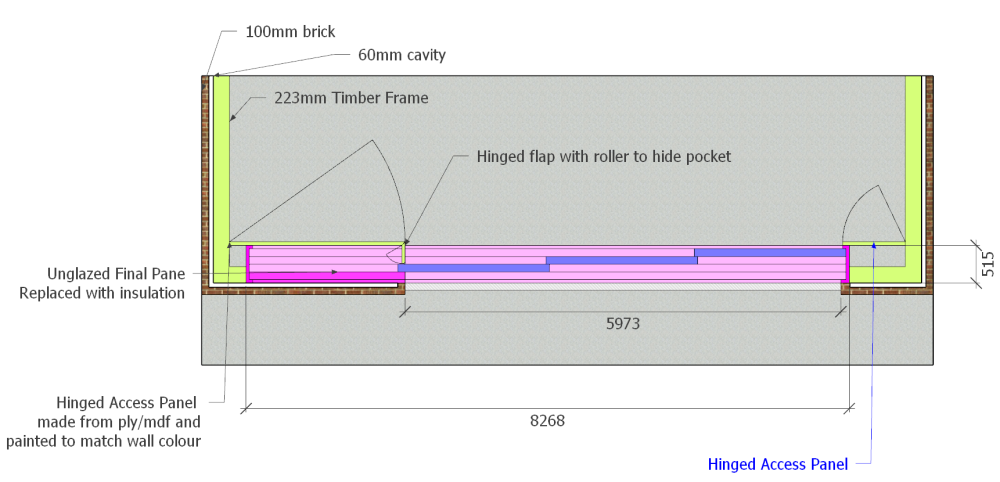
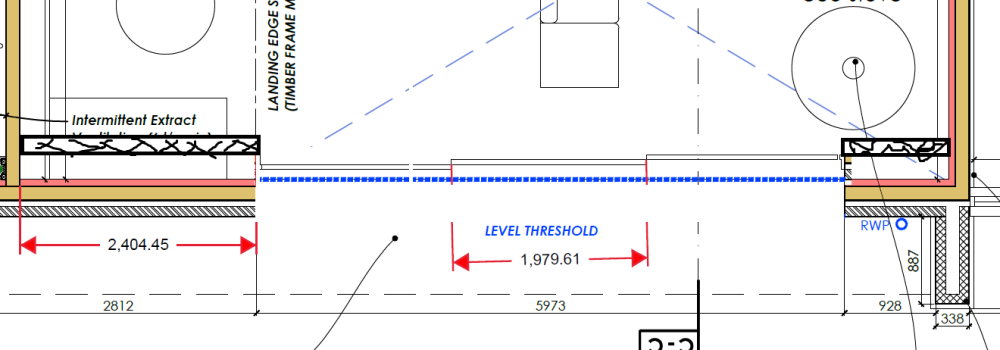
Here is a workable rat free solution I think. Maybe some of our onboard glazing genius's will elaborate if such a sliding door is possible. Pros. 1. Creates a perfectly open 5.9m expanse of frameless door when open, and a tidy hidden edges when closed thanks to hinged flap ( integrated rollers on the tip so it doesn't foul the sliders. 2. Full access to all the mechanism of the door via internal access panel. The pocket will be cleanable and not outside for vermin to inhabit. 3. Relatively easy to tape the perimeter of the frame for airtightness and wind tightness and detail for weathering, I have drawn an aco drain at the threshold too. 4. Secret cubby hole to created to the right of the drawing for aesthetics! Cons. 1. Supporting the brickwork outside the unglazed panel. I can't imagine fixing wall ties to the window is recommenced! Perhaps a decorative external pier or internal strengthening of the wall would be enough. 2. 8.3m span is chunky. You can buy 140mmx630mm glulam's off the shelf. This would be better for thermal bridging and fixing to and fit nicely with your 140mm stud wall. I imagine your SE will know better but I'd push them away from steel if I could. The window suppliers will require a tolerance above the frame to allow for settlement in the house too. I don't know much about sliders but it would seem prudent to fix the frame in a manor that allowed for adjustment later to keep the windows running smoothly. 3. You loose quite a lot of internal space and cannot put anything to the left of your plan to allow the access panel to be opened. 4. You will need a tidy joiner to make the internal access panels look well and function properly without fouling the doors. 5. It's different from the norm so inevitably you'll have to fight hard and pay lots of extra "just in case" money to the builders and designers. Best of luck!1 point
-
There are 8mm gaps between each plank of timber and depending on which way the sun is shining you can see the battens through those gaps to a greater or lesser degree. Now it’s done I feel it was 100% the right decision to paint em. @Mr Punter not sure what you mean about getting the cladding to line up with the brickwork?1 point
-
just thinking some rockwool underneath to assist with sound attenuation for if/when someone is walking in the loft. I see no benefit in putting lots of insulation for any other purpose under foot in the loft. I agree that doing it ourselves is probably more than belt and braces and wonder how a 'professional' would be doing it. but it's things like this, i.e. the fabric, that I'm happy to belt and braces as it's not something I want to try and redo after the house is finished! most of the house walls are finished with insulation now, just got the loft to finish PIR under the rafters and then I can do the AVCL, tape and service cavity. I have a fixed date of the plumber starting first fix August 1st so I need to be done by then. it's nice to have a deadline to work to as I find it focuses the mind.1 point
-
I think the EDDI has an option for a de-strat pump - pg50/51 of the user manual -1 point
-
Keep at it. Time I found so far is the biggest factor at play, and not necessarily having the prior knowledge of how to do something, I was adamant I'd do the donkey work like cutting fitting + taping , two layers of PIR between and under + Airguard membrane of all layers, it's taken us the best part of 6 months. Not a long job per se, but getting the actual time to spend doing the job is the limiting factor. I reckon in hindsight it's a bit belt and braces but nevertheless, I'll be happy knowing it's bang on... As this is your loft space, What have you got planned at foot level? Would you insulate here as well? We've got a loft where attic trusses were used, similar PIR'd between and under. I'm unsure if I really need to insulate at foot level, and if so, how much, considering how much insulation is between and under the rafters1 point
-
I take power direct from the battery terminals at 24V, this powers a 24V inverter to give 230V off grid ac1 point
-
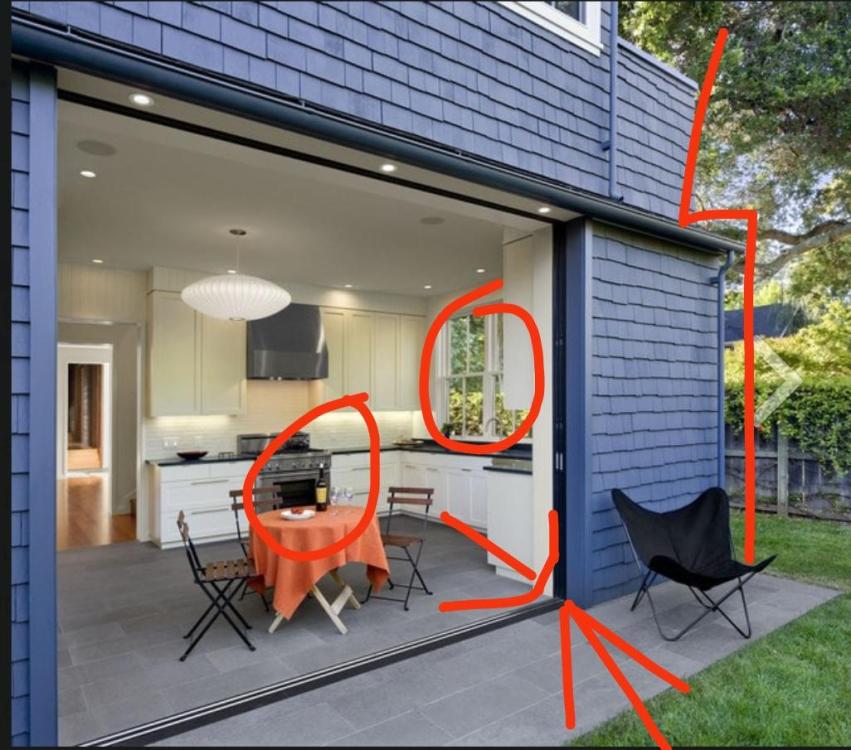
Beware of the internet when idea searching. The picture you showed has a few things that won't work for you. As Dave said it slides both ways, not one. The "pocket" shown is external to the main structure and there's a step in the fasade to accomodate. An external pocket will be full of leaves and starlings before you know it. The door sliders are very thin and wouldn't meet building regs. Fine in the Southern US ( where I suspect this pic is from, note the sockets and gas stoves and sliding sash windows). What you want to do is no doubt possible but perhaps not within a reasonable budget. I think you would need build say an 8.5m aperture with all the associated steelwork etc. It'd need to be seriously beefy to avoid too much deflection. Then install a full 8.5m wide slider with 4 panes, 3 of them sliding and 1 fixed. The fixed one could be just a solid insulated panel. Then brick up outside to only reveal the sliding doors and not the fixed one. Get a joiner to make an internal pocket to hide the doors once open. It would need a sprung flap to hide the pocket when the doors when closed and be able to be completely removed for access for cleaning and maintenance.1 point
-
Hmm.. from looks of it I think he designed that one when he was drunk. I think the curvy one looks miles better. Anyway I mustn't digress, car design could polax my thread!1 point
-
Couldn't agree more. I use it on the car, inside sills etc but can't help thinking it's not too environmentally friendly in this application i.e above plants we're going to eat.1 point
-
As above, they should have been supplied with a thin timber jointing strip that fits into the rebate in the frames, so not visible when fitted. To be fair though, mine were big windows and hard to manoeuvre, and too tight in the opening to get the joining strips in, so they're butted-up and screwed like yours, but with a load of sealant between. I've currently got 10mm plastic caps over the screw heads with a view to filling and painting at a later date. Rationel can provide colour matched spray paint.1 point
-
Excuse the poor cut and pace job, but I still see issues with Air tightness. At the sides of the doors where the pocket is, when the doors are closed there will be a gap internal and external into the pocket void? maybe "sealed" with brushes, and wipe seals? but not air tight. You will also have 2x width of sash opening internally waiting to accommodate the opened doors? what do you do with that space?1 point
-
sketchup is definitely a good option, it doesnt take a lot to make it work for basic stuff, a couple drags of the mouse to make a box and you can import floorplans to map them exactly if you need. when we were exploring house moving we used it all the time to really quickly flesh out layout plans based on the estate agents details - it often highlighted mistakes and missing details in the descriptions and was big help when sleuthing houses with no floorplans.1 point
-
I can't make any reccomendations of it, but John Lewis offer a free interior design service. Its not obligation, but obviously the idea is that you buy some of their furniture etc. It might be a case of pay peanuts get monkeys or just give you a little nudge that you needed.1 point
-
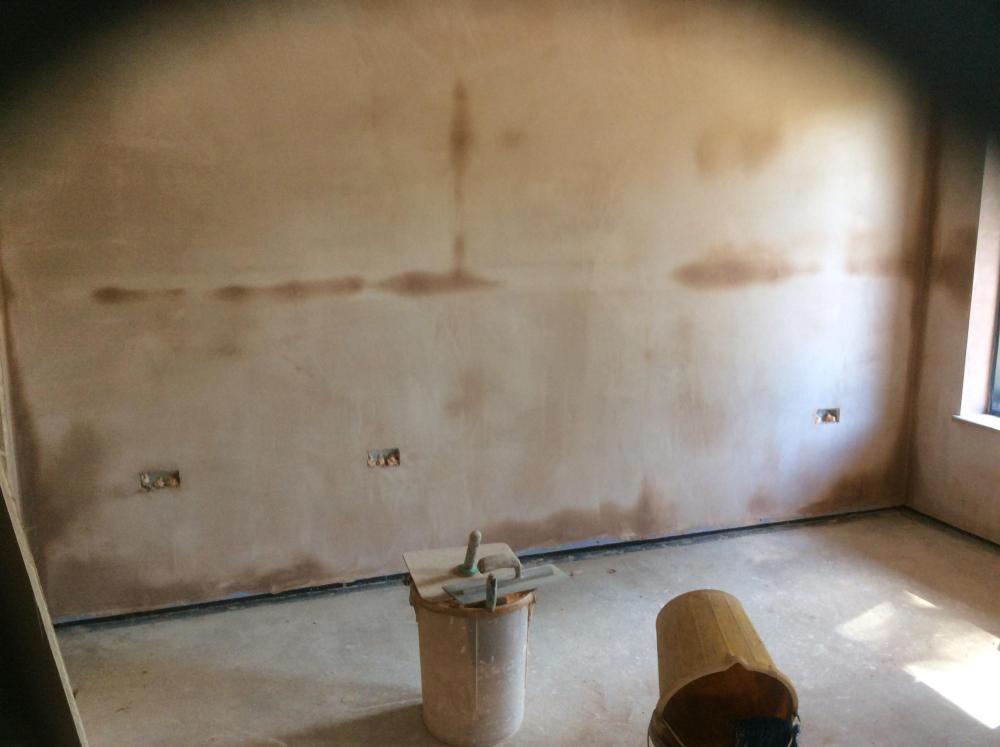
Cheers @daunker not to everybody's taste but we do have the option to plasterboard at a later date when we have more money - everything has doubled in price since we originally costed it out in Nov 2020! These things are something we can do anytime (though disruptive and messy). The main money has gone in the fabric of the build! We had to think hard about the insulation, thermal bridging and condensation (and class Q restrictions) so we wrapped the external stanchions in sprayed on closed cell insulation with a small amount of exterior insulation over the complete outside shell and the remainder inside. The roof provides full exterior insulation so the rafters are inside. The inside stanchions will also be fully 'wrapped' in foam and insulation apart from 1 which will remain open. We will always have an issue with thermal breaks from the stanchions in the ground but as had plenty of head room, we built the floor up with plenty of insulation! We got the idea from @IanR - see previous post that has some good photos of what he had done with his build. Hope this helps - we found it one of the most head scratching times in designing the barn as we have no architect. Everyone was telling us we would have condensation issues with no thermal breaks but our structural engineer and building inspector said that this would be very unlikely given what we have done and with the UFH and MVHR system - time will tell! What I have found is that compromise is the name of the game and as we hope to never leave, we are doing the best we can with the money we have - we are completely doing the work ourselves. Prior to this, we lived in an self build house built in 1963 so this has to be better! We are currently on ECP of B - 85 so are hopeful our blower door test will bring this down even further!1 point
-
We’ve gone with a big rectangle as it's cost effective and will fit well with the surrounding houses. Ignore the roof shape as that's not what it will be, that was just a drawing to show the site layout and prior orientation. Roof will be hipped. Question anyway was on the floor plans. We've not been lied to, was a turn of phrase, will correct. Question anyway was on the floor plan not who drew it or what their qualifications. Appreciate all the concern on that but not what we're after. Helpful feedback is welcome, we're not changing who is doing this and seeking some constructive input not what we could or should have done.1 point
-
So basically not a pocket slider within the existing wall structure but on the inside wall and new stud wall built to enclose it within. A compromise.1 point
-
CDM 2015 does not apply to self builders. Because self-builders are domestic clients.1 point
-
I used an interior designer and she was brilliant. She charged £60 for an hour visit and 2 hours follow up. I gave her the brief of Neptune look with Dunelm price, with some pieces from eBay. She was happy to review items I spotted on eBay and Facebook and use them if they fitted in. I got 4 beds and 2 sofas on eBay, she used mainly existing furniture with only a few new pieces then Dunelm curtain, lightshades and blinds apart from in the sitting room where she recommended bespoke curtains. The house was already decorated with kitchen in when she got involved.1 point
-
But if you did this then someone halfway through a shower would get warm water not hot 🤔. What we need is a “fuel gauge “ like on a petrol tank, come on bods design us something (that’s not complicated because I am a Luddite 🤷♂️)1 point
-
I learned about CDM 2015 on an SMSTS course. It has been designed to fit all sizes and types of construction projects but in fact does not. Most smaller builders and contractors just have a few pro-forma RAMS at best. Most of the risks on site can be eliminated or controlled. Falling is the biggest risk on most sites.1 point
-
Happy to take that away as well. Magpie me.1 point
-
Indy, An interior designer is a brilliant idea, the deal is finding one that does not break the bank and you and your other half having a good idea of what you like and don’t like and communicating all that. I had interiors designed and 3D renders of key spaces ( living room, master suite, entrance hallway, external elevations etc) and subsequently a separate lighting design before I obtained builders’ quotes even. All done remotely by professionals. For a 360sq m property.. it cost me about £1600 in total for both sets of professionals … What did I get for this…. Brilliant 3D renders of the designed spaces including kitchen and utility rooms which have been invaluable for communication with builder, much easier to visualise and change stuff if I want.. Detailed floor plan including furniture dimensions and circulation spaces all measured so that I can do my own furniture shopping working to the dimensions and knowing it will all fit…Items we are keeping all got measured and designed in. Bathrooms and kitchen all laid out. We are now at first fix and having those renders and designed spaces has been invaluable, makes tweaking things a lot easier, decided to change our original planned cladding, it has made all the myriad of choices a lot easier to visualise and also helps when you need to make the budget based compromises. Interior design was through a website called Upwork… sort of like Bark... Done by an architect and interior designer duo in South America.. very competitively priced and you negotiate what you want with your chosen professional, all that was required was our planning drawings and a back and forth consultation via email about spaces, as well as images of what we liked from magazines, telly etc . Of course there is some variability in expertise but you are able to view portfolios etc. I can forward the details of the team I used. Lighting designer.. London based so more pricey but all done remotely, fixed price, my existing renders made job a lot more straightforward and again having the detailed lighting plan has been super useful for communicating with electrician, far less guesswork etc. My other half.. typical bloke … what do you need this for….changed his mind definitely..1 point
-
I typed something long. Short version is I like the "Gus strap" idea for spread. You might want truss hangars rather than joist hangars though; or you might want the joist hangars upside down if the uplift loads are higher than the down loads. Glulam is 140 mm wide and 405 mm high Rafters are 47 mm wide and 240 mm high (more than 240 mm because angles) Compression stops them spreading into the glulam "horizontally" - cut nicely and you're done What stops them spreading away from the glulam "horizontally" - (more traditional?) roof tie between the rafters just under the ridge beam or - Gus strap; which is the metal equivalent of the above or - nail a thin strap across the top What carries vertical loads? - (more traditional?) sit the rafters on top of the ridge beam and carry down loads in compression / use a ruddy heavy roof covering for uplift (this is not the case with a metal roof!!!) or - (more traditional?) sit the rafters on top of the ridge beam and carry down loads in compression / use a roof tie jammed up hard against the bottom of the ridge beam to for uplift or - truss hangars are in 47x97 and carry 5-6 kN each in the "wrong" direction (uplift) which ought to be plenty; all they can't do is carry the "spreading" load but you have the strap for that https://www.bpcfixings.com/downloads/datasheets-new/BPC Data Sheet - MTH-240.pdf ~£1.50 ea in volume https://www.leofixings.com/product-p/lfprodpar00140.htm vs ~£0.50 for joist hangars? https://www.leofixings.com/product-p/lfprodpar00211.htm The truss hangars are stronger than joist hangars in the uplift. The ledger is fine for initial assembly and fine for tile load / snow load but it don't do anything useful for you in wind load. I think that the latter will be what keeps the SE up at night I imagine. He / she might even want the joist hangars to be upside down if they were used! Notching the tops of the rafters flat... 2.5 metre span though? Can't be much uplift on that!1 point
-
1 point
-
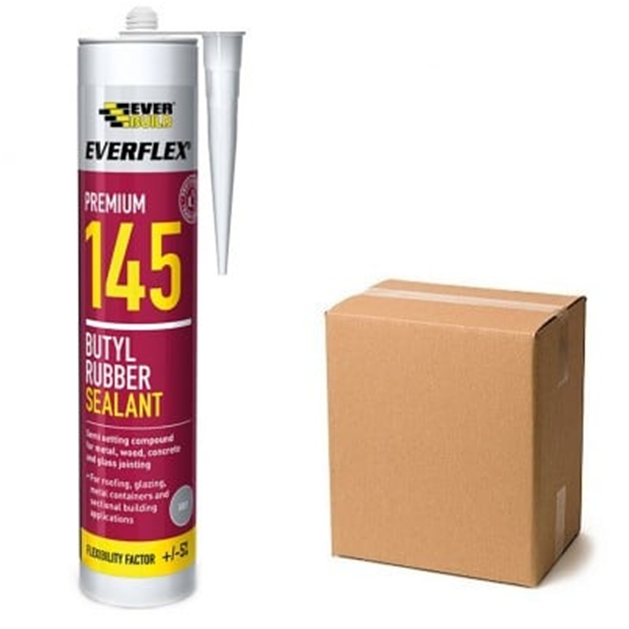
Judging by BH suggestions (for which thanks) when I asked, there doesn't seem to be a recognised solution. I want a seal that will stay sealed permanently, whereas most mastics become hard and brittle in fairly short time. Also there are inevitable variations in gap in placing a timber against blockwork. Draughts and spiders are to stay outside. I think I have decided to go for this product. It goes on thickly enough to fill gaps, then will squidge when the sole plate is fixed, and stays permanently flexible. I think a bead to each side, plus perhaps another in the middle or a squiggly line. I was surprised and pleased to see this is a Sika product. I asked the rep if it was appropriate or if there was another product more commonly used, but he didn't know. I suspect people mostly use expanding foam but I don't like it. Sika mentioned EB25 as an option....it seems to do everything, but is perhaps not the best at any of these purposes. 145 is costing £36 for 12 too....so not a big risk to try it. Comments welcome of course. Footings being dug, timber starts in 3 weeks!1 point
-
1 point
-
Jam it full of offcuts, better than going in the skip. It'd be a good place to hide any secret documents...0 points
-
Congrats, I briefly contemplated getting my SAP A EPC printed out mega big and stuck to the side of the house like a new fridge.0 points
-
0 points


