Leaderboard
Popular Content
Showing content with the highest reputation on 04/26/22 in all areas
-
Not quite the same, but our joiner is a big fan of using strips of dpc for shimming out timber in door frames, joists etc. Can be cut easily to whatever size and don't compress. If you don't want to pre drill the battens, use partially threaded screws.2 points
-
Good evening all, I have just had an offer accepted on a plot in Devon, and I'm somewhat nervous about what I may have let myself in for... Its a serviced plot (they seem to be becoming more common down here), and I can have up to 150m2 footprint. The plot has two root protection zones and some ecology planning conditions, but the materials palette seems pretty wide ranging. I've done extensions before, but not a full build, so I'm hoping I'll get a bit of moral support on here over the next few weeks as I think about my design and chat to the planners. Kim1 point
-
All of the above is good advice on fixings, especially if your lats are wet as they are likely to dry out and lose that initial bite they have on a screw . I typically start by finding the furthest out bulge. Once this is established I set up a string line horizontally from the furthest points. Practically impossible on your own as you need a person at each end of the string and someone eye’ing the string so it is just off touching the lat at the bulge point. You now have a straight line to pack and fix your lats to. I use plastic shims as they don’t compress. From here you can plumb up your vertical lats and pack at the fixing points. Sadly in your case it might mean starting again, or finding the bulge point and packing everything else. 2mm tolerance would be fine for most claddings but with a nice long straight edge and plenty of time you could get it perfect! Hope this makes sense.1 point
-
One more finding: I ran the DHW for 30mins at 11am this morning (reheated the tank right up to 55C), and the periodic 27W draw ceased for the following 5 hours. I presume as the compressor was nice and hot it didn't have any need for warming it up. Thus, the draw would appear to be dynamic based on environment and operational conditions, not a static invariant load.1 point
-
Where was this when we were crafting our design brief a year ago?! Really helpful and bookmarked for future use - thank you for sharing As to the original poster, once the excitement of having secured the plot wears off.... it's all downhill from there 🤔1 point
-
for us it wasn't but we had a insulated slab designed by TSD. if you're not happy with BB then get a second opinion, but it will cost you. I can recommend TSD if you want to go the insulated slab route, they were brilliant for us. or, just listen to @nod and @Russell griffiths who both know what they're talking about and stick with the block and beam! as they've said you can still build a warm, cold bridge free, airtight house with block and beam.1 point
-
I think the reason it's helpful to have the gripper on the outside is that one can adjust it after the rose has been mounted on the ceiling. i.e. if you want it 5cm longer or shorter you can loosen it and pull or push the flex then tighten it.1 point
-
Now that looks vintage, hook looks much better, as joe says, grip on inside or Chuck it away and put a cable tie around the flex on the inside to stop it pulling through. on the bigger old ceiling roses we used to tie a knot in the flex … they never pull out.1 point
-
Will the black bit come off? If so just put it in the inside, it won’t need to be “fitted “ just loose, then you won’t see it at all 🤷♂️1 point
-
It doesn't 😞 (Hence why I had this one spare, I'd replaced it with an emonpi for import/export measurements) There's a hack published to allow reading power direction, but I backed away from trying it. https://github.com/apreb/eNode#measure-direction-hack-1 point
-
Ughhhhh. I hated this job so much, I came to love it. Strange, but true. Two chippies helped me on our build for a short period: one sloppy as hell, 'tother, well, finicky is an understatement. Each had a different approach to the same issue. They only worked for a day or two, the cladding took me a full month (on and off) 2mm should be achievable quite easily: and less than that with a bit of care. For me the key thing is - while working on your own - it takes time. Soooooo much longer than working with someone who can share the job. And by that I don't mean a willing but disinterested / clueless / completely unskilled / person. I'm trying not to say - partner. (She won't read this, I hope) I found that battens need to be held by the head of the screw: not the whole of the (in our case) concrete screw. So the batten needed to be pre-drilled. That means that you can vary the tension by a mil or less quite easily - and fookitrightup if you don't predrill the hole. Because when you come to fit the counter-batten, the process of backing off a screw on an under-batten which has not had a pre-drilled hole, it pulls a large section of the batten one way or the other. Cross-making. One of our walls, in profile, bears more than a passing resemblance to a propeller. Excellent training for battening. I ended up making my own shims (modelled on trouser shims) . Thats when I learned (from the fastidious chippy) you can use multiple layers of DPM to get the battens lined up to within half a mil... He was on day rate. I feel almost nostalgic about it now @Dreadnaught: if you weren't so far away, I'd come and help ya......1 point
-
So what stops you getting the "temporary" meter in a kiosk, and then never quite "finishing" the house so never asking for the meter to be moved? Are they actually going to come and check and insist they move it?1 point
-
My neighbours, who also bought it cheap and had it left over from a recent job. I come home to find a 5ft high stack of it on our lawn, wife says ‘neighbours are storing that there till someone collects it’ 😂 Neighbour comes home from work and a quick exchange is done… I’ll use it somewhere, sometime.1 point
-
1 point
-
We used packers on the low spots and cut out the batten on the high spots. We were counter battening so any gaps in the first layer of battens didn’t pose a problem for our cladding, not sure if that would work for you though?1 point
-
My stairs were difficult. It is 2 strings joined by a half landing. The one insurmountable design feature is the lower string had to be slightly shorter than the top string so that meant an odd number of steps, so we ended up with 13 steps total. That pushed the rise to close to the maximum, 202mm iirc, I compensated for that by making the going as long as the space I had which ended up with a pitch of I think 40 degrees. I couldn't go up to 15 steps total as the bottom string would be too long then even at the minimum going.1 point
-
Neither are mine...nor am I for that matter. I hadn't worked in construction ever before taking on the build. Works for us and the stairs may stay as the final staircase for the house 😀1 point
-
That’s awesome well done, take a deep breath! 150 is a good size, and the serviced connections sounds like a winner. There are a lot of other free resources for self builders too, so check out the free presentations Link some companies do and the Self Build Centre in Swindon, and the occasional exhibition. If I was in your position, the next step would be budget. You will need a topo survey. Then fill in your brief here is a link to a free one (the link is in the grey box half way down the page) https://www.potton.co.uk/self-build-resources/designing-your-home/creating-a-design-brief and speak to a planning consultant and designer then. They will direct you, there’s no need to do it yourself unless you’re an architectural designer.1 point
-
That, and also the pump not operating at full potential as the rotor is not fully immersed. That can also cause overheating ( kettling ) by water then spending too much time in the HeatEx. I would consider changing the overheat stat also, as it runs quite close to the normal max operational temp of the boiler. You should be able to get the as-new resistance reading from the manufacturer to allow you to compare what you have, eg before removal. A decent plumber is always a help when trouble finding. Found 2 young guns about to remove a perfectly good WB boiler in a pensioners flat as they failed to diagnose a £6 flow switch part had failed...... They had quoted £800 labour plus the new boiler costs. Jeez!1 point
-
Here are a few links. I've used Relentless Microcement for the supply of Microcement. Topciment seem to do a lot of options. https://www.topciment.com/en/microcements/metallic-coating-pure-mettal#que-es-puremetal https://www.topciment.com/en/microcements/metallic-paints-oxide-effect-classic-mettal https://www.topciment.com/en/microcements/metallic-glazes-elitte https://relentlessmicrocement.com/liquid-metal-kits/1 point
-
Welcome. if you were to do a to do list it could easily run into hundreds of things and potentially overwhelm you. Just deal with the next few things, get them done them move onto the next. See it as running 1 mile, 26 times as opposed to a 26 mile run. At this stage you’re looking at the design and planning which I personally enjoyed. When you have you designs put together post them here plenty of self builders who’ll give you some opinions and thoughts based on our own experiences, and mistakes. Almost every challenge you’ll face someone here should be able to help. good luck & congratulations on your plot purchase1 point
-
Why not heat the cylinder fully from a ToU tariff such as Octopus Go overnight, via the HP, and then pump any excess during the day into the immersion to hyper-inflate the energy storage capability of the UVC. Nighttime charge to 50oC then reduced by whatever was collected during the day, with the boost from the immersion going as high as 70-80oC. You will get the better CoP with running the HP, but only at the lower temp plus you'll be cycling the HP on and off with the pockets of solar gain, which it will NOT thank you for. Once you calculate the wear and tear on the HP, PLUS those attributed losse of getting all of the HP components up to temp for each event, same with all of the interconnecting pipework etc, eg before it collectively then delivers premium temp hot water to give the stated recovery times, .......then the immersion route soon becomes a more attractive choice afaic.1 point
-
I would fix a stiff backing board first. Then glue/pin the laths to the board. Fixing them individually would be not only laborious but will end up all over the place.1 point
-
I’ve got the electric plane on many a upvc frame, makes lovely sawdust.1 point
-
You should just about be able to hack 25mm off the top and bottom of a standard upvc 70mm profile door with a tracksaw... it'll be touch and go though...1 point
-
I don't think you will easily chop down a PVC door without hitting metal reinforcement but I guess you could ask the manufacturer? If the workshop is outside building regs you can do what you like. Could you lose the lintel at the top and put in some metal angle to support the rafter?1 point
-
We have recently had quotes back for our self build for those that are interested. 250sqm house plus detached garage and we are coming in at around £1650 per sqm. That’s a good spec, ASHP, MVHR, well insulated and with a healthy 35k budget for the kitchen. Ours has some complex bits with 15k of steelwork, and 2 different ridge heights on roof meaning loose lay with about 3 weeks of joinery building the roof, which added to cost considerably. This is priced for a main local builder/ contractor and clean feet. Just in case this is of interest and this has been priced this week with 2022 prices for everything (which has pushed budget up considerably from last year when we did our budget).1 point
-
Latest update now really cold weather has hit us and some reasonable data points now in Sweet spot for heating is 4 degrees and above. Once you hit 3 for any length of time elec usage rises sharply.At zero degrees pretty much all day and night running costs are £5.45 day pellets would be £4.48. Suspect its defrost cycles causing the increased usage. Plus point however is that as they are 4 separate units they defrost at different times so you don't notice any heating drop. Running pellet boiler this week now to confirm usage of pellets is as I remember Overall still way cheaper to run than pellets but looking to maximise savings so hybrid running may well be the best solution overall. That said wouldn't be upset running A2A full time if didn't have pellet boiler in.1 point
-
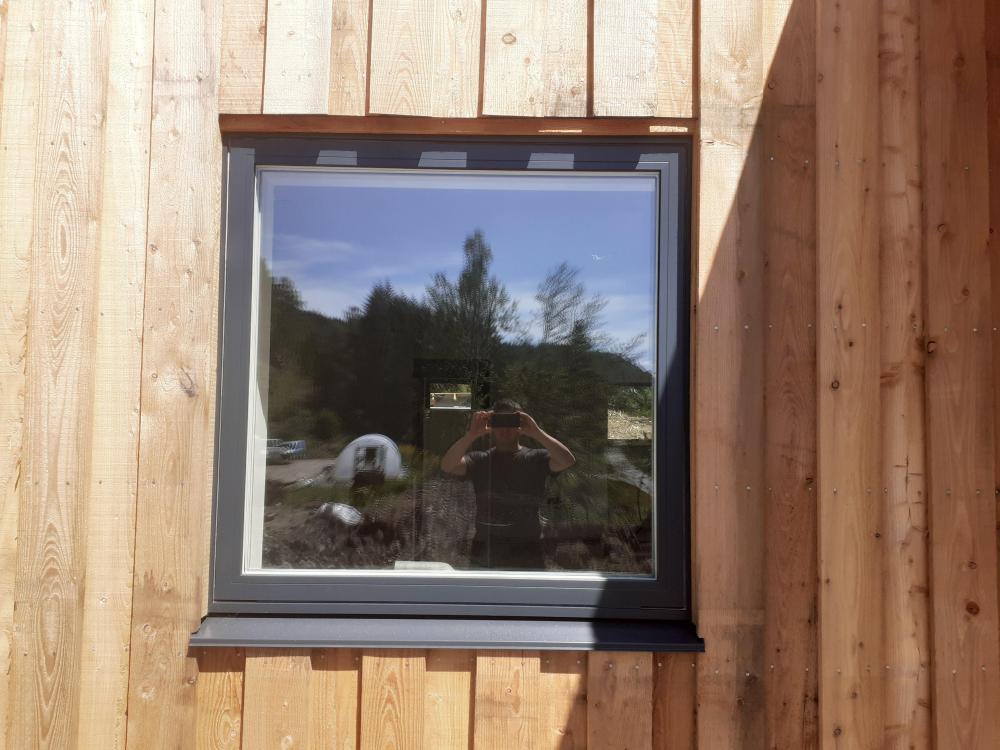
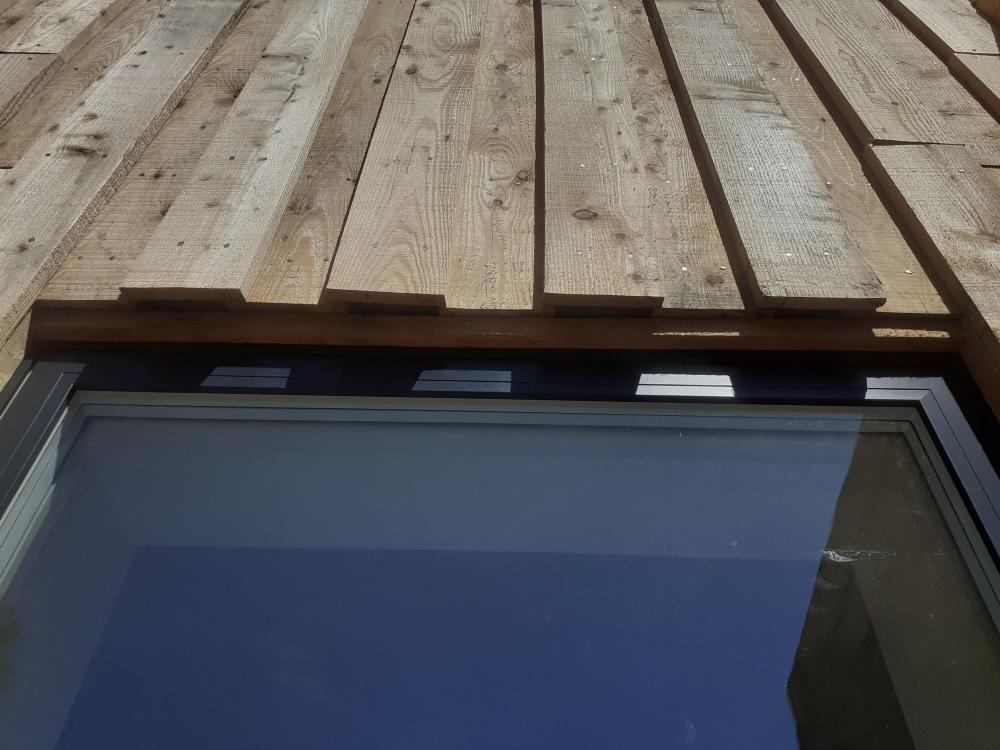
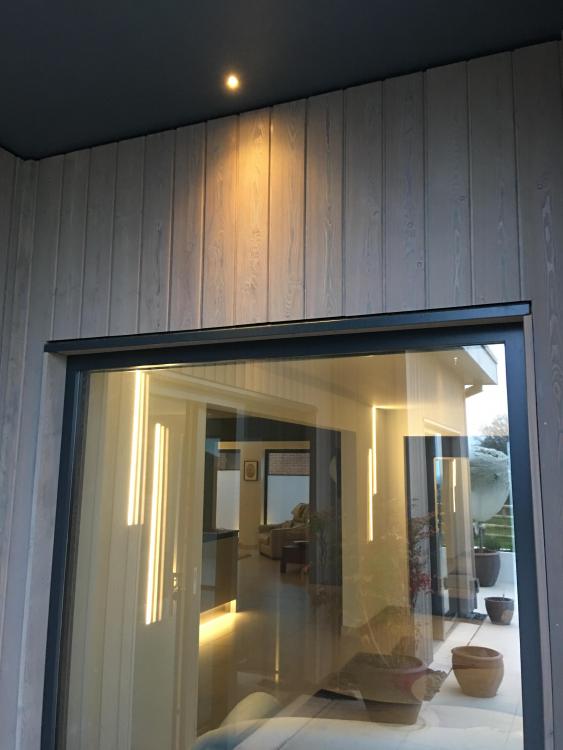
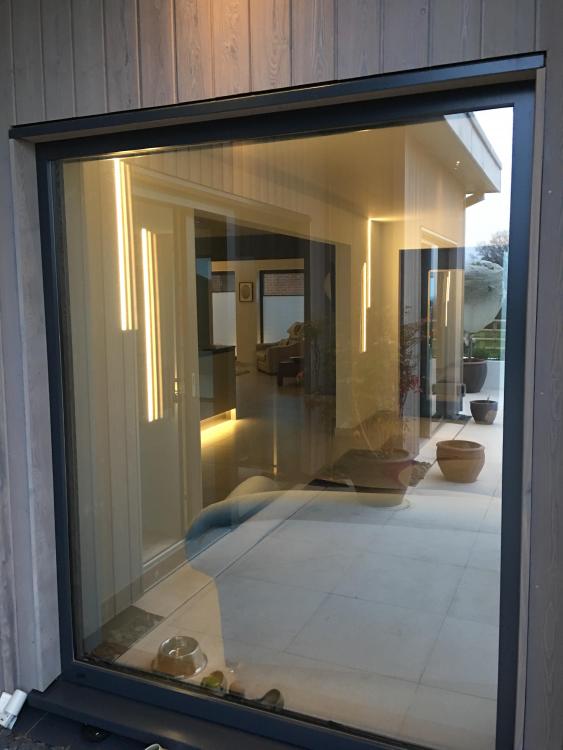
I will add to the mix, though we have vertical board on board cladding. I ripped a bit of larch approximately 50mm wide and fixed that over the top of the aluminium window frame. The top edge of this ripped bit of larch is bevelled at about 15 degrees to allow any water behind the cladding out. The cladding then comes down so the bottom bevelled edge of the vertical cladding is in line with the bevelled edge of the piece ripped for the reveal. There is about a 4mm gap then for water to drain out the cavity, with any water running down the vertical larch dropping off on to the aluminium cill of the window.1 point
-
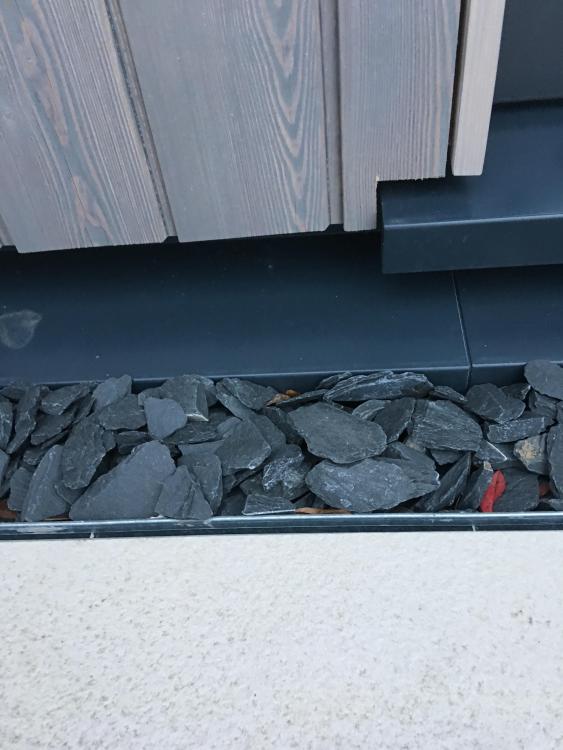
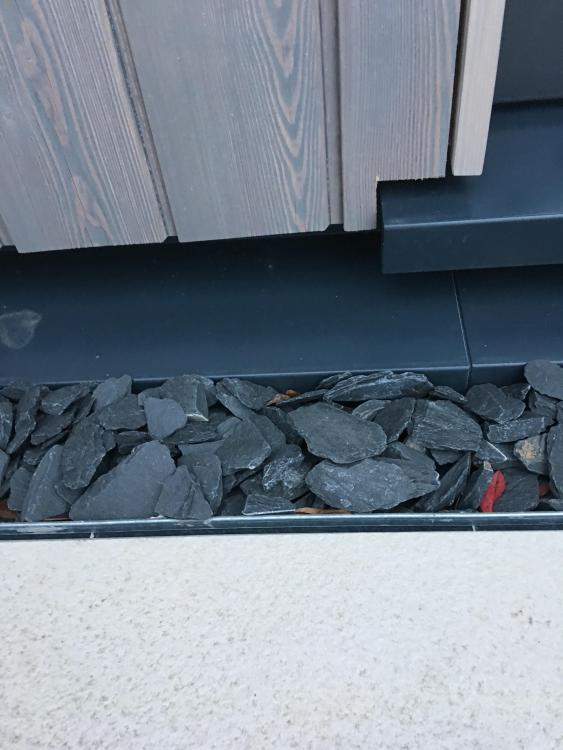
@Triassic thank you. It's Siberian Larch and I got it from Vincent Timber. It's a French product Sivalbp and Vincent are the sole supplier in UK. Mine was factory pre coated in new Age Gris It's a sacrificial coating which hopefully means I shouldn't get any uneven weathering. http://www.vincenttimber.co.uk/products/sivalbp/index.html It's very good quality cladding. The trim at ground level a custom fabricated cover in powder coated aluminium. Think a few have picked up on this trim now. It's very smart and easy to fit over the edge of the slab. Local fabricators did ours, they came out and measured up. I had it coated to match windows. Same company did the heads for over the windows.1 point
-
I’m not absolutely clear on what the issue is but if I have it right its the gap between first and second floor windows? I’m single storey but think the same priciples apply. At the top I have a metal header to match the windows and the vertical cladding comes down flush to that, have a matching piece of cladding across sitting under the header to make it look neat. At the bottom it is just cut off in a straight line all around and sits off the griund.1 point
-
Just thought I'd update this thread with some real life observations now our own SIPS house is in place. Really surprised at the comment above re 1st floor being supported *on* top or inserted into the panels - they should really be using joist hangers so there's no penetrating the structure at all.This is kind of fundamental to take advantage of all that insulation really. Even where we had to have steels in because of some.large spans they've cleverly been terminated without going through the wall (big strong upstands on massive timbers) The only things that go actually through the construction of our SIPs (done by clays) inside to outside (that is to say exposed in the 55mm cavity between the sips and the stone outer wall or under the roof slates) are 2 beams where we have a very large roof window I believe called a cabrio?) which needed that extra support, and ditto on our really large dormers, which would not be a feature in a normal 2 storey. However, even then since we are applying a layer of insulation inside too, nothing in fact will be cold bridging dorectly into the interior of the house. We certainly don't have any of those massive timbers referred to acting as cold bridges. There are large timbers involved but have quite cleverly been designed to be *within* the envelope. As for gaps, so far the only air gaps we have been able to discover were some timy ones between the sole plate/DPC and the thermal blocks it is sat on - and I think they were down to slight irregularities in the blocks/block laying actually. But these were sealed and we've gone over it all ourselves again and silicone the edges above and below the DPC even though it wasn't really necessary. Similarly since we'd bought boxes full of sealant, we sealed all the joins in the panels ( which was pointless to be honest as I saw how they were sealed together but attention to detail seems to be key, and I've tried to provide jobs that everyone in the family can feel part of available for them to do) Where you may see expanding foam used is I watched when they fastened the panels together - talk about thorough... the panels were spline joined, so no big timber cold bridges (the splines also being SIPS themselves), and they "glued" the insides first with low expansion sticky type foam, then the panels were pulled together under a lot of pressure with a device that reminds me of a fence tensioner, so a lot of the foam squeezed out at the joins of course then literally about 100 nails were fired in each edge( I stopped counting at 100. I reckon those house must weight an extra ton from all the nails ?) I was quite genuinely amazed how thorough the guys were - particularly when we got torrential rain and they were literally soaked to the skin through their waterproofs even. Needless to say, there's not been a lot of gap finding to do despite us going over quite literally every mm of join - but I do have to say that the guys were unbelievably thorough, I mean to a degree *way* beyond my expectations and possibly not all firms will be quite so exacting. I also think bridging from big timbers had been thoroughly thought about, because you *could* build it in a simpler faster way for the builder, but have those timbers bridging between the cavity and the interior. I think our checking out of the various firms for a few months paid off. One thing I have noted is that the breather membrane touted as waterproof for up to a few weeks has not stood up to some of the heavy rain we've had amd has definitely let water through... but the roofers started today and being a belt-and-braces type is actually felting over the lats too! So even if we lost a slate at some point in the future there would be 2 layers in fact between the outside and the osb face.1 point
-
0 points
-
0 points
-
Is that acid so strong it has eaten all the LHS stones. Or is it the Acid House that has vibrated them off.0 points
-
0 points


