Leaderboard
Popular Content
Showing content with the highest reputation on 05/20/20 in all areas
-
The pool has clearly been very popular in the lockdown period. In response to another thread re pools, dehumidifiers, corrosion etc I thought I would have a look around. Chlorine - As previously pointed out, the pool sits between 0.5 and 0.55 ppm chlorine, this is the same level as tap water. This compares to around 3 in a public pool, so 6x as much. There is no actual chlorine directly involved. When the pool was installed they dosed it with some salt, considerably less than in sea water, and there is a tube in the plant room which uses hydrolysis to create chlorine from the salt when needed. The water tastes neither salty nor is there any chlorine smell. Humidity - The room sits at a constant humidity level of 60% whether the pool is open or closed. When the pool is closed the room temperature is 22-23C and the water temperature is 29C. When you open the pool, the dehumidifier kicks in and heats up the air to 25-26C. As the pool is normally closed and the room is not overly warm humidity is not an issue and the room is quite pleasant to sit in. At the same level of humidity, 30C air holds almost twice as much water as 20C air. thus the air holds considerably less water than the air on a Florida summer day. The only time I ever see any hint of condensation in the room is in the winter, the door lock on the french doors is cold and water condenses on it. There is never any condensation on the window frames or windows. Rationel would not warrant them for use in a pool and recommended uPVC but knowing that humidity would be well controlled we ignored this. So my conclusion on corrosion risk is that it is minimal as long as you control humidity well, do not use chlorine and do not have the pool open all the time. However, to do this adds considerably to the capital cost of the pool. The pool cover and air handling equipment cost as much as the pool itself. Relative to the 5kg of sodium hypochlorite, it looks like it would only take 60g of hypochlorite to get my pool to 0.5ppm of chlorine. I took a picture of the door furniture where presumably corrosion would start to show. It still looks as good as new after three years. I think water damage is a much more pertinent issue than corrosion. The walls around the pool are tiled and we used special pool silicon to seal around the pool edges. The floor is tiled also, although as someone pointed out water does pool on the floor, because no one thought to give it a run back down towards the pool. Something we will do when it needs retiled. However, the builders did not seal the bottom on the door frame to the changing room (despite me asking) it only took a few weeks of use before it started to blow out and I got it sealed. Running costs continue to be very low relative to the historic scary costs of running a pool. Indeed they have probably fallen as gas and electricity tariffs have fallen. I reckon that we are running at around £1600 a year for gas, electricity and servicing, my previous estimate of the electricity use was probably a little high now that I have figured out the use in other parts of the house. One thing that I will be watching is the pool lights. We have 2x 36W LED lights in the pool. The original lights broke, one never worked properly. The installer said it was the fault of the builders for allowing the pool to sit full of dirty water for ages before it could be commissioned. Eventually I agreed to pay for the lights if he installed them, that was £800. On discussion he said that he is finding that LED lights break after about 5 years as over time small amounts of water get onto them and break the drivers. He said that this was a problem versus the old 300W incandescent bulbs. For all the time the lights are on if this continues the 300W bulbs may actually be a lot cheaper to run.3 points
-
2.5 is the normal stuff used for ring mains today. This is an old house. you probably have the imperial sized multi stranded cable that does look a bit larger but only because it is multi stranded. It is also probably 50 years old.2 points
-
One question my dad asked me on Saturday. He only came up to get rid of a tree stump in the garden that's been there since Storm Doris blew down our Silver Birch. Job done, we thought whilst he had the digger he could tackle 7 other stumps in a large overgrown border near our drive. He then asked the question he would now probably regret and was met with a response of "we will probably extend the drive at some point". He looked at my like he did when I'd told him I'd failed my GCSEs and explained we were going to pay a builder to get rid of all the hardcore then buy it back in again at some point for hard standing and that we can save 'thousands of pounds'. So, dad realising what he had talked himself into dug out the area under strict permission not to damage the Christmas Tree because where would we hang our fairy lights otherwise and I was on social media advertising 20 tonne of topsoil and moving stumps. The neighbours must wondered what was happening with an endless supply of trailers, cars and even a JCB Fastrack. The wheelbarrow clearly felt the impact of yesterday's hard work and pretty much sums up how we feel today too (another job dad sorted).1 point
-
Lets imagine someone wanted to build and live totally off grid a whacky lifestyle in an Iron age thatched hut with ownership of a few acres of land for self sufficiency , this would be one dwelling and not a community , where would they start with getting this project fully above board and legal as regards planning permission, building regulations ect ect, or is it some thing that is so outside the regulations that no council would ever agree to it ? I've looked into contacting local council planning departments for informal advice but not got anywhere, they seem to be uncontactable unless you hire them as consultants ? ( I'm aware of the Welsh experiment with a community of this kind but as far as I know its not going well and is not the answer )1 point
-
My wife has chosen a tap she likes, it is by a company called Schon, it seems to be a Victoria Plum own brand and I think are Indian made, it claims to be high quality and its got the WRAS approval but I am worried. I have found an almost identical tap by Sauber - at least I have heard of Sauber but I am not even sure who they are. Does anyone know much about these two? Who are the names in taps? I know Pegler & Franke.1 point
-
So I got conclusive word back from local help to buy office yesterday. They do NOT cover self-build. At all.1 point
-
I used howdens burford traditional in last house I really liked it and did have a thin edge. Your plastering has to be good else would look naff. Only 15mm thick though.1 point
-
1 point
-
Don't forget to paint the ends of the planks when you put them down to dry. Less chance of splitting due to differential drying times.1 point
-
Ebay appears to have one for £200.. https://www.ebay.co.uk/p/24034143521?iid=2743713498231 point
-
+1 @ProDave might correct me but if you were really stuck and couldn't replace the wire then nearest I think you can do to that set up is.. 2.5mm Ring Main -> 2.5mm wire -> 13A FCU -> 1.5mm -> single socket1 point
-
No The rating of 1.5mm is at best 20A and may be a lot lower depending on the instalation method. A double socket could draw up to 26A So no, 2.5mm minimum.1 point
-
Even smaller and cheaper samples from.. https://www.wood-finishes-direct.com/product/osmo-polyx-oil Tiny 5ml samples for £1.091 point
-
1 point
-
18mm is standard thickness There are plenty of places that sell online and can send samples1 point
-
I’ve used Grohe throughout Taps showers Really impressed with the price and quality Not so impressed with the £1000 we spent Ona quooker hot water tap Poor backup and guarantee1 point
-
Or this nailed to the studs https://www.insulationshop.co/600x2500mm_galvanised_steel_rib_lath_sheet.html1 point
-
I've just done some Googling, looks like you have "Part G" and need to limit water use per person per day - I can only assume that as some regions in England have water shortages this was introduced to try and help the issues.1 point
-
BC care about taps? Huh? What is this about? Compliance with what? Only spec in Scotland is thermostatic valve so you cannot scald yourself.1 point
-
Thank you , that's a good thread and very interesting to hear your experiences and thoughts. Great pool, you ve done a fabulous job with it.1 point
-
EPS 300... Safety margins etc mean the max design loading is only 140. It was doable, but the extent of the ring beam was huge. Was also the additional loading as the basement walls were acting as retaining walls.1 point
-
That is a huge set of purlins !! I would not be too worried about the wall plate but do not remove or touch those purlins !!1 point
-
1 point
-
TBH I would have had the window replaced - they are £200 and it would look better and also fit better1 point
-
Plasterboard it then attach galvenised mesh Then two coat render Or mesh directly onto the stud Two scratch coats One top coat Three seperate days1 point
-
Why not add directly to the side, you shouldn’t go higher as they lose the ability to do what they are meant to do the higher up the smaller a triangle you make, the lower the better.1 point
-
I don't think so, we ordered an off the shelf product, if that was the case then I'd have hoped he would have explained this rather than just appearing difficult. I can buy from eBay Osmo or Fiddes tins as small as 250ml, tempted to get what I think it is and have a go, that way I am only spending £15 rather than potentially £100 or so on the wrong oil.1 point
-
We had an anhydridte liquid screed on the extension (over 150mm of PIR). My anhydrite is 60mm with ufh. It doesn't feel as solid as I would have liked. Stomping teenagers cause a noticeable tremour on the kitchen island. If i had my time again I would have gone with insulation under slab and either polished concrete or a thin smoothing screed over slab. Anhydrite is super fast to install. The pair of guys who did mine were good and prepared laser set levels thoroughly, it's flat as a pancake and there can't be more than a couple of mm variation across the 80m2. I laid a large slate hearth and it just sat perfectly flat, not so much as fag paper crack between it and the floor anywhere. We topped the screed with microtopping as a wearing surface. The anhydrite surface laitance is easier to remove in the first days after install, it scrapes off. If left longer it then bakes on and needs machine sanding. Guess which option I naively took?! Sand and cement will feel a bit more solid at 70mm but compare the cured dry density, I can't recall there was much in it. Finding good sand and cement screeder isn't easy, its a dying art and back breaking work. I've seen several local jobs which I scouted when trying to find a screeder (before plumping for anhydrite) and the quality wasn't great, curling up at edges and not very flat, maybe OK to tile over but not good enough for microtopping without first sorting with a generous coating of smoothing compound. There are a few screeding crews still around but check carefully any jobbing builders or plasterers who offer it as it's a real art and a good flat finish is hard won through lots of experience. Fibre reinforced screed ready mix delivered to site would be my pref over a pile of sand and a shovel. Both anhydrite and s+c take ages to dry! L , I left mine a full 8 weeks and even then gave the ufh a tickle for a few days to sure.1 point
-
Good question, now it's done and there has been a fair elapse time to let the wounds heal... It took us four weeks to put up 177 sheets. Yes, it did take us longer than a professional, but you can take more time. We ended up putting shims under some of the battening to take out differences in the roof timbers something I doubt a professional would have bothered to do. Paying more attention to getting the boarding good also means your plasterer can concentrate on the finish rather than fixing the boarding. I don't think we had more wastage, maybe less as we thought about the best way to split sheets etc. It's not a job I would have attempted on my own, fortunately my wife and are happy to take on new challenges? So, yes, I think it was worth it. Our plastering cost £3200 including materials, we didn't get a quote for boarding.1 point
-
@joth It's never clear cut... That's why it was in quotes. I like to copy the clever kid's homework where I can as much as the next person for exactly the reasons you illustrate so well. (CPAN is a favourite for me when not doing microcontrollers.) I suspect if we did more rolling our own, there would indeed be more exploits, but there would be less incentive to find and exploit them. In the case of Arduino for my usage this time it's best summed up by this: https://xkcd.com/801/ I understand I was less than specific about my intentions, but what I want to do isn't going to be difficult - apart from the now removed Ethernet requirement (the TCP overhead is orders of magnitude larger than the data, and it saves precious little complexity in the system as a whole, so better to do something simpler) @Dan Feist Those look interesting for some other ideas I have. On the whole, I think I'm safe sticking with AVR chips, especially if I move to the newer devices with the better pinouts (e.g. the idea of a single voltage supply and have it do the separation of analog and digital domains is quite nice.) and it's a good excuse to think about a new programmer board. Mine is so old it was probably made with leaded solder!1 point
-
Normal screed - compo sand and cement - when laid properly 75mm gives an excellent solid level and flat floor with or without UFH. It does not need sanding or priming and you can lay any floor finish. The reason it is not more widely used is because it takes more skill than the liquid stuff so you cannot get untrained monkeys to install 1000m2 in a day. You can mix on site or have it mixed and delivered and with or without fibres - I would choose with.1 point
-
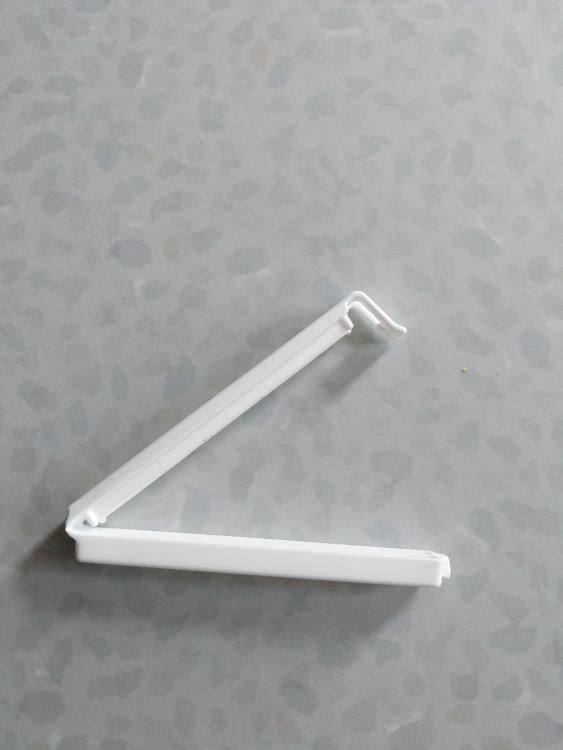
I had exactly the same issue with a brand-new bailey kit like that. It turned out to be the rubber bulb pump leaks like a sieve from the "one way" inlet valve. I didn't have the sense to test the kit first, it was only after I'd dismantled, cleaned and reassembled a couple of joints that I tried that and found the problem ? and subsequently from some googling established this is fairly common with the Bailey kits and general practice is to put a plastic clip on the tubing to the bulb once pumped up. Some of the instructions actually show that, though no clip is supplied. Which, given they're pretty expensive for a few bits of plastic, I have to say I found fairly... disappointing...!1 point
-
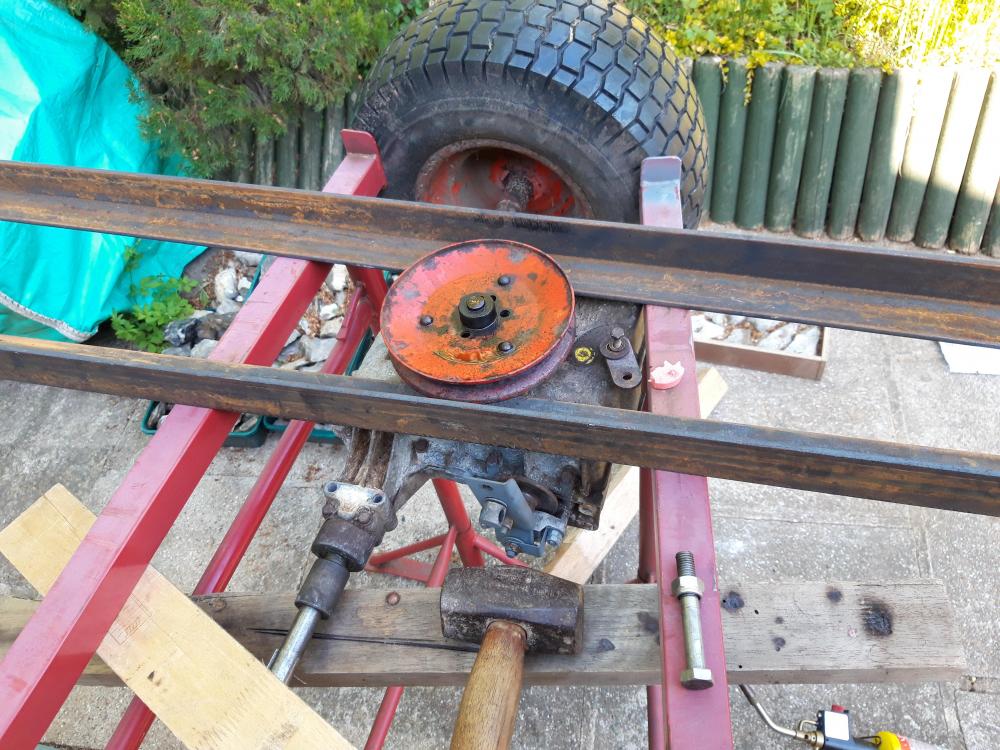
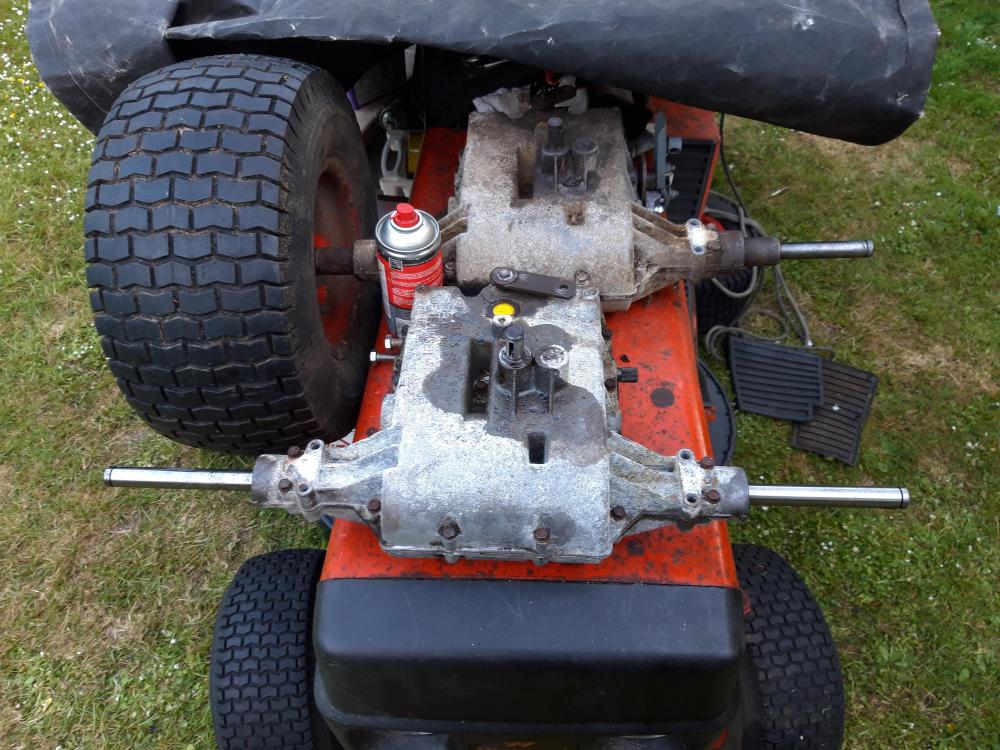
I win! Finally got the pullies off both gearboxes! Heat with MAPP gas, rub a candle over the shaft and the wax gets sucked in. Beat it with a bfo knocking stick and punch. Repeat. Pretty sure having it all on the sturdier trestles / angle iron helped. Exactly as the lad showed on YouTube tbh. The orange, better looking pulley took two evenings. The rusty as Hell pulley on the new gearbox about 2 minutes! Pullies degreased and in the citric acid bath to derust now. Still got to do the wheel ?1 point
-
1 point
-
So Octopus have now confirmed that: 1) They are installing 3-phase smart meters, but this is paused due to COVID-19. 2) Metering is "vector sum" across all three phases. (This confirms what @joth concluded from his investigation, and means imports/exports on different phases at the same time are netted out. Based on this, siwtched back to 3-phase now rather than upgrade later, as it seems there is nothing to loose and we already have a 3-phase supply on-site. Need to do load-calcs for the house, but this will probably still use the a single primary phase for house consumption.1 point
-
In my personal opinion that wouldn’t pass at all each shelf is a step ladder to be climbed over. So would need a balustrade 900 higher than highest point on that. Please tell me im wrong, but that’s how I would view it.1 point
-
@AliG I think wrote a full and detailed account of his pool project; it may be here In any case you need to read it. F1 point
-
@Dust Raker Vapour barriers come in different grades. For a domestic swimming pool you would need something like the one in the link below. https://www.icb.uk.com/file-uploads/Visqueen_HP_Vapour_Barrier_Datasheet_24_05_2013.pdf1 point
-
Well a bit of an update here. The Structural Engineer has said he isn't happy about the central wall misalignment but has kept me waiting for about a week now to do calculations as to how much offset is OK. The groundworks guys did day 2 of blockwork yesterday and that looked to be fitting nicely by eye. I went out this morning and they have taken it back down. They checked yesterday's work with the total station and realised they had made a mistake with a mark that meant a wall went 40mm off target (OK one end, straight, but 90 degrees 13 minutes to the other wall). They have now identified that the front area of foundation is out of shape and they are talking about digging next to it and pouring more foundation. 450mm width if just butting up or 600mm if doweled. I prefer the sound of doweled. To their credit they have worked all this out themselves and corrected their work, rather than coming to me and asking if it is OK, which gives me some confidence.1 point
-
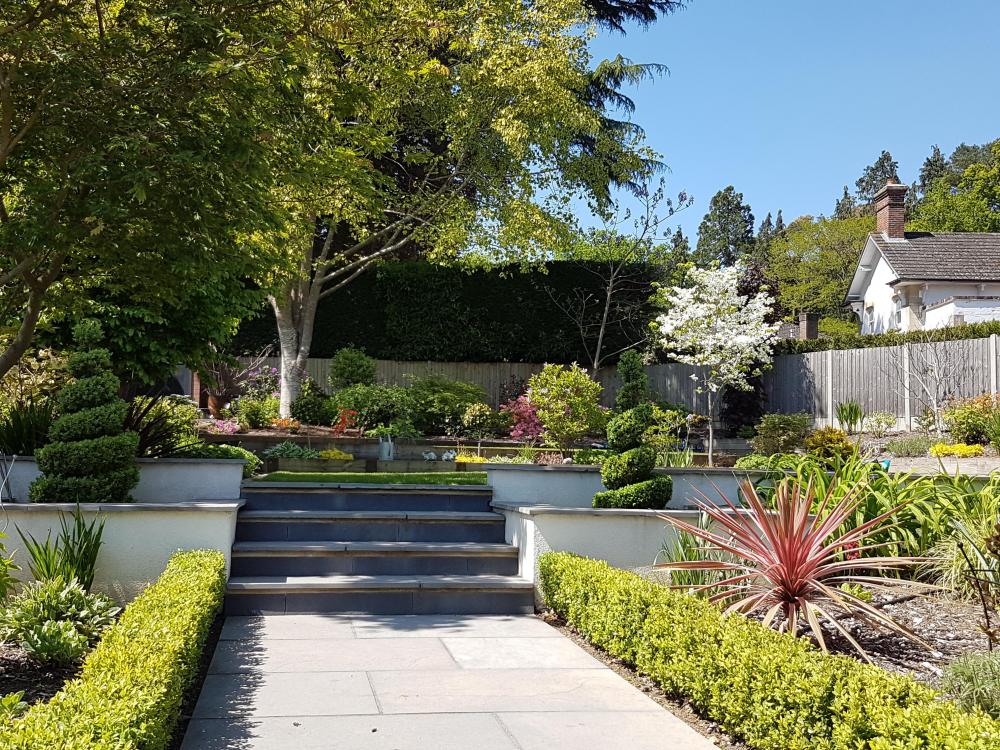
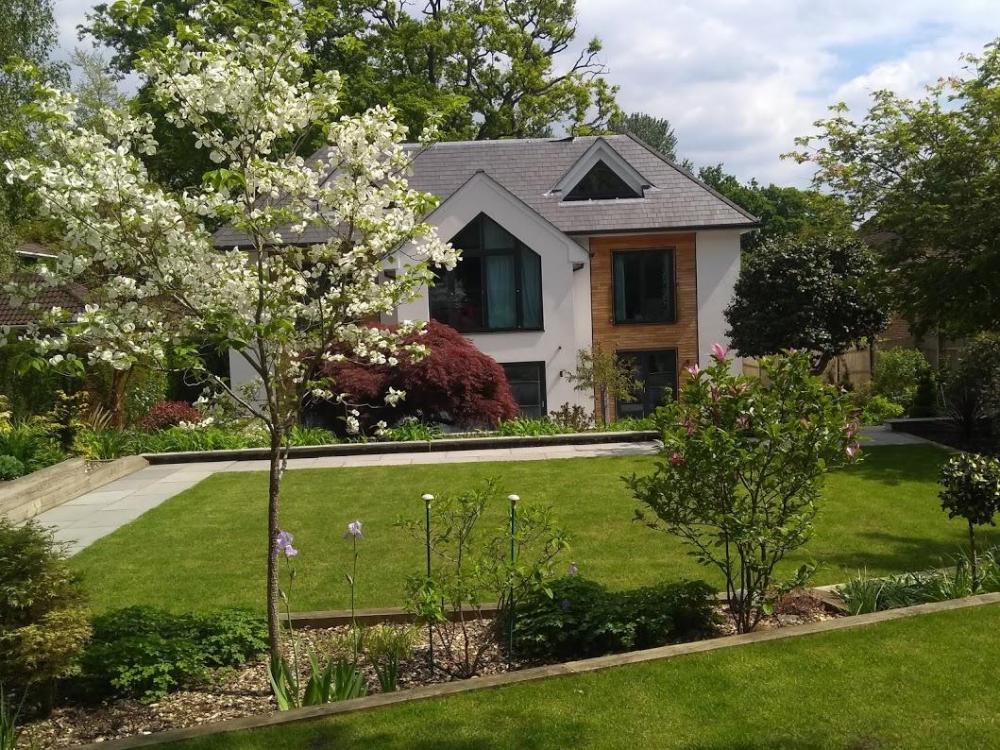
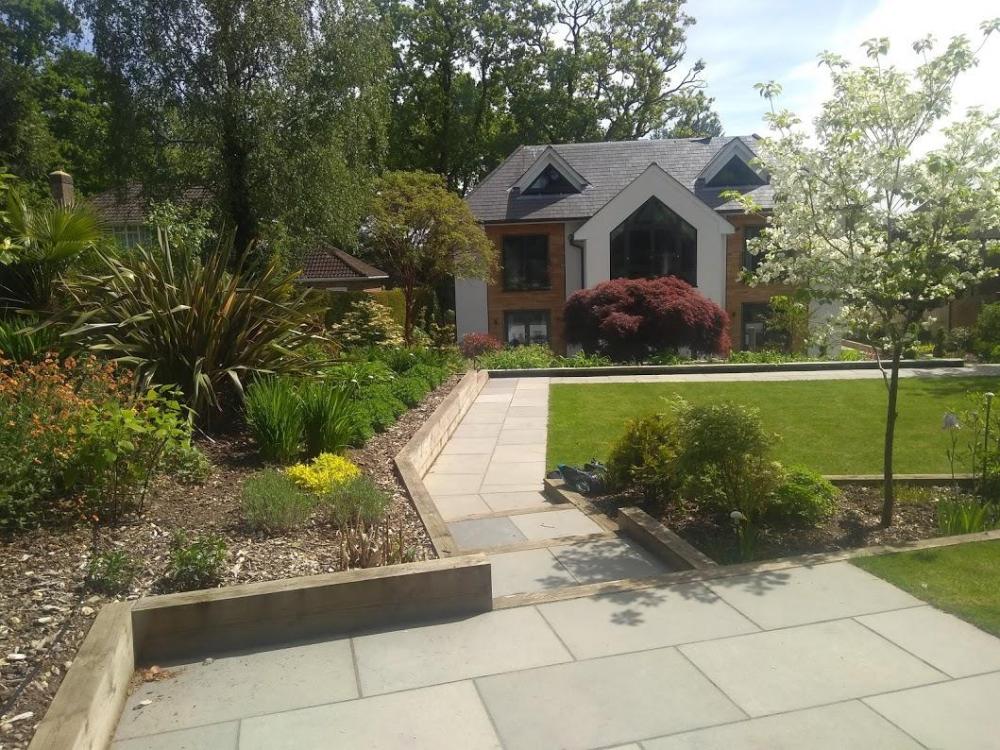
@PeterW absolutely correct about pricing and how it ramps up if you require all the services, especially in Surrey and Berkshire, where we built.. For our concept design, the total cost was £3,500 (including VAT which could not be claimed back as it was design service). I will admit to being horrified at this but SWMBO was adamant that it would add value to our overall scheme - she was right, as usual.... The proposed costs estimate for the next phases, including detailed design and then supervision of construction (hard landscaping) and planting would have been £ 6 to 10,000 , depending on the cost of the landscaping works - see my post below The photos I attached were last year. The garden is now looking great, especially with the lock down and all the work that SWMBO has been putting into the garden recently1 point
-
I laid a traditional 75 screed in our 158m2 20 ton I could hardly get out of bed The following morning Still thought I was 25 Originally I was going to let someone else do it and go with the flow screed Great for tilling You can tile on it the following week Like you mine would be stood so not a lot of gain At least a third more expensive than getting someone in To do a traditional screed We have had a couple of problems with flow screed when tiling UFH pipes on the surface or clips showing I also worked on one job recently and they had had difficulties with the flow burying through the insulation and finished with a 9 mtr ridge down the centre of the room I think the flow can be a bit hit and miss1 point
-
Yes, it does. Failure to make it vapour tight can lead to it getting waterlogged and very soggy over time. I used closed cell neoprene insulation around our intake and exhaust[1] ducts. PITA to fit and tape up, but I can be reasonably confident that it won't end up as a soggy mess. [1] The reason for doing the exhaust duct is only because the Genvex MVHR we have can exhaust air at about -5° C if it's ever run in heating mode.1 point
-
For best performance try to position the terminals so that there are no "dead corners" in any room. The idea is to try to get the air to take the longest path from the point of entry to the point of extract through any room. I made sure that all fresh air terminals were diagonally opposite the extract point from that room, usually the gap under the door. I did the same with the kitchen and downstairs WC extract terminals. In the utility room I fitted the extract terminal directly above where we have a clothes drying rack. In the bathrooms the extracts are over the top of the shower and bath respectively.1 point
-
The programmable humidity sensor and switch I used was this unit from Poland: https://www.ebay.co.uk/itm/DHC-100-Feuchtigkeitsregler-Hygrostat-Humidity-Control-Sensor-Fuhler-2-meter/182951476628?hash=item2a98c1fd94:g:hAgAAOSwFSxaKeA~ I put the remote sensor inside the extract plenum chamber and it seems to work well. Boost turns on within a few seconds of a shower starting, or even just from the steam from making a cup of tea, and the unit can be programmed with a variable turn off delay and RH hysteresis. I fitted the controller inside a surface mount box, in the services room, just above the MVHR:1 point
-
Yep... the reason is because humidity varies and you can’t have a “standard” humidity at which to boost. Most people have used motion systems or just a link to a light switch is enough to make it boost when it is needed. Its about simplicity ....!1 point
-
First off, filters can look dirty when they are still working OK, they tend to quickly get a thin layer of dark muck over them, long before they become clogged. Our filter alarm time is settable in the control unit for the MVHR, and I have it set for 6 months, which seems fine. Might be worth looking to see if the filter change alarm frequency can be changed on your unit, as 8 weeks seems to be a very short time to me. The extract side filter on our system rarely gets very dirty, but the finer intake one does. I can usually vacuum clean the intake filter once, then replace it at the second filter change of the year, which seems to work OK (it won't tolerate being vacuum cleaned more than once). The extract filter lasts longer, and can be lightly vacuum cleaned three or four times before needing replacement. Our filters look very similar to yours, I'd go so far as to say I think your intake filter uses exactly the same filter material. I found that the price of the filters from Genvex in the UK was very high, and also found that they weren't a common size, so I couldn't buy cheaper replacements. Luckily I found Jasun Envirocare, who can make batches of custom made filters to exactly the same specification as the OEM ones, but for a fraction of the price. I just gave them the exact dimensions of the filters, and the filtration standard, and they quickly made a batch of new filters, that look to me to be indistinguishable from the genuine Genvex ones, other than having a different label.1 point
-
We have an enthalpy heat exchanger, which was installed as part of the original installation 2/3 years ago - we have PAUL Novus MVHR. We installed the enthalpy HE because we have a relatively large house (340m2), there are only two of us normally living here. and it was recommended that a enthalpy HE would prevent the air getting too dry in this situation. It has worked well for us We do not have humidistats installed but control boost settings in bathrooms and downstairs cloakroom are initiated automatically when the lights are switched on in those rooms - the controller allows adjustment of the boost run time after the lights are turned off in those rooms (currently set at 15 minutes). If we require greater ventilation when cooking or drying clothes in the utility room, we simply use the boost setting on the remote controller, which is located outside the kitchen.utility room. As I respond to you, the house is sat at 23 C and 38% humidity on the low settings. Our system was set up with the BR values set as the 100% setting and the boost setting at 130% of BR values. We also have a reduced/low settings of 70% BR values, which is what the system usually operates at. We have remote controller for our MVHR in the hall and it is very easy to change all these values from this controller. The removal of the standard HE and installation of the new enthalpy HE should only be a 10 minute job, providing your MVHR unit is easily accessible. (our is in a plant room and we could change the HE it in 5 minutes...). There should be no need for any further adjustment of the system. We also have an F7 Filter on the inlet and G4 filter on the return. Again, we do not change any settings when using an F7 filter.1 point
-
In also used XPS as it was cheaper. To get the site level we started by wackering in the stone drainage layer, as we did the various layers we checked for level across the area using a laser. We then blinded the area using sharp sand, to get an even layer we used 25mm roof battens as screeding rails. Again this was wackered down, a final level check was carried out and any low spots filled and wackered. We then installed the insulation layers and the radon barrier. Our concreting guy checked levels around the edge of the raft and he commented that there was only one low point, about 5 mm low, As the concrete was poured he checked levels and racked the concrete about as required. He then put a final finish on the concrete using a magic screeder , this is a vibrating aluminium float around 3m wide. Once the concrete went nearly set he power floated the slab. Now the slab is set I checked levels and it’s within 5mm all over.1 point
-
The costs so far... Excavate the hole for the basement £14,872 Mot type1 and bedding sand. £1,109 Radon Barrier. £ 218 Insulation EPC300 and 100. £5,581 Reinforcing mesh and bar. £4,297 Labour to fix reinforcing and insulation. £6,548 Concrete for raft £2,763 Sundry items say. £. 500 Total spend on basement, excluding walls £35,888. I've worked along side everyone working on site, so I moved excavation material, fitted radon barrier, worked alongside steel fixers tying steel reinforcing, worked to place the concrete, tidied up etc etc. My time is free! Edit To put the above total length not context, I got three quotes for this work, the lowest was £50k and the heights the £150k. Having done my homework it was clear the lowest did not include everything and would have resulted in extras. The company who quoted the heights price, the M.D. drives a £100k Range Rover, I’m not inclined to support his lifestyle.1 point
-
The instructions for our MVHR stipulated that the ducts through the walls should have a fall on them, sloping down towards the outside. I assume that this was to ensure any water ingress or condensation drained outwards. The plastic grills I have fitted at the moment also have two small water drain holes at the bottom, presumable to let any water that gets in, flow out again. There was also mention of the need for the ducts connecting to outside to not have any dips in them; they had to slope outwards towards the external terminals and inwards and down to the MVHR condensate drain tray. I'm guessing that this is to avoid getting a pool of condensation anywhere in those ducts.1 point


.thumb.jpg.bac90f3bbf6868cf2118d010d936c99d.jpg)

