Leaderboard


Popular Content
Showing content with the highest reputation on 07/04/19 in all areas
-
Our architectural company just rung us today, the Council contacted them to apologise for the delay, they have approved planning and the materials and the full report will be with us at the end of the week (they have a backlog). Couple of conditions (which they think will relate to the ecology, bat boxes etc) but I so pleased the Council ignored the ridiculous comments from the consultancy stage from the Canal and River Trust who basically didn't like anything about the plans! Once we get the report we can then start to look at tendering and crack on with some major research, building reg plans etc and finding a builder for next year...... It's almost 12 months since we approached different companies, architects etc....7 points
-
I'm beginning to wish Id never heard the name SunAmp. The idea and the theory is so appealing. The reality is niggly, piggly lack of attention to detail. If ever there was a case for the application of boring, clumping Teutonic thoroughness and attention to detail, this is one. Scheiße ist das alles.3 points
-
No. I'm going to mount it horizontally and moan about it at every chance I get like the stubborn git that I am2 points
-
Prison then executed for certain . Farewell2 points
-
It’s ok to leave it outside Nearly always left outside onsite2 points
-
I am the opposite. I won''t let my stuff auto update for no good reason,. I will update something when it either stops working properly or I feel I need a new feature. If it ain't broke, don't fix it.2 points
-
Reading this and other Sunamp threads, one could be tempted to conclude that Fischer's customer support may be carp, but at least they have customer support ?2 points
-
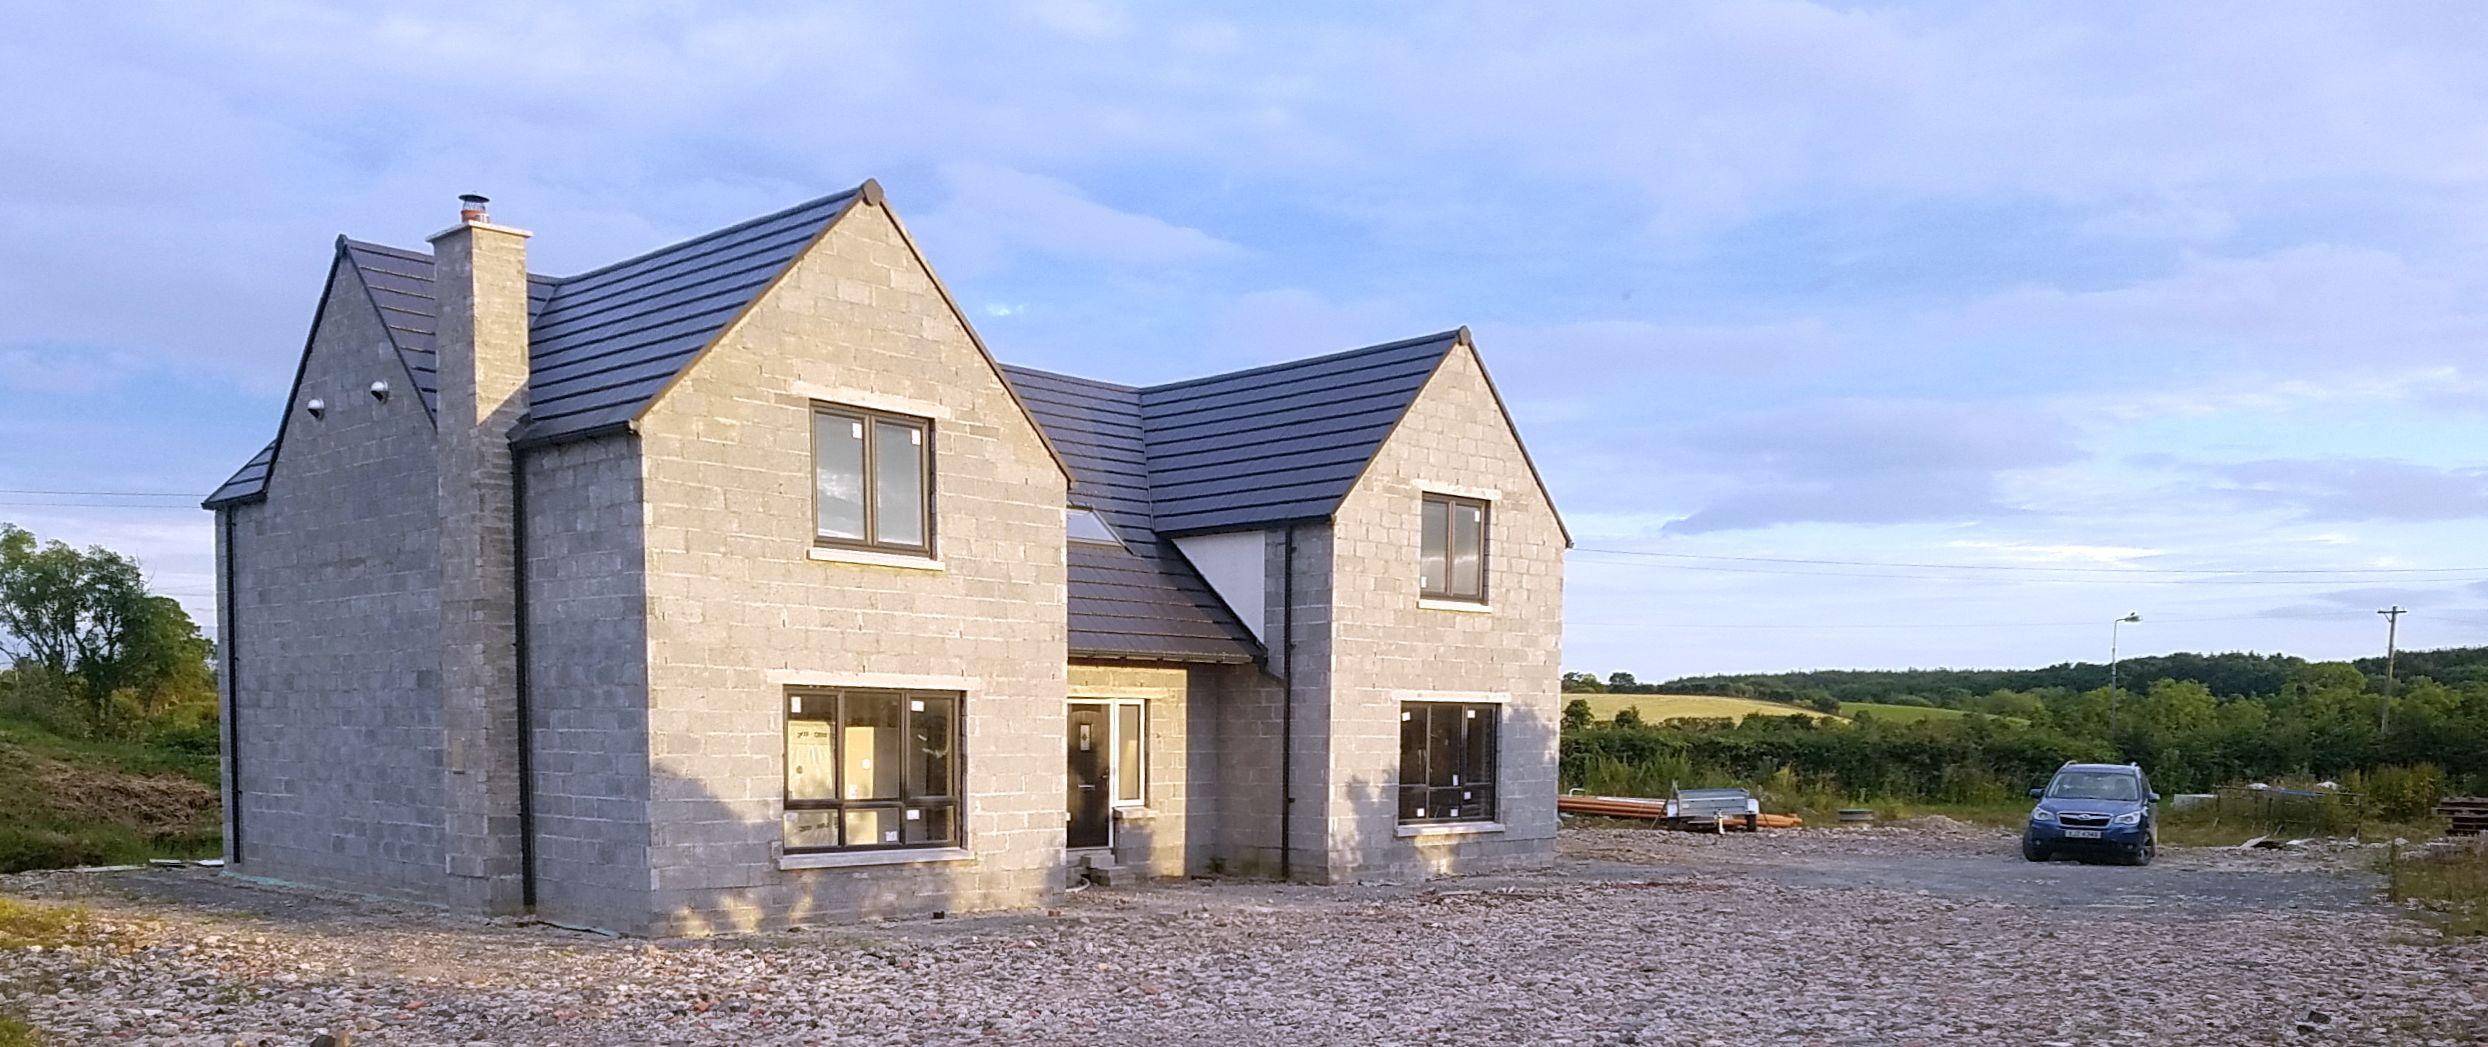
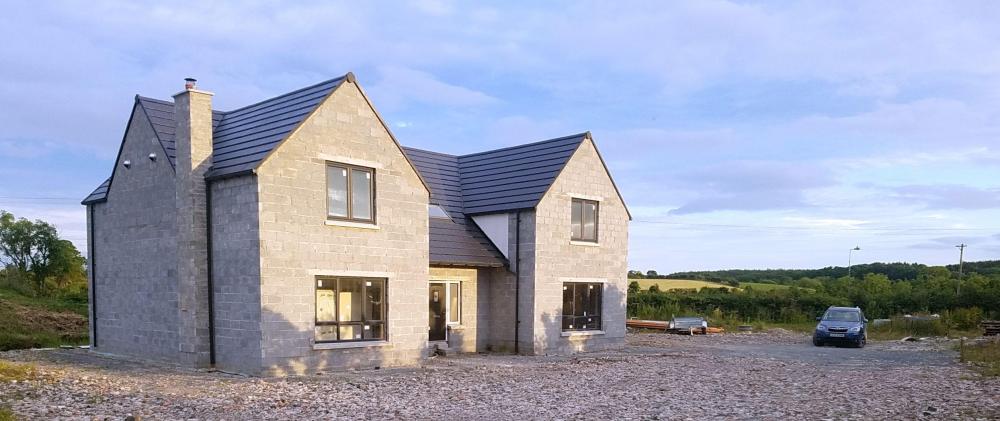
Since our last entry we've been concentrating of getting the standing seam roof covering on. It's one of those jobs where it would be nice to do someone else's roof before doing your own. We're using a roofing system from Blacho Trapez, broadly similar to the Tata colourcoat. It requires no crimping and minimal special tooling. It's around half the price of Colorcoat. The HPS200 coating we chose comes with a forty year guarantee. Our first impressions is that it's a quality product that's really well thought out. I'll raise a topic thread on the roof system with detail information from our install.. Here's a link to the Blacho documentation for more info: https://www.blachotrapez.eu/pl/26/instrukcje It was another Buildhub find. Back in April we came across an entry where one of the members @Patrick Who wanted to buy his roof abroad and was looking for someone to share transport cost. Enter Patrick, we exchanged emails and found we were going to need a roof on a very different time frame as Patrick is still in the site clearance phase and we were going to be ready to start in around six weeks. Lots of emails were exchanged and there was much head scratching over which components to order, In the end it turned out that three Buildhub members wanted roofs making sharing transport even more attractive. Patrick had been in contact with Blacho for some while, he's multi lingual himself and has a Polish wife. Without their help it would have been just too complex to sort our way through the parts catalogues even with the help of google translate. Having managed to get a list of parts we thought would do the roof, it occurred to us it would be good to get the guttering from the same source. It proved to be a step too far, we decided against it as the chances of getting all the required components correct the first time round was just too daunting, All is not lost though as it now looks as though there may well be an opportunity to get some steel guttering from them in future to replace the UPVC we have. Back to the roof and installing it. The three roofs were ordered and transport arranged to collect them from the factory on 03rd and deliver them to the UK on the 6th. The other Buildhub member ordering a roof is Greg, who is a builder with a yard with plant to unload and was happy to store the roofs ready for collection. The initial plan was to have all three roofs delivered to Greg's place and then we would collect, again Greg could help out as he has a lorry. The only slight problem was some of our roof sheets are 7.2M long and too long for the lorry. More negotiation with the transport company and they agreed to do a second drop off for a an additional 200Euros. All set for an 11:30 delivery on the 6th, we had arranged to have help to unload, no machinery just bodies. To our surprise and dismay we turned up on site at 7:40am on the 6th to find the delivery lorry already waiting...with just Pat and I to unload...by hand. Help was at hand in the form of the two guys who had come that day to do our roof insulation spray foam. They were brilliant, and between the four of us we had the roof sheets off their palettes and safely stacked on site. In addition to the sheeting there where also two smaller pallets for the other roof components, such as barge boards, eaves edges, screws etc. The lorry driver was getting a little fraught by this stage as it was all taking longer than it should have, not aided by lack of a shared language and the delivery documentation all being in Polish. Having unloaded and sent the driver on his way we started to look at the delivery documentation, this time under less time pressure. It turned out we had most of Greg's and some of Patrick's accessories. No big deal as we had already arranged to follow the lorry to Greg's yard to say hello and to borrow some roof tools that he had kindly offered to lend us. Meanwhile the delivery of the materials for our render arrived, 72 x 20kg sacks plus 20 x 25 kg tubs all to be shifted onto site..Just got that cleared when our MVHR system arrived, hotly followed by a soffit board delivery. Once done we set about loading the roof bits, only to find the length and volume of bit's overwhelmed the Jazz and we had to borrow a van great for volume but not so good for the 2M lengths and required me driving with my seat fully forward. Two and a half hours of agonizing cramp we arrived at Greg's, said our hellos and exchanged parts so we had the bits we needed to complete our roof. Finally got home around 10pm, oh the joys of a self build. A day to draw breath and it was time to start putting the roof on. The sheets themselves are 540mm wide and supplied to the customers required lengths up to a maximum of 8M, Being just 0.5mm thick steel they are not heavy but they are fragile, picking up a long sheet badly will result it it creasing, so care is required handling the sheets. The sheets had been packed at the factory front to front with polystyrene packing spacers which had stuck to the surface of the sheet requiring it to be cleaned prior to installation. After a bit of head scratching we decided to use a ladder to support the sheets. With the ladder tied to the scaffold we loaded each sheet, one person pulling the sheet from the top and another raising the bottom of the ladder we managed to slide the first sheet onto the front of the roof. All a bit “Heath Robinson” but it worked. Each sheet was then fixed in place and the process repeated. Soon we had a good part of the front roof in place. Cleaning loading and fitting was taking about an 90 minutes a sheet. Doing uninterrupted areas of roof with decent access proved straight forward and the front part of the main roof was done in a couple of days. Then we started on the rear of the house. This part of roof has two large roof lights and requires sheets to be joined as the roof length 10M exceeds the 8M max sheet length. The roof has two sections one slightly shorter at 7.2M, the largest of the sheets we had ordered. It quickly became apparent that there was no way we could get a 7.2M sheet onto the roof from the rear of the house. At this length the sheet is very fragile and requires multiple supports to stop it from folding. We quickly abandoned any hope of using them. Fortunately we had ordered some surplus material, so not the end of the world. We decided to start on the side of the roof with the roof lights to allow us to minimise sheets cuts. Partick had kindly volunteered to come over to get some first hand experience of the Blacho system. We started framing the roof lights. All did not go to plan and found that we had a 10-15mm alignment problem, nothing to do with Patrick just a bad datum line. No easy way to correct this so we removed the sheets and started again from a more accurate datum line. Second time round was a better result all round and we were able to continue across the main roof section. A lot of work but worth it..now we just need a good downpour to validate the flashing. . By good fortune a thunderstorm provided a test for the flashing, all was nice and dry round the roof lights. Sigh of relief all round, the roof is now on.1 point
-
We are now working our way through first fix for the self build. Our electrician has been busy drilling holes and threading many reels of cables around the house. The other area where we have made some progress is the ducting system. I’ve never ordered ducting before and it took me some time to order all of the parts and then have them to delivered to Skye. This came into two deliveries, both times some of the items were dented and buckled. Some were easy fixed but others required replacements to be sent. I wonder now if this is a common occurrence with others that have ordered ducting online? Once the last parts arrived, I was able to lay it all out to check back to the plan. My plumber will be fitting the ducting which should happen soon. Our brickie will also come back to construct the blockwork for the stove. My next job will be painting the house as the render has now had sufficient time to allow any impurities to be washed away. Although I have been busy with the house and work over the last few weeks, I was lucky enough to be given a wee boat. It was a group effort taking it down the croft and felt great to be on the loch after a few years. Might be the start of a new hobby.1 point
-
The wet room is getting there and the back of the house1 point
-
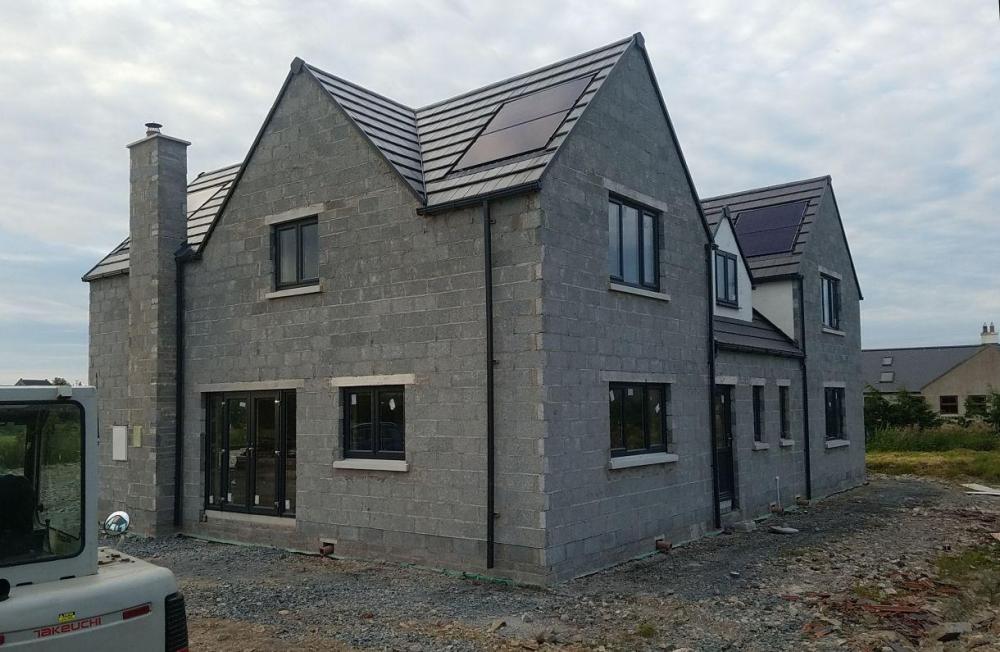
Guttering complete, scaffolding away, MVHR complete. photos!
 1 point
 -
This might help ref the fittings:1 point
-
The lady doth protest...TART! Just get the bender out and see it as a challenge. Wiped joint porn: Get some right angled adapters: Another vote for Hudson Reed: If I can do it anyone can! ? Remember, you're a highly skilled craftsman. Plumbers go home smelling of sh!t:1 point
-
Is @AnonymousBosch not a spcialist in online learning? It'll be sorted out before you can say Cinzano. ?1 point
-
Ok people, my situation mains pipe coming in from street travels 180m to old house, no check valve installed, I knock down old house and build a new one and reconnect pipe, who will be coming to inspect my new check valve, if I haven’t got one what will happen??? am I likely going to end up on D wing being someone’s bitch or should I not be worried. ??1 point
-
PIR is left exposed in cavity walls while they are built. I'd just buy a large cheap tarp off ebay. Stick some blocks on it. I'd be more worried about it being stolen .1 point
-
It was fairly straight forward, especially considering we have no experience. Windows are tricky, the Blacho video shows how to tackle most roofing elements. The guys doing the video are skilled and make it look easier than it is, no surprise really. Our roof is 150m2 and it's cost us just under 5K, less than half the quote I had for Tata Colorcoat. We did not get any quotes for installation, so I can't help you the DIY saving.1 point
-
PS The edges of green oak can be surprisingly sharp. Consider rounding or chamfering them before assembly. This may also extend life of the finish. If you want to retain the honey colour of new oak I recommend either... 1 coat Danish & 3 coats Osmo UV Protection oil. or Something like 1 thin coat of Sadolin Classic light oak and 2/3 of Sadolin Extra Clear. Must be thin coats!1 point
-
Is the site secure from theft?1 point
-
At the bottom build a brick plinth with a 15-20mm diameter stainless steel rod sticking out the top. Drill matching hole in bottom of post. Cover plinth with bit of lead sheet draped about 0.75" down the sloping face of the plinth bricks (anti frost measure) before placing oak post in position over the rod. At top drill drill an oversize hole/slot for a screw so the post can move vertically. The oak will/can shrink in length about 20mm. If hole not made oversize you can get a gap at the bottom of the post with the whole weight hanging on the top screw. Dont ask how I know. Use stainless steel screw with washers under the head as PeterW suggests. Plug screw head hole with oak peg to simulate a pegged joint.1 point
-
Onv we wary We had a month's rainfall in an hour only a few weeks ago Be wary of wind as much as rain unless you want to go on a PIR treasure hunt...1 point
-
Some people don't have a handle on their front door , just a keyhole and the key works the bolt (no latch).1 point
-
I don’t think two weeks this time of year will do it much harm1 point
-
Ideally should at least be covered to keep rain off. Under permanently damp conditions PIR can undergo hydrolysis (breakdown into constituent parts). It is why when used as under slab insulation it has a dpm below as well as above. http://blog.celotex.co.uk/technical/what-celotex-insulation-can-be-used-in-floor-applications/1 point
-
Because we got the erection of the timber frame the whole thing was zero rated so saved us forking out around 17k in vat, we still have our reclaim to do yet for the materials1 point
-
Toolstation sell an electric mortice release. https://www.toolstation.com/electric-mortice-release/p33871?store=K1&utm_source=googleshopping&utm_medium=feed&utm_campaign=googleshoppingfeed&gclid=CjwKCAjwx_boBRA9EiwA4kIELut56idmCnJLD72M6AbtPcpr00BG5ymu2aBck7_ahMVTV8xCKgWfbRoCIwUQAvD_BwE I can think of a few ways to use one of these to do what you want. Push button on outside to unlock door. Switch or numeric keypad inside to lock it and disable outside button.1 point
-
Yes you do - Timber frame though is usually supply and fit, so zero rated by the supplier1 point
-
Are you confusing Ecology building society with the work provided by your ecologist? Back to the OP. If your QS estimates add up to a sensible sqm cost (£1450 -£ 2000 sqm) I am sure they will be fine. I did my own costings for Ecology BS but they were quite detailed with quotes for timber frame and most work estimated on rates.1 point
-
Yep, it's so standard in the software industry now that most people seem to accept it as normal. The sad thing is that the bad habits of the software industry are spreading to more hardware-based industries rather than good practices going in the opposite direction.1 point
-
Frankly sunamp should be paying for @JSHarris input, us non informed humans would not have a clue. I am a bit of a Luddite, I like KISS and stuff that’s been about a bit and already had all the wrinkles ironed out , also the less technical the kit the less there is to go wrong.1 point
-
New task created at position 57 on the list. The garage door faces due south so this wood will dry out under the single story roof overhang.1 point
-
you could try sending the details to these guys: https://www.undercontrol.co.uk/heating-elements/cartridge-heaters/ they generally know their stuff...1 point
-
Is this a Sunamp PV? If so, then there was an issue on early models that led to two potential problems. The primary issue seemed to be that the over-run time on the pump was a bit too short, leading to heat soak in the small heater chamber. This could cause the resettable over-temperature cut-out to trip (I had this problem a fair bit). The second problem was that the over-temperature cut-out on some early models had a manufacturing defect, that lead to the terminals over-heating. Another possible issue could be that the heater was running at more than its rated power, due to a high local supply voltage. This was one concern that was raised whan we were having problems with the thermal trip operating on our old Sunamp PV. During sunny weather our local supply voltage runs right up to the maximum allowable of 253 VAC. At that voltage the 230 VAC rated heating element will be delivering around 3.08 kW, rather than 2.8 kW. I had several conversations with the Sunamp technical guru, who was very helpful at the time, and we worked through options to fix things, but unfortunately I believe that he's either left the company, or no longer communicates directly with customers (no idea why, as he was very helpful). I have the name and contact details for their current customer service chap, that I can pass on to you by PM if you wish. He's not quite as familiar with the technical side of their products, and may not know much about the Sunamp PV, but he does seem keen to communicate, which is a start. The control board switches the heating element with a relay, and IIRC that relay has 16 A contacts. Should be OK for a 3 kW heating element, but it's easy enough to whip the cover off and check the relay rating to be sure. Best check the supply voltage, though, as an element rated at 3 kW at 230 VAC would be well over that at the maximum allowable grid voltage.1 point
-
Accept the discount! It won't make a noticeable difference. They may have messed up but in reality the pressure losses in your internal house plumbing will be much, much higher than this short section of 25mm pipe.1 point
-
You're not getting antipathy - you're getting facts !! 1 - In normal circumstances, a first floor balcony requires planning permission as it is not permitted development. It is a raised platform and this is the planning guidance on it 2 - As a balcony or raised platform needs planning permission, it therefore requires building regulations. These are covered in Doc K and clearly state in K2 that guarding is required for any platform greater in height that 600mm. 3 - In terms of design, one or two of us have given some guidance, but tbh until you actually say how big it is, no-one can tell you how to potentially build it. We have made recommendations, but it feels like you want someone to design it for you. That's not going to happen as none of us would take the liability for it being wrong !! This is not a simple project. It has working at height, structural stability, and a host of other parts that make it bloody complex !!1 point
-
Find someone younger to do it..!!!1 point
-
I was at a planning committee meeting for a small housing development (about 28 houses) a few years ago. It was passed, against a stack of objections, including from the planning officer, and despite being way outside the development boundary. I walked out just before the meeting ended and was stood behind the door from the meeting room, chatting to a journalist from our local paper, when the developer's representative and his planning consultant left the meeting (they couldn't see us where we were stood). The planning consultant said to the developer "I thought we'd have to give him a bigger bung than that". The young journalist stared at me with wide open eyes and said something like "Did I just hear what I thought I heard?". I said yes, just watch for Councillor **** getting another new car soon. Sure enough, said Councillor (who doesn't work and lives on benefits) was driving around in a brand new Range Rover a couple of months later... No one seems interested in stopping stuff like this, and what seems to happen is that small groups of "like minded" people end up with more influence than they should have on planning committees.0 points