Leaderboard
Popular Content
Showing content with the highest reputation on 11/18/24 in all areas
-
It should cost nothing, just a try on - here is process we used. Ask to have the meter removed as you no longer want to pay the standing charge, wait 6 months and you will get a letter asking when the meter is being replaced, you say it isn't they write back and say in that case we will need to cut the supply off at the road - no charge.4 points
-
Just to update on this. I lost confidence in the one man band I used for the original drawings. I couldn't find a planning consultant that wasn't inundated with work although one did recommend another architectural drawing company and gave some impartial advice that was useful. I went with the recommended company having held calls with other businesses too. It was the best decision I could have made. This business explained the original drawings were over ambitious and no LPA would give their support. We started the process again, having withdrawn the 1st application. So, the fencing wasn't moved out and retained the openness. Instead of 2.5m out that the LPA suggested 1st time around, we went for 3m. This was a compromise on the 4m. We also went for an additional single bedroom and ensuite, rather that the original design with two additional bedrooms. The bedroom would now have a dormer window like @DevilDamo had suggested. No garage to the side but instead a 6.6m x 3.3m summer house relocated to the garden. This was always going to be used for a home gym, so no issue for me to go with this. The LPA came back and insisted the trees were surveyed by a specialist. The arboriculturist did his report and one lime tree was in the RPA zone, so that was then put in to be removed. With that obstacle out of the way, it received an approval. Thanks for all the advice, it was greatly appreciated.4 points
-
ON a recent install we intentionally turned up the EPS switch over time to several seconds. Computer kit inc PoE switch is already on a UPS anyway, and this way most manually operated appliances in the house (microwave, ovens, dishwasher, projector etc) will have a clear 10sec power loss and won't reset/resume when powered back on. this was the whole house can switch to EPS but actually come back up with a relatively low power demand The other cunning idea was redundant powering Loxone miniserver from both its own dedicated 24V PSU and the UPS backed PoE feed. This gives protection against PSU failure as well as power cuts, and cost order of magnitude less than the Loxone PS+B (given the UPS was being installed regardless)2 points
-
Recently I had a Nibe F2040 & SMO20 installed. Whilst the recent weather definitely doesn't require cooling I would like to know if the system I've got can be used for cooling in the future. After quite a lot of research I believe it can, however some parts of the manual talk about an accessory being required, however it doesn't state what that is?? If I were to enable cooling to be permitted in the Service menu, would I damage anything? Are all the pumps and valves etc. designed to run for cooling as well as heating? I am aware that I would need to be careful about the relative humidity / dew point to prevent condensation etc, Has anyone else enabled it on their Nibe units?1 point
-
Hmmmm. Understood and I agree with all but one point: regardless of the actions of others we will continue to consider others, even when their feelings are irrational or in our eyes unreasonable we’ll still do our bestest to be nice. That said balance is needed, and we politely tried to ease their concerns and went ahead planned in the ASHP anyway as we believed it to be the right thing to do. I guess I reacted to the unexpected and unwelcome extra cost in an emotional manner. I try not to do that too often. The plan is to go for v airtight with MVHR and sensible insulation levels for a modest house. Jeremy’s spreadsheet tells me at the lowest temperatures outside that we can reasonably plan on will require just over 2kW to maintain 21C inside. Whilst our design does not have significant amounts of glazing we really value the idea of ASHP cooling and we’re building in a fancoil in our bedroom to boost the effect of cooling the slab downstairs. Probably the weakest part of the plan is my penchant for washing up in very hot water. So rather than destroy the COP for DHW we’re having a Quooker tap thingy to top the bowl ready filled from the tank. The original motivation to go all electric wasn’t financial. I happen to believe that tariffs and subsidies should be set up to reward doing the right thing but life’s not always like that. The thing that really got my goat was the fact that new gas connections were subsidised. That really pissed me off.1 point
-
Don't worry. Cracked blocks occur in beam and block floors a lot. It doesn't matter because any crack is a very ragged interface and it is all still touching and jammed in place. if you try to take out a cracked block to replace it , then it is nigh impossible. So don't worry, and summarise the very good advice above....then do it. One last thing. This floor/ceiling already exists and is floored over I am assuming. Next time (for you or anyone) , there are proprietary hooks that can be hung down between the blocks.1 point
-
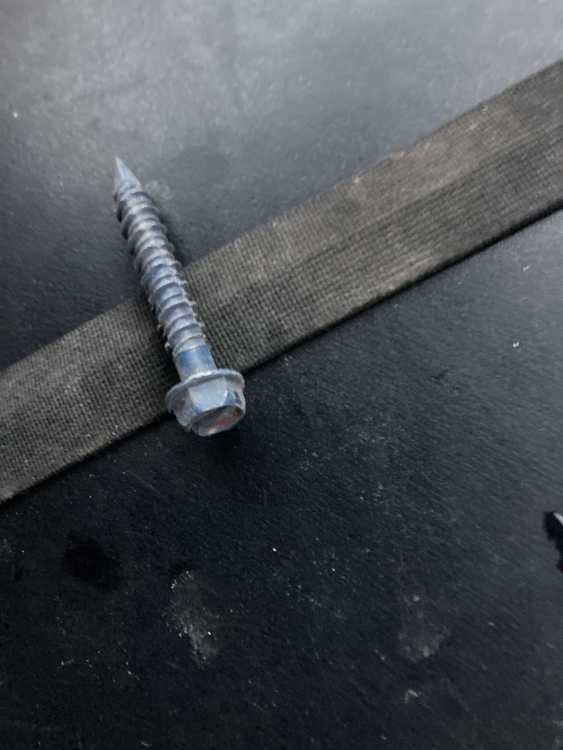
Concrete screws want a 6mm pilot hole, but with concrete blocks you can pull them loose by over-tightening a short screw. 50mm or 60mm would be best. If you don't just save shitloads of wasted time and effort and gas nail them with a Spit gun.........1 point
-
This is like pulling teeth. @lord mud of the flyes Who owns the land?1 point
-
Shame it wasn't part of your garden. If you pay yourself, you will need to account for income tax and possibly NI so just work out which is more tax efficient.1 point
-
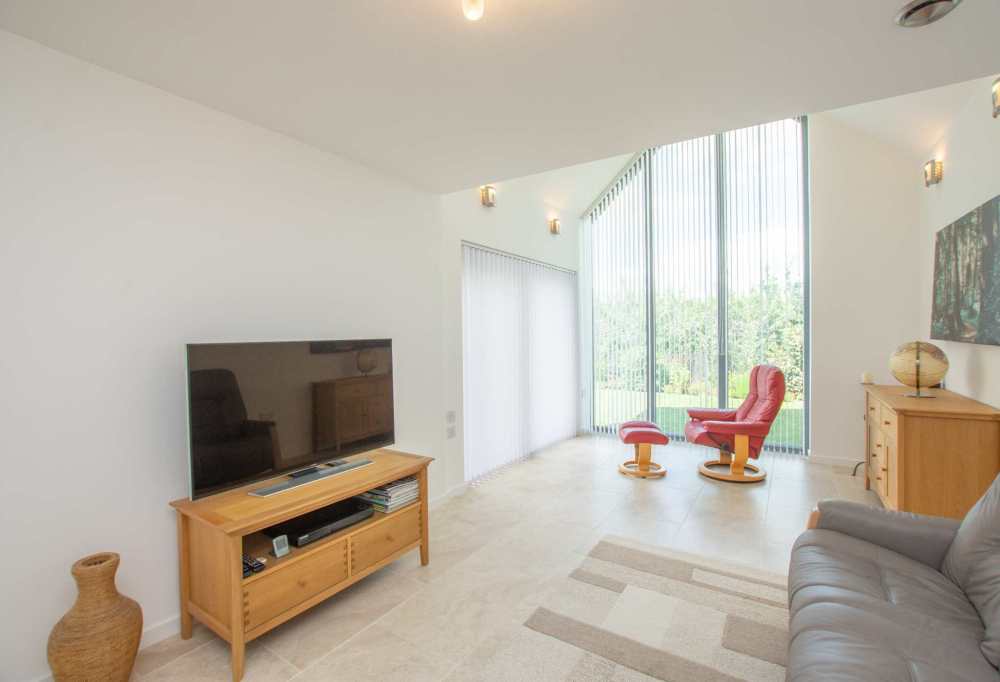
We are at about 5m split into 2x2.5m tall. Even then there was special lifting gear involved. Couple issues with the design Bigger means thicker, which in turn means heavy. Our triple glazed 2.5m tall are already 3 x 5.8mm thick panes and at design wind loads have a nearly 16mm deflection. Once over 2m tall you really don't notice the join as its above your eye line. Doing it again I would just stop the glazing at the 2.5m level and have well insulated above that.1 point
-
I think you only get one bite of the cherry I.e can only submit once and that’s it . Actually submitted mine online today - sure I saw wording to that effect .1 point
-
I recall watching a TV programme in the last couple of years where a couple wanted a two-storey window by a stairwell, rather like the one you describe. My memory is leading me towards "Your Home Made Perfect" and I think it was the beardy slightly weird guy that had the plan. I have tried looking for it but it must have been series 1 or 2 and they are no longer on iPlayer. My recollection is that Building Control kiboshed the plan and they ended up having to split the window in two. I apologise that I can't be more definitive, but maybe it might jog someone else's memory Regards Tet1 point
-
1 point
-
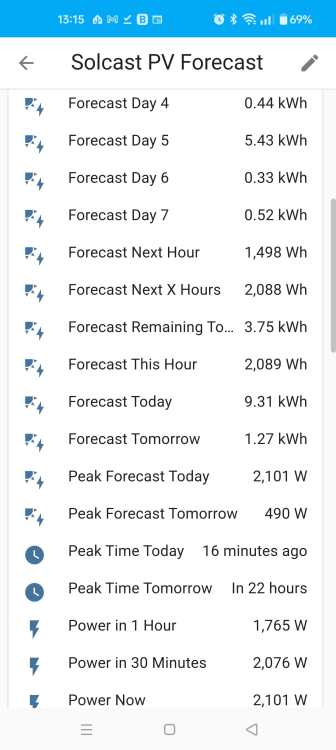
Home assistant will track sun angles if you want, it also has integration with solar forecasting such as Solcast. So you get all this sort of information So you don't need to know really what is actually going down the wires, with CT clamps etc. Mine is currently putting 5kW into the floor and 3kW into DHW, that stops at predetermine battery SoC or 2.5 hrs before sun set which ever comes first. All software driven via home assistant. The big solid state relay does what home assistant says for the immersion, while a small Shelly relay sets the heat pump at a higher flow temp, so it will run on demand.1 point
-
1 point
-
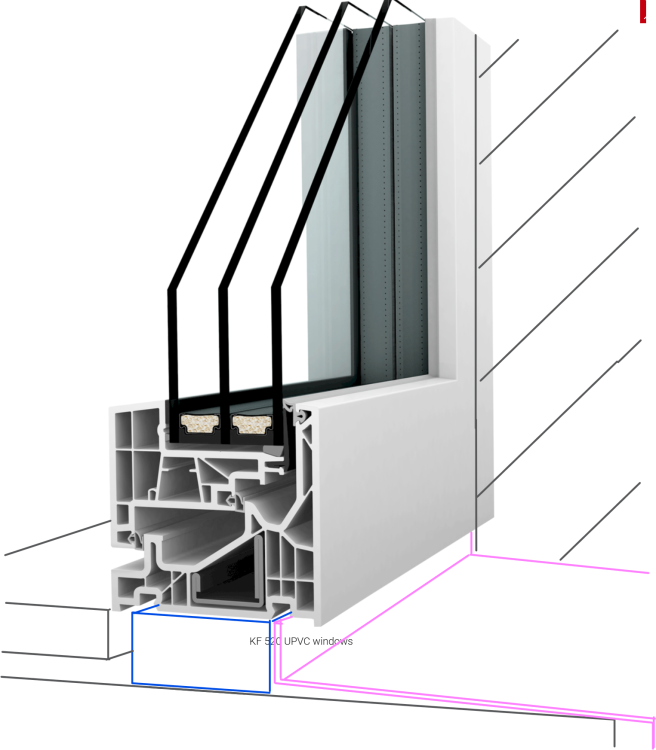
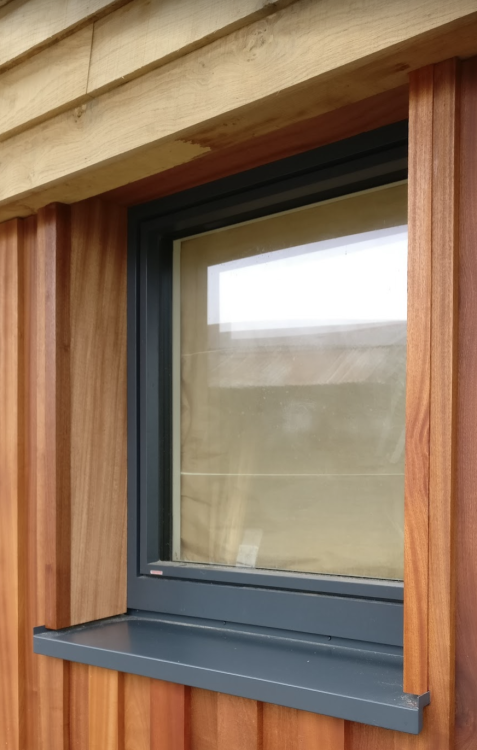
I've got the KF410 Studio from 2017 in my Utility and Boot room, which looks to be halfway between the current KF520 and KF410 versions. For an opening sash, there's not enough frame on the inboard side to cover any more than around 5mm of the frame, before you'd be stopping the inward opening sash from being able to open. So, internally you'll be seeing nearly all the frame. Externally, you can cover the sides and top of the alu-clad frame with your cladding/render board, but not the bottom. On the sketch below the blue block at the bottom comes on the window and I've shown the internal cill level with the bottom of the frame, and the pink is a folded external cill. The hatched area is supposed to show cladding on the side of the rebate covering some of the frame. Edited to add: I have alu-clad timber across the rest of the house and while I'm very happy with them, if/when I do it again I'll think seriously about saving the money and going UPVC through out. The KF410 is a really solid, stable, well built window.1 point
-
IUnless your in a conservation area or next a listed building NO1 point
-
1 point
-
Aaah! It is admirable to go for the sheep's wool and the lime. However, if you were to use modern materials you wouldn't have all that weight and nobody would be questioning the structure. If you have to rebuild or severely reinforce the roof then that counteracts the sustainability intent of the design. Sorry to put a downer on the green ideas, but I think my suggestion could be argued ( shown in numbers even) as more sustainable, if that helps. Pragmatic sustainability. Try multiple methods, test the design, decide if it is appropriate.1 point
-
I feel there must be too much risk of distortion with 5m 'unrestrained' (except by the glass, and that does not really want to be a stressed member, I feel). I wondered about making it as 2 units, one with a 'transom' at 2.5m and the side members sailing past that transom by say 300mm. The 2nd section has only bottom member and the 2 side members. Cut stopped pegged scarf joints on each (very easy to say...). With very accurate joinery it would look lovely, and the transom can be a 'spindly' as you like, as long as it can accommodate 2 rebates, so perhaps 60 as against the 90 mentioned by @fatgus1 point
-
Oil filled rads pretty effective just make sure the extension leads or temp power boards are up to the job1 point
-
Don't get too hung up dT. Use the settings you have now and fine tune. Start with a reference room say the lounge, don't touch these flow rates if you are happy with room temp. Then balance the flow rates to get the other rooms at your preferred temp. Increase flow rate, to increase room temp, decrease to get lower room temp. Leave you reference room flow the same all the time. Leave a good 24 hrs between adjustments.1 point
-
I have seen examples with a 25mm gap and no problems. I have also seen horrendous condensation and mould on breathable membranes with a 25mm gap (and admittedly some other poor practice too). The Gov't Best Practice Guidance for rooms-in-roof says 50 (https://assets.publishing.service.gov.uk/media/61d727d18fa8f50594b59305/retrofit-room-in-roof-insulation-best-practice.pdf) and that seems to me to be a good a**e-covering 'belt and braces' (to mix my metaphors).1 point
-
Electric panel heater. Gas heater no ventilation sounds like carbon monoxide poisoning, if your not careful. Or just work harder.1 point
-
You balance via emitter area principally and fine tune with flow adjustment, which is part of commissioning. You can add Salus self adjusting actuators which peg dT across a loop so it's constant if you want. You can have a thermostat in every room. Many options. Make as simple or complicated as you like. You do what you need and feel you want to do.1 point
-
We have it. Am I bothered - no Why, because it's installed in an appropriate manner, is not sprayed on to hold a failed roof together and not applied to non-breathable membranes.1 point
-
Our boarders used a nail gun. Don't know if it's the best, but fast and nothing has moved they were something like 20mm nails with a plastic sheath, fired from a massive gas gun.1 point
-
The point of metal cladding is that it spans between supports. So you could have battens at quite a distance, according to the product. The cladding should not leak but might get condensation under it, hence this void /ventilation idea is sound. I'm not against standing seam as such, and the risk of leaks through screw fixings is removed. Why did I never use it? horrible to repair if ever a branch damages a panel etc. The flat bit is very flimsy and does not tolerate cutting for services. Why choose a no-screws product and then screw through it? Cost I gave every client the choice. In most cases they had been told it was best and not told anything else...including the cost. sarking in solid board, even osb then a breather membrane so it never gets wet battens up the slope, battens across the slope cladding.1 point
-
I've just fairly recently installed a ducted A2A system (mostly retro fit of existing 70's gas warm air). I can confirm that it's virtually silent in the bedrooms, haven't noticed a major difference in comfort from the radiator/ wet systems that we've had in other houses but with the benefit of the option of cooling. The supply air is still "warm" but not as hot as that coming from the gas warm air system it replaced. If anything this is an advantage - you get a much longer, gentler heat and it modulates the fans up and down as it nears the target temperature. Our system is a 2 zone VRF - which is overkill, but was done for noise reasons and the outside unit is very quiet most of the time - barely audible from 5 metres, despite having a Sound Power rating of 70db. Biggest negative is the amount of space the fan units and plenum's take up; also the lack of grant and general wild west nature of AC installers. There are plenty around but trying to find a good one...1 point
-
1 point
-
We have internorm KF410 windows with one large window in two sections, one fixed and one opening. This coupling is actually very good. It is invisible from the front of the window and our fitters actually fitted it correctly (although I am a little concerned it sticks out at the top) unlike our very expensive internorm entrance door to sidelights junction that is a very different design and fitted very badly. You big windows will be supplied without the glazing units installed. For the installation of the glazing units into the frame Internom supply a sealant type stuff, fix-o-round to be applied around the perimeter to supposedly improve stability and sound reduction/airtightness. Our fitters didn't use it (they used packers) hence we have a box of fix-o-round on site. Fitters claim the fix-o-round isnt necessary but I suspect they just couldn't be arsed.1 point
-
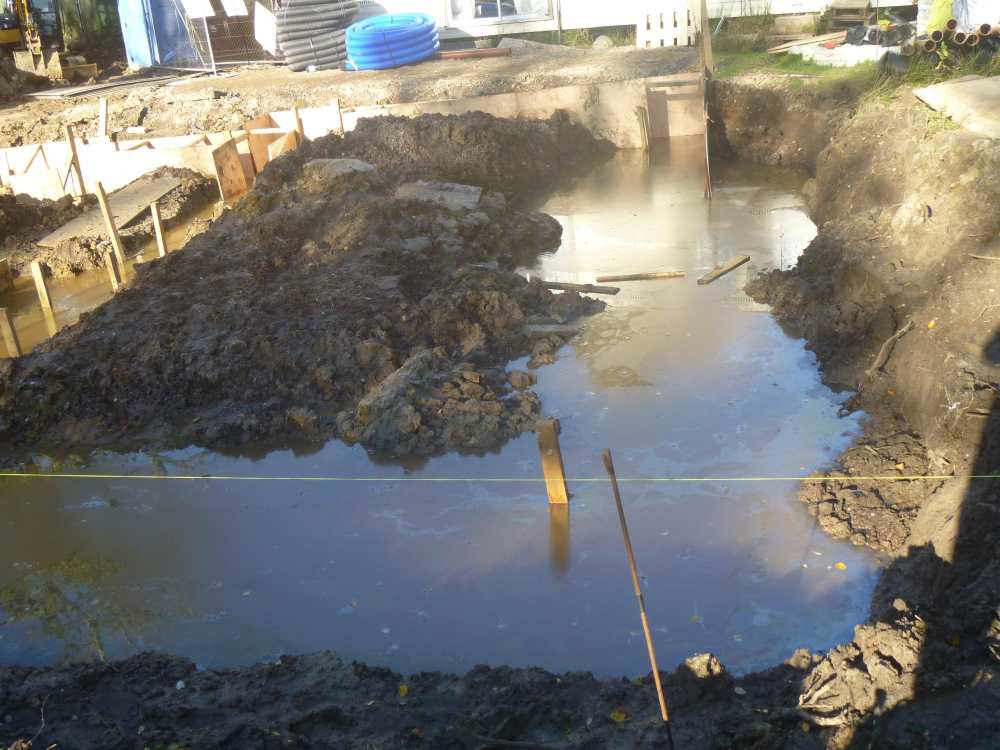
the water in to the sump is constant! there's an aquifer that runs under the sandstone 2m down and the flow is constant. so without power we will soon flood regardless of the weather. 😞 it is more of a trickle in the summer months so it does ebb and flow with the seasons.1 point
-
While I’m sure I might be inclined to head down this rabbit hole as well when the time comes, it occurs to me that a standard consumer UPS for anything computery plus a couple of standard battery-backed emergency lights (like they have in offices and blocks of flats) would be v cheap and simple and cope with the majority of the power cut risk. Do you really need to plan for the 2nd order risk of power cut plus rain storm and therefore need battery backup of the sump pumps?1 point
-
I do have solar pv (10.5kWp array) and batteries (LuxPower with 6.4kWh storage) but the LuxPower has a max 13A on the EPS so we only have a few emergency items running from it in case of a power cut. I didn't want to put the whole house lights through it hence looking for 24V batteries so Loxone can run and can power the low voltage lighting which is enough to allow us to see in all rooms of the house if needed. I also found that the LuxPower is not quick enough to react to a power cut (despite what their manual says) and my computer equipment did not remain on in the last power trip we had. and so I have bought a dedicated UPS for that simply to keep the equipment going until the LuxPower kicks in. yet to test it in anger yet though but it should mean that our wifi and router remain active allowing me to wfh in a power cut. my advice is to make sure you know how much power the battery system for your whole house backup can run.1 point
-
1 point
-
OK, so my plumber came today and for the first time I reproduced it with him in the loft next to the cylinder. I had him out to replace the NRV, T&P and EV. Figured I'd make sure everything had been done but after hearing the noise he told me it is definitely coming from inside the cylinder. On another group a plumber suggested that the breakup of the baffle can cause this noise as it catches / releases. Anyway, I've contacted Baxi to get a replacement.1 point
-
Many thanks for the add. We are just starting out on the self build process. Having read some of the threads it’s going to be an interesting journey. We purchased a 500 year old cottage last year in a little farming hamlet. It came with a 0.75 acre of land at the edge of the hamlet with its own private access and has a double garage on it already. Not in an AONB or conservation area. The land has a lane which we own with some services already laid but more needs to be done. The site is triangular in shape and whatever we build will not be visible from any of the other properties or roads. There is also a private wood with no public access along one side then another side is a farmers field which has access elsewhere and the final side has another lane that we own behind a tall stone wall. We have a planning advisor coming out next week and we will see where that leaves us. philb1 point
-
Yes, no, kind of. Combustion boilers are usually sized to heat the DHW so they can run a bath or a couple of showers. The space heating power requirements are generally a lot lower. Gas boilers have good modulation i.e. 25 kW down to 3 kW. A correctly sized ASHP of say 6 kW may only modulate down to just below 4 kW. There can be a bit of trickery with the flow temperatures, but to keep the CoP high, they are quite limited in power delivery. This is why they need to be sized correctly. Just fitting an oversized unit would not work, it would sense the return temperature, see it is close to the flow temperature, then throw an error and shut down.1 point
-
With windows you want quality, with your location go and look at norrsken, they have a new showroom just opening in Bournemouth.1 point
-
Thanks for the replies I’ll try and find your blog Thorfun. it sure does Jilly and tbh mine was pretty messy before I started! 😂 I’ll take your advice and just go with the cheapest (of the shortlist). Blimey that was helpful, turns out I just need someone other than my husband to tell me to get a grip! I may be posting a lot. Windows next!1 point
-
1 point
-
Moved the house 5 metres back. We have a massive garden now, way too big, but hardly any turning circle at the front onto a main road. I was so focused on the interesting stuff that I overlooked the basics 🙄 I would have said no to full height windows. Terrible to get the thresholds thermally broken, leak lots of heat in winter, too much solar gain in summer, and don't increase light much. But architects love big windows. Be warned! No bay window type rooms poking out. Nightmare. I would have thought about room sizes and solar panels earlier. I thought I did but we should have made the rear return wider to accommodate more south facing panels. If doing it again I would do things simpler.1 point
-
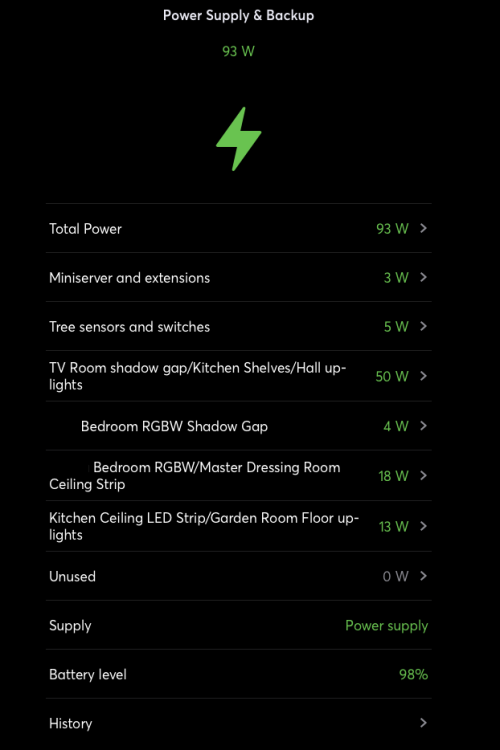
batteries installed and 42Ah backup available. I like the reporting capabilities of the Power Supply and Backup on top of the whole 7 x PSUs in one unit. nice bit of kit. expensive, but nice! I'll test the battery backup during the day when the family aren't using their lights. 😉 Current usage is 93W so even if we maintained that in a power cut that would give us over 10hrs of 24V backup lighting. more than enough I think. what the reporting also shows is that we have loads of headroom on the PSUs. the ones with 10A fuses in them can take 240W so I could actually amalgamate some of the lights if I need more than the one spare output I have left.1 point
-
Apologies if this has been answered elsewhere, but my searches are obviously not good enough ... I have a new water supply site survey arranged (for a single dwelling of 3 bedrooms), and some of the documents I've read on the SW Water website seem to indicate that a plumber is needed to provide the pipework from the property side, but this seems to be something that any competent DIYer can achieve. My intention is only to connect to a stand pipe to start with (along with the appropriate non-return valve or check/double-check valve), and I figure I can dig a 750mm deep trench and drip a few metres of 25mm blue pipe for SWW to connect to their equipment. My question therefore is - am I allowed to dig that trench and provide the short length of blue pipe? Follow on question #1 - can someone point me at a specification for the width, depth of the trench and what infill should be used below and around the pipe (pea shingle?) Follow on question #2 - can someone point me at the spec for the valve/s need on my side before I get to the standpipe? Thanks1 point
-
ahhh....Newton's 3rd law. i got an E in my physics A-level. but my body has lots of soft and squidgy bits that can absorb forces so definitely not as rigid as a solid floor above!0 points
-
0 points


