Leaderboard
Popular Content
Showing content with the highest reputation on 11/06/24 in all areas
-
Thank you all for your input. There’s lots of food for thought. I’ll look into the timber frames. There are some misunderstandings about proper straw bale construction. A properly built house should last 100-200 years. I did see a person using a poly tunnel to store his straw while he built. Ensuring it was kept dry. Yes the straw is the insulation and there is a frame around it. The houses are eco friendly and can be off grid sustainable. Straw is a byproduct of farming and currently has no reuse except for insulation (so far that I know), so it’s being recycled and not taking away from the food chain. The straw bale house will be sealed in lime plaster, or similar material to create an anaerobic environment. I intend to clad it in rock keeping with the home blending into the environment. And being more traditional in appearance. A lot of the building materials are sourced from Islay, keeping the cost of importing supplies from the mainland down. I’m also sourcing an experienced construction firm to help with the build.2 points
-
If you go down and underground then back up, then there is no way to drain that "sump" if you need to.2 points
-
As long as they are in the appropriate insulated pipe and conduit you can stick them where you want. if you price up the correct pipe you might find it far cheaper to run it internally.2 points
-
Hiya. Hope this helps. Bit of theory first and a few general comments. Excuse the spelling and grammer please! A gabion wall is fundamentally the same as what we would call a gravity retaining wall. Its weight does most of the work to stop it moving. The difference is that gabion walls move about a lot more and often they are designed for a 20 -25 year life span rather than a 50 year life span which houses are designed for to meet mortgage requirements.. Now for all. If you truck about you'll see many more developments by big house builders where they have big high gaboin walls to retain gardens, the houses themselves are set back. Can you smell a rat? The thing to take away from this is that gabions have a time and a place and much is to do with how much they move and their seviceable life.. before serious maintenance. Ok how do we design a gabion wall.. 1/ We need to know what it is holding back. @Great_scot_selfbuild it's your driveway. Now if its gravel then I would say.. how much do you want to spend.. do you mind if the gabions moves a bit and you need to level out the drive every 5 years? If you say I'm ok with that then I know I don't need to worry to much about movement (serviceability). I also need to know how long you expect it to last! The building regs can be a moot point here in terms of movement.. the regs aim to make sure it will still be safe! To design a gabion wall we often apply the same principles as we would use for a concrete or brick gravity retaining wall. Rule 1.. we need to make sure it does not tip over. Often walls have drainage behind but behind the drainage layer we also have a bit of sideways soil pressure. The drainage can avoid hydrostastic water pressure and having a "funny" effect on the soil. Rule 2.. there needs to be enough of a key and friction load at the bottom of the gabions to stop them just sliding sideways. For all types of gravity retaining wall design we allow for a surchage load ( a load applied to the top of the ground) of roughly 1000kg per square meter on the drive way in this case.. thems the rules folks! Drianage or not this surchage load causes a sideways thrust on the wall. Rule 3 / This is a biggy.. we need to watch put for a global failure (often called a slip circle) where the whole wall, driveway and soil above up the slope just takes off and moves down the slope. This can be a catastorphic failure and very dangerous. Some times to mitigate we need to drain the soil much further up the slope.. even then we are taking a risk. If you have challenging topography then I would need to know what is happening further up the hill. You may need to extend the scope of any site investigation. Now most SE's should have a grasp of these basics. But its your vegitation, could be trees an local topography that needs nuancing. I see you are using a Fittleworth stone gabion fill and probably you SE will just design these gabions as having no intelocking effect.. so the design will be standard. Theoretically the design can be realtively easy.. but for economic design.. that requires you to to identify what you expect and balance that with how much you want to spend on ground investigation. To sum up.. I've given you a few tips. Have a chat with some SE's and say.. I've read this and that, here is what I would like to do and what do you suggest would be a good balance between soil investigation and practical common sense design? Once you can get a handle on what your expectations are in terms of long term perfomance of the gaboin wall then most SE's will be able to handle that kind of design. What they will do is make sure is does not fail dangerously and if it moves about a bit, then you now know that .. and everyone is happy.2 points
-
25mm? You'll be heating worms. @Jeremy Harris on here had 300mm of eps under his floor slab. He calculated I think it was 8% of his total heat loss was through his floor with that much insulation. That's always stuck with me. If you're not fussed about cost it'll still feel nice underfoot, whatever.1 point
-
Ill be doing it myself. You can hire the slot grinding machine, so straight forward enough, if tedious. Ive looked at an overlay, but given id be doing the whole ground floor, it causes to many issues with doors, thresholds and the stairs, so ive discounted it. My house is 1800's solid wall with no DPC, so im not overly concerned about "warming" the wall as it will help push the moisture outwards, but im gussing yours is rather more conventional? Im not convinced it will need to run at an overly high temp, but clearly it will be a slow to respond heating system. The one i did in my last house was semi insulated with foamed glass, but pipes right at the bottom of the slab. It worked really well and ran at 35 degrees.1 point
-
If the edges match the tiler will probably blame the walls You can always find Something with tiles Some tilers are using leveling systems on wall tiles Which can give a nice edge but cause hollows I’m not keen on levelers on walls1 point
-
Icf is not considered non standard construction any more, mortgage is not a problem. timberframe rotting at the sole plate is down to poor detail and design, it was a thing in 1980, but not now. lots come on here and ask for some details at the sole plate, then choose to ignore it because of cost. You can’t help some people. ask here for correct design and then price up the methods. don’t try to reinvent the wheel, it’s all been thought of before. having worked on half a dozen new builds in the last few years I would not hesitate to use a high quality timberframe on an insulated raft foundation, but i would put a block skin around it, even if adding cladding.1 point
-
1 point
-
I've been continuously building for just long enough now for us ( well, HerInDoors) to want to change the gabions we installed 9 years ago. Annoying doesn't come close. The job of removing established gabion baskets was so much easier than I thought - shove two crowbars through the basket, digga, straps , snap shackles, normal shackles, a bit of Oomph - jobs a goodun. 4 gabions; several GCNs, a good few toads, a Jeremiah (Bullfrog), loads of snails eggs, lots (3?) of frogs and a pissed off normal newt. I should have remembered to classify our gabions as a hibernacula (newt refuge) for our Ecological Mitigation Strategy. When almost constantly wet, gabions are an excellent refuge for wildlife. Loads of mosses in the gabions that remain.1 point
-
https://www.screwfix.com/p/fischer-fxa-throughbolts-m10-x-126mm-20-pack/48986 Used to use them on the large log cabin saunas. The smaller ones we used the plastic ones. https://www.screwfix.com/p/easyfix-nylon-hammer-fixings-8mm-x-120mm-10-pack/191571 point
-
that makes sense and I guess just tape for airtightness etc but it might be a case as mentioned, it might end up being further away from the house and not next to it . Which is why I was enquiring 👍🏼1 point
-
As @nod says. He should only charge you for materials and labour less VAT, so you won't be adding this to your VAT reclaim. If he is happy for you to settle his merchant account (less the VAT) instead of paying him then that is for him to balance in his accounts, just make sure you get a receipt for payment received just in case down the road things change.1 point
-
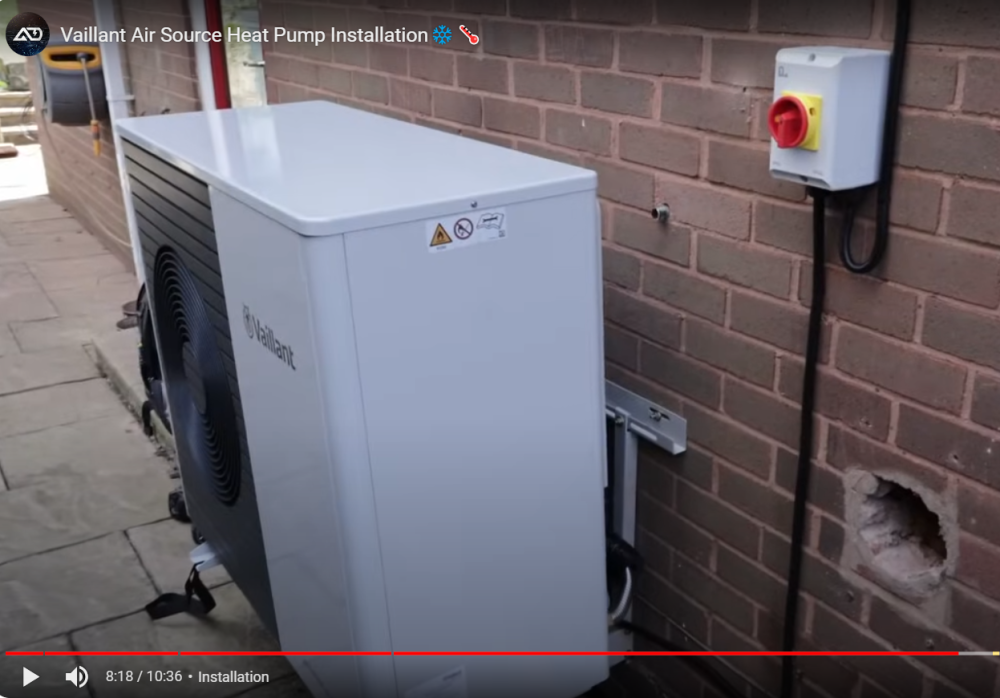
Good point, ProDave, but is this something that ever needs to be done? I suppose you could have the underground pipes passing through one of those cheap plastic inspection chambers if you're concerned you may need to bleed, in future. To answer Joe's question (although it was directed at Nic - sorry, Nic): I'd planned to put my ASHP against the wall on the south side of my house, which would mean it would be a prominent feature in my small patio + back garden area, but these things are so ugly (& there's the noise & cold draught to consider as well), I'm thinking it may be well worth be worth the additional installation, running & maintenance costs to put it out of the way, against the boundary hedge to the east. That would put it about 4m away from the house. This would mean the pipes would have to go underground, & if they're underground they may as well come up into the house through the block & beam floor. Please have a go at dissuading me. While I'm on the subject, I'll just ask, do I have to have one of these electric isolator switches, as shown in the picture, below? Does it have to be outside, near the unit or can it be in the house? The electrician who made this video explains it must be at least 200mm away, but he didn't mention a max. distance.1 point
-
Personally I don't like steps with a very long going, it is not natural and I end up making a very long step, or 2 little steps to ascend them. We are all used to internal stairs and their rise and going, so I like to stick to similar. Or at the most stretch them out to the longer going of commercial stairs, i.e. what we are all used to in a shopping centre.1 point
-
Pay for the materials net of vat and let him settle the vat Then claim it back later1 point
-
Can I ask why you want to run it up through the slab? I ran mine through the wall, used ordinary un insulated pipes, insulated with thick insulation and wrapped in tape self amalgamating , much cheaper (and shorter straight through the wall).1 point
-
If merchants then yeah, I do, all my build stuff is on CC, section 75 if nothing else. If it's brand new, make sure you've used it in a chip/pin somewhere first as it may decline over the phone.1 point
-
After a lot of effort I’ve managed to source replacement coils in the UK. A company called MJ Abbott Ltd in Wiltshire has them in stock. I’ve ordered two to keep a spare. I also ordered a replacement diffuser as the old one could do with changing. Just thought I’d update this thread in case anyone else ever comes across this issue and needs to source replacements. Thanks for the helpful comments and links provided.1 point
-
I bought Lindab products for decades because of the quality. So I'm a good referee but also biased. Cladding, gutters, modular buildings. I was shown round their ducting factory. Stunningly hitech. I didn't know catnic made cladding so no comment. See my previous comments on why I never specified standing seam.1 point
-
I did some very rough analysis I asked for large samples of 3-4 manufacturers, 1 wouldn’t send it so they got dumped the others I chucked on my driveway way and proceeded to walk on them every time I came home and parked the car. I did this for 2 months and checked the damage, I discounted one I didn’t like and got quotes from the other 2. I didn’t pick the cheapest but went with what I thought was a good product with good people to deal with.1 point
-
Switching 240 V seems like something out of the dark ages but it was the norm for boilers. Just looking elsewhere, it seems a single channel Hive uses voltage free switching but a dual channel Hive (heating and hot water) switches 240 V.1 point
-
@JohnMo's advice upthread was very sound as many HPs require voltage-free contacts (and I have had to add a relay to achieve this when converting from an oil boiler). So @Michael_S is lucky to have one which does not.1 point
-
I looked on e bay and Facebook, found a lad on Facebook who has a yard full of them, located near Swindon if anybody wants one. he also has miles of underground ducting.1 point
-
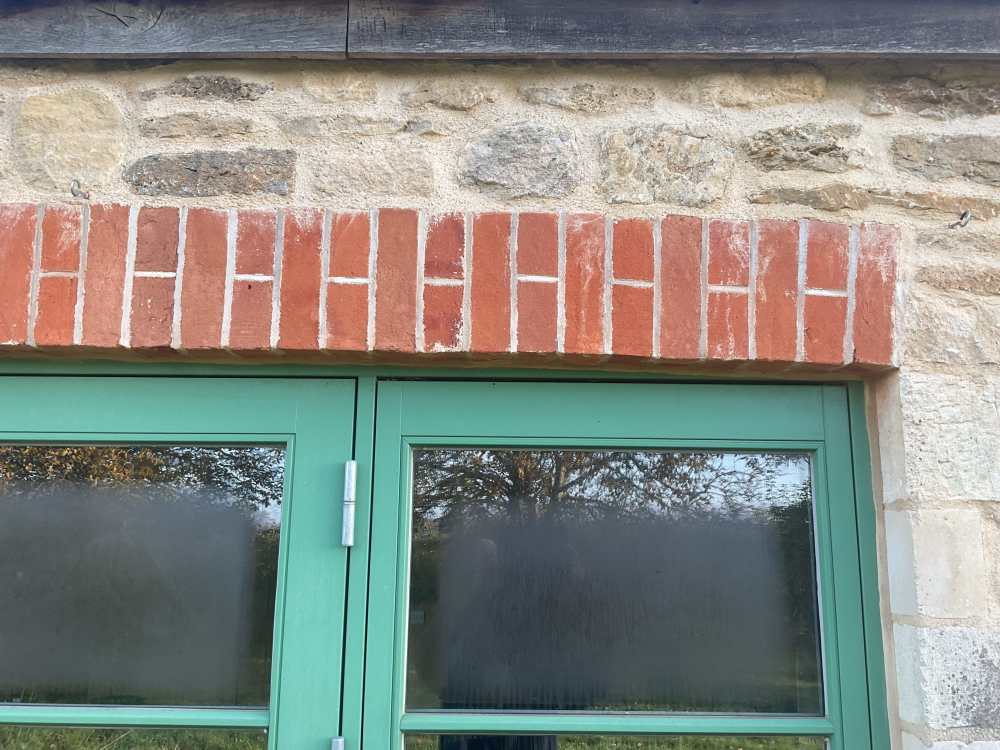
Have they puta damp proof tray above the lintel, some spec of lintel doesn’t require one, but either way there should be weep vents on that outer face to allow any moisture in the cavity to come out. as far as the brickwork goes it’s pretty rough. Either the lintel didn’t fit the cavity correctly, or they didn’t want to clip the back corners of the bricks to get them to sit back far enough.1 point
-
Picture of floor slab from above. location of heat pump outside location of tank or tanks inside distance between the two things. elevation sketch of rooms pipework has to pass through.1 point
-
I just had a look at some 15mm Armaflex pipe, 15m of it was nearly 500 quid. Basically all pipes have a minimum bend radius, so any conduit cannot have a tighter bend. As Russel says, knock up a sketch, if it is a simple run, it may just be a case of box filled with expanding PU foam.1 point
-
You can’t just put any old pipe through under there, needs to be highly insulated. you could make you own up, but by the time you have done that you might as well have bought the right thing in the first place. better off with a drawing with distance on it to get a better answer.1 point
-
seems to me this is a problem you brought on your self by not keeping them to the boundary in the fist place good luck1 point
-
Or a long radius drainage pipe (usually 110mm, other sizes may be available) Depends on the external diameter of the ASHP pipes 🙂 Think ahead!1 point
-
Yes, they can. Best to install a pipe (conduit) through which you can feed the pipes at a layer date. This also provides protection to your ASHP piping1 point
-
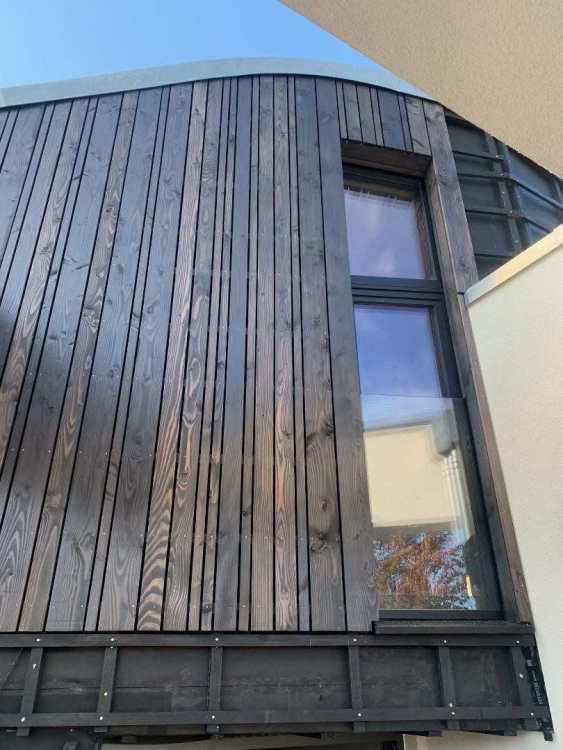
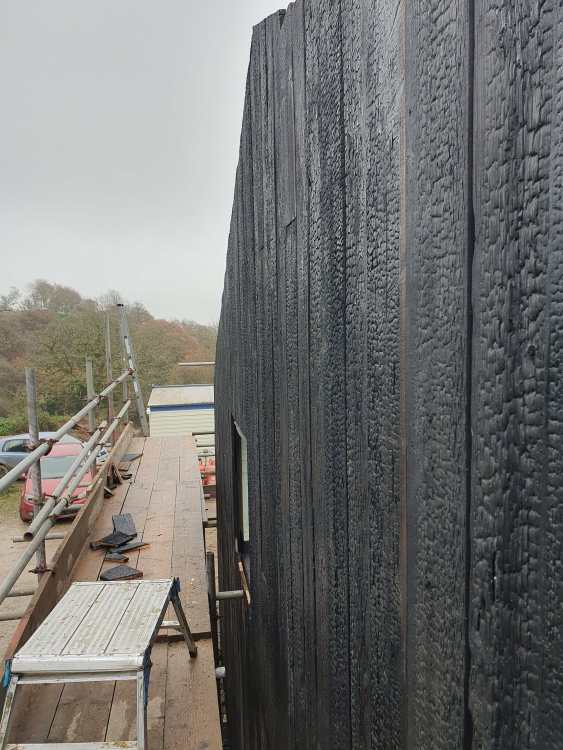
We Shou sugi banned our cladding also, which saved a sweet 10k. Terribly boring, but only about took us about 50 man hours from what I remember.1 point
-
1 point
-
1 point
-
Good luck with the purchase, hope it all goes smoothly. you’ll thank yourself for living a stones throw away from your parents, it certainly saves on a lot of stress and time when looking after the oldies, but on the flip side selling their property isn’t quite so nice which I’m in the middle of now with my dads bungalow, still think on balance it’s more a good thing1 point
-
From the collective experience and wisdom here, the consensus is stick to standard, proven methods of construction. You have to take account of the what most builders and trades are used to working with. Start doing something unusual, and somebody down the line will cock something up.1 point
-
Assume you have zero floor insulation? If so don't do it, you will spend more money heating other things and not the house.1 point
-
1 point
-
@GEO-PAR I do like what you're trying to achieve, very elegant Architecturally. Deflection is a key.. will come to that in a bit. I think you will have trouble with that at the clear span of some 1800mm. The way it is detailed is potentially risky in terms of failure of the stone lintel and bits falling on folk. Here are a few comments (with my SE hat on) on the structural design of something like this at this span. Firstly though for all stone lintels can work well if the span is short (image by @scottishjohn) and you have masonry above that is bonded to the top of the stone (no dpc / cavity tray as this acts as a slip plane) the composite action (stone lintel and masonry working together) form an arch thus the actual load on the stone lintel is small. For a piece of stone spanning ~1.8m say with a shallow depth of 150mm the primary design force is going to be a bending force, unless you have a huge uninterrupted wall above which forms a bigger arch. @GEO-PAR the detail seems to show the bottom of the Catnic in contact with the top of the stone. The Catnic is more "bendy" than the stone thus the stone could carry a lot more load than you expect not just its self weight. It takes a lot of finesse to design something like this that is not common bedtime reading. I would revisit your detail before progressing. The quality of the stone, type, mechanical properties and knowledge of that is vital. If you have ordered and paid for the Catnic then you need to work around that. This is something that interests me as I love a bit of stone.. but to make more detailed comment I would need to know all the loads from above and how the floors etc are supported on the inner leaf for example. In summary.. I would recommend that you check with your SE that your detail is ok... as it look a bit off to me based on what you have posted so far.1 point
-
Why don’t you just sit the stone lintel in a catnic1 point
-
I've literally just spent the last 8 days watching the foundations dug for our extensions and soakaways. The level of skill needed to accurately dig a straight and level trench is extremely high. It's not a job I would even consider doing myself. Regards Tet1 point
-
I’ve dug two lots of Groundwork’s out with zero experience A very good friend showed me how to operate the machine The only issue I had on the first was that I was far to slow at loading the muck away Wagons want to be away in 15 minutes I brought my mate back a couple of times This time I borrowed a five tone digger equipped with GPS No lines or pegs Just follow the sat nav It even tells you the depths Amazing bit of kit Drains are common sense and should be done with slab But are hardly ever done this way on large sites Take your time1 point
-
When I build my pallet shed, I wonder what value I could end up with if I packed the pallet walls with straw? Might be best not to do the shou sugi ban charring with the cladding fitted..... (My nephews shed, not mine).0 points


