Leaderboard
Popular Content
Showing content with the highest reputation on 09/06/24 in all areas
-
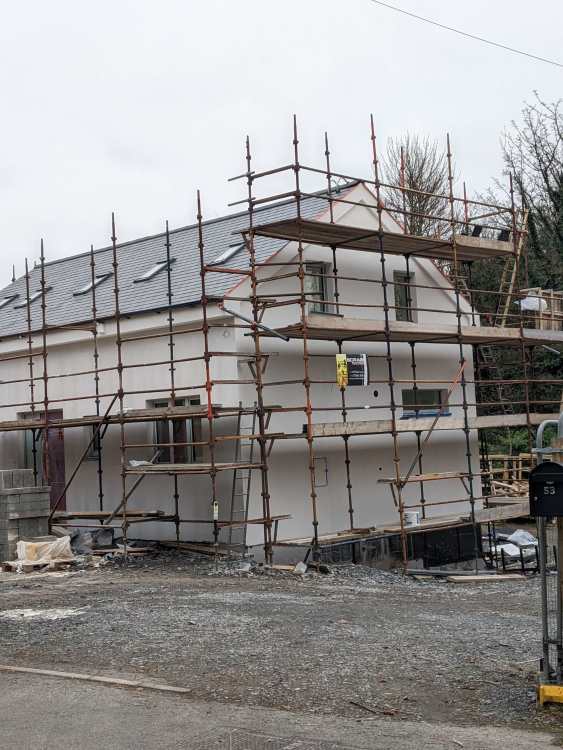
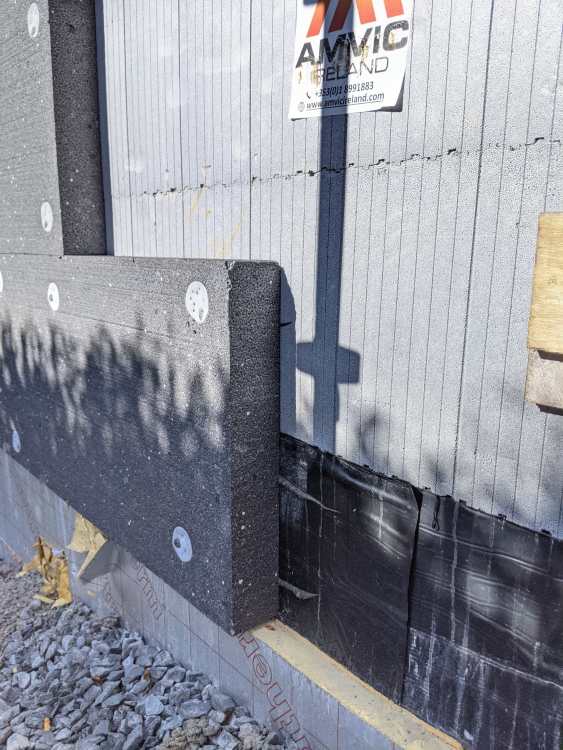
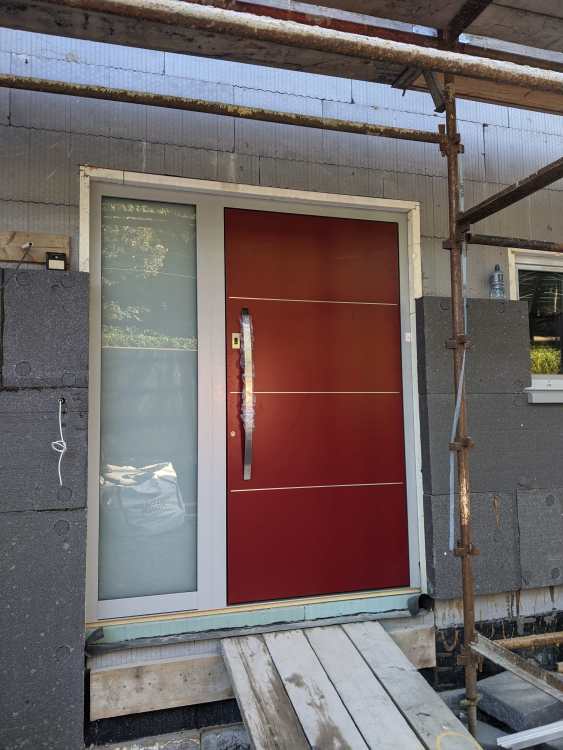
We did. 100mm EPS on to Amvic blocks. Got good advice from a guy that ran a EWI and rendering supply business. 1200x600mm EPS70 boards. Five fixings per board, full bead of EWI foam adhesive around the perimeter, a cross on the back of the board, and the edges where it met a neighbouring board. Fixings were 180mm galvanised screws. We used EWI washers and used a rebate tool so they were below the insulation, the capped off with an EPS plug. When it came to rendering, was all rasped down before starting. Was a lot of work, but really easy and light. Corners and around windows need a bit of cutting and messing around. I've hundreds of caps, screws etc left over. This is before we were told to recess in the plastic caps. After recessing and plugging with the EPS biscuits. N.b. the treated timber grounds for lights and fittings. After rendering.2 points
-
Greetings on a miserably rainy Sunday October morning. Perfect weather for catching up on some blog writing! As the title suggests this blog will be about our external coverings of the house and, by the end of it, the outside of the building will be pretty much finished allowing us to crack on internally. We started many months ago by battening the outside of the buildings. As we are having external blinds and they have a requirement for fitting the blind cassette we needed a large gap between the house walls and the outside of the cladding. This meant 50mm x 50mm timber battens and counter battens. We did this ourselves and saved many thousands and, even though it was slow going (as, it seems, everything is when you do it yourself!), it was very satisfying with the carpenter saying that it was good work and he’d seen chippies do a lot worse jobs than we did. Nice warm fuzzy feeling ensued. We are having a mixture of burnt Siberian larch (https://en.wikipedia.org/wiki/Yakisugi) and, to contrast the black, standard Siberian larch on the ‘arms’ of our property and entrance porch (all will be revealed in photos below) and I ordered all the cladding to be delivered on-site prior to the carpenter starting. The carpenter started on the garage using the standard Siberian larch which we bought from Jewson at a very reasonable price, and quite a bit cheaper than we could get from the usual timber cladding suppliers and we are very happy with the quality of the wood. He then went on to the black charred larch (which gets everywhere and he and his tools looked like they’d been in a coal mine by the end of each day!). We purchased the charred larch from Permachar (https://permachar.co.uk) who gave us a brilliant price. The wood itself was burnt and delivered from Lithuania (https://degmeda.eu) but they will only sell to the UK via Permachar. It is stunning wood, but incredibly fragile and any sort of dragging or scraping will cause the black char to flake off. While he was busy doing that and while the scaffolding was up I thought it a good time to get the guttering started. Our architect specified Zinc guttering and after a lot of thought and looking at stainless steel and zinc we also decided that zinc was the choice for us. We ordered it from Rainclear (https://www.rainclear.co.uk/guttering/copper-zinc-guttering/guttering-fittings.html?color=235) who offer next day delivery if in stock and were incredibly helpful and very well priced. It’s also a clip on system which even I managed to install without any major issues! Around the same time and while the carpenter was busy putting the cladding up our external blinds got fitted. We bought those from a local company called Powell blinds (https://powellblinds.com) who stepped in brilliantly at the last minute after we were seriously let down by Cornerstar Aluminium (long story which I won’t get in to here). The blinds are fitted up behind the cladding above the windows but externally so they will be hidden from view when lifted up. We absolutely love them and during the heatwave this summer we lowered them and this drastically reduced the temperature inside the house. There was still one large south facing window that didn’t have blinds that needed shading. We wanted and the architect designed a Brise Soleil in this area but all we had to go on was a 2D drawing. I contacted a few companies about getting one made and installed and the quotes came back at between £6k - £7k! A figure we simply could not afford. So I did research and spoke to a local forge called Horsham Forge (https://www.horshamforge.co.uk) with an idea I had. He said ‘that could be done but how about this instead?’. He suggested brackets with a pole running through them and vertical timbers slid on. Genius! On to Sketchup where I draw up the brackets and gave them to the forge to be created and spoke to my timber manager at Jewson who procured me some thermowood at the size I needed and got my carpenter to fit it and it cost me £1700 in total. So we saved around £5k by doing it ourselves and we also enjoyed the journey and got a solution that we designed (with the help of the forge of course). We think it looks fab and it does a good job of shading from the sun apart from a couple of hours when the sun is directly facing that side of the house. So we will still get some solar gain but it is definitely reduced and it’s a brilliant architectural feature. 😉 Right, while all this was going on the chippie was finishing up the cladding and now that it is all finished and I have put the downpipes on we have an almost finished external facade to our dream home. We love it and think it’s stunning. So very happy with the carpenter’s work (http://www.kmlcarpentryandroofing.co.uk). Kieran’s attention to detail at the junctions between the 2 types of wood is fabulous as it is in other areas too. He would also discuss any issues and potential solutions with us to make sure we were happy with them rather than just doing something he thought was right. Hopefully the pictures below do it all justice! (Note: please ignore the 110mm brown downpipe in the below photo! It will eventually be a rain chain but this works for now. 😉 ) Thanks for reading and we hope you like what we’ve achieved so far.1 point
-
1 point
-
What does your building control inspector say? If (s)he says it is wrong, the builder might stand up and take notice.1 point
-
Not that much of an impact. The engineer at Pasquill has over specified it and a 202mm joist will suffice. I think he specified it for a traditional soil + greens roof makeup whereas we are using a lighter tray system.1 point
-
My name is Selina. I’m working on settling on Islay and I hope to build my dream home there. I look forward to getting advice and sharing my experiences as they come along.1 point
-
Welcome. You’ll find nearly as many opinions as subscribers here. And boy do we like to drift off the subject of the original question.1 point
-
Not in my opinion, tell the builder it’s not right and to correct it. Why should you spend more money. Tell the builder this.1 point
-
they are the biggest name. The sections are robust and durable, and snap together well. The price is highish accordingly. If you hire a tower it is very likely to be Youngmans.1 point
-
It might be different in Scotland but the boreholes local to me are all 60m+ and two of the three houses sold in the last 5 years. Anyway, @Kuro507 is in the process of completing on this house with an unregistered borehole. The advantage of it being registered is, in theory anyway, you get a drilling report that shows where it is and a bunch of useful information about the borehole.1 point
-
I have looked at it again and it is indeed as you say a calculated figure and not a slip of mine on the keyboard. I have to assume its correct. Yes. And yes i am. But i used 1 in case my score is not actually any better when i get that far.1 point
-
Don't arse about, have all water filtered. Get a company to install, so you are covered for wholesome water. They will disinfect as required also. If your water isn't pH neutral the last thing you want is to spray that all over your car or plants. Servicing, day to day, there is none. We have just had an annual service done, everything reset as required media topped up, filters replaced etc. £160 incl. VAT. Filter changes (10, 5 micron and UV) are an annual task unless water source is really mucky. Last year watering 800m of banking (2 hose pipes for around 2 hrs continuously) every other day throughout summer added an extra 10 and 5 micron filter change, so about £10.1 point
-
1 point
-
That was pretty much my thought process. If I just dump a ton of foam in and then cover the foam with insulation, presumably I can just forget about it?1 point
-
100mm because we wanted to meet the passive house standard. The Amvic blocks at the time only No, was several months. EPS isn't UV stable so all has to be rasped down prior to rendering. It'll need to be done anyway to level everything off.1 point
-
For the extract fans, if they are standalone the information is on the manufacturers data sheet. You don't need to test each fan or pay any money.1 point
-
Hi all, I have recently started a project to new build 4 eco friendly homes in Braunton. This site has cropped up during several of my searches for guidance and detail which is inevitably needed when setting out on a new endeavour. Hopefully I will be able to contribute in some way. However I expect I will be leaning on the wealth of experience of the members for quite some time.1 point
-
1 point
-
you want 100mm centres max for low flow. Kick this lot into touch and do it yourself/sub in the trades. You will get a superior setup for half the cost.1 point
-
Bloke from the water board came out when I had a leak. East European lad. Whipped out some divining rods but said the water board frowned upon them so I'd best not mention it. He located the leak within 10' over about 50m. Said he couldn't be 100% as there was a concrete path alongside the house. The leak was under the path. The path had been reinforced with old chain link fencing. Guess that masked his divining a bit.1 point
-
He / She has a 3 phase system, so 16A per phase, 3 x 3.6 on G98. They state a 6kW array (panels), so could possibly be single phase 3.6 kW inverter legitamately over paneled on one phase, or could be a larger 3 ph inverter correctly installed over 3 phases, or a larger single phase inverter 'overloading' one phase, which might explain the installers actions.1 point
-
This site is worthy of a look not necessarily to buy from them, but because they show a lot of different options. https://www.continal.co.uk/systems/suspended-floor We used the pug mix system, very cheap and easy, but make sure the joist are rated for the extra dead load.1 point
-
the home show inExeter this weekend. it’s a small show a few hours max and it’s done. https://builditlive.co.uk/pxsw29/?gad_source=1&gbraid=0AAAAADtZLTcS7bBRwZDo0699yl3Eut_c_&gclid=Cj0KCQjw0Oq2BhCCARIsAA5hubUoP87A1PfAtZKy7URNcrGhf6w_g9k0R_2TiJ0UDA6tDjkYYkBU_8IaAsQJEALw_wcB1 point
-
Random thoughts: A chimney sweep would clear it. Don’t forget to wear a dust mask (asthma sufferer here!). The Period House Manual is very useful for learning how insulation works in old houses. If there are cold spots which could get condensation, using breathable sheep’s wool can hold water then slowly let it evaporate might help. Rock wool is also breathable, so would be better than spray foam, I think? Others might comment. I like access panels to see what’s going on (insulate behind) in difficult places. I also have a cheap little endoscope for investigations. Old houses always seem to have wtf moments as you try to work out what previous builders and occupants have done, and jobs seem to be bigger than you thought to rectify. Be mindful of asbestos and get anything suspect tested. A dehumidifier can be very useful and a few hygrometers.1 point
-
@ProDave, in a nutshell, our decision to replace the SunAmps was because of the poor reliability of their engineering implementation: the circuit boards broke basic layout design guidelines, e.g. lack of 240V isolation and inadequate track sizing for 3kW power routing, so they had an MTBF of maybe 2 years; all of the pump and control plumbing was hidden inside a pretty steel case, which looks sexy but makes maintenance and repair a total dog. Yes, the concept of a PCM thermal store for DHW has great potential, but not this model and company. @Duncan62, Jan is our procurement specialist; she found a supplier online, which had the model we wanted in stock and could deliver it in a week. Seek and ye shall find. @WisteriaMews, We have an electric-only passive-class house. All of our white goods use timer-controllable cold-fill in-device heated water, so our HW use is pretty low: primarily showers for three adults and occasional shared baths for the 2 OAPs (mostly in the winter). Our OSO model is double immersion heated only, which makes sense for our use. I need to do I full blog post on this, but my CH control system uses 4×Finder contactors driving the 2 OSO UVC Immersions, my UFH pump and a 3kW heater that heats the UFH. I use Home Assistant to do the user interface and graphics for my Home Automation, but in terms of CH and HW control I have a custom NodeRED application (about 900 lines of Javascript that I wrote) to control a 4-relay Tasmota module via MQTT, and this in turn outputs 24V control signals to drive the contactors. I buy my electricity using an Octopus Agile Tariff. This has an API which published its day-ahead half-hourly prices at around 5PM starting midnight C.E.T. In essence, at 11PM each night, this app schedules the daily CH and HW heating for the next 24 hrs to use the cheapest half-hour slots. In terms of HW and heating the OSO, I have installed top and bottom digital thermometers to monitor the tank temp. The app uses these 2 tank temps to estimate the total kWh needed to bring the tank up to 50°C and it uses the day-ahead prices to schedules the cheapest time slots to heat the tank. (If the top temp falls below a preset, it also stuffs in a ½hr top-up regardless of price, but this happens so rarely that this isn't a significant cost premium for always having HW.) The OSO has a parasitic loss of just over 1 kWh / day, plus replenishing used water, which varies but is typically equates to another 2-3 kWh at most except during the winter bath season. The kWh price for this last couple of weeks has been negative on 4 days , small pence on another 4 and only peaking at 14½p on the stiller overcast days, so the cost of of our water use runs at under 50p / day on average. We tend to have our big bath days when Octopus will pay us to do this or it only costs pence. I've been coding for over 50 years so the Javascript bit is easy for me, but I understand that those who aren't so IT literate will have a lot fewer options. I believe the like of Octopus and OVO are exploring some Smart Control options, but these aren't yet prime time.1 point
-
Same build up as I did. After I drilled through the battens and PIR into the brickwork, I squirted a glob of acrylic sealant into the holes before drilling the screw through to, hopefully, provide an airtight seal. internal wall joint - I used Pro Clima Contega PV which is a plaster-able tape - to provide an airtight joint between PIR and internal wall bottom of external wall - I used hemp lime plaster to bring the floor void flush with the PIR and taped again, opted for hemp lime for its breathability around the joist pockets into the brickwork. top of external walls - I pulled the ceilings down, stapled an airtight membrane to the bottom of the rafters and taped the PIR to that, then fitted a service void to the ceiling and plasterboard it external wall to intermediate 1st floor/ceiling - see "bottom of external wall"1 point
-
1 point
-
It all became "worth it" in 2 stages, first when we moved in to the unfinished house (from the static caravan) and then 4 years later when the old house sold. Short version of story, we started in 2013 put our old house on the market in 2014 and it did not sell. 3 years it was on the market with no buyers, several other properties around us were the same, simply no buyers. That was the low point. Shell not even wind and water tight, no money to continue. Plan B was an offer to rent the old house with the intention to buy it later so we moved into the caravan and did that. We than had a slow "build as you earn" and completed nearly 2 years ago, and the old house finally sold to the tenant at the end of last year. Lessons from this be flexible with your build and financing plans. If you can't be flexible, don't even start until you have funds secured to at least get the house habitable. I cannot describe how demoralising it was to have an unsalable house and no funds to continue the build of the new one.1 point
-
We moved in on 5th July this year 12 months on from the start of demolition of the old house. The main build flowed well ( its my day job) and we were waterproof on the two houses by last Christmas. Then the finishings started and things slowed down and we were unable to move in until July. Waking up and not having to travel to site made it all worth it. It rapidly turned into a home. I had gained an extra hour and a half a day to do all those tomorrow jobs. We are not finished by any means we just need :- Heating A driveway The garden office completed Sign off from BC and the warranty company Then a million finishing things. It's all quite relaxed at the moment.1 point
-
It’s strange how most self builders suffer stress . Have no timescale and have no budget - no problems !1 point
-
As soon as planning passed and my plot of land previously was worth 5k instantly was worth 500k . I was jamming like a mofo that day1 point
-
As we got over the crest, which it sounds like you are just about to do. The stress I felt was unbearable, as we started demolishing the bungalow to begin the build I wonder what on earth I was doing (I had zero build experience). The stress increased as it became apparent that I didn’t know so very many things. I kept a close eye on the budget until it became apparent that we were going to go over budget then I stopped watching so closely, I couldn’t turn the clock back and it had to get finished. Now, 3 years after moving in I can recall how bad I was feeling during the build, it was painful but the pain has gone. I’m chuffed to bits with the end product, survived the budget overspend and rue the numerous errors made to get here. We now get on with enjoying life in a low energy home. It was most definitely worth the not insignificant effort.1 point
-
1 point
-
Panels are on our roof but we haven't purchased the inverter yet. Theses are the panels we have on the roof. https://leisurepower.co.uk/solar/solar-panels/rigid/15139/10-x-aiko-455w-all-black-solar-panels-aik-a-mah54-455-ab-g2?gad_source=1&gclid=CjwKCAjwodC2BhAHEiwAE67hJIC4gQq28yAfvy0rndgda032mOLPHGcf0UW0m6trniTA3LBsW8jIqRoCGsUQAvD_BwE ... we purchased the panels from an installer who put them on the roof for us. We're very pleased with his work so far. We used S5 pvkit clamps onto standing seam. The UK suppliers only sold the old version so we ordered the new version 2.0 clamps direct from the US. Our installer can't source our chosen inverter within the UK but he is happy that we supply it and he installs it. This 3-phase hybrid inverter has been available on the continent for over a year but the last time I looked all the UK suppliers were selling the old series 5 model. Which is no good for us because we want the latest model with >2 MPPTs. https://etronixcenter.com/en/8176291-se307-solis-solis-s6-10kw-hybrid-inverter-compatible-with-pylontech-force-h2-hv-battery-including-logging-stick-wifi.html Yes its fully G98 compliant... https://connect-direct.energynetworks.org/device-databases/search-gen?model_number=S6-EH3P10K-H-EU We will be plugging in a pylontech H2 battery. Probably this one.... https://etronixcenter.com/en/8173159-pyl-h2-1421-pylontech-pylontech-force-h2-hv-system-1421kwh-1x-fc0500m-40s-v2-4x-fh9637.html ... and conected to this will be a couple of zappis. And maybe an Eddi.1 point
-
Time of use tariffs will always be available. Here in Ireland (NI is part or the Irish market, not GB) demand falls off a cliff at night and wind generation is curtailed. Regardless of how many EVs are on the road there will always be a need for an incentive to shift load into the E7 hours. Little and often is ok if you don't do many miles. If I were to commute to Dublin three days a week then I would need to charge my 75 kW battery at 11 kW every night and that would only just fit inside the E7 window. (thankfully I don't do this any more, but I did in the past) The problem I found is that here in the UK the PV suppliers have no clue and don't want to sell 3P hybrid inverters. When I approached UK inverter suppliers they just wanted to flog me three single phase inverters, which is fiendishly complex and crazy expensive. There are plenty of good 3P G98 compliant inverters, its just that UK suppliers don't stock them and don't want to sell them, probably beacause there is too little demand here to make it worthwhile. Look overseas however and it is a different story. We are getting our 3P inverter from an EU supplier where there is lots of choice at good prices.1 point
-
There is something more fundamentally wrong here. That does NOT look like a load bearing wall, there should be a double header. Anyone else care to confirm that or tell me it is okay?0 points
-
0 points
-
0 points
-
I can't help with a location where you can see the floor buildups, but I'm keen to understand more about the loving area. I've not got one of those in our plans and feel I may be missing out... 😉0 points
-
0 points
-
0 points


