Leaderboard


Popular Content
Showing content with the highest reputation on 03/21/24 in all areas
-
I’d avoid Ring or anything else subscription based and relies on the cloud.2 points
-
What actually happens to the house UFH is a little different to what you may expect, the floor settles to about 23/24 over the day, following heating it up overnight (I leave the UFH pump stays on 24/7 to distribute the heat evenly), i trip the ASHP off via thermostat. When the heat pump starts against a 24 Deg floor, it's trying to managing a dT of 5/6, so the output temp of ASHP is actually pegged at 30, with lots of concrete to soak the heat away, the temperature takes hours to rise, a sub zero day it gets to about 33 by the time the house is up to temperature. Repeat the next day. The heat pump doesn't modulate just runs at a high sustained load but at a low flow temp. In theory on a 7 deg day I should get an average CoP of 5. Whether I do, not sure, I just look at the most cost effective way. Doing most of it overnight at 13p kWh is as cheap as gas even with a CoP of 2.2 points
-
Depending on time between course and card issue, mine took 6 weeks to arrive.2 points
-
https://jmoncrieff.co.uk/lighting https://www.creative-cables.co.uk/content/67-components https://www.creative-cables.co.uk/content/68-Indoor-lighting http://www.spatial-lighting.co.uk/shop Remember, you can go simple now, and change them as you learn to live with the space and funds become available again.2 points
-
No the 18 layer foil is equivalent to 90 mil of rigid pri and far easier to seal with tape in awkward spaces Use two layers1 point
-
Who said anything about gas safe. I've been plumbing for years but not gas. So I did the G3, so I could do my own heating and DHW. Thus I'm not in any scheme1 point
-
If they are just earth cables could you not use an MET block? (main earth terminal) https://www.screwfix.com/p/ced-4-way-earth-block/123861 point
-
Score deeply in diamond patterns with edge of a scraper.1 point
-
Geo Consulting are just up the road from you. https://www.geoconsultingeng.co.uk/ I have worked with Howard, good guy. This also maybe useful for you https://www.swgeotech.co.uk/1 point
-
your SE will have contacts.1 point
-
Not an expert by any means. Had a project recently and the engineer asked for 3 window sampling boreholes which would give enough detail on the things you list for the engineer to design the slab. Reach out to a few geotech companies. Before committing make sure to go back the company for your raft to confirm the ground investigations that they will be providing are sufficient and that they can decipher the results.1 point
-
From recollection the application of the new Part L was done by a plot by plot basis rather than all plots within the original scheme. So even though the site may have have started as a whole, only those individual plots that were under way in June 2023 could claim to be built under the old version. If the defective house was being demolished and it's foundations removed I'd thought it'll be hard to argue that the new replacement wasn't an entirely new building and thus subject to the current regs.1 point
-
This is who we used https://www.eslightingdesign.co.uk1 point
-
I would agree to some extent. I see many architects drawings with a phrase such as " drainage layout to be agreed between builder and building inspector" and your example regarding foundations. That is unfairly using BC as a cheap design service and some designers/builders do take the p...s. However, BC has to agree matters on site when a building notice is used and I would hate to see things degenerate to a point where professional common sense could not be exercised on site.1 point
-
@kandgmitchell It isn't dis-similar to a current BCO picking me up on a wording on a drawing. It related to the depth of foundations and that the depth is subject to BCO inspection and approval. The BCO asked me to change the note, otherwise he wouldn't approve it. His comments stated... Following the October 2023 changes to the Regulations and subsequent guidance issued to BCBs around “design advice”, we are not approving jobs with this wording. I can approve if a foundation design can be provided from a suitably qualified structural engineer, who has considered the site conditions. Alternatively I can conditionally approve, subject to such a design being provided. Our job on site is checking the contractor is following the design, rather than participating in the design on site. I understand this seems a subtle difference, but I won’t approve these plans with the phrase “agreed on site with building inspector”. So asking them what "they" would accept is no more and it's down to the client/contractor/designer to present a suitable deign for approval.1 point
-
Extract from the Home Energy Scotland website (https://www.homeenergyscotland.org/funding/grants-loans/detail/) You cannot start work on any installations until you’ve received the funding offer in writing. If you receive a funding offer this financial year you have up to nine months to carry the work out and claim your funding.1 point
-
Mine too.. I've commissioned mine and I'm not registered via a scheme. I've sent the paperwork to Building control for my completion certificate this week. They didn't seem to have an issue when they came to inspect so we will see. (Scotland)1 point
-
Yes, you get a lovely little competence achievement card from the awarding body with an expiry date on the back. I never carry both cards, just my Gas Safe card, even when it hadn't been updated. But if you're concerned, you just need to call gas safe to check on the installer. They will confirm if they're registered for G3.1 point
-
Sweden does panel builds indoors. Eastern Europe does thin bed mortar. Why? Seasons. Winter is cold. This is good. You can drive over the building site without sinking. There are no mosquitos trying to eat you. This is bad. You can't use thick bed mortar. Thin bed mortar (actual mortar) can work down to 2C and doesn't take a lifetime to cure. Thin bed mortar (PU foam) can build in down to -5C. They're not fussed on houses having decorative brick rainscreens. Render or cladding over "structural" (rough) brickwork is the norm. Or with wooden panel construction you can drive the flatbed with palfinger over the site where you laid foundations in autumn, throw up the panels whilst it is snowing rather than raining so everything stays nice and dry, and get weather tight before spring comes and the snowmelt turns the whole site into a bog. Looks easy enough if your founds are level. No cavity wall ties (all additional insulation is external after the fact) and the PU foams will likely be stickier in tension than mortar.1 point
-
Go to the NSBRC if you can and play around with the exhibits there, most (if not all) suppliers mentioned on this thread have displays there. We were 100% set on a set of sliders until we tried some of them at the NSBRC. Same with windows, lots of the 3g ones have very thick frames. ETA Nordan windows are awful - they have them in the Scotframe exhibition house in NSBRC. They are a significant cut below the other manufacturers IMO.1 point
-
for a property that size you might find that a good lighting designer is not as expensive as you think.1 point
-
From memory....there is a distance at which there can be an airborne spark, depending on voltage. Find that and draw a vertical line for no-go. on site erect a marker tape there. Inside that, nothing must be able to fall towards the power. Mewps must be very stable. Scaffold must be tied to the structure. Lifting zones must be worked out. Safe handling of metal parts must be studied and controlled. Your contractors will need supervision. I'd get them to write their own risk assesments. Right now get reading.1 point
-
The Gas Safe website is an abomination. I don't understand how they get away with it. Try using it for managing Gas Safe registrations etc. The search is most likely not working as it regularly doesn't. If someone is Gas Safe registered and G3 they will have it on their Gas Safe ID card listed on the back.1 point
-
https://www.hse.gov.uk/pubns/gs6.htm1 point
-
These work great, designed for the job. When you install, one turn in, half back, a further turn in etc. until fully screwed in. https://www.screwfix.com/p/dewalt-aerated-concrete-anchor-nylon-60mm-50-pack/454HT?kpid=454HT&cm_mmc=Google-_-Datafeed-_-Screws%2C Nails and Fixings?kpid=KINASEKPID&cm_mmc=Google-_-TOKEN1-_-TOKEN2&gad_source=1&gclid=CjwKCAjwte-vBhBFEiwAQSv_xSPJizrRNcYEjQuP7ZUJI4VyVx8cKj8RcKlyx5vZJCAQXNT_FOFBqRoC80MQAvD_BwE&gclsrc=aw.ds1 point
-
The John Cullen lighting webinars are really good - https://www.johncullenlighting.com/events/#webinars1 point
-
Yes @Nic that's a great link - gets a heap of professional advice from @Carrerahill who has a degree in lighting design.1 point
-
Here's a start:1 point
-
As per @Russell griffiths, if you're thinking of using aerated concrete blocks, they're better avoided. They are are notorious for cracking even when, in my experience, correctly using the recommended movement joints and bed reinforcement. Better to choose a medium density block instead. The only other block I know of that can take thin joint are Porotherm, but they have a different set of issues.1 point
-
That's what I did when we were in the middle of Covid lockdown and needed a cylinder - it works very well and will be used to dump excess pv when the time comes. There are two different things here: The G3 training certificate to gain and show competence Being registered with a competent person scheme to self certify You can be G3 trained without being a member of a competence scheme, something that some plumbers are bacause they don't do gas, for example. If you're not registered with a scheme you then pay building control or another plumber to certify. Without training and competency scheme membership, there's a problem, but there seems to be very little come back any way if people do. You can ask the same question about gas and oil boilers.1 point
-
If your thinking of using thermalite blocks, for both inner and outer you need to have a serious re think. or are you thinking of the single block that does solid wall construction did this in the 90’s lots of problems with the blocks crumbling. not for me.1 point
-
We have a continuous air gap at the bottom and top with insect/rodent mesh also at the bottom and top. Ours is board on board which naturally creates a big gap behind the cladding anyway. One issue we do have is at the window head where we don’t have any mesh. My plan is to use thicker stainless steel mesh bent to fit and pushed up into the gaps.1 point
-
We've gone for "nice" ply (great BandQ find) and fermacell for ours.....
 1 point
 -
used 18mm mdf for ours. gives really solid fixing for all the kit.1 point
-
I used 18mm osb, then sheets of fermacel then a couple of coats of eggshell paint so any dirty fingerprints wash off. as has been said, bring your floor level up either level or higher than ffl in the house, you don’t want a drop down in there when the main house is done. nice ply would work just as well, I just wanted something with a fire resistant rating in case bc becomes a plonker.1 point
-
I buttoned and fixed a membrane Then used a 12 mill faced ply
 1 point
 -
Well it’s harder to do after. I boarded mine with 12mm plywood that I painted white. The mistake I made was not putting in a self-levelling floor screed to bring it up to the same eventual height as the floor tiles from the hallway so we now have a step. I will still put in a self-levelling screed but I’ve made things harder for myself now everything is in the plant room as always.1 point
-
Aaaah, THAT sort of erection. My bad.1 point
-
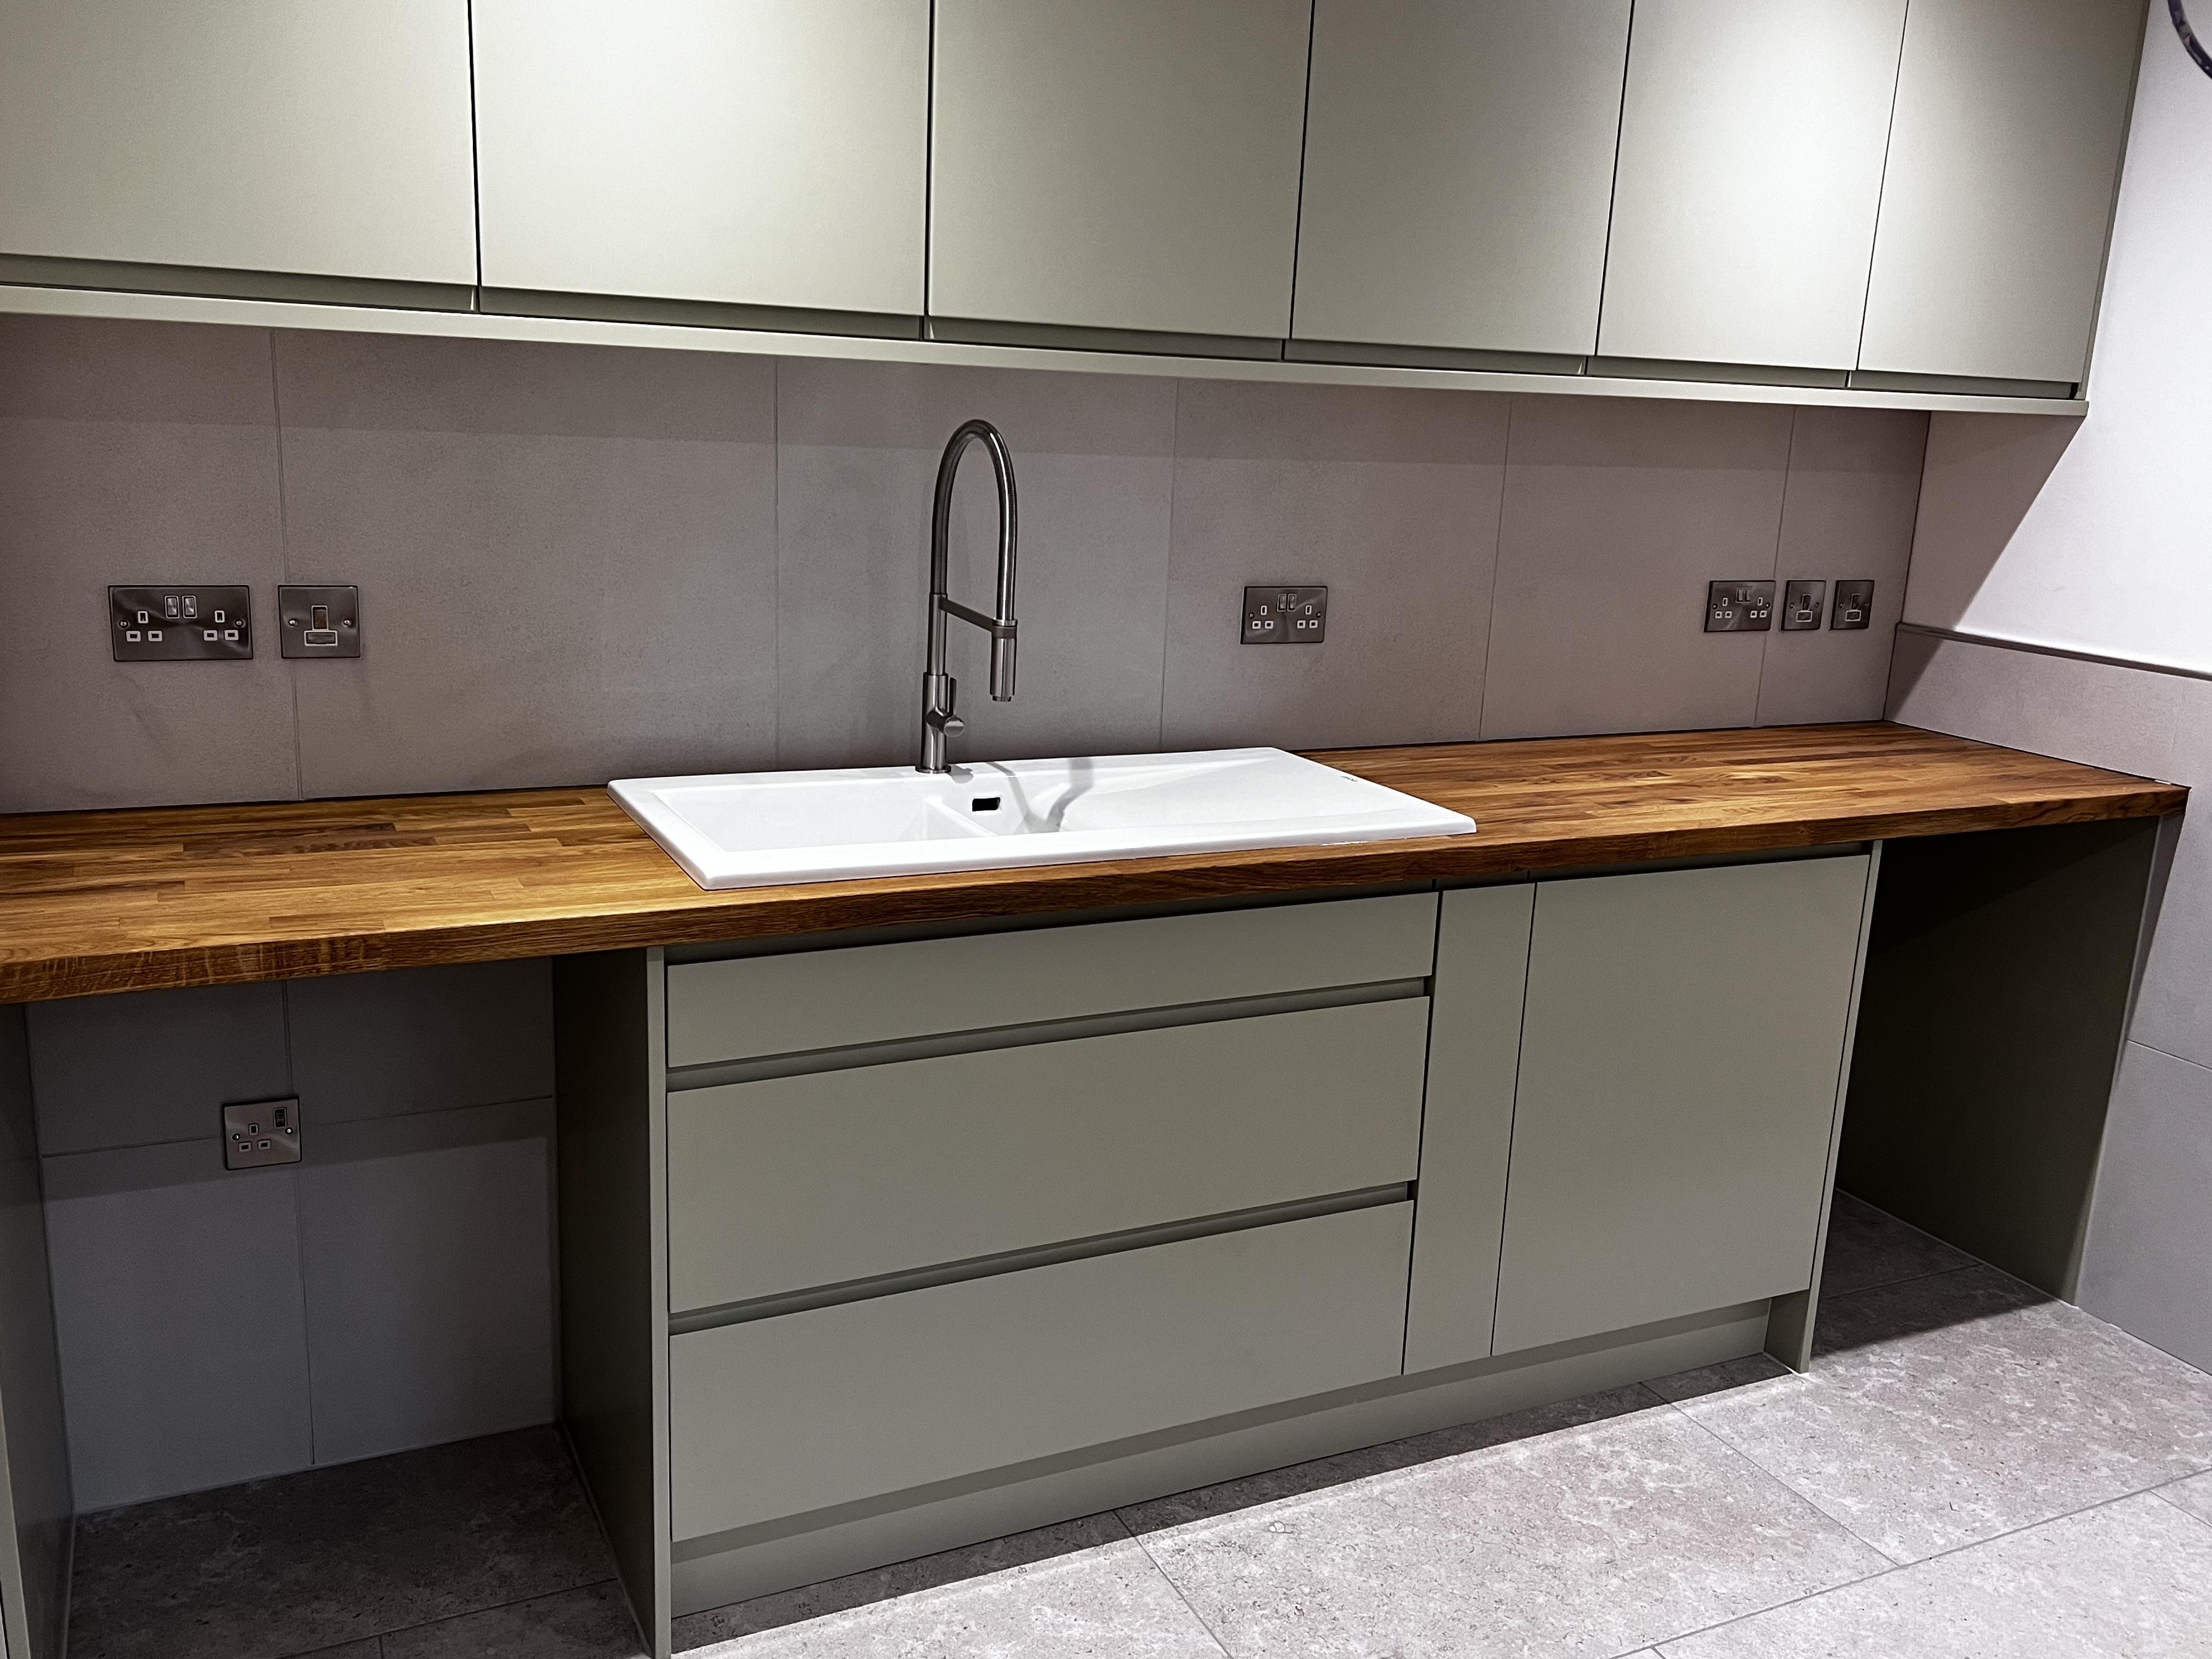
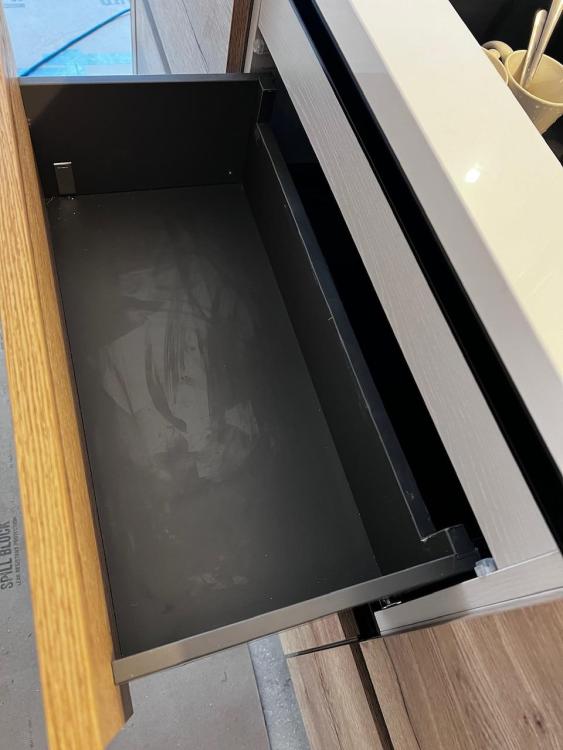
Kitchen and utility room finished. I need to fit the overflow for the utility room as it wasn’t in the pack and fit some black laminate tape to the top and bottom of the cookers as the light grey carcass stands out like a sore thumb. The sink drawer unit has been a pia but I managed to get the kitchen manufacturer to make me two short drawers and I cut out the back of the top drawer to get it to go past the sink. Feels a bit bodgy but it works and looks fine. I’ve made a bit of an arse of the Quooker plumbing insofar that the flex bit doesn’t really work as the weight is fouling the other hoses. I’m not entirely sure I can fix it to be much better. A job for another day. Main thing is we have hot and cold water in the house now.

 1 point
 -
Or fix your wall starters to the bed joints. Better fixing in my opinion.1 point
-
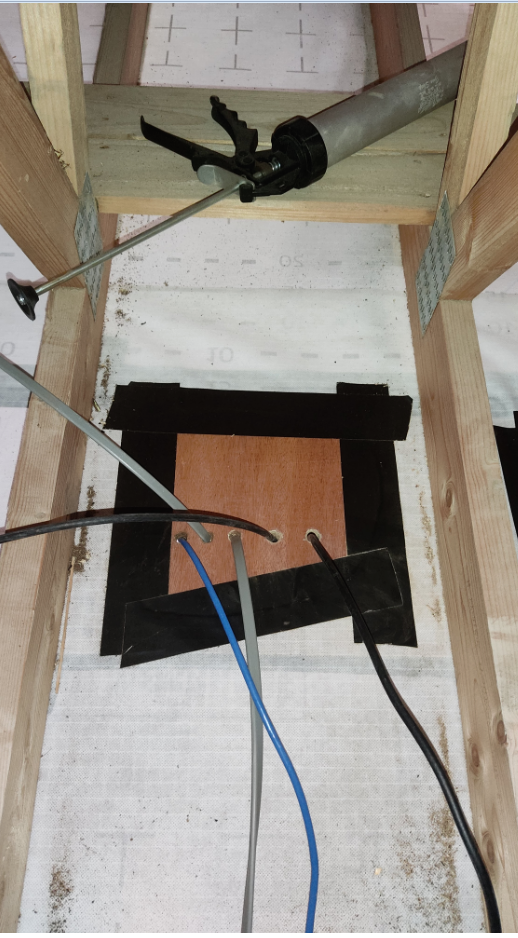
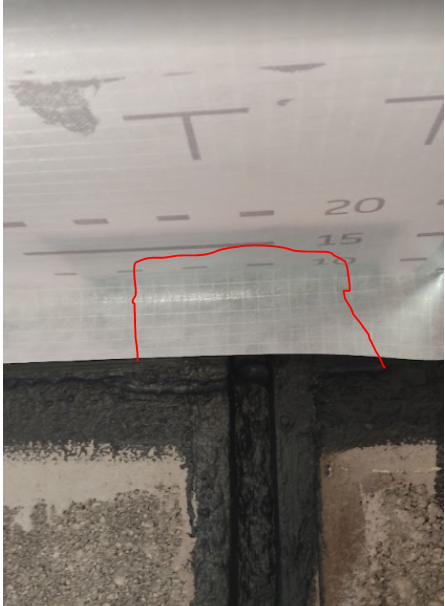
Here's how I did the wires into the attic. The pic is taken looking down from above. A scrap trapezoidal piece of ply screwed to the trusses from below. The membrane cut back and tapes to the ply. It doesn't need to be pretty but it needs to be neat and effective. ONE WIRE for ONE HOLE. No expensive grommets needed, just a squirt of airtight sealant from both sides. The sausage gun can be seen. Note there's plenty of space between the holes.
 1 point
 -
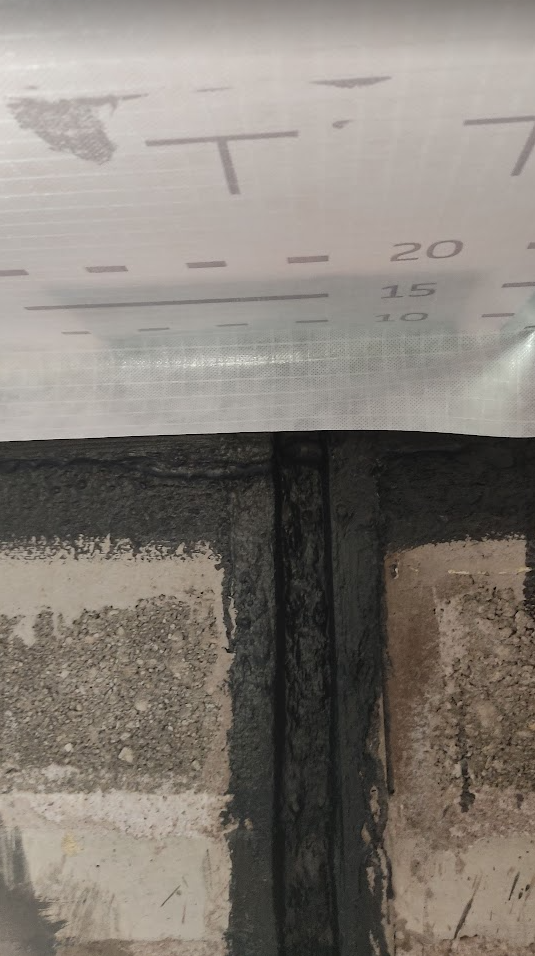
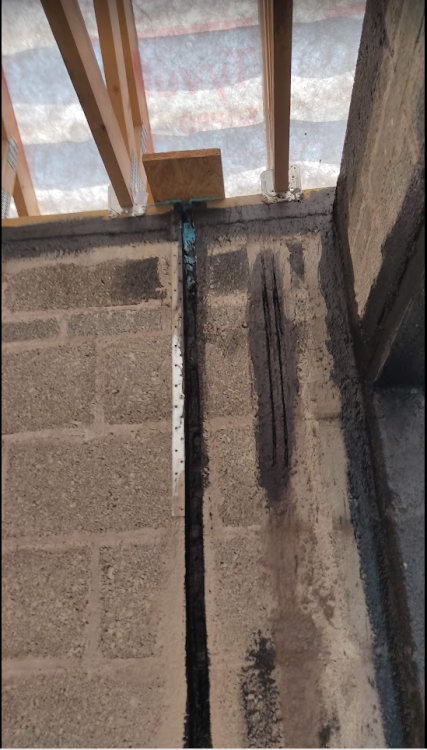
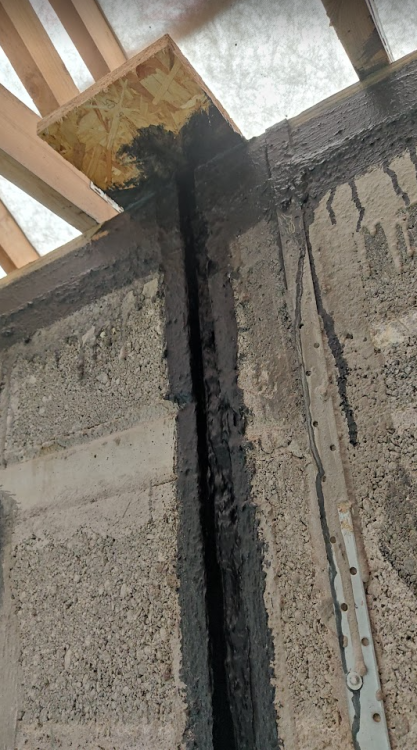
Here's how I did the top of the conduits as membrane is almost impossible to seal into the corner. Continue the chase up through the wall plate. Screw a square of OSB down from the top and seal with airtight paint. Then run the membrane down the wall under the square of OSB. Seal to the wall everywhere with airtight sealant. Cut back the membrane as shown and seal to the OSB with airtight tape. That leave the electrician plenty of space to take the conduit above the level of the plasterboard and bend the wires into the service cavity without any need to go near the membrane.

 1 point
 -
Plan for ZERO holes in the membrane. I did this by. 1. Running a service cavity below the membrane, making everything go in here. 2. Put plywood where ever you need to penetrate and tape the membrane to that. Use the ONE WIRE for ONE HOLE mantra. I even drilled the holes and labelled them for the electrician. 3. That left a very simple set of instructions for the electrician. Don't ever make a hole in the membrane, only in the ply. ONE WIRE per ONE HOLE If there's any accidental holes just tell me. There will be no bollockings, no scolding, no problem. Just tell me and I'll fix it.1 point
-
On the upside, the Cambridge neck of the woods have challenging soils, not run of the mill stuff, exciting but you need to have your wits about you when entering this den of underground terrain.. not common bed time reading but for the keen. Cambridge lies roughly on the edge of the Gault CLAY formation. It's a thin band of a particular soil that stretches from Swafham, East of King's Lynn, thickens (on plan) aproaching Cambridge to Oxford, thins out and ends just to the east of Bath. At the Bath end it tends to be a bit less expansive as it is siltier and more sandy... but at the northern end (Cambridge end) is becomes a wolf in sheep's clothes. I'm trying to introduce some drama as it's nearly Santa time. The Gault clay can trip you up as when you dig as it can appear quite firm / hard. But when the weather changes is becomes a highly expansive soil. This can trip builders and designers up. It is quite a unique soil for the UK and in a thin and variable band so not often encountered. I can in some ways see why maybe design changes were possibly made late or on site. Now there may a be a bit more to this as Gault clay can also contain elevated levels of suphuric acid and sulphates that can attack concrete... and all that impacts on any steel rebar reinforcement in terms of rebar cover. It may be that the heave thing is exacerbated by the durability of the concrete and rebar cover. Maybe someone has said.. hey it's not just the heave thing but your cement content in the concrete / rebar cover is under spec for the soil type. Now that would impact on any concrete piling potentially. Anyway. At least no one has got hurt, it has been picked up, a lot of folk will have learnt some lessons.. the insurer's will pick it up and we the punters will pick up the tab one way or another.1 point
-
Soraa LED Vivid are the best I know, but aren't cheap - for example https://theledspecialist.co.uk/search/?q=soraa+vivid Personally I'll probably be choosing Tridonic modules (or similar) on my upcoming project in lieu of GU10s - see this discussion:1 point
-
This. Layering different types of lighting - ceiling lamps, wall lamps, spot lights, table lamps, floor lamps, etc. - to provide a variety of light intensities and suit different purposes. Take a look at some of these : https://duckduckgo.com/?q=ambient%2C+task%2C+accent+lighting It's best to stick with one colour temperature per room. In other words if you like warm lighting in a bedroom, stick to 2700K. If you don't know what temperature lighting you like, you can always buy a few bulbs and test them out.1 point
-
I'm one of them! For a modern home 4000K is perfect for me in all rooms - a good balance between too warm and too cold that doesn't overly distort colours. I know that many people like warmer in bedrooms & living-rooms, but personally I'd only do that if I lived in a 'heritage' building, had wood panelling, or similar. I'd only go higher if I wanted to deliberately enhance the whiteness of a room (I once used 6000K to brighten up some dingy white-painted subterranean corridors previously lit with something like 2700K). Because mixing colour temperatures looks strange and unplanned (unless you plan to have them on at separate times, not simultaneously). Other tips: Do go for layering - ambient, task & accent lighting. Ambient lighting doesn't have to mean downlighters in regular grids in every room; that produces even but bland light. They're usually better when used to wash curtains or walls, mixed with narrower-beam spots directed at tables, shelves, etc. Do use dimmers on the ambient lighting in bedrooms & living rooms. Do look at the colour rendering index (CRI) of the light source - a higher rating shows objects closer to their 'real' colours (<80 poor, >90 great).1 point
-
Can you not do a deal regarding the kitchen, power only run to pre-cored holes for downlights or something? I am not aware of your situation, are you self building and have a fixed price with agreements in place, built to plan and the builder will hit your with variations for any changes? You could always use tuneable colour if you want some cool light. 4000K light can be good for reading and study as it is closer to natural daylight, it is also a favoured in offices and generally the workplace as it is good for focus and alertness, this is due to more blue light from the light spectrum being available, blue light supresses melatonin production, a hormone which makes us sleepy and drives our circadian cycle, something that is heavily impacted by light, it would have been sunlight, however with all the artificial light we are exposed to now it stuffs things up a bit. So sitting in 4000K light at 2300hrs when your thinking of reading a bit and heading off to the land of nod is not conducive, however, when you need to read something and stay alert and focused or do some work, it may be, albeit you are artificially influencing it. This is why visual devices often have a night time setting to remove the coolness, the "blueness" from the screen to help reduce the influence on your body. When Scottish Power did their new HQ in Glasgow someone got wind of this, they opted for 6500K lighting in all the offices, it looks hideous from the outside and must be worse to work in, but they heard it would keep everyone alert and focused, then, across the road at the RoS, they were kind to their staff and installed circadian rhythm friendly lighting which tracks the colour temp of the daylight, so 2300K in the morning, peaking at I think 5500K in the afternoon for a while before heading back to 2300K.1 point
-
A lot, in fact, I did a BA in lighting design (and I had the opportunity to do a PhD) and specialised in it for about 15 years, although now I am a consulting building services engineer I still do a lot of lighting design as every project we do still needs lighting. Don't get too hung up on lux levels and uniformities and glare and what not for domestic lighting, even when I do domestic lighting I still just use my professional knowledge and best practise. The issue with domestic is that it is not used like typical commercial buildings, offices, it is an office, you light it like an office, or a warehouse, you light it like a warehouse. Houses are a different kettle of fish, you can put a single pendant kit into most rooms and that complies with what BC want to see. However, we all know we will add desk lights and table lights and floor lights. Kitchens are about one of the only rooms in a house that needs proper, as close to a "design" as you need for task lighting. If I am doing a kitchen in apartments etc. I usually go for about a 500-600lumen downlight, say 2.4m ceiling height, spaced at about 1000-1200mm in a row or array to suit along the counters - typically I will pull out a second row if there is a dining room table shown on the architects GA's. Bathrooms being about the only other room that needs dedicated properly "designed" lighting or else you are stuck with it. Corridors I would typically put the same in in about a 1200-1500mm spacing. I have my go to downlights for these applications and I know the optics will give me the right distribution to work in these spaces for me. Very occasionally I will fire up the lighting design software and do a quick check calc if I want to do something a bit different. "Design" when used in a domestic situation, to me and for many interior designers and even lighting designers is just picking nice lighting, and placing it in such a way to create some nice ambient and useable light. A well placed downlight to create a scallop of light down a tall wall above a stair, or a row of small (e.g. 35mm) down lights along an oak balustrade in a hall, or some recessed LED strip into shelfs. Dimmers are also your friend when it comes to domestic lighting as it lets you add all the light you want, but without the concern you might end up with your living room sitting a 600 lux!, however, make sure you pair your source and dimmer or you will have a hell of a time. I have often put in standalone DALI dimmers (Osram DALI MCU) with DALI driver luminaires to guarantee nice dimming and when done wisely, the over-cost is not that much. Houses, in my opinion should always be 2700-3000K light. I hate seeing 4000K (or worse) in domestic settings, however, that is my opinion, I think some people like the clinical look.1 point
-
Or a further alternative. Get them to agree to you burying a length of cable ducting up your plot passing over the buried 11KV cable at the rime the 11KV cable is installed, through which you will later pull any cables you want with no need for excavation at that point.1 point