Leaderboard
Popular Content
Showing content with the highest reputation on 01/27/23 in all areas
-
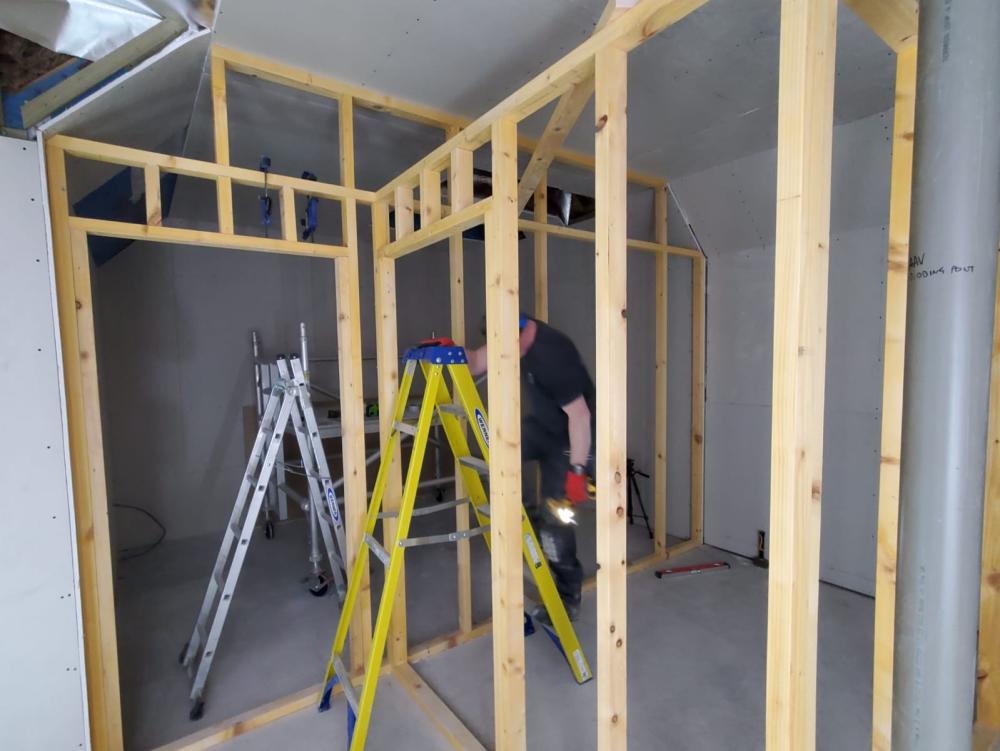
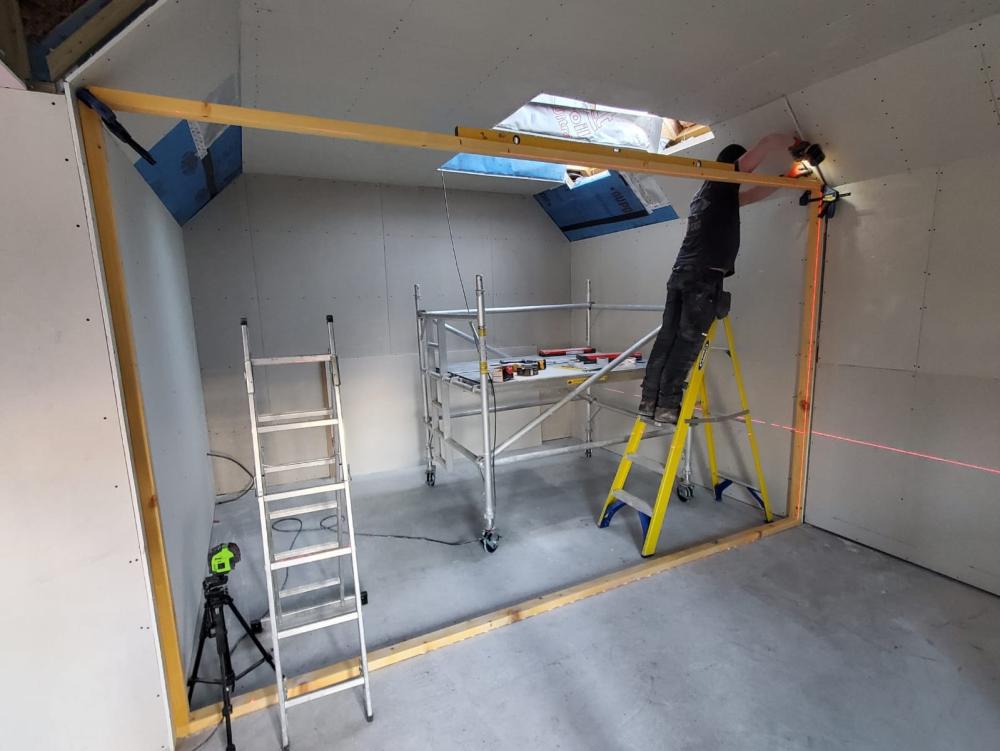
Back up again to the Isle of Lewis, this time camping in a small tent inside the building to try and stay a little warmer and more sheltered… started out a bit snowy when I first arrived, but has now risen to a balmy 8° 🤪 but hey, I finally have working electricity now! 😎 So far just removed just over a tonne of old plasterboard and disposed of it at the dump. All good progress!5 points
-
2 points
-
On the actual topic, my view is that generally you cannot make someone fix something of theirs that is in disrepair because you would like it fixed. Building Control may order a fix if they think the retaining wall is unsafe and a danger to the public, but it is not that high, doesn't appear in imminent danger of collapse and it is unlikely that people would be near it, so I very much doubt they would care. If you wait two or three years I doubt the wall will be in any different a state. It is probably best to read this thread in conjunction with this other below thread where @PXR5discusses building a further retaining wall very close to this one. My view is that they should be considered as one and this should not be built without the input of a structural engineer. Indeed I think building a retaining wall over 1m without SE input is a breach if building regs. A tall retaining wall like this would have be considerably more substantial than suggested. If you propose digging down 2m within 500mm of an existing retaining wall you are going to have all kinds of trouble, with a good chance of destabilising the existing wall. If you need to do this to build a house then the cost and responsibility of this will be yours. I am sorry that the neighbours appear to not be very nice people, but they do not have to rebuild their wall to help your project. Indeed it would be pointless of them to rebuild their wall if you then plan to dig right next to it.2 points
-
They work on the same principle as a regenerator in a Stirling engine. Warmer air going through in one direction gives some of its heat to a thermal material, then the airflow is reversed and colder incoming air picks up heat from the thermal material, then the cyle is reversed again (etc).2 points
-
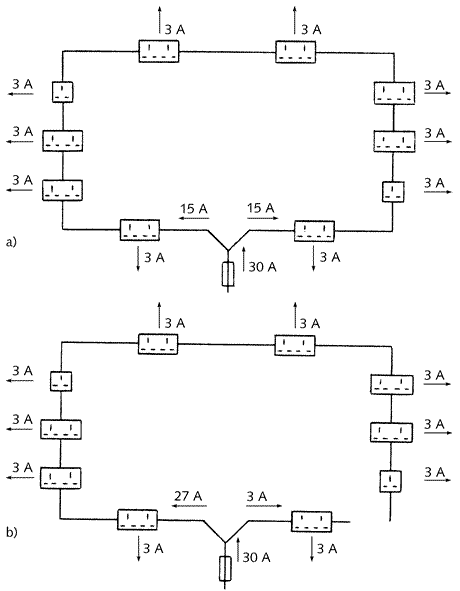
To begin with you have to wonder why ring finals are peculiar to the UK. Their origins go back to their introduction circa 1942–1947 and the materials shortages of the time. It was a crafty trick to effectively get more current through less copper wire. It makes it possible to supply twice the safe current carrying capacity of the cable to any given set of loads on the circuit due to current being shared across two cables: Topologically, every socket is being fed by two paralleled cables. Except when it isn't. If a screw works loose somewhere in the circuit, the ring can be broken - yet you might not know it as there may still be an intact connection to every socket from one direction. Now the ring becomes two radials but sod's law states that the tumble dryer, kettle and toaster all huddle together at one end of the break. And then the burning smell isn't necessarily the toast. A radial will have an MCB rated for the safe current carrying capacity of the cable it feeds and at no time can the cable be stressed beyond that limit. A ring final may become inadequately protected due to a (relatively common) defect.2 points
-
No. The one I posted a picture of earlier was done because the owner of the wall said there was nothing wrong with it. So if the wall leans a bit more it would come to rest against the king post wall and move no further.1 point
-
Hmmm, how does it deal with internal measurements? My favourite is a bit more low tech but effective: Advent 2 in 1 Gap Tape https://www.amazon.co.uk/Advent-Professional-AGT-5025-16ft-Measure/dp/B0021FXI5Q My next toy is probably going to be a thermal imaging camera, was thinking about this little one. Might be worth a punt https://www.amazon.co.uk/Topdon-TC001-Consumption-Temperature-Sensitivity/dp/B0BBRBMZ58/ref=sr_1_1_sspa?keywords=topdon&qid=1674846376&sr=8-1-spons&sp_csd=d2lkZ2V0TmFtZT1zcF9hdGY&psc=11 point
-
If it IS wired to Fig 19 then the LS is the Live Switched from the loft unit to the fan (being pedantic is is actually switched 24V but does the same thing) So if the fan stays on forever it has to be humidity. Turn the humidity adjust pot fully clockwise to start with. and the timer pot fully anti clockwise so working out what is happening takes less time.1 point
-
I think it may be wired wrong. It needs a permanent live to keep the trickle going plus a switched live which is triggered by the PIR.1 point
-
Much earlier in the thread we suggested King Post retaining wall systems that don't take much space and would just go in front of what is there to stop it leaning any further. For some reason this was rejected?1 point
-
1 point
-
A few random thoughts. Entrance to utility from Kitchen breaks up the run of worktop. Have a combined utility and downstairs WC accessed from the hall so no door into kitchen. The cupboard from the hall between the study and WC is the obvious coat / shoe space. Don't have a door, a neatly detailed recess with hanging for coats and a shoe rack at the bottom. you might want to redact your address from the plans........1 point
-
Hi @WWilts Crap! If the thing will only operate at 90% RH why have something you can adjust???? However if you turn the humidity dial up clockwise, gently, to the limit and it turns off then the humidity level that the fan turns on at has been set too low. Don't forget it has a delayed stop so may run on for 50 mins! (turn all the way anticlockwise for the least delayed off. I usually set fans between 40 and 60% relative humidity as this is considered the most appropriate for a home. This may or may not change things....1 point
-
No. You could use DC coupled PV/batteries with DC charge controller, which also feed an inverter with mains AC backup - AC backup only kicks into run loads or replenish batteries (if you so desire) if PV output has been poor, no way to export the generated PV in this setup (although methods do exist). This is the initial system I will use to take my first floor of my house totally "off grid" with the security of a grid backup. The plan being to ditch DNO connection entirely once I am self sustaining with a suitable backup supply (probably a natural gas generator - maybe diesel initially).1 point
-
1 point
-
1 point
-
1 point
-
Hi @GraHal In my humble opinion, I would want one with 2 pipes (an inlet and an outlet) or with a concentric pipe. Our MVHR whole house system runs the warm air out, heating one side of a temperature transfer thing, whilst the fresh air coming in picks up the heat from the orherside of the temperature transfer thing at the same time. This warms the incoming air in winter. Although it may be the single ones your looking at operate differently. Can you post a link? M1 point
-
I'll make some further inquiries, but by the sound of it, there's no night and day difference between the two where double glazing means I'll be losing heat day and night while triple glazing would keep all the heat inside. I think I might stick to double glazing since the rest of the insulation in and around the extension is really good + oversized radiators connected to a very efficient boiler. As for the price, you're right, they are cheap. I found the same ones for considerably more, I just can't see myself forking two and half time the price for basically the same product. While I'm sure there are some differences in build quality, I'm also convinced I won't be getting a swiss cheese of a frame. The entire project is a mid-budget one anyway, so it should do. Thanks all!1 point
-
Turn the power off and test that it is really off. Remove a convenient socket and take the wires out. you will have 2 live, 2 neutral and 2 earth. Measure the resistance between each L, each N and each E cable. Ideally using a proper continuity meter but an ordinary multimeter on ohms will do for a quick test. You should get the same reading for L-L and N-N and E-E will typically be about 1.4 times greater as the earth core is smaller.1 point
-
In defence of the ring final. In most instances the Current Carrying capacity of 2.5mm t&e is 27 amps, and rarely less than 20 Amps, so it would not be overloaded in most cases if there was a break. (certainly not overloaded to twice it's rating) And testing the end to end loop integrity of a ring final is a very easy test that can be performed at the consumer unit or any socket on the ring.1 point
-
I wish I was better at explaining. Perhaps this article on the TLC-Direct website might do a better job. This picture from there should help: They arbitrarily chose to show a break just after the first socket to the right of the 30A breaker but of course it could be anywhere. But you should be able to see how up to twice the expected current might end up in the cable if a fault develops. The big fail is that users may be blissfully unaware of the problem. In practice one socket (the one with a loose terminal) is very likely not to work but it doesn't necessarily even have anything plugged in to it.1 point
-
It's left on, but on a sunny day, the immersion diverter tends to keep the tank so warm that the ASHP won't come on, even overnight. If we're using a lot of hot water for some reason, or it's cloudy, the ASHP will come on to heat the tank. Also, if it's warm and sunny (especially for more than a day or two in a row), we generally run the ASHP in cooling mode during the day to keep the heat down.1 point
-
Yup, you’ll need a bigger buffer, agreed, but £3k now is bucketloads cheaper than all the faff and retrofitting of another device later on / more complex controls / integration etc etc. Physical size will be smaller and neater than an oil boiler being retrospectively plonked alongside the ASHP . You won’t really get a smaller oil boiler either way, so if you want oil then discussing size is moot ( and needs to be based on a min of 15/16kW for this exercise.1 point
-
Be about 10 days and I’ll be on a project with some peel & stick and send a pic remind me tho1 point
-
To not install a softener is madness, sorry. Knowing that all the crud and scale is growing on / in everything, from the day you switch on, and doing nothing proactively to defend against / prevent this from happening makes absolutely no sense to me whatsoever. Showering in glorious soft water is fantastic, vs the hotels I stay in ( when behind enemy lines ) where I need to use 3 times more shampoo / gel etc is something I couldn't cope with or get used to, let alone justify choosing NOT to mitigate against! "Go soft or go home, lol". Probably a good time to remind the masses that manufacturers of certain equipment / appliances / outlets will stipulate that; beyond a certain PPM of hardness their warranty goes south and the installer / owner should mitigate, howsoever, to prevent damage / early failure of said equipment. Just "no". Sorry!1 point
-
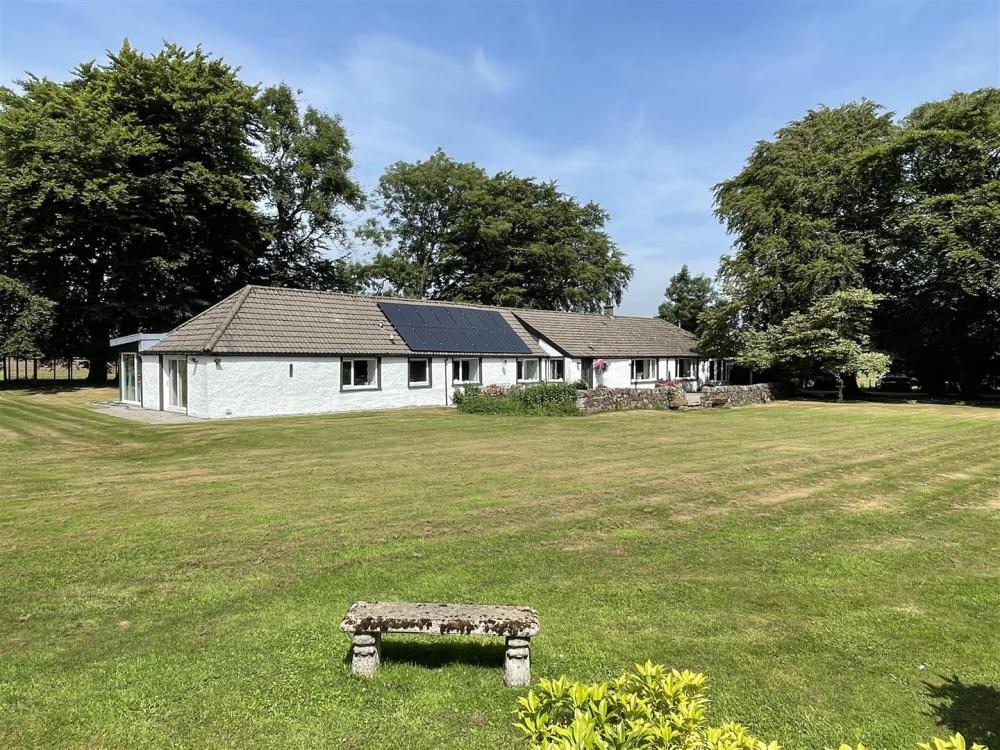
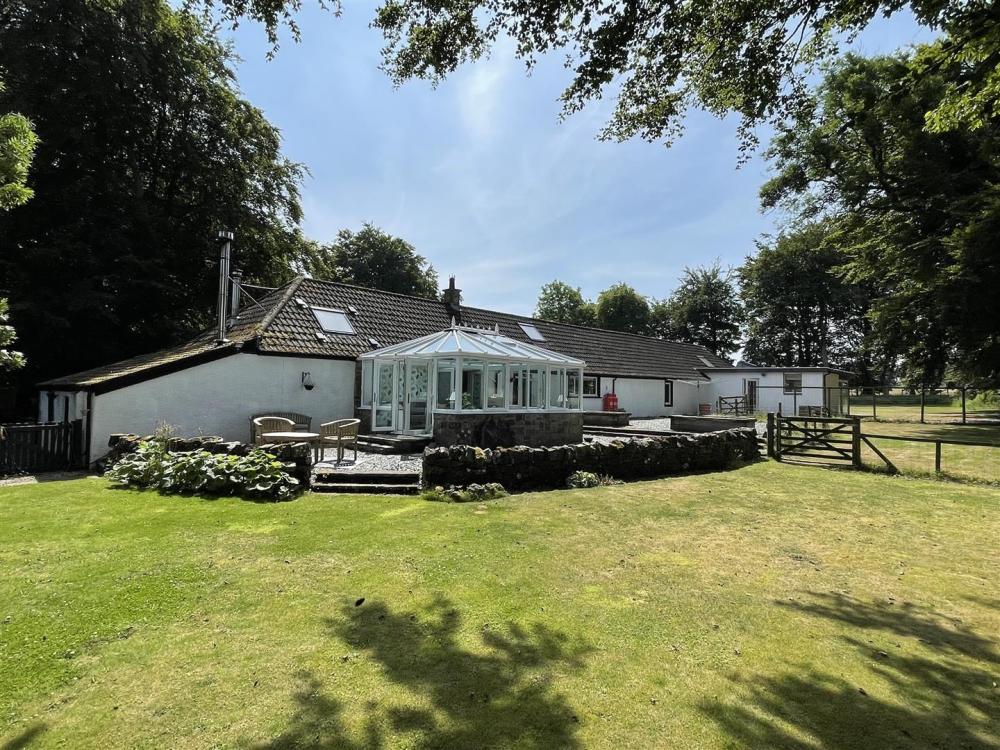
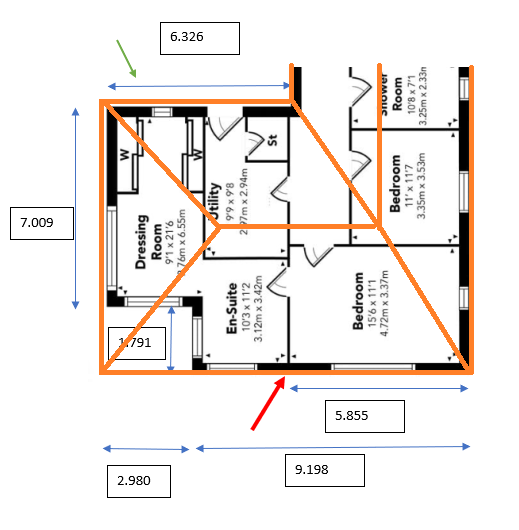
Looking at the agent's photos you linked to, the language of your property permits the use of shallow pitched roofs: This may help inform a suitable design. Harmonising the hipped edge section over the bedroom with its lower soffit level is one of the main challenges. By the looks of it though, the soffit line might just continue along forming a slight brow over the glazing (which is set back a little way). The pitch of this roof section would have to drop sufficiently to span the extension which is getting on for 9m! I estimate the pitch would have to be 33o on these three new planes:1 point
-
1 point
-
That is what we would do, but others, in the future...1 point
-
Just protect the roof from any sharp edges and no worries.1 point
-
After several year, can you safely stand a small scaffold tower, or ladder on EPDM?1 point
-
For me, having done GRP and rubber. Without a doubt it would be EPDM. A decent installer will have no issues detailing the lantern and box gutters ( I'm assuming that's what you were describing) EPDM can sit in water with no detriment and can easily be patched if it gets damaged.1 point
-
Is can, but these new PU resins are marvels of chemistry and can be applied in the wet. I want to play with them, but missed the guy when he did the roof.1 point
-
Sorted it today. Fitted 40mm offset connector and mcalpine pan connector with 32mm branch on to which i have fitted an aav. Managed to road up from the manhole and cleared a large blockage. Hopefully its sorted, only just moved in in Nov so may have been a n issue for a while. All working fine now.1 point
-
Having patched up GRP boats and cars, it strikes me that it could be more successfully repaired than the other options as well?1 point
-
GRP properly done will last 40 years. We have just had our old corrugated asbestos roof repaired with a polyurethane, not rained yet so cannot comment on it at all.1 point
-
Are you using blocks in the inside ? I am used to laying old imperial bricks ( as well as metric) and the vertical tie spacing can be problematic.1 point
-
If this is a terrace and most others have changed to PVC you could do the same. You can get the gutter cleaned out with a long reach vacuum for around £100. It has rained a lot. It is all gutters, damp and leaks at the moment.1 point
-
if your wanting any sort of build warranty then drain tests will need to be carried out and the results provided as well. Not that hard to do and the kit can be bought for under £30.1 point
-
1 point
-
I install Geberit, and they make a shallow profile frame that will sit within a 100mm ( typical 4x2" ) stud wall. Would that help? Not sure if Grohe do one that thin.1 point
-
If it’s an outside wall it’s worth knocking a brick out of the back an adding a vent brick just above the damp course on the outside wall1 point
-
Can it not recirculate ..? Usually go straight through the wall behind the extractor if you want external - is that not an option ..? Make and model would help along with a photo or a plan1 point
-
Who’s land is the wall on? How long has the wall been there? ahh, just seen the pics too .. a new wall on your side cast up against the existing to stop any movement and root penetration.1 point
-
If you re about to develop the land Re building a retaining wall in the grand scheme of things isn’t a major job and stop this rumbling on throughout the build It would be a long and expensive process to force your neighbor to rebuild it Which leaves you with two options1 point
-
This is also a bit for all on BH. I'll assume that you are going to build a home for yourself rather than just looking at this as a commercial opportunity? If so (commercial) then you should be sticking your hand in your pocket for professional advice and not be tooling about on BH for free advice as folk on BH also think about their neighbours. I do a bit of claims work I but don't just act for developers / builders I also act to defend home owners against development in an SE capacity. I hope you get my drift? Here is a thing. As an SE I do a bit of claims against say the NHBC.. by the time I get called up folk are often at their wits end, suffered a lot and have spent loads of cash, often unnecessarily. Positive note: Let's assume you are building your forever home.. you want to get on with your neighbours, some can become great friends, keep an eye out on your property when you are away.. gives your kids a neighbour to go to in an emergency or you too when you get older and need a hand out. That has a value. Holding that train of thought.. you want to get on with your neighbours... really you do in the long run. I'm stating the obvious but your neighbours may feel they were there first.. have ownership of the view / privacy and been able to plant up their garden the way we they wanted. This is human nature.. imagine yourself in their shoes? If you can't then you need to learn more about negotiation. I'm not suggesting you go all soft.. but to negotiate well you have to put yourself in your "enemies" shoes and if you want a forever home you need to compromise to get good neighbours and what you want without a big legal barny and the risk that comes with it. Lastly never under estimate your neighbours, some may have friends / have relatives who may be with KC's, Lawyers QS's, Architechts, SE's and CE's the list goes on.. and if they feel you are bullying they will jump to their defense and often work pro bono.. I do and can tell you I can quickly rack up the stakes for you just as an SE.. to the point where you will often wish you had never gone down the legal route. Imagine your neighbour came on BH looking for advice? How would that play out? To make a start on resolving something like this, your post suggests you are already frustrated? Go back to the start. Ask: 1/ Is the wall dangerous.. is it a high wall? say greater than 1.0m in height. Could it hurt someone. Lets say the boundary wall is 1.2m - 2.0 high. As a rule of thumb if the top of the wall is more than 1/3 over the centre of gravity then that is a good starting basis as an SE for making the case that the wall is not safe. Say the wall is in old money 1 foot / 12 inches thick. The middle third is 12/3 = 4 inches. Thus if the wall is leaning out more than 2" (50mm) at the top then you question the stability. Next is the condition of the mortar.. if it has deteriorated then that has to be considered. If roots have penetrated the wall.. again this leads to instability. 2/ What do I want to build? How close to the disputed wall do I want to go? Best thing to do is to mull this over at your end. Post a few photos and your ideas / plans. The good news is that you probably have more options than you realise, often with a bit of tact things can be resolved. I totally get that you feel you may want to go legal.. but you'll just suffer grief. The first thing you need to do is fully understand the problem. Why is the wall bulging and what are the consequences. Safety is paramount and that is where your best argument lies. Unless the wall is unsafe your neighbours are probably doing nothing wrong! It may well fall to you to prove it is unsafe. Also if you build something next to the wall that compromises it further then the responsibility lies with you.. be careful what you wish for!1 point
-
Your insurers wont be interested, no damage occured, no insured peril. However if you notify your neighbours of your conern and document it, if it comes to a claim your neighbour's PL insurers (usually contents) may in a sticky position. Damage was forseeable and your neighbours negligently did nothing. Photos letters, annual reminders and file until needed.1 point
-
1 point
-
1 point
-
We are just commencing our second self-build (started onsite last week). In both cases we have used Architects and in both cases have been very happy with the results. We have outlined how in both case we selected and worked with our architect which we hope will assist other people starting out on their self build journey. 1) Start thinking about which architect you are going to use when you start looking for land and not when you have found land. 2) Draw out a requirements list. My approach is to provide a brief / framework for the architect to interpret rather than prescriptively dictating to the last detail. Requirements should be no more than 2 pages. By making the requirements generic, you can apply them to most plots of land. Include in the requirements why you are building as well (develop and sell, house for life etc) 3) Checkout your architects previous designs. There is likely to be a common design pattern and if that is way off what you want then maybe the architect isn't for you. Also go and see a couple of houses - just viewing from the outside can tell you a lot. 4) If you see a plot that is a potential candidate, email architects on your shortlist for feedback. Most architects will provide feedback for free within reason and the reply will help you to decide if the architect is thinking along the same lines as you. Also, meet with your architect before you engage formally to check that they are a person that you can work with. 5) Be completely upfront with the architect about your budget, put it in your requirements list and be very clear what that budget includes and doesn't include. 6) Be completely upfront with your architect about their fees. Fees based on a %age of the build cost are OK as long as the build cost used is your budget for the build at the outset (fixed) rather than the actual build cost (variable). 7) Good architects are in high demand and don't need to advertise so you will need to research (a lot) and do your legwork. Be prepared for the fact that you might need to wait for the architect you want to become available. 8. Check whether the architect has any experience in the build method you want to adopt and the energy standards that you want to achieve. Find out what the build costs have been on recent build projects and how these compared to budgeted costs . 9) Check with the relevant boards that any claimed registrations are correct. 10) Fees may seem expensive, but for the amount of work that goes into a design I have always felt I got good value for money. In the context of the cost of the project it is a small percentage much of which can be quite easily recouped with a little restraint on the fixtures and fittings. 11) If you use an architect local to the build, it is more likely that he will be able to advise on securing good contractors based on experience of previous builds. My architect has more than recouped his fee by drawing up an attractive house that is straightforward to build. Insulation is what we need to get to passivhaus but no more and the size of the house is what we can build to meet our budget (based on his previous build costs) and requirements. Listed below are the requirements we drew up which may assist others going through a similar exercise: Build Budget: £325K (House, Garage) excludes landscaping, external works and professional fees. The Plot There were a large number of objections to the development from residents but planning permission was granted on appeal. Plot width is around 16.7m. Plot length is 44m. Electricity, Water and mains sewerage (but not gas) available at the plot boundary. Functions of the Building Home for ourselves and the dog. Enough room for friends, grown-up children to stay and family get-togethers. Building a house for life as we can’t get what we like on the open market. We love cooking and the outdoors, so it should support that. Combine open plan living combined with a segregated quiet room downstairs Provide a comfortable and healthy interior environment with a stable temperature and no drafts. Design Direction and Requirements Good natural light to rooms is really important with dual aspect windows in as many rooms as possible but not too keen on huge oversized windows that require complex and expensive shading solutions Designed to Passivhaus standards in a cost-effective manner but don’t over-rely on technology that has high cost to install and maintain. Downstairs Open plan kitchen, dining room and seating area Utility room (able to dry clothes in using pulley) Lounge Small Study if possible WC / Washbasin Good Storage – larder cupboard, cloakroom and cupboard for cleaning utensils Somewhere to sort out a muddy dog and muddy boots (A covered porch with a stone floor and bench maybe). Sliding doors or similar out to the garden from the sitting area. Bottom of kitchen window to be level with the kitchen worktop. Back door into the utility room No large step into front or back door WC away from front door if possible Upstairs 3 to 4 double bedrooms. Small study if not room downstairs (or 4th bedroom) Built in wardrobes Cathedral ceiling. Master bedroom should be able to comfortably take a king size be. En-suite in master. Separate shower in bathroom. General Heating / DHW – no mains gas. Solar PV with a diverter? ASHP (noise?) Consideration given to some acoustic insulation between rooms and between downstairs / upstairs. Doesn’t need to be completely soundproof however. LED lighting throughout and up the staircase Point for charging electric car. Ability to use battery storage in the future should it become more cost-effective. No requirement for chimney or wood burning stove. Agnostic about whether the garage is attached or detached, but should have storage for bikes and a little workshop area. Could be modified for easy access upstairs in the future (Straight staircase maybe). Point for charging electric car. Low maintenance exterior for windows and wall facings. House to have a more contemporary feel inside. Outside to tie in with planning / design code. Window frames recessed into the openings. Other Stuff Recess in shower wall for soap etc. Built in bookcases Lots of sockets Sockets in cupboards for charging hoover etc. Room in utility room for dog crate Built in water filter Water softener Lighting on dimmers with switches that gradually turn LED lights on so they don’t blow. Good outdoor lighting (pathways) Outdoor power point / tap Phone point in every room1 point


.jpg.c21f3ac78c9b7efd90cbdcb312744dc5.thumb.jpg.7adcad4c0e384f5ecd7d56b0618df6e5.jpg)


