Leaderboard
Popular Content
Showing content with the highest reputation on 03/16/20 in all areas
-
Is there such a thing as too many? I was looking at some pictures on here for how the UFH manifold is temporarily supported (installing mine at the weekend) and noticed that on all the images there is a distinct lack of mesh castles? I thought i needed to put in enough to stop it flexing too much whilst walking on it - i think now that i may have been overzealous?4 points
-
Sometimes I think I'm just unlucky, sometimes I question whether we should ever trust things written on the Internet! So based on the rave reviews here (and elsewhere) I bought a kitchen from DIY Kitchens. Lead time was long which wasn't too much of a problem as the property was having major renovations and I wasn't in a hurry. It arrived just in time (well on the last day of the week window given). The delivery drivers were friendly enough (their own team as I had paid for Gold delivery in a small van) but gave away a couple of facts that should have heightened my senses (by the way chatting to the man in the van is a great way to find out the truth!). Low and behold there was an entire unit missing. So I phoned (as the driver advised me against raising an online ticket), was told I should raise an online ticket. I said "well do it for me then" which she did. Anyway long story short (broken promises a plenty) it took them 7 days to even acknowledge the shortage. Now two weeks have passed and all I know is that "we've raised a new order". So then I go back and say "Hey, I don't have all my order. Its all sat stored in boxes. Do I have to unpack everything and check for damages?". The answer was "yes". So despite not being able to fit the kitchen (No I wasn't going to leave a hole for the missing unit, that is just asking for trouble) I then had to unpack and repack everything. Oh the joy when I found 1 damaged door and 3 damaged carcasses. Again not even an acknowledgment of this latest ticket. Now for the other interesting bit. DIY-Kitchens are clearly quite masterful at deleting negative reviews on Trustpilot. Since this horror story began I've been checking it daily. Almost every day their is a negative review and every day one of the previous ones disappear. If you look today their are a few from the last few days. Perhaps DIY-Kitchens have succumbed to their own success? I'm certainly feeling grateful I paid by credit card!!2 points
-
I'll repeat, it has nothing at all to do with the thickness of the PIR (or any other insulation). All foam insulation has a maximum compressive stress that determines how much it deflects when loaded. Making the insulation thicker doesn't change this. For example, the EPS under our floor has a maximum allowable compressive stress of 100 kPa for 10% compression. In reality this equates to about 10 kPa for a more realistic 1% deflection . It doesn't matter if the insulation is 50mm thick, 100mm thick or 300mm thick, the max allowable compressive stress remains exactly the same. To get a higher value means changing the insulation for one with a higher max allowable compressive stress, like EPS300 that can take 300 kPa for 10% deflection. The ability of the screed to work to spread a point load more evenly into the underlying insulation is key, as is the magnitude of the point load and the area over which it is imposed (which gives the imposed bearing stress on the floor immediately under the foot). The best analogy I can think of is snow shoes. Walk on thick snow in ordinary boots and your feet will sink in. Spread the same load over a wider area by using snow shoes and you can walk on top of the snow. If you have a floor where the screed isn't strong enough to take the point load, and so fails and crushes the underlying foam insulation, then spreading the load over a wider area will stop that from happening. .2 points
-
Looks like you’ve got the wrong bottle trap - that’s a 40mm and basin sinks use 32mm. Can use an adapter to take it to 40mm where required.2 points
-
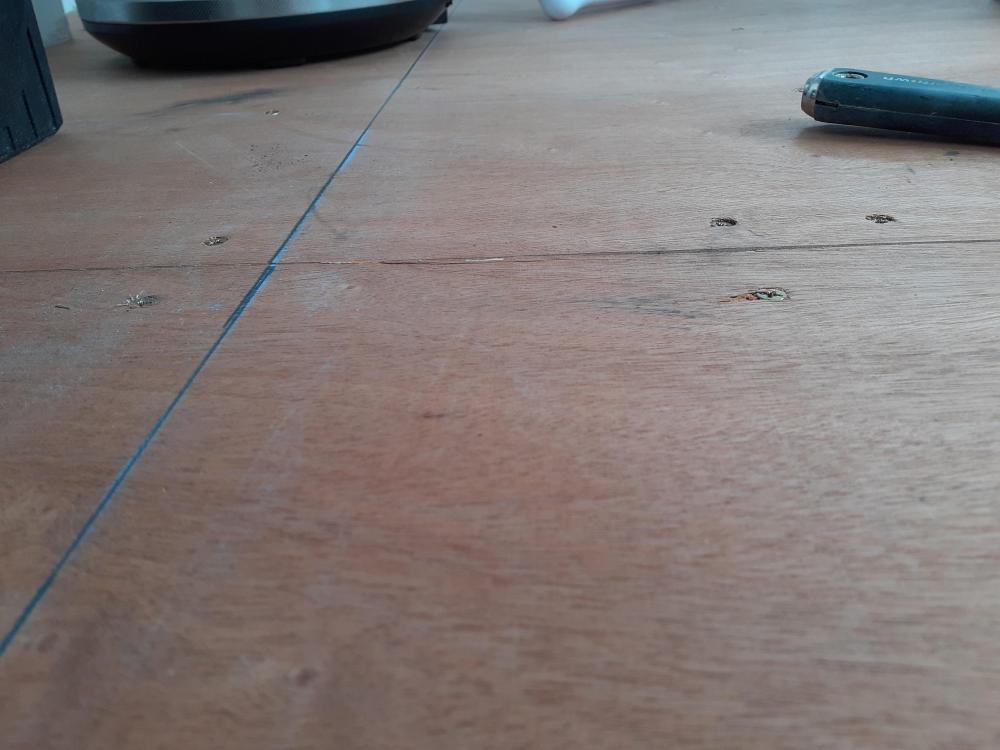
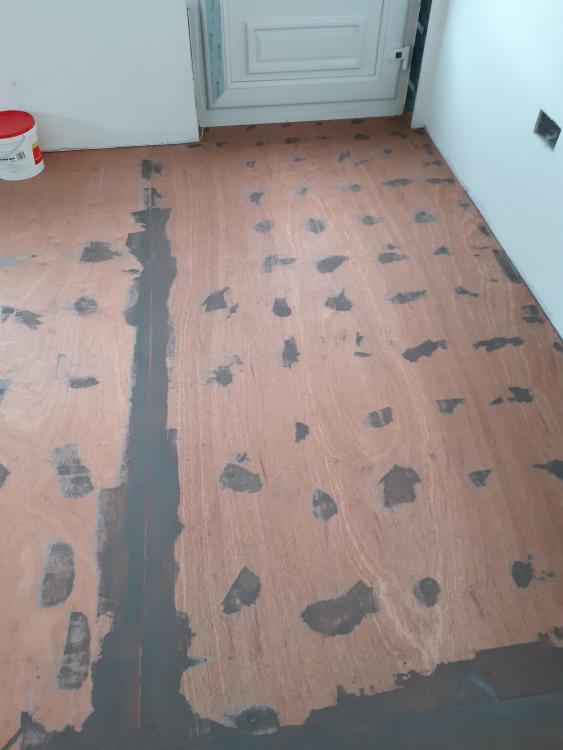
OK - I made a start. 12mm Hardwood core external grade ply was finished last weekend. I screwed it down on a grid, 8x12" in the field and 6" on edges, this resulted in a very smooth level floor (floor deck was level anyway). I then used F-Ball Stopgap to fill the screw heads and also to feather a section of the ply that differed in height by about 0.5mm - as I had the stuff I ended up just feathering the whole joint, took the finest of skim and that's me happy it is damn flat and level and these variations and marks cannot telegraph up through the Amtico. I then snapped lines to work out where cabinets would be and the centre line, I was going to butt a piece up to either side of the centre line but after a little test layout I discovered I would be better centring a piece on the centre line as that would save me awkward slither cuts. I even sanded the F-Ball just to get it super smooth, I then vacuumed it all.2 points
-
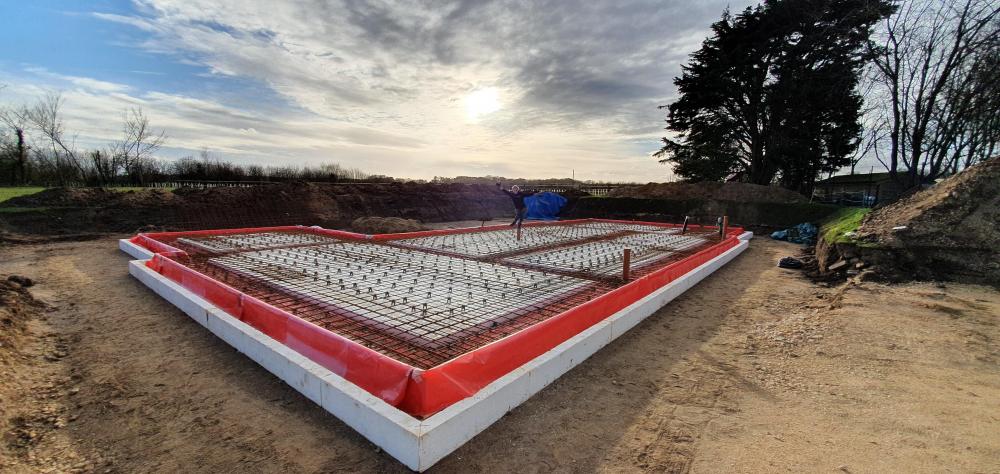
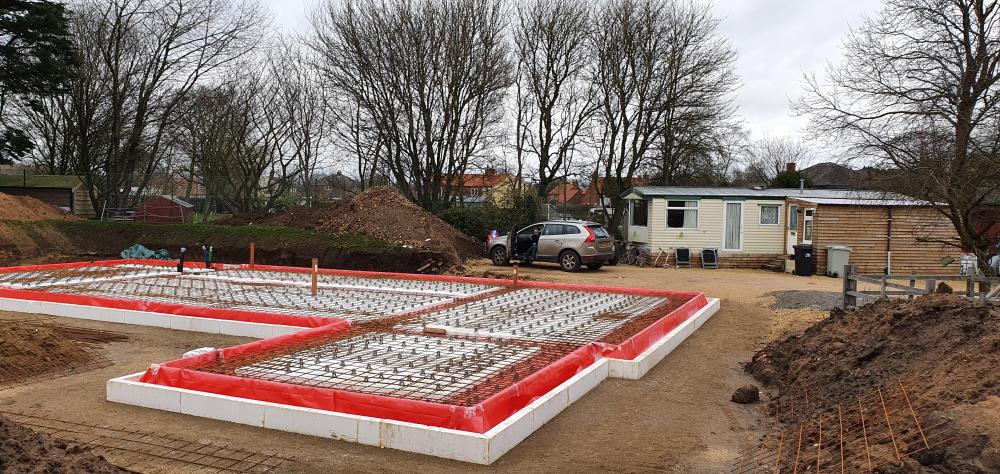
I intend to do the UFH pipe this weekend, yes its three soil stacks and four service ducts into the plant room. Black 110mm to run SWA in, grey next to it for phone line, green and blue are to run water into and out of the house (green because it's what I had to hand!). It's been some graft doing this, approx 180m2, mainly by myself. Had a few days help from father in law and a mate as well as the missus who has put in a few days graft tying steel (didn't do her back any favours!). To be honest the weather was the thing that probably took its toll the most. Gets really windy on site and I was out in it all trying to meet a deadline (self imposed as I want the house up at start of April) for the concrete pour. Made mistakes - normally due to rushing and thinking 'that'll do'....it usually doesn't! The sand blinding was the first mistake and it affected other things. A it if a saga to explain but I should have done a second pass (nearly did). The surface wasnt flat and the EPS ended up not sitting right, after a lot of cutting and glueing I scrapped it, pulled everything off and redid the sand. It was much better this time and the EPS just butted nicely together. Didn't put profiles out. Yarp stupid, I thought about it but once I'd got one wall marked out I assumed I could plot the other corners to that and then fill in from corner to corner. No. What looks straight to the eye is not, the walls wandered out by up to 30mm on the longest run. Scrapped it again, put profiles up and then it was easy. Rookie errors which cost me time. Frustrating as I considered them but dismissed it and cracked on only to have to do it as I was thinking to Nearly got a slab though so things are good - until Corona virus gets in the way?♂️1 point
-
1 point
-
Really nice job! I'm looking very closely as I'll be doing mine before too long. Those photos are before the installation of the UFH pipe? Is that 3x stack pipes? And what looks like three service conduits (green, blue and black), presumably in the area of a kitchen/utility?1 point
-
1 point
-
1 point
-
I will just get on with building the house. There will be the garden to tend to soon, and next winters firewood to start chopping and stacking. Then there's Building control for a temporary habitation certificate and a VAT claim to submit. I wonder how BC will cope with that if they are locked down? Would a trip to the boat class as "essential travel" as long as I promise not to go close to anyone else?1 point
-
1 point
-
1 point
-
Thanks for asking. Yes, all is well. Long story short: I had to change the design of my bungalow to have a green roof and pay for some expensive water calculations to convince the local SUDS-officer to agree to me being able to discharge storm water to the local drain. Quite a palaver but got there in the end!1 point
-
1 point
-
I had the same planning condition, so I forwarded a copy of the Enviro Search report our solicitors obtained when we bought the plot. This report included the statement the level of risk is not such that the property would be designated "Contaminated Land" within the meaning of Part 2A of the Environmental Protection Act 1990. I also stated that references in the report to the site being in an area affected by radon would be addressed through the usual Building Control process. They accepted this without any questions.1 point
-
No idea, TBH. If you want to do a simple experiment to see what happens, then get a bit of foam insulation (or foam packaging), a bit of cardboard and a bit of strong plywood. Put the cardboard over the foam (this simulates a relatively weak screed or floor) and then push on it with a narrow stick. You'll find that the cardboard won't be able to spread the load and will fail, resulting in the stick sinking through it. Try the same with a bit of stiff plywood over the foam and you'll find it takes a great deal more force to try and push the stick through it. In each case the foam hasn't changed at all, it's just that the surface above has, with the plywood spreading the load more evenly.1 point
-
Have a look at this video for LVT These are the boards https://www.wundatrade.co.uk/product-category/home/overfloor-retro-fit-solutions/wundatherm-underfloor-heating-boards/1 point
-
That's not enough imo. My downstairs has about 80mm PIR or so ( extensive extend and reno of a bungalow, done in 2008),and I would far prefer it to be 125 or 150mm, since the ufh struggles. Peter's idea is probably a good one. Ferdinand1 point
-
While your quote is quite high You have done very well to get a detailed quote Most groundwork’s companies won’t give a fixed quote So it would be madness not to load it a little bit Don't be surprised if the muck away rises Very difficult to estimate As BC may come along and ask for mor depth1 point
-
+1 We have a mixture but in some rooms we have 80mm PIR insulation and about 60mm screed with UFH. Wish we had more insulation. Our favourite rooms have 21mm engineered oak flooring on battens with PIR between and no screed. The top layer of PIR has foiled covered grooves for the pipes that spread the heat. A system like that would allow a greater depth of insulation.1 point
-
That’s very thin. What is the proposed floor finish ..? You could go 100mm insulation with one of the thin UFH board systems like the one from Wunda at 22mm on top, so your less than the 135mm and substantially better heat retention with a smaller loss of heat store from a screed.1 point
-
When and ONLY when your tiling is done! Push the flush pipe into the wall and make a mark level with the tiles: Put the flush pipe into the pan connector then into the pan with a bit of silicone spray: Mark flush with the back of the pan: The measurement between the two marks is how much you cut off the flush pipe, about 85mm in my case: Cut it off the non ribbed end and emery off the hairy bits: Ditto the poo pipe. I found a plastic bag used like this helped when swapping between the poo pipe and yellow bung as I was into a "live" drain. The yellow bung sat in a bucket of Dettol: Marking the poo pipe level with the back of the pan: Ott to cut the poo pipe down once I knew how much to trim off:1 point
-
Stick the temporary faceplate over the flush mechanism and the two yellow bungs in the flush and poo pipe holes asap to prevent debris getting in. Do not cut your poo and flush pipes until the tiling is done.1 point
-
I'd tend to the opinion that NEC contracts are overkill for a self build. They can work well on larger jobs, but from experience they undoubtedly involve more time and paperwork than other contract types. They need quite a lot of knowledge to execute correctly and protect both parties. I have never seen them used on self build jobs as they involve too much work relative to the typical fee. The general advice above related to allowances vs lump sum seems sensible, but if there is any uncertainty over quantities or effort a contractor is likely to price in some risk and pass it to you if you want a lump sum.1 point
-
NEC Contract? Option B? It's remeasurable. I would push for a lump sum/ activity schedule (Option A). Risks I see are: Site clearance is an allowance. If more than one day, this will increase per day by the sum. Grab load allowance - As above for the allowance, how much is a grab load? I would want a lump sum for this and the site clearance. How much vege' are they clearing? Reduced level dig - Is the site already level? i.e. a scrape with a bucket. Or is the site signifcantly undulating? If it's flat then I would ditch this and go with a single JCB + driver for a 2 days at around £1500 allowance. Also, is the 200m3 correct? = 500m2 clearance area for 400mm. Spoil removal is 80m3 - What they doing with the other 120m3? Is that the trim formation level? i.e. landscaping. Drainage and water supply look OK for risk. Prices seem reasonable but I'm not Cambridge based so won't claim to know. Off-site drainage - This can vary a lot and depends on your site plan. Does it include traffic management etc? Off-site services - That doesn't look unreasonable to me as a sum. And you look fairly protected from risk, it'll only change if the meterage goes up. It's always worth getting them out to site first so they can measure up themselves and take decisions. That way, if they argue a change then you have the security that they had a site visit to include these things and price accordingly, which places it as ther cost.1 point
-
Whassa 90 degree tee, an elbow? Yep, if it's all in firm your there.....unless you go ott and stuff the cavity with sound deadening stuff.....like one bloke on here did.....1 point
-
1 point
-
You don't need the 3rd wire, that is just a speed signal. I used to build a lot of PC's and Servers and fans were always coming in 2/3 wire mixes. I never had a 2 wire fan fail to operate on a 3 wire circuit - it just meant you didn't have fan speed in the BIOS and if it had speed control it often ran at full speed regardless, which frankly isn't so bad.1 point
-
I have just looked myself as my switch needs fans too. https://uk.rs-online.com/web/p/axial-fans/6688808?cm_mmc=UK-PLA-DS3A-_-google-_-CSS_UK_EN_HVAC+%26+Fans+%26+Thermal+Management_Whoop-_-Axial+Fans_Whoop-_-PRODUCT_GROUP&matchtype=&pla-436838252065&gclid=Cj0KCQjwx7zzBRCcARIsABPRscO9z_Kt5TGUJ1y0seNnka8F-a5yIXL-PFUhGiuB7ZQCVTpp1iSDYQcaArPtEALw_wcB&gclsrc=aw.ds1 point
-
1 point
-
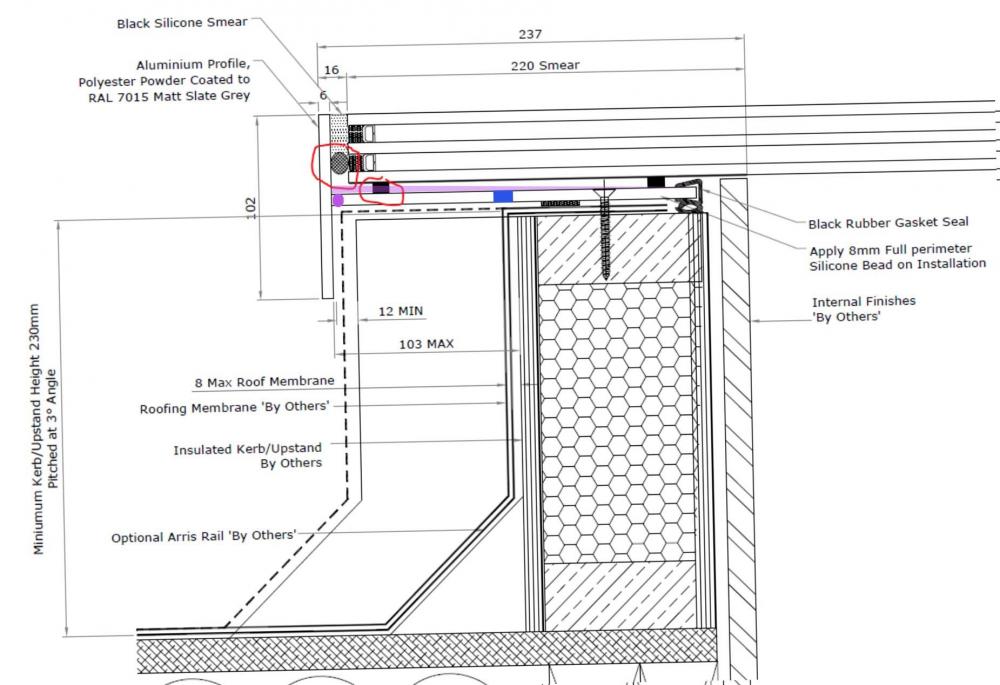
I've had a rather similar experience with a Vision AGI skylight on a flat Bauder (same as Sarnafil) roof. If i've interpreted your earlier blog posts and pictures correctly you made your own upstand and then the skylight was fitted onto it frame first then the glass inserted. You'll need to have been fairly hands on involved really to be able to answer the following points, but the top flat surface of your upstand needs to be really quite good in terms of its flatness in order to provide continuous full contact with the whole circumference of the skylight frame. It also needs the roof membrane to have been lapped both up the side of the upstand AND over the full width of the top surface. You wouldn't think this was critically important based on the supplied technical drawing but what if the frame actually does have weep holes, say where i've put a blue mark on your drawing. For me there were weepholes not illustrated, ask the supplier. Given the wide fitting variation of 12mm min to (103-8mm) max possible the actual whereabouts of the weepholes wouldn't necessarily sit where i've marked blue, but in this position they'd drip inside the membrane IF the membrane terminated on the vertical and didn't roll over. If they're blaming the mastic failure, thats the easiest fix for them and the first thing they want to try before getting more 'deconstructive'. I'd presume they've now drilled a weep hole at the lowest possible point so about where i've marked purple, on your lowest falling edge....so I've tilted the image for a fall and added a pale purple 'wedge' representing the potentially trapped water that drained out. To form that wedge of water all mastics and gasket seals had to get breached and the wedge height reached the screw through the frame into upstand. Maybe the screw became the leak point....otherwise the wedge would have to grow to overflow the internal edge of the frame, at which point water would escape directly behind your internal finish...can you see any staining or evidence there. These are my thoughts anyway, hope something is useful. Mastic was initially blamed and replaced in my case but it was not the final answer. I actually ended up with a replacement skylight but that was in part due to a concurrent problem not relating to the leak(blown glass unit leading to condensation between panes). My initial skylight was supply only and I made my own upstand. The replacement (on the grounds of the blown unit) was offered supply only, leaving me with the consequential costs of removal/refitting totalling approx £1000 for me, largely due to need for crane/lifter/banksman. They denied liability for getting the skylight onto the upstand but having ascertained the info' that @Temp has uncovered for you I persisted and so they delivered and fitted it with their own team and hydraulic lifter 'in the interests of being helpful'. I still paid £500 for a local crane though but reserved the right to make a small claims when I have time (which will be never). I would fully expect to win that claim as should you regarding your peripheral damage.1 point
-
1 point
-
I was about to say the same thing until @Temp beat me to it. Almost all supply contracts seem to have language similar to this and it is totally unerforceable. I think I quoted something similar in a post about a similar issue previously. Basically you cannot just wish away your liability for negligence by saying so in a contract. Imagine where that would leave us.1 point
-
Hold the nails with some long nose pliers to save your fingers at the start then use a long punch or two hammers to drive them home.1 point
-
I've got mostly minor DIY scars. Worst was when I fell off a ladder. I landed on a wood floor and was lying there unscathed, happy I had missed my tool box and thinking I'd had a lucky escape... when the ladder fell on me.0 points
-
0 points
-
0 points
-
0 points
-
When you tile this, it is not essential to cut around everything as accurately as @Onoff as the WC pan will cover all the holes easily. You could just do one big cutout. If, however, you leave a gap at the top of the flush pipe the pan will not cover it and you will cry.0 points
-
0 points

