Leaderboard


Popular Content
Showing content with the highest reputation on 01/10/20 in all areas
-
I've a slightly out of date test and inspection guide here you're welcome too. Fundamental testing remains the same tbh. The Scadden books are pretty good imo but for belt and braces the latest Guidance Note 3 is probably the best bet (about £27). Lots of clear, pretty pictures. I know I'm rarely serious but dead testing prior to energizing a circuit is a must. Saved the day for me on many an occasion. Done properly it'll flag up your and other's mistakes and tbh isn't that hard to do. An all singing all dancing Megger multi function tester is around the £800 mark now. Of course you have to know how to use it.
 2 points
 -
Ages ago I wrote a spreadsheet for doing what-if comparisons to see whether it was better to invest in more insulation in the walls, roof, floor, fit better windows and doors, or fit a better MVHR system. Others have found it useful and I've been reminded that I've not re-posted it over here, so here's the latest version. It should be self-explanatory, you fill in the cells with your wall, roof/ceiling and floor areas, add the areas of each door and window, put in the U values for each and, if you can, get hold of the met data from the met office for your area (the data in there is for West Wiltshire, right on the border with Dorset). This isn't a thorough modelling tool, it just looks at heat loss fairly accurately but doesn't take into account heat gains, although there is a crude way of doing that by drawing a line across the seasonal plot at the point where you don't use heating and you can very roughly assume that anything above that line will be heating. Please feel free to ask any questions, but bear in mind I wrote it back when I was designing our house and haven't used it for a couple of years. so I may be a bit rusty. Heat loss calculator - Master.xls [edited to add latest version of the spreadsheet]1 point
-
I had to return an order to a German company (reuter.de) today. This is how the order arrived. If at the time of refusing the delivery, I'd have known what I know now, I would not have sent it back. Why? read on.... Megabad stopped delivering to the UK last year sometime. Reuter.de were cheaper than Megabad sometimes, so I ordered from them because they continued to deliver to the UK. Chatting to the guy in the Returns Department I find out that reuter.de is no longer shipping to the UK from the end of this month So bang goes that way of saving 20% then (with a further 20%off by reclaiming the VAT).... I have some other things on order - washbasins - there's a 3 week wait for them: not sure whether they're going to be delivered..... bit cross about that because if thats the case I should not have been able to purchase them. Worse things happen at sea eh?
 1 point
 -
After a summer spent cruising the canals we arrived back on site with a little trepidation and a lot of enthusiasm. When we left the build we had just got the scaffold down and had a lockable water tight shell,. Well almost water tight, we still have two leaks. One where our roof lights join and another on a roof seam that abuts the wall on the house gable. Fortunately neither were bad enough to have caused any damage over what has been a pretty dry summer. The internals of our ICF build required no supporting walls making it a nice big unencumbered space to start installing the MVHR, electrics and plumbing. We had decided to get the MVHR installed first as the pipes are the largest and least flexible. The system design for our MVHR had been provided by Blaugberg making it a fairly straight forward install. Of course the design hadn’t taken into account joist spacing or any other details of the construction. Taking the joists into account etc we ended up mounting the two manifolds next to the MVHR unit raised for the floor to allow access. Getting the MVHR into position involved getting a bulky 80KG box to the roof area of the house, a task made pretty simple with the aid of an electric winch. With the manifolds raised off the floor and two of us feeding the pipes through the aero joist webbing we managed to get all the pipes in with minimal loss of skin. The manifolds have large removable panels that allow access to install flow constrictors. Our intent is to get the MVHR setup as soon as we can to help keep heat in the house and to get the humidity down from the 65-70 percent it’s currently at. One other job we wanted to get done early was an initial air tightness test. Although we are not building for passive certification we want to make sure we are as close to the 0.6 passive house level. We needed to get the roof VCL installed, in our case this is just a plastic membrane. Getting the membrane in place where we have vaulted ceilings was time consuming as it involved step ladder, a ladder and staging to get to the top of 5M high. With the membrane in place we called in a local firm to do the air test. With the fan drawing air into the house detecting leaks was straight forward as the air was much cooler outside than in. We had a few leaks virtually all at the junctions of the VCL with the roof purlins. The guy doing the test recommended trowelling mastic over the spray foam which had been used to seal the junction of the purlins and the ICF. Having identified the areas we needed to fix we got on with the air test proper. As the test proceeded restrictor rings were fitted to the fan until the required air pressure was stable. The initial figures are excellent down at 1.08 ARCH which given we have a bare structure and know leaks around the purlins mean we should be able to meet the 0.6 ARCH. Interesting form me was the degree to which the fan got restricted, you can see from the photo that just a 15mm ring was left exposed. For a normal build this would be the case for a small single bedroom flat. With the MVHR tubes in place we set to installing the water pipes. It’s surprising just how much having to make decisions about tap positions can exercise your patience. We had opted to use a water softener and after a bit of searching around decided to use a Monarch Solo, a non electric water softener that gives ample flow rates for our house size. Compared to re-plumbing a house starting out from scratch made it a simple and quick. Again having two people to feed the pipes makes the job a lot simpler and saves shaving the pipes through the ceiling webbing. We will pressure test all the water circuits prior to do any plasterboarding. Along side the water pipe installation we also installed the electrical ring mains. With ICF it’s important that the wires don’t come into contact with the polystyrene as it leaches the plasticiser from the cable insulation making it brittle over time. Lighting rings will follow. We have a fairly good idea of where we want lights but it’s difficult to be sure so we plan to put in a lot of redundancy so we can change lighting as required once living in the space. We have also installed stud walls for the two bedrooms and bathrooms. The seemingly huge space soon shrinks! Having said that the rooms are generous. In the entrance hall one wall has a curved corner, a little more fiddly to construct but well worth the effort making the hall/stair area look really good.1 point
-
These are popular in Austrailia from plans I've seen online. Rather than being a second kitchen, it's more of a utility sized (or smaller) area with both storage and some worktop, decoupled from the ktichen which is typically open-plan. The addition on a sink means they can be good for food prep too if required, and not just for hiding all the dirty stuff. We saw some Metricon (australian builder) layouts with them in and really like the idea, especially the layouts that have a butlers pantry between the kitchen and utility and stole the idea for our house too. We have slightly less storage cupboards in the kitchen because of this, and like @Dreadnaught we plan to put the freezer in here also, with frezzer and two full height 600mm storage units on one side and a counter-top with storage below on the other side. We've not starting building yet, but this is where we got the idea from: There is a walkthrough VR of this design here: https://www.metricon.com.au/new-home-designs/qld/riviera?category=virtualtours&photo=riviera&floorplan=54 The metricon website also have plenty of other, more modest designs, with this concept too. This is our intereptration of it (clear copy! bit smaller I think though, and with the addition of pocket doors)


 1 point
 -
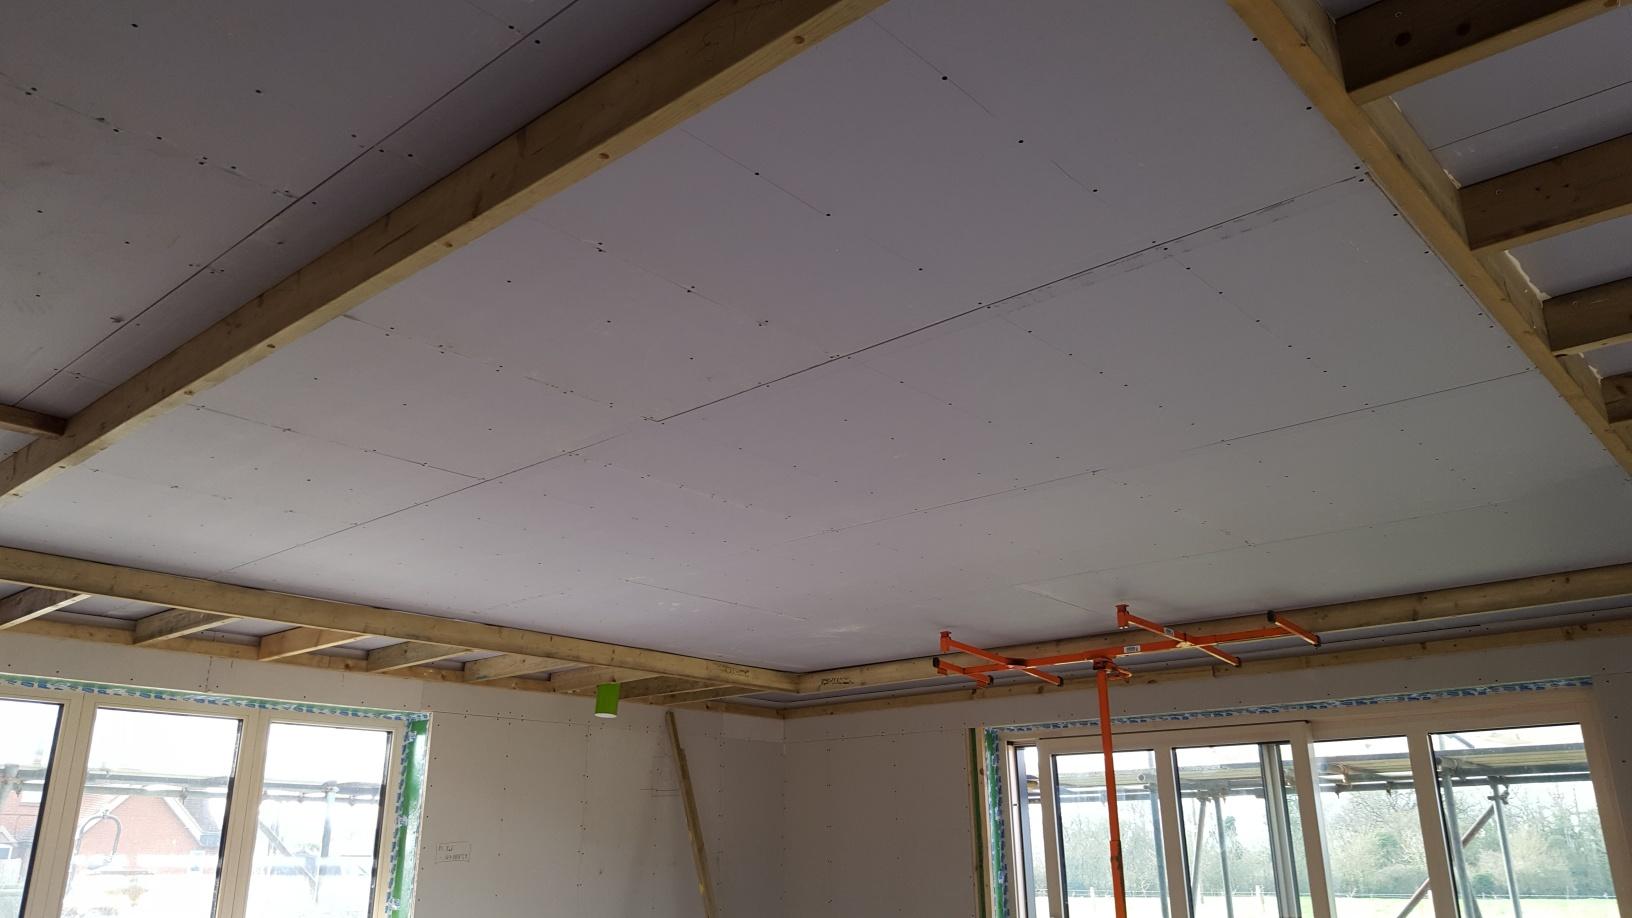
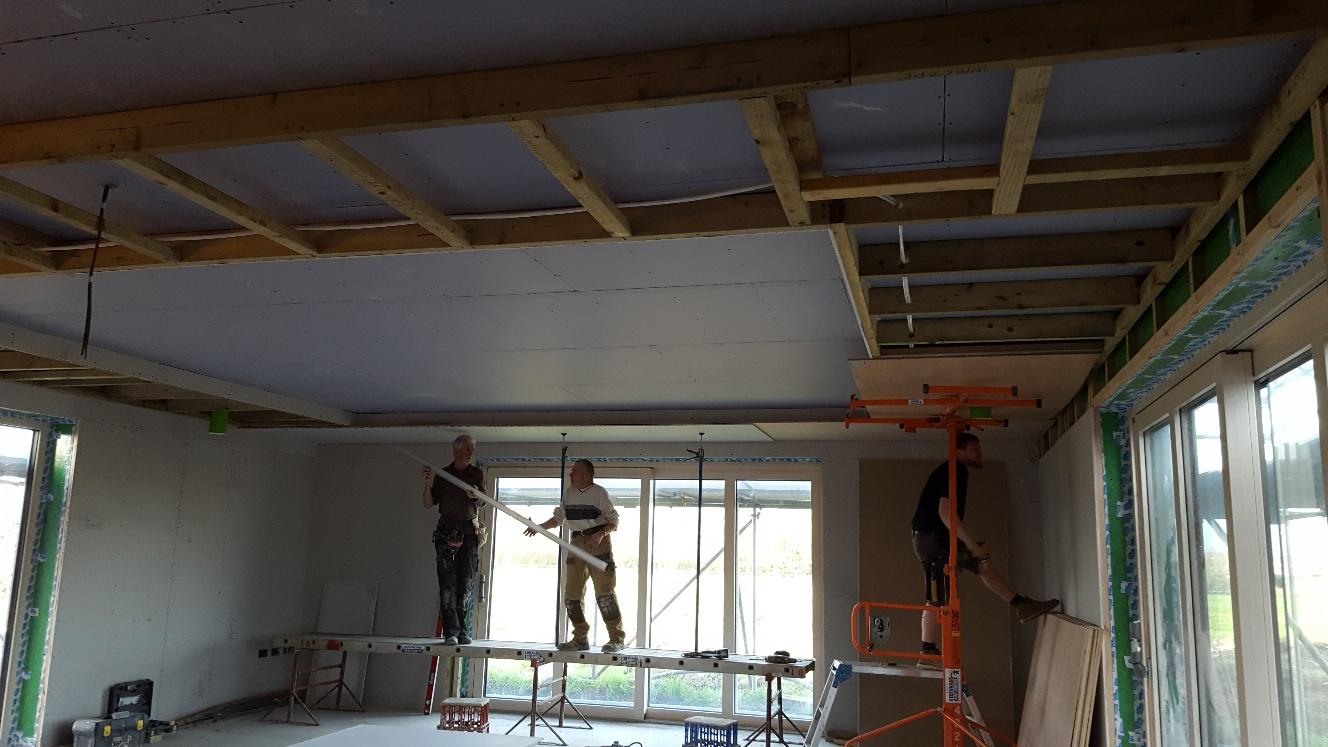
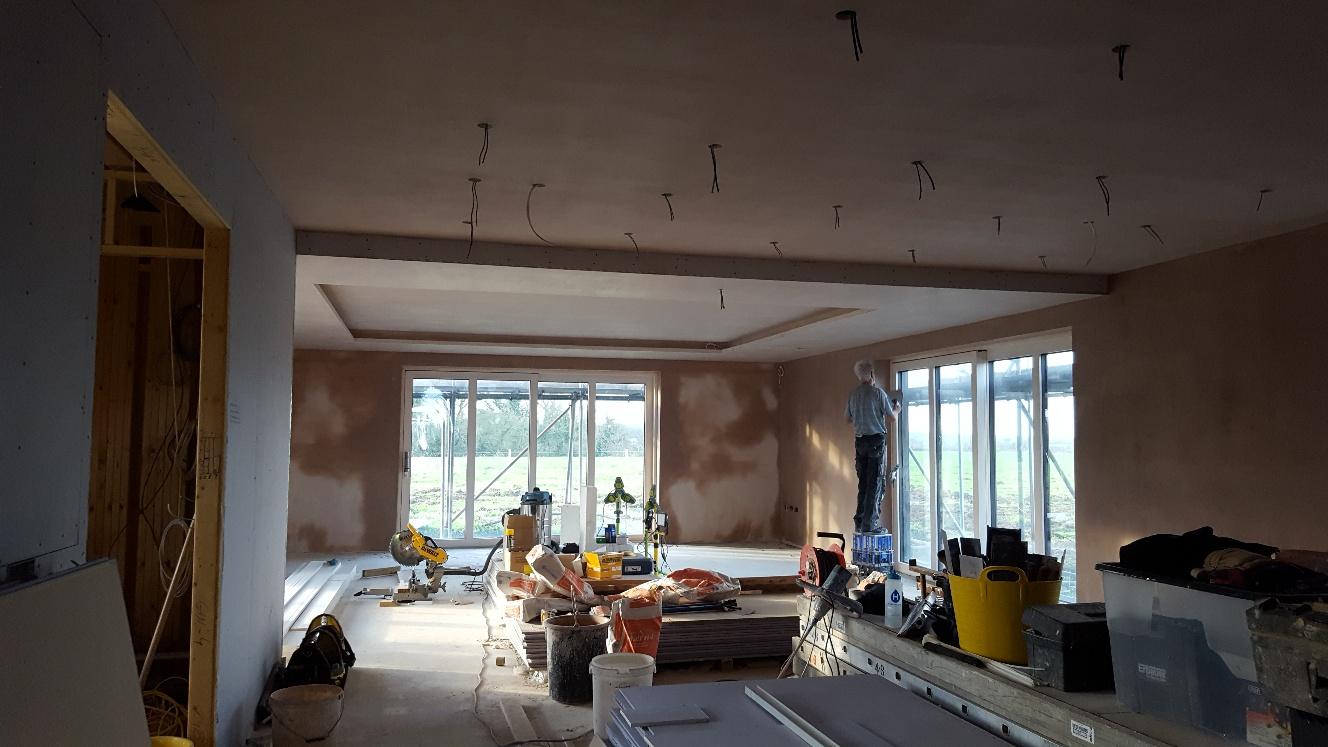
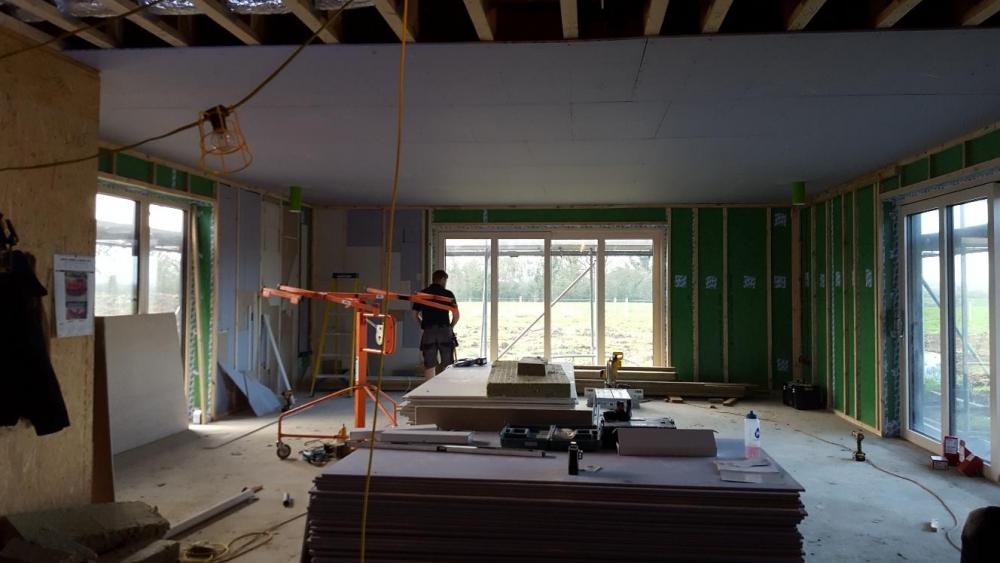
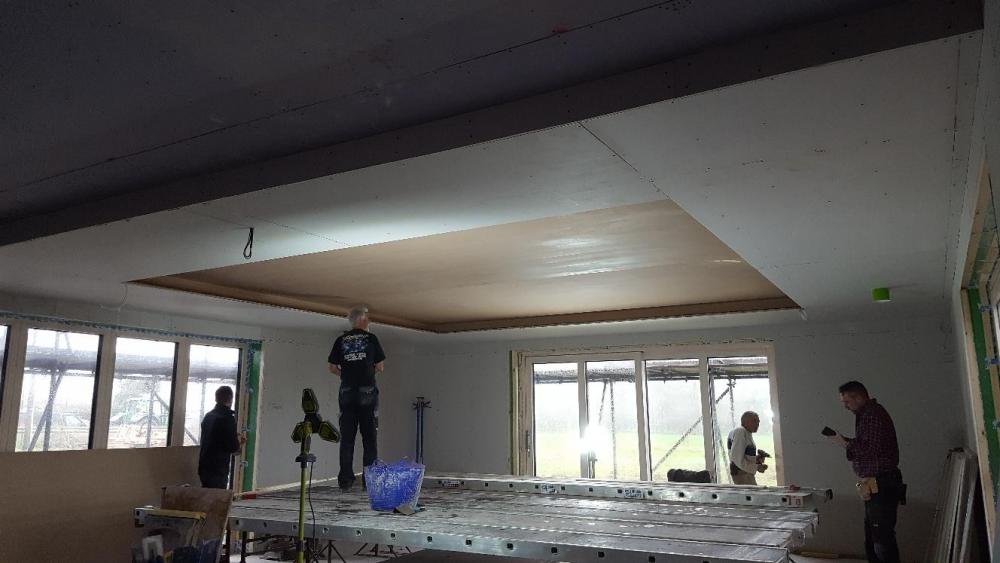
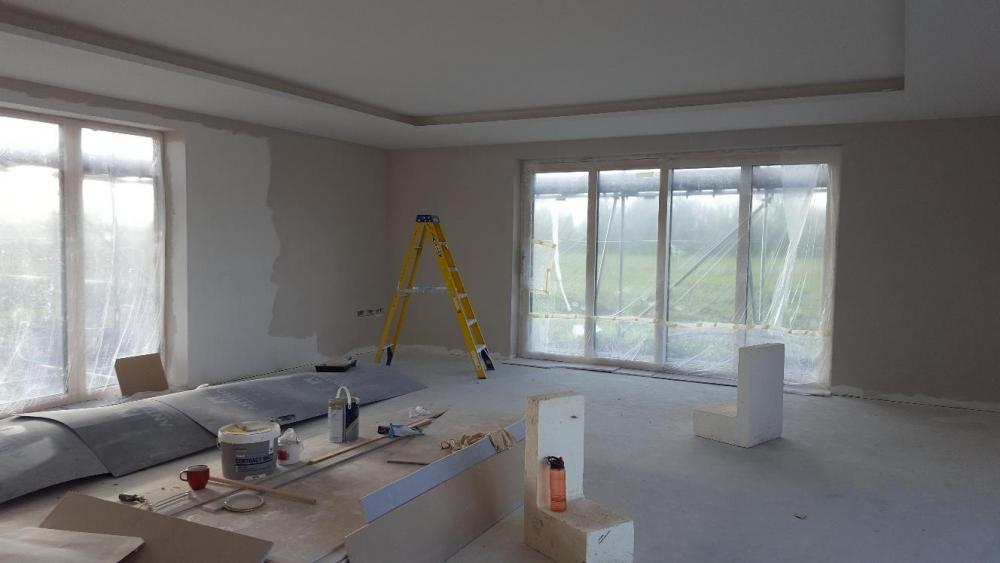
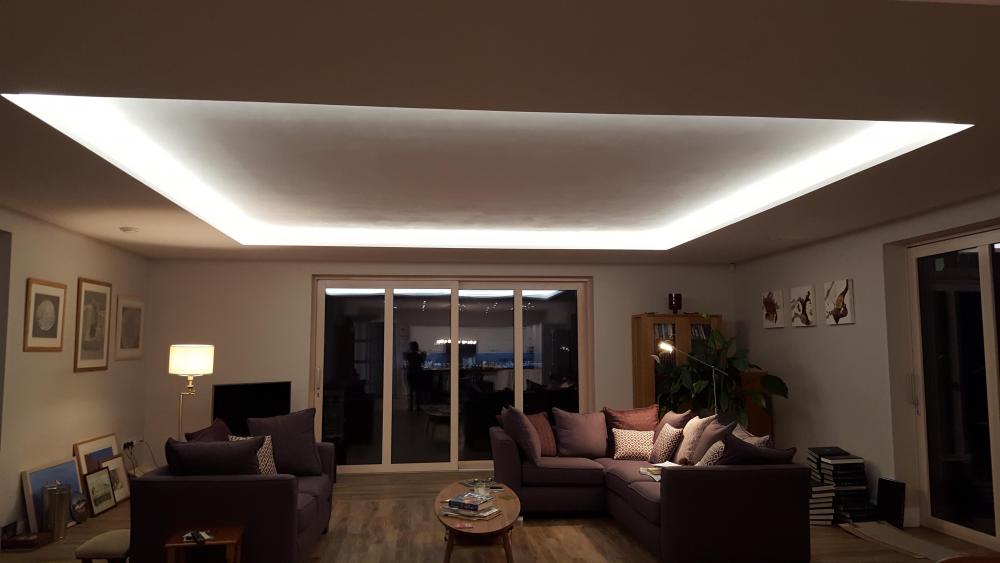
Sorry for the delay on the reply here, I've been transferring everything to a new PC in anctipation of the death of Windows XP and 7. Anyhow, I've found a few photos of the ceiling feature in the lounge area whilst under construction, so here they are. First off, the entire ceiling was dry lined with acoustic plasterboard. Heavy stuff, quite literally, and it took the PB lifter and plenty of strong arms to get it all up there. After the entire lounge/diner/kitchen ceiling was boarded, construction of the dropped border area was started. Note that the lighting electrical connections were all pulled through the boarding and in place throughout. There is a perimeter border, on the top of the walls, then the inner border at the appropriate depth. Noggins were put in all around to stabilise the whole thing and to make sure that the next lot of plasterboard had something to attach to. The green tube poking out at the bottom just left of centre is the MVHR inlet. There is another at the mirrored position on the right hand side, just out of shot. Next up was boarding the dropped section. This was done on the horizontal and then vertical pieces on the inner inset part. The horizontal was done in two stages - first up using ply, then the plasterboard was attached to this. Also, timber was put around the edge of the inner rim in the form of an upstand. This gives the impression of greater depth and more substance, as well as something to hide the LED lights behind. Once all the boarding was done, plastering was next. As seen in the photo, the inner section was done first. You can also see the right hand MVHR inlet now. It's worth making a comment on the staging boards, which I hired in for this job. They weren't cheap to hire, but it made the job of plastering so much easier and what it cost in hire was more than made up for by the quality of finish they were able to achieve and not having to waste time moving things around to get from one part to another. The whole of that lounge area ceiling was plastered in a day as a result. Here's the final plastered result, looking from the kitchen. The excess MVHR inlets was cut away immediately before plastering. Then, finally, here it is with the mist coat sprayed on.


 1 point
 -
The problem with that, is at first fix it is typically a bare timber frame, or quite often the stud walls boarded one side only. Everything is fine when I leave after first fix. Then along come the bufoons who fit the plasterboard , followed almost immediately by the plasterer. By the time I get a chance to see if the bufoons have damaged a cable it's too late to do anything anyway, so it all waits for second fix to find the issues. They don't even have the gumption to look at the wall they are boarding and observe where the cables are and avoid screws at that position.1 point
-
I think this is probably related to supply voltage variation. It's a non-inverter drive unit, so will run at a higher input power with the supply at the maximum allowable (probably 253 VAC, as that's the UK grid max) than it will when run with their lowest supply voltage (stated as being 220 VAC, but could be as low as 216.2 VAC for the UK 230 VAC nominal supply). The compressor probably isn't a resistive load, so my guess is that there might be a significant input power variation with supply voltage.1 point
-
Compliance with the law when it comes to electrical work is fairly complex, as unlike gas work there is no requirement to adhere to any standard in order to ensure a safe installation. BS7671:2018 isn't law, and doesn't have the backing of statute, and whilst adhering to the guidance within it may be deemed to absolve any individual from liability in the event of an accident, it would not constitute a complete defence, and it's quite possible that someone who has followed the letter of BS7671:2018, and then been prosecuted for negligence as a consequence of an incident arising from the work they have done, could still be found guilty. I must have dealt with several dozen cases where proving negligence has been involved, and none of them have ever been clear cut. Thankfully 99% of them never get to court, but if they did then I can pretty much guarantee that just adhering to guidance would not be enough, on its own, to get someone off the hook. BS7671:2018 is full of incomplete advice, as well as the occasional bit of conflicting advice. For example, BS7671:2018 mentions that the total demand should be taken into account when inspecting/testing an installation, but is silent when it comes to the detail as to how to do this. Clearly this is a critical safety issue, as it's well known that running the cut out fuse at close to, or in excess of, its rated current for long periods of time will cause it to overheat. There are also examples where such overheating has cracked and damaged the fuse holder and housing, such that live parts are exposed. The OSG (again, just guidance, not law) has some advice about calculating diversity, as ONE way of estimating the likely maximum load, but it's common knowledge that this isn't either foolproof, or even that applicable today. For example, lighting circuits are most probably far less lightly loaded than the (very old) diversity calcs in the OSG might suggest, due to the widespread use of low energy lighting. Equally, we now have some high power loads that aren't yet specifically included in the latest OSG guidance on diversity (or at least aren't yet in my 2018 copy of the OSG). A common approach taken to try and estimate maximum demand is to fit a clamp meter to the tails and leave it switched on in peak hold mode for a day or two. This works well enough, but nowhere in BS7671:2018 does it state that this is an acceptable method for ensuring that the maximum load is within the supply rating. In fact, pretty much all that BS7671:2018 has to say on this is:1 point
-
Personally, I'd use a longish bit of flex. Connect one end to the end of the cable to be checked (e.g, with @Mr Punter's Wagos), L-L, N-N, E-E, and take the other end to the other end of the cable then check with a meter continuity L-L, N-N, E-E and discontinuity L-N, N-E, E-L. Checking the discontinuities actually looking at the resistances (on a highish range) might be better than just relying on it not beeping but I'm not sure I'd bother.1 point
-
Typically first fix is just get the wires in and leave them normally untested. Then when you're counting down the weeks to move in you'll find a nail or screw through your cooker circuit or something and have to smash a big hole in the wall to get at it... ?1 point
-
Good idea to test it. The regs say "test during and on completion", and it isn't supposed to be optional! These dead tests include continuity and insulation resistance tests and the IR uses a specialist tester and you also need to know how to use it and with rings it is also a bit complex re the continuity test so I would advise you use wago's as previously described and get the sparks in who is going to sign off the work to test it because he will need to record the results on the installation certificate. Doing it this way will also give you piece of mind and will mean when you energise the circuits you don't have to worry about a bang or the RCD tripping which is always a good thing. Also good point re cable position.1 point
-
With the sockets you could strip the cable ends and use wagos x3 to join earth-earth, live-live, neutral-neutral. You could then short all the wires one end and test for continuity the other end. A sparky will probably post soon with a much better suggestion.1 point
-
Always cuts against archs They are hardly ever level1 point
-
I think a number of different controllers have been used over the years,perhaps a quick call to ESP would get you the info you require?1 point
-
Thanks Peter! Seems a lot more accurate using a weighted average than just taking an average. This way you're looking at how much each wall's fabric build up (u-value) contributes to the whole house. Yes, I think I took that approach first, looked at my the bigger walls, worked out the u-values and then averaged. But looking at each wall in greater detail (especially those walls where I have been able to squeeze in extra insulation) has altered my weighted figure in my favour. Again, if you want to be as accurate as you can, then I would use a weighted approach than just averaging that whole wall section. Did you insert various thicknesses of insulation against that wall? If you know their sizes still, then you can calculate using above method. If however you just used one sheet and rasped it down to get a level surface and average u-value would probable suffice. Just talking one wall here after all.1 point
-
The centre is the full height ceiling, 2700mm. The border around the edges is about 150mm depth.1 point
-
FWIW, this is how ours looks now.
 1 point
 -
Could you do a cardboard mock up and stick it to your ceiling and get a feel for it?1 point
-
In our experience (full footprint basement) get your chosen SE to spec what they need from the GI report and then take that brief to a number of GI companies to get quotes. You may want to wait until you have the PP in hand as there could be conditions on contamination, etc.. - we had these and folded in the necessary tests into the brief. Also needed soil WACS classification for the basement contractor so they could price muck away disposal. We had a mix of dynamic probing (10m) and cores (5m) - our build up is chalk / river gravel and clay - typical for the Thames Valley. The big concern here are 'solution features' aka cavities in the chalk layer, so the survey was designed around that. A few of the cores were sleeved and capped to monitor for gas and ground water. GI usually also does a historic survey to identify old workings or sources of contamination. Our GI was a bit of a car crash as the original supervising engineer mislocated some probes and drew the wrong conclusions (made ground = piling & £££). The crew had to come back (at a discounted rate) and do it again with a more positive outcome (no made ground, no piles). I also found out, after the fact, that the GI should zero rate any disruptive or tool based parts of the work (digging, probing etc) whereas the walkover and desk work (reports etc) attract standard VAT. You can access the national borehole database and see if there is anything near you - this is really just for guidance as local conditions can always vary. https://www.bgs.ac.uk/data/boreholescans/home.html1 point
-
Basically any of the plants that work on the Air Blower principle. That includes the Biopure, Vortex, Conder, and Graff units. When I was looking all these air blower units had very similar performance and were way better than units that have some mechanical process. Often the actual choice is down to which you can get locally for a reasonable price. Surprisingly, Travis Perkins gave the best price for my Conder unit and it was delivered to site by their own wagon. I have the Conder 6 person plant and it is doing it's job very well. Mine discharges to the burn and what comes out is a clear odourless liquid.1 point
-
Hi, I am trying to choose which sewage treatment plant for up to 6 persons with discharge into a stream. The Vortex and the Biopure seem to be mentioned most. Any recommendations? Also, I will be having a water softener (probably a Kinetico Premier) fitted. The water softener needs an drain outlet (I believe this is for the waste salt solution). Can anyone advise me if this outlet can feed into the treatment plant or does it have to be to to the groundwater drainage. Thanks.1 point
-
The key issue is that CDM (all variants) is intended to be an industry regulatory mechanism, and the creators of it just didn't consider self-builders as being within the industry, but they also failed rather dismally to make their intentions with regard to the relatively small number of self-builders clear. It's a pretty typical bit of poor government regulatory drafting work, where not all groups that could be impacted by the regulations were consulted properly. This is a common failing in government; they are required to produce a regulatory impact statement before getting draft regulation approved, but have a nasty habit of leaving out some who could be impacted adversely by the regulation, and only dealing with these "anomalies" afterwards, and then often rather inconsistently. Thankfully there is a clear, if somewhat tortuous, path through CDM 2015 that, after you've joined up a lot of dots, does result in a clear outcome, which is that, in essence, a self builder is a domestic client and therefore cannot have any appointed responsibilities under CDM2015, and might find themselves creating more problems if they tried to do so, as they might well be putting themself in a position where they could carry liabilities as a commercial client, for which they neither had the expertise or indemnity cover protect them, rather than the very much lower level of responsibility that a domestic client carries under the over-arching health and safety legislation, of which CDM 2015 is a part.1 point
-
I'm having an MBC slab and frame, then subbies thereafter. Most of the time there'll be one contractor on site at any time. To fulfil CDM (from another thread), I've made a list of forms to fill out, H&S signs to erect, as well as: plasters, fire extinguishers and eyewash stations. But I have the following questions: 1. Unless an accident happens on site, do H&S ask to see any of the actual documentation? (does it need to be submitted anywhere or just held on file) 2. As a Chartered Surveyor I am expected to know every trade and will I therefore be held to a higher standard than the expectations of a typical domestic self-builder? I am not a building surveyor, nor am I capable of building my own house myself!1 point
-
There was an extensive and involved thread on this last year: https://forum.buildhub.org.uk/topic/2376-principal-designer-role/ And a good summary of the thread by @recoveringacademic, here: https://forum.buildhub.org.uk/topic/2514-cdm-2015-and-the-domestic-client/1 point
-
Or this might help - HSE guidance.pdf1 point
-
There's a free PDF document of the HSE's guidance to clients, designers, contractors -- maybe you were thinking of this one?: http://bit.ly/CDM2015_guidance The one I tend to send to new contractors or clients is the easier to digest "A short guide for clients on the Construction (Design and Management) Regulations 2015": http://bit.ly/CDM_short_guide @laurenco I would be careful to check what roles you are expected to carry out, as you might find yourself responsible as Client, Principal Contractor, and Principal Designer all in one!1 point
-
All you need for HSE is an F10 form completed, with a copy on display in the site office, as well as a copy of your Insurance and the HSE poster. It is unlikely that they will visit unless there is a notifiable accident on site or someone reports obviously dangerous working. As a minimum, get workers to supply risk assessments / method statements - especially if they are higher risk. Also get copies of insurances and evidence that they have attended H & S training. Also get them to sign in. Give a site induction to all new starters and get them to sign that they received it.1 point
-
....dictated by access and H&S stipulation are they not? Heras fencing is the norm, and a hedge only really defines the boundary rather than provide protection, ( the main consideration ), with security really a side effect of having to fit it for protection. H&S don't care if you get burgled .1 point
-
I did my own and it's pretty straightforward although fairly inaccurate I think. It gives an interesting insight into the system if you do your own. This might help:1 point
-
I might need to push the limits of English regulations governing moving into my forthcoming self build project ahead of final building control sign off. Reading up before starting this thread I now understand: The property must have a functioning toilet and kitchen. There is no formal validation required to move in unlike Scotland's temporary residence permit process. I should notify the Council that my new build propety is occupied for local tax reasons. If I moved in without notification the council will likely discover the situation and issue a back dated council tax demand. Have other forumites encountered where the boundary of tolerance is for early occupation? Here is my hypothetical test case. Detached two floor brick & block property with established access to public road via rear site lane. Weather tight shell with mains water, electricity and sewer connected. No gas but heating provided via sealed external air supplied wood burner. Hot water tank plus plumbing to toilet and kitchen. Usable kitchen fully plastered. Toilet including washhand basin and door. Door to kitchen and all smoke alarms wired in. Staircase with balustrade fitted. Upper floor ceiling plasterboard up and 50% of roof space planned insulation just to rafter height. Wall cavity already insulated with 100mm of rockwool. Most floors screeded. Most walls with exposed inner blocks i.e not yet dry lined. Most upper floor stud walls incomplete. My hunch is that the English authorities take a light-touch approach because the system is self regulating i.e. Councils want tax income asap and self builders want their VAT refund sooner rather than later. At this point I am wondering what BC criteria might trigger some form of enforcement notice to improve the property or cease habitation.1 point
-
First things first - what did your ground survey say re-water table? Are you above it or in it? We're above ours so went for The design above is not that great as it assumes that the basement will leak and you're effectively building a membrane inside the basement to catch water and take it to a sump, which needs a pump (and a spare or alarm etc...). Works well for retro basements but you can do better. Sika, Kryten or similar will give you a warrantied watertight box, assuming that the crew are trained and licenced to use that system. The waterproof reps will come to inspect work and sign it off to generate the warranty. External membrane is optional - I didn't bother. Warranty provider was fine with that. To insulate, we laid 300mm EPS 250 (as approved by the SE, you may need higher/lower spec depending on the weight of your structure) on a 150mm blinded base and then put some Radon membrane over the top. The basement crew treated this as ground zero and laid the rebar on top and made the slab with a 100mm kicker. Then each wall section was cast in situ with penetrations made for lightwells, door to external means of escape and services. Sika waterproofing bar & mastic at every join and the holes left by the shuttering support bars were plugged with a rubber bung that screws tight to the hole sides We designed an 'open box' basement which meant stronger walls (effectively cantilevered) and then had a steel & suspended timber floor vs a poured lid. Cost wise it was probably marginal but gave us more flexibility on the internal layout (which we framed in timber). MBC did not blink when we suggested doing a house over a basement and I think they're still in touch with the contractor we used if other clients requested similar. Design wise, MBC did the house design first and then we passed everything to the SE who designed the basement & steel floor to match up, we then passed this design back to MBC who took care of the steel & timber ground floor and another contractor did the basement construction. I was quite nervous about the whole thing coming together but needn't have worried as MBC took final measurements off the finished basement before putting the frame into production. If you go for a more traditional cast lid then it can be treated just like a slab foundation but you will need to make sure point loads are catered for. MVHR is a must, cheap as chips in the grand scheme of things - superior ventilation and significantly reduces your energy bills through efficient heat recovery. You can turn it off, open windows if you wish (although you'll want windows without trickle vents). The only other reason I was wary of ICF is that you can't inspect the pour quality, which if that's all you're relying on is a bit of a leap of faith.1 point
-
Hi, did someone say basement We built a passive* 'cast in situ' basement made of Sika warrantied waterproof concrete in Berkshire and then popped a MBC passive standard house on top. *essentially sits on 300mm of EPS250 with 200mm EPS70on the sides to meet the insulated layer for the MBC house. Very happy to bore you senseless on the details. Also looked at ICF all the way but it was much more expensive than the option we ended up going for TF.1 point
-
Welcome. I've never heard of this company, but the aeration treatment system is a common one, and some of the stuff in their video is a bit misleading, as there are many other plants that fit the air pump in a chamber inside the unit (our BioPure does, for example), and few that run compressed air lines across the ground as they illustrate, or that have the pump in an indoor wall mounted enclosure, like the one they show (I've never seen one like that). They've given timed/pulsed aeration a new name, but again other plants do the same, in order to reduce pump power, and pretty much any pumped system can have a timer added to turn the air on and off in a cycle, in order to reduce power consumption. Most units with continuous run pumps over-aerate, to be on the safe side and met their maximum person rating, so the aeration can be safely reduced and still give good treatment. I'd suggest having a look around at some of the other units around, and comparing the price and performance, some mentioned ihere, perhaps: There are also some other posts here on treatment plants, comparing their relative merits, prices, etc, and a search will probably bring up some additional info. I'd also add that having the air pump in a chamber in the tank is a bit of a nuisance, I've moved ours out of that chamber and into a stone chamber alongside the drive, as you need to get at the pump, to replace/clean the air filter at least annually and replace the diaphragms every couple of years, and lifting the lid on the treatment plant and leaning in to the equipment chamber is neither easy nor pleasant. There's also a very slight hum when the air pump is on, even with the pump in a chamber in the tank, we found. Not enough to be a nuisance, but just about audible on a quiet night, when standing near the unit. Putting the air pump inside a stone chamber has reduced the noise, as it's lost the slight resonance from being in a fibreglass box inside the hollow space at the top of the unit's main chamber. You also really need an alarm, for pump failure, which means adding something that can be seen and heard when there's a problem, and that's better placed away from the unit, where it's easier to see and hear. Our unit was supplied with a battery-backed alarm that sits inside the equipment chamber, and flashes a red light on top of the unit, and make a gentle beep, if air pressure is lost (which is usually either a pump diaphragm failure or a power loss to the pump).1 point
-
When I was looking, the Vortex, Conder and Biopure were the three that stood way above the others in terms of effluent quality, all having very similar numbers. So you are definitely on the right lines. Before making a final decision, check the figures for the Graff units. These seem to be becoming increasingly popular so I would look to see how they compare.1 point
-
no matter what sort of spray gun you use you should always 'sieve' the paint, you can get special filter paper for it, or, at a push, use a coffee filter1 point
-
I sprayed our last house inside and out, we backrolled the last two coats. House was 360m and it took no time at all. We are positively stuck in the dark ages in this country. Sprayed all ceilings, walls and interior woodwork. Including doors. Even spayed all the facia as we couldn't get the colour we wanted. Advice for @JSHarris buy lots of masking tape and brown paper, I guarantee the bit you don't mask will get overspray on it. Who said if if you have 8 hours to cut a tree down spend 6 sharpening your axe. This is so true for this spraying lark you will spend 3/4 of the job time in prep and a 1/4 chucking the paint about.1 point
-
Problems with your ring? Live by the sword etc! ?0 points