
Leaderboard


Popular Content
Showing content with the highest reputation on 01/06/20 in all areas
-
I haven't been on here for a few weeks so I am late to this party. I have my system up and running now. Against a lot of good advice I went ahead with my installation in a fairly leaky, 1830's stone-built cottage. For me the primary goal was to reduce the moisure level within the house while I get around to addressing the root causes over the coming years. I am staggered by the difference the system has made to our home. We now have zero condensation on the windows in the morning (vs. having to use the Karcher Window Vacuum 4 or 5 times per window every morning!), a much drier, healthier air quality, reduced condensation on walls after showering etc and an unexpected bonus that fresh food in the pantry now lasts longer than it used to. As I get around to making the house more airtight I hope that the benefits will prove to be even more profound. For me MVHR has been an enormous game changer and I wouldn't be without it.6 points
-
??? There were moments when I didn't think it was going to go though! SWMBO fed the whole 6m of the snake through the blockage to start with, think she should have stopped when she hit the "wall" and started rotating then. Tbh there wasn't that much resistance. Anyway, nothing happening so I got the cordless on it. Still nothing. Think in the process I've killed this brand new Silverline snake only delivered this evening. (That's a strip down I'm not looking forward to). Put the other half litre of the cleaner down and still nothing. I was hand rodding like a good 'un and nothing was moving. Poured a couple of buckets of hot with bleach down and still nowt. I remembered school physics lessons with the vacuum pumps that ran off of the bench taps. So with me in the upstairs ensuite, No1 son on the stairs and SWMBO in the main downstairs bathroom we went for a synchronised flush. OMFG! Things started vibrating in the loft as the turd slug started shifting, the AAV was clattering like a demented Kango. Then the whoosh we'd been longing for and the sound of sweet running water down the pipe. Celebrating with some crumpets and a pint of Levy. Thanks to all who chipped in as ever.2 points
-
2 Years on:1 point
-
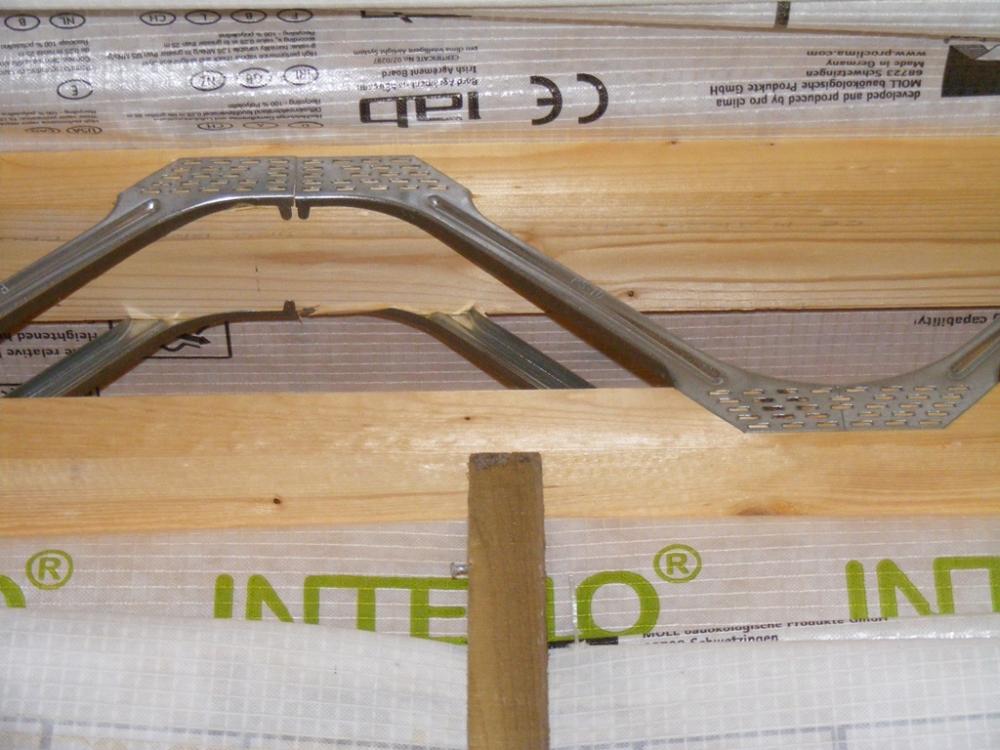
Yes that's right. This is the only photo I can find, not much help really. This is one of the joists running parallel with the front wall of the house. You can see the membrane wrapped around the joist that goes round the outer ring beam and back in one piece. That gap was filled with rockwook offcuts by stuffing them through the gaps in the joists and into the void behind. Warning: Posi joist webs have sharp edges. Obviously this photo was before the insulation.
 1 point
 -
which is why I was careful to support my drain runs located under floors where access was not possible and a min diameter of 50mm. I have found that pipes that exit hot water (baths basins and showers) can sag quite a lot over time causing just such a problem.1 point
-
? Just had a head-scratch moment. When I rechecked I couldn't make the numbers stack up. Realised I was using 70mm as the radius in my calculations rather than 35mm! ?1 point
-
Pretty much, but they usually work by balancing the current needed to maintain two hot wires (which are usually very, very tiny bead thermistors now) at the same temperature. One of these will be a held at close to ambient temperature in a sheltered location, the other will be at the top of the probe that's poked into the moving airstream. The flow of air past the tiny exposed sensor cools it, and measuring how much current needs to pass through it to bring it back to the reference temperature is directly proportional to flow rate. The handy thing about using very, very tiny bead thermistors is that you can measure their resistance to ensure that the temperatures remain equal. They are also extremely sensitive, and able to measure very low air flow velocities. In the flask variometers I used to repair, the tiny bead thermistors were placed on opposite sides of a tiny hole in a plate made from double sided PCB material (maybe a 1mm diameter hole, or thereabouts). This plate had a glass pipe bonded either side of it and was connected by flexible pipes from the glass tubes to the static port(s) on the fuselage and a lightweight air flask. With no air moving into, or out of the flask, both would remain in equilibrium. If the glider started to gain altitude, then air would flow from the flask out of the static port, as air pressure dropped outside. This would cause one thermistor bead to cool faster than the other and indicate that the glider was climbing. The same would happen the other way around when descending. They were tricky things to repair, even when I was a lot younger, with sharper eyesight, as the thermistor beads were maybe 0.1mm in diameter, with even finer wires coming out either side, and both beads had to be exactly centred on the small hole, with the wires soldered in place to the board, so that stronger wires could be fed off to the instrument electronics.1 point
-
Insuring your digger is down to how you view risk. My excavator is worth around 7k and it’s never been insured on my site, until I started the new build, for a few quid it’s on my policy as a named piece of plant. The reason for this is 1. It cost bugger all. 2. The risk in my opinion got a lot more severe, lots of different people appearing on site every day, and a big blob of a house springing up attracting lots of attention. So the chance of a theft increased in my opinion.1 point
-
OK having seen the rest of the images and read your additional info and as mentioned by someone else above, the blockage could not have been backing up too high or else your ground floor pan would have overflowed. If you knock the soil pipe in the loft, or even try to slightly lift it by hand does it feel heavy like that whole horizontal section is full? I think if if that was me I would get a piece of garden hose (perhaps a bit you are happy to bin afterwards) and some gloves on and shove it down the access point and round that bend from the loft. If it doesn't clear by the time you get to the horizontal section (i.e. passed via the 2 No. 45°'s) then I would abandon ship there and try it from outside. Get the camera on the tripod first.1 point
-
Do you have a budget for the renovation at least if we know this we can tell you if your in the ballpark, and a picture would be handy. Why not a picture of the whole plot frontage as we might be able to give you a clue regarding planning.1 point
-
I suppose that the losses associated with the heat exchanger alone should amount to a 10%ish loss in energy (plus ducting losses etc especially as most of the system is located in the cold roof space) but it feels like the heating system is kicking in less often than it used to. Of course that's not scientific, it could just be that we're having milder weather at the moment. I don't think that the MVHR is good at evening temps by extracting the warm air and redistributing it's energy through the vents, I rather suspect that air is being pushed and pulled through areas of the house that had no significant airflow before. Again, not scientific, more just a 'feel'.1 point
-
Have you got a spare length of soil..?? I’d put it into that branch and see if you can add a bit more weight to the blockage by adding a bucket of water slowly, but watch for the level in the pan also. Pair of rubber mallets or similar would be my first call just to find where the blockage is.1 point
-
There is...I have this very same fitting on the foul pipe I put in for the static caravan. The lid unscrews and then there is a plastic insert underneath which just pulls out.1 point
-
Sorry to hear your predicament; you ask for suggestions - Yes, we'll all like to look at what's done so far - most of us on BH are as nosey as a dog with debts. The company has disappeared but the drafts person will not have done so. If you know the name of the architect (draftsman or woman) , have a look at the architects register and see what you can find. Find out if the company has an arrangement for other architects to take over their existing work: leaving customers in the lurch is very dimly viewed by the RIBA Rattle the grapevine again and see what has happened to the people in the company. Network locally and see if an Architectual Technician will finish your drawings for you. Upload the drawings - looking at those will give us better idea of what needs done next (pdf format'll likely be best)1 point
-
yep, pretty sure there's an insert under the cap.1 point
-
Screws will do straight through the sides into the ribs.1 point
-
I’d check if it’s the elbow as it turns to drop into the vertical. Judicious use of a rubber mallet bouncing it gently along the sides of the pipes upstairs will give a good indication of where it’s blocked as the sound will change.1 point
-
Let us know if you do, I usually go to the cafe there on the weekends. They system they are using on the site just up the road is pale green in colour, no idea whose it is.1 point
-
Try flushing half a bag of crushed ice. The weight and abrasiveness of the ice scours the pipes clean.1 point
-
Could be crud but equally the cartridge might have failed. No. 5. here. https://blancotapspares.co.uk/blanco-culina-s-mini-chrome.html1 point
-
Get ya hand in there you softy.1 point
-
2 port vs 4 port buffer tanks.. https://blog.heatspring.com/2-pipe-versus-4-pipe-buffer-tank-configurations/ Apparently the 2 port set up is more efficient as hot water only flows into it when needed not all the time.1 point
-
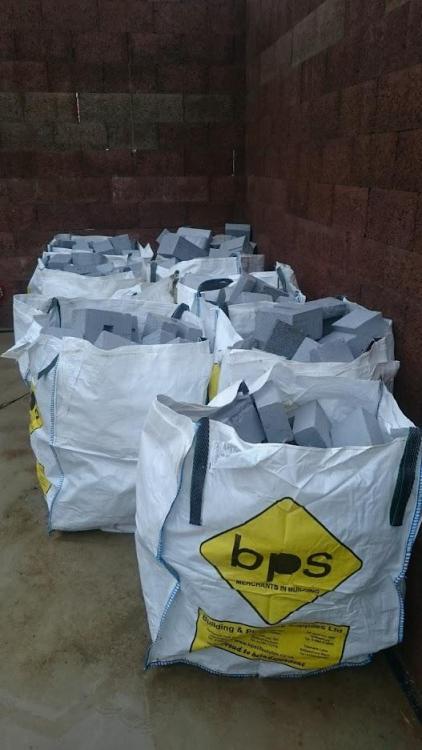
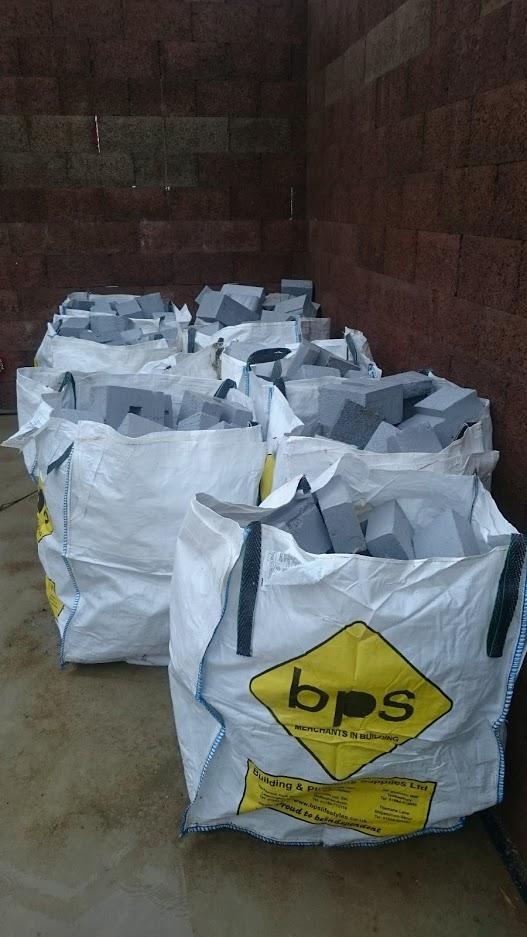
Isotex Waste Onsite An interesting point regarding build methods and how much waste they create. With all the blocks that get cut, for one reason or another, the waste has been dealt with in two different ways. The off cuts of insulation (I removed them from the blocks) equate to 9 builders bags. I sold the lot on ebay for the fixed asking price of £20. It was collected from site and is being reused to insulate a garden office. The off cuts of blocks are simply thrown on the hardcore pile ready for the new patio. This situation has meant that site created waste is at an absolute minimum. Skips are not cheap as you know.
 1 point
 -
I often think surface water drainage requirements as a bit heavy. For instance before the house was there water drained away. I'd perhaps just use a gravel filled French drain for now perhaps digging so there is a section which takes water away from the founds and gets deeper1 point
-
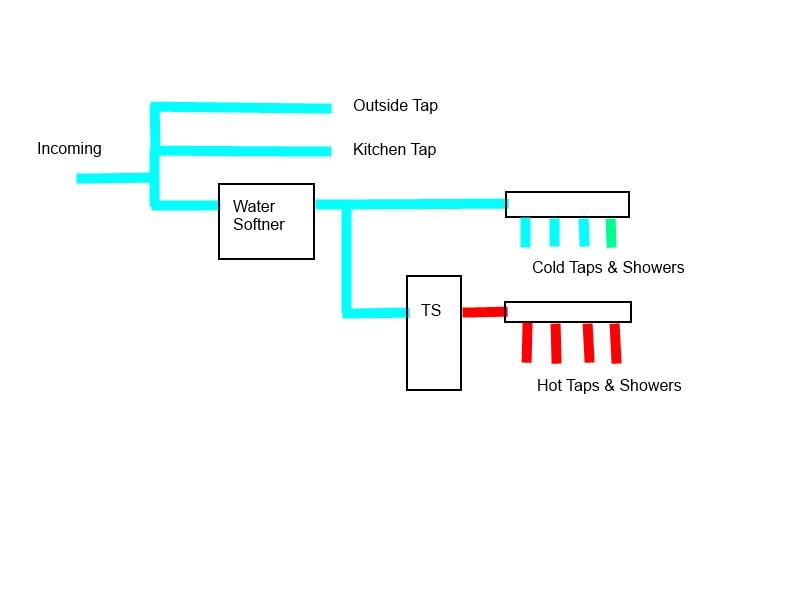
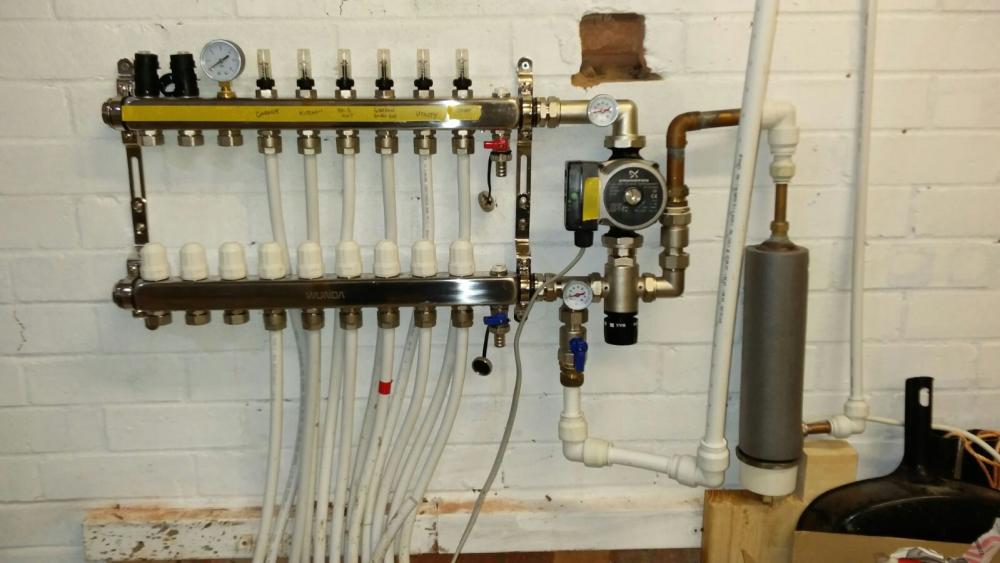
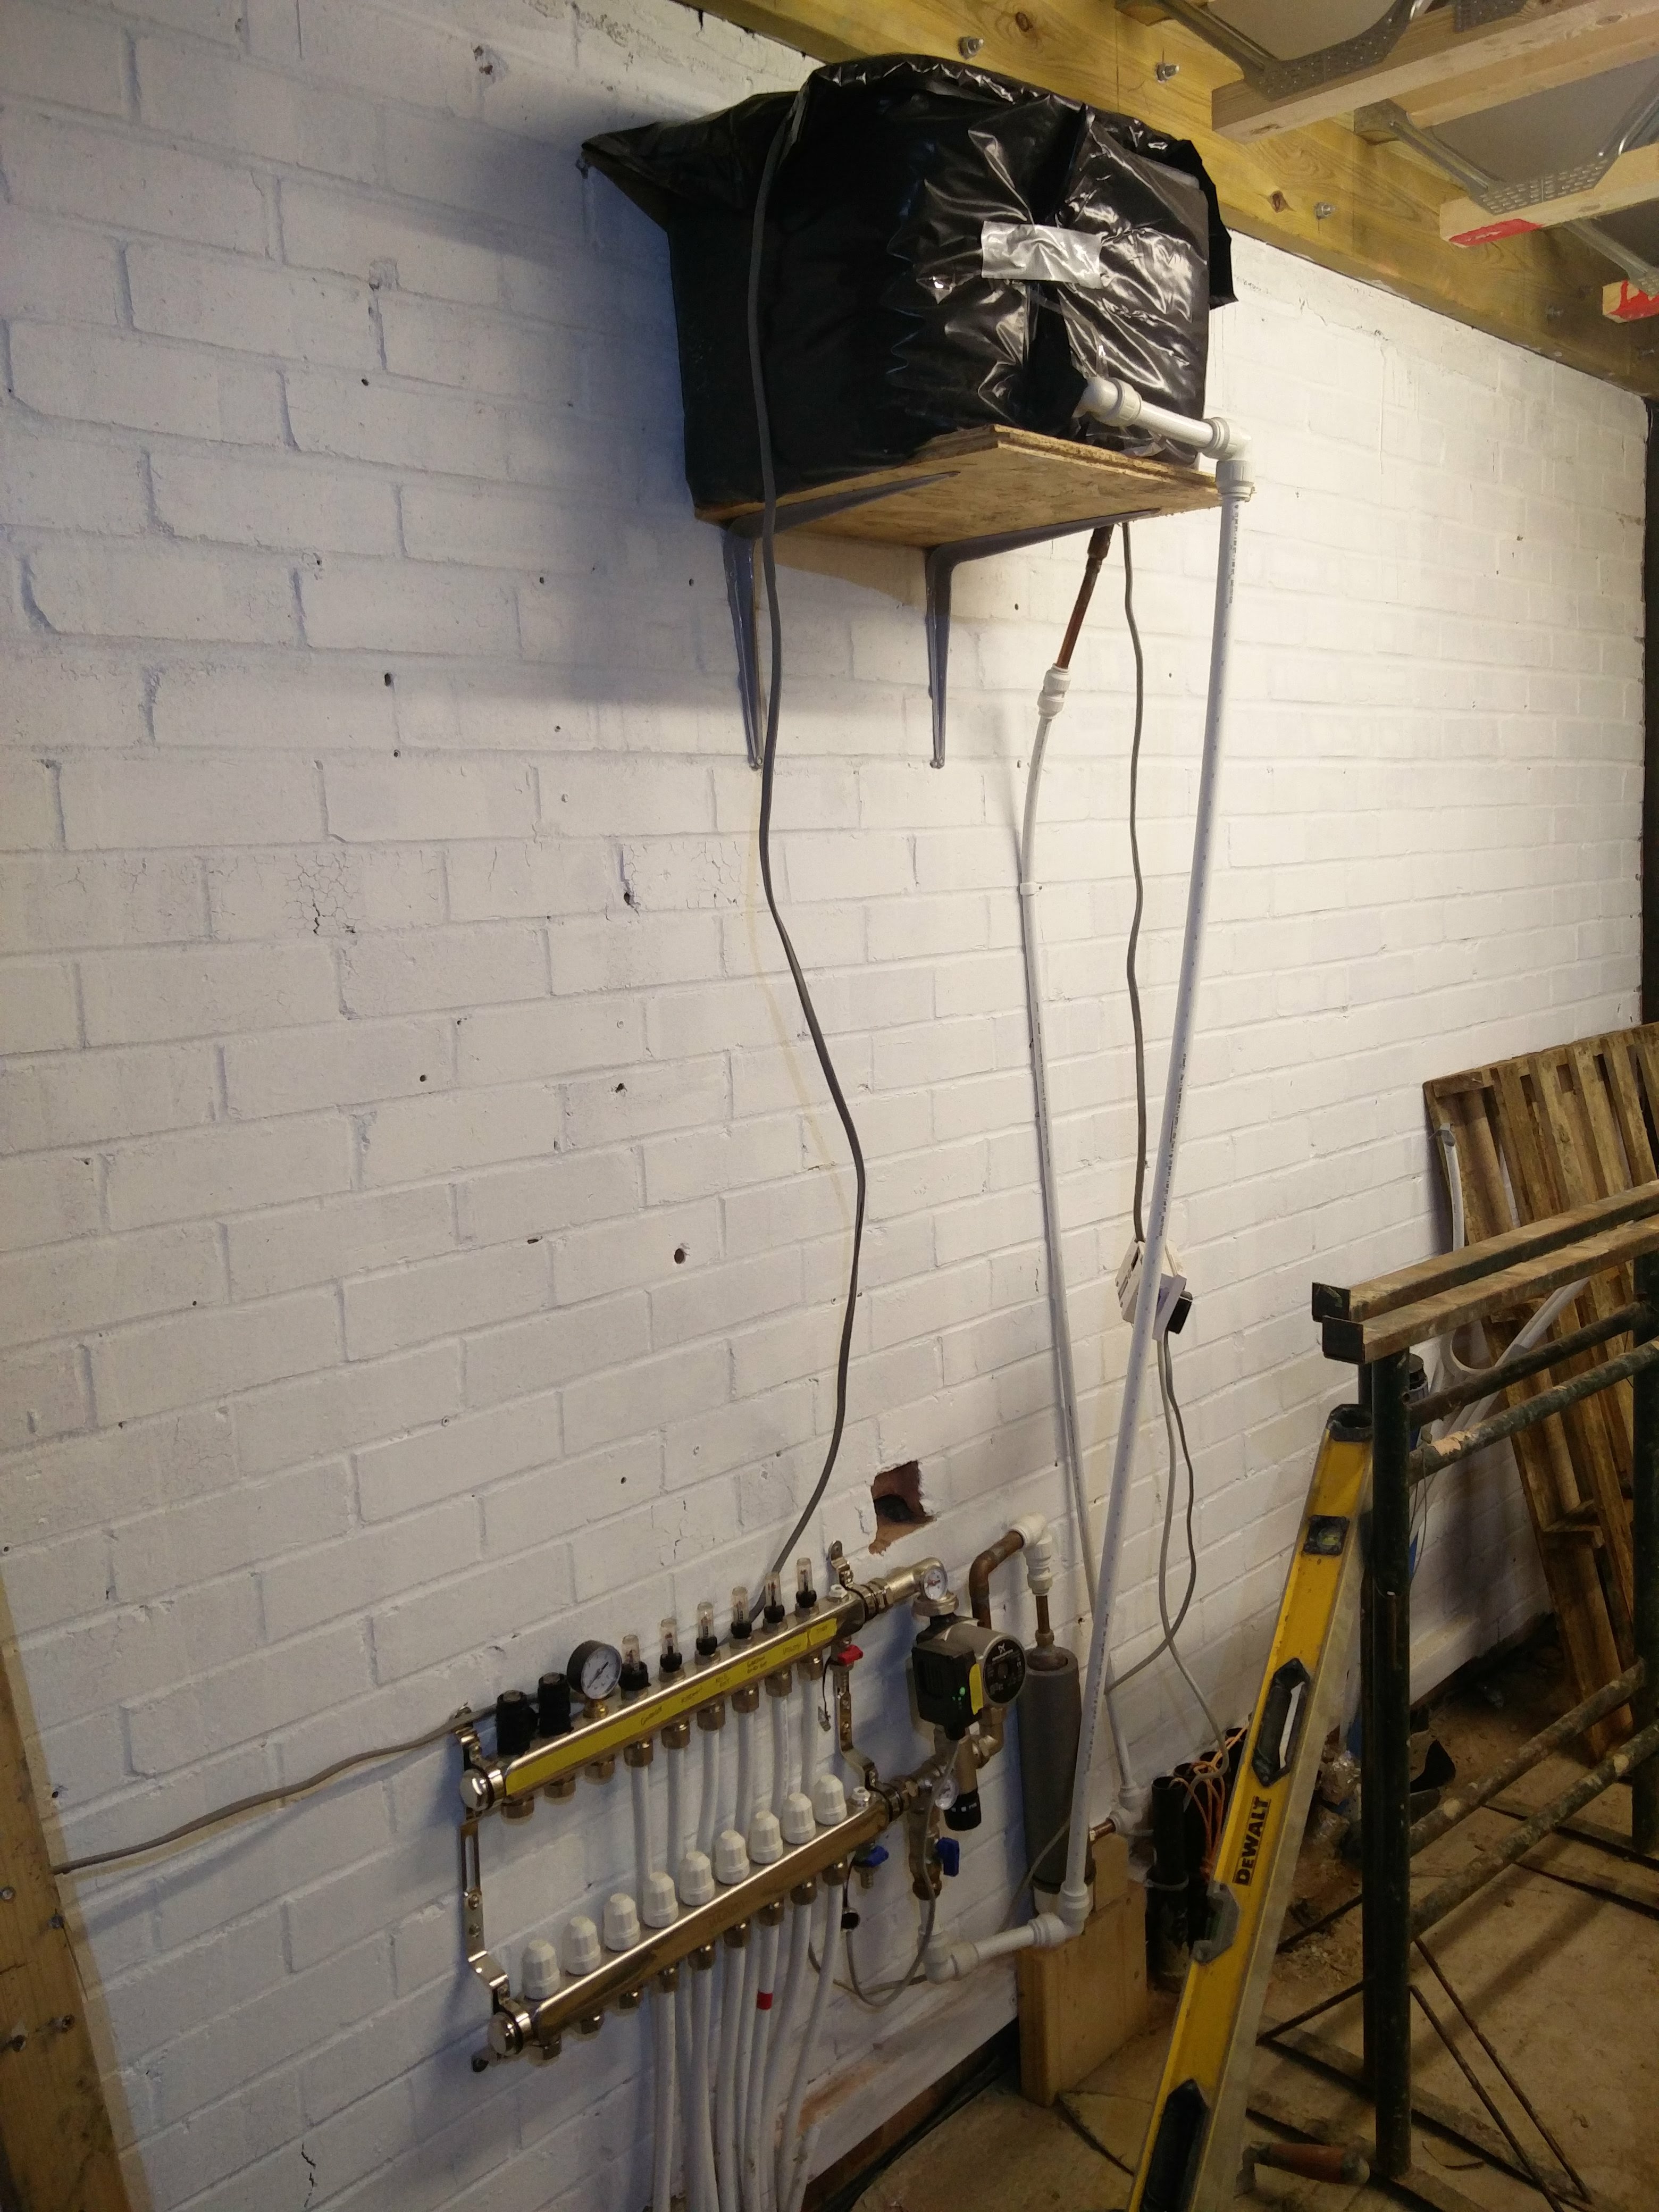
We have a bit of a mixed system. Everything to the left of the Thermal store is downstairs. The Store and manifolds are upstairs. The manifolds are located between the two bathrooms which are close together. So I think any extra pipe due to the use of a manifold approach was minimal. It's a mix of copper and plastic. Mostly 28mm copper before the manifolds and plastic in various sizes after. The manifolds were "home made" from 28mm copper fittings. The diagram is simplified (I've not shown the boiler loop, isolating valves and the Thermal Store is much more complicated). The water softener is just a place holder with bypass as we haven't needed one. One of our showers is a high flow rate with body jets. Works well.
 1 point
 -
No. I had grand plans to do so, particularly around the TV room and between bathrooms. But in the end, the plasterboarding suddenly happened sooner than I'd planned for, so I didn't end up using any additional sound-proofing techniques (other than double-boarding all internal walls). I'm generally not that happy with the inter-room soundproofing. It's something I'd definitely pay more attention to if I were doing it all again.1 point
-
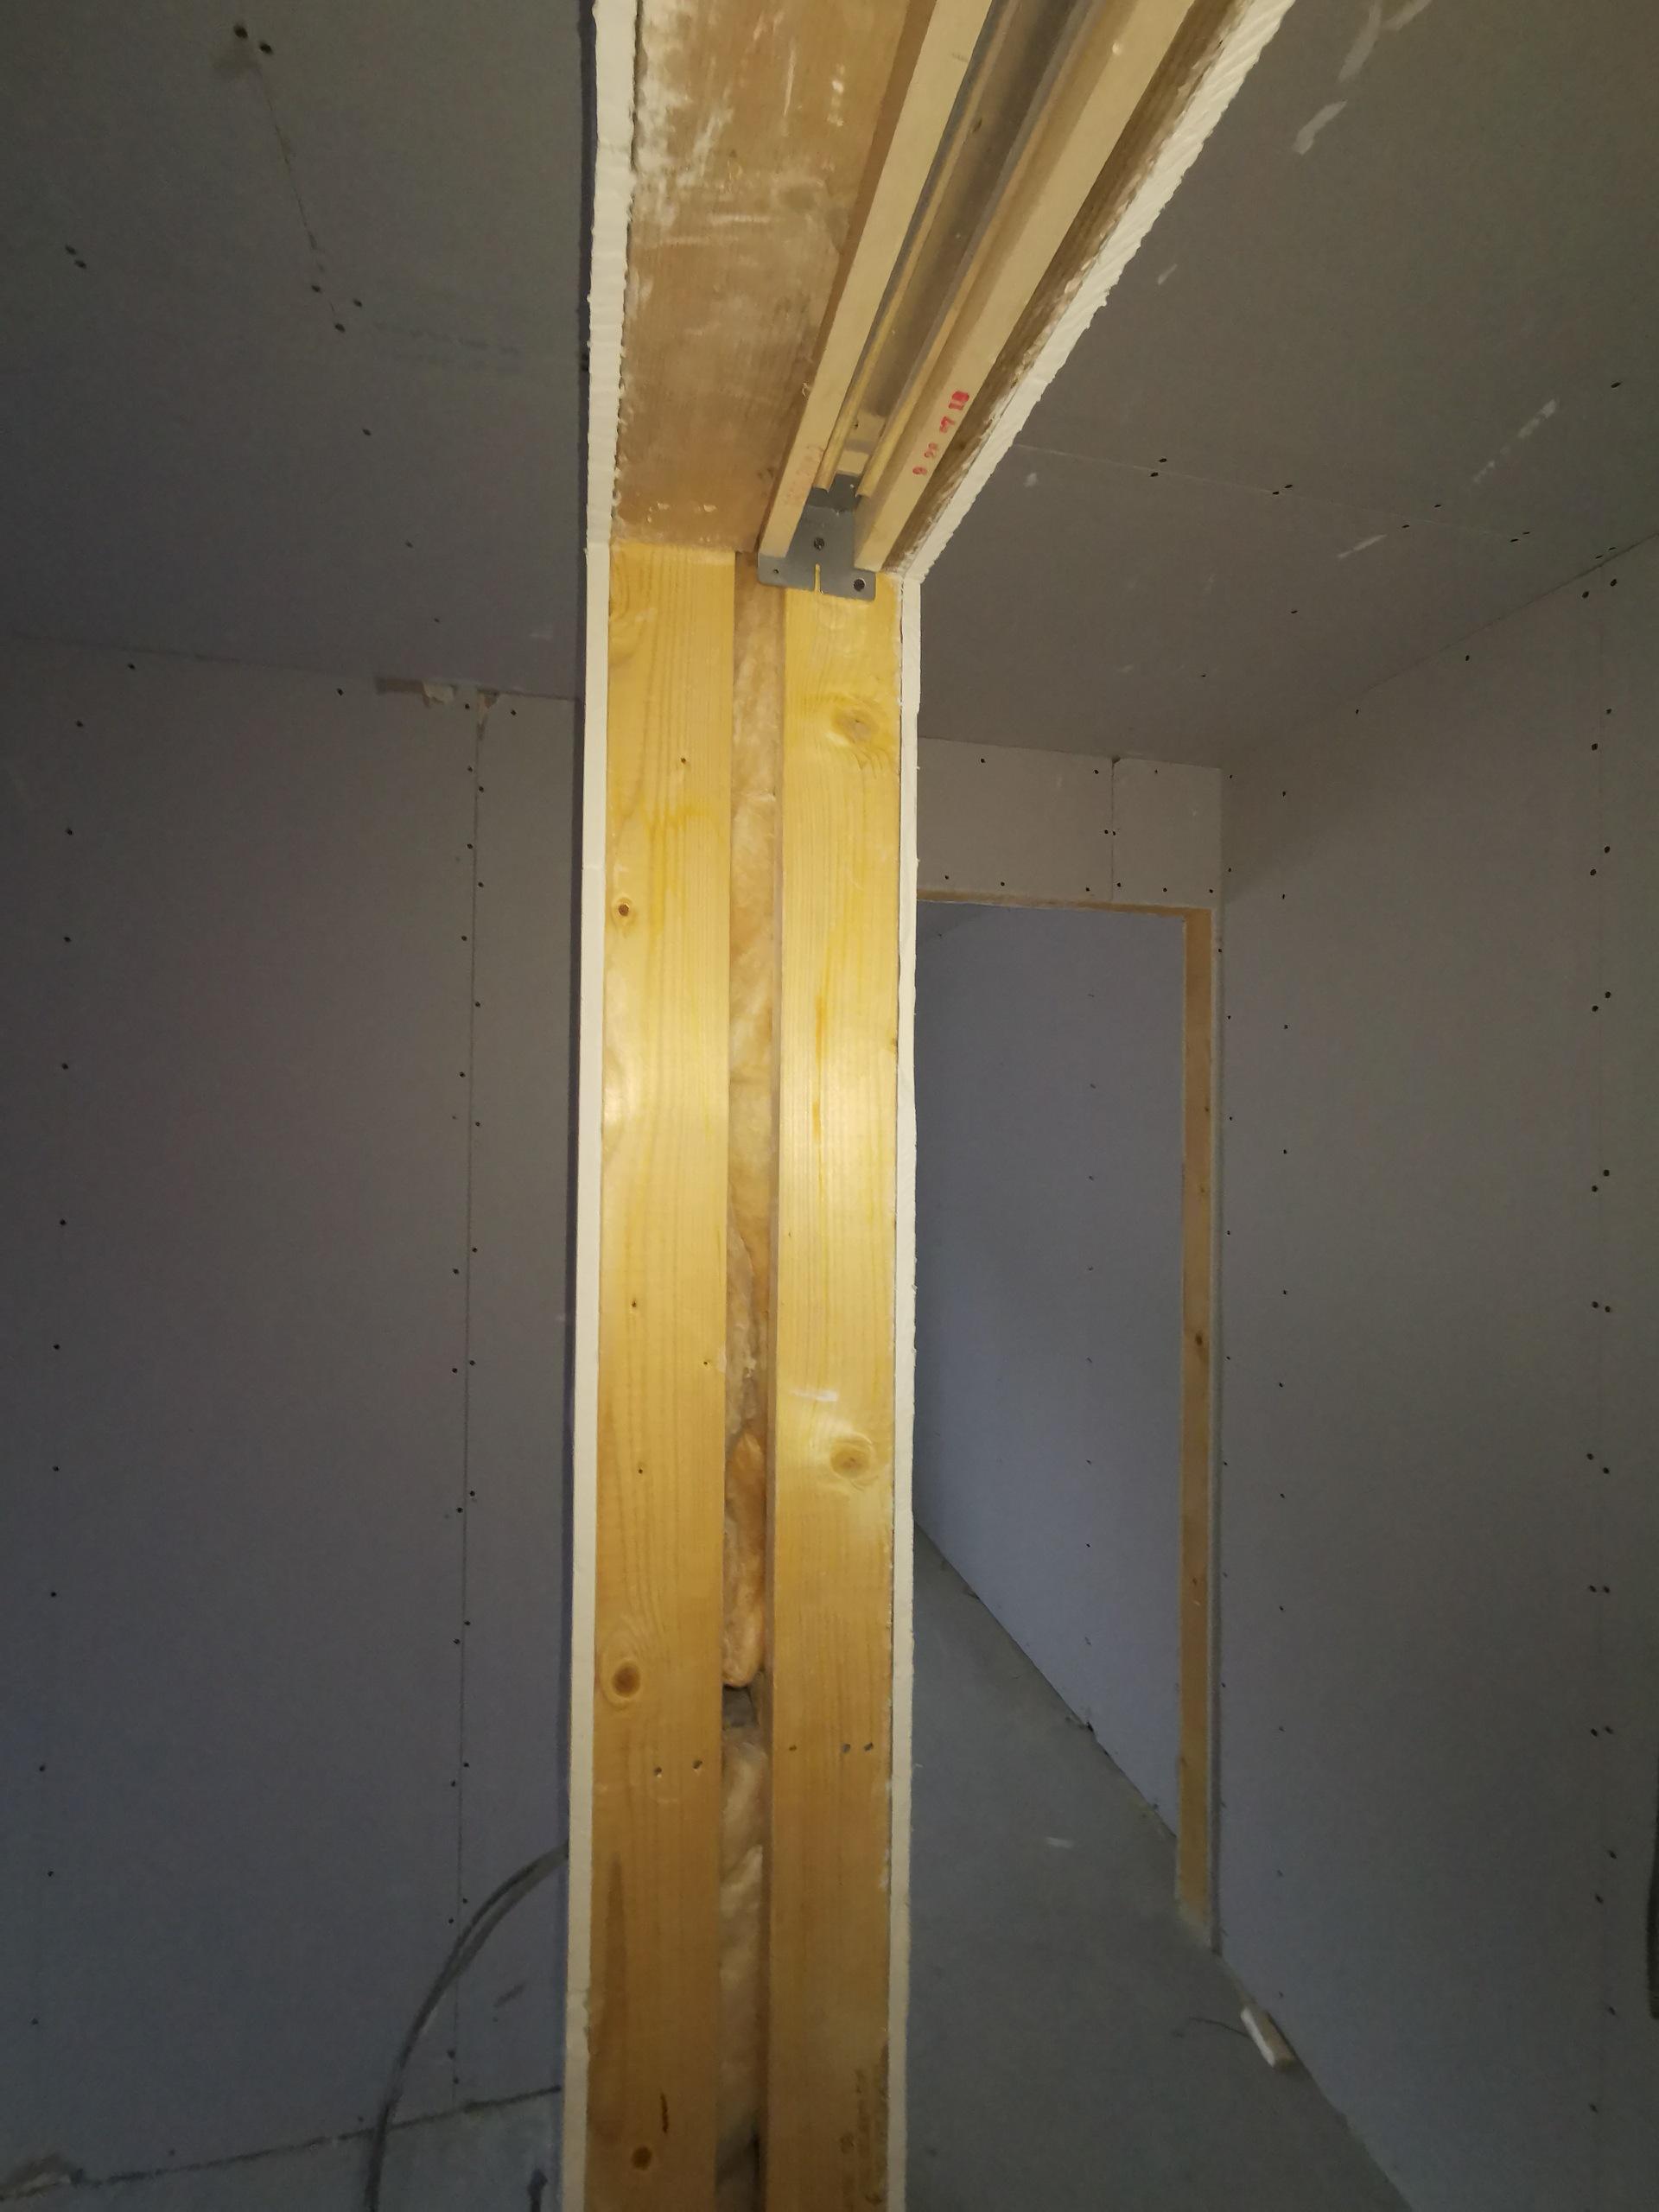
I fix MF framing for a living But I’ve used block to devise rooms off Except for bathrooms and utility on the ground floor Though it’s a bit of a myth that better soundproofing can be achieved using block To decide our bathrooms I’ve used two back to back 70 mil studded walls with a 50 cavity With a loo on either wall you can’t hear the flush from one bathroom to the other Two 50 mil studs back to back with a 50 cavity will give you better soundproofing than a 100 mil timber stud1 point
-
My builders rule was never order off plan if you can measure it on site. He remeasured all the window openings before ordering windows.1 point
-
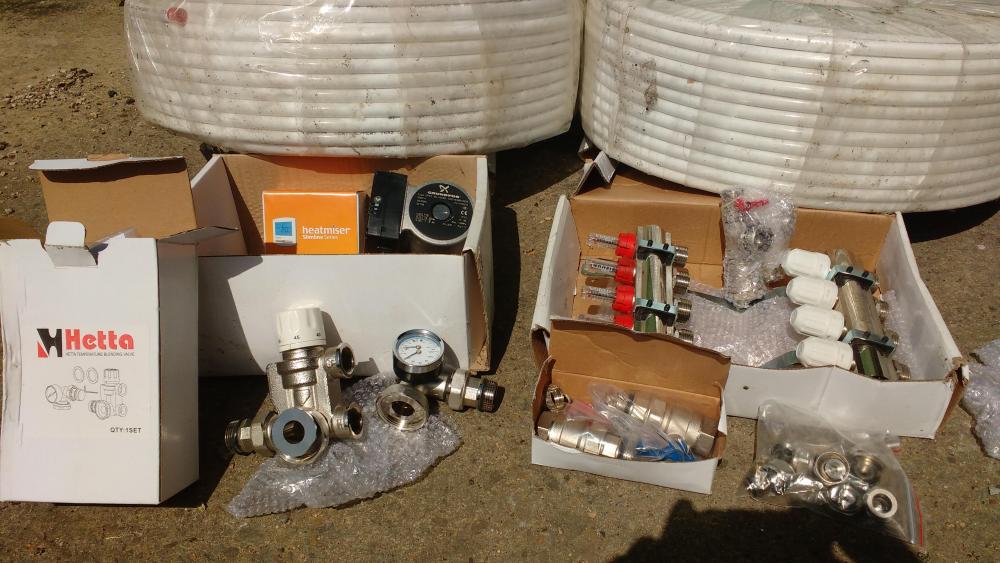
I am getting set to pour my concrete slab with A142 mesh and UFH pipes attached and have a couple of questions. I bought a Hetta 4 way manifold kit with 2 x 200m 16mm pert-al-pert pipe second hand (unused) on Gumtree a while back so hopefully it works and has all the relevant bits! 1. I notice that the kit doesn't include any 90 degree conduit for near the manifold - should i get some like this? https://www.toolstation.com/jg-speedfit-conduit-elbow/p74951?utm_source=googleshopping&utm_medium=feed&utm_campaign=googleshoppingfeed&gclid=EAIaIQobChMIx_qppoKM4wIV4b3tCh3k_QOcEAQYASABEgKTl_D_BwE 2. i have a couple of expansion joints where the pipe will go through - should I use conduit for those sections as well? 3. I was not planning on pressure testing before the pour (mostly because plumbing isn't my strength, don't have a compressor, having looked at some advice on here suggesting it isn't absolutely necessary, also will be running at low temperature (100mm spacing) so pipe expansion issues not so relevant) - do I have to fit the pipe to the manifold before the pour? I was thinking I could leave the pipes sticking up in line and fit manifold later. I think I need someone to tell me to stop being stupid/lazy and just fit it now as I can see it can't be as easy to fit later - it is just that the wall isn't quite ready to fix to yet. 4. Can I use a vibrating poker when I am pouring the concrete or could that damage the pipe? 5. It is an open plan space of 25m2 - at 100mm spacing I make that 10m per m2 so 250m pipe in total is needed. It will all be run as one zone. I am planning to use 2 loops of 125m each in a spiral pattern. Is there any reason why I should do 4 shorter loops instead?
 1 point
 -
Delayed reaction to this post. Been stupidly busy. We have Eclisse pockets. All have ply then plasterboard and feel very solid with the double layer and a skim. They are a bit hollow sounding but the space saving convenience is worth it. All on en-suite bathrooms so hopefully noise won’t be too much of an issue and will be personal to the occupants of the bedroom / bathroom. ? We were advised to put the ply layer on so that we could fix things to the wall. Its a bit stronger with the extra layer.1 point
-
We have these. Working fine for the last 4 years - haven't even looked at them to be honest (they're on the roof under the panels, which in our case are mounted on weighted frames on a flat roof). The latest update to the app gives per-panel info (per day, I think, unless you pay), so you can see whether there's a problem with any particular panel.1 point
-
One advantage of microinverters is that their commutation capacitors only need to handle modest currents, and so they can use non-electrolytic capacitors. These don't suffer anywhere near as badly as the long-life electrolytics used in much bigger inverters, so realistically I suspect their life could be many decades.1 point
-
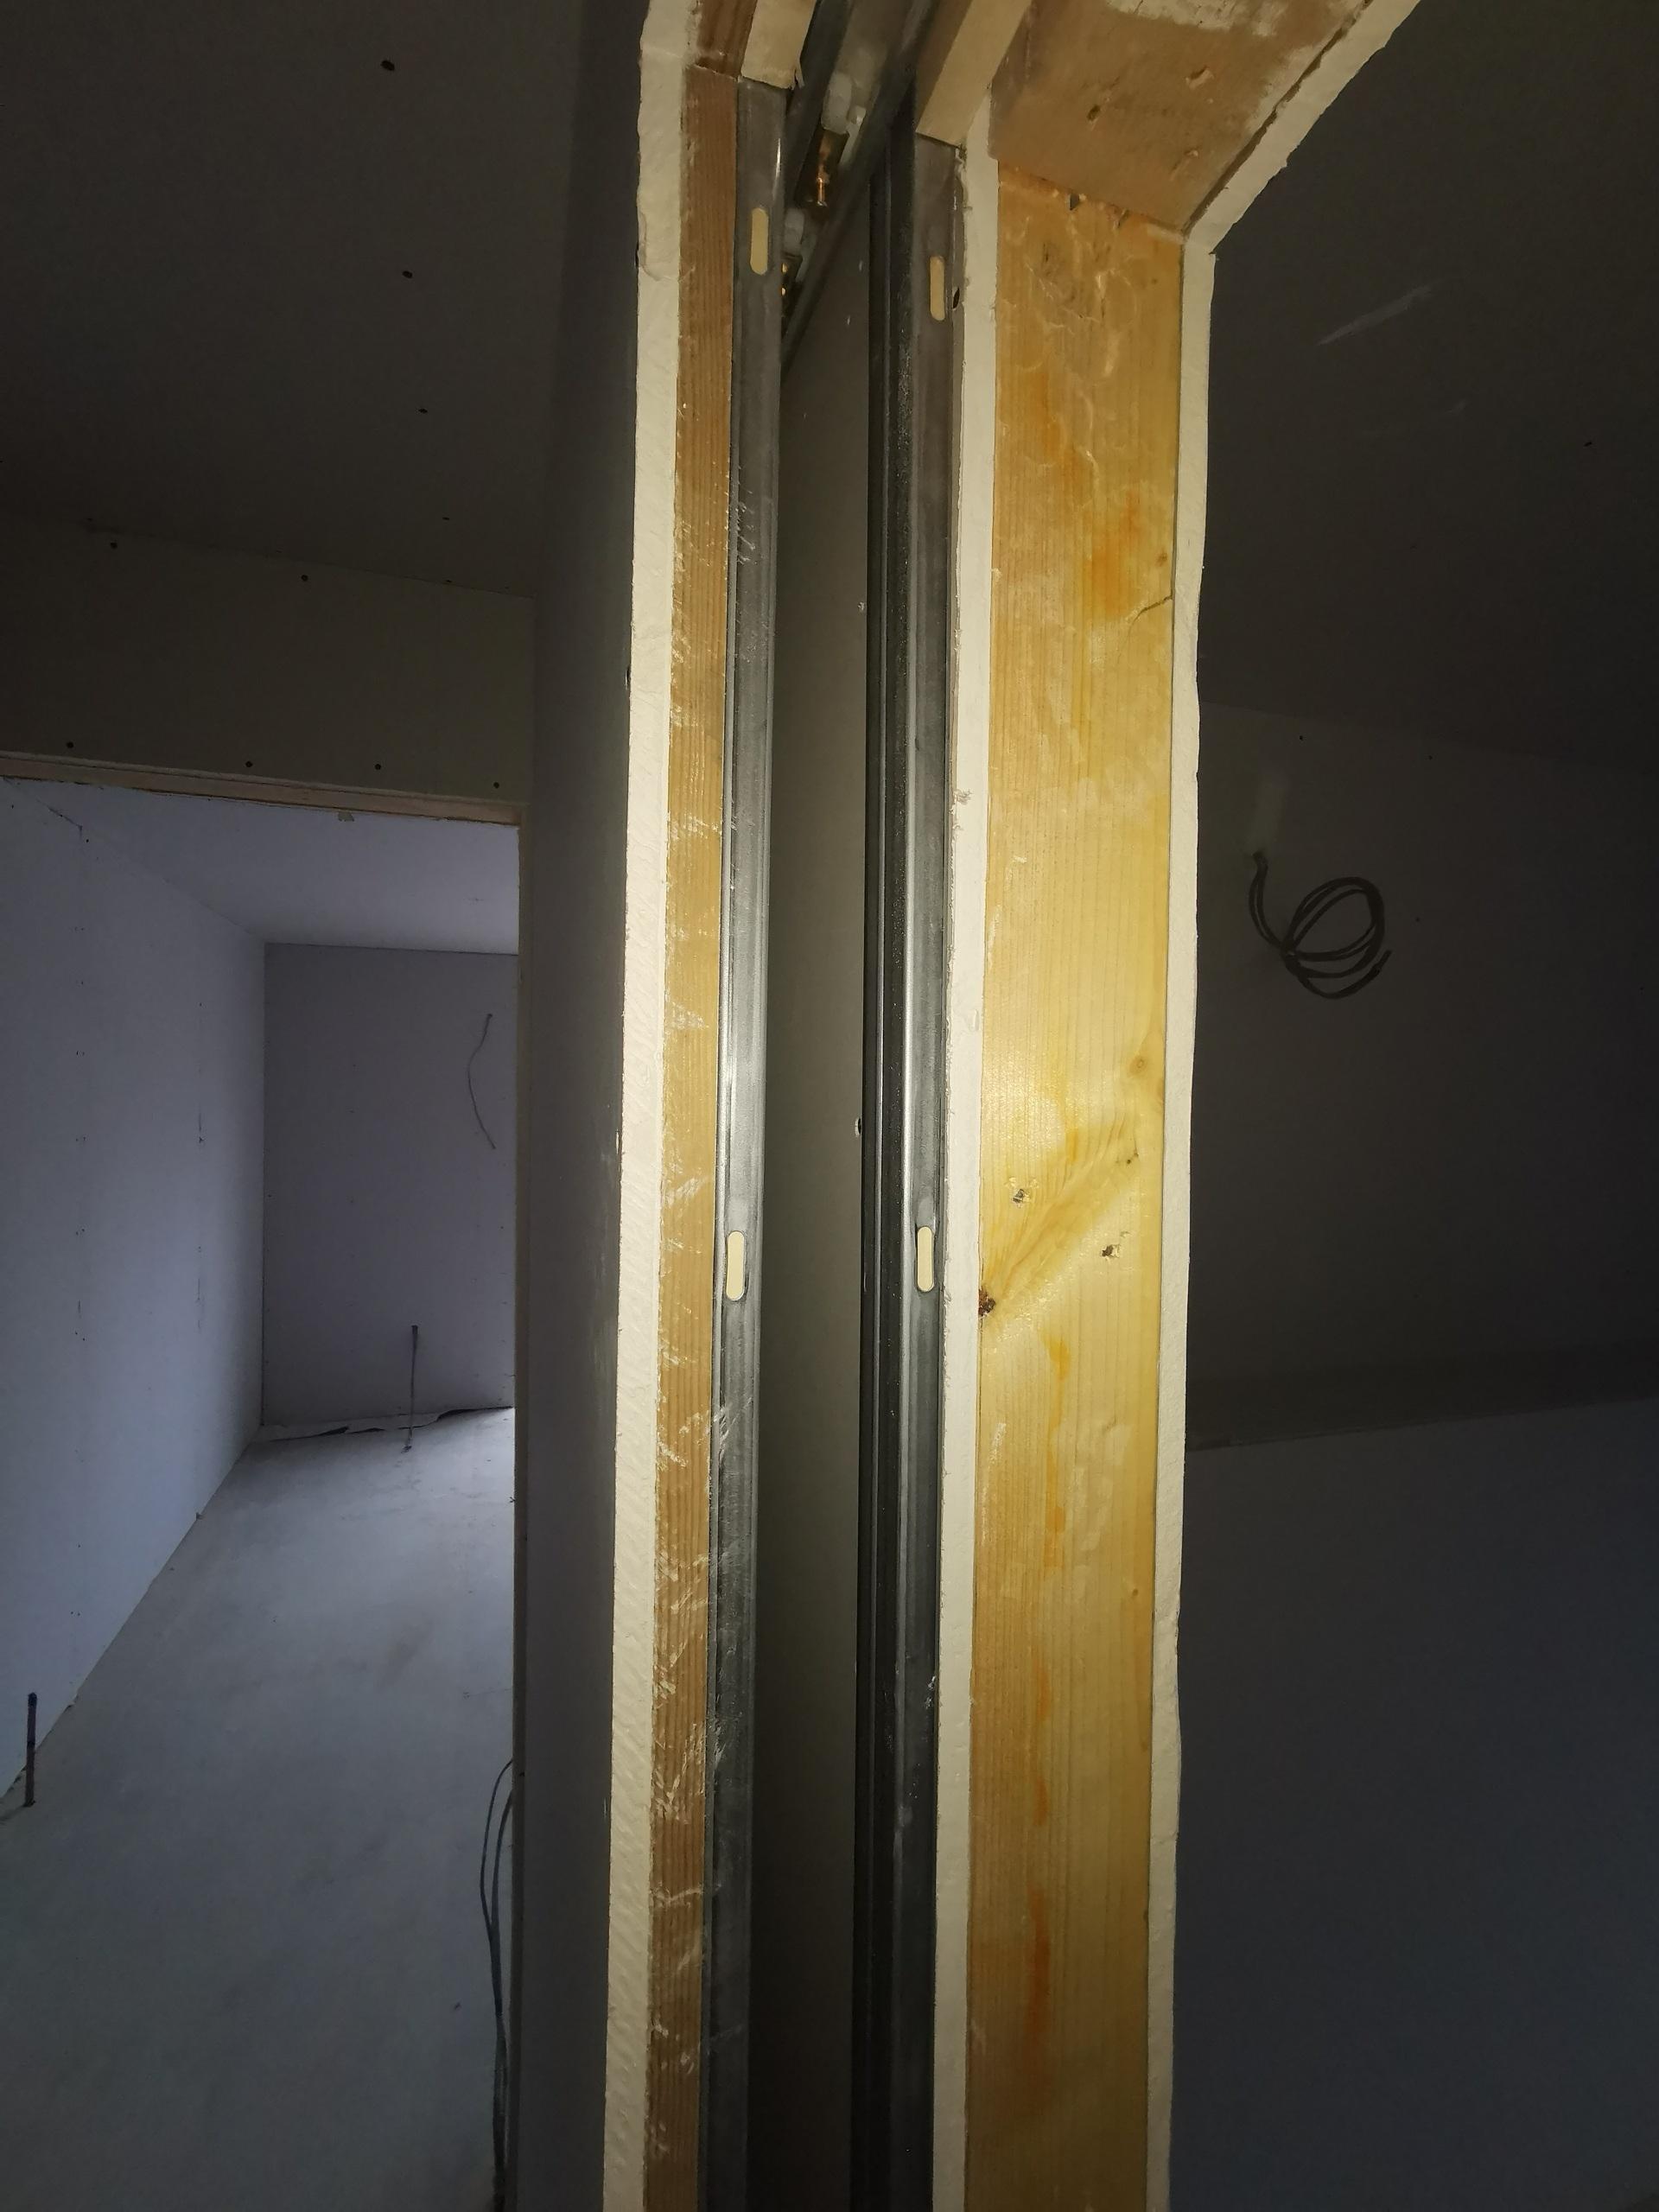
I have just had two of these fitted: https://www.coburn.co.uk/product/hideaway/ My joiner really doesn't like pocket doors and said this one is the best of a bad bunch (from his experience) The frame is encased in the middle of a 90mm partition and loos like 20mm. Obviously this approach takes up more space, however the wall is still fully insulated and feels very sturdy


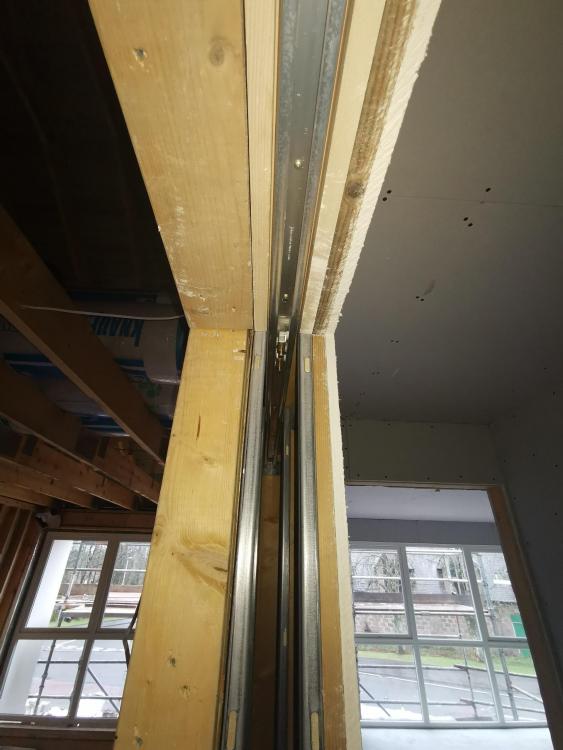
 1 point
 -
By complete fluke, we ended up with a 25mm shower tray on the OSB deck being completely flush with the adhesive / backer board / UFH mat / latex / tile adhesive / tile. When we fitted the shower glass, it went on a bead of clear Sikaflex on the shower tray edge - we used a few 2mm spaces to get some clearance. Once the Sikaflex had set, spacers were removed and the gaps plugged up with more sealant. Looks smart. N.B. Nick has a bulletproof guide to tanking a shower area and fitting a shower tray - we followed it to the letter (even though plumber was not keen) and have never had any issues. Check the bath waste fittings now before tiling as you can plan a neater solution than the one we had to bodge, Nick also had a method for building a little wall around the opening for waste to prevent any water ever making its way down there (we had to use loads of SikaFlex). Another note - after tiling, the engineered wood floor in the hall outside the bathroom would have come up a bit short, so the floor guy built up a subtle ramp of latex to bring it all flush - you'd never know from looking at it. Stainless steel threshold to finish it off.1 point
-
Both the feed and return pipes are attached with tank connectors low down in the side of the tank. I filled it with a hosepipe and check the level every couple of days. The Willis thermostat is set to 25oC and the TMV set to the hottest setting. The Willis never turns off, well certainly not yet, anyway. I wired the willis and the pump to their own 13A plugs (yes, I know about them not being continuously rated for 13A), which connect to a pair of single 13A sockets connected with a length of 2.5mm2 T&E run from a 16A MCB in the consumer unit on the other side of the wall. The plugs are in free air, and I have checked after several hours of operation and the heater one is only slightly warm. I'm satisfied that the fire risk is low, unlike the 2kw fan heater which stopped 'fanning' and turned into a melted lump of plastic pretty quickly, and the convector heater which has a very hot plug if run on the 3kW setting.
 1 point
 -
Enjoy the moment. Tomorrow you will be rodding the turd berg out from where it next came to rest under the garden.......0 points
-
I often wonder how this one will fair in the long term. Dead flat run between the joists. Out of shot it then turns right to the en-suite with not much fall on it. Far too many places for a blockage to occur imho and nowhere for rodding access. It was done by a plumber.
 0 points
 -
We have a travertine counter top basin with wall mounted taps. I wouldn't go with travertine again because it stains but everything else about them is great. You can get them with overflows built in... https://www.victorianplumbing.co.uk/costa-600-x-370mm-counter-top-basin-0th-ves009?campaign=googlebase&gclsrc=aw.ds&&gclid=CjwKCAiA0svwBRBhEiwAHqKjFs3zrhMpnMhPic36B_xvzLKTVmclDSsqovoLNc6mzWn8M4idAcguTxoC_n8QAvD_BwE or you can add one hidden in the wall that bypasses the plug when the level gets too high. https://www.tapsempire.co.uk/product/ideal-standard-idealflow-hidden-basin-overflow-n8326/?gclid=CjwKCAiA0svwBRBhEiwAHqKjFi_5DK62Xm2p-79kvMlxftgAc8GxTC07UWv_k5vHNIVAWpCCs9KhJBoCfZ0QAvD_BwE Taps can be wall or counter top mounted. Our wall mounted taps seem to stay cleaner for longer as water from wet hands doesn't run down the tap or puddle around the base of the tap. Some counter top basins even have mountings for taps. I fixed our basin down with a bit of silicon same as our shower glass panels. They aren't going anywhere. The basin is also fixed down by the waste but you arent meant to do that (our counter top is also travertine and I forgot to make the hole big enough to clear the nut). I would avoid a basin with a very rounded bottom as it would be hard to clean under there (other things with rounded bottoms are fine by me :-)0 points
-
Ha ha Ian Once the walls are plastered you won’t see them Any imperfections on the screed will cover when your floor covering goes down If you employ a messy plasterer He will fil them in for free0 points
-
Just make sure you record it ?0 points
-
Make sure you have your "wet weather" PPE on for when it does uncouple....0 points
-
It's yours once I've finished with it.0 points
-
The Anni-Frid Lyngstad of science, as opposes to Maggie Philbin, who was the Agnetha Fältskog.0 points


.jpg.c21f3ac78c9b7efd90cbdcb312744dc5.thumb.jpg.7adcad4c0e384f5ecd7d56b0618df6e5.jpg)


This leaderboard is set to London/GMT+01:00