Leaderboard


Popular Content
Showing content with the highest reputation on 08/01/19 in all areas
-
Old post, I know, but I've just used FreeCAD to read in a .dxf created in AutoCad. FreeCad will accept a wide range of file formats, and can export .stl files. There are a few potential gotchas, for example, I've found that it makes life easier if the drawing coordinate origin is set to be in the centre of the view port before saving the .dxf (FreeCad seems to be a pain when it comes to handling offsets properly). Not sure I'll stick with FreeCad, as it's a bit quirky, but the learning curve to drive it hasn't been too steep. I'm just setting up my new toy, an Anycubic Photon 3D printer. Limited size of objects (115 x 65 x 155) but pretty high resolution, as it's an SLA machine, that uses UV cured resin (layer thickness is typically 50µ). It's just been superseded by a newer model (same resolution and print volume) so this older model is on sale for £229. Should have it set up to print a Benchy later today. I'll post a photo of the outcome.2 points
-
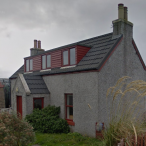
A very very long and difficult history to our self-build that we will compact into as short a space as possible to save readers much of the grief we have been through. We have always lived in (and renovated) old, cold, draughty and character-full houses, and our last house (a Victorian vicarage) had lots of glass and double aspect rooms and was full of light. We wanted to downsize but couldn’t find anything with similar light and space, and some of the new build ones we looked at were really poor quality. So we decided to self-build and started to look for land – and as some of you already know it’s not an easy task. Then we came across a tired 60’s bungalow on a 1/3rd acre plot about 2 miles from where we were living – perfect location. All the other bungalows on our side of the street had been developed to reasonably dense new build developments with a real mix of styles and sizes, and outside the conservation area – perfect for knock down and rebuild. Piece of cake we thought – how hard could it be to get Planning (little did we know!!!! and if only we had known then what we know now ....). So after a small round of bidding, that was won; not on the highest bid, but with our throw away line ‘offer not subject to anything’. We won the day, we were the proud owners of a somewhat tired bungalow, and then the fun started! First problem was selling the Victorian vicarage in a downturning market which took about 3 years. So finally sold, and knowing how much cash we had, we moved in and started on the long winding road to PP and self-build nirvana. We started with the German kit houses – fantastic quality and build process, and after a few trips to Germany we decided we really liked the modern sharp style that typifies much of new European houses today (or, rather, doesn’t in the UK). As a tip if you want to see literally dozens of show homes visit one (or more) of the (19) Fertighauswelt (think this translates approximately to “ready built house world”) sites in Germany (https://www.fertighauswelt.de/ ) – the best 5 Euros you can spend if you want to look for design ideas. Sadly over time and a Pound sinking against the Euro the German kit house was never going to work. And also working with the site and the budget it really started to make sense to build two houses and sell one to subsidise the one we wanted to live in. Unknowingly we had just created the perfect anti-PP scenario:- cutting edge modern design in a street of pastiche estate type houses; being greedy enough to want to want to build two; and being the last bungalow standing and surrounded by FD&H NIMBY neighbours. Rather than taking you through the gruesome blow by blow story here are the statistics:- Total time from first App to final Appeal decision:- 4yrs and 10months 1 Pre-App – which was a total waste of time and money 7 Planning Applications (inc 3 CofL/ PD apps) - 2 Approved 6 (or perhaps 7) different Planning Officers 3 Committee decisions:- 2 Refuse & 1 Approve, all with prior Officer Approval 2 Appeals:- 1 Refuse & 1 Approve (sadly we didn’t win costs) 105 letters of objection & 1 of support (from a London Architect who loved the design – bless him for that ray of sunshine It was a dreadful process and the main reason for the time and grief we suffered seems to be that we are surrounded by vile neighbours who have friends in high places. The public comments generally had very little planning relevance but included phrases like ‘peeping toms’, ‘covert surveillance’ and even likening our design to ‘Grenfell Tower’. We were stoic and kept turning the other cheek but we sent this last one back to the Chief Planning Officer as ‘offensive and defamatory’ – he said it was perfectly acceptable (to quote Joe Walsh ‘You Can’t Argue with a Sick Mind’)! If we thought the public comments (sometimes called ‘solicited hate mail’) phase was bad then let’s say the Committee phase was much worse. Firstly it seems that the decision is made before you even walk into the room, and that nothing you say will make any difference, or even be listened to. Then the Committee infringed our copyright, accused us of greed and telling lies, and told us that they didn’t care at all that we were planning to build low energy houses. If we had any faith in local democracy and politics we have much less than none now. We are certain that the only reason we got one through the Committee is that one of the esteemed Councillors really upset/insulted the Chair (we decided we really shouldn’t print the exact comment); at which point the discussion divided on party lines and incidentally we won! As mentioned the Pre App Advice was a complete waste of time and money (for us). We offered the Officer 3 options and he agreed what he thought the ‘best’. He also gave us a lot of ‘advice’ which we incorporated to the letter in the Application. He then proceeded to keep changing his mind and we did 3 major re-designs over 12 months until he ‘approved’. It finally went to Committee and was refused. The subsequent Appeal which we lost was true goldmine as it contained real data on what was acceptable and what wasn’t. We then built the subsequent Apps on this and the Officer(s) really couldn’t disagree with the previous Appeal comments. Also in the second Appeal we seriously questioned some of the proposed Conditions and the Appeal Officer took out most of them. A real win and we saved our Planning Consultants fee in having a really onerous Design and Methods condition removed. Certainly worth a shot if you ever go to Appeal. If any of you have been through this sort of process then you will know how personally depressing and demoralising it can be – and we have heard worse war stories! We had great and very patient designers and a superb planning consultant and some amazingly supportive friends and family. Also after the initial setbacks we did have a very focused plan on how to get to where we wanted to be in incremental steps, with a workable Plan B. However our advice would be: only ever buy a plot that has PP for something you want to build (unless you have lots of time, very deep pockets and skin much much thicker than a rhino). So finally we won at Appeal, and we are staring to build two really interesting low energy houses – more in future posts. We will try and keep up a Blog as best we can, and having got that backstory out of the way everything should be easy from now on!!!!!!1 point
-
Hello everyone, I discovered this forum while doing some research about the current state of the MVHR market. I intended to install a unit 5 years ago when I did a major refurbishment on a house that we bought but it never got done. The market has moved on since then (or so it appears) and it’s time to get on with it. I’m going to go to the MVHR section and see what I can find.1 point
-
Autodesk make both AutoCad and Fusion 360. Fusion 360 is free and can apparently import DXF files from AutoCAD and export STL. I'm really loving Fusion 360 but I've never used AutoCad so can't compare.1 point
-
yeh should be no problem, just get a heater and dehumidifier in as soon as its wind and water tight and you shouldnt have any problems1 point
-
In that case it'll be me climbing up the scaffold to do the work lol1 point
-
Same here. We bought the matching microwave/grill unit to go with the main oven and it doesn't have a turntable. PITA, as it doesn't heat evenly, nowhere near as good as the old (and much cheaper) stand-alone combination microwave we left behind at the old house.1 point
-
Protect Bariair was the cheapest I could find. I got it to order from Jewsons.1 point
-
Building regs that stop me doing some things the way I really want, or stop me doing them altogether (hence a growing "after completion" list.) On the subject of ovens. We wanted a matching conventional oven and microwave. What we were forced to buy was a fan oven and a mini oven / microwave combination oven. That combination is not as good a microwave as we would have liked (no rotating turntable for instance). I could have bought a "matching" built in microwave by the same manufacturer that functionally is what we wanted, BUT that type looks like (because it is) a free standing microwave with a front plate put on to make it pretend to be built in. I was not happy with that.1 point
-
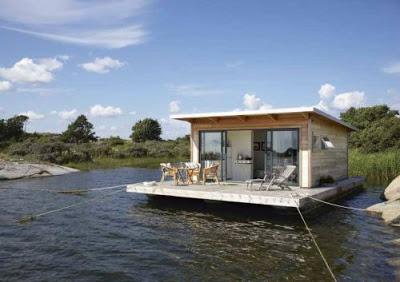
The rate of injury in construction is 1.64 per 100k, agriculture is 8.44. The fishing industry is 62 and that's in 2017. As a teenager in the 80s I spent quite a lot of time on fishing boats, sometimes in seriously bad weather. I don't think I ever saw even basic PPE, not a safety harness or even a life jacket, never mind survival suits and hard hats.1 point
-
If being a vapour check is O.K. https://novia.co.uk/uploads/components/variation/NoviaVC2Mar19-5c865c7509c30.pdf1 point
-
Tanking is normally associated with internal, the same just a slightly different context.1 point
-
For future reference, if you’re ordering the stuff for the house then use JTM Plumbing online as they are much cheaper for bulk.1 point
-
I'm a bit anal even about the plastic pipes I can't see being straight! All hidden now:1 point
-
When we were looking around there weren't that many suppliers offering a thin (~20mm) option, either (more do now, I believe). We ended up going with Silestone mainly because the local stockist had a good reputation and they did the colour we wanted.1 point
-
The Sunamp can be topped up anytime, if needed. It's easy to just connect to a standard immersion timer so that you can control it in pretty much the same way as a normal hot water cylinder. In fact, our 9 kWh Sunamp is connected via a standard immersion timer, that is used to provide a boost top up on the E7 cheap rate if it hasn't charged up from PV during the day. Much harder to do this with Agile, as it's a continuously variable tariff, so a timer doesn't know exactly when the next 30 minute rate slot has dropped to a low rate. No reason why it couldn't work just fine with a normal off-peak cheap rate, or with one that has a fixed low rate tariff.1 point
-
Material wise not that much difference. The cheaper quartz has lower quartz content, therefore higher resin content which makes it 'softer' and less heat resistant but only relatively. The main difference is going to be customer service in case of issues. There is a lot of quartz coming in from china, india etc which is unbranded, not made using Breton machinery (I am told is superior with better polish) and there will be no warranties or service backup on the material. We only stick with 3 or 4 brands of quartz who we know have responded well when the rare customer service issue has arisen. It could be argued that issues are rare and while that is partially true, be aware that you will be left very little to no comeback if such an event occurred.1 point
-
I did the hep2o plumbing in our house and with a bit of common sense and a lot of research it isn't that difficult. As @Onoff says don't forget the pipe inserts! Also the connectors are really easy to fit, just push and twist. Measure exactly where you are putting the basin, shower and toilet and bring the pipes through in the correct position. I fitted dwangs to bring them through the walls. I attach a picture to demonstrate. Bearing in mind these were stud walls. I also fitted wooden supports for the bolts on the basins. As you can see it is easy to attach copper pipe tails into the hep2o fittings. Have a look at YouTube, there are some good demos there.
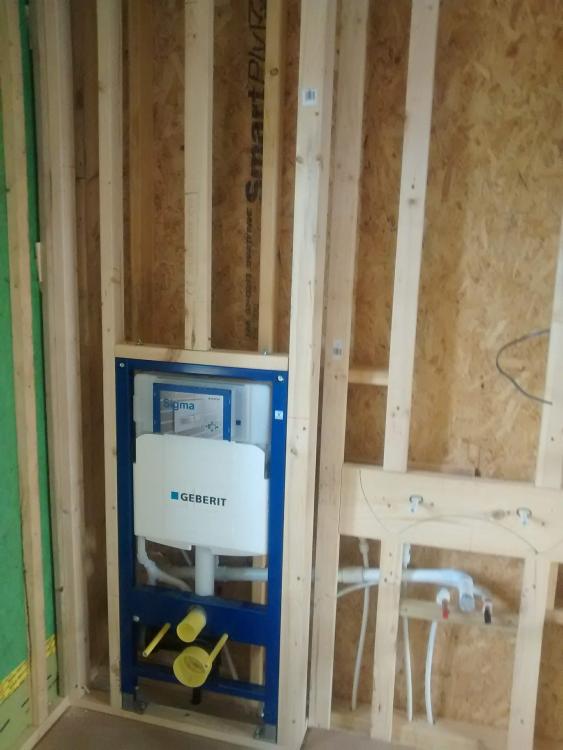
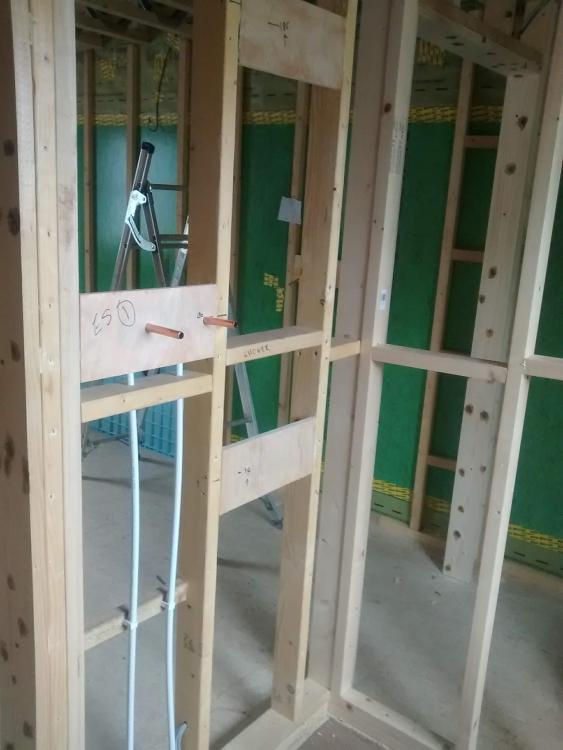 1 point
 -
Ferdinand, I agree with you that it is guidance and not a ban in this case but still consider it good practice. Also, I believe that 'intentional' is a term that is legally dubious in this context as the offence would be the 'disturbance of nesting birds' and as there is guidance on timings one could well argue that by virtue of ignoring the guidance, if birds were indeed disturbed, it would be intentional by default. There are a lot of these guidances/laws currently being ignored by people moving to the country, largely through ignorance, the main ones being controlling certain weeds (esp. ragwort), controlling rabbits (that one is a law not guidance), creating a garden from fields without planning... As for Mr Packham, he came rather unstuck recently when he caused the general license vis a vis shooting corvids/pigeons etc. to be suspended. The RSPB came down on him like a ton of bricks (pointing out that one of the major causes of the decimation of song birds was corvids) and the general license was reinstated fast. M1 point
-
Sorry, yes ... working from memory. Was a while ago! The older LightwaveRF dimmers (no longer available) did suffer from that, but all currently available ones are fine with LEDs.1 point
-
This may be of interest to some in the vicinity of Inverness / Ross-Shire. I had the heads up from a joiner I was working with yesterday that a new independant builders merchant has just started up in Alness. So I went there today. They have only been going about 2 weeks, so their stock is a bit basic but they are clearly building up the stock and were very happy to show me around. I ordered some chipboard and plywood from them, total cost was £271, Jewsons had previously quoted me £320. Hopefully this will give us some cheaper material for the rest of the build, and they are closer for us.1 point
-
Hi James, welcome to the forum. The first question has to be, “will that UFH system heat my rooms?” A decent UFH supplier will do heat loss calls for you for a small fee and tell you what heat ( watts per square metre ) the UFH would need to provide to keep the temp at 21 degrees when it’s -5 outside. Anything below that and you’d need auxiliary heating to supplement the UFH. Buyer beware!! 100% take all the floors up. Staple some nylon pallet strap to the underside of the joists to make a cradle for loose ( fluffy ) mineral wool insulation to be dropped in between the joists. Full full those voids and enjoy some much better insulation values for not too much money. Draught-proofing the ventilated space is a no no, but sealing the floor / joists to the walls at the top to stop that draught getting into the house is a great way to reduce heat loss, and therefore the above measures may well bring you into the realms of UFH being viable. If you intend to go this path, many in here have installed Wunda products ( I have fitted the same for many clients ) and if you commit to buy from them they will do the full design and calculations for you and compile the materials list to suit. Takes a lot of the unknowns away then, and you can instantly see if UFH will suffice. Even if you can scrape by without the added Insulaton / draught-proofing you’d be mad not to do it ( depending upon how long you wish to stay at the property of course ). The room thermostat for the spaces served by UFH needs to be chosen well, with a hysteresis of .2-.5 degrees C maximum. Do NOT use a standard rotary room stat or you’ll go from hot > cold > hot > cold with the resulting over & under shoots that you’d get from a room stat with even as much as a 1 degree swing. You can just fit spreader plates atop the joists, see Winda’s website for examples, but an Insulaton board system will interrupt cold bridging from the floor joists and improve things further. Forget leaving a draughty cold air blowing around under your UFH as that’ll suck away a lot of heat, and the resulting infiltration could render UFH ineffective. The downstairs bedroom radiator will need to be on the UFH zone valve & controls ( not on the manifold, just fed with heat from the boiler, teed off the pipes that feed the manifold AFTER the UFH zone valve ) and will require a TRV to stop that bedroom from overheating. As for a buffer, you could maybe get away with fitting a monster of a radiator in the hallway ( if the hall / stairs / landing ) are open plan, and run that radiator as a bypass rad, and even better if you can do a bathroom towel radiator as a bypass too. It’s mainly to get some extra primary system volume which should deal with short cycling enough to negate a buffer. Either that or a small buffer tank in the airing cupboard so the waste heat keeps the Y-fronts toasty. Fabric first, heating system design second1 point
-
1 point
-
Unfortunately the issue with charging the hot water Sunamp from a heat pump has little to do with the controller or its software, it's a fundamental physical issue with the phase change material that it uses to store heat. This has a transition temperature of 58°C, but needs to be uniformly heated to about 65° (or a bit more) in order to ensure all the solid has melted to liquid. I suspect that your electrician probably doesn't understand how the Sunamp works, which isn't surprising, as it is a novel product. The electrically heated Sunamp is much the same as the hot water heated one, it differs by having an electric heating element in the base, in addition to the heating heat exchanger. This has two effects; it allows the PCM material to be directly heated, much like an immersion heater heats a hot water cylinder, and it allows both heat exchangers to be plumbed together in parallel, which increases the instantaneous heating power a bit.1 point
-
No. Yer a star! Time for some research....1 point
-
I have now watched through and, admittedly, they don't look like steels. My comments are based around safety: if using an electric hedge trimmer (personally I always use a petrol one, also stihl, because of reach, safety and reliability) you should have the wire coming from behind you over your shoulder, the way you were doing it could so easily result in cutting the cable. You should also, ideally have your arms covered and be wearing face (certainly eye) protection. Secondly, while it is laudable that you made this video, you should not be cutting a hedge in the countryside (in fact the RSPB would argue any hedge) between 1 March and 1 September. This is advisory in your case (DEFRA) but if you one is registered as a farm (ie over 5 hectares and CAP payment), it is mandatory. The exceptions are to trim back for safety (ie roads/visibility; footpaths/access). As you are promoting sustainability it would be wise, I feel, to respect this guidance. https://www.fwi.co.uk/news/hedgecutting-ban-one-rule-for-farmers-one-for-councils. Good luck with your venture.1 point
-
They might have been steel toe caped and soled wellies. Agree that they should be worn, steel capped wellies (or boots etc.) are also cheaper (no VAT).1 point
-
I did do a check on the frame company and its directors before placing the order. This showed that the company seemed to have had some tough times during the recession but had kept going. It's a judgement call in the end, with any company, but I took the view that a company that had managed to keep trading, despite a significant downturn in new builds, was probably going to be a reasonable bet. The history of the directors is also a useful guide, as some companies come and go with the same directors just starting a new company from the ashes of the last one. This shows up on checks, reasonably well.1 point
-
Less of a mix than you'd think, since all of the Sonoffs, Koogeeks and MagicHome LED controller are all now running the same firmware (Tasmota). Tasmota communicates over MQTT, as does the RFlink 433MHz gateway. So my main control integration point in OpenHAB is just MQTT.1 point
-
We are using Protect VC Foil Ultra. While it was supplied with the TF kit it's a brand that's common in the merchants and isn't the most expensive product out there?1 point
-
+1 The modem can provide info on the quality of the line. Things like the signal to noise ratio (or signal to noise margin). If the engineer that turns up knows about broadband perhaps ask him to show you how to access the modem admin page. The signal to noise ratio should be above 10db, over 20db would be good.1 point
-
One simple quick test to narrow down areas of concern - have you noticed an increase in background noise on your landline? i.e. crackling, popping etc. A quick way to test for this is to do a quiet line test - dial 17070 and choose option 2 for 'quiet line test' - it'll go silent but keep the call active... listen for a minute or so for anything crackly or pops. Once done, hang up. This could be intermittent. Second thing - if you could login to the BT Home Hub - somewhere there should be a log page that you can download and potentially share with us. On the Home Hub 6 this is under Advanced Settings -> Technical Log -> Event Log. There should be a button to save it (I think!). Would be good to take a look through that to see whats going on. Probably best to PM that to one of us and/or have a check through it before sharing as it may contain your username and/or land line phone number. HTH. R.1 point
-
Yes, remember to test with your router plugged into the master socket and ALL other slave sockets disconnected before you get Open Reach out to check.1 point
-
I have had my tower for many years and it’s flexibility is amazing, even used it on stairs to reach ceilings etc. They are usually 4’ square and go up in 2’ stages so you are never reaching far fir anything, I even use mine now (that the build is finished)for hedge cutting, and going to use it to wash the conservatory roof. Frankly I never see me getting rid of it (till I am in a rocking chair ).? Two towers with a 4’gap will give you 12’. You could make the gap larger if you are not too heavy or stack too many blocks on it. Top tip, if you span a gap with scaffold boards screw a 2x4 underneath and across the middle of the span to keep the boards stable and to stop the boards bending independently .? also towers are easily dragged along a firm surface to reach the next bit. This is like mine https://www.ebay.co.uk/itm/DIY-Scaffold-Towers-5-5m-4-x-4-x-180-Working-Ht-Galvanised-Steel-Tower/261206309482?hash=item3cd11bfa6a:g:5TYAAOSwstxVdZKV1 point
-
Had BT here twice adopt their default position of first suggesting their tests indicate the fault is within my property and only attending site if I agreed to £150 or whatever charge should this be the case. Subsequently found to be 2km away from the exchange etc. Both times I emailed them after having done IR tests from where their cable terminates high on the wall to the master socket.1 point
-
I've been watching prices for a year or two now and they are steadily reducing, but not by enough to make them viable, in terms of paying back the investment through lifetime cost savings. Not far off, though, the 9.6 kWh system I recently had a quote for is within about 10% of break-even, and with the added benefit of providing a backup power supply (for us, we get lots of power cuts) it seems worth investing in. I've no doubt that prices will continue to fall, though, as most of the price is in the battery packs, and the prices of those seems to be falling as a consequence of the increased popularity of electric vehicles. I'm not yet convinced that electric vehicle cells are best suited to home storage, though, because of potential cycle life issues. Redox flow batteries seem to be a promising home storage technology, as they potentially have a long life, if the capacity loss issues that have been seen with electrode degradation can be resolved . The snag is that they aren't suitable for electric vehicles, which seems to be the mass market driver for battery development, and so not a lot of development cash is being spent on them. Redox flow batteries are about at the same stage of development as lithium ion chemistry was around 15 years ago, when they were also suffering from problems related to electrode composition.1 point
-
My design goals were: Main lights should always be operable with a standard(ish) wall switch. Important for any visitors or house sitters, or even any regular occupant in a panic! But only add automation for those lights where it's actually useful. Accent lighting doesn't necessarily need a wall switch at all - app/automatic control is fine. No biggie if it doesn't come on, can always be turned off at the CU. Default to off when power comes on. "In-use" detection for main appliances, mainly so that I can get an alert if we both leave the house when they're on. Currently includes washing machine and tumble dryer, still thinking about on cooker/oven detection. Window/door open detection for commonly used windows and doors, again for notification when we leave the house. All avoids that awful "Did you shut the back door?" discussion when you're half-way to Cornwall. Presence detection (linked to the above two). Easiest route is via mobile phone detection on the local WiFi. Camera motion detection, active when we're not home. Everything removable and portable so we can take it with us when we move. Integration with Google Home so that you have hands-free lighting control in the kitchen, and a simple way to turn everything off at night. Key components I've used are: Itead Sonoff devices for simple on/off. This is a WiFi gizmo that you wire inline (requires neutral). Flashed with the far superior open-source Tasmota firmware. I've used these for kitchen accent lighting and patio lighting. Koogeek plug-in WiFi devices for simple on/off and power consumption detection. These are based on Tuya hardware, and again flashed with Tasmota. I used these for the washing machine and dryer. Magichome WiFI RGB LED strip controller for accent lights in utility. Dirt cheap, again flashed with Tasmota. LightwaveRF dimmers. Only one 3-way at present - they're not cheap, but they look damn good and are usable by anyone. Controlled either with the LightwaveRF WiFi Hub (again, not cheap) or with a self-build RFlink Arduino-based RF controller (which is what I'm using now). Will be adding more. Yi Home WiFi webcam, flashed with the Yi-Hack firmware. Raspberry Pi running OpenHAB. This is the main "brains" of the system, communicating with and controlling everything. Provides me a control panel on my phone and remote alerting. I'm planning to add more 433MHz RF devices, such as door/window sensors, door bell, and smoke/heat detectors, and an electricity meter pulse counter.1 point
-
Why would you not rest the joists on the concrete core of the ICF? When you pour the concrete, you leave it shy of the top by around 55mm - and then pace in your wall plate with pre-assembled wall plates with J-bolts through then. If you do it smartly, then you'll measure the joists to be 20mm in fron the outer edge of the ICF core - then ply right along the edge 'B'. And then you can continue up the outer layer of Polarwall to meet the roof pitch. I'll draw something up and post.1 point
-
Me too.....shudders quietly.0 points