Leaderboard
Popular Content
Showing content with the highest reputation on 05/30/19 in all areas
-
Don't forget to always leave the tool at the scene of the job and never return it to any logical central storage. Helps you hit you 10,000k daily steps target as you wander around trying to remember where you last used it, discovering all you other abandoned tools as you go (but don't be tempted to collect them up as you now know where they are...).4 points
-
Update: Got our PP this week - hooray (despite our wings being clipped by forbidding 2nd floor sunroom, so we ended up with simple 2-storey 4-bed box, half-hipped roof, and an approved non-habitable basement (half-the-footprint). Space-wise it's OK, but of course basement increases the costs, and it starts with the SE quotes already! Had 2x objections from neighbours (both unexpected), but dismissed by LPA. Now feeling really scared ? and the whole thing is quite overwhelming and daunting (still can't believe we're doing this!). Need a Jameson and a ton of biscuits, and back to re-reading the H-Bible!..3 points
-
2 points
-
These discussions always remind me of a carpet fitter who was telling me how fussy some customers/people can be when it comes to detail. He gave the example of people making sure the orientation of all faceplate screws were the same... He took the expression on my face to be one of confusion so proceeded to indicate on a nearby lightswitch what he meant only to realise that *I* was one of them! ? So, yes, another vote from me that upright writing is the 'right' (indeed *only*!) way to have those hinges.2 points
-
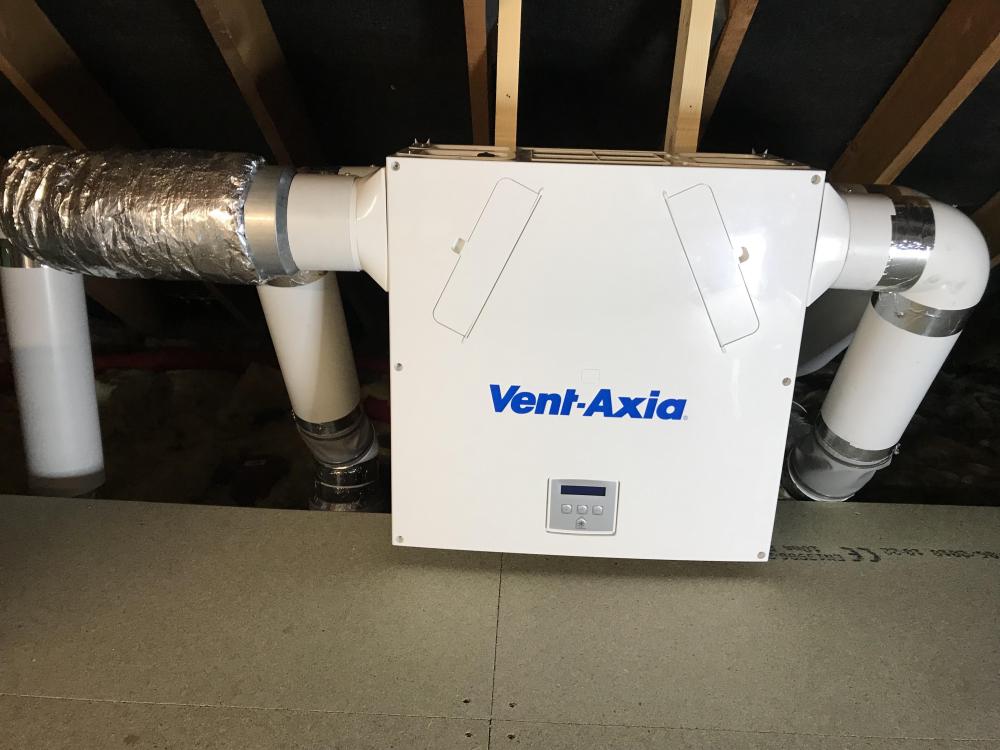
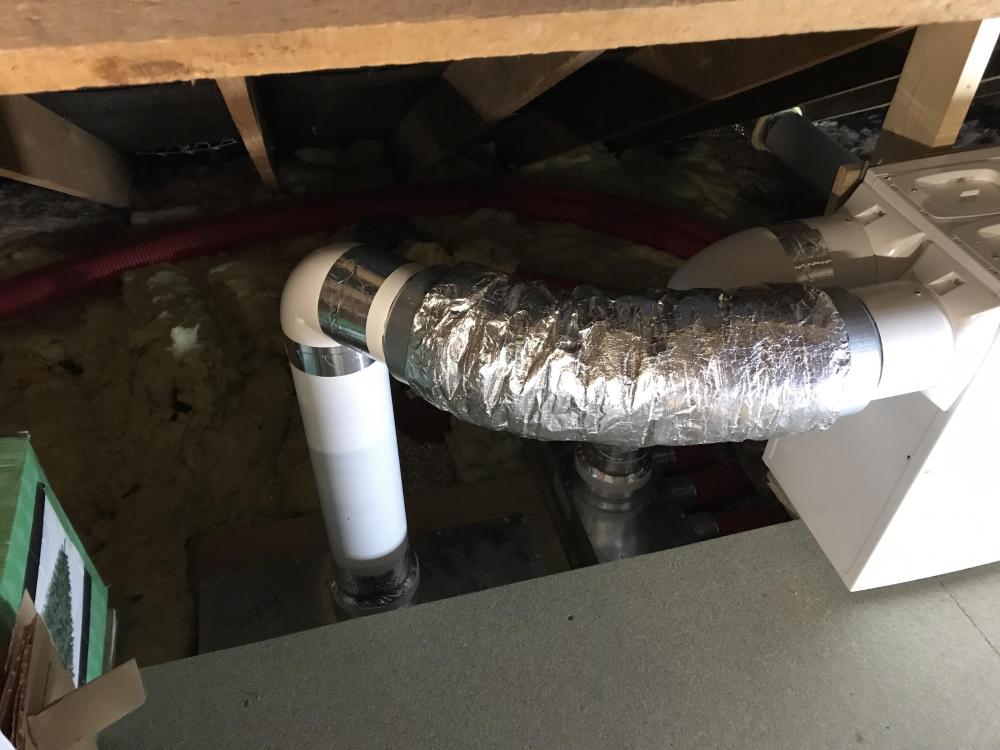
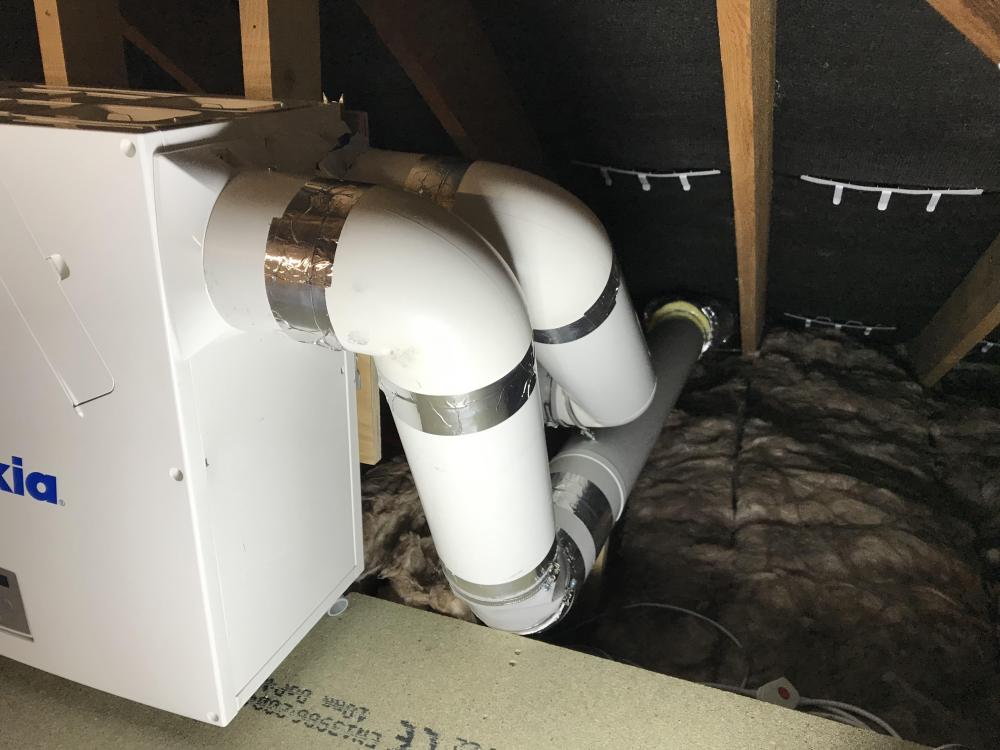
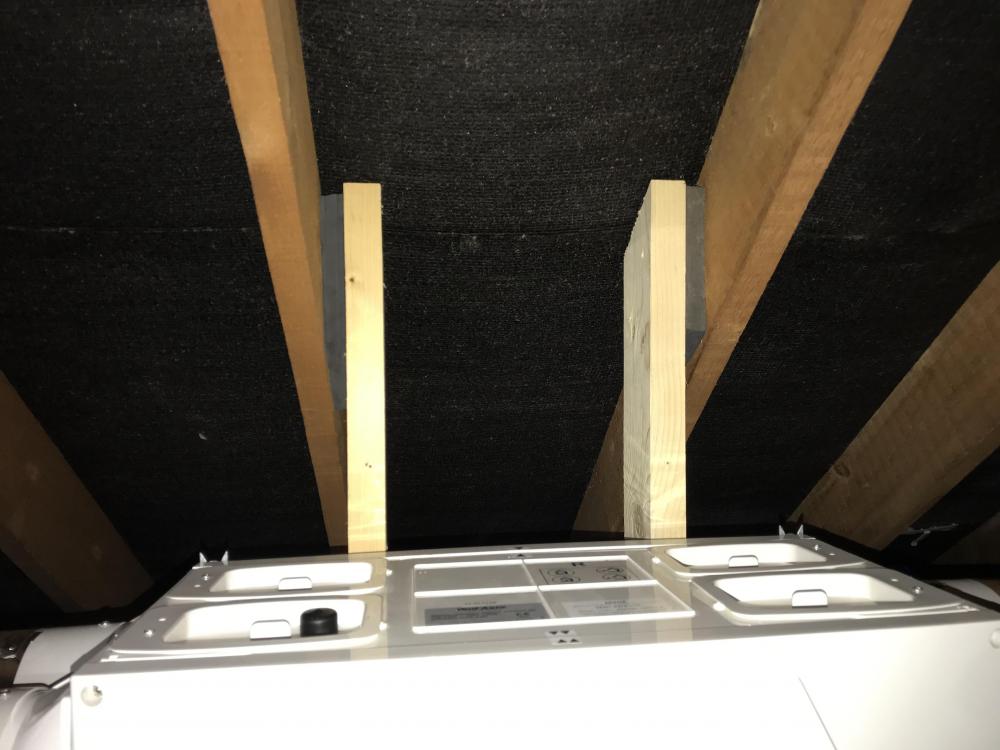
Progress update from today! Took @joe90 's sensible suggestion and roof mounted the unit, and included a generous piece of rubber: And then cracked on with the pipework. Will insulate it all next week. I did in the end buy the flexible rubber adapters, and they were less hassle than the metal flexipipe, and look to cause less restriction (BPC have now removed them from their site!) It won't look as pretty as some others have managed as I don't have a nice wall behind to run everything on, but it will be done right (I hope!) and work Tim2 points
-
You need the over hang, facia finishing level with wall looks crap imho, what you do is reduce the depth of the joist after it has rested on the wall plate, so the non load bearing part gets reduced in depth, then build up another course of bricks to allow a slimmer more elegant facia some of these new builds with there deep rafter depth and high roof trims end up looking like a supermarket.2 points
-
Colloquially known as "5 holes" due to the 5 adjustment positions. Try and drop the h to sound like you know what you're talking about. For example: "Whacked a bit of tape round it & managed to get a couple o' turns with the 5 'oles and that sorted it!" Builders crack showing is optional.2 points
-
2 points
-
If @steve77r you are looking for cheap you need to follow the route of the mass house builders ordinary square shape, red tile roof, plastic facia, plastic gutter brick n block or timberframe and brick skin if forterra was a cost effective way they would all be using it.1 point
-
If the writing is wrong, take up Crossfit and stand on your head. You know you want to.1 point
-
Whichever way up they are the same number of bearing supports are achieved, writing right way up fits with my OCD.?1 point
-
That doesn’t work as the concrete compresses the insulation and sticks anyway. That is the correct approach, or if it’s a new pipe then slide a length of 6” clay over the top and secure in place with some gun foam.1 point
-
1 point
-
This is how our pitched roof has been done, using ladder frames all around to create the overhangs at the eaves as well as the barge boards. The reason for it being down this way for us was to reduce the thickness of the overhangs, as our rafters are just over 400mm deep, so if they had been allowed to overhang we'd have had to cut them back in order to get a reasonable look.1 point
-
You could have the joists a bit shorter and screw some smaller section timber to the sides for the overhang.1 point
-
umm, a quick search on the british standards, indicates that BS6206:1981 has been partially replaced by BS EN 12600:2002 https://shop.bsigroup.com/ProductDetail?pid=0000000000101292961 point
-
BS6206 is the old standard superseded by BSEN12600 so I would say you're covered.1 point
-
no wonder and good riddance the old ones with the handle that would pinch your flesh if it slipped off --most will have gone same way as my old dads ones hurled a great distance after nipping you helped on their way with much cursing don,t think HSE would allow them to be sold anymore I hate cheap "mole grips --i,m no superman ,but if i can bend the frame when locking them up on a job --no good you buying moles --get moles grips , Irwin or vicegrips1 point
-
1 point
-
You're paying his bill..!!!! He's being lazy, get this right and you'll be in a better place at the outset1 point
-
I have a series of black buckets around a job and tools get put in those... Newtons 9th law of soddery says that the tool required is in the last bucket irrespective of order checked.....1 point
-
@Powerjen you need to get it right from day one, it’s so much more costly to change/put it right afterwards. With our build I went through the design in fine detail with my wife and said “it will not be changed during or after the build.” Sounds harsh but it paid off. I will follow your build process with interest.1 point
-
@pritch I have overhangs on East and West elevations and lights in them. Works well, gives a bit of shading from sun too (could do with a bit more really). On our North and South elevations we did not do overhangs because they were unnecessary and a bit impractical.... they are at the side and back of the house so we dont see them anyway. We used low level lighting there instead. I have hidden gutter and only two downpipes on whole house.1 point
-
Overhang looks much better on a flat roof like that, but I would want to put hidden gutters in and make the fascia nice and tidy. Which way does the "flat" roof slope..?1 point
-
1 point
-
No If you go with block then you need to go (inside to outside) Plasterboard Block Cavity (with Insulation) Block Render This will give you a wall of 325mm thick, there or thereabouts. Floor joists will go on the inside skin, both block skins connected by ties. Roof (if you want a full open apex) will be hung on a ridge beam / steel resting on inside skin. As @Carrerahill says, I recon £20/m for blockwork is about right so that would give you around 150sqm of block and a £3k bill for that section. TF would probably come out not dissimilar I would expect1 point
-
Ha, no chance (sorry) I am burnt out having spent the last 3 years building mine. I am looking forward to gardening, pottering with my vintage tractor and classic car. My wife (still working) reckons I will be bored when the build is finished, no chance!!! note, this forum has been a mine of brilliant information , I have learnt so much invaluable knowledge despite being a retired builder. Never be worried about asking a “stupid question”, stupid is not asking!1 point
-
ICF? Its not the answer to every problem, specially not if you lay them in the nude.?1 point
-
1 turns nuts or bolts of varying sizes. 2 grabs or squeezes things. Can cut cable or wire if needed 3 grabs or squeezes smaller things in tight spaces. 4 grabs things tight and locks on so you don't need to constantly squeeze 5 grabs and squeezes a bigger range of sizes. Usually used when you need to turn or hold pipe or conduit1 point
-
so assuming the garage is not fully tiled etc that cost sqm will be lower and interior spec of house could make a big dif some people on here are spending 30k on windows roofing cab be from £12 sqm to over £100 depending on type you choose so you can see until you spec up the build its hard to be anything but a guesstimate all depends on spec and how much hunting you do for better prices post up your plan --people will give you good ideas for cost savings1 point
-
If it can't be fixed after the slates, I'm stuffed @Roz .1 point
-
1 point
-
Before I met her my wife bought a house at auction that “needed work “ she had no idea what it would cost and a friend was a QS and he told her approx £25k, she met me and I took it on and (if I charged her labour) could have done it for £8k.1 point
-
Hopefully various bods here can help you do your detective work in the most useful directions. I think that whilst you have the budget to do it well, to keep to budget it will need to be done carefully to avoid sacrificing quality. And I think you do not have the budget to throw an army at it except for specific small projects. As it is a long term house, I would not want to sacrifice practical quality. It is a significantly large renovation (2000-2500 sqft?), so I would probably suggest some sort of phasing, based around what you actually need to have by Christmas plus stuff which is basic (eg structure changes for spaces you are renovating now), and the overall strategic things you need to do now. Overall things might be roof-repair, sort floors, perhaps rewire and reheat in part, and reglaze. F1 point
-
That is perhaps a quote for an architectural view, by my eye - and may not pay sufficient attention to services and fabric. Does it have, for example, a new heating system included? And what work on the fabric? The new glazing? In my view, your ensuite and bathroom together could well come in at 6-7k for a good standard of finish. I have comments to make on the project sequencing etc later on, so I will leave that there. But more on that later. For now - given that you have a full QS assessment, which I think you mentioned, I suggest a quick "top slice" on some of that data - so that you begin to build an understanding of where your prices may actually be. By top slice I mean select a sample of items - say a couple you think you understand and every 10th or 15th in the list, and check what prices you can easily find for those. Create a spreadsheet parallel to the QS, and just start to make some quick comparisons with the best you can easily find online or locally - this is not to do with dissing the QS, which is still useful information, but building understanding of what you can do in your particular circumstances. Ferdinand1 point
-
@PeterW I agree which is why I joined this fab group for advice. I am finding it all dreadfully depressing at the moment to be honest. I am sure that I can cut costs massively on fixtures and fittings but it isn't helpful if it's not giving me an indication as to what we can afford to do without alot of additional detective work on my part. I just need to move my old folks in and care for them Thanks again for your input.1 point
-
Wowsers ..!!! DIY kitchens you can get a good kitchen for £4k... £9k all in for an en-suite I would want solid gold taps and hot and cold running WC flush ....... Not sure on the £20k as don’t know what it includes but that again seems steep.1 point
-
1 point
-
I think I said quite a while back A trade expecting a £1000 per week isn’t a fortune1 point
-
the middle of the waste comes out and the flooring goes into the trap then a cover plate is screwed over the top and sandwiches the flooring in place, they can be a bit tricky and you need someone fitting the flooring who isnt useless https://www.google.com/search?q=akw+medicare+waste&rlz=1C1NHXL_en-gbGB781GB782&source=lnms&tbm=isch&sa=X&ved=0ahUKEwiy4a7ssMLiAhWQVxUIHV3RBooQ_AUIDygC&biw=1920&bih=937#imgrc=q5pD-fCJ-EThrM:1 point
-
1 point
-
If that happened either the weather is getting past the aluminium, which means the warranty applies (most of these windows have 10 year warranties), or water's getting to it from inside, which sounds like it's not a problem with the window. The design of the alu cladding does change from window to window. Some have cavities. Some fill in the cavity with insulation for better U values.1 point
-
Well the boss man finally surfaced after I think a fairly sharp contact from the council. He has been round this afternoon and professed himself shocked.....mmmmm. Its all going to be redone/rectified apparently. That stub of pipe is not under the basin its in the middle of the wet area wall.....the mind boggles! There were a lot more issues but I didn't want to bore with too many pics. See what happens next. It is truly awful that these council appointed contractors think they can get away with such terrible work. No shame at all.......I thought bodgit and scarper only worked for unsuspecting self builders now we know their cousins are alive and well and working for the council doing disabled facilities. You couldn't make it up! @Onoff if they dont get it right next time maybe you would like a shot at it! All your input helped the lady homeowner stand her ground and not be intimidated by bodger the builder, thank you.1 point
-
If you got to https://www.mybuildestimate.co.uk/ you can download sample of Schedule of Works, Cost Plan and Bill of Quantities that may help. From my experience some builders will give you a decent enough breakdown some just give you a single figure.1 point
-
I doubt whether you will get the full responses. I would expect a confidentiality clause.1 point
-
@Onoff will be doing the makeover of that bathroom When his own is finally finished.1 point
-
He won’t need to use the adapter - Geberit frame comes with a 90 bend so just a standard short radius elbow onto the wall and then drop the Geberit connector into it. Looks like that bathroom needs a complete strip back to bare walls and start again ....1 point
-
How would you get colour variation with a single colour mix? I did some imprinted concrete years ago, mock block paving if you like, about 12'x12'. Mixed the concrete and it was the colour of ketchup. Let it go off and imprinted it with a homemade mould. I then dipped an old broom head in black dye and "flecked" the whole area. The finishing touch was to run along all the mock mortar joints with a half inch paint brush. The flecks of black dye in the joints were enough to colour the joints one single colour. Still looks good nearly 30 years later. Will try and find a pic. Edit: Found the pics. From memory I chambered the timber beads that formed the joints and used WD40 to coat the imprint board - the side of an old wardrobe:1 point
-
Some real assumptions being made here about the ability of someone to do something. Can the OP climb a ladder to soffit height and drill holes to pull cables through? If not its a job for a professional. Can the OP pair and crimp an RJ45 plug? If not its a job for a professional. Can the OP differentiate between what needs power plus a Cat5/6 and what would run POE ( power over ethernet )? If not its a job for a professional. Does the OP want to be buying expensive switches / routers to get the POE capability? ? Heres a sensible comment, given that @Hecateh is of retirement age and won't be climbing ladders to the soffit; Your BB provider will give you a wifi router with 4 hard wired RJ45 socket outlets on the back of it. Its free. Decide where you would best use those 4 sockets. 1) Main TV 2) Master bedroom TV 3) Printer 4) Where will you sit with your laptop? Then run a couple ( 2 or 3, not 10 or 11 ) for where you think they may be of use occasionally. Label them all at the router and then you can just unplug one and redirect it elsewhere. Your printer swaps out to free up a socket for the spare bedroom, for occasional guests to plug in a laptop for eg. Cheap, simple and you still have wifi. The major importance is to mount the router wisely, so you get the best signal where its most important, so if you need good wifi for the TV fire-stick then have the router in the room where the tv is. Other wifi devices will cope, its a small house. Should we encourage you to not part with any more money than you need to? Yup.1 point


