Search the Community
Showing results for tags 'screed'.
-
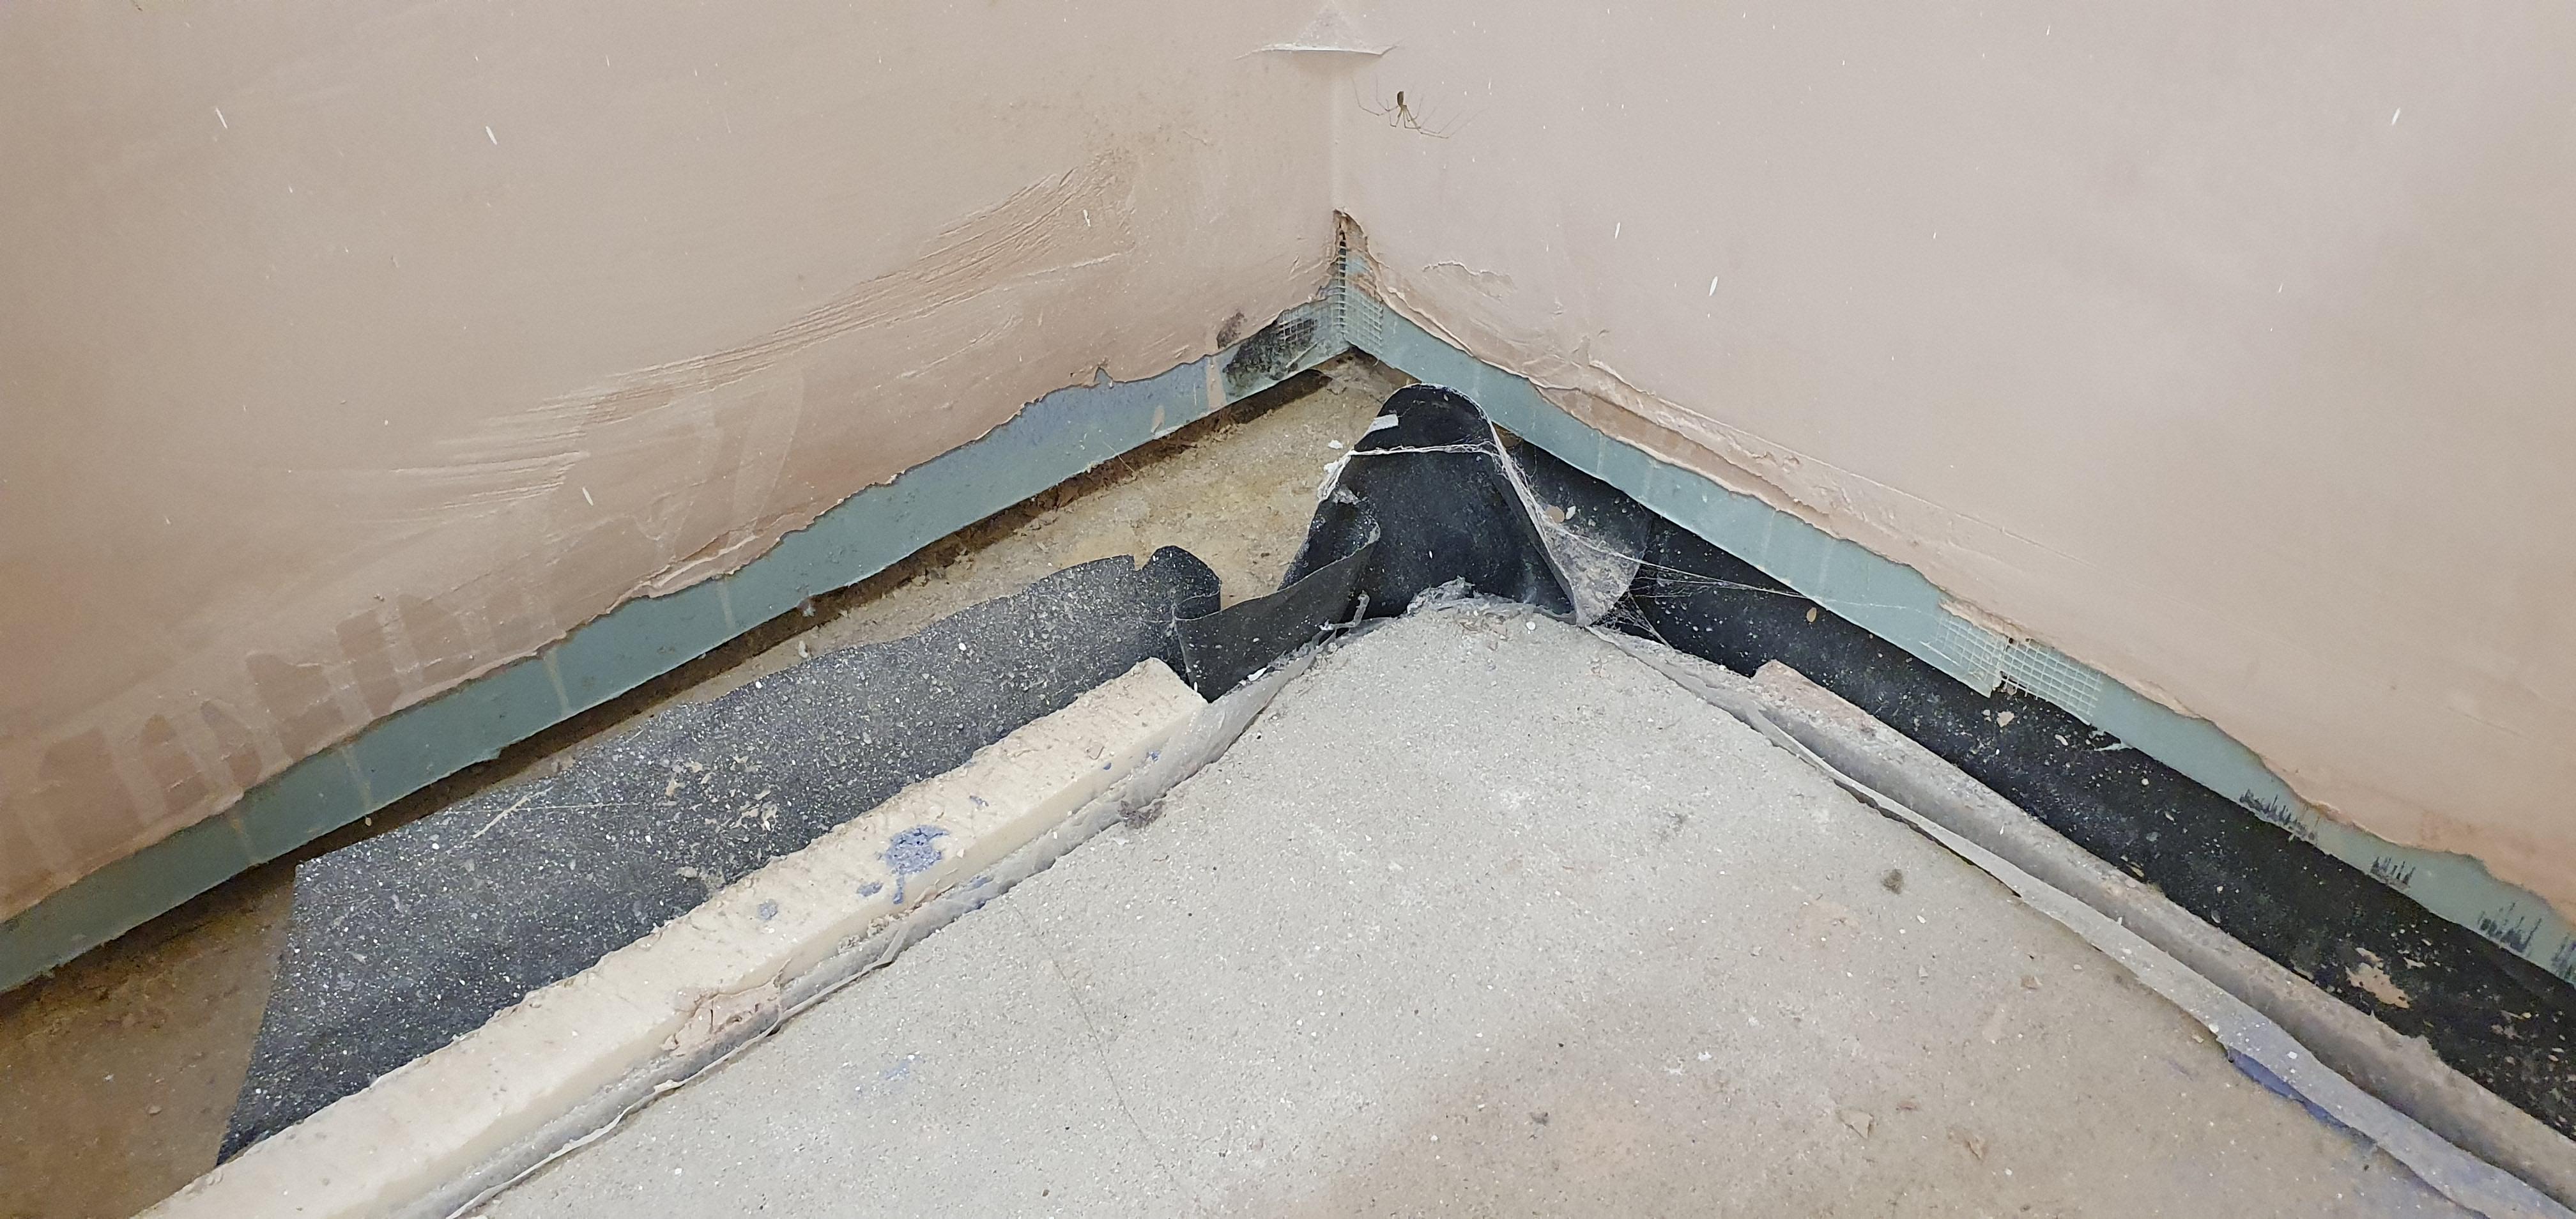
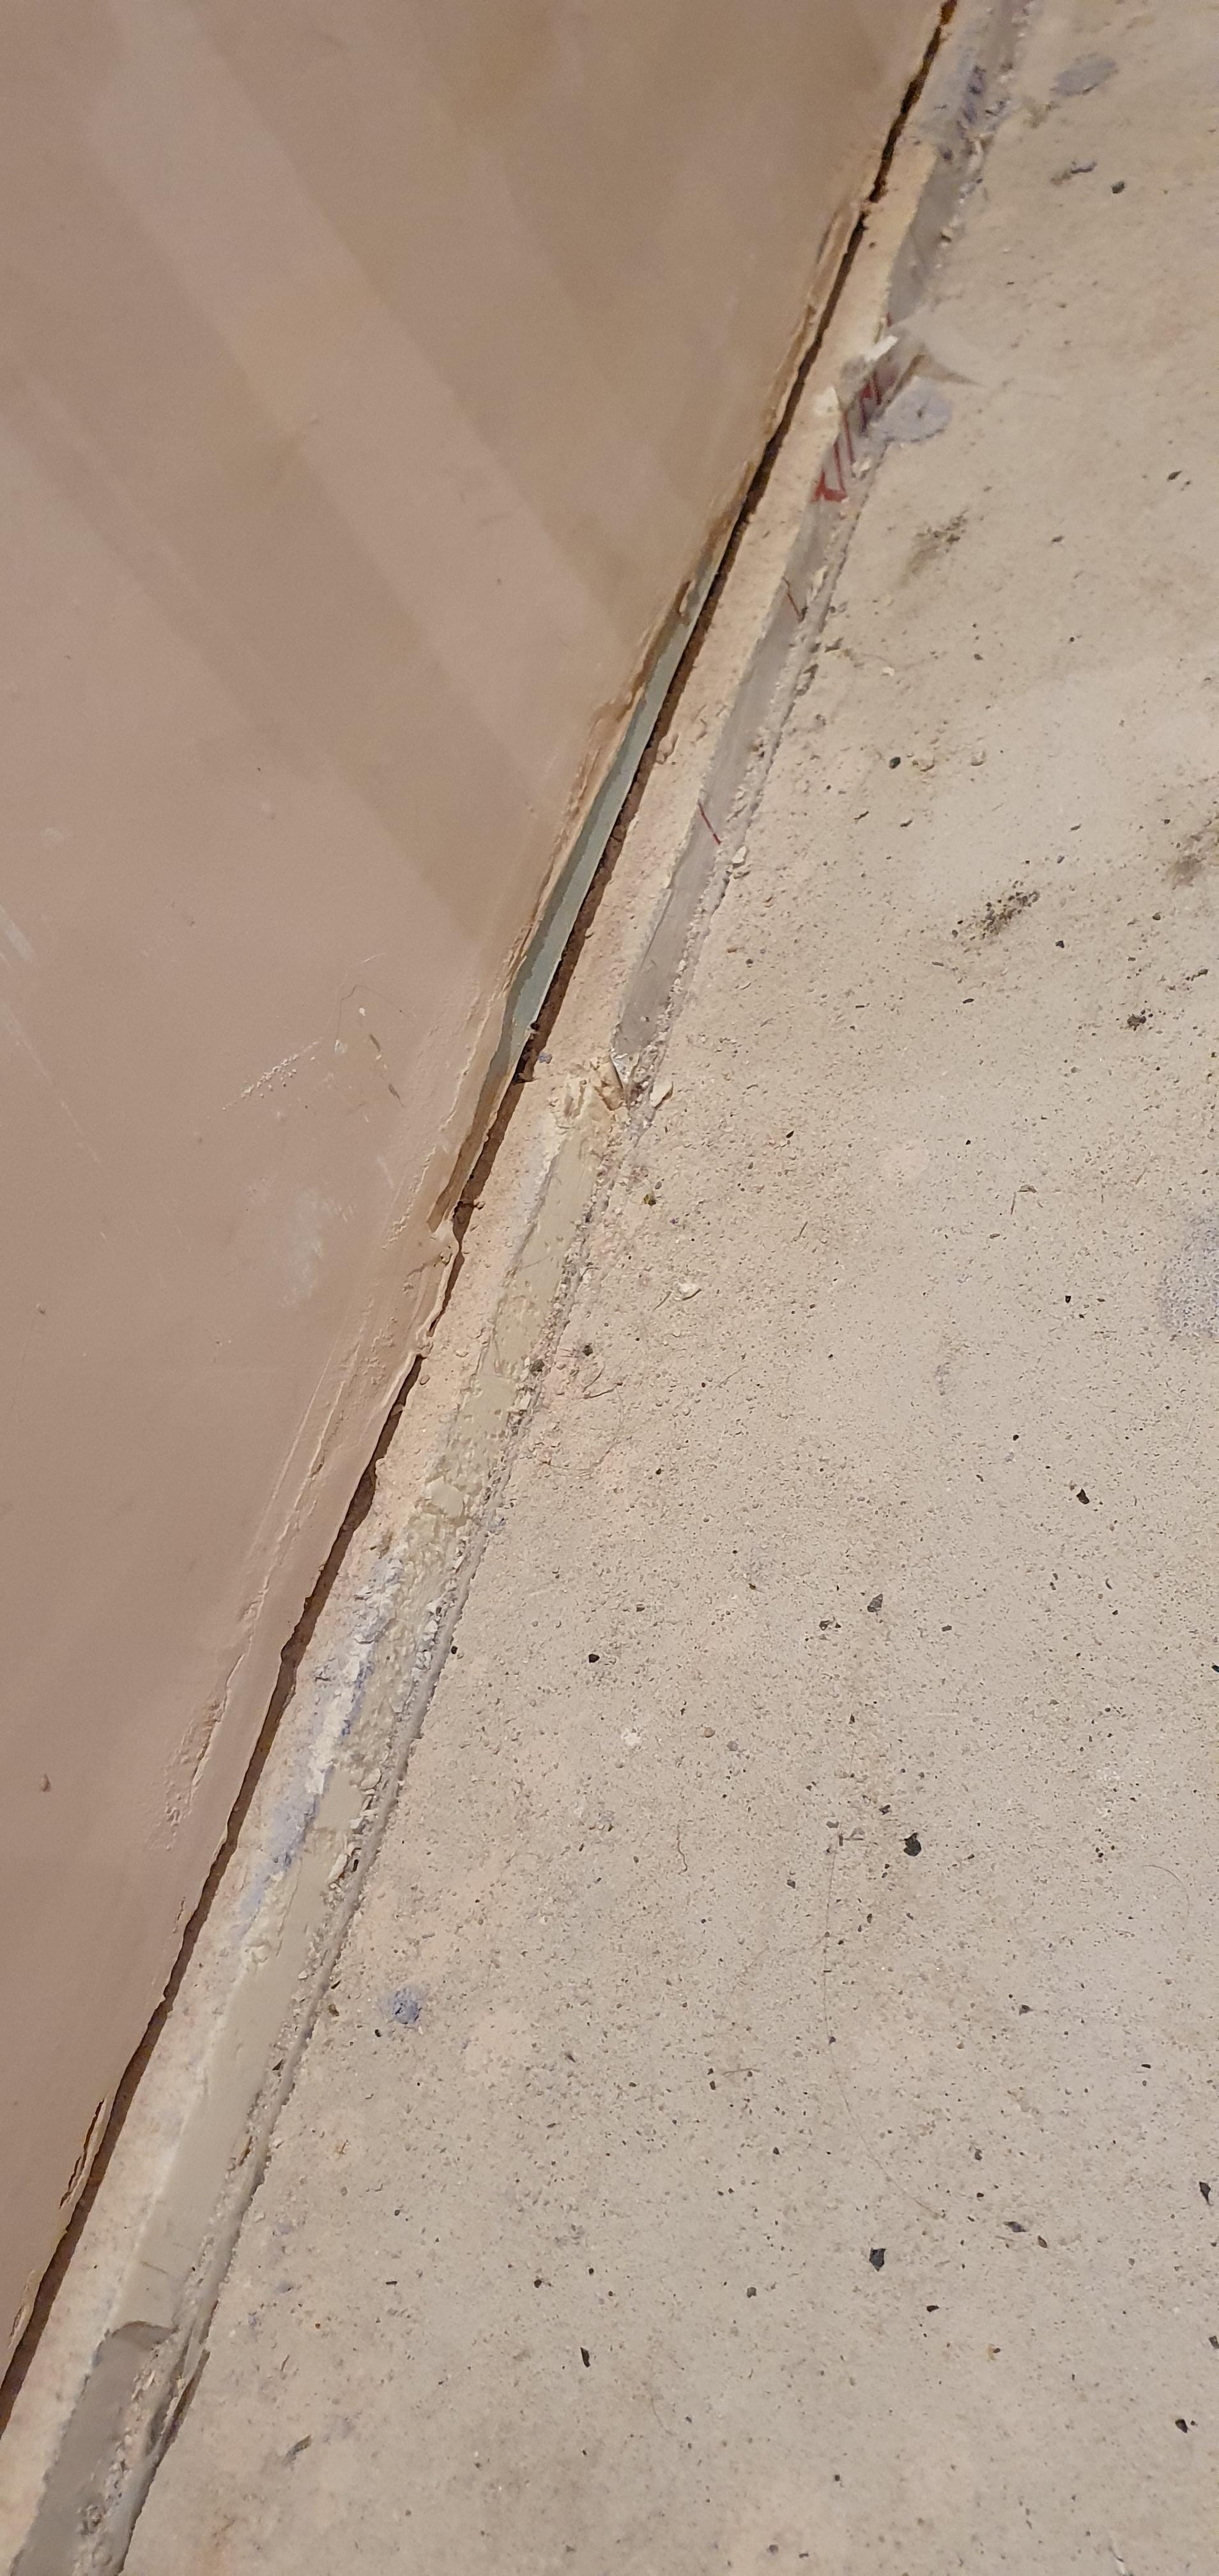
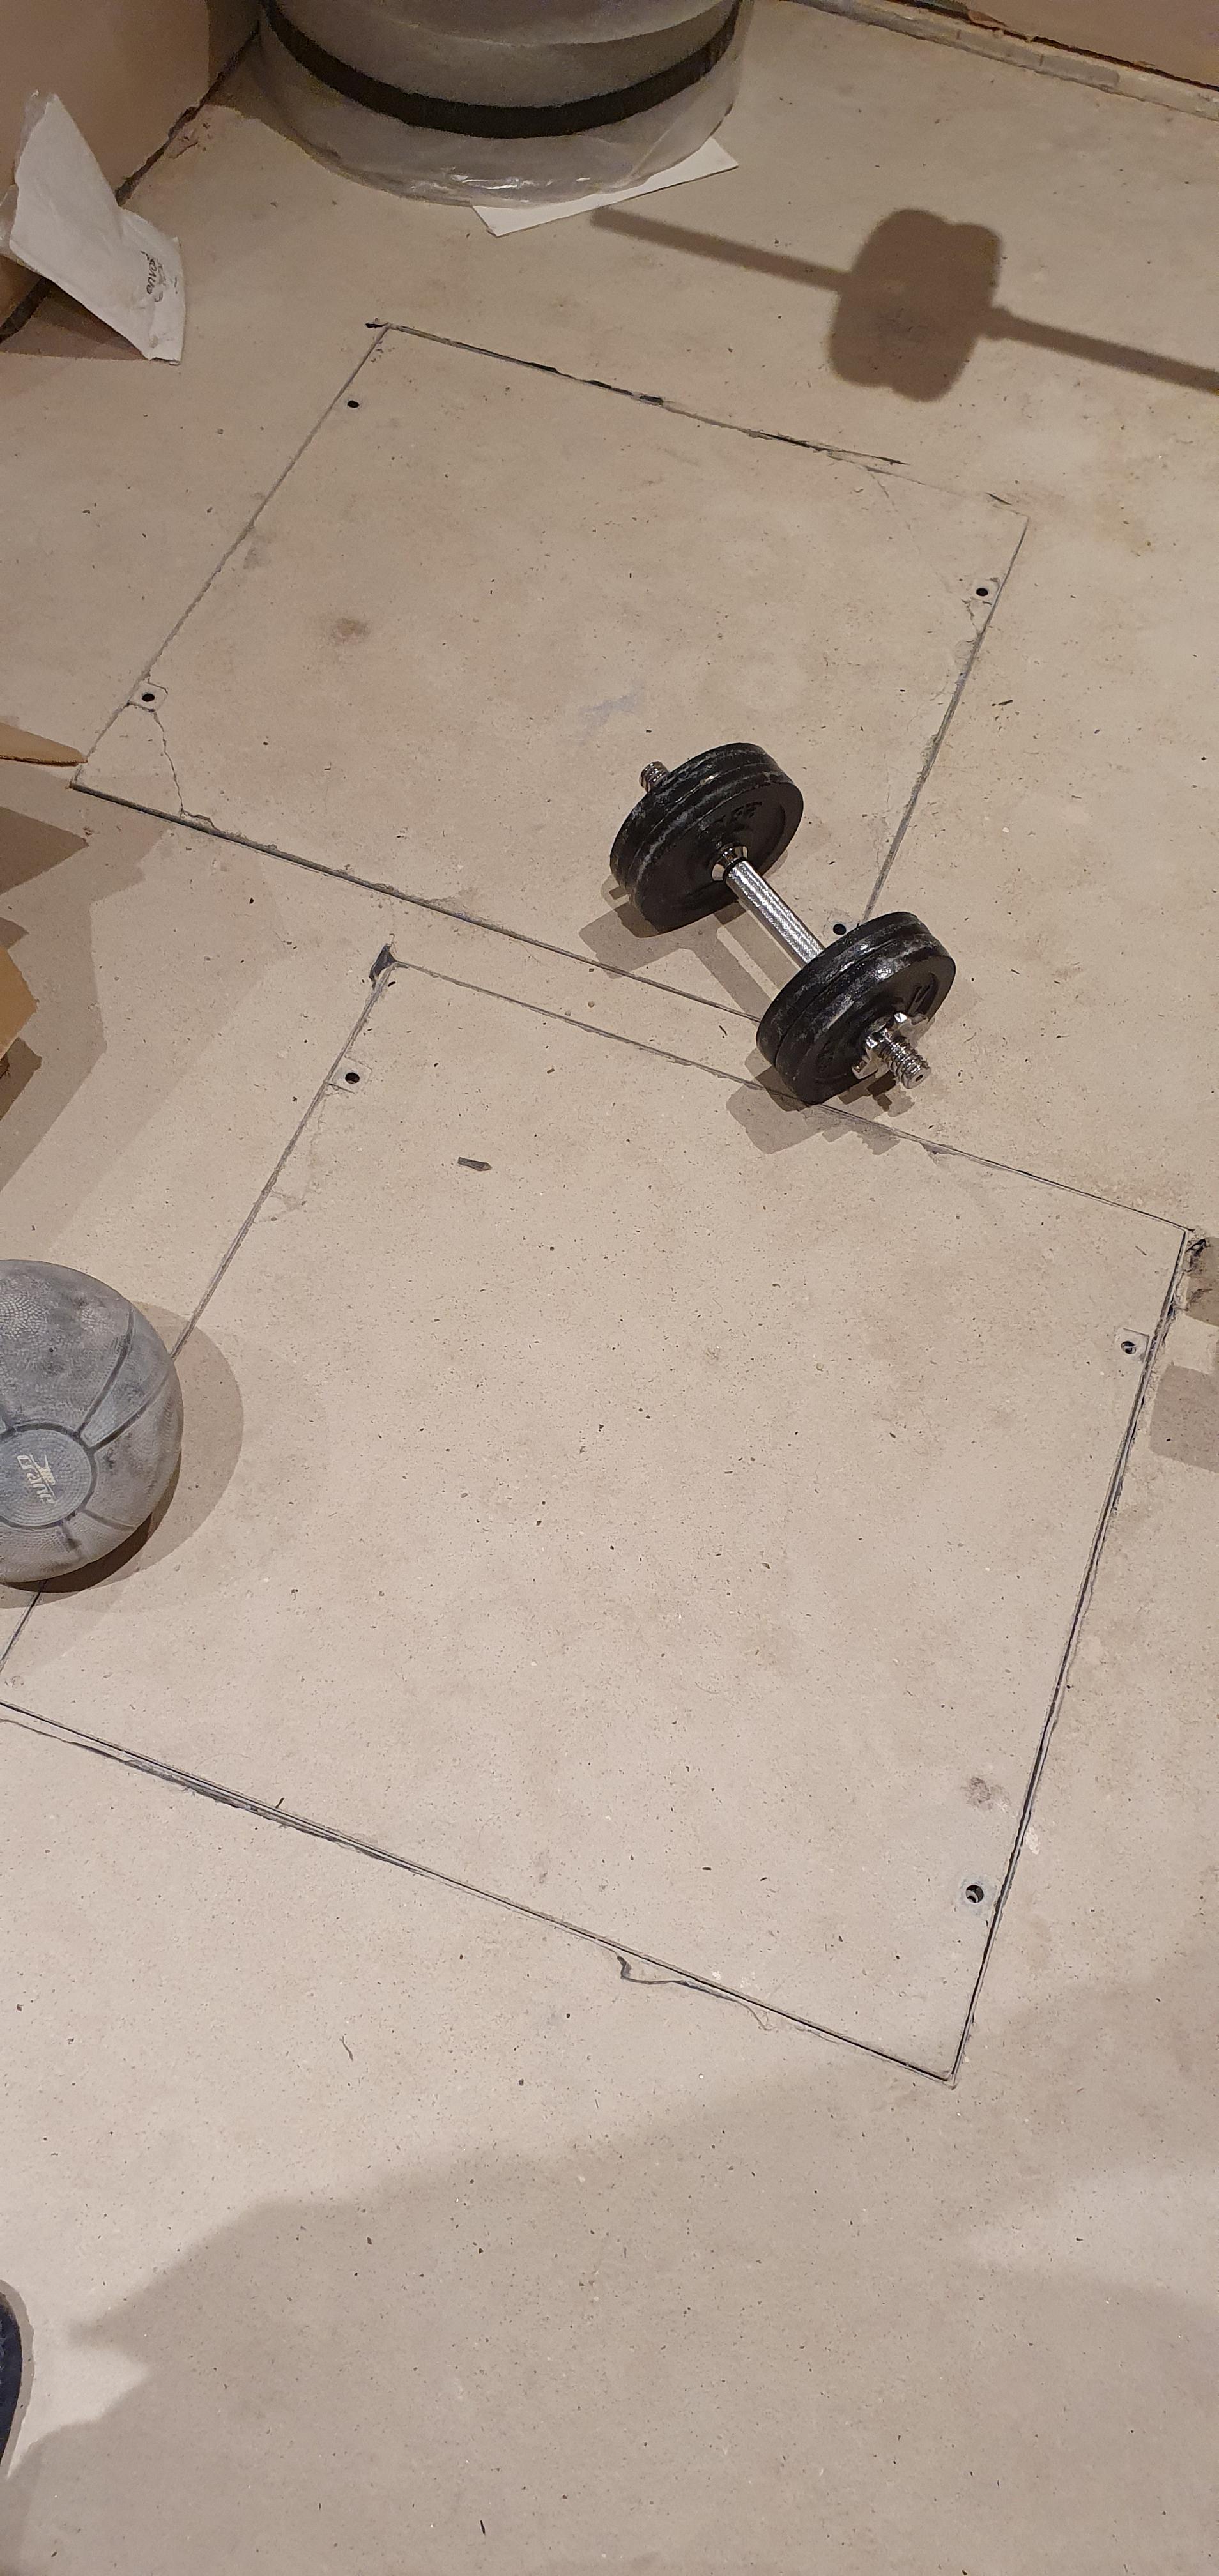
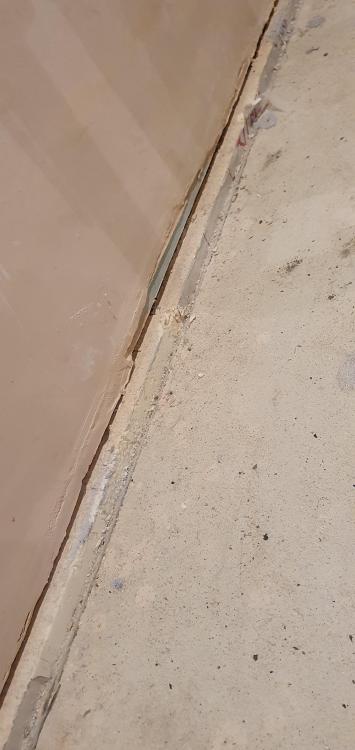
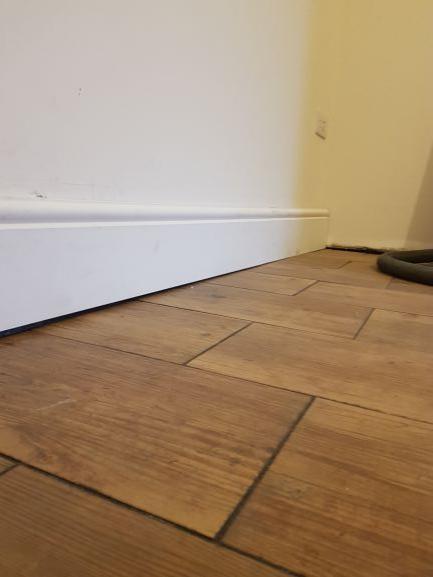
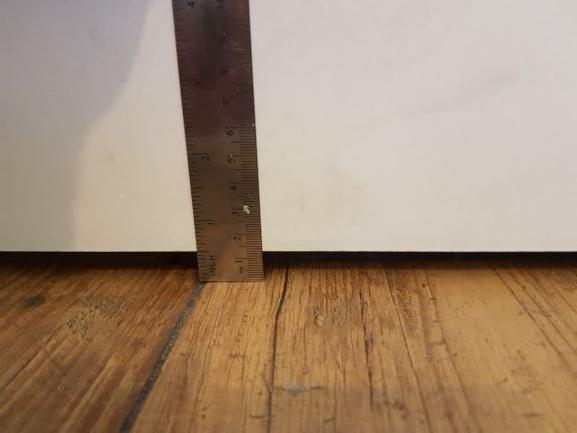
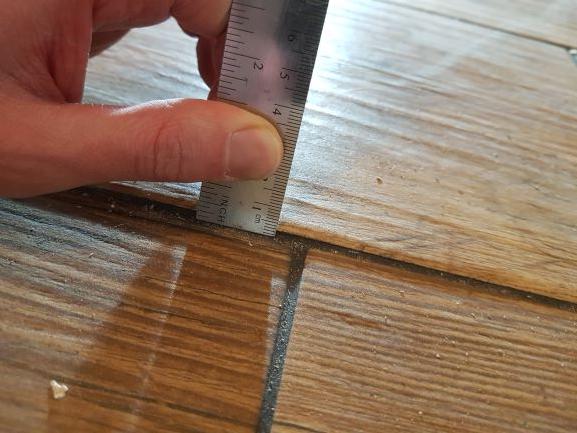
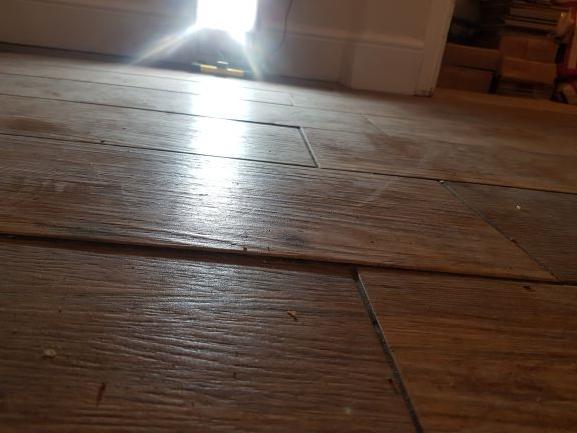
Hi all, we moved into our self build with the basement still not complete and would like to finish it off. As cash is tight, I'm planning to do the work myself, so ideally would be looking at a solution that is possible for the experienced DIYer. The floors are currently rough screed over UFH and I need to decide how to complete the floor, ideally, before taking the project further. The rooms are: 1. A fitness studio. Ideally this would be a spring wood floor but I don't think this would work well with the UFH. My initial thought would be to pour an initial self leveling latex screed and then finish with either laminate or karndean, if funds and experience allow. 2. A den/cinema room. This is also rough screened with the added complexity that there are two large manholes in the room for the basement sump pumps. So I would have to create an access hatch for these,i guess. Again, I think that a laminate initially would privacy be easiest and cheapest here, but open to suggestions. You might see from the photos that the screed doesn't come up to the wall in many places but to insulation boards, and I'm not sure quite how to deal with these. Should the insulation be cut back level with the existing screed, or should I foam any gaps and bring the screed up to the level of the foam? One particular corner has an elevated concrete block, which is a bit of a pain Ideally I'd have a completely level floor for whatever surface goes on to of it. I'd love to hear any suggestions or experiences with something similar. I'm lacking in experience and confidence and don't really want to make an expensive blunder. Many thanks!!


-
Hi My first post here - was pointed in this direction by a friend of mine. After months of research (feels like months) I think I have come to a conclusion on which UFH system and I just needed some support on ensuring I had made a right decision (otherwise my wife and kids will kill me in the middle of winter). Background I am doing a renovation project of the ground floor of my house - 95m2. It is a 1930s semi - whole place is being gutted and an extension going in. The current flooring is timber joists and in a bad condition and has no insulation. So first job will be to rip up the flooring and add 100mm of Kingspan or Celotex in between the joists. Now the complexity of which UFH system to go for. I have boiled down to 2 options: Option1: TorFloor by Omnie - I can use these boards as the structural floor, I am hoping a competent plumber can install this and I can get a 9mm plyboard on top and finish the floor with LVT like Karndean. The height build up is 35mm (22m board, 9mm ply, 4mm Karndean). So the build up is pretty similar to what I have with the existing boards and underlay and carpet Option2: Install a pannelling and screed system (like Nuheat or Profix). With this system I would put some 6mm T&G plywood over the top of the joists, put down the castellanated panels, pipes would go in and screed on top. As I cant put Karndean straight on top of the screed, i would need to finish with 6mm ply and Karndean finish on top. So the build up is 80-85mm (6mm ply, 15-20mm panels depending on system, 50mm screed, 6mm ply, 4mm karndean). It is not clear how much screed I need as some systems are different. I am hoping I have described the above scenarios correctly - I am not a seasoned DIYer so all the research has been mind blowing !!!. In conclusion I am tending to go for the Omnie Torfloor system - number of reasons - floor build up is lower and its £3k cheaper. However what I dont know is the output and difference between a screed system and an overlay system. Any opinions on my conclusions?? Please tell me if I have got this one wrong !! Ideally I need a fairly quick heat up and a fairly good output - kids and mrs moan in the middle of summer of how cold it is !!! Thanks for reading
-
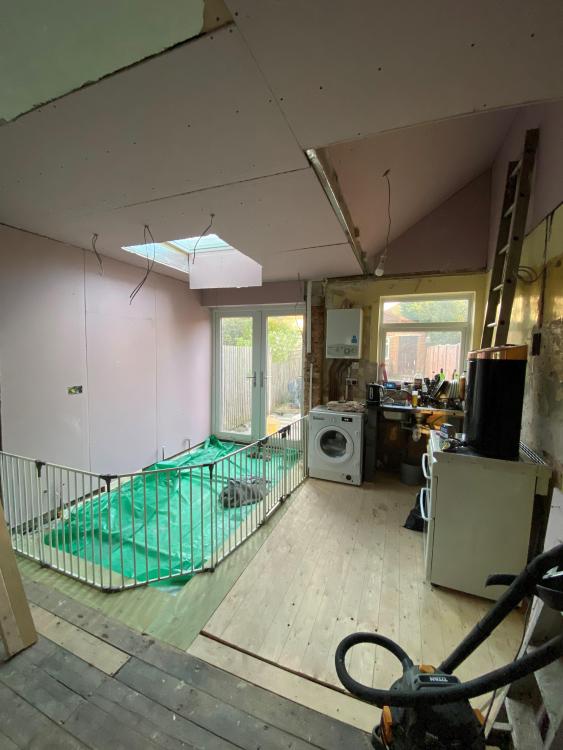
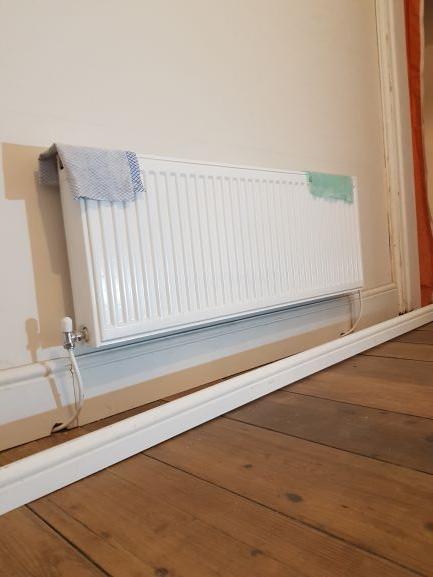
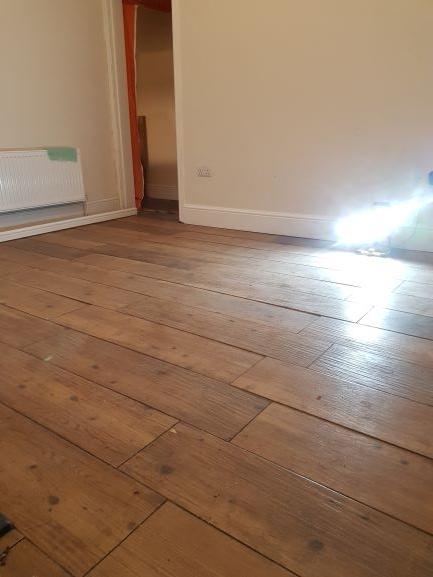
Hi All, Carrying out a DIY small infill extension and can almost see the light at the end of the tunnel! I am looking for suggestions on how to bring the extensions floor level up to the existing property. The extension is the area where you can see the green vapour barrier in the photo. Underneath is Celotex insulation and the joists of the existing house finish on a course of bricks under the plyboard surrounding the green vapour barrier. I had initially planned to lay 50mm of screed to meet the floor boards of the existing house, however is there an easier/cheaper alternative to screed that would be acceptable with building control, such as laying a wood frame with ply board on top which I believe is referred to as a floating floor? Many Thanks Joe
-
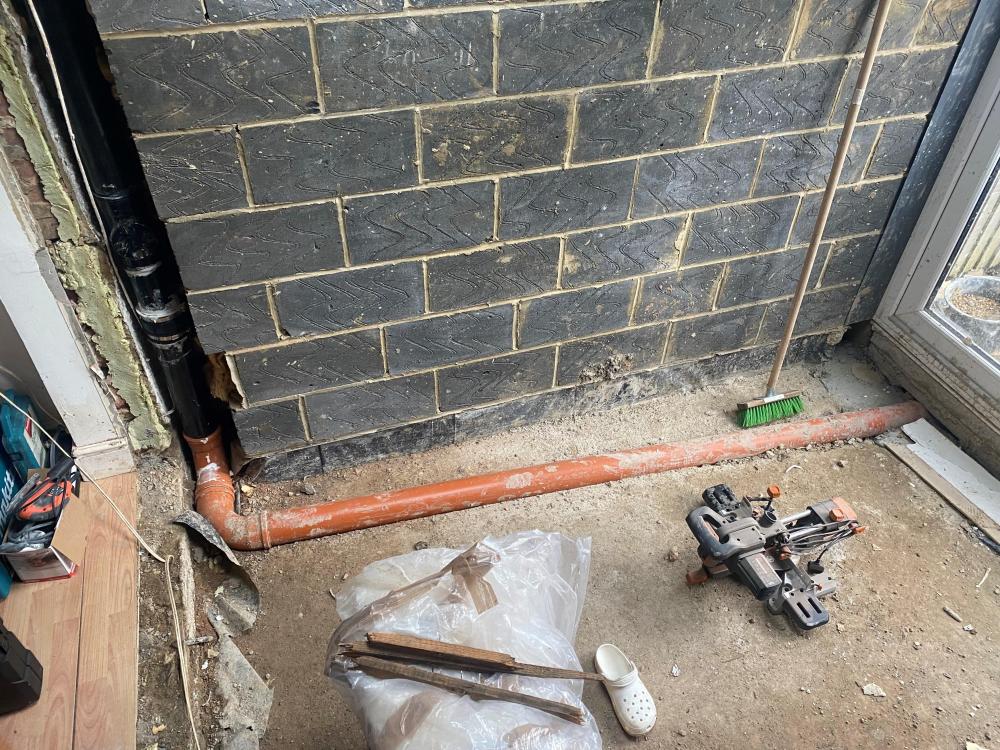
Hello, Would someone be able to advise what the best course of action is for laying screed over the waste pipe in the image. The floor has been built up so far with Type 1, Sand, DPC, Concrete. So all that is left to do is insulate and screed. Does the Soil Pipe need protecting before Screeding, if so, what product? Would you recommend PIR Boards for the insulation on the floor or another product? Thanks
-
Hi all. The architect spec'd to install 50mm of screed. Thing is, I think only 40mm was actually put in. I think this coz I marked the walls before the screed went in, and all suggest 40mm. In addition, 40mm is apparent around doors etc. I'm mindful that the centre of the floor could be deeper - any way of checking? 🤔
-
Hi guys I’m new to the forum, please be gentle with me! I have built an enclosed workshop on a tarmac driveway - the floor of the workshop is the tarmac. I believe there is a concrete slab about 30mm below the tarmac… I don’t know for sure that the slab is continuous, nor do I know the condition or thickness of the slab because the tarmac was down before we moved in. The tarmac wasn’t great to start with but now there’s trolley jacks and the ocasional spillage to contend with it is getting scrappy. Every time I sweep I’m bringing up the aggregate 😕 I should like to have a non-porous, flat, smooth, strong floor without adding more than 15mm to the existing height of the surface. Is there anything I can pour / trowel / paint onto the tarmac to seal it, stabilise the surface and level it off? Or am I stuck with excavation as my only option? The area is approx 25m2. It is bound by existing tarmac front and back, the house on one side and a dwarf wall on the other. There is no DPM under the tarmac - this is not a problem for me, but may affect the solution. We live on the top of a hill… and the subsoil is sand and ballast… we don’t have drainage problems! The workshop is a wooden structure and is built directly onto a 300mm engineering brick (and waterproof mortar) dwarf wall and leans-to against the house. Front and rear are full height / full width doors. If you need more information, please let me know. Thanks for your help.
-
Hi, All the answers to questions I see which ask about when you can walk on screed after laying, typically say 24-48 hours (or as little as 12 for a special type). But this is described as being for ‘light traffic’. I just want to walk over mine ONCE. Across the room and back because reasons. The floor is 4.6m across. So, never mind ‘light traffic’… when can I cross one time (and back)? Thanks!
-
I've messed up and set the block and beam too high, I now only have 150mm to the top of the bi-fold reveal and am concerned that a ufh system will leave the room permanently freezing. The back wall is only 6.66m and 3m of that is Bi fold doors but space is tight and a radiator will really make the modest dining section too small. We wanted a tiled finish, so allowing 20mm for that I've got 130mm for pir and screed; Is that a bad idea or will the room be ok? I don't want to freezing every time we sit down to eat.
-
Does anyone know of any tried and trusted techniques for speeding up drying of a basic concrete screed? Here's the context: I have a tanked basement with a Delta pumping system. A base screed has been placed over the floor membrane with the insulation, underfloor heating and top screed still to be done. We've got a temporary pump operating as the electrics have not yet been connected. Up to end of December the screed was drying out nicely although certain areas were concerning me and potentially indicated that the membrane might have some small leaks that needed to be addressed. The contractor was due to look at these after Christmas, but on Boxing Day, the pump faulted and we had a flood - back to square one and the contractor wasn't able to identify any leak areas as the whole of the screed was no damp. We dried it as much as we could and a month later were due to get the contractor back. Two days before they were due to come, a builder switched the pump off overnight in error and the basement flooded again. We've wet vacced it out, but I understand it takes around a month per inch of screed for it to fully dry so it's still pretty damp. We've since had the contractor in again to look at some wall issues and he suggested heating the basement to help dry it out. I've tried using a diesel heater, but it's very localised heat (the basement is roughly 9m x 6m) and doesn't appear to make a huge amount of difference. Smaller but electric powered heaters might cover the area better, but until we get the electric supply in, the power needed is going to be too great for the existing power extensions. That won't happen for another week or so. Also, there is going to be an air ventilation system based on a Mitsubishi Lossnay, but that won't be in action for some time yet. I'm wondering whether there are any ways to draw the water out of the screed, such as sawdust, skim plater, paper etc, that I can speed up the process with as we're now two months behind with it. Any thoughts/experiences/suggestions gratefully received. Thanks!
-
I'm confused by the general rule that is oft quoted here that screed dries at 1 day per 1mm, so a 50mm thick screed would take 50 days, and after that one counts 2mm per day, so a 70mm thick screed would take 90 days. That is a very long time. If that's the case, what is the downside of using something like this: https://ardex.co.uk/product/ardex-a-29/ which appears to dry much much faster?
-
I will be tiling the floor of a conservatory and need some advice on how to proceed. The conservatory is new-build with a cement-based screed. No underfloor heating. Size 5.8 by 3.8 metres 600 x 300 porcelain tiles; 0.9mm thick. Flexible adhesive will be used. I would appreciate guidance on the following: Does this size and environment need an expansion joint? Is this environment suitable for tiling direct to the screed, or do I need decoupling mat? (I have received conflicting advice from tile shops: one saying mat is required, the other saying it is not required). How long do I need to allow the screed to dry before tiling? Should I use a 10mm half-round notched trowel for this, or would another profile do a better job? I have been advised to leave a 5mm gap between tiles and walls, with silicone across doorways (where there will be no skirting board). Does this sound reasonable? Anything else that your experience suggests I should consider/do (and my lack of experience means I haven't thought of)? The screed has not yet been laid, and the builder says depth can be set so that the tiled surface will end up level with the carpeted surface in the next room (so I need to know what I will be putting under the tiles ?).
-
So I'm finally starting on the ground floor buildup. It's 50mm poured screed on 150mm insulation (100mm PIR/50mm graphite EPS). I'm unsure of how the tray works in this situation... The tray is (IIRC) about 45mm thick, so I'll need to set it on ply/OSB/cementboard to get the levels right. That bit's OK. But how does said underlayer sit on the PIR, is it just bonded down or should it extend under the screed edge too, to "key" it in? It's in a corner so two walls and two floor edges. ta
-
Hi, I’ve got a rear extension within 45sqm of floor area which will be new floor (insulated, concrete and liquid screed with ufh). The existing area at rear of house is 25sqm of timber suspended floor. I’ve looked at the void is 750mm deep. Is this too much to make up? So I just leave the existing as suspended and run ufh under floor boards onto insulation between joists then vent it through the new slab or fill it? The other advantage of doing that would be less chance of crack straight across what will be a new porcelain kitchen floor. Thanks in advance
-
Hi there, I've a 125m2 extension being erected next year with a pretty basic floor slab planned. Floor covering 65mm Screed UFH Pipwork 150mm PIR insulation 100mm c35 concrete with mesh Whilst looking at the overall prices of each piece of work there's a couple of questions that have come up would it beneficial to change the floor structure to incorporate circa 250mm of eps insulation under the concrete slab, instead of the 150mm pir above slab. And whilst I am at it, possible to incorporate the Under floor heating pipework into the slab, as opposed to having the pipework in a screed on top of the slab? The reason for looking at this is to save time and money. The 250mm of eps insulation has similar u value to 150mm pir, whilst being cheaper - circa 1k at the moment, but there is another price increase on pir due in February. If I incorporated the pipework into the slab, I could save circa 4k for the screed work post panel installation, but it would also mean I could crack on with the studwork immediately after the kit erection as opposed to laying pipework and ordering in self levelling screed. any thoughts/drawbacks?
-
Hi all, Trying to figure out the best option for ufh in our new extention incorporating existing kitchen area etc. (I’ll attach the plans) I can’t figure out, A: is it best to clip onto foilbacked board in between joist and biscuit screed/cover with chipboard? B: lay routed panel boards and tile straight on top? I don’t really like the idea of tiling straight on top of the pipe as In “B” but will I feel the benefit and will we get enough heat from option “A”? the boiler is going into the utility, would like two zones, one for the main living space/kitchen and the other for the shower room. it’s a mine field, any help and guidance would be much appreciated. Also any other systems/options that would work? Best, Keith. GROUND FLOOR.pdf STRUCTURE 1.pdf
-

It's not a roof update . . .
canalsiderenovation posted a blog entry in Canalside Bungalow Renovation
To those who commented on our GRP, this is not an update. The next installment to that will hopefully be at the end of next week when the crap roof will be off and a proper company coming in to sort after we insisted on an insurance backed guarantee. I shall update then, watch this space! Flat roof aside..... All our new extension had insulation laid and our existing flooring excavated for insulation too. We had the UFH pipes laid and there was A LOT. And then screed laid which is suprisingly even and flat using TG Cemfloor – a liquid self-levelling screed. Needless to say they did a better job of this than the roof. And part of the in roof solar frames have also gone up. Our builders found these up the loft when taking down the old ceilings. Unfortunately empty! Someone had a good party ? -
Hello, I’m refurbishing a Victorian terrace including removing chimney to create open plan space at the rear. Existing solid floor is being dug up and replaced to include underfloor heating. Existing quote and spec was hardcore, sand binding, DPM, 150mm concrete slab, 120mm PIR insulation, 75mm sand cement screed. Builders are now suggesting hardcore, sand binding, DPM, 120mm insulation, then 150mm flow screed i.e. no concrete slab. Aside from issues this might create with the heating (less responsive due to thicker top layer), is anyone able to comment on the structure of this build-up? I've seen specs for similar build-ups (i.e. insulation directly onto hardcore instead of slab), but that's when the top slab is 150mm concrete, not flow screed. I'm not convinced in not having a concrete slab somewhere in the flooring structure, but would be good to get some thoughts... Many thanks, David
-
 I have for the last year or more been assuming that I would have an insulated-concrete-raft floor in my modern bungalow, but I am now having second thoughts. The alternative is to have a timber-cassette floor *. But I have a constraint which is making me re-consider things: height: a ridge-height limit **. Anything that I can do to lower my dwelling's height is attractive as I am struggling to get under the limit. A timber-cassette floor filled with PIR could easily be 200mm thinner ***. The reason I favoured a concrete raft was that I felt a timber-cassette floor may well feel insubstantial, hollow and flex. But… am I wrong? Can a timber floor be made or feel as solid as a concrete floor? For example, would something as simple as a biscuit screed do the job (I have never seen one)? I would be grateful for your thoughts. - - - (* By the way, my foundations will be screw piles. The floor will have no direct contact with the ground surface.) (** And I have a no-dig requirement too.) (*** The build-up of the concrete-raft floor will be 775mm for a U-value 0.10 W/m².k, as follows: small pea shingle 50 mm, Cellcore HX-S heave protection 225, EPS 300 mm, reinforced concrete raft 200 mm.)
 -
Doing an extension and have laid a concrete slab which is due to have insulation and wet underfloor heading and then screed installed. I want to build the stud walls before the UFH is put in, but worry about cold bridging damp up the studs. Could do with advice on how to fit the sole plates either 1) screwing it into the concrete (could wrap it in visqueen) 2) laying a row of concrete blocks on dpm just below final screed level and then screwing the sole plate into them. Any practical advice would be welcome about the way to go...
-
Hi All, I’ve just had 2 rooms tiled with oak effect ceramics and I feel a little disappointed with the final result. The tiler used self-leveller to even the floor prior to laying but I feel that this should have been done with more care, and that many of the subsequent problems are a result of this… I’ve used the closest thing I have to a 2m straight edge to check the flooring and I’m finding regular deviations of around 5-6mm. Offering up the skirting has highlighted a couple of areas far worse at 10mm & 14mm. The tiler has offered to rectify these two areas but I still have my doubts about the overall quality of the job and feel it was rushed. He spent no more than a few hours on the screed and then 3 days to lay both rooms totalling over 30 sq.m. I worry that in correcting these local defects with extra adhesive or whatever, he simply creates new problems elsewhere. There are also several areas of lipping affecting at least half a dozen tiles in each room of 2,3 & 4mm. The British Standard BS 5385 seems to say that 1mm is the tolerance for such narrow 2mm joints? The standards also seem to suggest a tolerance for levelness of 3mm over a 2m edge? I’ve only garnered this info online and haven’t actually read the specific standards but I’m wondering to what extent I could use this as a stick to beat him with? I’ve already paid £1000 in labour for the job but frankly I feel it isn’t justified. I know he’s legally entitled to try and rectify it but short of ripping it all up, I can’t see me getting a result that’s compliant with the relevant standards? I feel the best outcome for me would be to get him to fix what he can then attempt to get compensation for the rest.. Sadly I’ve already had to sue someone for a failed floor in the past so I’m all too familiar with the small claims process! Any help much appreciated., please see attached photos


-
 Our liquid floor screed is drying off: all windows and doors open all day - this weather is helping a lot I'm sure. Someone on BH suggested we put a sheet of plastic on the floor to see if there was any evaporation: a quick , dirty check. So I have done. When I remove the plastic sheet, the area covered by it is significantly lighter in colour than the area which has not been covered. Why would that be so? Instinct says the opposite might be the case (because there will have been less transpiration / evaporation). Anyone know why , first thing in the morning the screed is a lighter colour under the sheet than everywhere else?
 -
Assuming a non structural 85mm sand and cement screed how do I determine if I need reinforcement mesh/fibres or nothing at all? Buildup: Beam and Block Sand blind / EPS DPM 150mm Kooltherm K3 Seperation Layer 85mm Screed with UFH Many thanks
-
I have a utility room with an existing screeded floor which is out of level by around 10mm in a distance of 2m so quite noticeable. Where I've been doing the other existing floors I have only need to do odd patches with latex prior to gluing my Wunda floor heating panels down. The room is only 2.5x2m so quite small but would take several bags of latex and a few separate layers to get it nice and level and I assume there must be a better and easier way to do it. The finish doesn't have to be perfect as it will have the heating panels on top but it does need to be level. Any advice or recommendations gratefully received. Cheers
-
Doing the floor insulation in the house currently. What should I do for the shower and bath traps. Screed is a flow screed so nominally 50mm deep, traps are deeper than that.
-
Hi We have been asked if we would consider using "Thermal Bead Screed" on the ground floor, it's an Italian product, real name Politerm Blu 110. It appears to be a lightweight screed with insulation beads used as aggregate. My original ground floor build-up gives me a respectable U-Value of 0.14 and is as follows; 100mm Sand & cement screed with UFH pipes embedded 3mm Polythene 125mm Thermafloor TF70 insulation boards with hot & cold water pipes embedded 3mm Raydon barrier 150mm dense concrete sub-floor The key to reaching the U-Value of 0.14 is that the boards are installed correctly without gaps or voids. The "Thermal Bead Screed" approach appears to remove the risk of gaps & voids and the floor build-up is as follows; 50mm Liquid Hemihydrate screed with UFH pipes embedded 3mm Polythene 175mm "Thermal Bead Screed" with hot & cold water pipes embedded 3mm Raydon barrier 150mm dense concrete sub-floor This won't give me as good a U-Value, I've been told 0.16 by the company selling it to me and 0.18 by an independent energy assessor. Have any of you used "Thermal Bead Screed" or know anything about it?