


MdeB
-
Posts
10 -
Joined
-
Last visited
MdeB's Achievements
Member (3/5)
3
Reputation
-
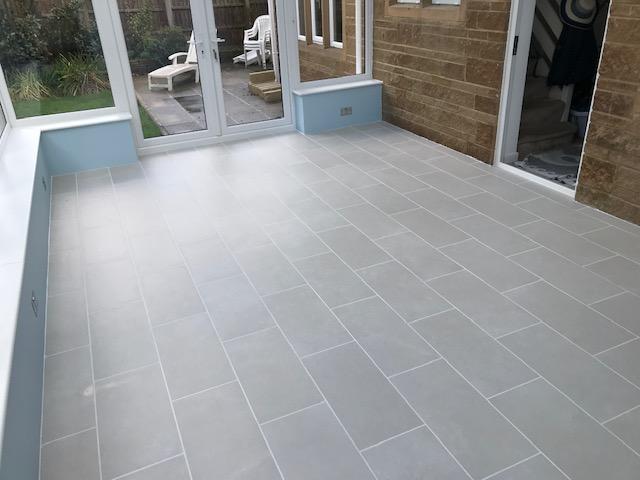
All done now (except for skirting); thanks for your input. And here's what it looks like. In the end I started in the middle of the floor, so it was centered on the double doors and almost centered on the single door (to the right in picture); If I had centered on the door, then I would have had about 5cm cuts at the end of rows. As you can see, there is less than half a tile width by the house-wall and more than half by the outside wall so not symmetrical, but far less noticeable (and permanently annoying to my wife) than a center-line offset by about 20mm from the center of the main double-doors.
-
All done now. I used Durabase matting and a 10mm half-round trowel (and a tile-leveling system).
-
Except for the 3 doorways, but that is my plan. My wife thinks we might not need skirting, by I know that I am not that good. I managed to do that on a wall in a property I let when trying to be clever, so I have learned my lesson.
-
Thank you. I plan on making a "tiling stick" to get the layout right (I have done a theoretical layout using the nominal tile and spacer dimensions, but they may not fit together in practice as they do in theory"). I was hoping some experienced tilers might say "I tile a floor like this".
-
Thank you for replying. I have done a scale drawing on the computer and determined that the centre line needs to be through the centre of a row of tiles. I will also have to do a bit of jiggling because that is showing a 5cm "prong" going into one of the doorways and I am a bit worried that it might snap off. But getting rid of that gives a 24cm cut on one edge and a 14cm cut on the opposite edge (and I do like symmetry) That is what I was taught for walls. My worry is that the space left will make it difficult to spread he adhesive and I won't get full coverage, or it will be too deep and fill the grout lines. Some of the "edges" (end of rows of 60x30 tiles) will be almost full tiles (because of the brick pattern) and getting those in properly (adhesive coverage and level tiles) after the whole ties have set seems like quite a challenge. It wouldn't be such a problem if I were laying with four tiles meeting at corners.
-
Thank you.. I suppose the idea is that you get all the cutting done and then just blatt through the fixing. The second batten doesn't work for a "brick-work" pattern. I think I will go with a straight edge held down with boxes of tiles to guide the first row. It is because of the brick-work pattern that I was thinking of doing the "end" cuts and laying a couple of rows at a time. Definitely going to back-butter. Definitely not using rapid set as I am not fast enough for it. But rapid set has been recommended for fixing the decoupling mat, and I think I should be OK with that, as long as I mix just enough for one length of matting at a time.
-
When I did my (2 week) tiling course, we were taught to: dry-lay the entire floor with spacers and all the cut edge tiles (working toward the door). remove some tiles to provide access to the other side. Remove a row or two of tiles, then apply adhesive and lay them, using the dry-laid tiles for alignment. Work backwards towards the door. I have found when using this approach that the tiles don't seem to go down with adhesive exactly where they were dry-laid, meaning that some cut tile no longer fit. For my conservatory (600x300mm porcelain tiles, staggered pattern) I'm thinking of cutting edge tiles for a couple of rows, laying those rows, then moving on to the next couple of rows (5.8m rows). With this approach, I could start along one long wall (lay a full row to get the alignment then the cut row), then work my way across the floor, Or I could lay a couple of rows across the middle of the room and work out from either side toward the two long walls. How do you experienced guys approach laying a floor?
-
Thanks guys. I shall take your comments on board
-
Tanks Joe, Nod, Temp. I've had fun with anhydrite in the past, when my son got me to tile part of his extension: sanding and sealing. That was a worry of mine. almost white tiles. West side of house, so no sun until after noon. (supposedly) heat-reflecting glass in roof and walls so probably not a problem??? I knew those times for anhydrite. I had an inkling (hope) that cement screed dried more quickly. I've used that trowel for previous jobs, but I wondered of a square-notched trowel might make it easier to compress the adhesive to attain a solid bed. Interesting. I shall look out for this to see if my builder is doing it properly. Thanks for reminding me to seal the grout. Grout not yet chosen, but definitely not white to go with the almost white tiles (that is probably the only input I will get on the colour ?). One more thing, is a cement screed likely to need sanding before tiling?

-
I will be tiling the floor of a conservatory and need some advice on how to proceed. The conservatory is new-build with a cement-based screed. No underfloor heating. Size 5.8 by 3.8 metres 600 x 300 porcelain tiles; 0.9mm thick. Flexible adhesive will be used. I would appreciate guidance on the following: Does this size and environment need an expansion joint? Is this environment suitable for tiling direct to the screed, or do I need decoupling mat? (I have received conflicting advice from tile shops: one saying mat is required, the other saying it is not required). How long do I need to allow the screed to dry before tiling? Should I use a 10mm half-round notched trowel for this, or would another profile do a better job? I have been advised to leave a 5mm gap between tiles and walls, with silicone across doorways (where there will be no skirting board). Does this sound reasonable? Anything else that your experience suggests I should consider/do (and my lack of experience means I haven't thought of)? The screed has not yet been laid, and the builder says depth can be set so that the tiled surface will end up level with the carpeted surface in the next room (so I need to know what I will be putting under the tiles ?).
