
Leaderboard


Popular Content
Showing content with the highest reputation on 02/07/21 in Posts
-
Don’t you just fit one that isn’t actually connected to the heating system, so SWMBO can crank it up as often as she wants. But you actually just control it from an app. ?2 points
-
All still going good in ‘experimental’ mode . What I have noticed is it can take many hours to drop 1 degree and of course many to go up 1 degree . Therefore my narrow range is in fact really wide : below 17 heating on above 18 heating off Never had ufh before so it’s a novelty . Tempted now to change it to 17.5 . As half a degree is still a few hours of heating . It does feel different aswell . Just feels warm everywhere. It’s quite strange compared to radiators; no hot nor cold space ; just even2 points
-
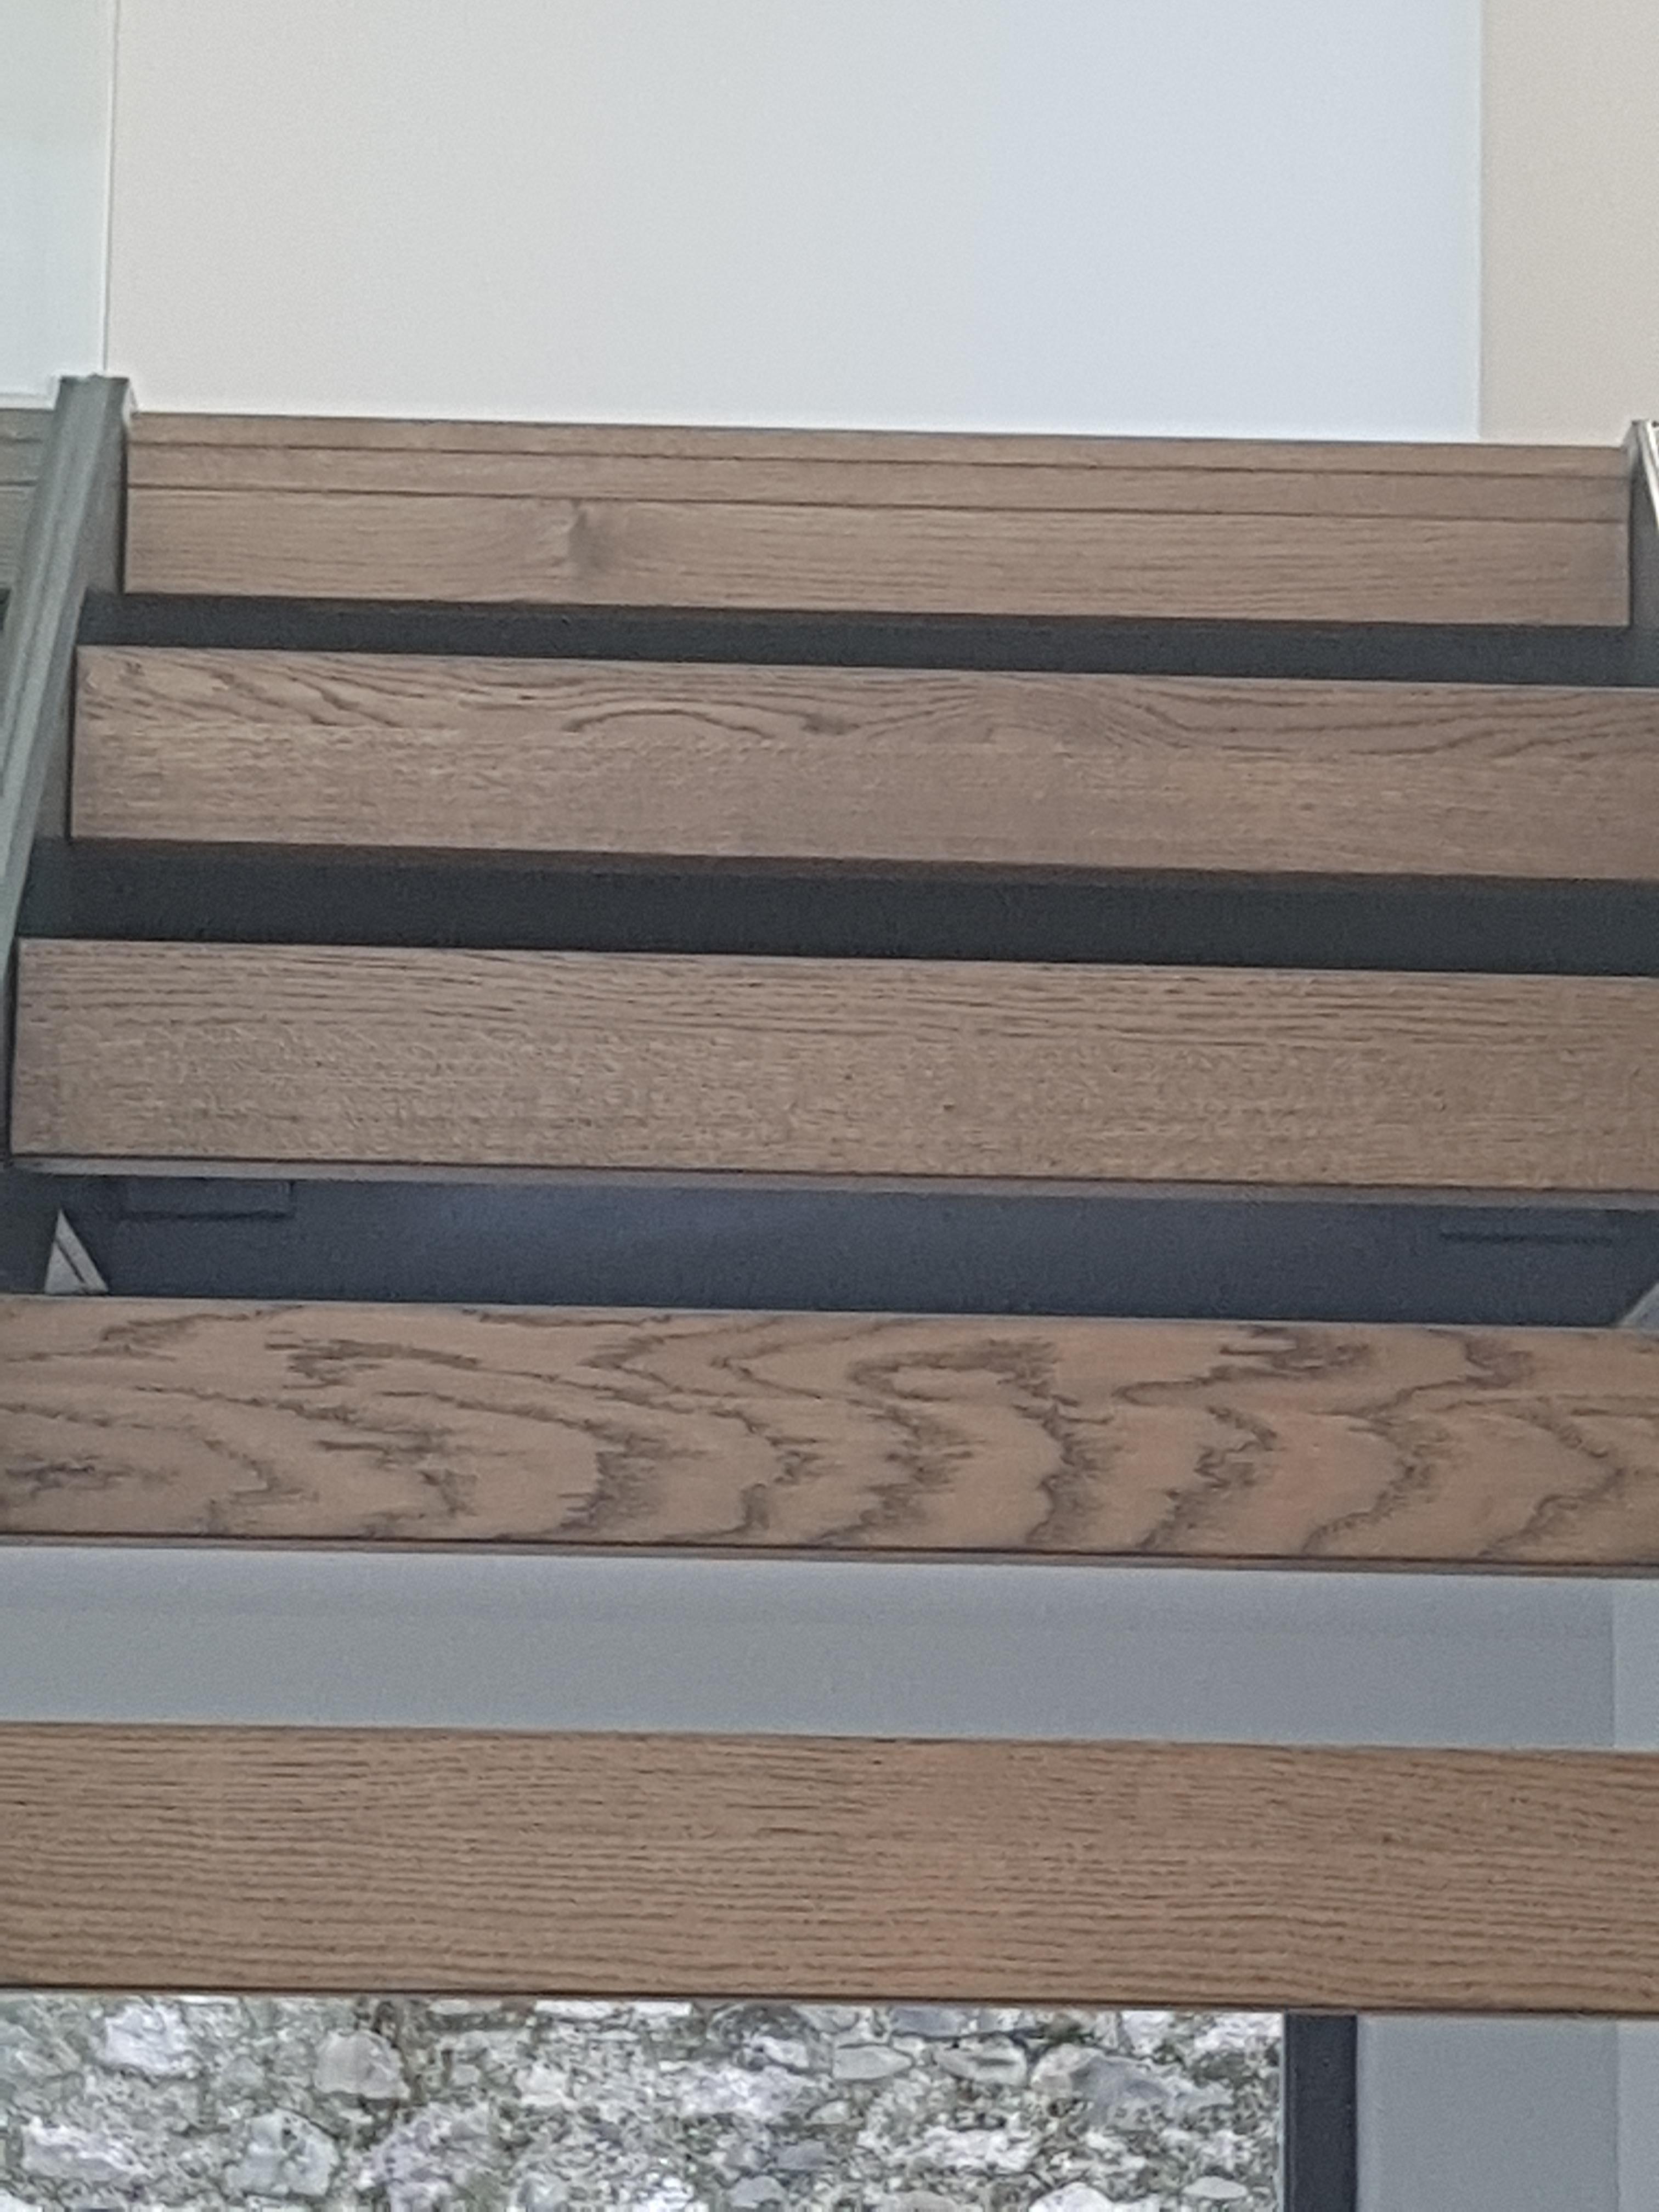
Just thought I would show some pics of our timber treads in situ. We are really pleased with them and they are very solid. The second pic shows the top of the stair treads were they meet the oak flooring on the landing and it is a perfect match apart from the different make up of the wood detail. The wooden treads and wooden flooring are completely different manufacturers so we are really pleased with the colour match
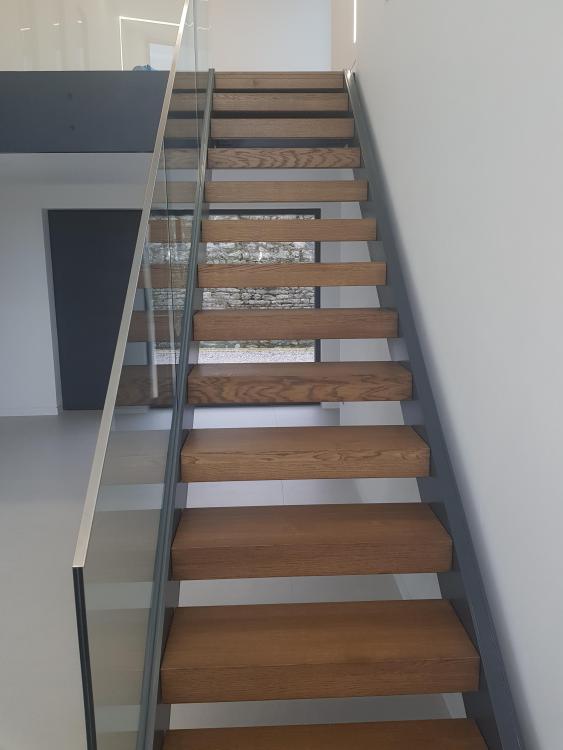
 2 points
 -
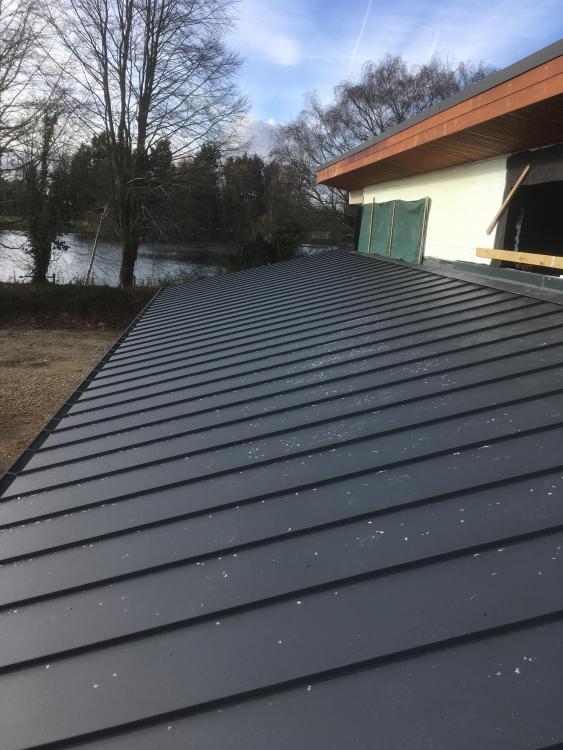
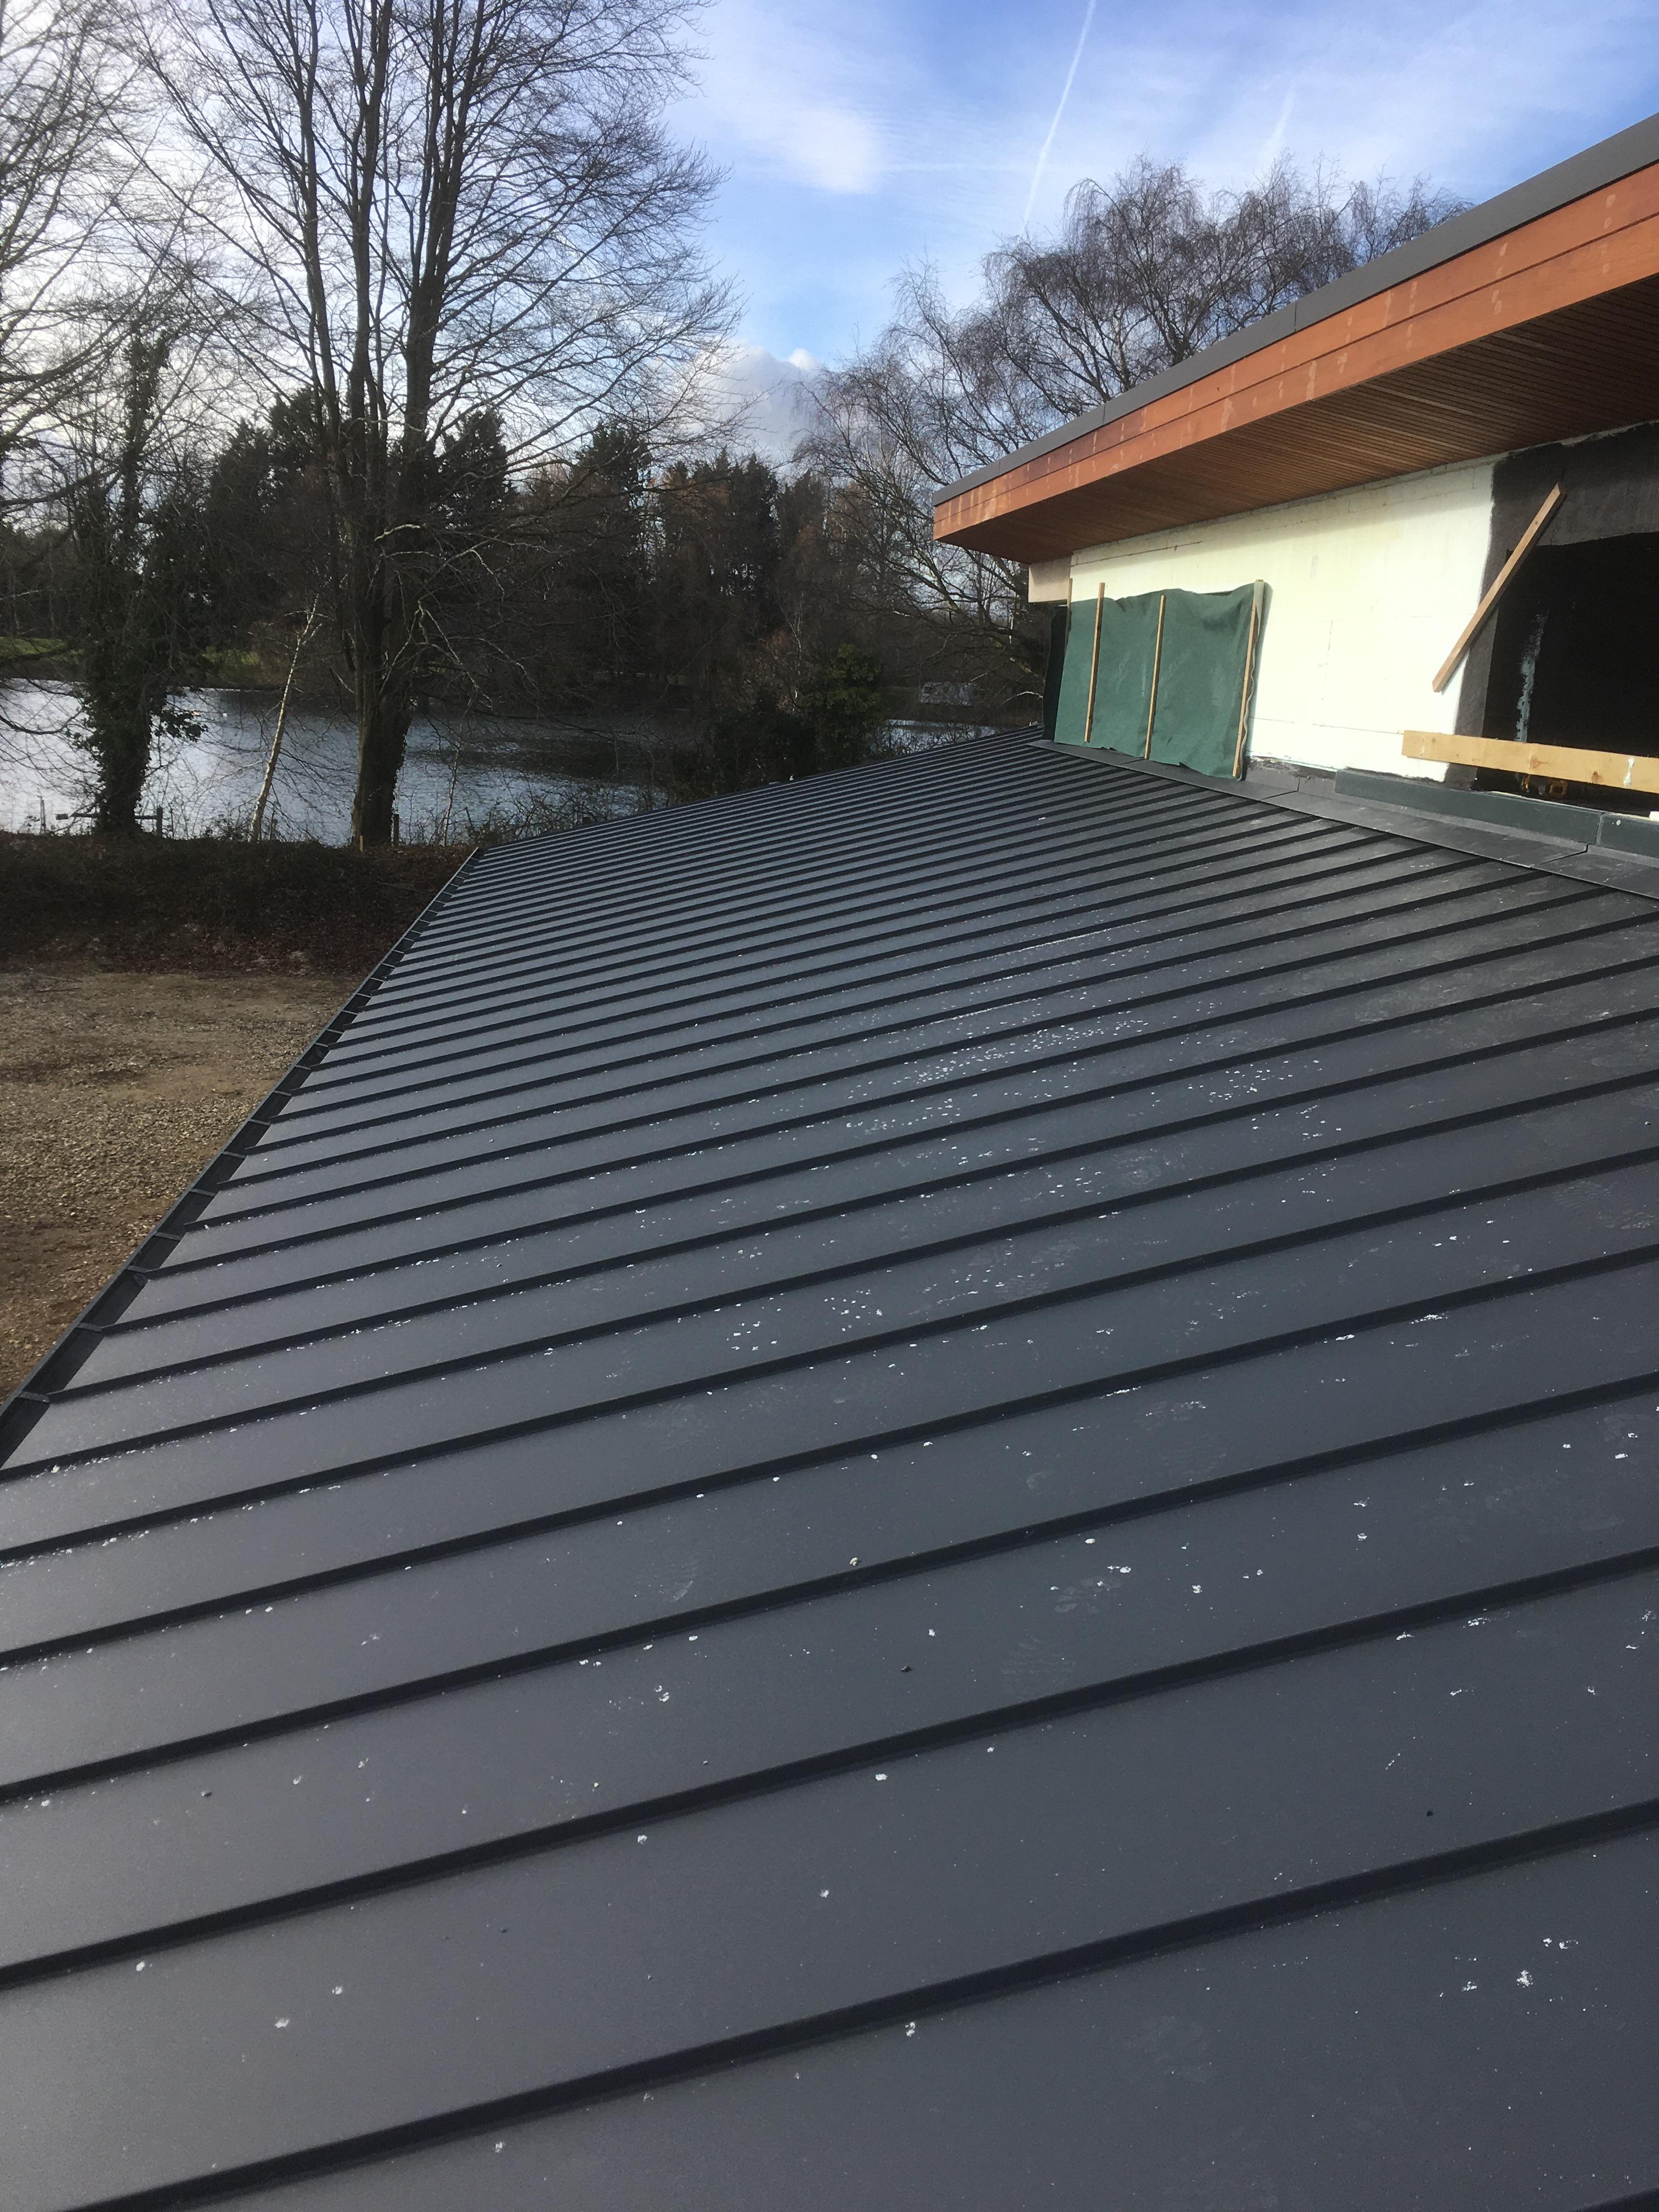
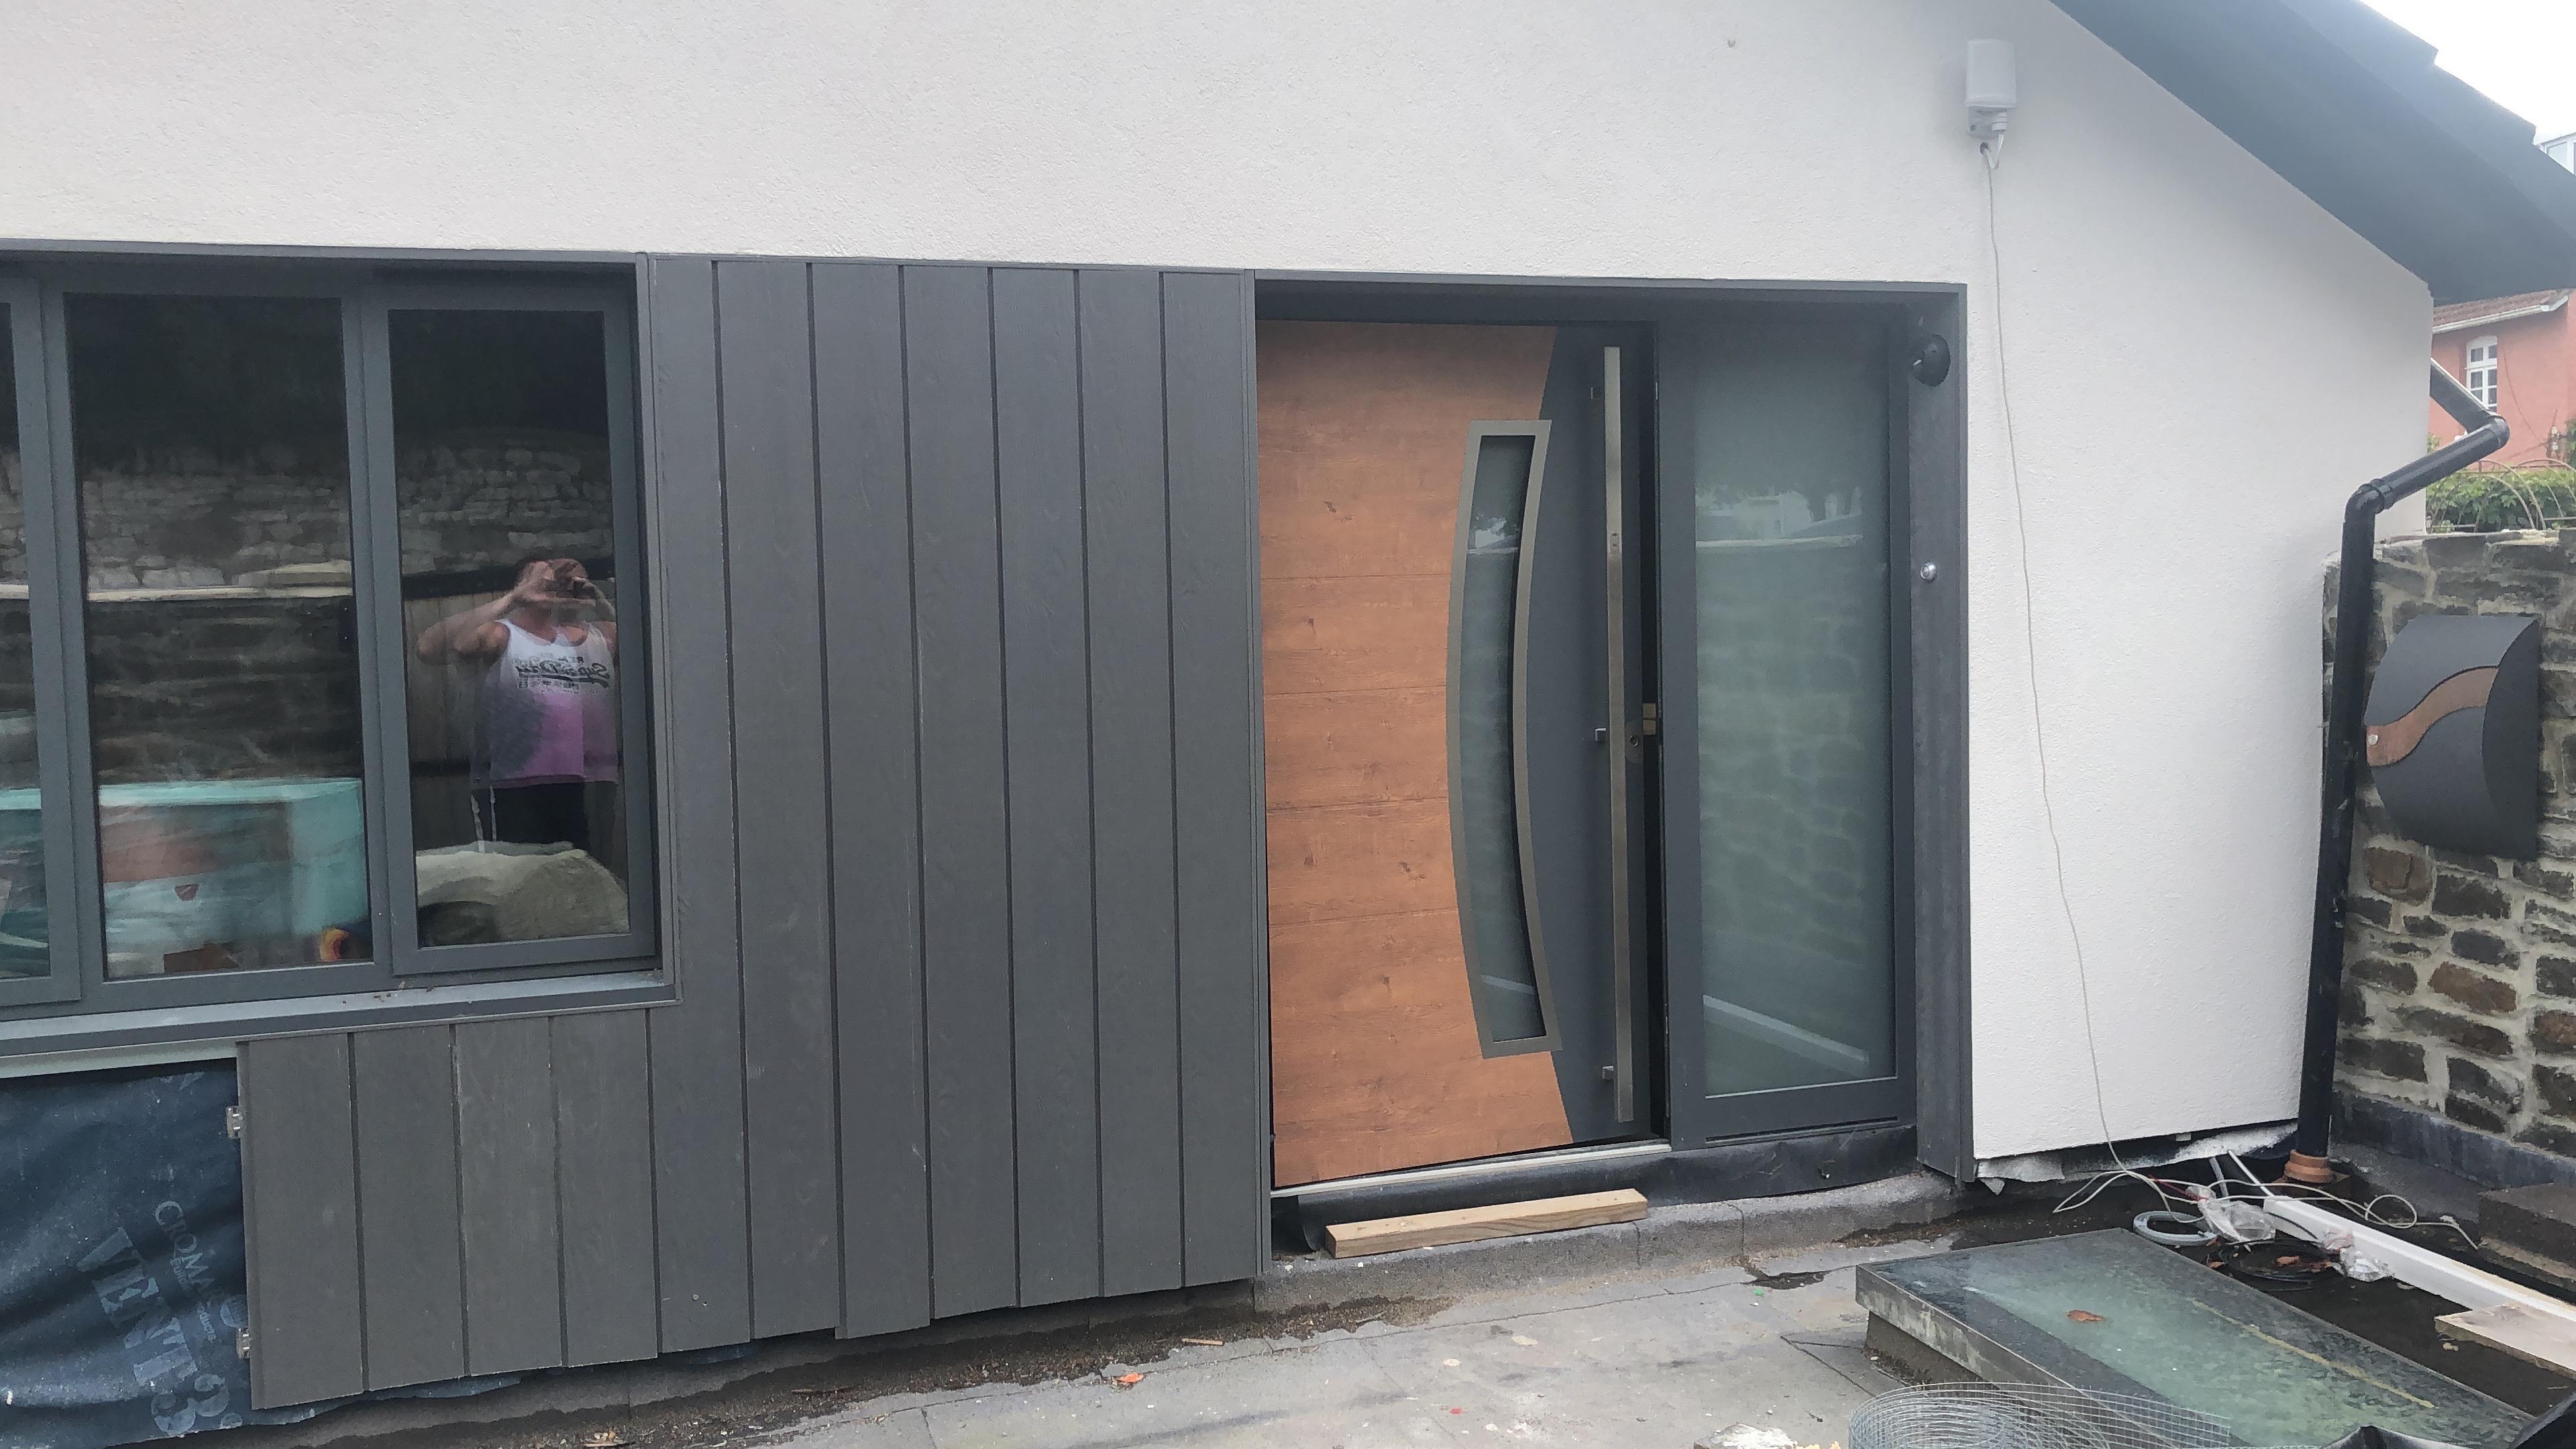
If you want to save money ditch the zinc roof eye watering costs, and lots of alternatives out there. this is mine. If that’s the sort of thing your after. Ignore all the white bits I was hacking a window reveal about.
 2 points
 -
Now that I am partly retired, I will begin my dream project: starting a new build once the bungalow which I am in the process of buying is complete, then will move to the next phase of PP. The bungalow came with PP but the design was not to our liking, so back to the drawing board for a new PP. As a newbie I will definitely need all the help from forum members. We have decided on a highly efficient energy house like Passivhaus but will not go for PH certification too costly!! A passive Timberframe with an insulated slab with triple glazed windows, MVHR.1 point
-
Very nice good effort1 point
-
Here is the data sheet for your thermostat https://cdn.wundatrade.co.uk/wp-content/uploads/2017/08/E02-generic-E91-touch-screen-Stat-27-4-2018.pdf See page 3. Parameter 4diF Switching differential, adjustable from 0.5C to 10C1 point
-
There is nothing there worth keeping, rip it all out and get it chucked in a skip.1 point
-
Cordless grinder, diamond blade, lots of water, lots of mess. I would have a go myself, but I’m a bit of a no guts no glory merchant, so I just get stuck in and wait and see if the shit hits the fan or not.1 point
-
Ah ha, upstairs for thinking down stairs for dancing. Vaulted ceiling in garage for extra headroom.1 point
-
my stat has a 3’ hysterisis , means it switches when 3’ difference is felt. Set to 21’ it switches off at 22.5 but switches on at 19.5, really need to find one that’s got a 1’ hysterisis. Yes, I have little temp devises around the house to PROVE it’s warm enough (she still asks me to light the woodstove tho).1 point
-
https://www.ductstore.co.uk/acatalog/Round_Vents___Wall_Cowls.html Don’t know what the rainwater goods look like but some in here look ok1 point
-
not quite. Mechanical stats had a resistor in them that heated the bimetal to get it to switch slightly ahead of time. Today's programmable stats have all sorts of rate-of-rise fuzzyness in, and turn off slightly below setpoint as they know there'll be a bit more heat added after the boiler is cut out.1 point
-
That’s all I’ve got for my ASHP and UFH. Seems to work.1 point
-
be interesting to see just how much overshoot you'll get with straight on/off control. And how that changes with flow temp too1 point
-
Temporary electric battery fencer and wire would be easy. You may need to offer them some cash mind you as there's not much nutritional value in the plants there ATM.1 point
-
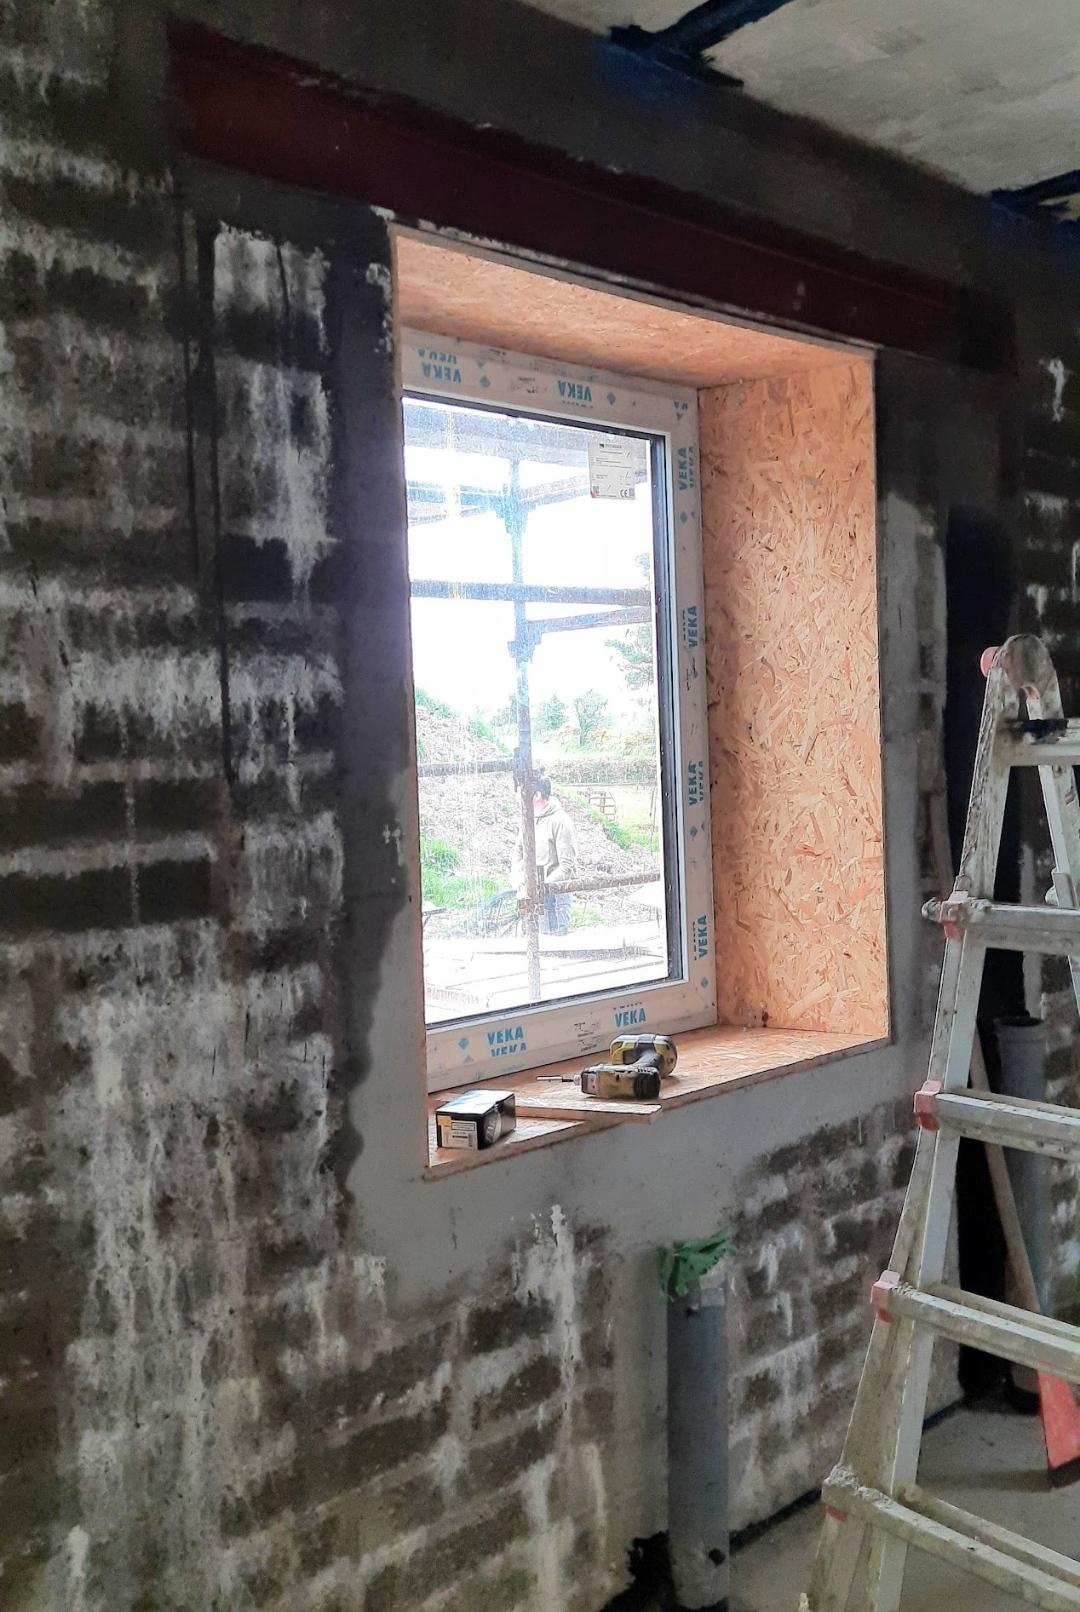
Worked fine with PVC windows for us. I made angled 18mm OSB boxes after the windows were fitted and concrete screwed them to the inner leaf. No need to cut blocks just set back the inner leaf by 100-150mm depending on the angle you desire. In hindsight it would have been easier to build the boxes in as the walls went up.
 1 point
 -
Ask the structural engineer or phone the engineer at the precast slab manafacturer. Beware the cost of blocklaying. You'll double the cost of your inner leaf. Resting on precast window sills and concrete screwed via brackets into the outer leaf. Avoid lintels that span the cavity. Thermal bridging is an issue. Use concrete in preference to steel. It's cheaper and easier to finish. Again your structural engineer has the last word here.1 point
-
We used Schneider Lisse and we liked the rounded look with no sharp edges. The light switches are good because they have a spare terminal for connecting neutrals for loop in at switch.1 point
-
I too love switches and sockets. Nice way to add warmth to a house, particularly if the decor is a bit neutral. Helpful to have the USB sockets for the ones near the bed / that spot in your living room you sit to watch TV. Check out https://www.busterandpunch.com/product-category/electricity/1 point
-
Maybe a rear view on a single USB faceplate?1 point
-
Just read your blog Peter brilliant! thanks for sharing.1 point
-
Retrotouch are the make
 1 point
 -
You can’t rush these things (and he sure doesn’t ?).1 point
-
"designer" switches and sockets is a very good way to drastically bump up your materials cost. Personally I prefer a good well respected make of white products like Scholmore Click or Schneider. Some of the very thin "flat plate" designs just serve to show how out of true the wall is, and can look a mess, particularly when someone wants them fitted to an old house with rough plastering.1 point
-
@Russdl sweet home 3d. Crude but very handy for playing around with room layouts and configurations. I roughly drew up our architects drawings in it. Meant we could tweak walls and rooms before going back to him to draw up. http://www.sweethome3d.com/
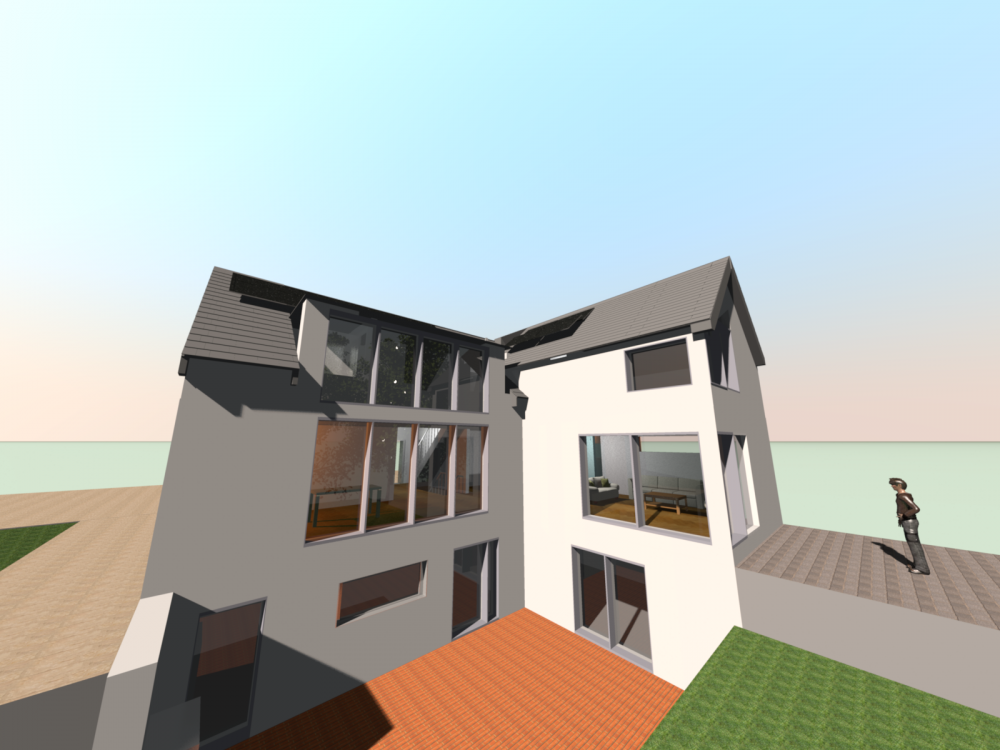 1 point
 -
Those sheets @ProDave referred to: https://www.wickes.co.uk/how-to-guides/garden-landscaping/fit-corrugated-sheets1 point
-
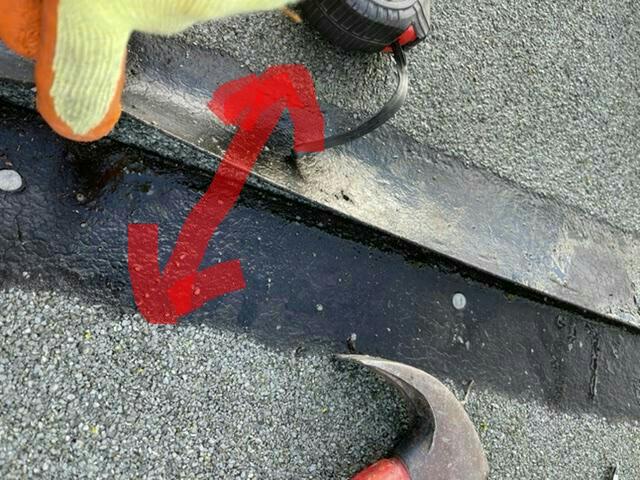
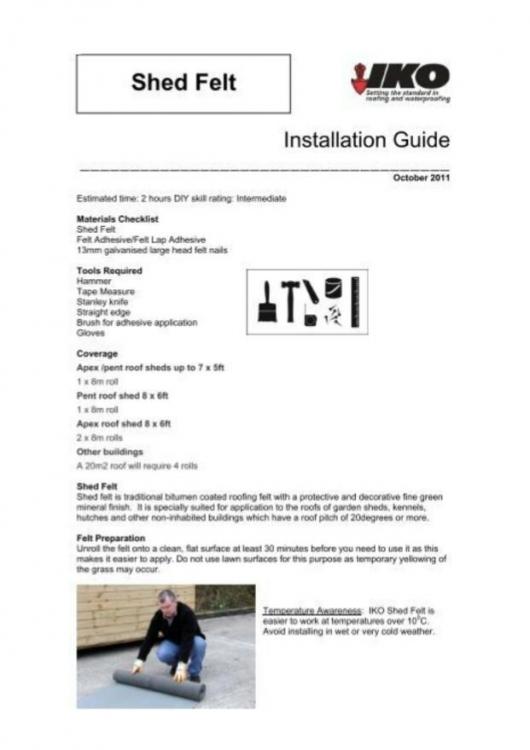
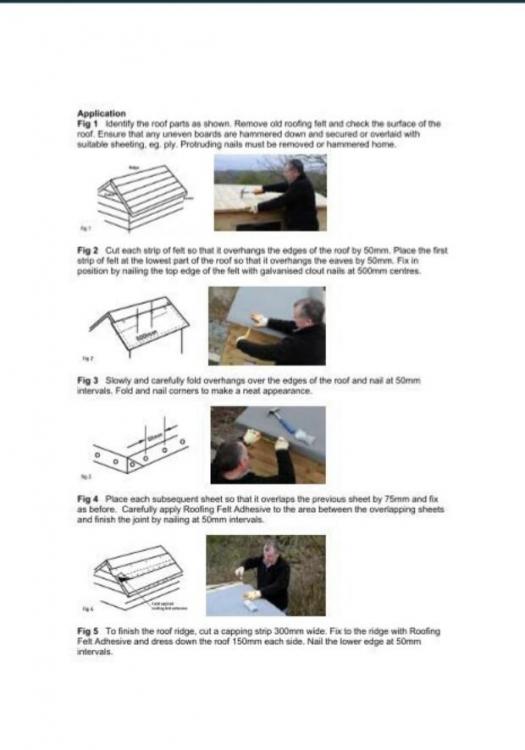
Was the batten the width of where the red arrow is? The bit your finger is on is the factory edge, I think of the 1m wide roll piece used on the apex? There should be adhesive under that bit you're holding up. Where the nails are the adhesive appears to have been applied on top of the green mineral and maybe under the batten? Looks to me like it's done wrong. How far up, does the bit with the nails in poke up under the bit you're lifting up? A shed roof btw should really have a minimum of two separate layers of felt. One underneath then the green mineral impregnated "cap" sheet you have there. How many layers have you got? If you must go "one layer" there's a proper way if doing it. This from IKO (one of the big felt producers) for instance. It's good to know to help diagnose where yours is leaking: You don't necessarily need wooden strips if done correctly. They can rot and in fact hold water, forcing it back under a poor lap. Not got any on my 2 layered shed roof. My joins are stuck like sh!t to a blanket. Have to be careful (good) to avoid adhesive dribbles. I just wipe and brush in the mineral "dust" onto any dribble. North facing elevation: (I'll finish it one day! ?) Battens can in fact be run up the slope and can look quite good. My experience of the black, bitumen impregnated roof sheets @ProDave refers to was dire. I reroofed a, shallow pitch, concrete section garage with them (from Wickes). I observed the support spacing requirements by adding in extra angle irons to match the originals. In between the supports the sheets just sunk in like washing up bowl size depressions then split. Poor picture of the roof. (Ruined a Ford Capri I had stored in there. Salvageable but loads more work than when it went in ? ). I'd say a one off/bad batch but similar happend to My BiL. In both cases there was no supporting boards underneath I might add but the bumpf on the corrugated sheets said you didn't need it. Imho I reckon you'd be better with a one piece sheet of EPDM and the proper edge trims. I'll pm you the proper, old school instructions for felting a shed, give me a while.
 1 point
 -
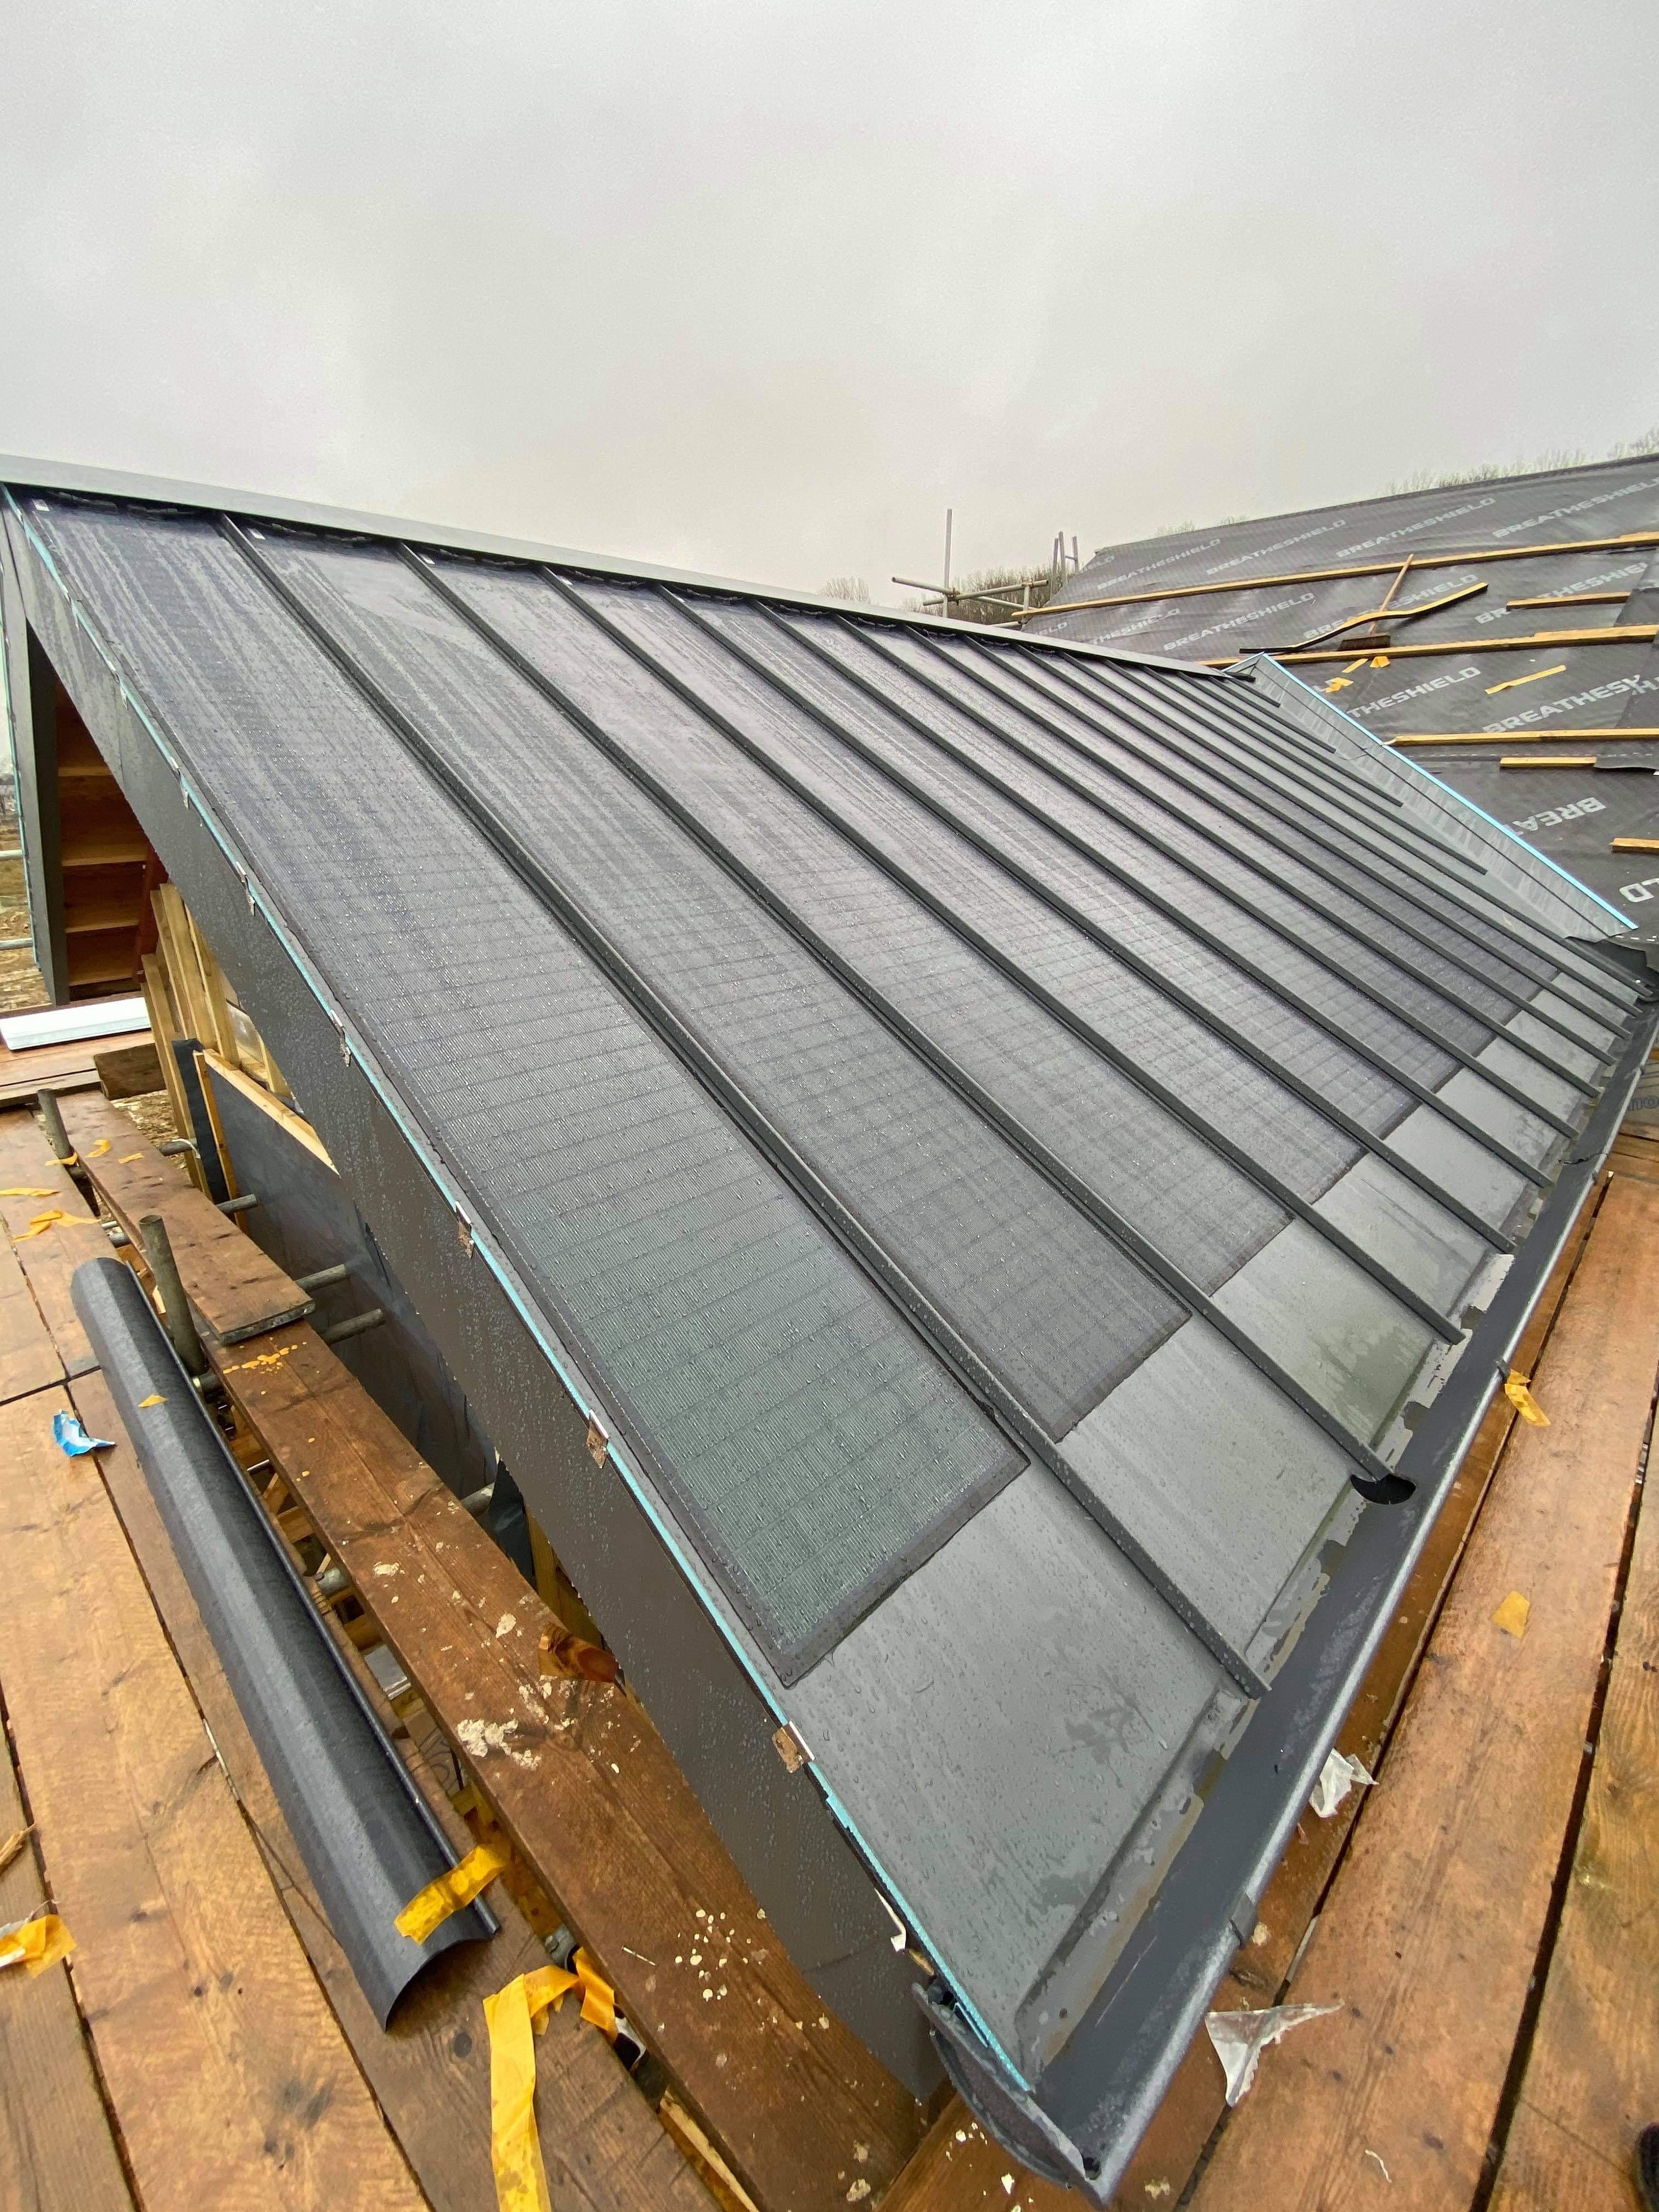
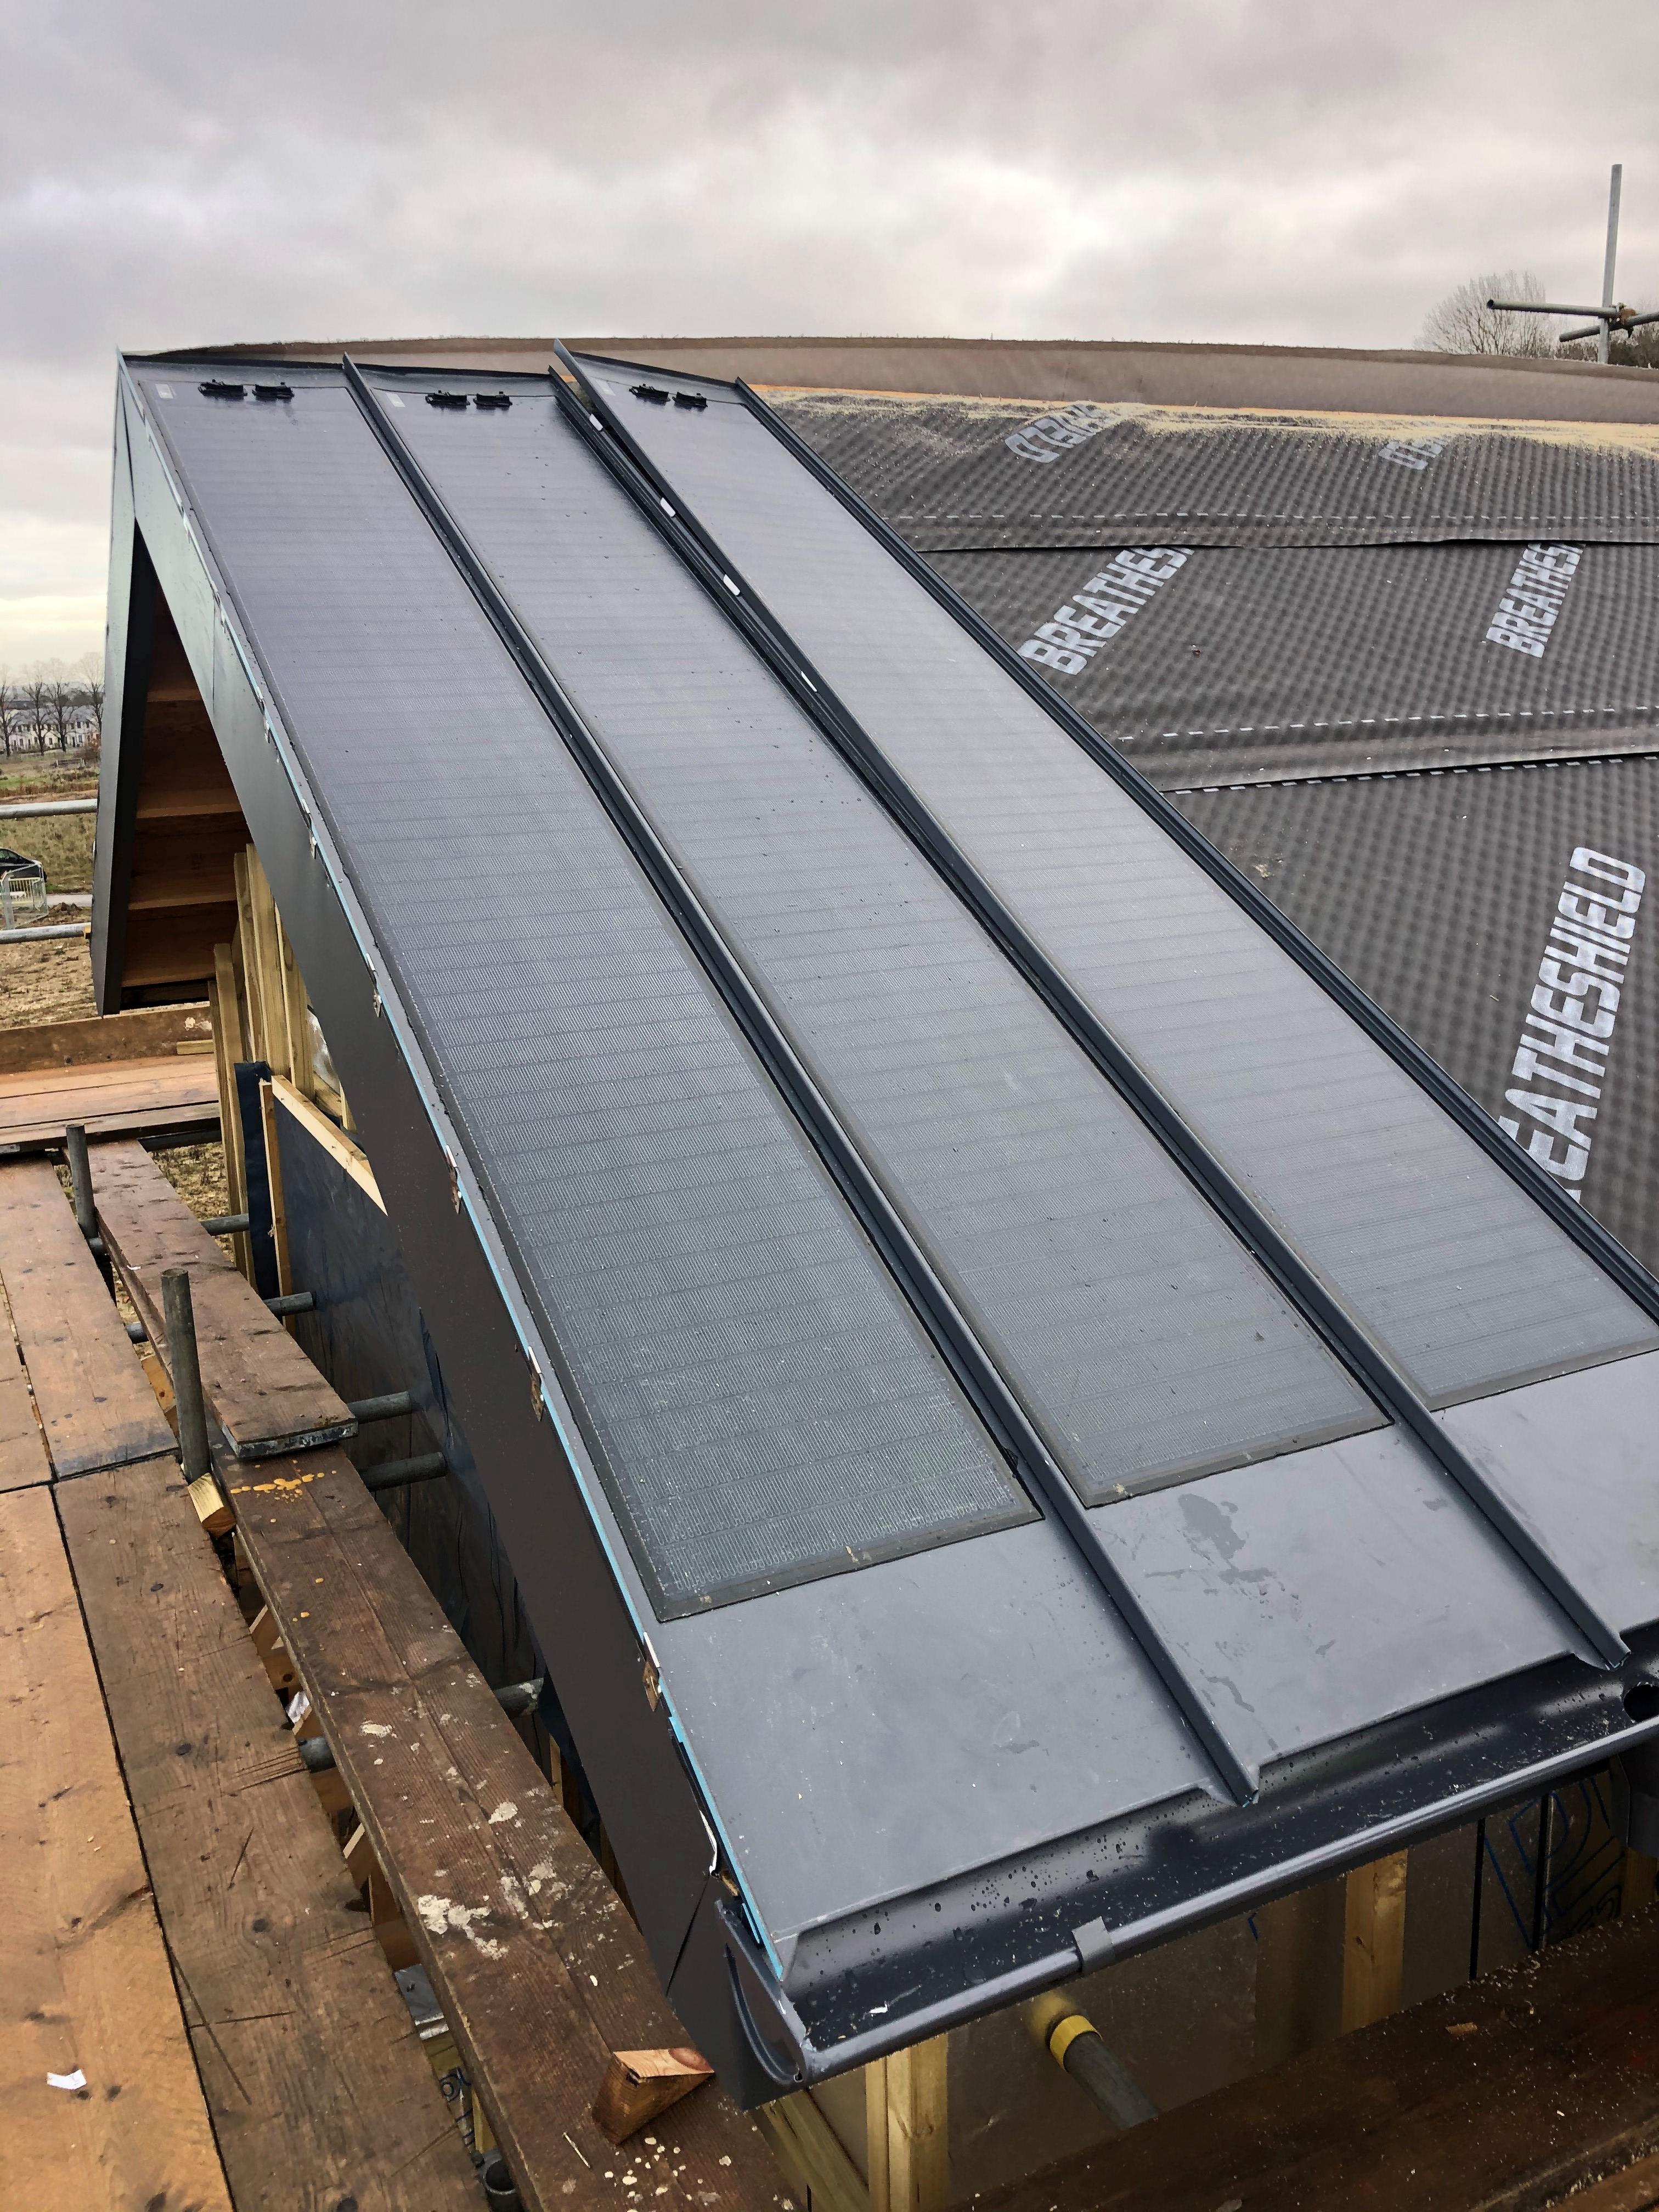
Installing BiPVCo Solar 358mm PV on SSAB GreenCoat PLX Pro, Colour Mountain Grey (036) from Metal Solutions Ltd with Snaplock(R) Standing Seam at 400mm wide panels Installation in Graven Hill, Bicester. Electrics at the ridge under a low impact profile
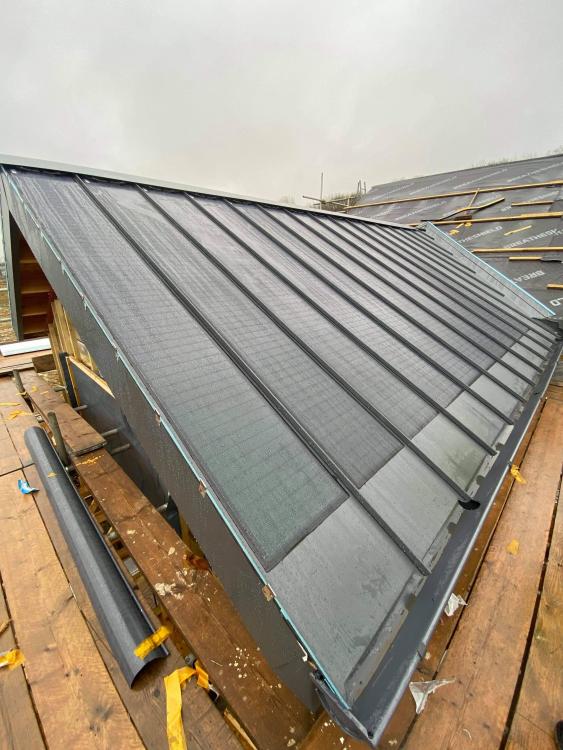
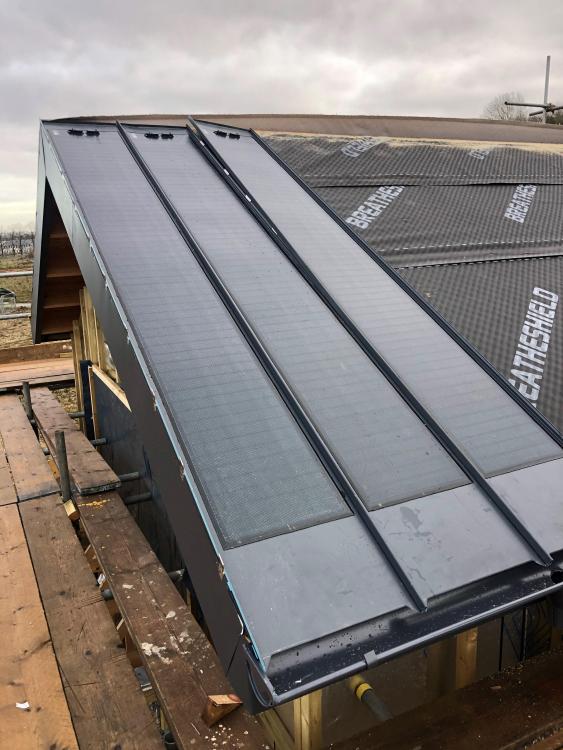 1 point
 -
Defo delay install...i've damaged my own door being careful, it doesn't require a careless contractor. Also if its a metal skin as mine, i'm finding the finish very vulnerable, to the point i'm going to put helicopter tape around the key hole area to protect from inadvertent scrape by stuff dangling from keyring.1 point
-
Seems your system is working right. Do you collect data all the time on the air temperatures? Phew, got away with it. And you have a nice cosy house.1 point
-
Here’s ours
 1 point
 -
Hello to you all, My name is Matt and I live in Norfolk with my wife and 2 young kids. We have completed on a plot with detailed planning permission and are currently having the plans re-drawn to better suit our needs and spec. Although we own the plot, we can't really develop it without selling our current house which should be completed by the end of January, at which point we will move in to rented for the duration of the build. The new house is a mixture of materials including a zinc roof, K-render, brick, with a slate roof to the garage section. It will be 2650 ft2 and will be a very bottom heavy 4 bedroom 2 storey house with a roof terrace overlooking the field views the the rear. My intention is to build to a semi passive haus standard and avoid an air source heat pump in favour of solar panels with a large battery bank and an electric boiler coupled with evacuated tube hot water system. While having the plans re-drawn, I have tried to reduce costs as far as possible, purely as I know it will cost us more than I think, as it does for all bar the most experienced house builders which we are not. The house and garden will be planned to make it as maintenance free as possible, me and my wife work full-time and want to make the most of every spare moment we have. We're hoping to get started in March 2021. Regards, Matt. We are completely new to this1 point
-
Yes, I'm going for the extra fat, super-insulated version in this design. 1.5m wide so a bit wider than in the image. Black escutcheon (yes I didn't know either: keyhole) unlike in the image. That's a bespoke groove pattern by the way.
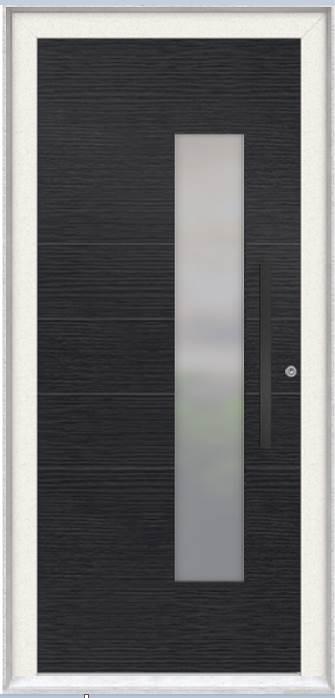 1 point
 -
Lol ! Think you’ll be lucky ! Of course you could offer to pay half now and a small fee to ‘hold’ it for 12 months ... Fantastic doors by the way ! - though my finger scanner has since died ☹️1 point
-
What about a black, sprung/pneumatic door stop, affixed to the cupboard or door. For example: https://www.sdslondon.co.uk/suite-914-matt-black-stainless-door-handles/skirting-door-stop-80mm-1.html?1 point
-
We have Roofus who is a small heavy dog door stop, think he came from Next, looks good and is effective.1 point
-
I had a 200mm cavity but brick outer skin, I also had “check” reveals. This means the inner skin has a bigger width than the outer skin and the windows and doors are fitted to the inside of the outside wall. Mine was held in place by stainless brackets and expanding foam strip between the window and outer skin. (I also had angled reveals giving better light into the rooms and looked cottagey.)1 point
-
I used dritherm 32, it is certified fir full fill and it can be installed DIY, I followed the bricklayers round installing it, just need to keep heavy rain out.1 point
-
What lintels?. I built 200mm cavity with 100mm block and brick inner and outer skins, had to go 500mm strip founds for the ground conditions (said building inspector) and had concrete internal lintels and brick arches in the outer, but these could have been. Concrete or something similar!!!1 point
-
I am not a fan of shed roofing felt, in fact I would never put it on a shed. Lousy stuff with a very short life. I would leave it there as an under felt and over sheet the whole lot with bitumen corrugated roofing sheets, cheap and very water tight. e.g https://www.wickes.co.uk/Onduline-3mm-Black-Corrugated-Bitumen-Sheet-950-x-2000mm/p/240039 Link to show what I mean not a recommendation for that particular product from that particular supplier.1 point
-
They’re effectively the same product . Other manufacturers also available1 point
-
Appear near identical. Same insulation properties.. Found a thread here.. http://www.greenbuildingforum.co.uk/newforum/comments.php?DiscussionID=111991 point
-
I’ve made doors for an under stairs cupboard and they have got two 6mm ply skins over an 18mm chipboard core. It’s much more stable than MDF and nicer to work with. If the 6mm oak is oak though and not laminate then you could do both sides and edge the doors with some strips and trim with a router. Decent glue such as Titebond will stop it all moving if it’s all clamped down or held flat with some blocks.1 point
-
It sounds like you are new to house renovation. I think each of these issues needs to be broken down into a thread of it's own where it will be easier to offer advice.1 point
-
Tell him to say "no" to drugs An UVC will have 22mm pipework and will happily connect to a 15mm cold mains. The discipline you need to observe is taking the 22mm cold supply all the way from the UVC multi-block ALL the way back to the 15mm cold stopcock. Reducing the resistance that the cold mains has to suffer before getting to your outlets is the critical thing to observe. You really need a plumber who has done a few ( lots ) of UVC installs, as the difference between plumber 1 and plumber 2 can be night and day. If you wish to retain the existing combi for money saving measures ( as long as it is in A1 serviceable condition ) then just have the hot outlet connected to the kitchen sink, and then use the heating circuit for heating CH and the UVC. That will work just fine. Do NOT connect the combi hot output to a shower, as whilst the shower is running ( the combi is in DHW priority mode ) zero heat will go to either CH or UVC. Flow rate and static pressure of cold mains needs reporting here before ANY advice can be given. You could get away with a Vaillant 938 and an accumulator, but we also need to know how many people living there, when they shower / bath / how often and more. INFO PLEASE!1 point
-
Hi Harry Did you ever get anywhere with this? I've just come across them in my research and was wondering the same question! Cheers1 point
-
In mine I have ventilated strip of stainless mesh at eaves and a ventilated top flashing, it’s all part of the metal roofing system.1 point
-
Welcome to the forum. Good luck with your PP. I don't want to put you off before you've started but you could look at my blog to see the potential ups and downs of self build. https://forum.buildhub.org.uk/blogs/blog/7-east-kent-self-build/1 point
-
I used the Isoquick passive slab which could very easily be a diy job. http://www.isoquick.co.uk/1 point


This leaderboard is set to London/GMT+01:00