Leaderboard


Popular Content
Showing content with the highest reputation on 07/06/23 in all areas
-
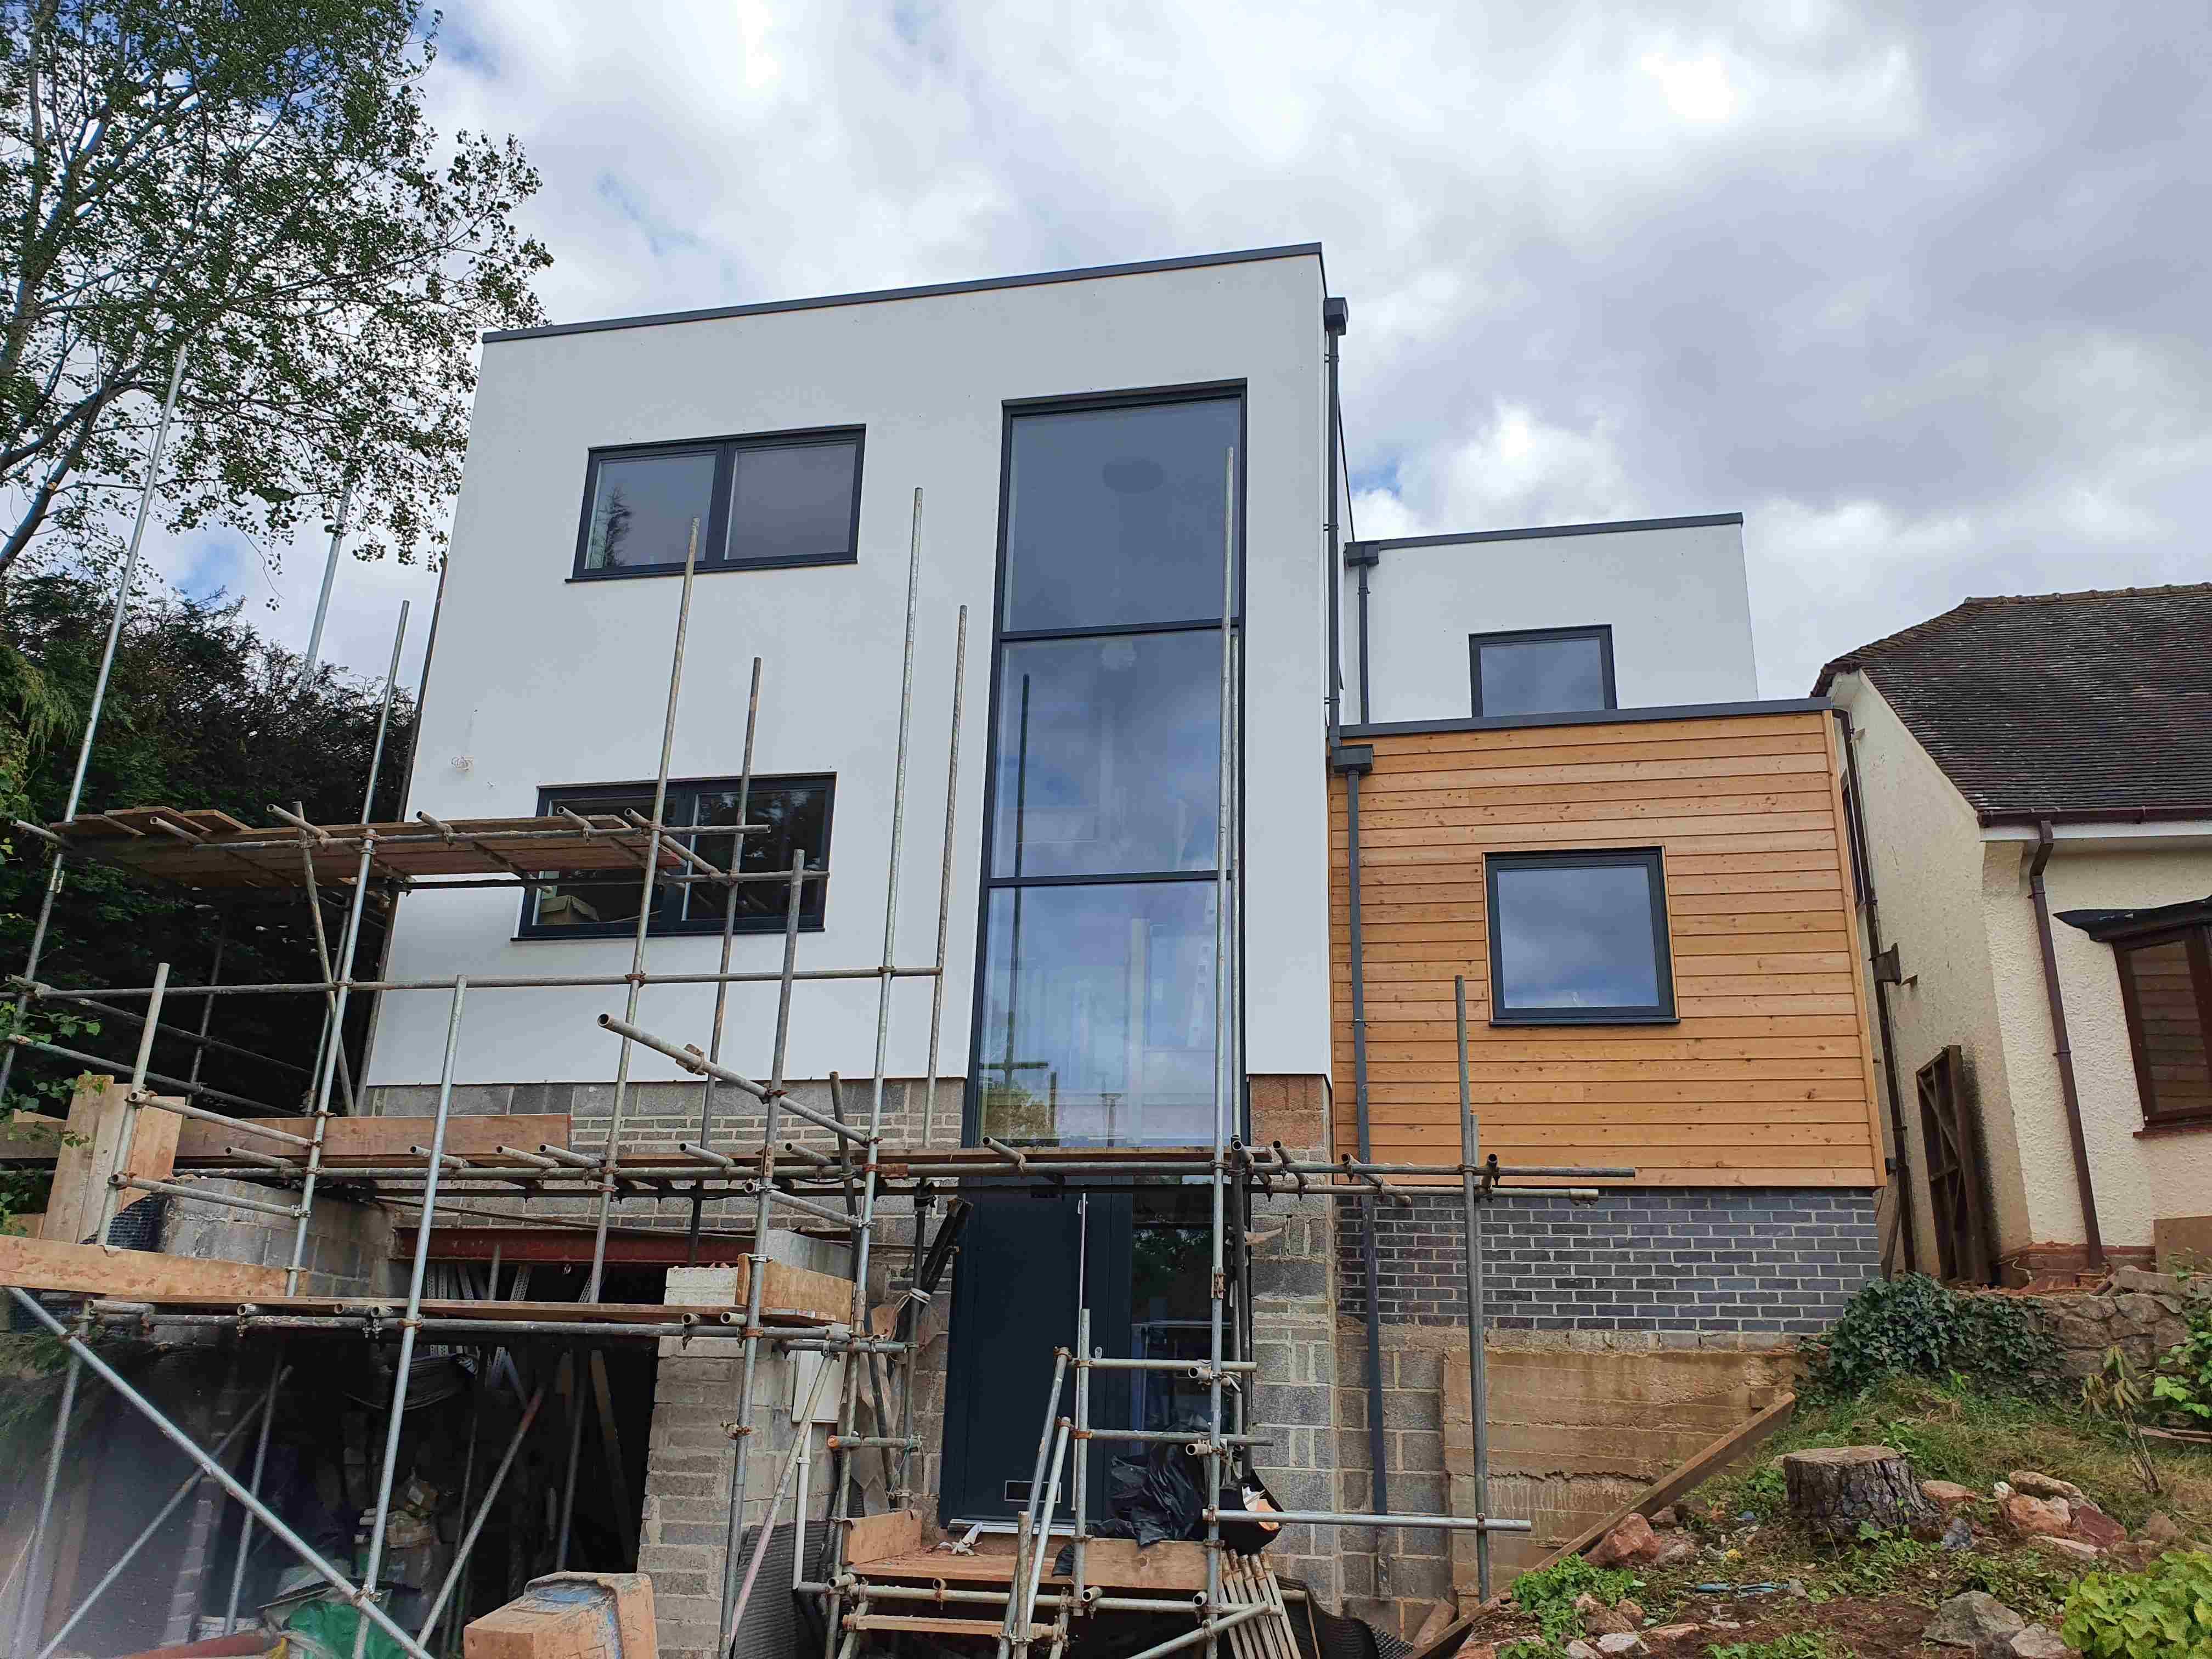
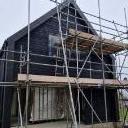
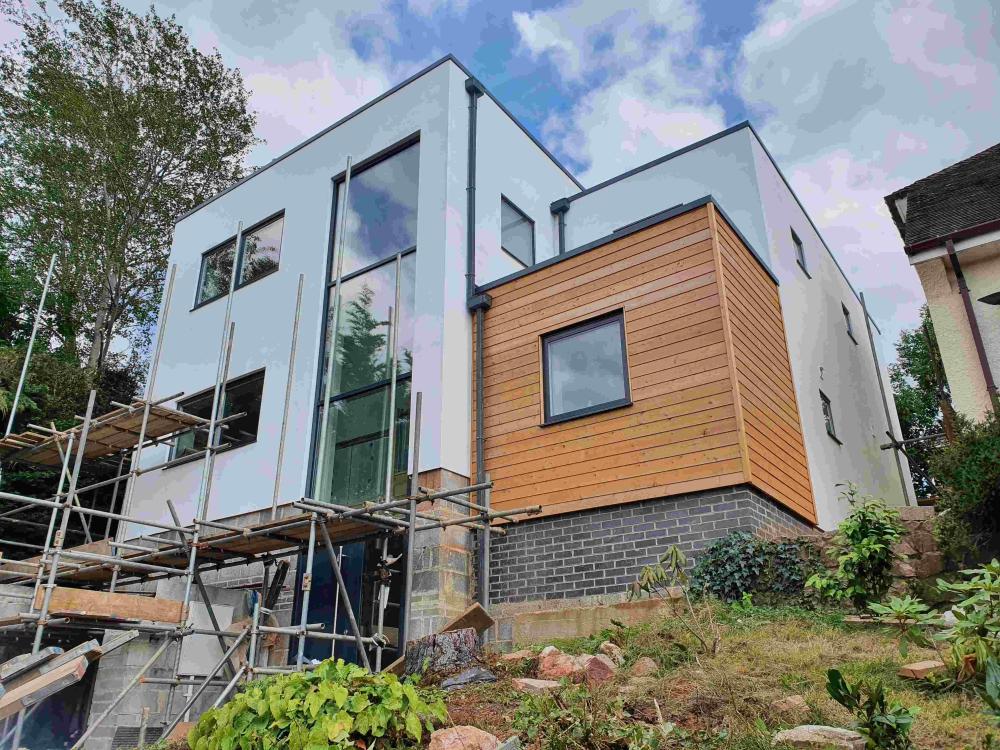
The majority of the scaffolding is down. A long way to go still
 7 points
 -
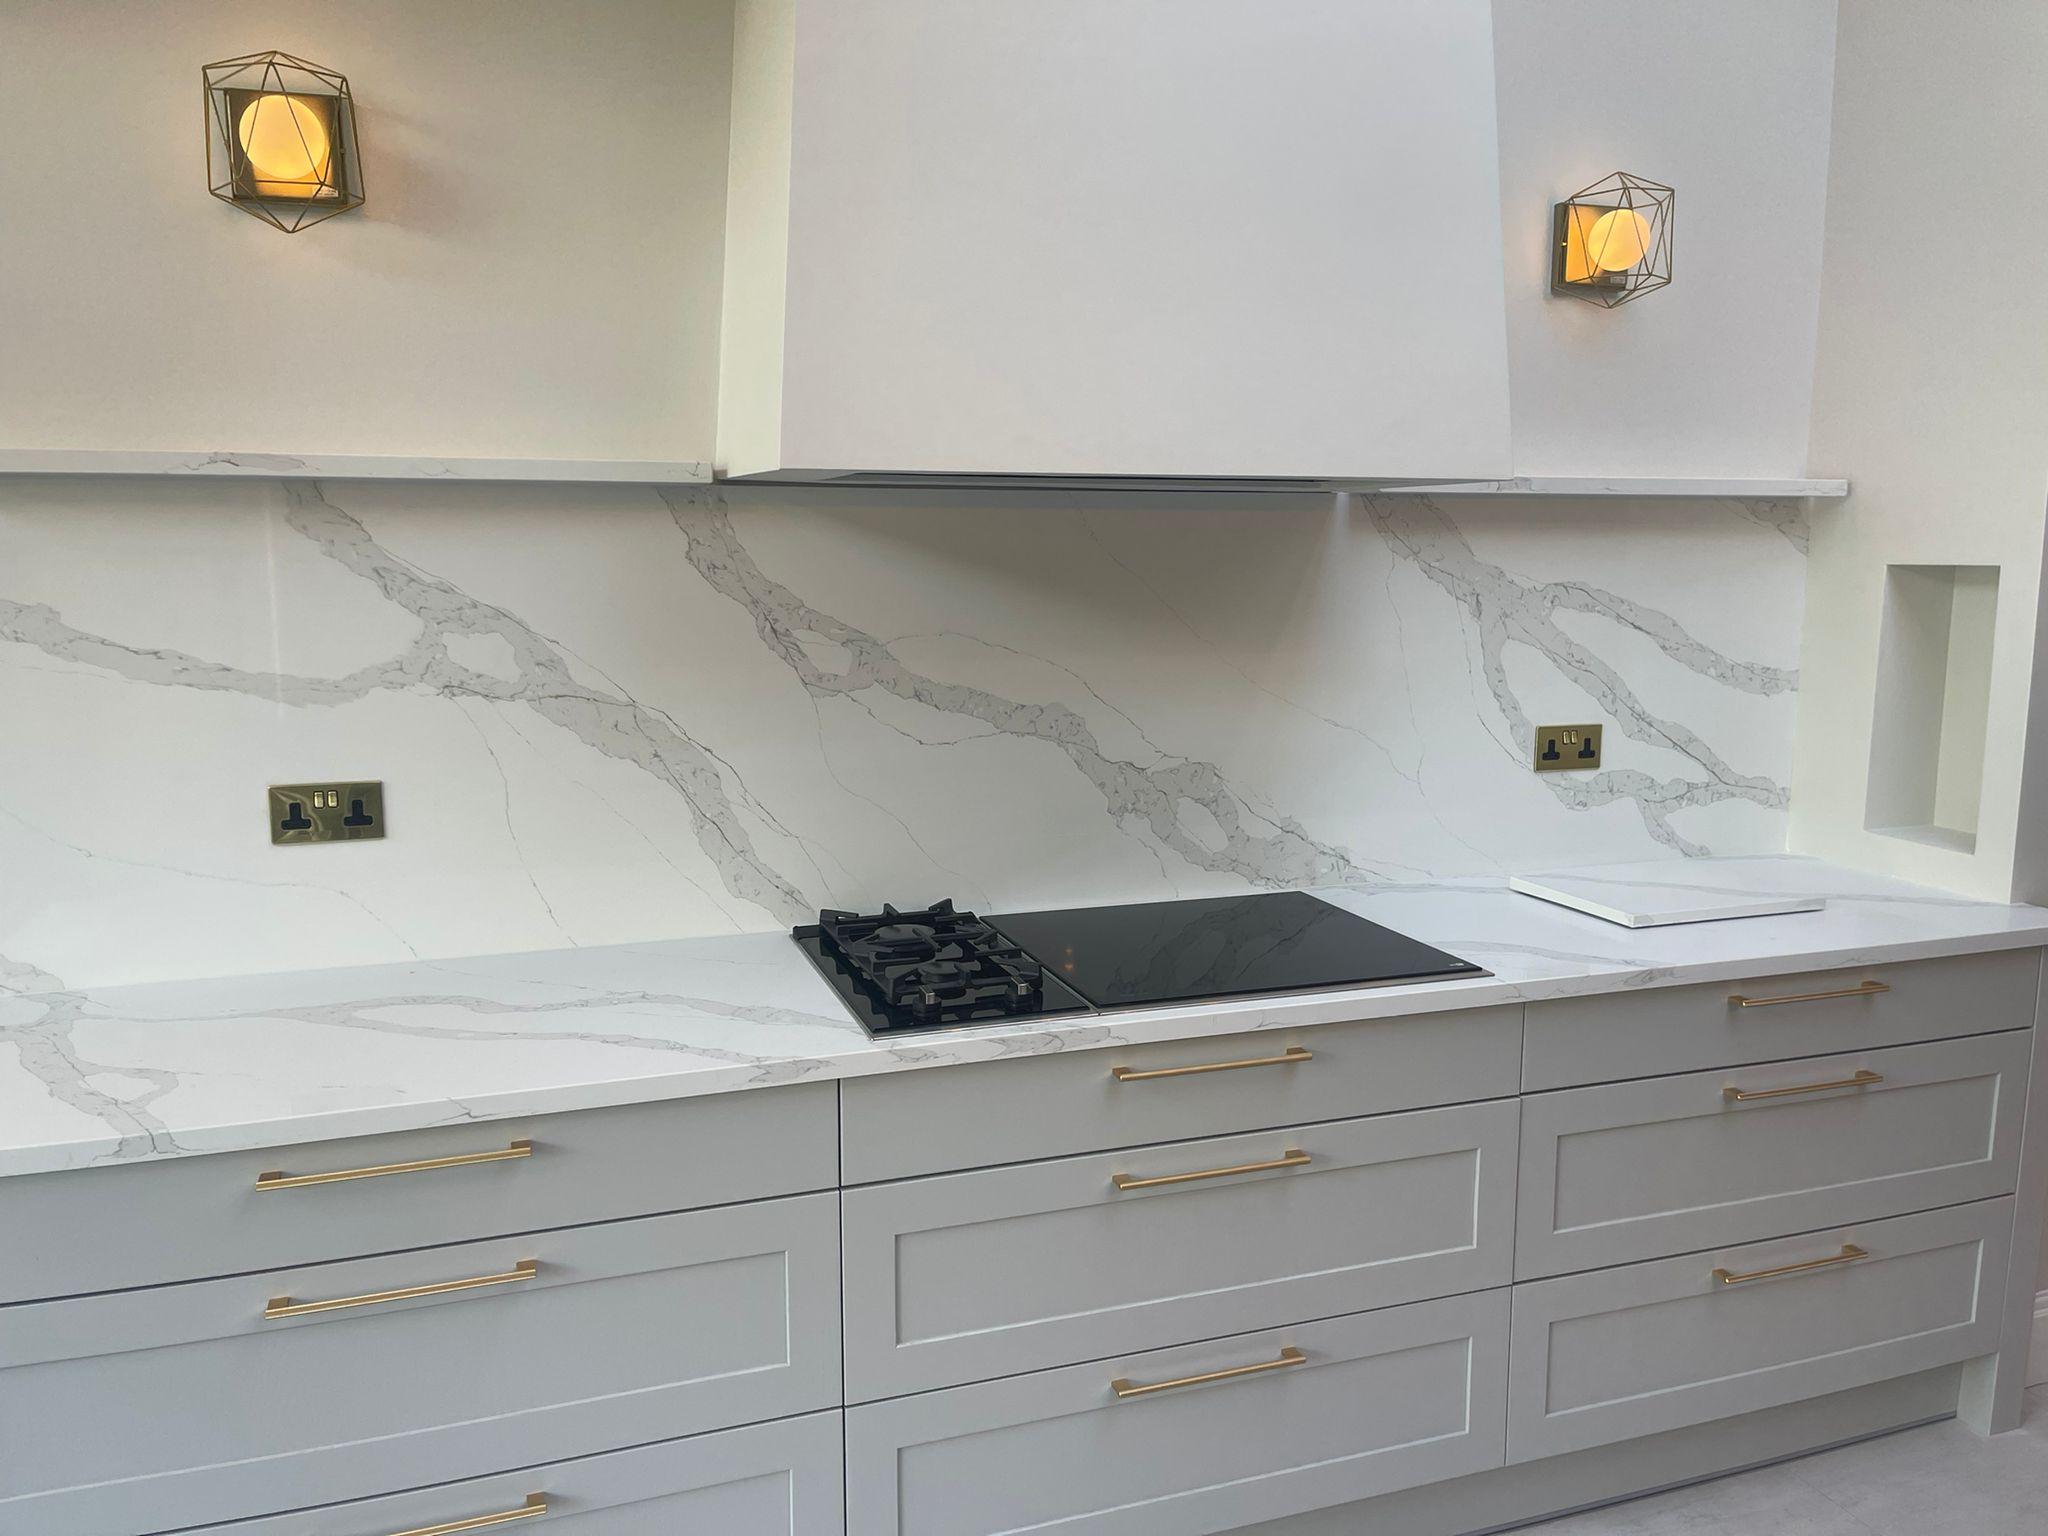
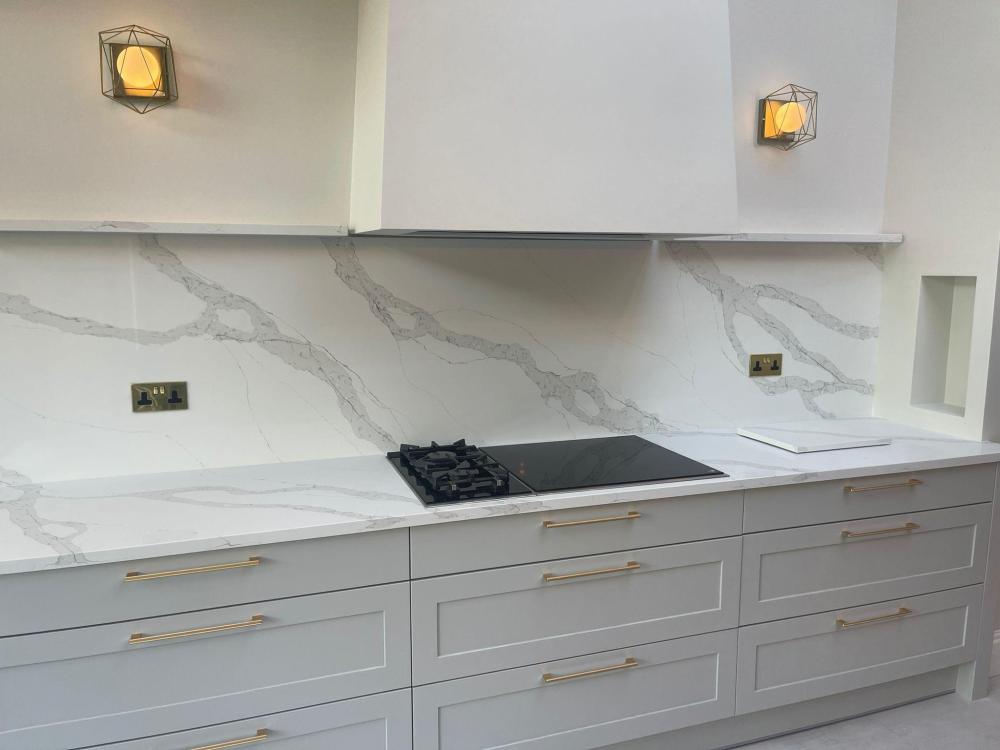
not bad for a first effort even if I do say so myself.

 3 points
 -
I needed a new collated drywall screwdriver and the black and gold version was discounted. I've started down the dark side! it's all @pocster's fault.
 2 points
 -
All put to bed now……
 2 points
 -
Bare tiles vs women's feet. Bare tiles at <25C feel cold barefoot. (some heat pumps have a "enable minimum return temp" setting for summer use that keeps the floor heating circuit at 25C for this purpose) Wood on the other hand feels fine. So do rugs. Rugs on wood even more so.2 points
-
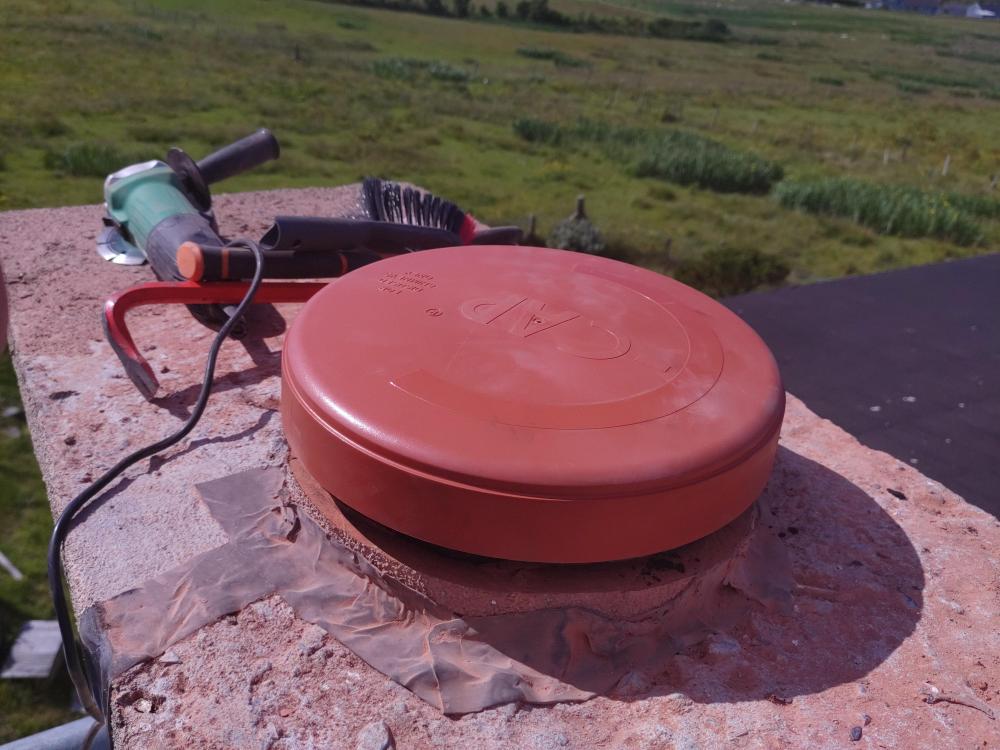
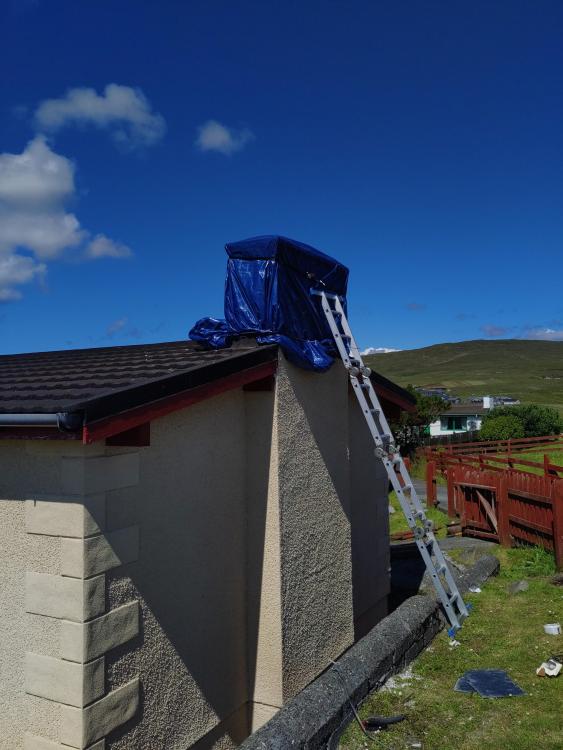
Aye, definitely the plan when I've got a bit more time, I don't want to put myself under pressure with it when we're definitely leaving on the boat on Sunday . I can probably make it back a bit later in the year, but wanted to give it every chance of staying dry until then. So I've applied copious butyl tape to the cracks, knocked off the chimney pot, fitted a chimney cap to the hole, and wrapped the whole thing in tarp. It'll do for now.
 2 points
 -
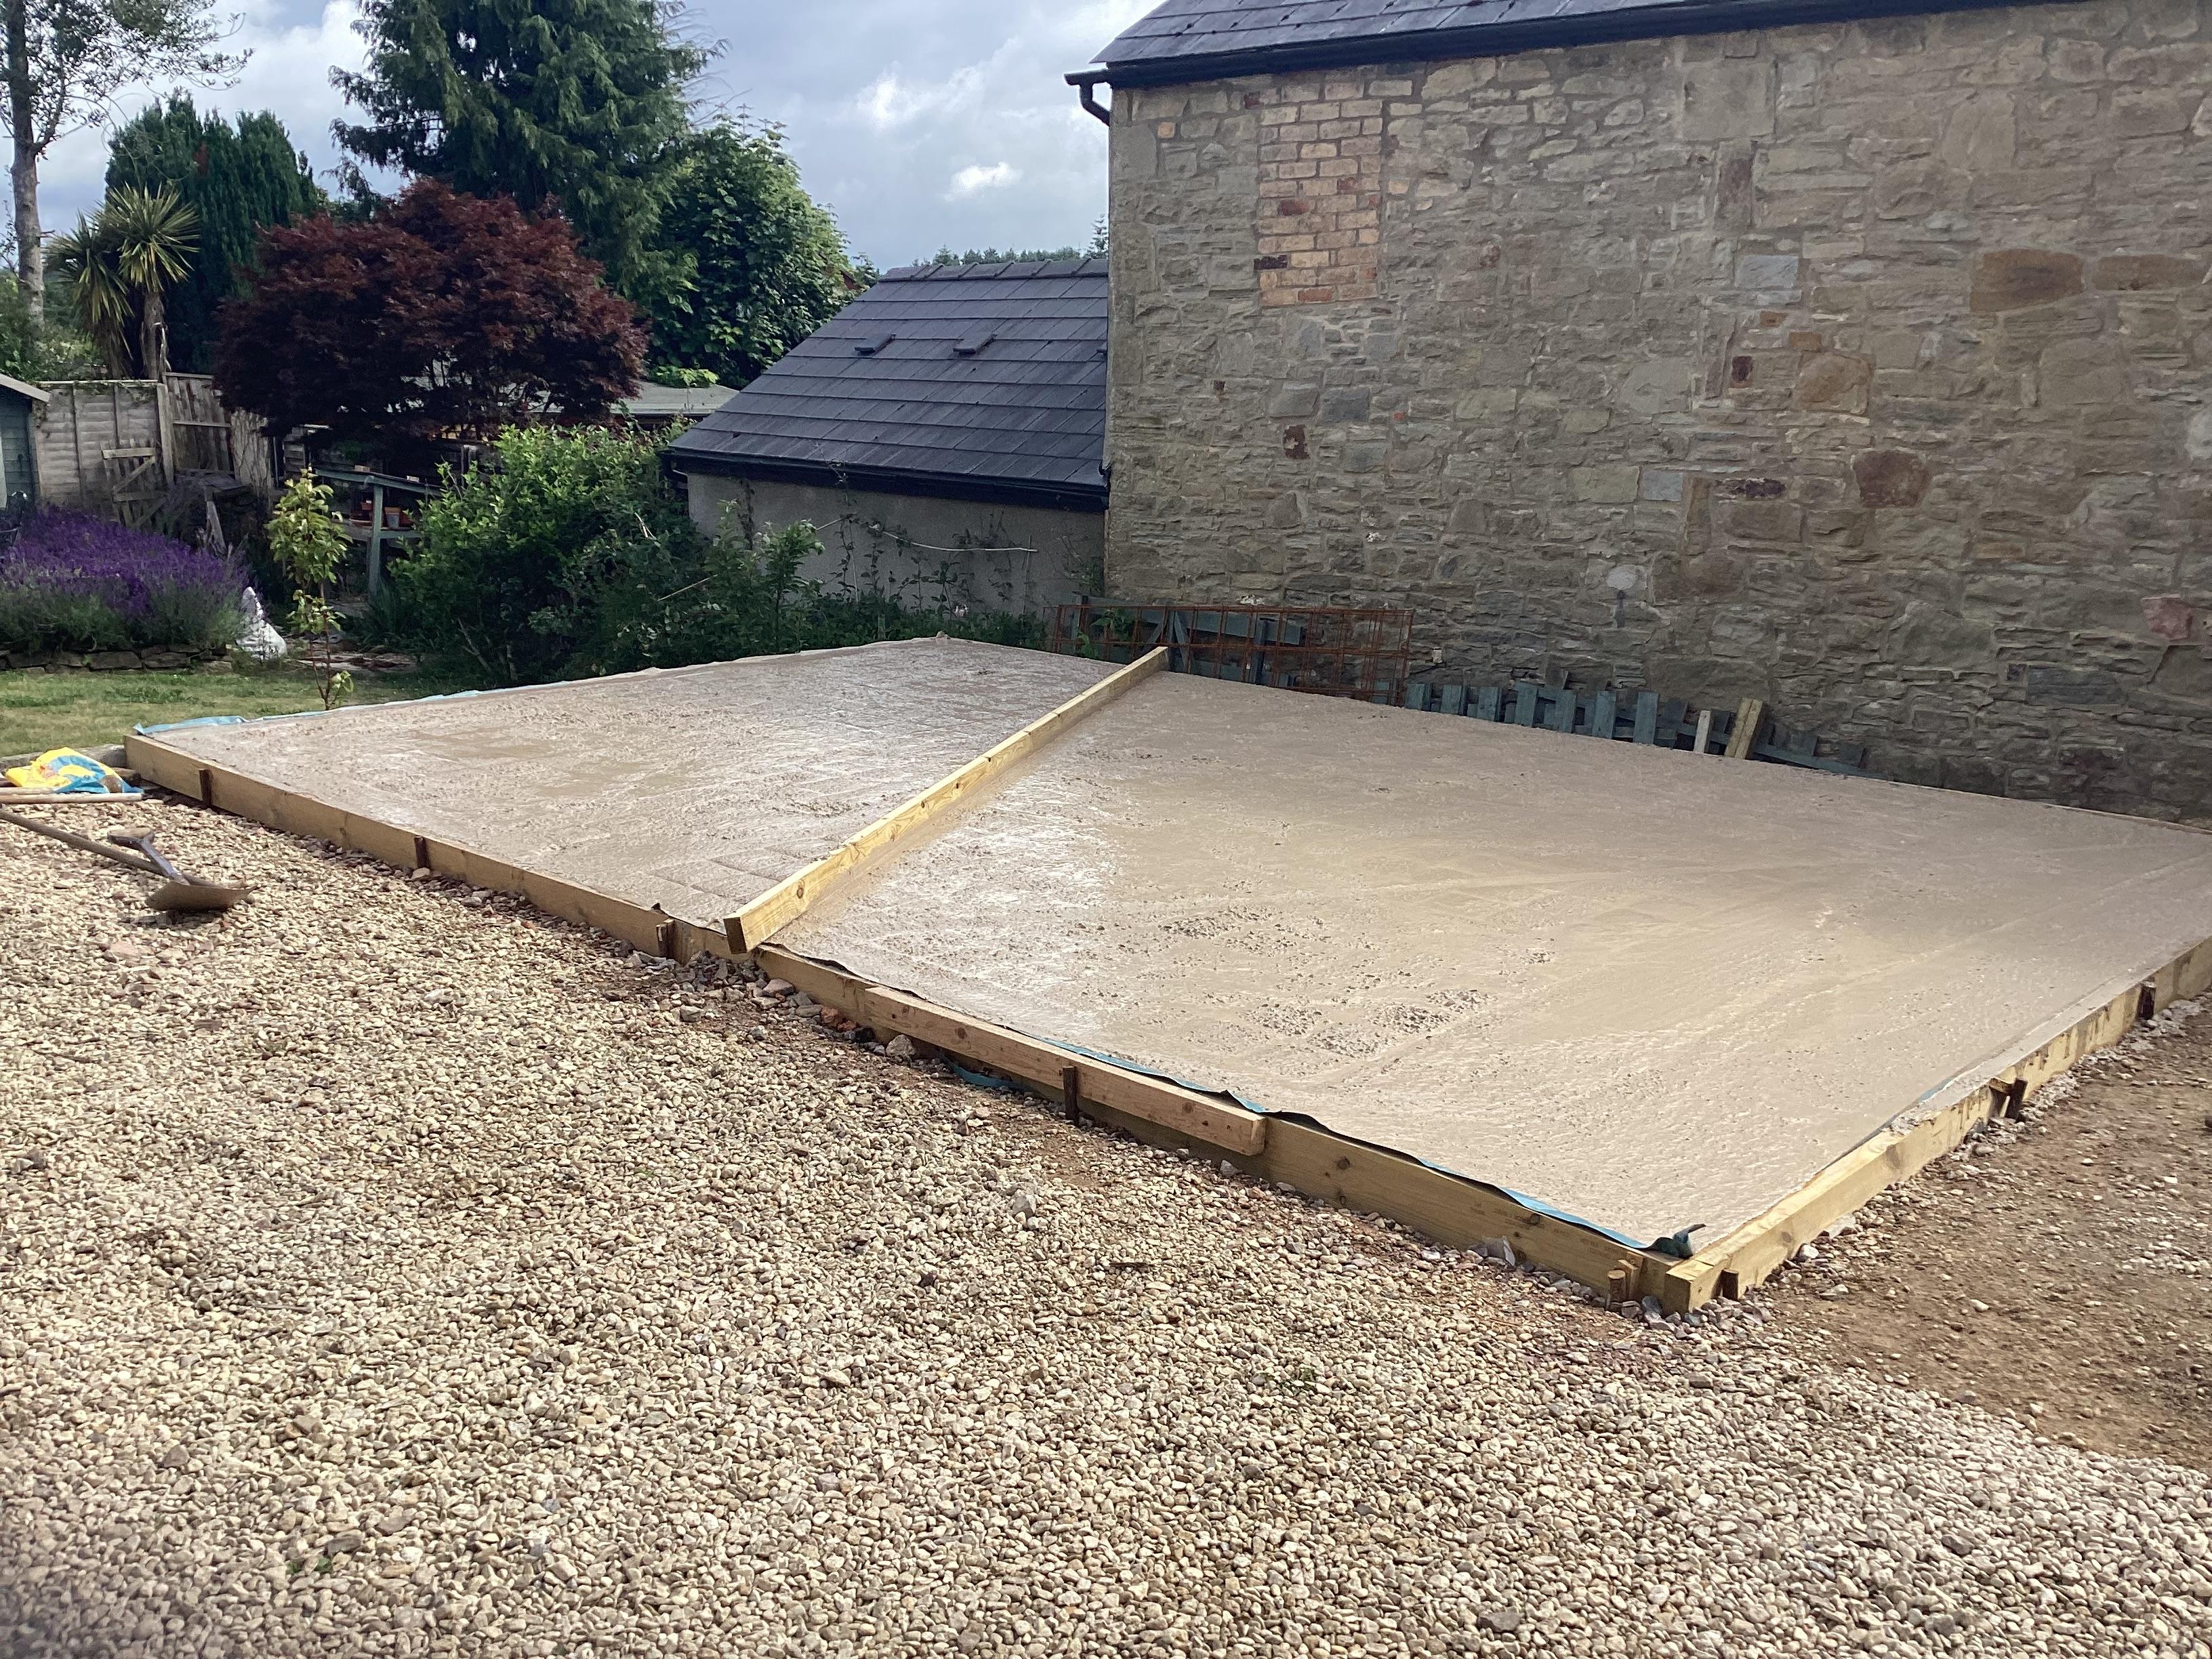
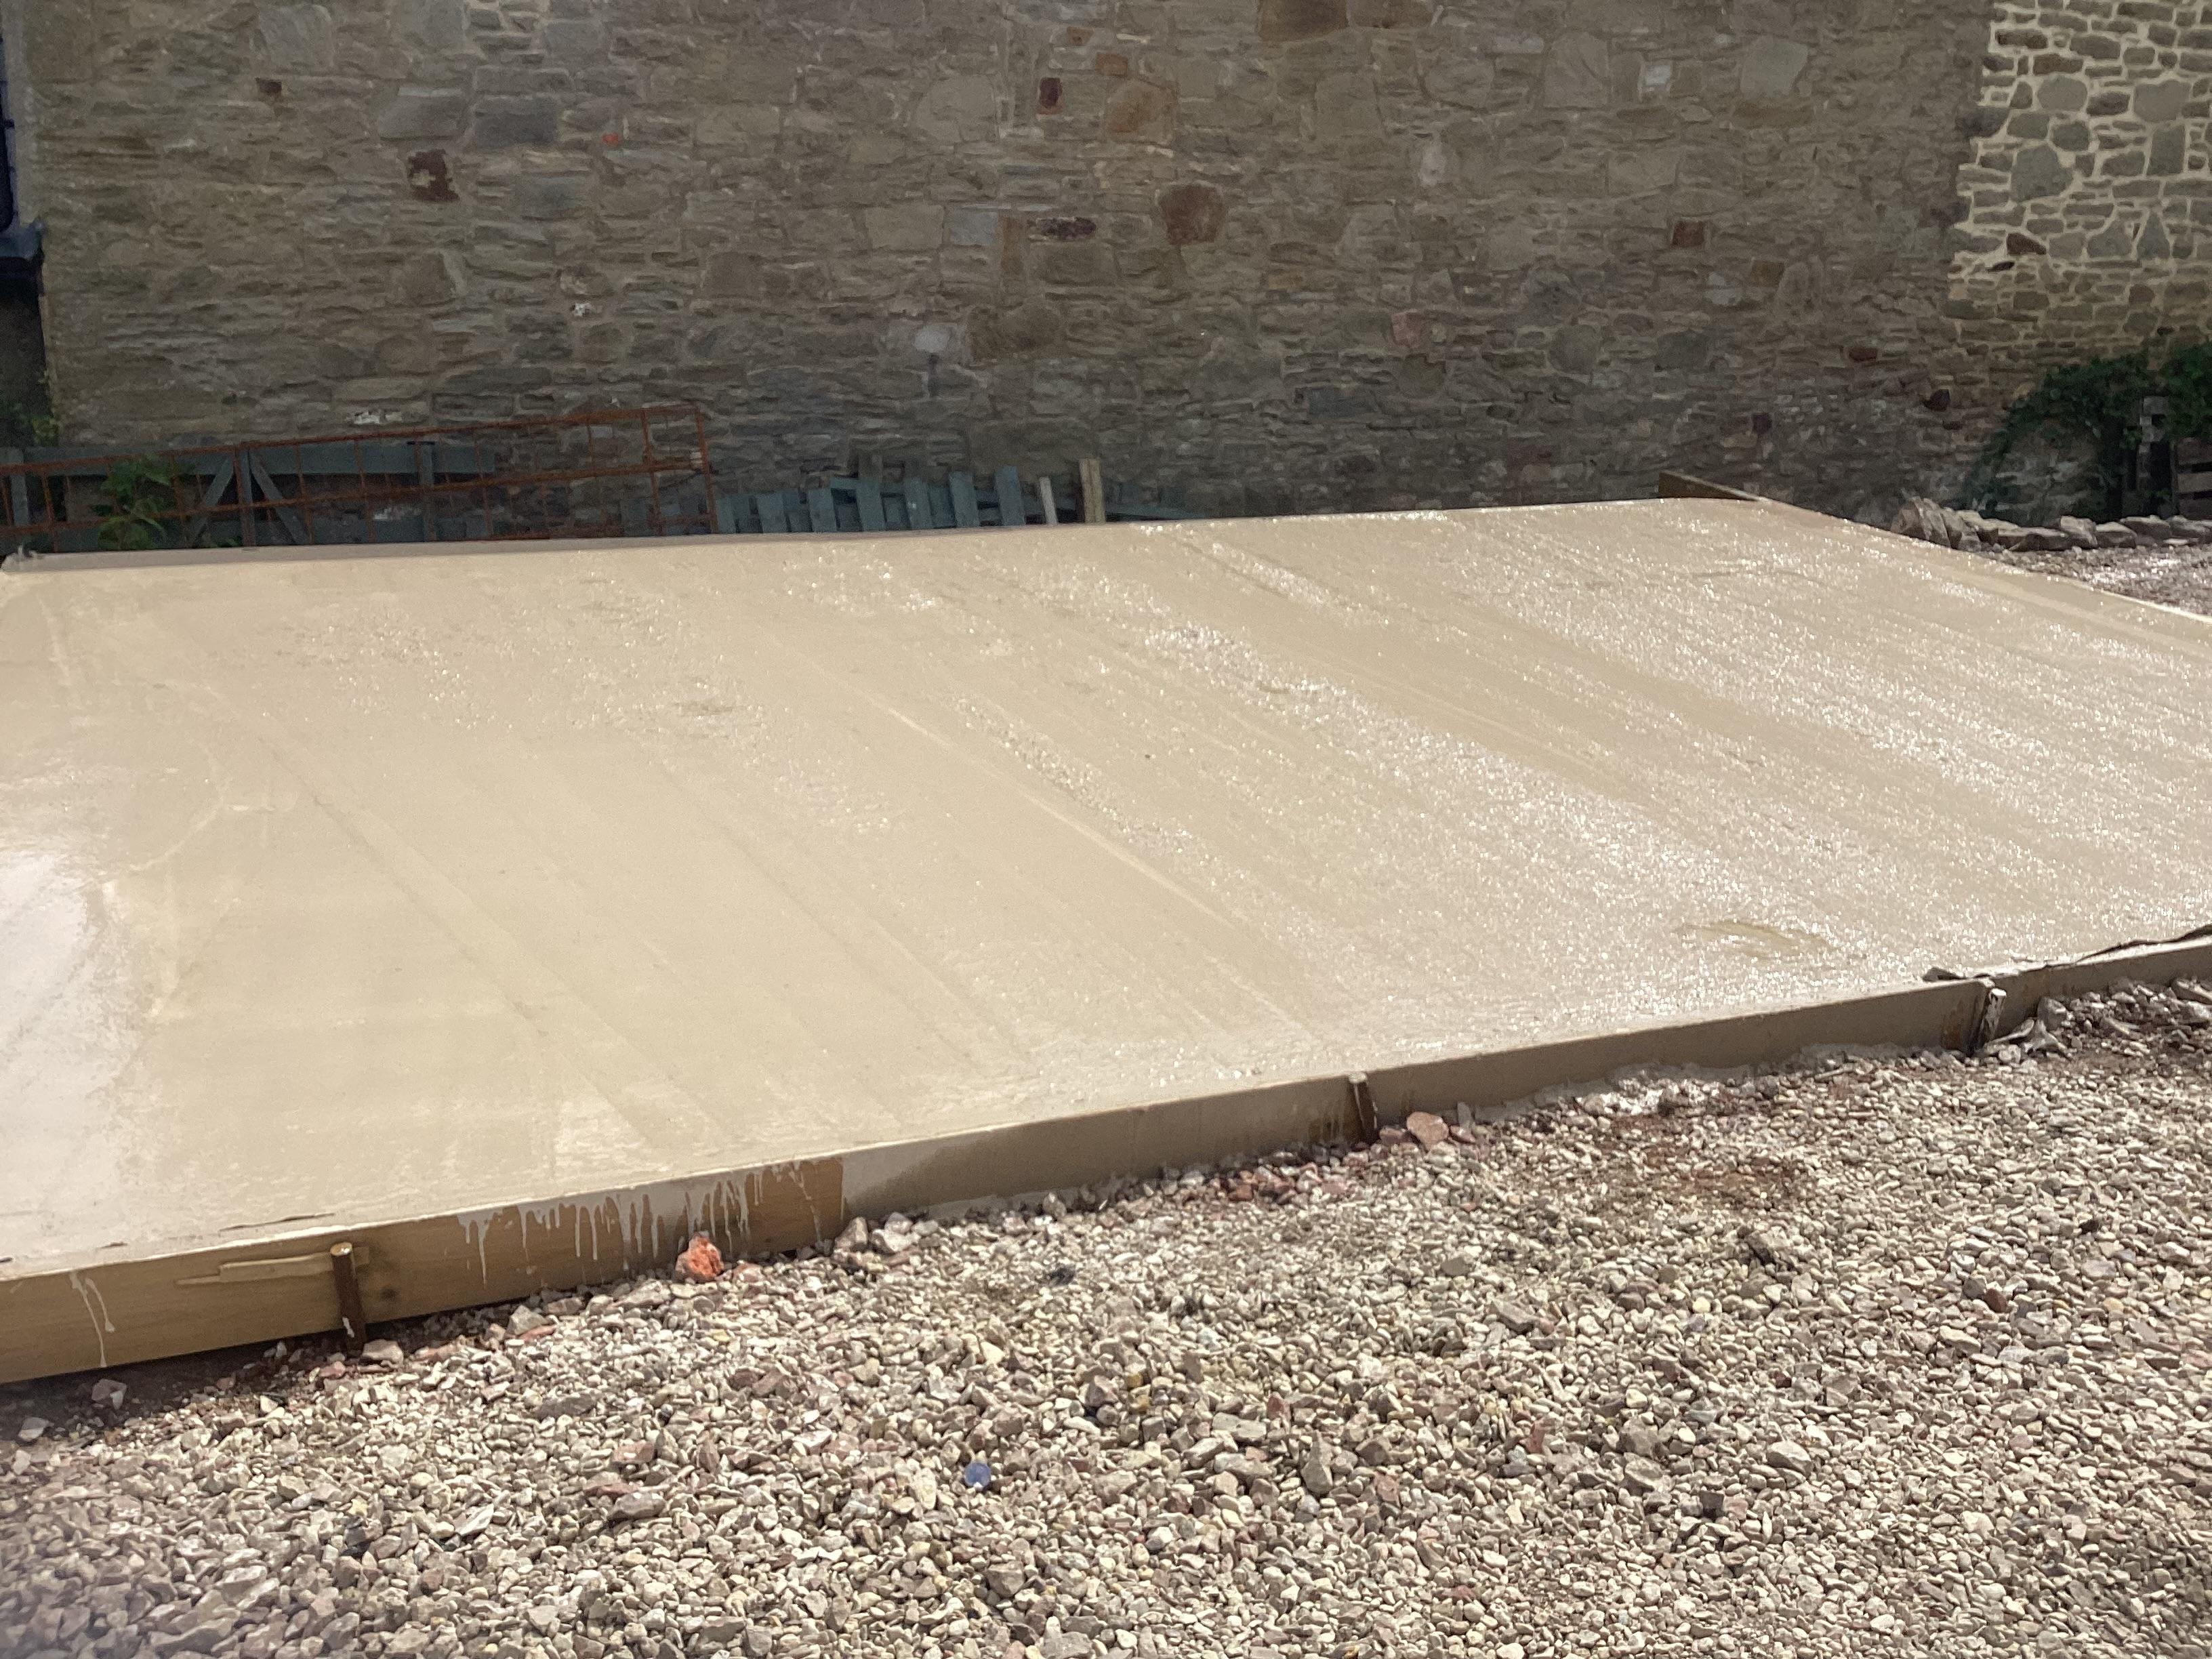
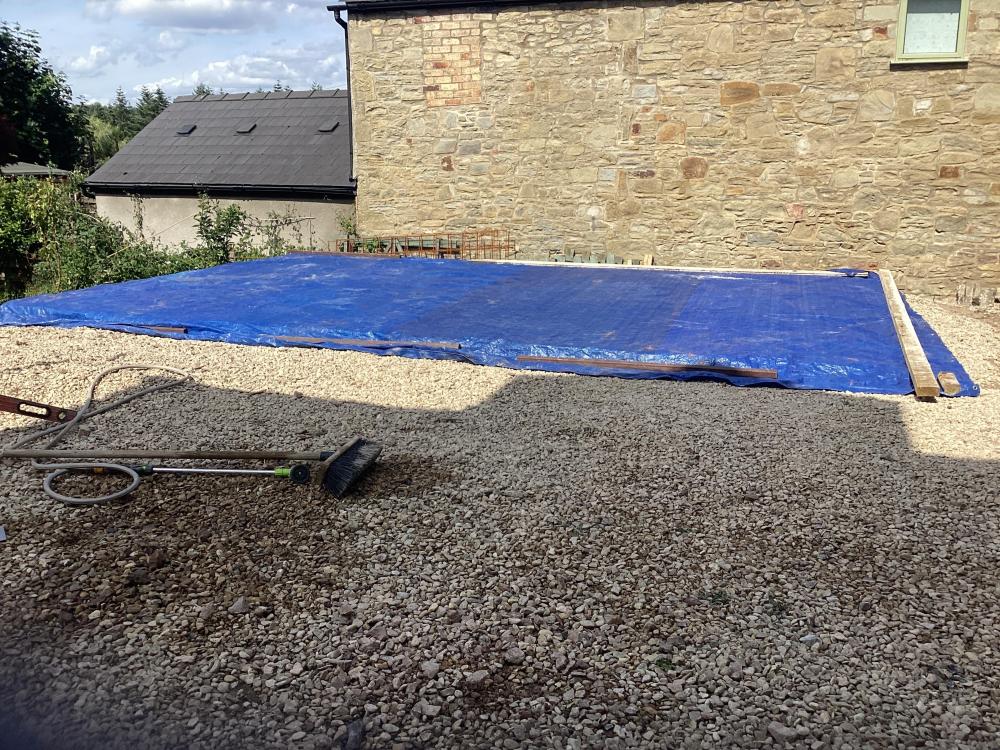
No time to arrange time lapse photo because concrete arrived an hour early 🤯, still down and tamped, just waiting for the bleed water to evaporate and get on it with an easy float.
 2 points
 -
If concrete has taught me anything, it’s that you hire the pump from the company supplying the readymix as a single price job… If the pump goes bad, it’s all on their heads…2 points
-
I assume you know this but mention for the benefit of other readers, DC from the panels is lethal. At the very least leave each string of panels incomplete, i.e at least one dc plug and socket not connected so there is no potential on the cables while wiring the dc isolators and making the connection to the inverters.2 points
-
2 points
-
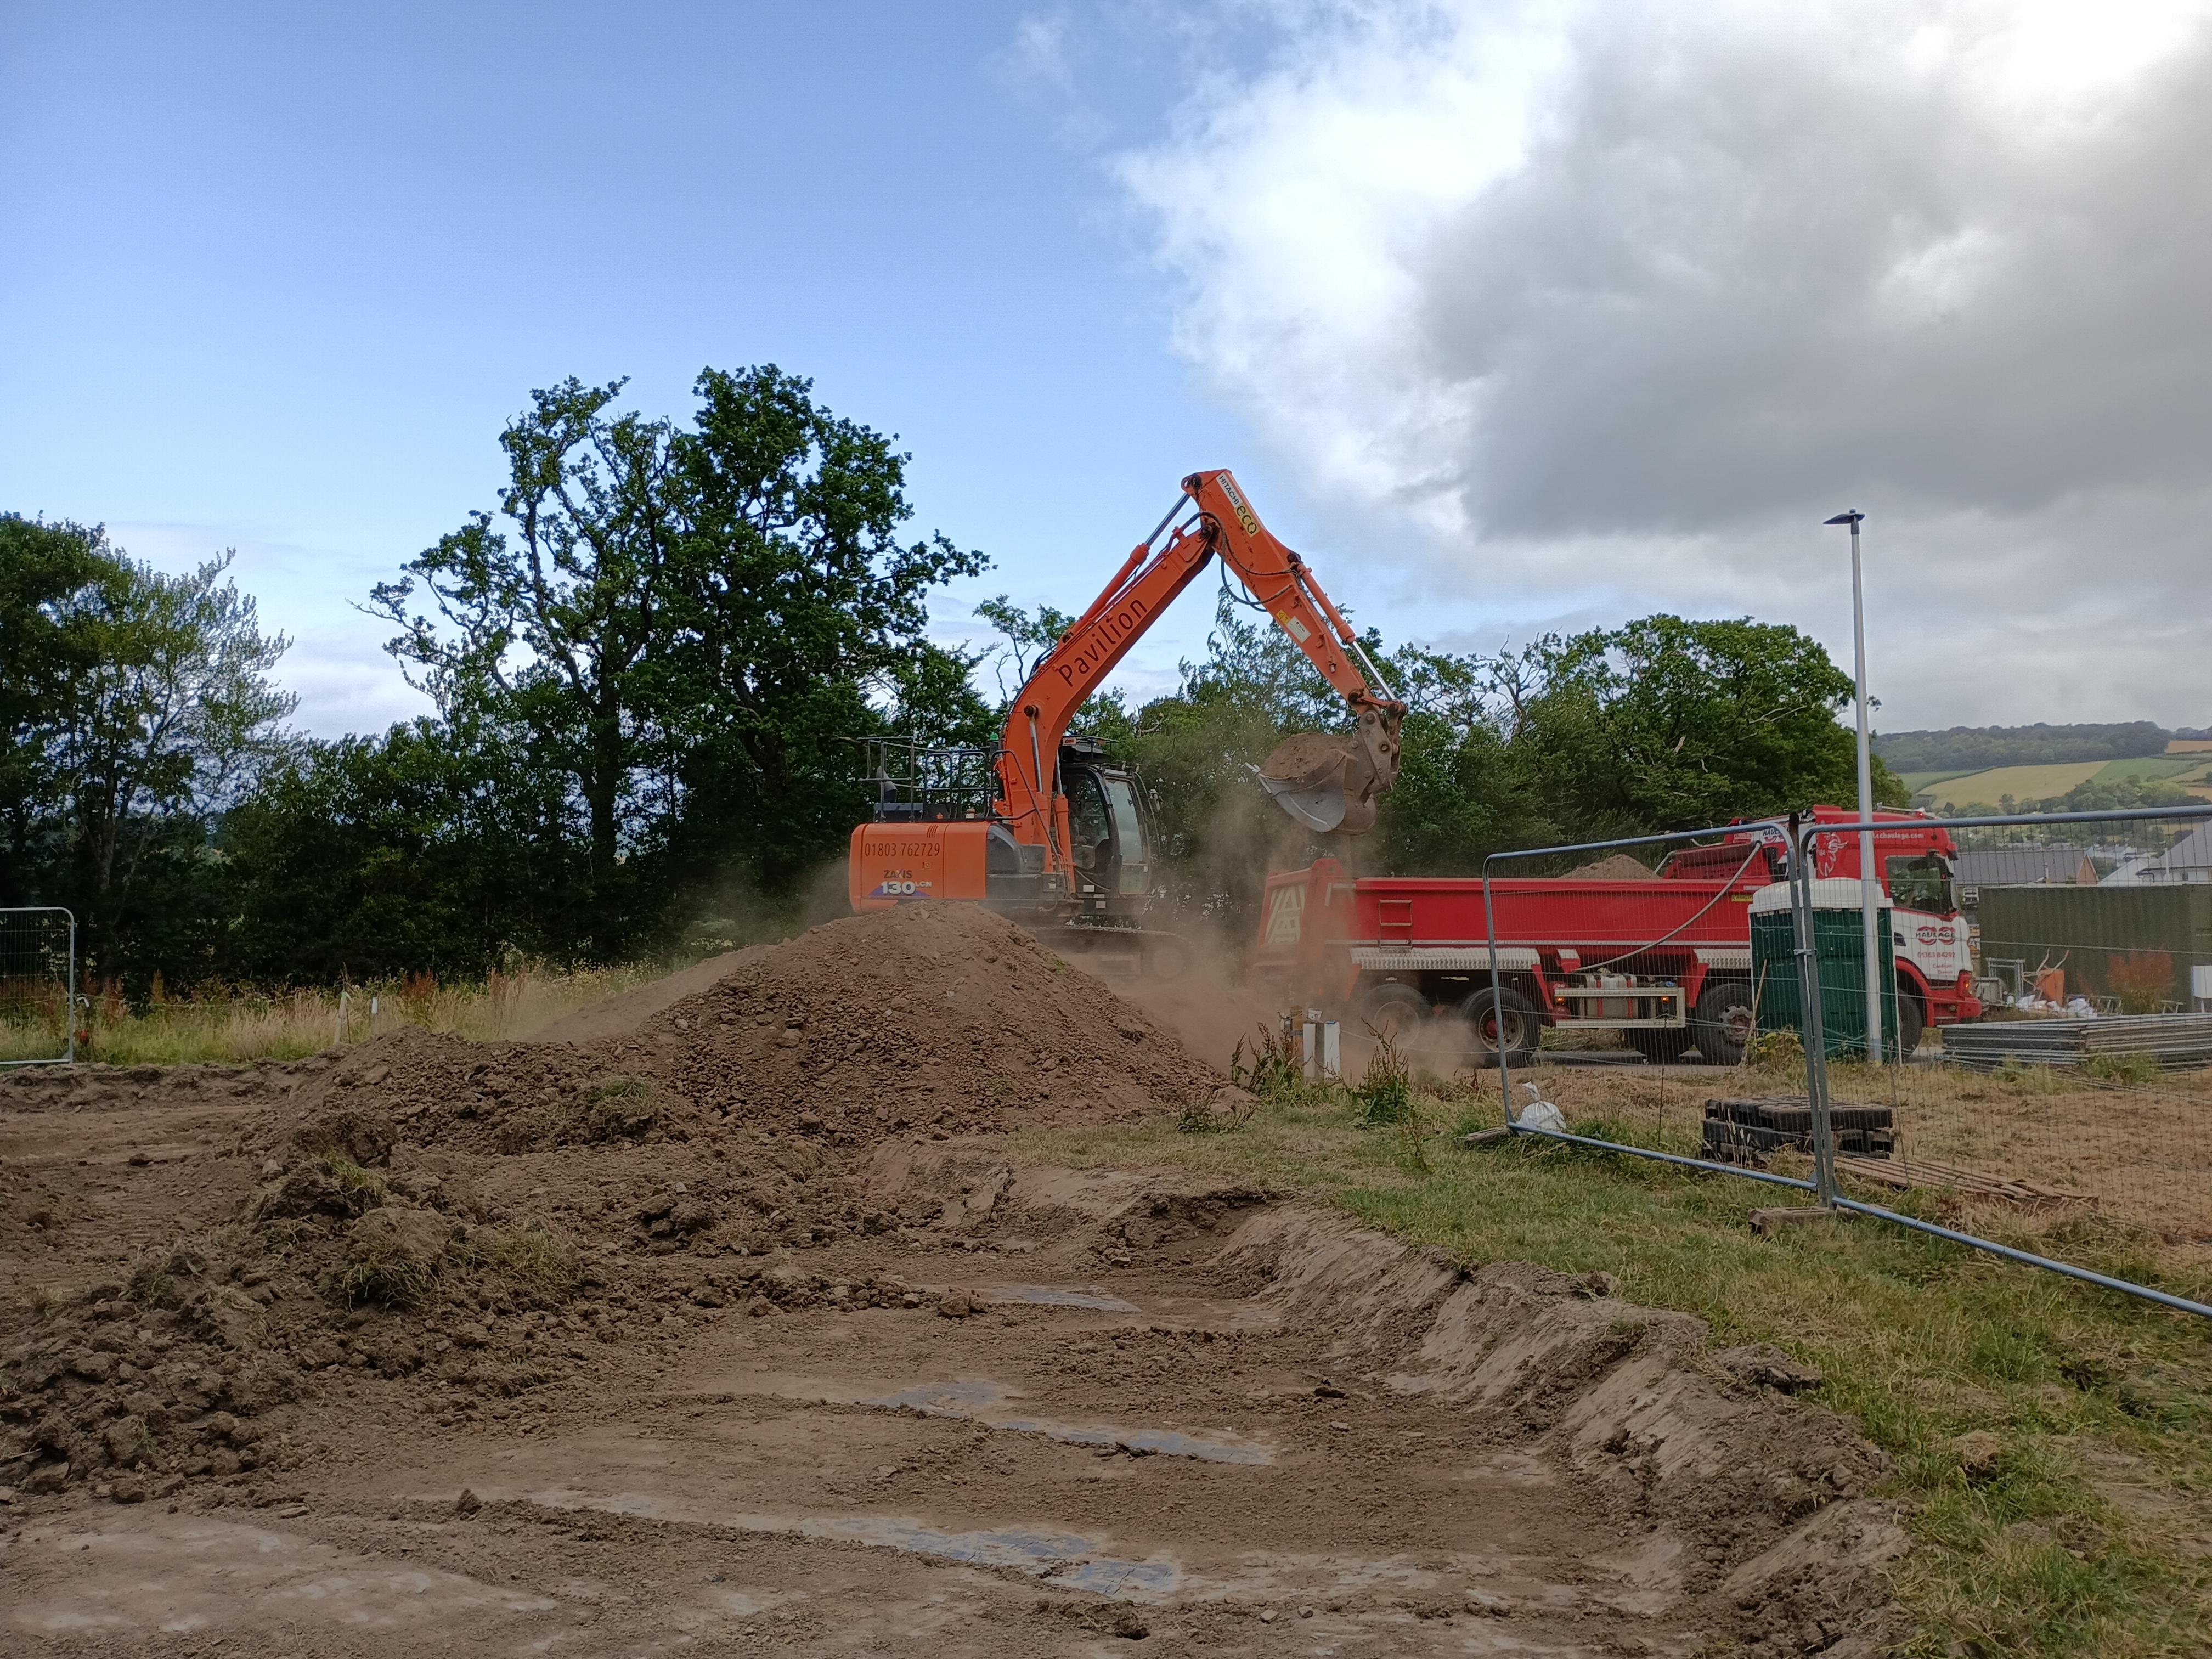
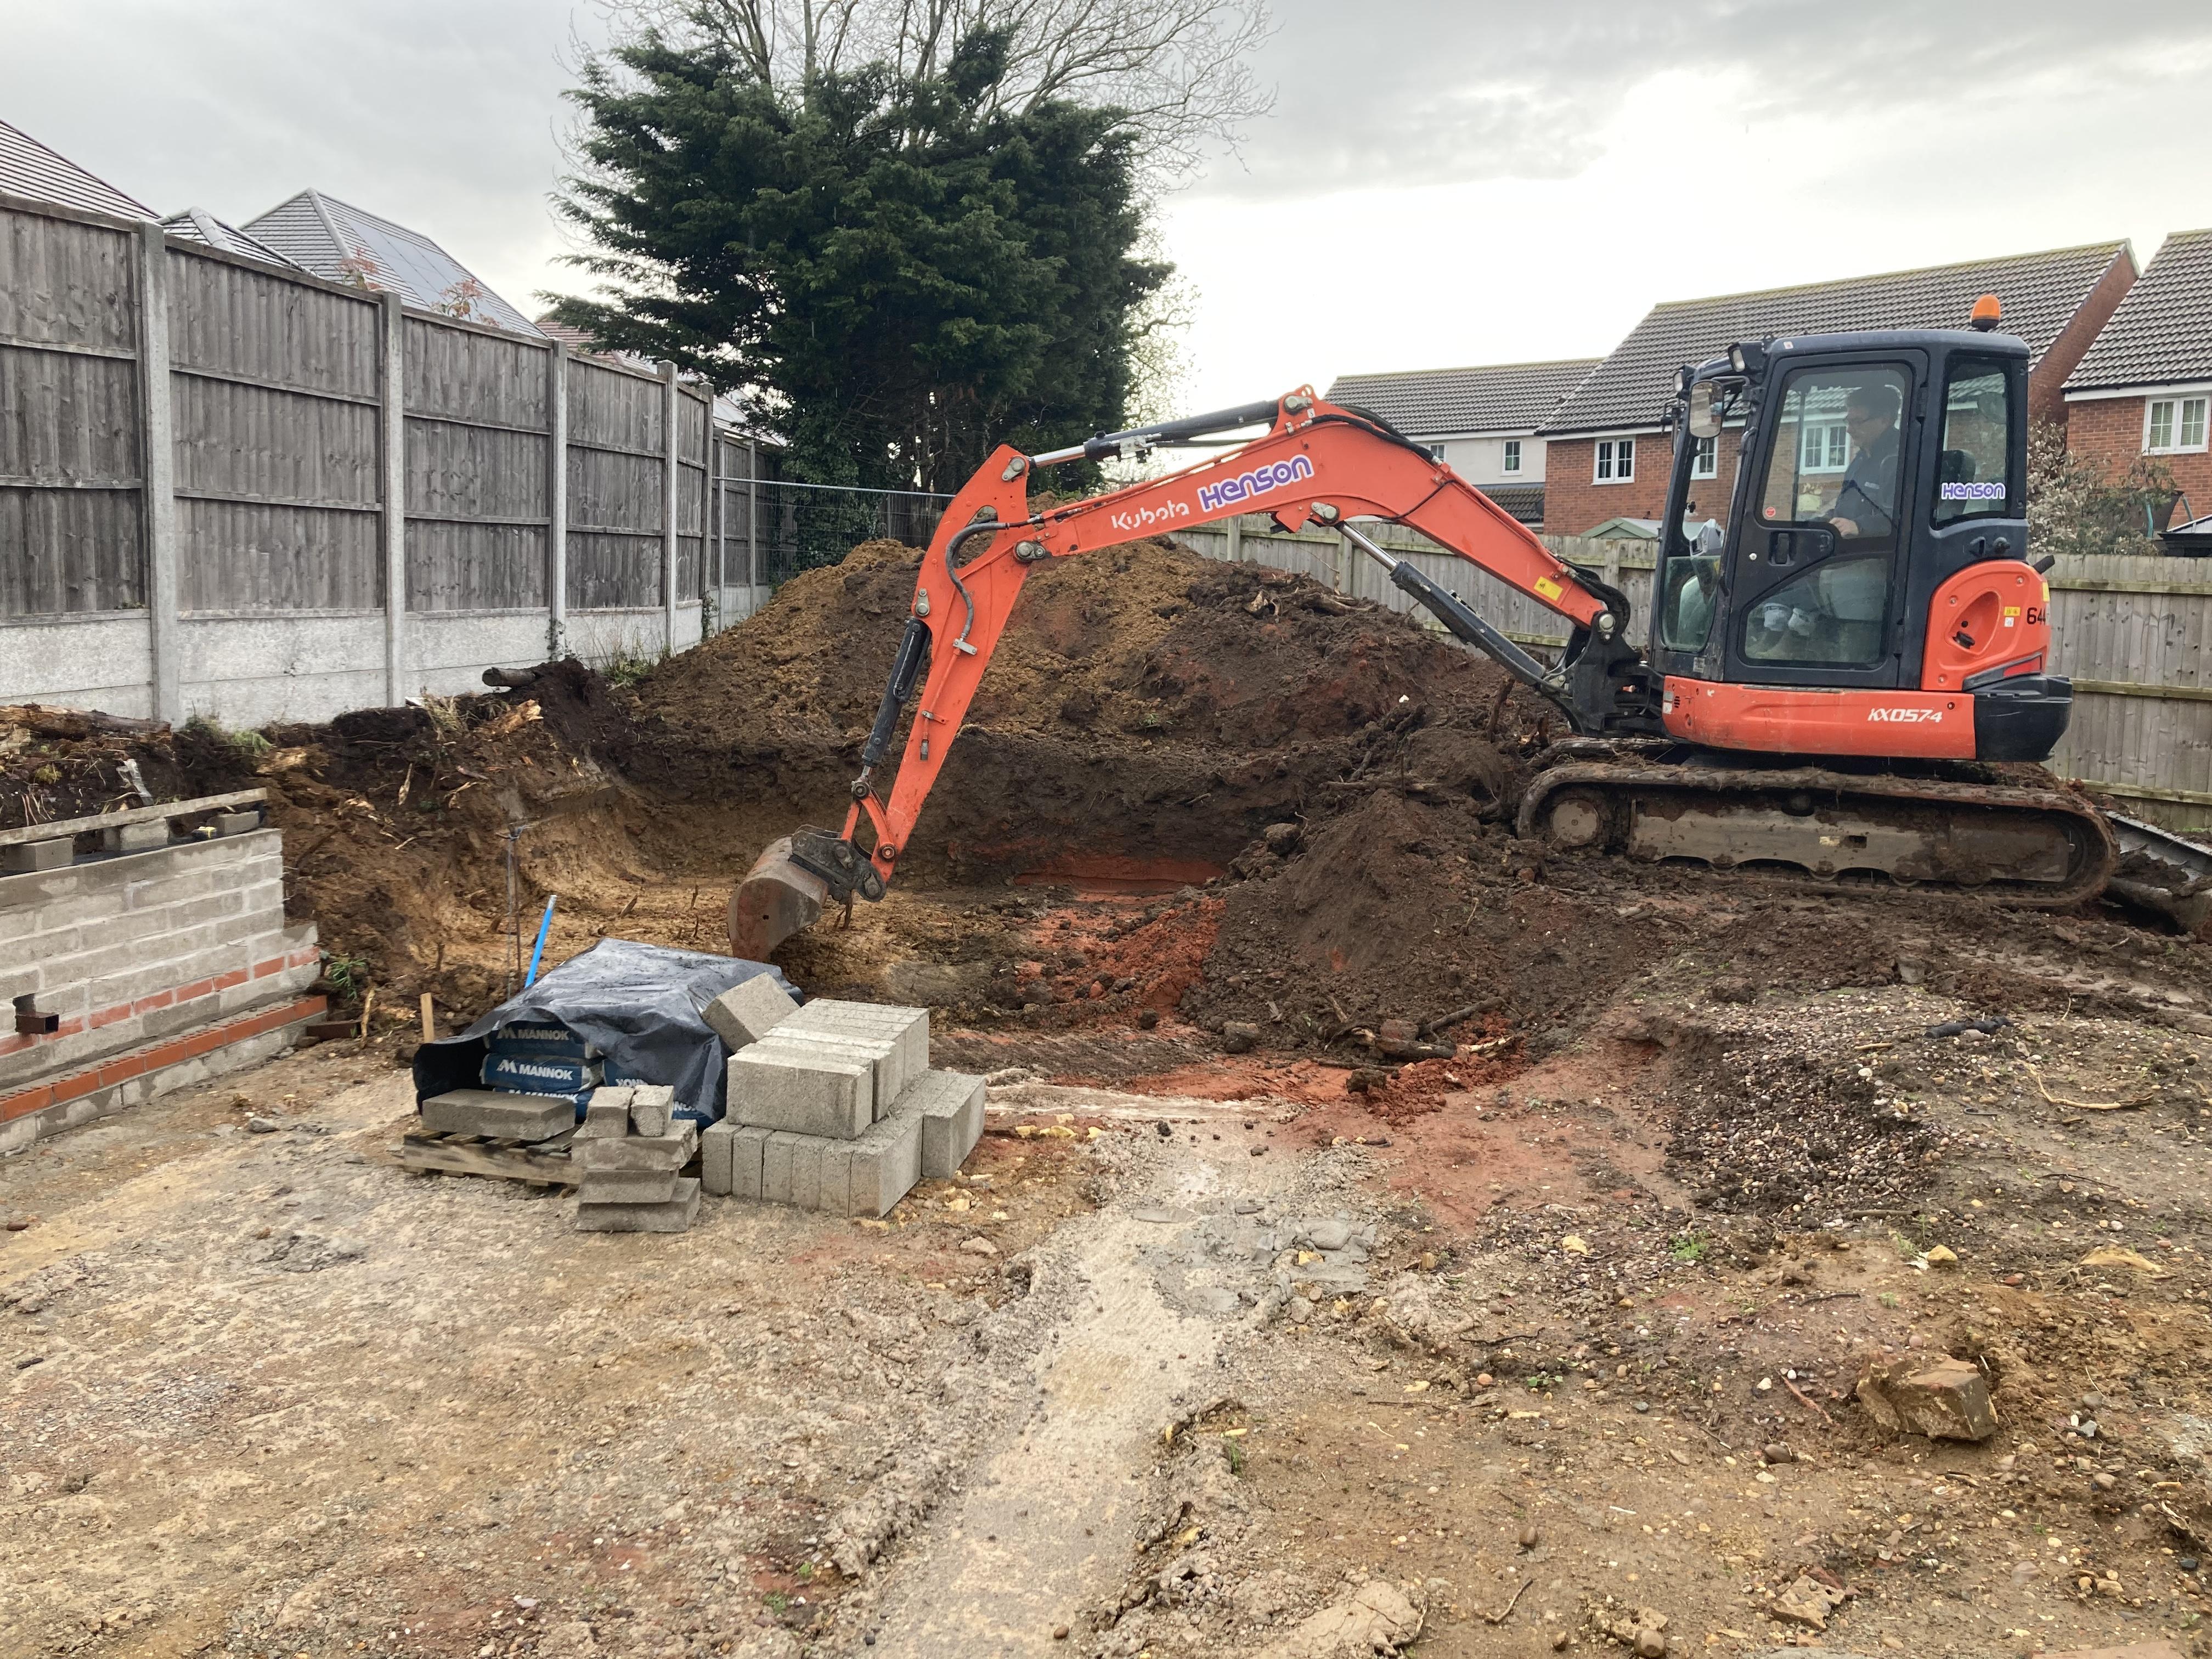
It has been a long and windy road up to this point. I bought the plot in February 22 and have had over a year of ecology surveys, useless solicitors including the county solicitor and a few changes of plans along the way before planning was granted earlier this year. The old house which was formerly housing for workers on the fruit farm had been used as site offices for a national house builder. When the builders left it looked like they just finished on a Friday and locked up and went home. There were 30 odd chairs and several desks in there. The filing cabinets were full of the site paperwork and then the kids had moved in and spread the contents around to make it look like the inside of a plasterers van. Finally we got the green light from the ecologists on Monday morning and with the help of have moved straight on to the demolition stage. I am enjoying this bit. 😀😀😀😀1 point
-
Like many other people, I have had slow progress getting started, but I now finally have the diggers on site.
 1 point
 -
I had a solic and it lasted less than 18 months. Just purchased a cool energy one instead, it can do two immersions sequentially and tells you what it is doing in figures (kW and kWh). Way better and was a similar price. It also has an in built timer so you can ask it to boost during cheap rate times if you want.1 point
-
Go directly onto the screed for anything other than tiles1 point
-
No it wouldnt. Your heat pump cant consume 28kwh in 3 hours, not unless it heats a block of 15 flats. The compressor will be 2-3kw max so max for 3 hours would be 9kwh. There must be a measurement error somwhere1 point
-
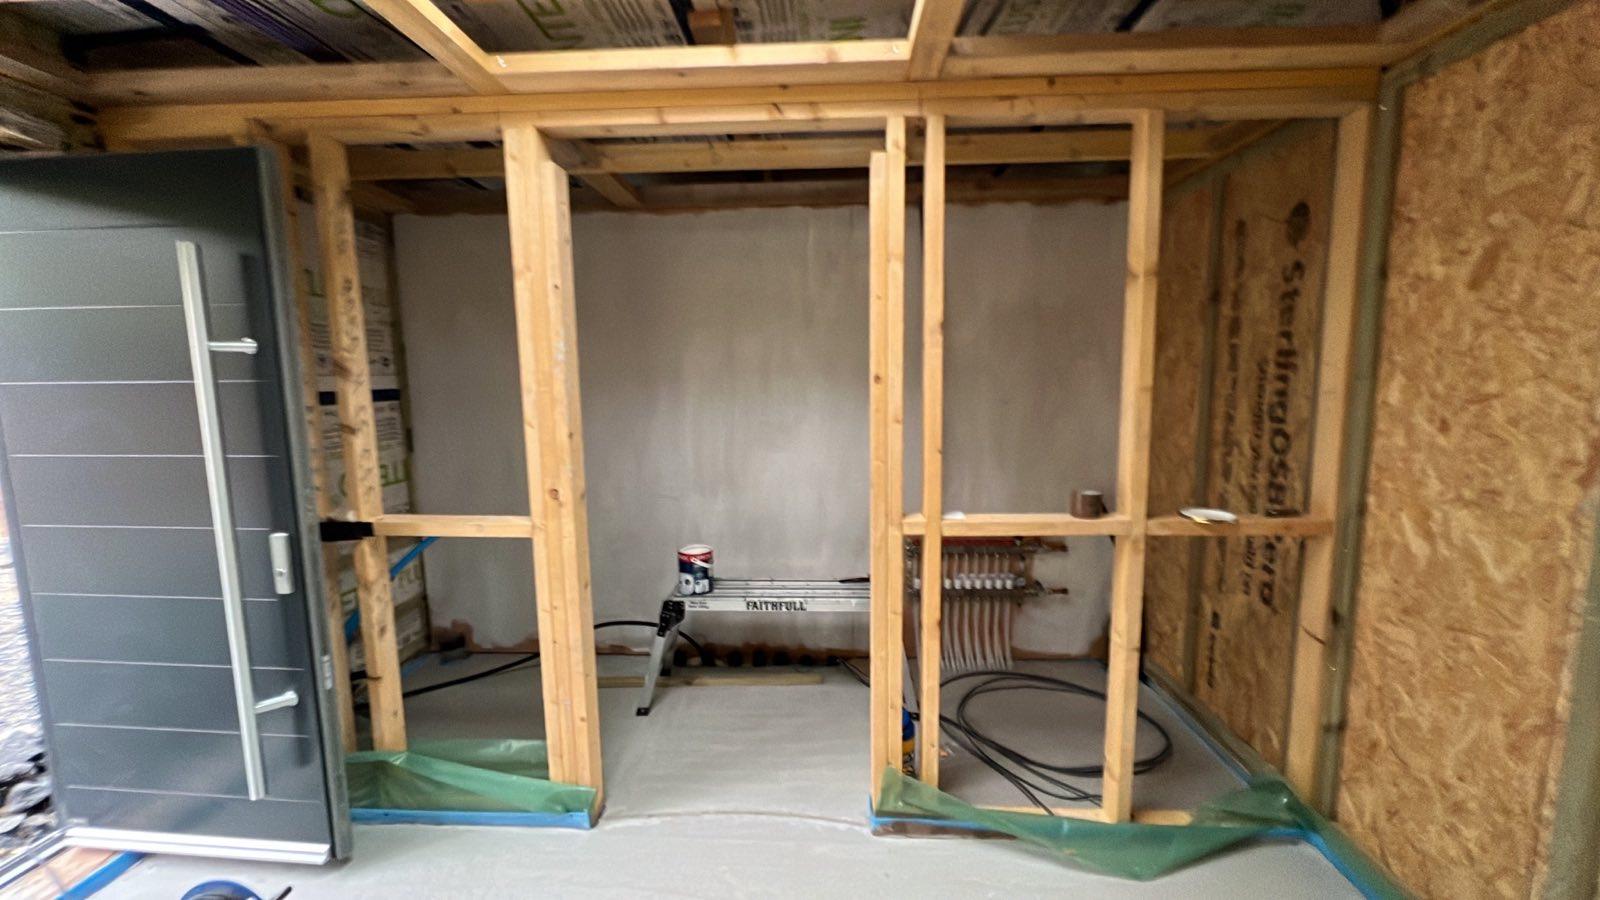
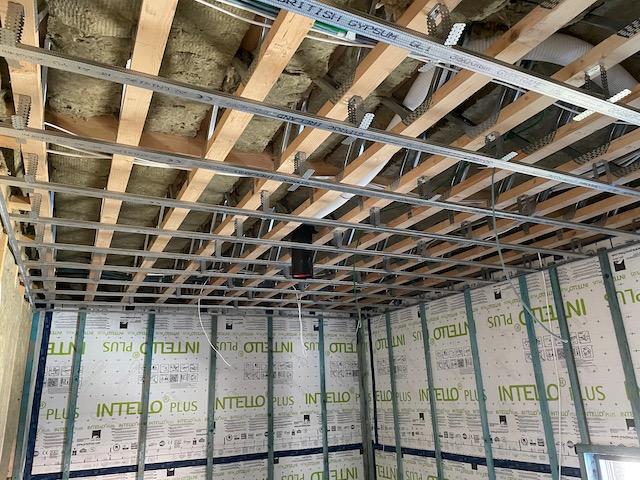
Started decorating 😂 Put up some ply to hang all the plant room gubbins off. It was a bit rough to just leave so quick coat of paint. Will need another two I reckon.
 1 point
 -
Makita = fisher price1 point
-
Yes. Forget it. Crack on. Enforced ? After yer done and dusted...... Just get it done pronto Tonto.....1 point
-
I think that on another thread here, it's been pointed out that it's the neighbours who police the planning conditions... If they're happy, then you'll have no problem.1 point
-
A bit of an update for anyone doing this in future... The search term to use is 'architectural photomontage services'. There are 2/3/4 separate graphics tasks, not all graphics people can/will do all: + Model in 3D model to get 3D shape, probably with no or c..p materials/textures on. + Paint some decent materials/textures onto the model. + Adjust lighting / white balance etc etc to approximately match the donor images. + Tweak the chosen images for lens distortion etc and remove any unwanted artifacts, objects etc. + Position the painted 3D models on the chosen images, in the right place/orientation. + Cut out from the tweaked images any bits of the foreground that need to be super-imposed and place over. Voila.1 point
-
I have PV with a grid tied inverter, a solar diverter feeding the immersion and currently a gas boiler. I set it up so the boiler dhw cycle is at night. Furthermore the immersion is set to a higher temp than the boiler dhw thermostat. Thus if there is sufficient PV, all the dhw heating is by PV. If there isn't then the boiler tops it up. Works perfectly. I have 4kWp so I can turn the gas boiler off entirely from April to September. However the same principle should work in your case.1 point
-
@TonyT See the OP. This thread is about preserving PP from the "must start within 3 years" condition. The stuff you mention will be relevant once the OP starts building in several years time but now they need the BCO to confirm work has started for the Planners.1 point
-
it's already happened
 1 point
 -
If it is a planning condition and you breach it and someone complains you will get a visit from enforcement and possibly a breach of condition notice. If you continue to breach they can take you to court.1 point
-
I am near Elgin (NE Scotland), just fired 12x 285W panels, apart from a brief spell when the sun came out they are generating about 500W on a generally cloudy day. So it can be hit or miss, so I wouldn't rely on it. My-PV do a DC immersion which can also take an AC input, it comes with mppt controller built in. Bimble solar do kits with panels https://www.bimblesolar.com/elwa-PV-water-heater1 point
-
Fair point. Each to their own.1 point
-
Why would you need to heat the bathroom in the summer in a passivhaus? We're not passivhaus and have just had 2 weeks of rain and very little or no sun, outside temperature around 14 and lower, house hasn't dropped below 20. We still get people coming into commenting how warm the house is. Had an hour or so of sun this afternoon and the UFH has just kicked in.1 point
-
I've done lots like this. If the concealed brackets are fixed to the wall before templating i drill oversized holes usually 15mm in back of the stone shelf then use chemfix on installation. The shelf should be 30mm thick. Alternatively we glue stainless threaded rod into the stone at the factory then drill holes into the wall and fill with cemfix. This is usually better for brick walls. If you want to put weight on it recessing the shelf into the wall makes it a lot stronger.1 point
-
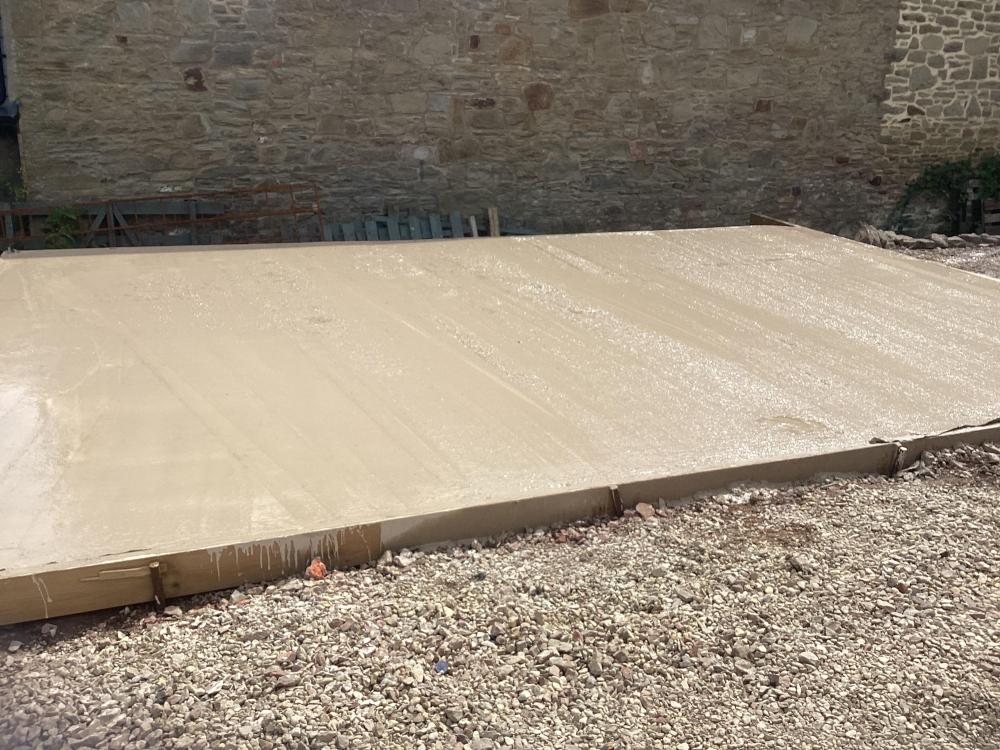
Yes large tarp ready, finish is not quite as good as I would have liked or did before with a power float but it’s only a garage, mistake I did make was bringing the dpc up and over the shuttering so unable to get my edging trowel around the edge. I have a concrete grinder disc fir my angle grinder so can always tidy it after it’s set hard. Old chap needs a lie down now 🥱1 point
-
I'm grappling with similar. You can't run a heat pump at tiny load. It will need to either dump a shedload into a thick slab then shut down or you'll need to use a volumiser/buffer type setup to allow (a) a high enough minimum flowrate for the unit to operate and (b) sufficient active system volume for it not to short cycle. Burn and coast into a slab is only viable on the ground floor. First floor needs something else. Run the math on how much heat the heat pump will lose (in the case of an outdoor mounted unit), the volumiser/buffer will lose, all the spaghetti from heat pump to/from the buffer will lose, and all the pipework from the buffer to the UFH zone will lose...vs the actual heat delivered into the floor...and I doubt you'll beat a temperature-controlled direct electric setup for a small bathroom. Especially if you then need to take that heat out of the rest of the house with active cooling! There's some argument for using the DHW cylinder as a buffer for the heat pump. You have one anyway. You could run water through the DHW cylinder coil to pinch some heat into the UFH, and allow the heat pump to reheat the DHW in the usual way. That avoids you having a dedicated buffer. I think @Radian toyed with similar. It's less sketchy than using a DHW recirculation loop through a potable rates brass/stainless towel rail for heating bathrooms... I think I'm going to do that AND fit an electric mat / sensor (given the stuff all cost of it now) before laying the floor. Then I'll probably use a wooden floor finish (on top of a suspended wooden floor), in what is otherwise a warm building, and never ever use the UFH. (that's what happened in the house in Cambridge - if you do wood rather than tile you don't need the underfloor heat) So yeah. What @Nickfromwales says. As usual. But perhaps do some head scratching about how you would suck heat out of the DHW tank for running the wet UFH (and the towel rail) in the summer. The COP isn't amazing when heating DHW to 50C but it's better than 1.1 point
-
I might be wrong but I think you can only reclaim the vat on items you purchase yourself under the >10 year scheme.1 point
-
A 240W mat will probably give you overshoot tbh, I'd stick at 100-150W max. Nothing will melt as you need to cap the floor temp at 27oC max anyways, and if you're anywhere near 27 then you've done something VERY wrong. Electric mats don'y usually turn on/off, they usually go from one temp to another (comfort & economy / aka setback) so maybe just allow them to cool to (x)oC instead of down to frost setting? If you have PV the maths (running costs with using setback temp vs "off") won't be too uncomfortable. FF bathrooms yes, just electric. GF with slab go for both afaic, as electric mats are cheap enough to install, less controller if you insist, and then retro-fit the controls later if so necessary. Always separates the miserly from the luxury-feel folk Give me a little 'luxury' every day of the week!1 point
-
I'd say pointless, if the last few I've installed are anything to go by . Quieter than a mouse whispering and zero movement / vibration etc. Piped with rigid copper too and not a flexi in sight.1 point
-
The easy float does a good job, still trowelling away …..
 1 point
 -
I have the 8kW version. I bought the control interface on the basis that it should be simple to install and just work. No doubt you could get the HP to work with other controllers, however I doubt that it would be that simple. The controller talks to the outdoor unit over a 2 wire data connection and there are no obvious control inputs. Apparently you can control it over the modbus interface, but that isn't cheap. Using their controller has a potential advantage in that it will speed control the circulation pump, if you use a compatible one, which might improve the performance.1 point
-
It's unnecessary with a concrete pour afaic, but necessary with a Flocrete or liquid screed. Radon is down low with Kore and MBC, so doesn't need much more protection other than at the perimeter, where it is exposed for a while. The upper level of EPS becomes the 'sacrificial layer' and protects it.1 point
-
Points to note 1. I've moved the Radon membrane between the two layers of EPS and forgone the Sand binding as the EPS will protect the membrane. You could then use 150mm X 2 of Floor insulation then which will give you a U value of about 0.11. 2. I've put a French Drain at the perimeter which is always a good idea to keep the bottom of the walls dry and prevent splashing. 3. The cavity insulation extends well below the floor insulation. This will ensure any mortor droppings don't fill the cavity and create a thermal bridge here. 4. The PIR upstand is "pinned" in place by the floor insulation. Otherwise it comes loose during the floor pour. 5. Let the slip membrane extends well beyond the internal leaf during the pour and trim it back later. It'll protect the Radon membrane and the PIR upstand during screeding. 6. I've included the block sizes to allow for normal cavity tie spacings.
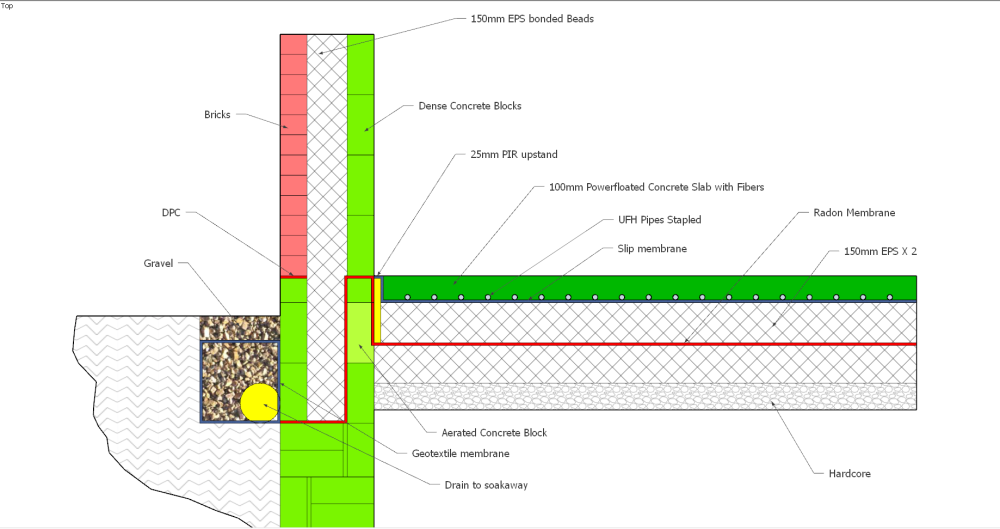 1 point
 -
To amplify @ProDavecomments, this is the procedure I am following. DC panel connections. Make extension wires from first and last panel, install MC4 connectors and terminate at isolation switch. Clip all wires into place - I used UV resistant cable ties secured to unistrut. Connect panels in series and connect extension leads. Using multimeter check voltage is present at isolation switch. Mark each positive wire terminal. DISCONNECT TWO PANELS IN EACH STRING. Use multimeter to verify no voltage present at isolation switch. Make up and terminate cable between isolation switch and inverter. Ensure positive and negative terminals are not mixed up. Make all AC connections prior to connection to consumer unit. Once all connections are made reconnect PV panels. Then follow switch on procedure detailed in inverter manual.1 point
-
Our two most wildly inaccurate quotes came from a professional cost estimator and a professional builder…Yet another project manager eyeballed the finished project and estimated our costs surprisingly accurately after a brief tour of the property. My point is there can still be significant differences regardless..We had multiple costings from many sources some paid for and some free “ calculators” and this informed our feasibility assessment. We went with a main contractor. 3 months post completion with all the costs calculated.. we ended up circa £1850/sqm for build costs including professional fees, investigations, planning, landscaping, light fittings, solar, ASHP, 3d renders etc.. Main exclusion to this figure: Land costs as we were a demolish and rebuild project. We are south east based but not in one of the more affluent parts of east kent.. All the variables matter.. Design, Build method, Spec, Main contractor or actual self build, Project manage yourself or not, Slope of plot and location…Serviced plot or no..So no easy answer..I found using as many costing and estimating resources as I could ( most of them free including this forum and most of them allowing me to change the variables a few times) as well as the TF companies even though we eventually went with Masonry gave us a good indication of financial feasibility.1 point
-
I’m a month behind my plan 😂 We start cladding the outside next week.I have all the battening system on-site and the larch turns up in two weeks. Been slowed up with that as trying to work out where and much fire cavity barrier to fit. Architect had it everywhere which added up to 160m! and thousands of pounds. However I asked the building control officer to pop by and he thought it was mental and was quite happy to go with my suggestions so 90m of the dear stuff and vertical timber stops on the corners. I also has the foundation wall rendered after all in Weber Pral D and render aid. I tried painting the insulated blocks with black jack but it looked terrible and didn’t go on very well. The render looks great albeit it wasn’t cheap to do.1 point
-
I second get rid if it’s not used, take down below roof level and tile/slate/whatever over.1 point
-
Have a look at section 56 of the Town and Country Planning Act 1990 (it's on line). That section sets out the time when development has begun. You seem to be relying on paragraph 4(c) "the laying of an underground main or pipe to the foundations, or part of the foundations of a building". I would suggest that you would have to take the pipe from the soakaway right up to the location of the proposed foundations, not just stick in one length of drain. I'm slightly cautious because argueably there are no foundations are there? If you are concerned that the LA may be awkward (if perhaps it was a contentested site) the most secure way is to dig just a small section of foundation trench, then there is no possible dispute because paragraph 4(b) is clear. Get that inspected, photographed (and then backfilled) and write formally to the LA with the evidence advising that works have materially started on site in accordance with Section 56. The whole hog would be a LDC but it would take a really difficult LA to try and overcome that evidence. Is there a reason that they would take such an extreme approach?1 point
-
I just love a hash 4af3a3b61d25366b7b1efa7923eea289.mp4.2618557127cdcfbcb915c3701917b219 Bit extreme, I would have just redecorated.1 point
-
4af3a3b61d25366b7b1efa7923eea289.mp41 point
-
I was unable to complete the garden office which will serve as site office and canteen during the build due to trying to avoid it getting demolished for free.1 point
-
Whilst waiting for the legal processes to go through I embarked on clearing the rear of the site and reducing the ground levels and building a 43 m long retaining wall. I made use of the digger to get the base in for the garden office. I actually built the garden office in sections one cold winters week in the living room of the house.
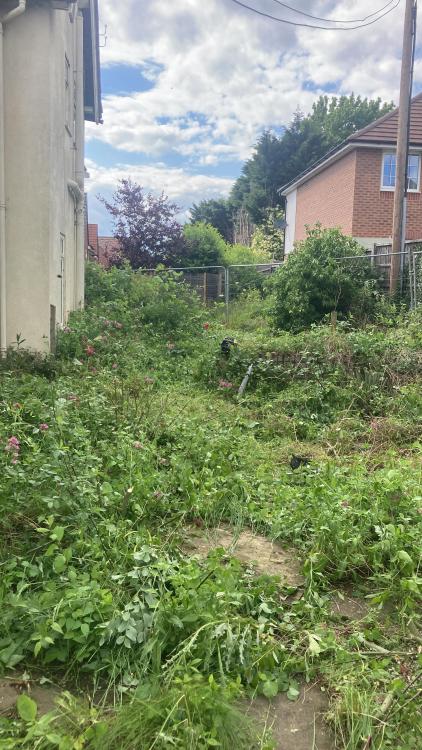
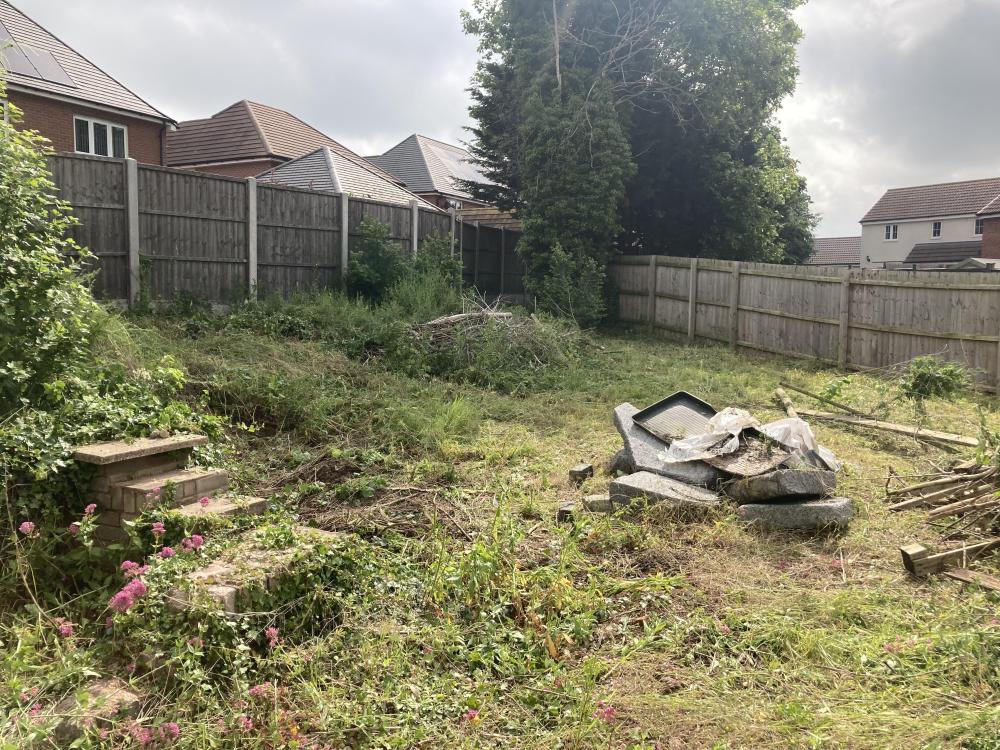
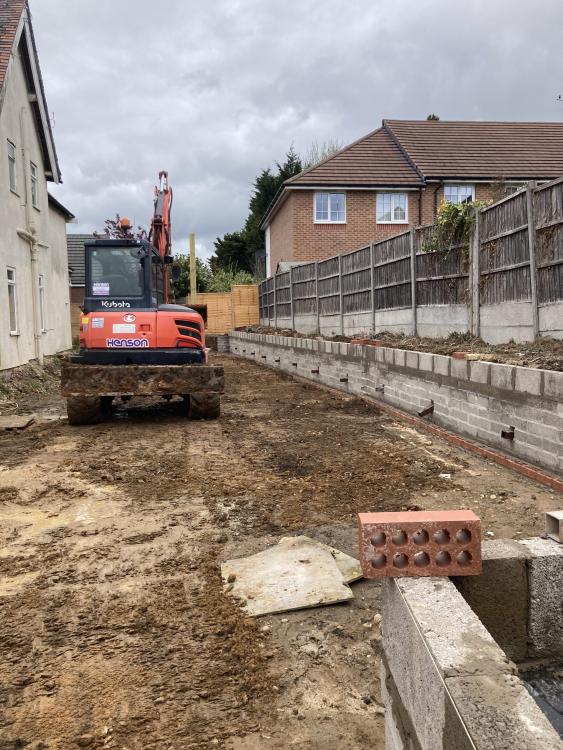
 1 point
 -
Vertical solar panels, use all that solar gain 🤷♂️1 point
-
Hello, Exactly what you said. That is the best way. I was hoping I had a picture but we would usually make a recess and drill a hole in the back of the quartz shelf and use these: https://www.amazon.co.uk/Concealed-Floating-Brackets-Hardware-Decoration/dp/B07XFCF3KP/ref=asc_df_B07XFCF3KP/?tag=googshopuk-21&linkCode=df0&hvadid=375434312298&hvpos=&hvnetw=g&hvrand=9295025951555391328&hvpone=&hvptwo=&hvqmt=&hvdev=c&hvdvcmdl=&hvlocint=&hvlocphy=9045938&hvtargid=pla-827903059895&psc=1&tag=&ref=&adgrpid=77211061112&hvpone=&hvptwo=&hvadid=375434312298&hvpos=&hvnetw=g&hvrand=9295025951555391328&hvqmt=&hvdev=c&hvdvcmdl=&hvlocint=&hvlocphy=9045938&hvtargid=pla-827903059895 We did one recently like this: The positioning is usually on the studs but yeah. Exactly what you said is the best way.
 1 point
 -
Let's see what the diamond polishing does😜. But that will probably have to wait, going to start on the walls while the weather is still good, so some OSB on top to protects it from the scaffolding. ( I'm putting it on the inside to help with bracing the walls)1 point
-
To be fair, lighting calculations will be done using software - however, I don't think calcs are necessary here - it is a domestic setting. If I was to offer a lighting design service for a client, I would produce a full set of CAD drawings, with all the details, such as suspension heights or wall mounting heights, it would come with a full luminaire schedule outlining all the product, precise spec, colour temperatures etc. I would also provide some 3D renders and a concept board with imagery and sketches etc. it would be a proper lighting package. I would not probably run any calcs for a domestic property, only maybe to check we could achieve a decent illuminance in areas like a kitchen and to check the combination of lighting specified would work well to deliver a good ambient light level - it also then lets me show a client what it would loosely look like. I would not throw a set of lighting level calculations at you and expect you think you are sorted. Those are there for building design, to ensure lighting complies with the regs - what do they expect you to be able to tell, as an end user, from those calcs? It probably, with all due respect, means very little to most people. What a joke. In my kitchen I am having no down-lights, I am going to use recessed linear details hidden into sections of wall and bulkheads to largely have the lighting almost invisible, the kitchen will just glow with light. There will be a single suspended continuous linear LED product, very low profile, circa 30x7mm - but I will need to mock it up to get the size right in proportion to the rest of the space - and about 4m long, I want it powder-coated burgundy or royal blue or something so it standing out as an object, but not as a light, it will be indirect light only (i.e. uplight only) - this will wash the vaulted ceiling section with light which will provide reflected light and the general lighting to the space.1 point