Leaderboard
Popular Content
Showing content with the highest reputation on 06/02/23 in all areas
-
300mm reinforced concrete slab... for a BBQ? Seriously? First, the slab is too thick, not needed. Secondly, if you build the slab properly, the slab will be a raft found, the BBQ will move with the slab, therefore the tree/BBQ should be OK, as the tree does its thing it may move the slab a bit, but it will move the slab and BBQ construction as one. I think for this I would be happy with a 100mm slab, A252 or A393 mesh set centrally with 50mm cover top and bottom obviously, and 50mm cover at all edges or you risk it rusting and popping and a C20 concrete. You could stick in another 25-50mm if you want, but 300mm is madness.3 points
-
If it was mine I'd lift the lid on the cover and see the cable could be lowered. If so then cut the concrete either side of the cable with disc in angle grinder. Chisel out a channel in the concrere. Split a plastic pipe lengthwise to get it over the cable. Concrete it into the slot cut.3 points
-
Stiff mix will stay put in there, plenty of surface to get hold of and a small volume so unlikely to slump2 points
-
put glass wool batts between the rafters as they'll 'squash' to fit the wonkyness to some extent and then put PIR internally. would mean you could reduce the amount of internal PIR and still get the U-value you want.2 points
-
100% top quality virgin installation. Nothing you can do unless you fully excavate the cable back to the public side and install a duct with draw cord at a suitable depth. That's what we did and it still took multiple visits for them the actually put the cable through. (Issue was they had to dig down between their chamber and our pit - they don't like getting their hands dirty.)2 points
-
2 points
-
Unless it's changed fairly recently I don't think that's quite correct. There is an option to use an Approved Certifier of Design for the structure (your structural engineer) and/or for energy/insulation. In theory it's optional, you get a discount on the warrant fee for each Approved Certifier you use, in practice I've heard building control are reluctant to sign off structural engineer's calcs if they aren't an Approved Certifier. I did my whole application other than the structural engineering, and put that in with the engineer's drawings and certificate, and BC were happy with that.2 points
-
Appreciate your frustration @Dave Jones Thing is that when the timber was put through the grading machine it may have been ok. Fabricated trusses tend to have their own special grade of timber TR26. Remember that when the timber is tested we work on probablities and normal distribution curves to determine strengths. Here what you have is some splitting timber that could be outside the 95% percentile. But it has been spotted before it got built in.. that is good that you have spotted this as in some ways it shows the system works, awareness from site operatives.. if it looks wrong it probably is. The timber could have dried out after grading and fabrication.. wood is a "living material" and is full of surprises. We design for the odd concrete cube test not being strong enough and say for the odd truss being crap as we know that really one off bad one.. say like you have will hopefully get spotted. If we designed on the basis of everything being perfect houses would cost an awful lot more to build. Options that spring to mind. 1/ Send the photos to the truss folk and say you are concerened about the splitting. Ask them to confirm that the material is still compliant with say TR26 timber / their design and that this may be outside the normal expected strength / material property distibution. 2/ Ask them if one or two can be remediated.. at their expense or how quickly you can get new ones and the old ones taken away also at their expense. Express you preferance. 3/ Say you expect an immediate response and warn you will follow up with more in depth enquiry if not the case.. starting with how this got through their CE marking process, sent to site and that they are now not responding to reasonable enquiry about a safety concern. The key is to state the facts, send photographs and say this is a structural safety issue.. and that it is costing you money due to delay as you can't progress the works due to a safety concern. I think you may find that you have new trusses in two to five days at no cost to yourself. The reason is that when faced with a few photos and technical observation the manufacturer can fast track stuff to head of bigger problems and claims at the pass. The above is the way you start to lay the groundwork for a legal claim if they don't play the game... but that is very remote.2 points
-
2 points
-
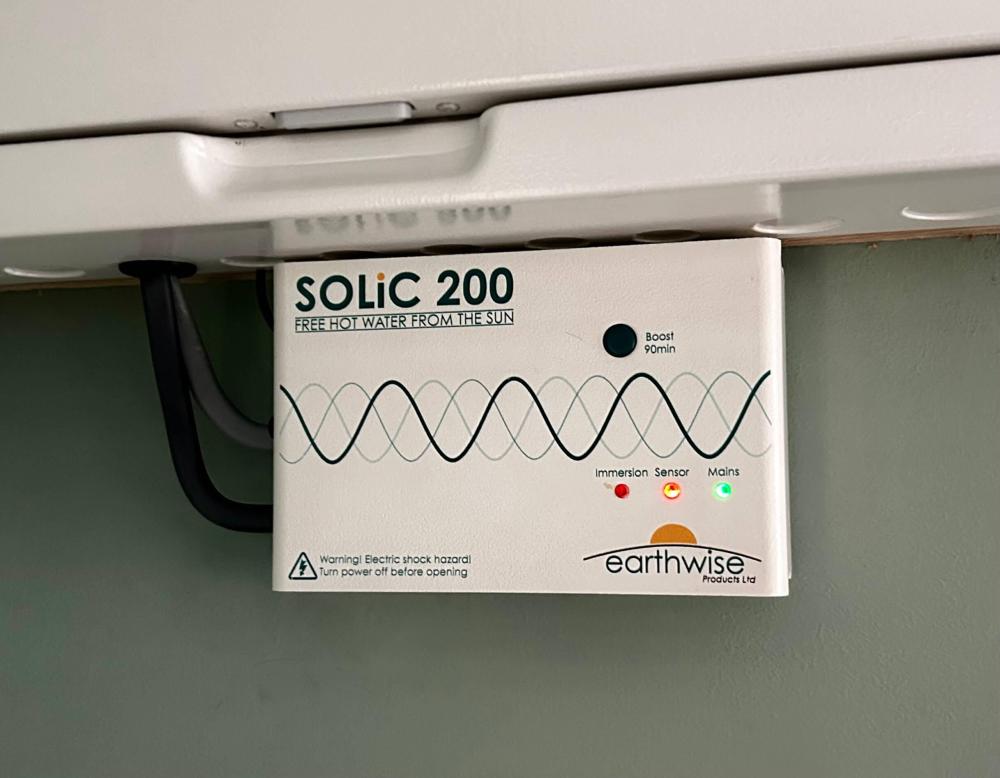
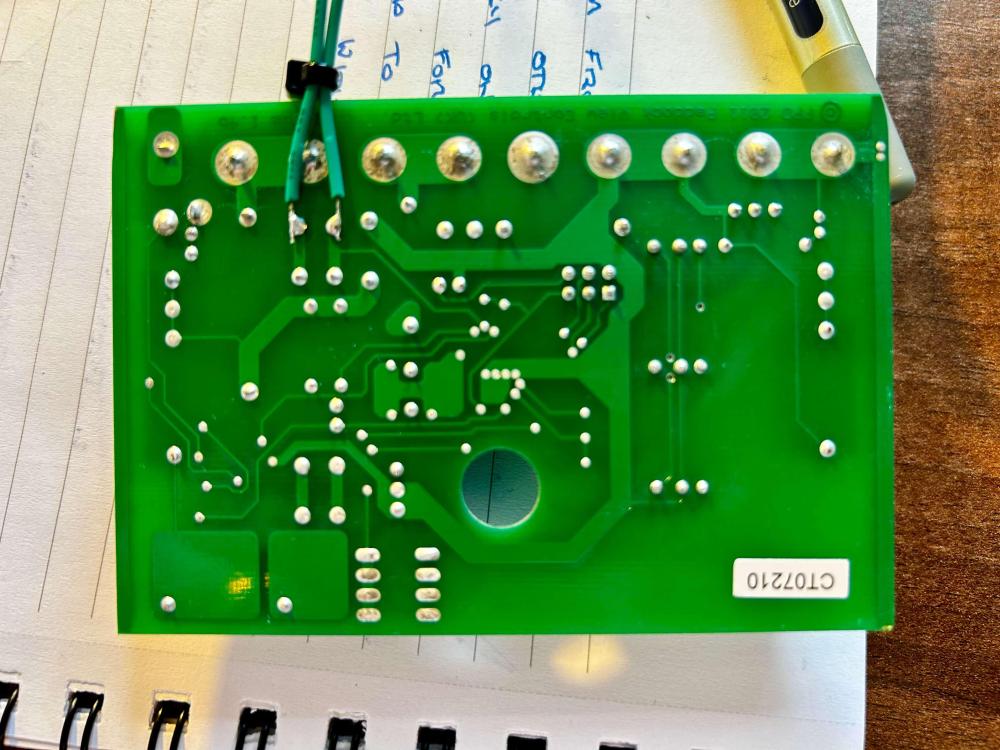
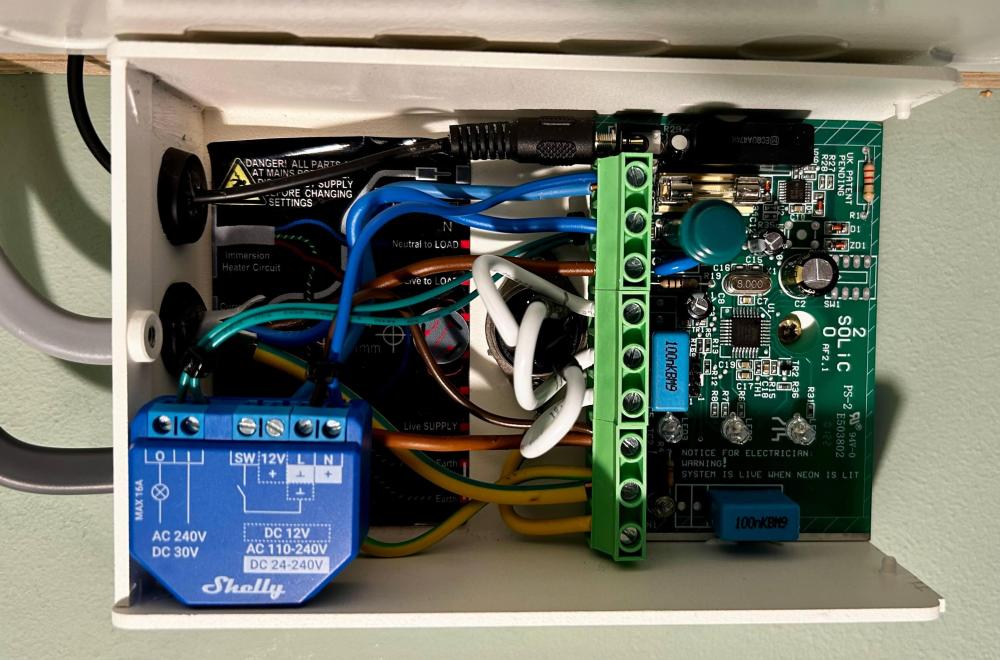
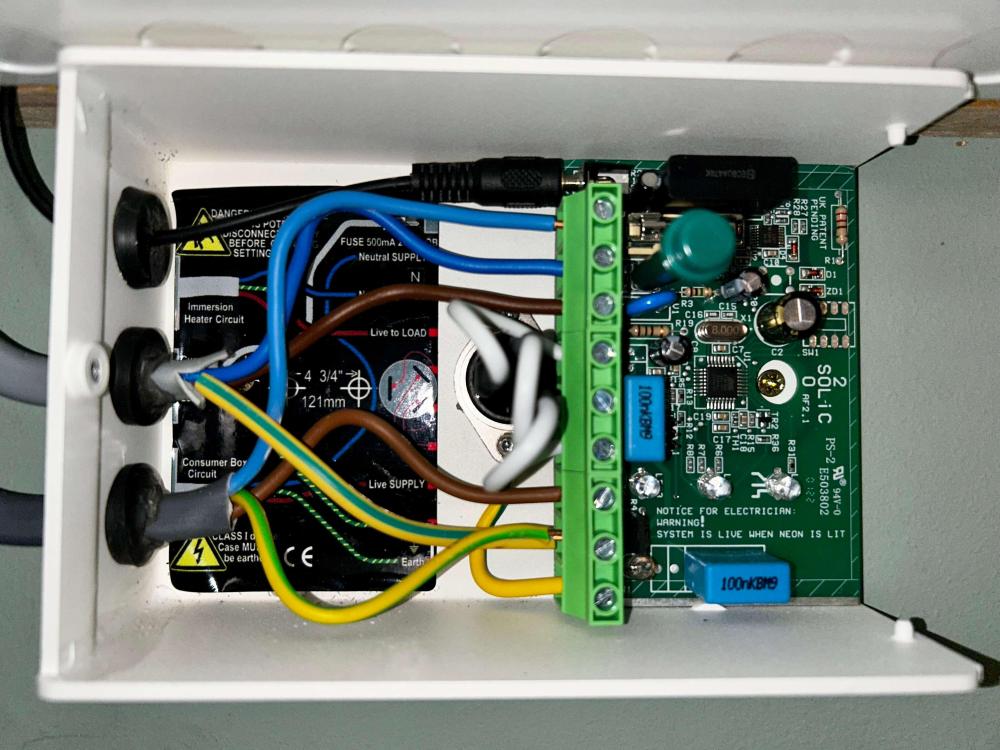
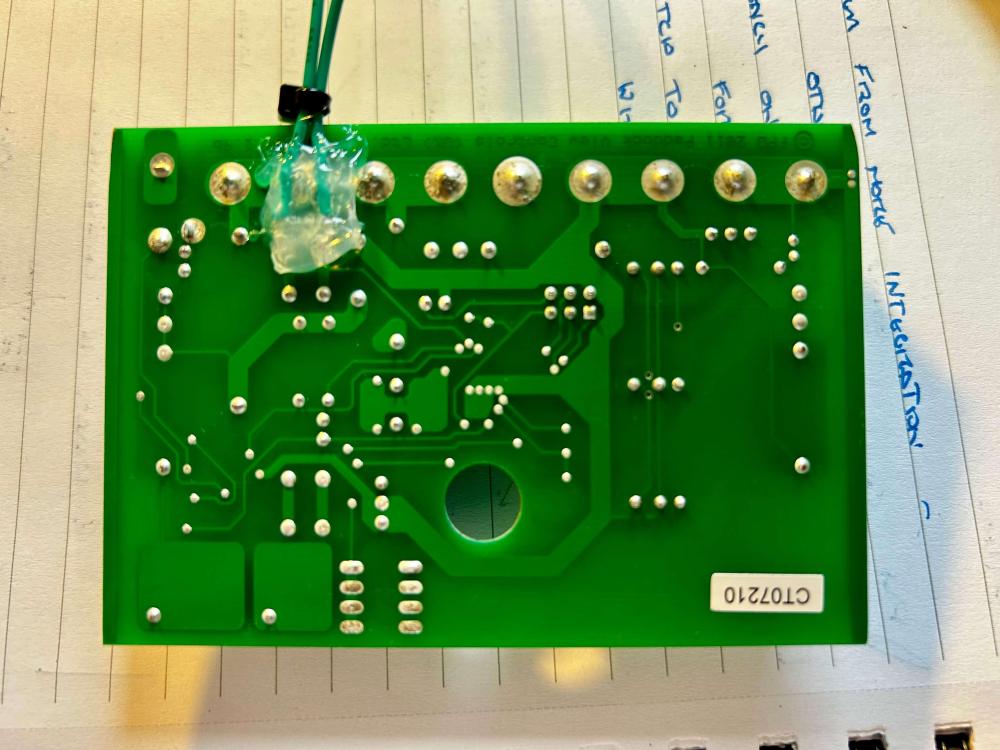
The end game is probably a combined air source pump/cylinder. In the interim, to get off oil, I'm going with solar excess immersion via a Solic 200 & off peak top up when there's no solar. I've read the threads on expensive to install/cheap to run heat pump cylinders vs. cheap to install/expensive to run immersion - and on the latter for now. Shelley schedule My first try is a Shelley module which has built in scripting, but in this case just needs the schedule to close dry contacts and hit the boost button. Boost on a Solic turns on the immersion for 90 minutes - that should be plenty if timed on key days to top up the cylinder hot water. Relatively simple, non destructive, mod to let the Shelley push the boost button - i.e. low voltage switching. Bonus - the solic is a nice steel case - so relatively contained if there were any issue. Programming Merely a Shelly schedule to push its button and a timer on the same button to turn if off after 1 second. Thinking Keeping this super simple - i.e. if there was sun during the day the tank will already be hot and the immersion cut out, if no sun, or winter, then off peak will do most of the work. Not perfect in terms of efficiency - but on the side of KISS for now. No cloud - not even network required for it to work, other than NTP now and again to sync it's clock. No questions - just sharing. Before Getting the board out needs the vice to spread the case sides - it won't just slide out. Mods After1 point
-
I'd get the membrane on at least in case it rains. Then 75mm glass wool batts (allowing 25mm for the membrane drape. Then as much PIR below the rafters as you can afford. Expanding foam where the PIR meets the purlins. Tape any joints.1 point
-
At that price, I'd be looking to go off-grid. Seriously though, if you have a contact give them a bell and ask what if anything can be done to get the price down, sure there will be costs for the footpath and highway that probably cant and wont change but mention a lower amp supply and see if that alters the cost. Up here they wont give anything other than 80A per phase, so maybe 100A per phase requires twiddling at their equipment which you are paying for. Fingers crossed it's a simple as that.1 point
-
It’s still very good PB like most things has gone up in price partly due to things out of all our control and partly due to high demand It’s good to see your benefiting from the fall in demand1 point
-
what ever you do don't put the washing machine valve behind the actual machine. Better behind a cupboard next to it with an access hatch.1 point
-
3 guesses if the morons in the council decide. It's a homes tax nothing more that the buyer has to pay. Like all taxes immoral.1 point
-
£8.40 standard 12.5mm was the last quote I had. Maybe prices are starting to come down. I will check out Wickes to compare1 point
-
Is that 100 amp per phase per property you are requesting? That seems like an awful lot if it is. When I first enquired about our 3-phase connection last year the DNO told me there is a threshold that I should not exceed in my request. I forget what it is now, but I'm pretty sure it was less that 100 amp per phase. Maybe talk to your DNO about resubmitting your application with, say, 79 Amps per phase.1 point
-
Just buy a Cool Energy diverter, does timed boosts out of the box and can drive two immersion heaters one after the other as well. Way better than the Solic200 I had - which failed and the warranty was a nonsense.1 point
-
1 point
-
SBR then mortar good tool is the multi tool if you don’t have a concrete poker, use a worn blade and vibrate the timber…1 point
-
it's a tough call this one as i'm trying to reduce sound transmission from bedrooms upstairs and they will have engineered wood flooring. so an underlay of sorts will help reduce impact noise transmission but won't give as solid a feel. it's kind of a rock and a hard place scenario!1 point
-
Not strictly true. You just need to provide your electric provider with the details they require - schematic, system capacity, details and a safety sign off. I'm getting 8.5p, better than nothing.1 point
-
I would dig out and expose, there may be an F-Connector under that draw pit that you can unscrew (might need a spanner), and pull the cable back to protect, then dig out, add some conduit, proper stuff would be nice but just use some uPVC 20mm conduit or flexi or something, and cover over. I am confused as to why the draw pit is there, is that on your land or what?1 point
-
we used Roofshield. that web page has examples of what i'm talking about. 🙂1 point
-
just to add, as you've got to re-tile the roof have a look at a breathable roofing membrane and batten/counter batten build up above the rafters as then you can fully fill the rafters with 100mm mineral/glass wool. obviously check with your BCO that they're ok with that method. ours was but sometimes they differ in their opinions!1 point
-
I have done both methods, a combination of both and various others. First off, I would highly recommend insulating it now, as you suggest you will do, because it will make your life so much easier and healthier, PIR in a enclosed room is no fun, working with an open roof structure will be good. I would probably work from the outside and fit, as best I can, PIR of 75% depth of the rafters, cut the sheets to max width, then with the help of a handsaw encourage the PIR down between the rafters using the rafter as a guide for the saw, then, a small bead of expanding foam to seal. Once complete, internally fix PIR to the underside and foil tape to create a insulated diaphragm. I would screw them up with long screws and washers and pull them in flush, you only need 4 or 6 if your going to be PBing over, more if left along and less important to get flush fit. If plasterboard needs to be screwed up make sure to mark timber locations or you will have a fight to find them. Depending on how thick the underslung PIR is will impact how I would proceed next, 2 inches (because you have more in between the rafters), I would just fix the PB up through it with 100mm board screws, if you go thicker I would put the PIR in, couple of screws to hold, then add battens fixed up into the rafters or you may have screw pop issues in the future as the PB is sort of floating on a PIR base and the screws are acting more like suspension points - ask how I know. There are of course many other ways too, but this is my methods. It also all depends if that is going to form a boarded ceiling or not and if headroom is important. Mean, you could also put 200mm PIR in underslung, I'd then use lag screws and battens to clamp the boards in.1 point
-
Bear in mind you won’t be able to get paid for your export if you go the DIY route. This isn’t a dealbreaker with most suppliers paying pittance but Octopus will pay 15p a unit flat rate on their Outgoing Fixed or 21.7p day rate/34.8p peak rate on their Flux tariff. Just something to consider in your calculations.1 point
-
BC won't care as long as the loadings have been accounted for in the design. Your DNO and electric supplier will, however. The installation will need to be signed off as safe and G98 compliant by a competent spark. But no requirement to be part of any scheme. My 5.2pKw in roof install cost about £5k. That includes the £600 for the sparks side of things. Prices have gone up a bit so im not sure you'll get it done for 1p/W. I installed the trays myself with help of the roofers. Fairly simple once you get your head around the battening requirements.1 point
-
1 point
-
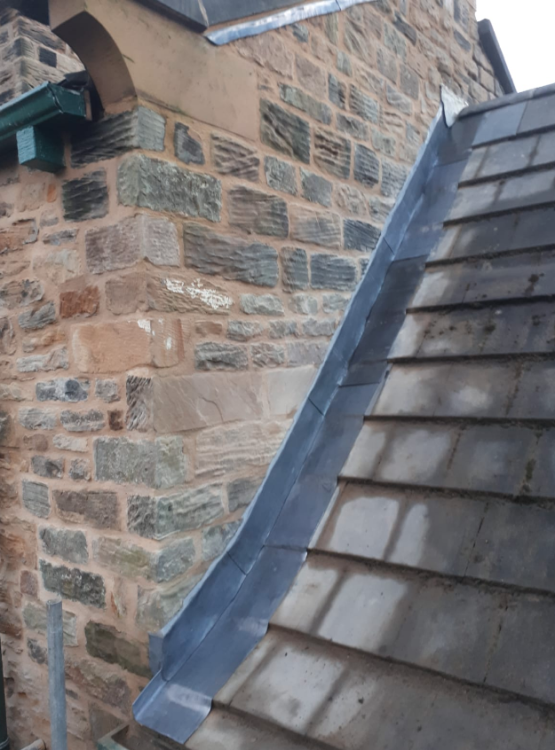
PS if the wall is very uneven so there are wide gaps between wall and slate the lead may need support.1 point
-
1 point
-
this is good to know. although many on here recommend to glue directly to the 22mm chipboard for a more solid feel rather than a floating floor.1 point
-
The simplest is as already suggested: an isolator inside the house. Otherwise it's the tap box if it was me. If your concerned with vandals I would suggest avoiding tap locks. One could just unscrew the tap. Good luck. M1 point
-
>>> Isolator on the inside - which you should have anyway along with a non-return valve. Just turn it off when you go away. +1 also you can shut off and then drain the tap during the winter to avoid pipe bursts.1 point
-
We run our immersion via a digital thermostat (which is a 2 channel relay but too weak to take 3kW) which signals another relay that can take the power for the immersion, supplied via our solic diverter. We run the back up via our ASHP which uses a different digital thermostat. The 2 probes fit 1 pocket in our tank. The back up comes on when the tank temp is too low and is set just high enough to give us what we need. The diverter temperature is set at 75°C or more in the winter and 60°C in the summer and is easy to change because the controller is not on tank. M1 point
-
Have you got a spare thermostat pocket? you could fit a temperature probe and read that, and then only activate the off peak boost if the tank was below a certain temperature.1 point
-
Use a hidden gutter run alongside the stonework and lapped into it, then cut the slates to fit with a 50mm nominal gap - don’t try and use soakers1 point
-
@crispy_wafer just on your layout - and this may seem odd, but I wouldn’t tee everything off before you get to the UVC control set with the exception of the outside tap (which also needs an isolator along with a DCV) as you then won’t have balance issues on mixer taps etc.1 point
-
We had an Architect and Engineer in family, but neither registered in Scotland. It wasn't worth the process and cost to get registered for one project. So we needed one registered party, and that was the Engineer.1 point
-
I would at least put the door opening in the wall if being built out of block. I would make it a normal hinged door opening into the bedroom. You would be creating a Jack & Jill bathroom, nothing wrong with that. Don't forget light switch wiring so the light can be turned on from either entrance.1 point
-
board and skim - MR plasterboard - and then install. Also give it all a coat of Super Leytex when there is nothing in there too as it is much nicer working with painted walls !!1 point
-
Yes , many have, including some who are giving you advice on here. Not what you want to hear, but it is complex thing, and you would have to learn a lot. The building inspector may then ask you to prove some aspects. In Scotland you even have to be on a register, so we couldn't do our own. Sorry. Get studying or find someone. But £700 is cheap already.1 point
-
I did my own for my extension - but I already had quite a bit of experience of producing technical drawings, interpreting regulations/technical standards and documenting compliance (e.g. for licensing applications for temporary venues) from my previous life working in theatre and events. It took a huge amount of time. Partly that's actually just doing the drawing, especially because unlike a pro I didn't have any library of symbols/templates/past drawings to adapt and reuse so had to draw everything from scratch. But the bigger part was working out what to draw: * Researching examples of other people's plans to see what Building Control would expect to see detailed and how it would usually be presented - if drawings stand out as being done by an amateur that may attract more attention and questions over the details * Researching the actual building regs to understand what I was actually allowed to build, how it had to be constructed, all the limits on sizes, positioning of things, layout of drainage, minimum numbers of sockets, smoke alarms, u-values and lots more. A lot of this information has to be shown on the drawings to show BC that it's been considered and the design complies. So unless you know all the rules, it's not possible to produce a drawing that shows you meet them. I found it an interesting and rewarding challenge, and my first set of plans came back with one very minor comment to amend before BC approved them, which was better than my mother-in-law's architect managed! And as I'm also building myself, the process was very useful in then knowing exactly what I was doing once I started construction. But it is not easy, and unless you would enjoy investing a lot of time learning a new skill then it would probably make sense to pay someone - the prices you've had seem about right from what I've heard.1 point
-
1 point
-
Council archaeology officer regarded my DIY ADBA as insufficient and is requiring a pre-commencement condition of a 'field evaluation'. This is typically digging some trenches that are monitored and examined by an archaeologist. I sense that this would have been required anyway, so I've avoided spending £2k on an ADBA. However, the planning officer believes the 'field evaluation' is an onerous requirement and has suggested that a 'watching brief from an archaeologist when excavations are taking place' should be sufficient. That would be similar to @saveasteading's experience. Fingers crossed.1 point
-
I've never done a Velux so you may know more than me but.. I think there are several different flashing kits for different situations and types of tile so check you get the right one.1 point
-
dont add double felt, you want the roof to breath. There is no possibility of water ingress with a GSE tray unless the panel is physically removed. depending on what tiles you have I found lead much neater than the galv metal flashing kits as it made our tile sit too high and looked bad. Lead soakers worked perfect.1 point
-
This may be of interest to some. This is part of our quote for a new connection in Feb Description of reinforcement charges Install 1 substation £6,386.78 Reinforcement contribution -£3,832.07 (Our Cost Apportionment Contribution, as set out in our Terms and Conditions) Total reinforcement charges £2,554.71 Description of non-contestable charges Upgrade to 50kVA split phase transformer. Dismantle LV Pole 1A and LV Span. Erect a LV Stay. POC - LV Pole Termination POC and Network Assessment, Design Approval (where relevant) £185.00 Final connection £1,051.00 Inspection & Monitoring £2.00 Total non-contestable charges £1,238.00 ..................................................... and just received this when we asked for a revised quote in April Description of reinforcement charges Install 1 substation £7,850.46 Reinforcement contribution -£7,850.46 (Our Cost Apportionment Contribution, as set out in our Terms and Conditions) Total reinforcement charges £0.00 Description of non-contestable charges Upgrade to 50kVA split phase transformer. Erect a LV Stay POC 1ph line connection only. Dismantle LV Pole 1A and LV Span POC and Network Assessment, Design Approval (where relevant) £185.00 Final connection £1,418.36 Inspection & Monitoring £2.00 Total non-contestable charges £1,605.36 Note prices went up in April but we've saved a bit just by waiting for the April changes.1 point
-
Just make sure anything sticking out of the wall exposed to UV, is UV protected. Normal armaflex isn't UV stable. It may make a small difference on the east wall, but it's air temperature that's important and that doesn't really change. Also make sure the temperature probe on the ASHP isn't exposed to the sun as it screws up your weather compensation curve.1 point
-
I find a jumper is the most eco thing. Some people's houses are so hot and then they complain to me their gas bill was £200 a month..1 point


