Leaderboard


Popular Content
Showing content with the highest reputation on 12/28/22 in all areas
-
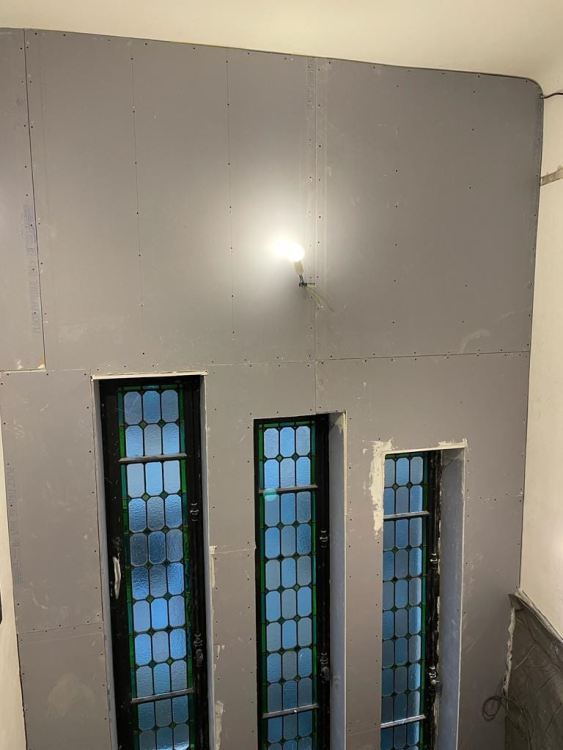
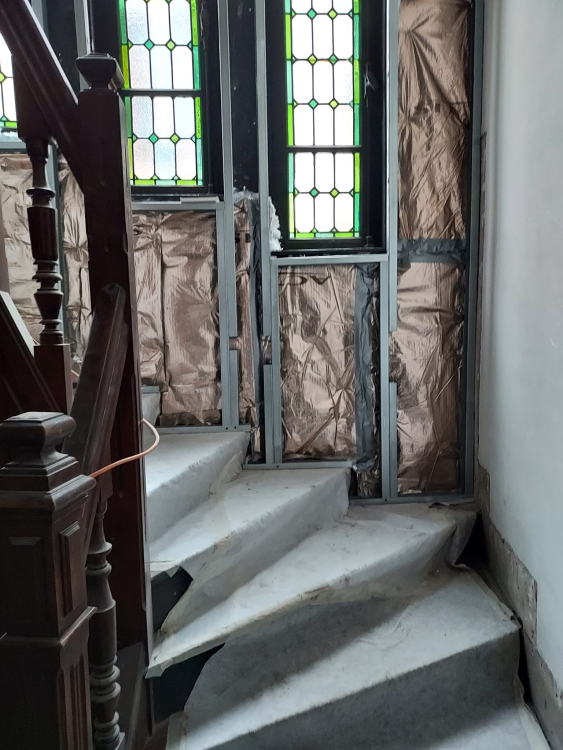
Here it is, just input your postcode then the other parameters, it lets you play with different configurations etc. and most people find it lines up with real world performance reasonably well: https://re.jrc.ec.europa.eu/pvg_tools/en/#PVP I don't have a basic guide reference, I think you understand the fundamentals from the spreadsheet but the forum will be happy to answer any specific questions I'm sure. If you have a smart meter at your current property, you can get into some proper analysis of what you might self use in the new house with respect to plug in electric, see my other thread: I have a system installed now and have started logging data so can share more on real usage soon, but others have posted various data in this forum topic before. The key takeaway is it's massively usage dependent, every household is different and will self-use different amounts. You can change usage patterns to address this, but solar is very unpredictable. A battery helps smooth this out but they are very expensive at the moment. We installed a small one (3kWh) as we don't consume enough to go down the Octopus Go/E7 route. For the shading, it will affect you differently throughout the year. Whilst the average for a 2m dormer might shade 1.7m, in winter with the sun at 15 degrees it might shade more like 7.5m. I believe PVGIS can model this to show the overall effect, but I've never used it for this. This may push you towards all the panels on the west side, or it may not be an issue. Also check vertical mounted panels on the South wall, depending on the space you have there and view on aesthetics. As you haven't tiled yet, in built panels will be "cheaper" for you as you will save on tiles, so probably stick as many as you can up there, just consider the shading.2 points
-
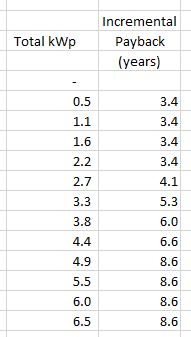
I can't see anything wrong with your calcs. I did something similar to this calc a few months ago for an existing property i.e. I have some reasonable energy usage stats. I came to these tentative conclusions (some or all of which might be nonsense) : + until Ofgem make the feed-in a proper % of the standard rate, selling the surplus is not worth the bother. + a HW diverter is a fairly simple way of using a lot of the extra generation. + you can always add the battery later if the cost/benefit is good. + even if you have good projected usage and generation stats, the sizing calcs are a bit iffy - there are just too many assumptions. The key assumption, of course, is electricity prices going forward - hopefully things will normalise a bit once the Ukraine war is concluded. But that implies the payback will be longer + ideally you could add single panels at a time to your model - until the incremental payback of the extra panel was longer than you could be bothered with. In my case (12 panels/6.5kWp is the max that will fit on this roof) I came up with these calcs: + but overall I decided that the panels themselves are fairly cheap and you might just as well fill the roof while you're about it (even if you don't use/install an inverter/battery to cope with max. panel output). That is, the fixed cost of installation is high enough that you only want to do it (that is, the bit on the roof) once (except that you might start with a smaller inverter / battery etc. if funds are tight). That might mean asking for something a bit more custom than the usual packages that get sold. You can probably change the electrics inside without much bother/cost later if needed. At least I can - since there's an easy / substantial / flexible attic space to use and easy to access. As I said - these conclusions might be nonsense , and they might be too specific to my particular situation for anyone else to draw any conclusions from.
 2 points
 -
Thanks folk for all you comments and time spent writing. Trying to digest it all at my end and thought I would respond in a way longer than you.. I have an ex council house, extended with a hybrid system. Thus new solid concrete slabs and retro fitted timber suspended floors Rads on the top floor I oversized them to keep the flow / return temperature down to promote the boiler to condensate. Ground floor has a combination of retrofitted UF on the old timber suspended floor with and extenion that has a concrete slab. It sounds dog rough but I made my own manifolds and it is really simple. Few electronics. But it is user friendly and simple to maintain. The house is much bigger now and we use less energy to heat it even though the house is much bigger. If things break I can fix it in an hour roughly.. don't know as have had no problems. Look folks.. this home automation.. have you factored in how often you are going to have to replace the different parts? Also who other than you is going to be able to fix it? You could be doing something that detracts from the house value? I'm all for technology, I'm a pretty innovative designer, love working with new materials and learning about their behavoir.. but I also as a designer I need to give best advise to my Clients and that includes ongoing potential maintenance and often environmental cost. Relpacemnt of parts is also an environmental cost.. intuitively the less parts the lower the environmental cost? I'm just asking you to think about this, I'm not slagging the concept off. I'm not kidding you.. I got a guy in to service my boiler.. he has a PHD.. but became a heating enginneer, he had the cheek to say to me you are asking me tecky questions and you are asking me to give away my trade secrets, my response.. hey donkey if you want play that game.. and this is from a guy that works with a regular contractor that I do design work for. I am paying him to be techy with me and want sensible answers.. ground my gears. The point is .. keep it simple.. yes if you want to make your house high tech.. fine but I would not buy your house... unless you can produce a full and verified O & M manual.. otherwise you could buy a pup! High tech can be an appreciation of simplicity and how you get the best out of it. Folks UFH is supposed to be simple that is the elegance of the principle. I'l say agin UFH is supposed to be simple and environmentally friendly! It works great when you design the rest of the house to suit. It's holistic design. I designed my first UFH some 25 years ago. The Scandinavians have done it for much longer. Lets just look at the cost of all the controls, flow meters, zoning, automation. It will probalbly be fine at first installation but just wait for two or three years.. then when things start to fail, getting replacemet parts.. good luck to you. Yes weather compensation works but when you look at the lifetime of the buildings and they way folk use it.. I'm not sure about how friendly it all is. The house I have at the moment has hybrid floors, all sorts of nuances but as a kick off I just built a simple manifold DIY.. it's working great, to set it up I just put my hand on the flow and returns pipes and crancked down the really hot ones. yes folk say I should not use gate valves but I did this 25 years ago.. if one leakes.. a couple of quid to fix it. To say again..UFH is easy to design, the controls can be very simple. There are some basic conservative rules. For 15mm pipe keep the loops under 75m, DO NOT over bend the pipe. MAKE sure you get plenty flow rate.. it can be turned down. It is really simple with common sense. If you are using a pug mix my own view is that you should pressurise the UF pipes to say 4 bar then pour in the concrete. Reasoning is this.. the pipes need to last for 50 years. The heating system may run at about 1.5 Bar but will expand and contract over the length of the runs. They have bends that are in the pug mix.. thus abrasion will occur. The pressure relief valve on a typical system is set at 3.0 bar.. in the round the 4.0 bar pressure at time of laying the pug mix will be just enough to compensats for the screed shrinkage and movement in the sreed plus say movement in the structural floor.. my gut feeling is that this will allow the pipe to last 50 years. To put this into context. I did my first UF system some 25 years ago, have been keeping an eye on others and had hand in others for some 30 years.. have not seen signs of abrasion in the UF pipes in a pug mix to date. To be honest when these pipes were installed they were sold as barrier pipes.. to stop oxygen ingress, I though it was a bit bollocks at the time but the boilers have held up so maybe it was not sales bollocks after all. Nice to be proved wrong. Yes if the weather suddenly warms up there is a lag time.. but all that happens is we say.. it's warm outside and the house is a bit warmer.. but that can happen on a sunny day too as we get a lot of solar gain. The thing is that in the UK UFH is great but from time to time the house may get a little warm.. it is rare.. just open a window or the door! There will probably be folk going in and out the house anyway so any heat model you make it likely a bit rough. Save your money folks and go for the most simple system you can.. have a look at the Sputnik that the Russians sent to the moon. .it had gate valves (look like Screwfix today) brave boys right enough. Think.. how much is my home automation going to cost vs a Guses "Fintstone" design.. If there are any takers I'll be happy to defend my design approach as I think this is the best environmental choice and most cost effective in the long run. There is one caveat.,. you need to make sure we are debating on a reasonable insulated external house envelope. There you go have stuck my head above the parapet. In other words.. I'm saying that for UFH go for the simple stupid, low maintenance solution. Save yourmoney and spend it on the insulation envelope.. or if you have large areas of glazing then spend you money on sinking the solar gain into an internal wall to be released later. I know folks on BH debate thermal mass.. but that is not what I'm talking about.. more the concept of how a Tromb wall works and how you start with the paint finish and store the solar gained heat from that. @tuftythesquirrel When I say simple DIY UF manifold have attached the prototype I talk about above. Yes I know it is probaly a million miles away from what you envisage. But it works, is cheep maintainable and reliable.
 2 points
 -
I live in a 1930's built house with some pretty skinny (4X3") floor joists on the first floor spanning approx 3.5m at 400mm (ish) centres. For several reasons* this is not satisfactory. Part of the long term renovation plan is to remove a chimney stack in the wall supporting some of these joists, thus I suspect once it's gone the joists will need to be lengthened -or rather replaced. Would I be insane for considering replacing *all* the joists in the affected room(s) with something deeper like 8x2" Obviously this would lower the ceilings some, which is no problem (they're at 2.5m + already). This would be quite disruptive, however the longer term benefits are pretty obvious. * We plan to install underfloor heating, between joists rather than an overlay, to keep the floor heights consistent. * we can hear every thump, bump and fart from the bedroom above the lounge. * given the state of some of the plumbing and DIY work I've encountered, I'm fairly sure some of these joists have been notched to death in some locations too.1 point
-
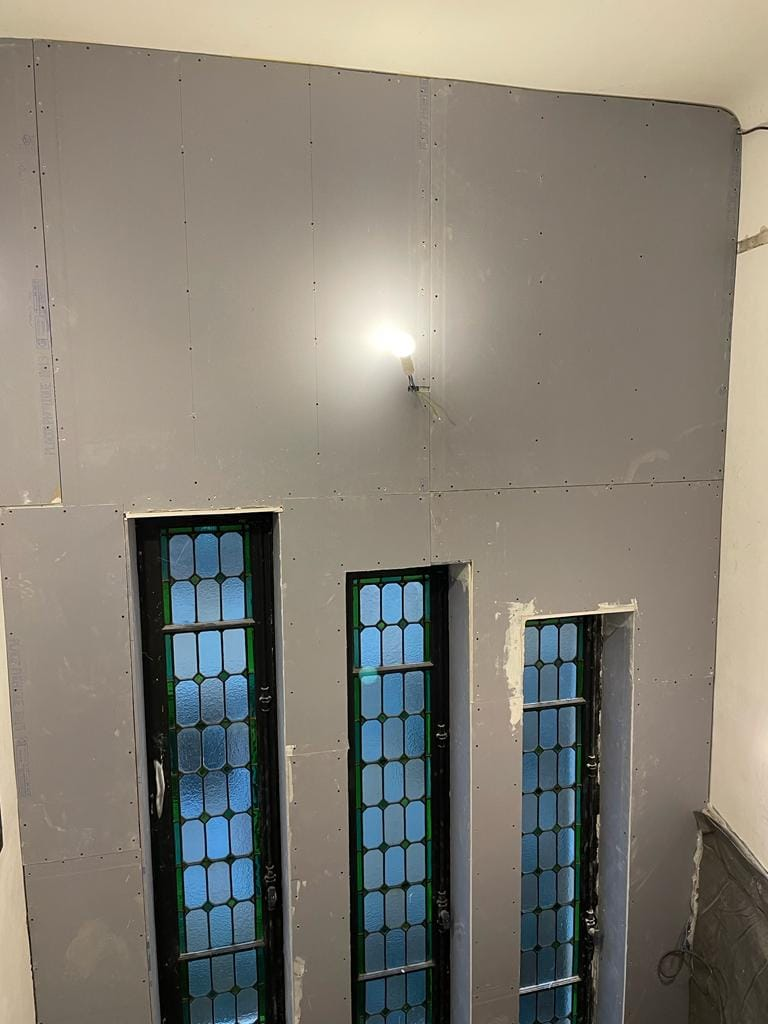
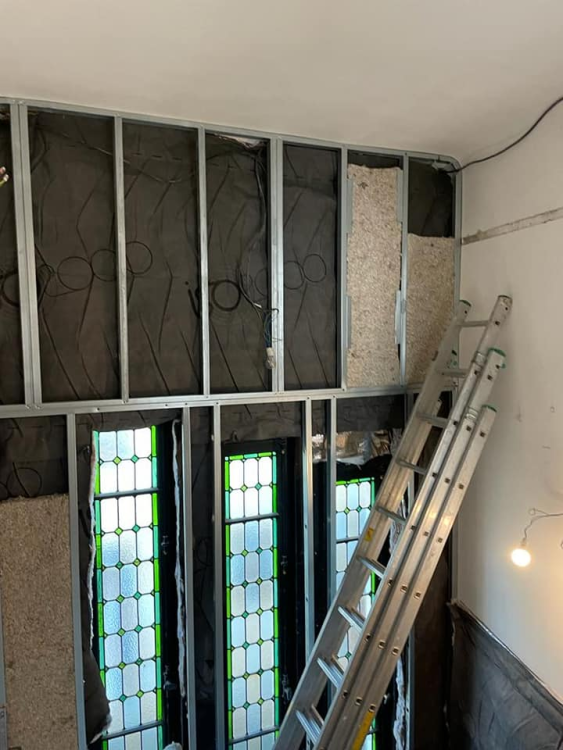
ISOLIN HPV (reflective insulation) + 45mm Biofib Trio + hygrovariable vapor barrier (Proclima) + 13mm fireproof plaster
 1 point
 -
Unfortunately I am away at the moment so can't check for certain but I am pretty sure there's no overhang but equally I don't recall ever seeing the top face of any brick so my money is on it being flush, noting however that we've got rough-faced (tumbled I think they're called?) stone bricks so there isn't a mm-perfect straight edge to be flush against if you know what I mean.1 point
-
Yeah, that’s not too bad. We have similar hatch in the ceiling of our utility room to access a bath water waste pipe.1 point
-
That's a low loss header not a heat exchanger, the auto vent on top is the give away. I would be tempted to disable any immersion until you figure things out. I would wind the trvs to max, and bring flow temp down 10 degrees. If rooms are not getting up to temp add a few degrees. When most the house is the correct temp, balance the rest, to get them where you need room temp wise. Night setback should be on the HP flow temp not the trvs, otherwise you gain little or no benefit. Treat the trvs as limit stops for room temp rather than controllers. Reducing flow temp is key to good a CoP1 point
-
Well there’s your scop problem. Inefficiency caused by the plate heat exchanger after the indoor unit. Get Brendon to re-plumb it and get it running on the daikin controller only (no external stats) and you should see a marked improvement in efficiency.1 point
-
and this is exactly my thought process here.1 point
-
i was told i wouldn't need heating in my basement but i installed UFH loops throughout just in case. total materials weren't much more than £500 and we fitted it ourselves so no labour costs. for that sort of cost it's a no-brainer to install even if you never use it in my opinion.1 point
-
Sadly it doesn't allow any greater floor void for services routing (electrical and plumbing) or noise insulation, once the UFH goes in there'll be very little space left in the remaining void.1 point
-
Thanks Nick. I dont mind straight talking in the slightest by the way. Regards keith1 point
-
Could your grandmother change the temperature or switch on the heating, if the answer is yes, wonderful, if no, does it belong in a house. You get run over by a bus, could a 'normal' electrician or plumber fix it? Without spending hours scratching their head? See above. Mines confusing to most plumbers - because I have a big buffer cylinder.1 point
-
Guys I am very impressed with the level of input, even though some info disagrees with other bits, Thank you all. The 'by others' phrase is liberally spread throughout the documents i have been presented with so far. Also the phrase' extra over'. Its this phrase thats starting to make my numbers look less than achievable for the house i have submitted planning for.1 point
-
I found that placing the nails before hammering them in easier if the nail is jammed into the tines of an (old) table fork before placing the nail in the hole in the hanger. Hammering the fork - and not my fingers - was less painful. Cheaper too: fewer plasters needed.1 point
-
Be careful assuming self use will be so high, if the hot water and car charging are set up as a divert that will greatly help self use but for heating (unless also divert with some logic if you're not installing a heat pump?) and plug in electric (assuming this is house load?) your generation and consumption are unlikely to line up. I found self use for house load was as low as 30% using PVGIS and smart meter data. With an E/W split you definitely need to be using PVGIS data as generation will be a lot lower, I'm unsure if this is already factored in? If that dormer is on the East roof am I right in thinking it's towards the South end of the roof? That would shade panels significantly on the larger portion of the roof so would need careful consideration.1 point
-
When I had questions about our POSIs, I rang up the manufacturer, and talked it through with their designer. To double check (because I knew less than nothing about the matter) I rang Cullens. They put me on to one of their design team and we had the issue sorted out straight away. It shouldn't surprise you to say that their advice was to exactly what @nod suggests. We chose German wood-to-steel screws. Worked like a charm. On the few screws that appeared not to 'cut' into the steel , we simply spat on the screw tip ; spit , it appears is a cutting agent (who knew that eh?)1 point
-
Plus UFH is a slow low temp system, linking to a PIR is point less, the room will still be cold when the person has up and gone elsewhere. If I walk into a room switch the light switch and my light doesn't come on, I change the light bulb, sorted. When I go out I switch the light off. Living in houses for last 59 years, never seen a normal light switch need to be changed. Plenty of bulbs have been changed though.1 point
-
Your SAP calculations, and double checking with Jeremy's spreadsheet should give you a good idea what the new place will use. DHW usage generally don't change much, not as if we move house and decide not to wash. Cooking will probably not change much either, I boiled potatoes for the same amount of time for the last 50 years, they taste the same. Why are you heating the DHW with an immersion heater and not a heap pump?1 point
-
Correct, also a lot of it is is likely to be 230v anyway. For the tri-rated cable it comes down to max current. While tri-rated supports higher current/temperatures than most cables it is wise to leave a decent about of headroom, also because you are suppsed to derate max current where wires are bunched up (as they often are in a cabinet). How much current each cable has will also depend on how you wire things up within the cabinet i.e. if you distribute power from a power distirbution block or daisy-chain. I used a mix o 0.75mm2, 1.0mm2 and 1.5mm2 - 0.75mm2 for DC (this is all low current though, as all my lighting drivers are outside panel) - 1.0mm2 for almost all 230v runs, including blinds, dimmers, UFH, towel rails (I used power distribution though, so no single run was more than a few amps) - 1.5.mm2 from RCBO's to power distribution and any higher current runs. - CAT7 twisted pair for Loxone tree. See page 3 of https://www.doncastercables.com/product-documents/TRI-RATED.pdf. I think I used 1mm2 for anything under like 8A, and 1.5m2 for anything that might be a bit higher. No reason not to use 1.5mm2 everywhere either, I just had a bunch of 1mm2 that my electician provided to use.1 point
-
I’m not sure what you hope to achieve. The planning process is the planning process in which you need to operate within the area you make the application. It’ll take as long as it takes. There’s not much you can do to influence it other than making sure you follow their process to the letter and provide clear detailed information about your plans. Therefore the sooner you get the application in the quicker you’ll get the decision. Knowing in ever granular detail how long the process takes won’t make it happen any faster.1 point
-
http://www.idratek.com/products/catalogue/plh-001/1 point
-
I am with @Gus Potter I dislike anything that is over complicated. I have very basic E7 storage heaters, they have two controls, energy in, power out. Sometimes I adjust them. Below is a chart that shows this year's energy usage and temperatures. This year has been useful as we have had extreme (for UK) heat, cold and dryness (more solar gain). At the beginning of the year, I was away for a few days at a time a lot, I would turn all the power off and let the house do its things. This used less energy, but larger swings in temperature. Heating was totally off by the 14/03/2022 and did not come back on till 15/11/2022, so 119 days of heating and 246 days without. A quick look at the data shows that at the start of the year, the mean external temperature was 7.5°C and the house temperature was 19.1°C. End of the year mean external temperature was 6.3° (1.2°C lower) and the house temperature was 19.3°C (0.2°C higher). Energy usage was similar at less than 0.8 kWh/day difference, with the beginning of the year using less. When looking at the variation in temperatures, at the beginning of the year, the min and max external temperatures were 0.1°C and 15.9°C, with the house swinging between 5.2°C and 23.3°C (this was when I was turning everything off). The maximum power draw was 10.6 kW. So far this winter, the min and max external temperatures have been between -2.7°C and 13°C, with the house temperatures between 16.1°C and 22.6°C, maximum power draw has been 8.3 kW. Two proper temperature distribution would show what is happening better rather than the extremes.
 1 point
 -
Can you provide a link to the sensor please, this sounds interesting1 point
-
Having a few local PIR's will allow the lights to come on as you walk towards, and stay illuminated for x mins after you've walked onwards / away. Simples. I do this within my normal lighting designs, and it's relatively cheap and simple to achieve with a bit of thought / planning.1 point
-
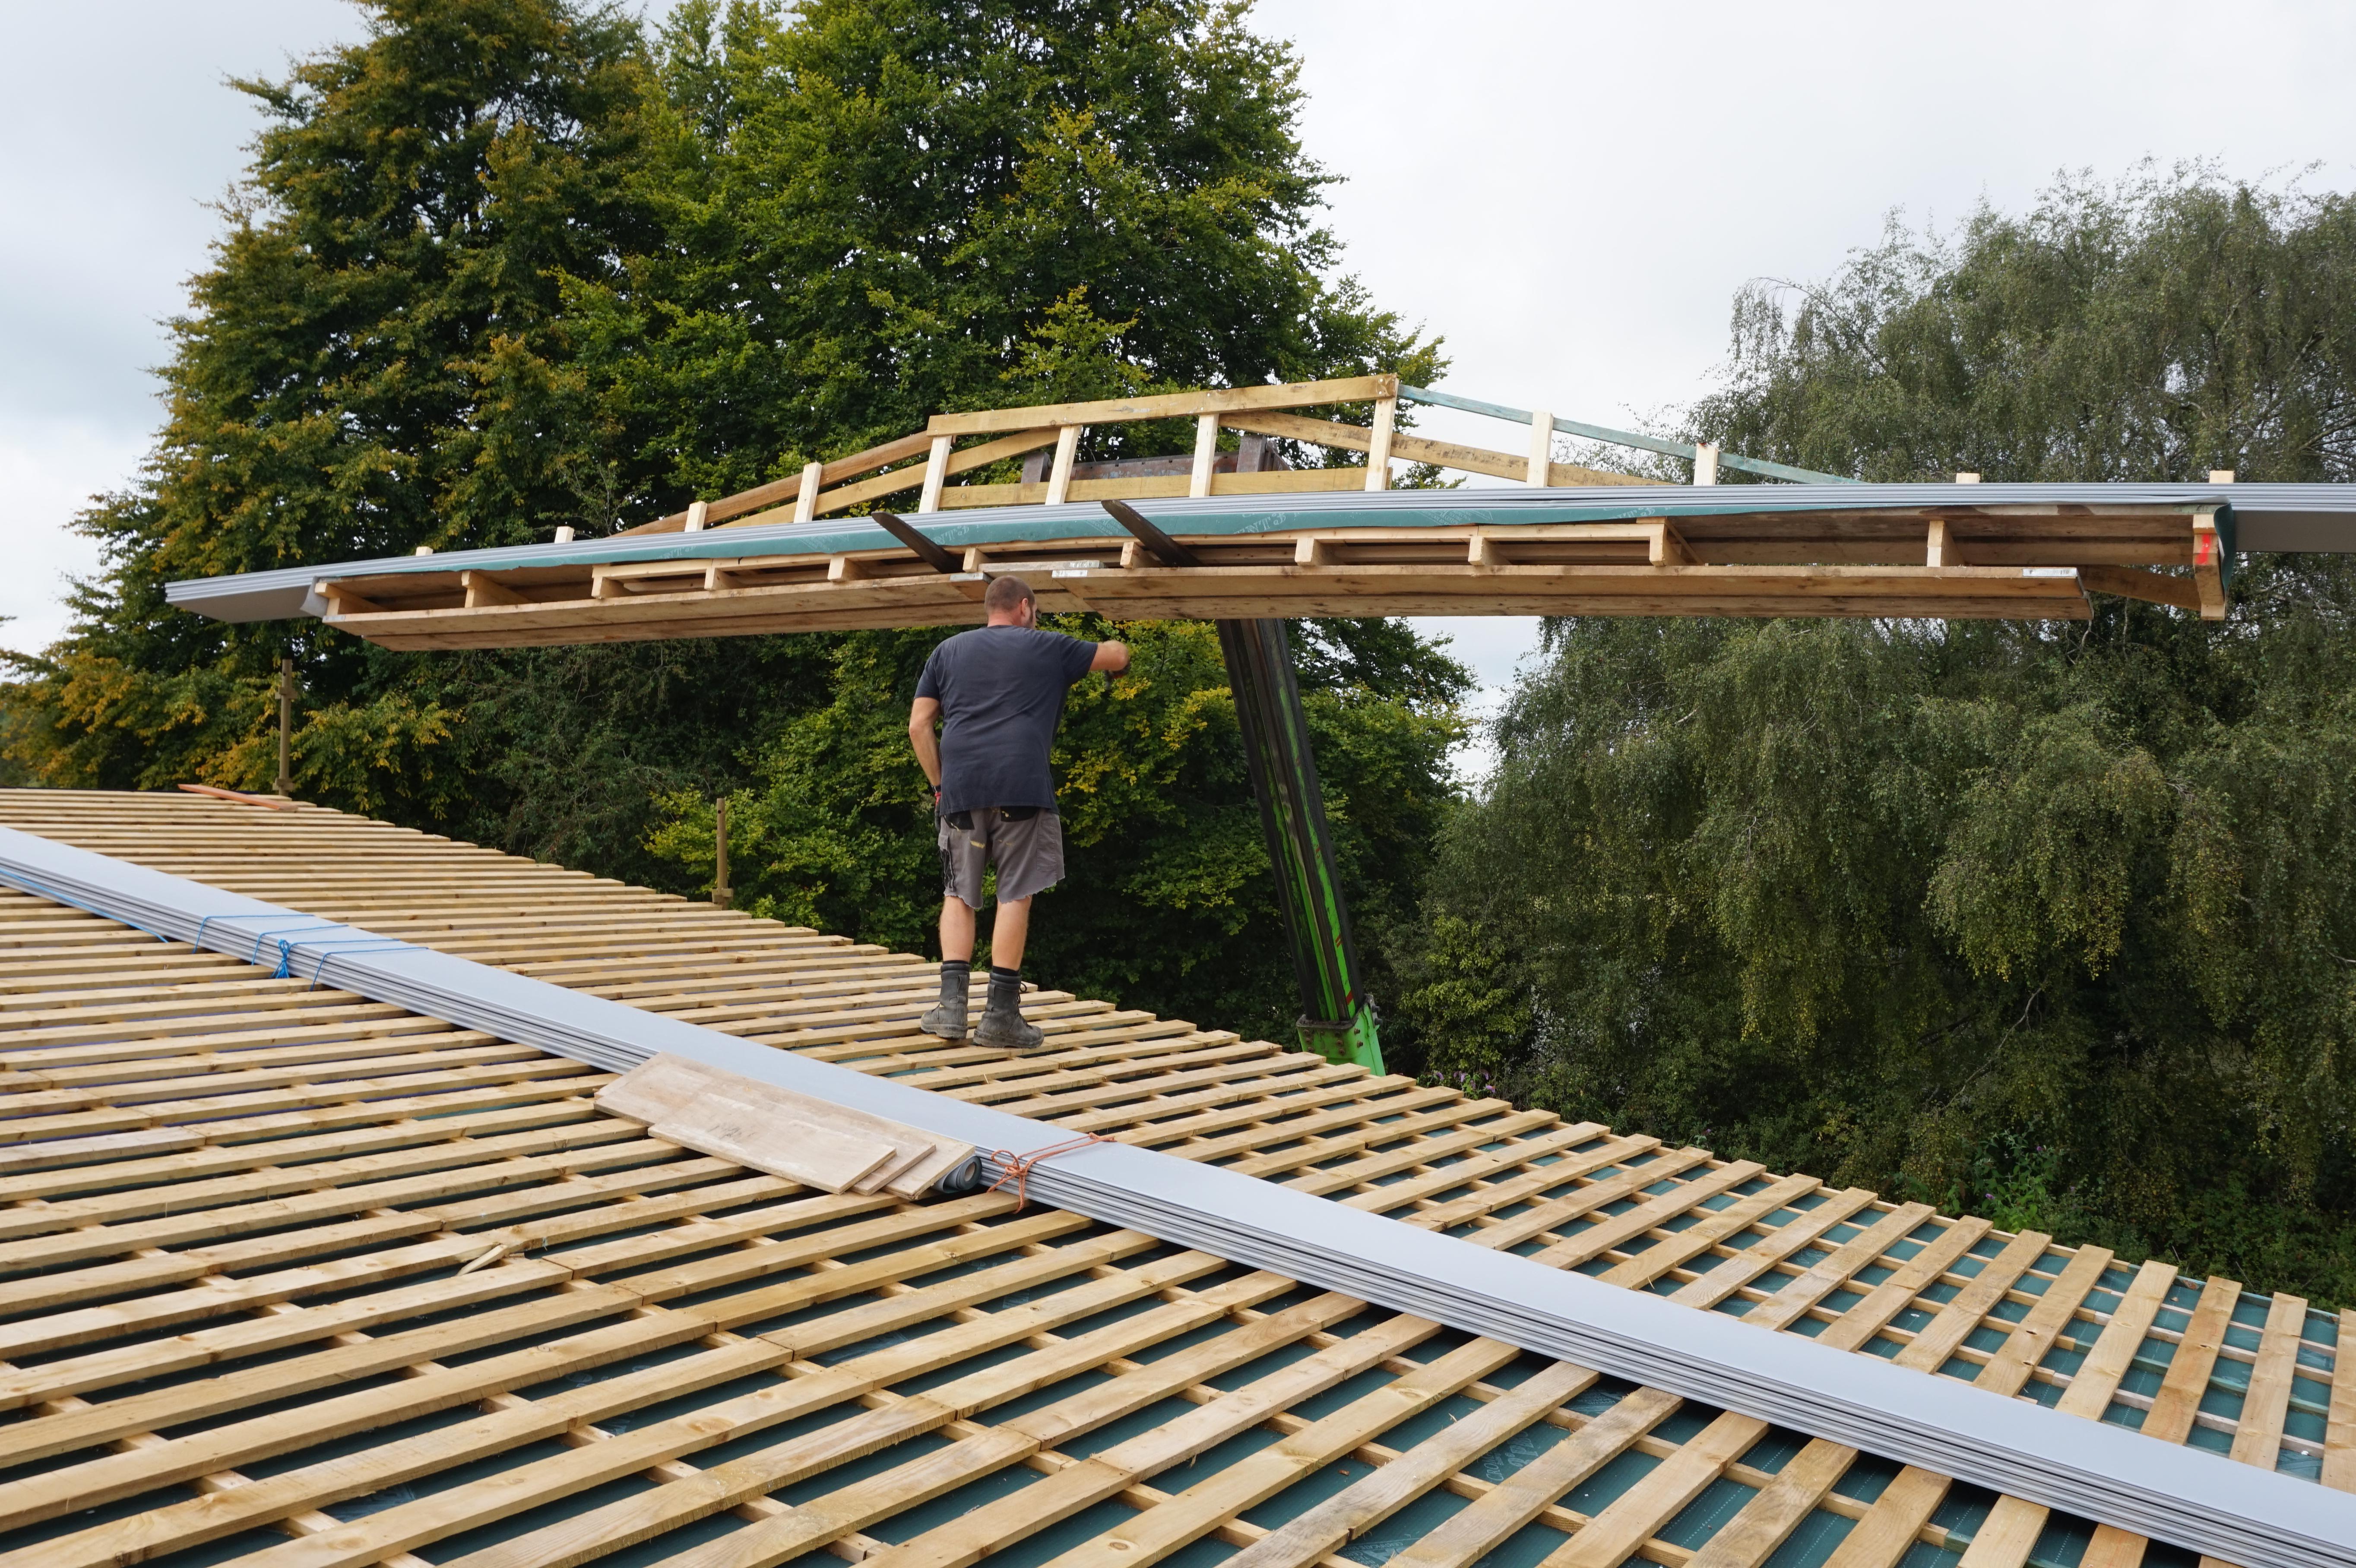
In principal you can use beam and block externally. In Scotland you can (in the right circumstances) have B&B over a a raw soil solum.. i.e no DPM with solum screed. They can stand a damp environment. But there is one big caveat. As a bit of background the Champlain Towers South in Florida that collapsed, I think the documentary is on I Player. There is one school of thought. They had a swimming pool and the slab connected into the main structure. They did not realise that the swimming pool slab was "really tied in" so when it failed it pulled the rest of the building with it. If you asked me to design this I would want to play safe and say.. I want you to make sure that the B&B floor / roof is subject to no more a harsh environment that they would be say in a ground floor. In other words it needs to be waterproofed from above. One main reason is that some folk put salt on their drives and patios in winter weather. Folk may get too keen on fertilising pot plants.. again these chemicals can promote corrosion of the steel in the beams. Reinforced concrete can protest and this can lead to failure that will drag the house with it. Yes I know you may not do it (use salt etc) but subsequent owners may be unaware. For all @DeanoFromTheDock is cracking on and has a big chunky retaining wall. Looking at the photo the design looks reasonably balanced as the house is not that wide along the road elevation.. but if it was a little wider then it opens up the possibility to make big savings on the retaining wall. Here you use the house to brace the retaining wall at the top and that can be a game changer in terms of retaining wall cost. Depending on the soil you have and the loads on the ground uphill there is a trick you can deploy. We know for example that some CLAY soils can push quite hard horizontally against a retaining wall. This can be great if you are doing a passive build or eco freindly house. You are probably using EPS ayway so can get a good deal on price. What you do is to dig out more of the soil (if you have the space) and replace with EPS.. this takes out a lot of the lateral soil load, you brace against the house (If you are using ICF walls they can offer great stiff sideways/ horizontal support).. in other words you look at the design holistically and get try and get every bit to work most efficiently. Oh but it sounds like I could sell you chalk from the Downs.. but.. here is a pit fall. If you use this trick you have to be sure about how you are going to control and understand the ground water. EPS floats so you need to check for "ballast".. if not you could wake up one morning and find your EPS is now blocking the view from the windows.. not a good look if you are the designer. @DeanoFromTheDock Let us know what your SE thinks.1 point
-
Great point @Annker Something looks a bit odd here. From the info you give I have understood this is definitly the first floor. On these 1930's houses you often find that the first floor joists are 1 1/2 " thick ~ 38mm. The old rule of thumb is when working on a 2" thick joist is to take the span in feet( 3.5m ~ 11.5 feet) divide 11.5 by two .. 11.5 /2 = 5.7 and add two inches for joists at 2' centres. Thus 5.7 + 2 = 7.7.. about 8". By inspection you can then say.. a thinner 1 1/2" x 8" deep joist looks about right at 18" centres. But you may ask.. why did they go to the bother of putting in thinner joists at closer centres. One reason is that the closer centre joists lets you make the floor boards thinner. In todays money we know that for domestic floor loading you need 22m thick chipboard for 600mm spaced joists and 18mm thick for 400mm spaced joists. Measure you floor board thickness and let us know. But you mention you have 4 x 3 floor joists. Yes the width is a lot more but I suspect you have a steel transfer beam hidden in the floor that you have not found yet. Even though you have much thicker joists I doubt they are spanning the full 3.5m. You may find you have an old rolled steel joist in the floor depth acting as a transfer beam. If you are able to drop the ceilings then there are a few things you can do. But you need to know about this transfer beam. For all. Lets just say you don't have a transfer beam. You want to add UFH, beef up the sound proofing, make the floor less bouncy and say make the ceiling more level as it may have sagged over time. The easy way is to just bolt and glue deeper timbers to the sides of the old timbers. This stiffens and strengthens the timber between the walls. But at the ends the new timbers don't get embeded into the walls.. you leave the walls, bearing and restraint as @Annker alludes to. But now you have created a stronger timber with a big nasty notch at the end where it bears onto the walls. When you check this you'll often find that the timbers now fail in shear at the ends and the grain wants to delaminate / split not least. You can get round this sometimes by using steel straps at the joist ends .. like stirrups. You can see this with Engineered joists where the top flange is the bearing part on the wall head, they configure the nail plates to act as stirrups. @Crowbar hero If you want post more info, a few sketches would help a lot.1 point
-
Tufty’s plant room definitely looks the business..I definitely would go as big as is comfortable to. We had 1.8m x 2.7m and it has ended up a touch too snug because we originally did not plan for one and split our generous utility room to create ours. All our MVHR equipment, Solar PV set up and batteries, Hot water cylinders, Buffer cylinder, Water softener..blah blah..will be lucky to get a little space left over to put the rechargeable vacuum cleaners out of sight.. Fermacell sounds a brilliant idea for maximising wall placement… as does making sure that there are good heat smoke alarms installed .Earlier on in our design process ..researched Plant rooms as I had this same question and there was precious little info out there..Really informative thread!1 point
-
If you are having for about to have the house wired, is that utilising the 3 phase? If not, I'd speak to your sparks and tell them you may be going for 3 phase and could they consider that in any work they are doing now. If you go for a 15kw system, WP could well ask you to spread it over the 3 phases so you would need the house wiring over 3 phases to use your PV. That said there was a post on here a while ago saying if you have a smart meter with net metering any unused exported PV on one or two phases will cancel out an equivalent amount of imported energy on the third phase. You look to be calculating the forecast monthly PV generation with a panel "efficiency" figure. You'll likely get more accurate figures if you Google PVGIS, input your data and use their forecast figures. If you are focussed on ROI, you might want to run your calculations using a variety of grid kwh unit figures. I cant see the current unit rates lasting too long!1 point
-
I believe the limit is enforced with a supplier owned circuit breaker (not fuse) and if it trips the supplier has to come and reset it. Well this is one way to limit energy usage, it makes realise how good the UK system is with often a 100A fuse being the only thing to stop excess uses. The domestic appliances are easy to control, i.e. don;t put your washing machine or tumble dryer on while you are cooking your dinner etc. But you have to assume the ASHP can turn on at any time it wants to, so if you are installing say a 12kW ASHP which might consume up to 5kW of electricity, then increase your supply rating by 6kW so it can be on at any time without having to interfere with any of your normal usage.1 point
-
Which is fine if there is a designated main (or principal) contractor however under CDM2015 if you’re the main contractor on site at that point - ie have total control of all operations, then you are deemed the main contractor for the purpose of CDM 2015 and by the HSE. From the HSE website : If a domestic client does not appoint a principal contractor, the role of the principal contractor must be carried out by the contractor in control of the construction phase. So for this to not be correct then the contractor should have an explicit clause in the contract that requires the client to act as such. I would be interested to see where that is highlighted in any Potton contract as I’m not sure how HSE would see it being passed to someone with no liability or training in safe working practice.1 point
-
this.. and.. this.. Potton are the main contractor under CDM2015, you are a domestic client. Under CDM2015 the main contractor holds the responsibility not you - if Potton are telling you otherwise they need to go and re-read the regs …1 point
-
Plus another one. For my temporary accommodation in self build site I converted a farm shed with uneven concrete slab. Dpm, sand strategically placed to stop the 100mm butted insulation boards from rocking, then a raft of 2 layers criscrossed of 12mm construction ply screwed together, floating on the insulation boards. Solid.1 point
-
Thanks, it's still a work in progress. I'll leave the tours for my wife - I prefer being on the tools ☺️1 point
-
hangers better for thermal bridgeing/air tightness.1 point
-
I have said before the cheapest way to provide this is buy a cheap old touring caravan. It will provide a chemical loo, will have seats and a table and a sink and gas stove to boil a kettle. Only downside is you will have to bring drinking water each day if there is none on site and you will have to empty the chemical toilet. Practical experience, my builders were more inclined to go behind a tree for a pee and bring their own food and drink and sit in their vans.1 point
-
I built a shed using timber and windows from the previous demolition and a bit of shiplap. Kettle and a water container, even biscuits and a cool box for milk etc. proper nice it was, well I thought so. The timber frame contractors had a look, admired my handiwork and then retired to their white vans for their breaks, mostly with their own thermos flask (but the biscuits did go). The shed is still in use, but as a shed now. I think it would be well worth asking Potton exactly what they expect of you to fill their requirements and do the bare minimum to meet their demands.1 point
-
Hi all. I completed my 100% self build extension some time ago and decided to blog every step. I know how long I spent researching and looking for information - it's why I wrote my blog. Viewers of my site encouraged me to share my experiences here on the Buildhub forum so here I am. My blog site is 100% free and not a commercial site, it's just me detailing every step I took from design to completion of the structure. I didn't pay an architect or a builder and completed the project for circa £25,000 rather than the £125,000 a builder quoted me. Whether you are interested in doing some or all of a project I hope you will find something of interest on my site - www.diyhomeextension.co.uk - You are of course also welcome to contact me on Buildhub too. I'm here to share what I learned and to help and encourage others. I wish everyone good luck with whatever project they are tackling. Best wishes, Chris
 1 point
 -
I'll probably stick with traditional timber, as the tops will need notching for UFH pipework, and I'm not sure what else engineered joists will bring to the party.1 point
-
I added a Pi-based controller as I was finding the built-in humidity trigger to be a bit hit and miss. The threshold was set on the unit but it was an absolute threshold so just when I got the balance right it'd need tweaking as the seasons changed. Sometimes it wouldn't trigger when I expected it to and sometimes it'd do so when I didn't. As I had an unused Pi Zero and humidity sensor I put it to use even if it was a bit overkill. To lessen this though I add temperature sensors to the four main ducts so I could monitor (and graph) its performance. Useful to begin with when I was still learning about MVHR, and I still look at it occasionally now. Handy for knowing the outside temperature too, and I've always liked graphs. ? I may expand it to have greater control over the summer bypass and summer boost if I get some time to do so.1 point
-
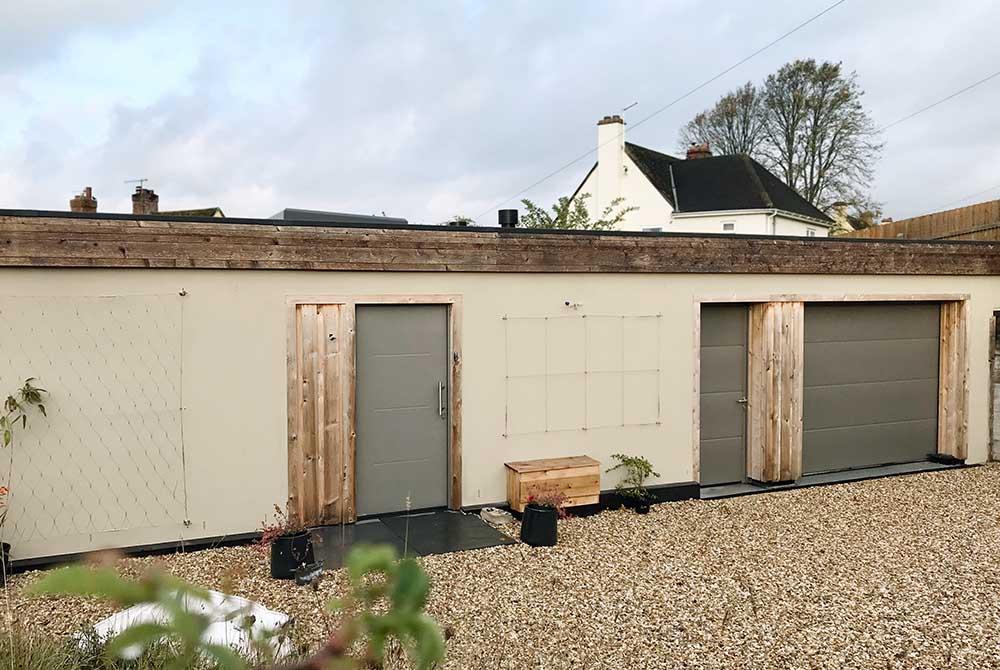
So a caution re' 'harmonious' garage and house doors by Horman. I used a high end supplier fitter who Horman says are fastidious and fit more units than anyone in the country. I was clear that I wanted matching doors. After wood was ruled out my compromise was as pictured below and it's disappointing. The thermo65 with square profile frame doesn't use the same horizontal panel effect but I was accepting of the 'mimic'. It can't be fitted with the same handle as the garage personnel door and only offers a choice of pretty horrible handles. These things I knew and accepted. The colour of all products is the same, but the metal surface finish is marginally different on the Thermo65 product......when installed side by side on the same plane, as I have them that colour manifests vastly differently.
 1 point
 -
Last one I fitted we used concrete screws to hold it in place and then drilled 600 centres at 50mm staggered along the centre line starting 150mm from the end, then inserted the Fischer resin capsules and stainless pins. Waited til it went off then nipped them tight. It’s still there and has a lot of weight on it so it must work ..!!1 point
-
Consider bolting a ledger plate to the wall and then nailing your joist hangers onto it. Much easier to achieve good air-tightness and achieve a level first floor. As per the excellent green building store videos.1 point
-
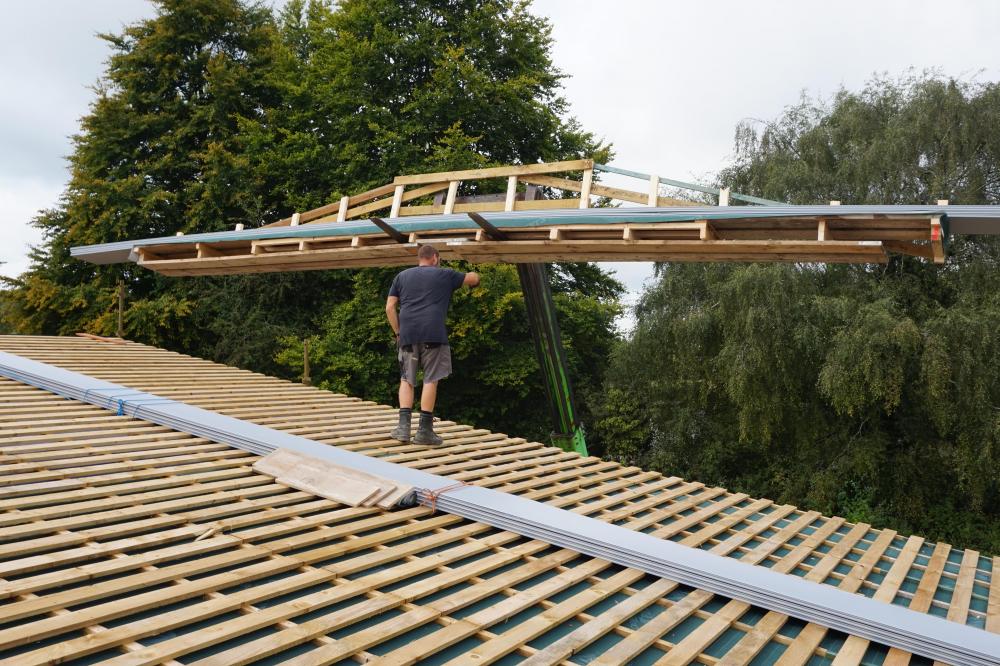
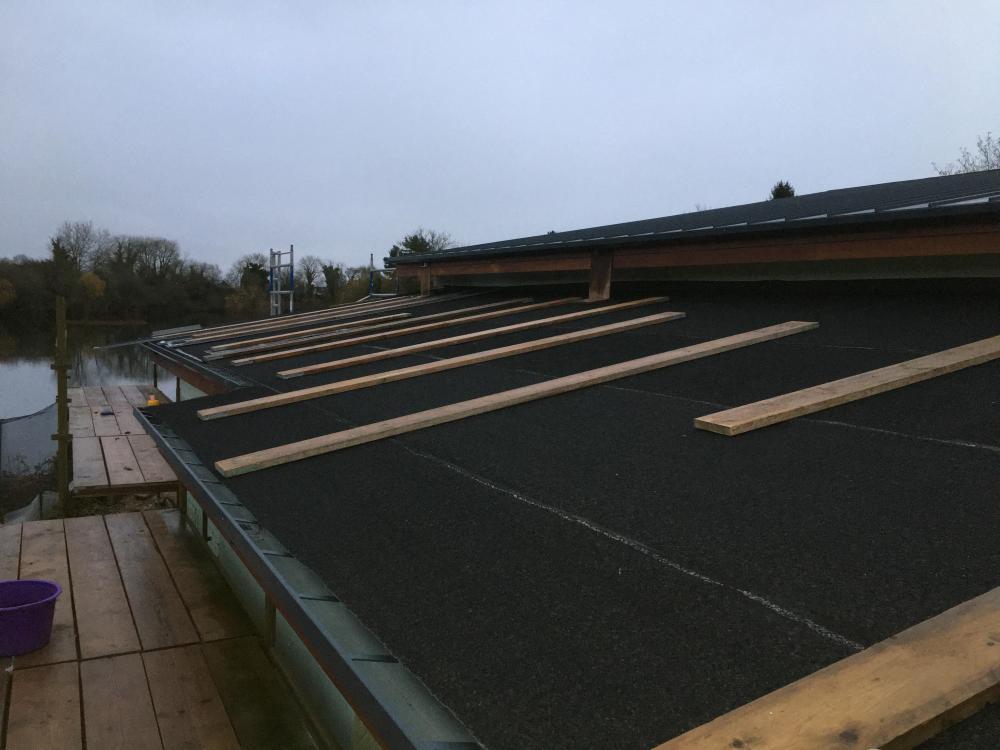
I have two lots of membrane, metal roof but similar, membrane counter batten, sarking fitted hit n miss style membrane metal roof.
 1 point
 -
Any chance you can use the quote function, please, so that we both get notifications properly and to make reading and replying a great deal easier? The simple reason is that much of the air permeability will be through fabric that you cannot easily draft proof. Masonry is inherently quite leaky, for example, as are other elements of the structure. A chat with any builder who is building new houses will quickly show that, even to meet the pretty low demands of building regs, they have to radically change their approach to making the house less permeable by design. Our house, like all new houses now, has an airtight/vapour tight barrier layer over the inside surface of the external structure of the whole house. This is taped and sealed everywhere, including taped seals that connect this internal layer to the door and window frames. It's really difficult, short of completely stripping an existing house back to a shell, to get close to this when trying to improve an existing house. I think you've made your point clearly that for your particular circumstances, with an expensive installation in an existing house, where ventilation heat loss may not be the most significant heat loss element, you do not feel that MVHR is worth installing. That's fine, but many others hold views, based on their experience, which are markedly different to yours, and those views are every bit as valid as your own. The title of this thread is bogus, too, as it is clearly intended to be highly provocative and to create a firestorm of outrage. You knew that when you chose it and that doesn't really endear people to respond calmly, IMHO. My personal view is that the air quality alone in our house is something I would gladly pay a premium for. Not having hay fever symptoms, because the pollen and spores are filtered out of the incoming fresh air alone makes it worth having. The complete absence of condensation anywhere in the house, the rapid drying rate of towels and any washing we hang indoors, and the fact that we no longer use the tumble dryer are all additional reasons for having good ventilation. I've never lived in a house with such good air quality in my entire life, and frankly I couldn't go back to living in a house without an effective form of continuous background ventilation.1 point
-
Not meant as a serious post but.... This thing has a screen, so you can see (via the ring camera) who is at the door, and it has a speaker, to go ding dong when you press the button. Replace with an old school wired door bell with the chime unit in a more central place in the house, and a spy hole through the door to see who is there. No need for the shelf and you will wonder why there is a socket there. I'll get my coat.0 points
-
It's not set for weather compensation is it? Seen it plenty of time on here recently, where the weather compensation curve has been set the wrong way around, so as it gets colder outside the flow temp also gets colder. Have you checked?0 points
-
0 points
-
Make sure you give clear instructions.0 points