Leaderboard
Popular Content
Showing content with the highest reputation on 04/16/21 in all areas
-
Hi Have done the final pour today and fitted the glulam ridge beams, all went well so happy days will get the wall plates fitted tomorrow and will start the roof weekend. I PU glued the blocks for the gables so the beams could be sat in place and this worked a treat. Also managed to get the floor joist fitted this week. So good progress?5 points
-
Profit 15% = 150k SDLT, fees for sale, SE fees, warranty fees, finance fees, BC fees, architect, QS, interest, valuations legals £80k CIL 25k Utilities £30k Prelims £10k Construction and fitout £300k Contingency 5% £15k Total £610k Purchase £390k2 points
-
Yes but you'd be better going with a rockwool batt or similar that would help with the thermal performance.2 points
-
I've a velux and keylight in my house but researched Fakro at the time. I've also had various CPD's by all these companies. I've installed them all at various times in different projects I've worked on but only once installed the conservation version so don't know as much about these. All the knowledge is about 18 months old so newer stuff may exist or have changed. What I've found in summary: For the electrics velux have their own control panel. This actually has a benefit in that the the Velux technical department can answer questions and help. Keylight just use a control panel by an outside manufacture. I've never used Fakro electric rooflights that I can think of (maybe a standalone AOV). On one university project I installed 20 odd Keylight rooflights and had loads of problems connecting these back to the BMS. They got it to work in the end but it was difficult. Velux have a 5 layers of glass Passive House version but that needs it's own separate mortgage and only comes in one or limited sizes. The Velux and Keylight triple glazed are very similar however you can get a sound reducing glazing for Velux. This adds cost but also improves the u-value beyond what Keylight can achieve and what I went for in my own house. The electric Keylight roof windows are cheaper than the electric Velux rooflights which is why I've an electric Keylight. The thermo foam perimeter strip on Keylight rooflights is a bit of a gimmick and marketing pitch. A squirt of expanding foam finished with airtight tape is better in practice. In tripple glazed they're all heavy. The Keylight Flick-fit brackets help but it's still a two person job on the larger ones. In generally Fakro are more expensive (based in Ireland, not sure if this is the same in the UK). Not relevant but Fakro make excellent loft ladders. In short the differences are minor and I don't think you'll go far wrong with any of them.2 points
-
2 points
-
Nothing wrong with that, but if BRegs were eye-balling this they'd want robust access for rodding / maintenance where the adverse changes in direction were. As long as the first invert at 1000mm turns to horizontal, an air bereak will occur and there is still no need for a stub-stack or 110mm air admittance valve. Basin anti-vac will suffice.2 points
-
1 point
-
I know what you mean. I'm currently battling to get grass seed down to create a maintainable 'blank canvas' before actually deciding how to proceed with the garden proper. Over the last month I've put some fencing up to deter the Muntjac a bit, put 150 mixed native hedge plants in, and a few young trees (birch, rowan and walnut). Pond liner arrived today, so that's this weekend sorted....1 point
-
Back to that time of year again, when you have a large plot it’s not easy to decide what you are going to do with it all. Last year we put up a fence at the back of the house about ten metres out to divide what we wanted as garden from what is essentially a paddock, we had decking built from the house and then you step down onto what is currently rough grass , seed spread quickly last year to give the appearance of a lawn. It’s been difficult trying to plan what to do with this area but we’ve just had a couple of walls built and it’s amazing how when you decide to do something like that you then begin to form a picture in your mind about how the rest should look, it doesn’t all come to mind at once but bit by bit as you decide on one thing and get it done the next part sort of falls into place. I’m really looking forward to getting it all done before winter so that next year should be maintenance only!1 point
-
Hi All, many thanks for the replies. Thanks @recoveringbuilder I'm thinking asking them to come and remove their equipment might be an option and then run an off grid system to the annex. @Bozza I'll dig the plan out and post it for you, thanks again.1 point
-
Fcuk me! Another week of 2021 bites the dust. Weeks are going by like days atm. Shizer!!!1 point
-
Yes Ali clad, Rationel Aura Plus. What they call Pebble Grey, same colour inside and out. I can look up the RAL number if you need.1 point
-
I’ve put each of my 4 kids rooms ( well every room except the kitchen and utility ) on radial circuits and their own RCBO’s. Lighting on their own circuits and smokes on their own circuits. CAT6 PoE switch is on its own radial, which also services hall / landing / cleaning / air wick sockets, and at a set time I can just drop the LAN and WiFi off to everything other than the downstairs TVs / set top boxes etc, and any time my kids offer up a bit of ‘confrontation’ the mere threat of my finger waving over the little test button on the RCBO makes the kids concentrate much more intensely on what I’m saying. I call it Parental Override. Works like a dream. I’ve hooked up with a sparky I met about 7 years ago ( @Bitpipe used him ) and he’s been giving me some ideas. Current projects will now be getting 20a rings instead of the 20a radials that I’ve been using previously. Made a lot more sense once the pros snd cons of both were discussed. 2 heads better than one and all that jazz.1 point
-
We removed the slider to reduce the weight for install, and just the fixed pane and frame was heavy enough. Then lifted the slider back in. It's lift and slide, turning the handle lifts it up onto the rollers and it slides easily but it is a big lump of window. Just shy of 3M wide so the sliding pane is probably about 1.4M wide and 2.1M high triple glazed.1 point
-
A friend of mine had a cat flap tunnel through the wall with a cat flap at each end, which he claimed cut down heat loss a bit. A sort of cat air lock.1 point
-
This is not a re run of the passive cat flap thread, The main house is air tight and mvhr ventilated and there was no way I was having a cat flap in that. The sun room is an add on at the back, think of conservatory with a roof, or Orangery. It is not as well sealed and not part of the mvhr system, so it's windows have trickle vents. It is joined to the main house via a pair of Rationel French doors, so exterior doors thought hey will never see any weather. So the sun room being separate can tolerate a dirty great hole in it that would kill any air tightness. I think a good compromise to solve the cat flap conundrum.1 point
-
1 point
-
@MP1 You simply bond the PIR ( you could just use 200mm of much cheaper EPS if you have the depth? Not much in it performance wise tbh ) to the slab with foam, weight them down whilst curing, and then you don't need joists. The 2 layers ( lay in opposite directions per layer with staggered joints eg not just overlaid ) will give you a rock solid floor with zero bounce, and zero cold bridging through the joists. Winner winner, chicken dinner. You need to shutter the slab in a timber shoebox so you can get the slab flat and level so there are no undulations to transfer through the uppers layers, ( that's where attention to detail is very important, but you're laying a foundation anyway so no extra expense other than time / eye for detail ) and you're good to go. For DPM, just put a sacrificial 25mm layer of EPS on the slab, then put your DPM atop that ( will prevent any puncturing ) and then put whatever insulation you want atop that. so 175mm PIR and 25mm EPS would be the 200mm sandwich. 200mm should be doable as that will allow a bit of a rain splash zone at the bottom of the external walls. If you can get 150mm or 200mm of insulation in, that would be the best outcome, but if the floor is not heated, then you could probably get away with 25mm EPS and 120mm PIR as that will still be quite a high spec for what it is. What are your plans for the walls and roof? Roof detail is of importance too. MVHR? I wouldn't bother tbh, as how far do you really want to go? Trickle vents in the windows and doors and a regular extractor in the shower will suffice in the real world. You will end up getting dizzy balancing between A2A heating and cooling plus mechanical ventilation. Plus you cant really have a single room MVHR system and a regular extractor sharing the same envelope in such close quarters as there will be a conflict when both are running simultaneously. A2A climate control, floor insulation to the max and save on the screed. A2A units will provide a degree of air quality and humidity / CO2 control when used in unison with manually set trickle vents. The trickle vent in the bathroom will typically need closing whilst using the steam room so the warm air from the office / bathroom spaces gets pulled into the bathroom vs cold air from outside, which will help with managing the damp / humidity in the bathroom. That will need a beefy extractor too, as the steam room will be a condensation bomb. Most steam units come with an integral fan which you duct to atmosphere, but I would use that, plus a secondary unit set to control humidity as well as 'stink removal'. I would look at the ICON range as they have shutters for when the fan is not in use, very handy to prevent backdraught without an annoying sprung 'flap'.1 point
-
I wouldn't cross the road to piss over Wren. Showroom is drop dead gorgeous, killer salespeople, "buy now or your children and the planet will die before you get back in your car".....etc......and then nothing after you have left and have paid, other than two fingers when the order all arrives smashed to bits by an over-worked angry delivery driver and huge turn-around times to get replacements 'when they can fit you in'. I lost a lot of money on 2 of their installs, when replacement panels and cabinets etc kept on getting redelivered by the same angry driver in the same state. The builder had to threaten the driver with a slap around the face due to just how badly he was treating the clients order whilst getting it out of the wagon and lobbed onto the pavement. 7 damaged deliveries of key decor panels which halted the whole install, and when the client went to the showroom to protest the showroom manager took over and got the transport manager to deliver the new white gloss decor ends, and proudly opened it up, removing all the 34 layers of bubble-wrap, to reveal the new hand delivered panel, damage free, in fcuking grey.1 point
-
Left the gap as you suggest which was covered by the skirting. Did not bother with silicone to save money!! (Tight us northerners!)1 point
-
Wales Online: Your decking is upside down and the grooves are not there for grip, experts reveal... https://www.walesonline.co.uk/news/wales-news/your-decking-upside-down-grooves-203890981 point
-
Normally with bricklaying, but they are simple to fit. Have a look at the reveal before the closers go in to make sure the insulation have been properly fitted.1 point
-
Two issues spring to mind: 1 - strength of the crate is intended in the correct orientation (and adding extra holes won't help) 2 - if the soffit level is too high it'll reduce the storage capacity May not be a problem but potentially is. Phoning the manufacturer is usually the safest way.1 point
-
1 point
-
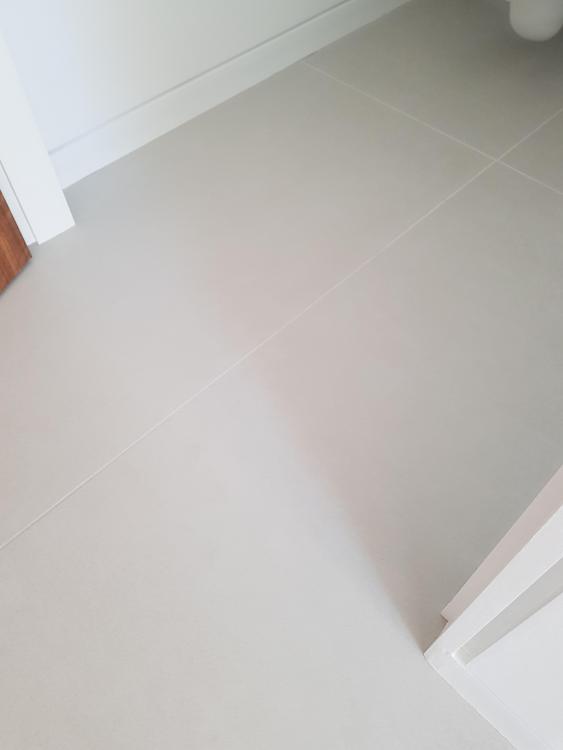
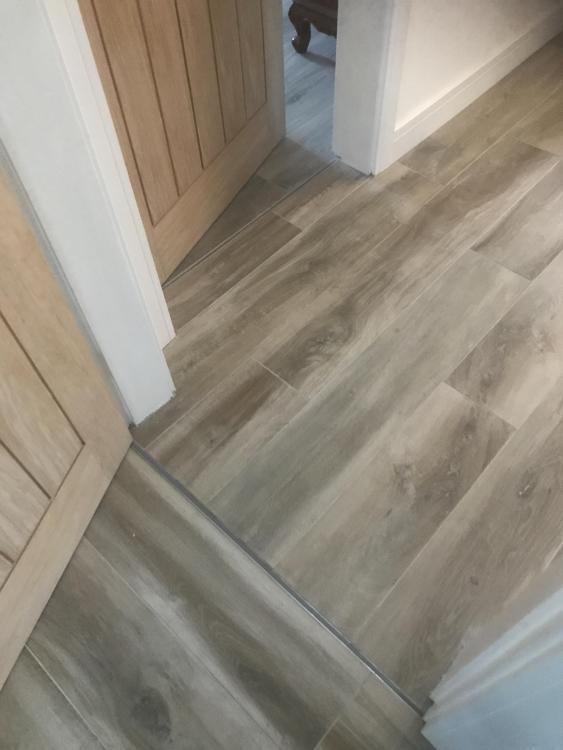
Would be ok but I did not even do that in the two bathrooms as I had used the mat throughout1 point
-
No, you have every right to be aware of the content of objections that are made, otherwise you have no ability to address them. If those are the only objections you've received, I'd just ignore them. If "I have looked on that open land for years" were a valid objection, nothing would ever get built unless it were completely out of sight of every other dwelling. "kitchen smells" is simply ridiculous. The last one adds nothing to what the planning department will already consider as part of the planning process, so can safely be ignored. I can't see how you'd gain anything by learning the numbers of the houses involved. Proposals for new buildings are nearly always objected to, even by apparently otherwise rational people. In many cases, there are no long term issues, especially if you're a good neighbour going forward. Of course, there are some people who might remain prickly, but frankly it's unlikely you'd want to be friends with people like that anyway, so no loss.1 point
-
As above, a pain and fiddly to get right but well worth the effort1 point
-
1 point
-
i would do it as you have drawn and fit it all dry on a bench and mitre bond it together, then fit in place.1 point
-
1 point
-
Nope. As long as you detail a bit of decent airtightnss and as much insulation as you can get, that is a winner. Electric towel rad and UTH for the bathroom and bingo. The cost of insulation vs screed is a no brainer. If you can get 150mm-200mm of PIR and then another 36mm of deck board atop that, you wont need any screed. In screed heater wire1 point
-
As usual it depends. The less energy your house takes to heat the more of a difference it will make. Going to double glazing would increase our annual heat demand by 30%. On a poorly built house this would represent a far lower % difference. The numbers can only tell so much. A cheap double or triple glazed window will leak air, catch when opening, and fall off the hinges in a few years. Whimsically there needs to be a point at which you draw the line at where the inner accountant gets to rule all. Otherwise you'd be mental to install windows turning on the light is far more economical!1 point
-
Looks good and can see where you are coming from - there's an SME developer in south west Scotland that only does small developments in the local vernacular and whose sites I love but I'd take a streetscape like the one below before it: There's some custom build pilots that aim to do that but not sure how they're progressing (Igloo, now owned by Aviva, have a site in Plymouth which is the main one that I remember from looking before, where you could choose from shell designs by a panel of architects then choose from within approved palate of materials and configure however you liked internally).1 point
-
Just googled that myself, and 904 seems to certainly be non-magnetic, so that's a good start...1 point
-
Be very wary of products that are other than non-combustible. Trespa is such a product and I would steer clear as it may be an issue with insurance, mortgage and warranty.1 point
-
Yes. I asked and was told there is no need to seal it. Our house has wooden cladding. Before that was put on, some areas had no clearance at all between the MOT1 and the DPC. So, a bit of damp came in - and promptly left when the sun came out. When I eventually reduced the MOT1 to the correct level and put the cladding on, it's drizabone. After 4 years, I still need to sort out the back step: there's gravel to just above the DPC - a bit of damp comes in now and then when there's driving rain from the South west , nowt to worry about. Disappears straight away - sun cooks it.1 point
-
https://www.amazon.co.uk/dp/B01HD653WS/ref=cm_sw_r_cp_apa_glt_fabc_CQ3BMNH9B7629HYTMVMK I have a product similar to this just under my soffit. Works fine for the normal free view channels. Gets most the hd ones as well1 point
-
Talking to the fitters from Isotex it would seem to be about what you should use if your are pouring 10 courses one side was 11 so better to be safe. I have had two pours and all been ok so worth taking the time as I still did not sleep well the night before?1 point
-
Hi have got up to wall plate and braced the walls, also fitted the pole plates to the walls for the floor joist so the fixings will be set into the concreate. The second pour was Thursday and all went well, so will be building up the gables over the Easter brake and then onto cutting in the roof. So making some progress.1 point
-
You will determine whether or not this is to be a contest. Nobody else. Take the hint, apply for PP, move on. What possible advantage is it to anyone - most of all you - to make a mountain out of an as yet non-existant Enforcement Notice? Yep, some people are bat-shit-crazy-vindictive-little-cock-wombles. And you feel the need to take notice of their behaviour? Get a proper problem.1 point
-
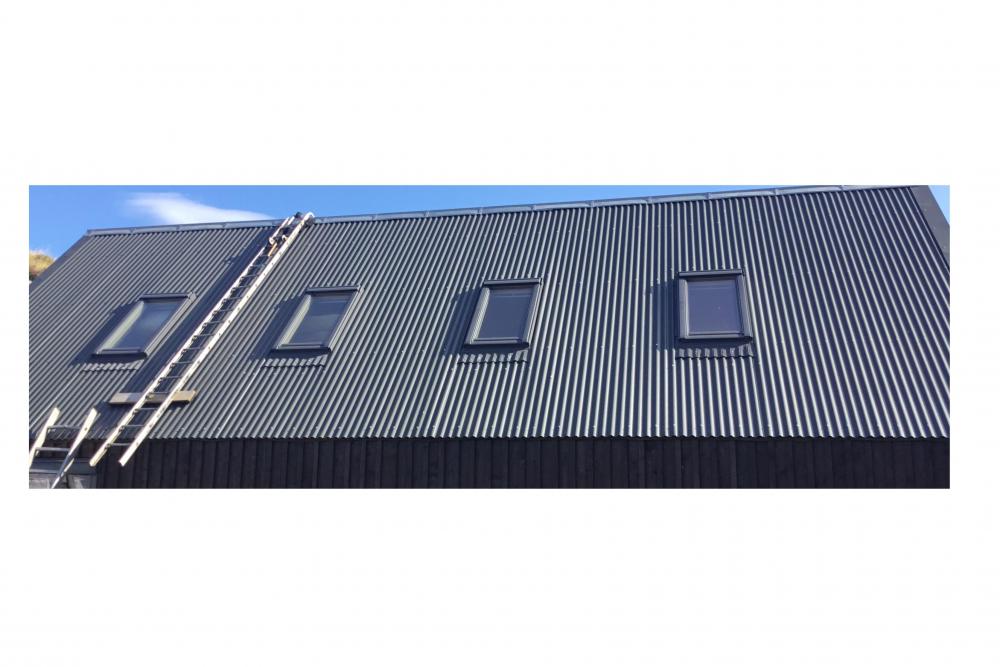
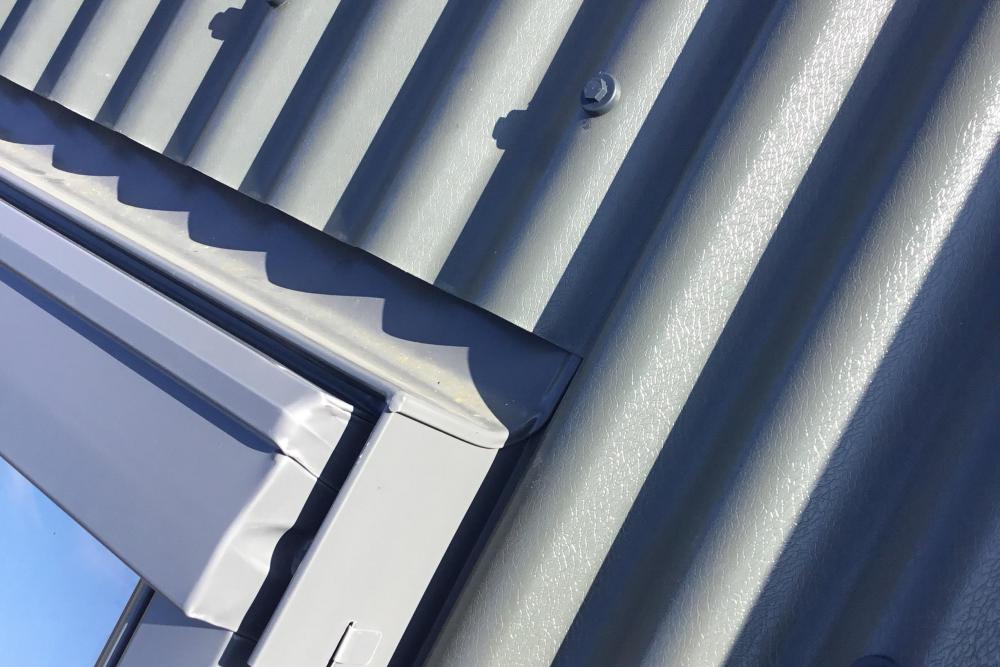
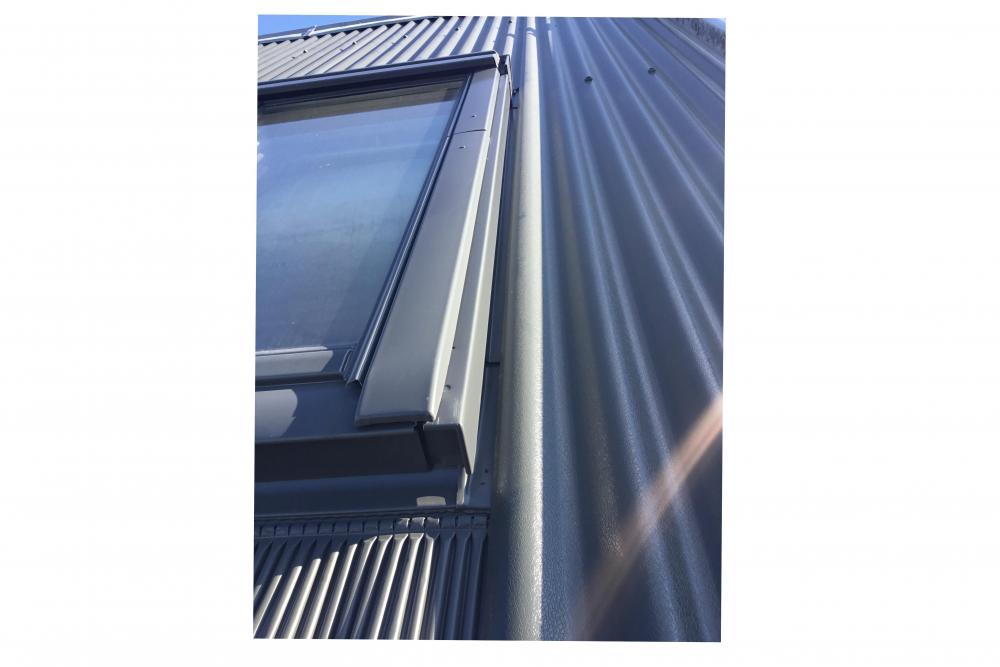
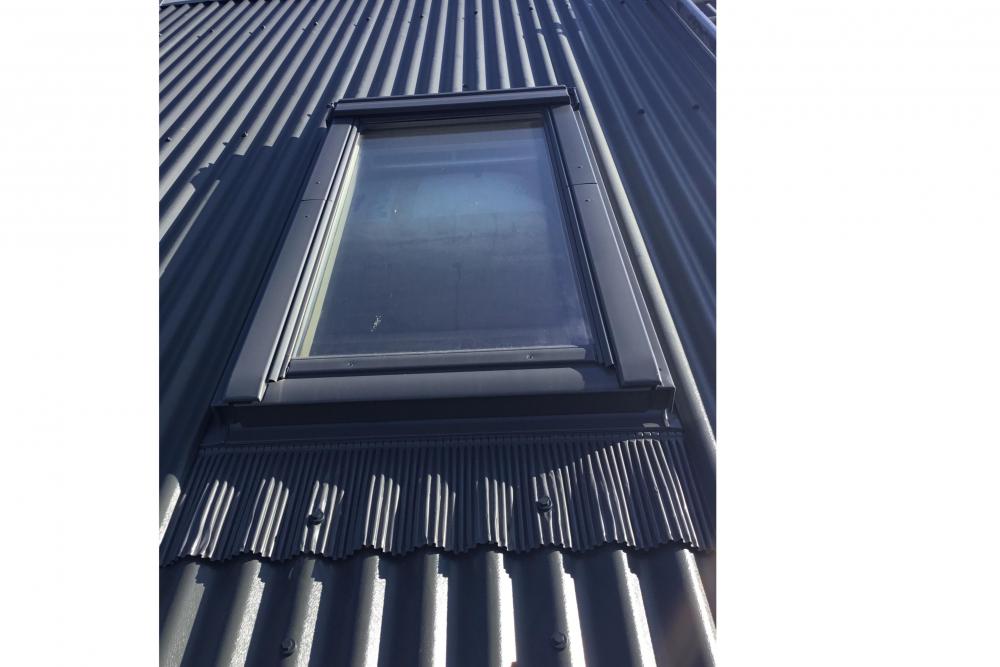
I spent a long time looking at velux installations in corrugated tin and NOT ONE was done well....... I looked at why they were done badly and then sat down and worked out how to do it well. I did the layout and install myself as the devil is in the detail if you want it all to line up and work properly. The most important aspect for me was the position of the windows and there size in relation to the corrugations in the tin sheets. You need to make sure that one sheets edge will end with with a non cut downward sloping corrugations that falls directly into the inner gutter of the velux..... you then need to know that the windows width is also correct so that the far side gutter lines up with the next sheet of tin enabling that tin edge to fall in the opposite velux gutter...... then if you have multiple windows (I had 4 in my roof) you need to make sure that they all correspond with the corrugations. There really is very little to play with on the set out as the tin does not allow for error, you get about 10-20mm of space in the flashing gutter to play with but you really want the tin edge to fall in the middle as if it’s to close to the window it could block up with leaves or moss, to far and it’s not going to be as effective, also ANY error will be carried over to the next window as the corrugation spacing is set. It’s possible with very carful layout but if this is done wrong your going to have another example of how not to do it....... if you find a contractor that says they can do it INSIST to be able to go and look at one of there installs..... I visited 3 different installations done by 3 different professional roofers and I would not have payed for the work......1 point


.jpg.1d90e205355df294b5f629730a37e2af.jpg)
.jpg.b2b0581180cab1fbdb4b713857bc1604.jpg)
.jpg.a310953bbe83d2e325b24b4fee0cd7f9.jpg)
.jpg.dbbf1f234bdeea5e69788f81c913a09c.jpg)


.jpg.c21f3ac78c9b7efd90cbdcb312744dc5.thumb.jpg.7adcad4c0e384f5ecd7d56b0618df6e5.jpg)




.jpg.ae50efa00268d4bb46c86511b2dfe102.jpg)
.jpg.3253a093c1962f6455bb60d7ba0054f7.jpg)
.jpg.d46af05da9dff50522f54b7a31708709.jpg)
.jpg.ecc59e9cd42b7d9a99cfd438eb4f7d51.jpg)
.jpg.a9b1197d3d32c40db721e5a37ea8efb7.jpg)
.jpg.7a6e0c5163fab6a6300f9acba58d23de.jpg)
