Leaderboard
.thumb.jpg.bac90f3bbf6868cf2118d010d936c99d.jpg)


Popular Content
Showing content with the highest reputation on 03/04/20 in all areas
-
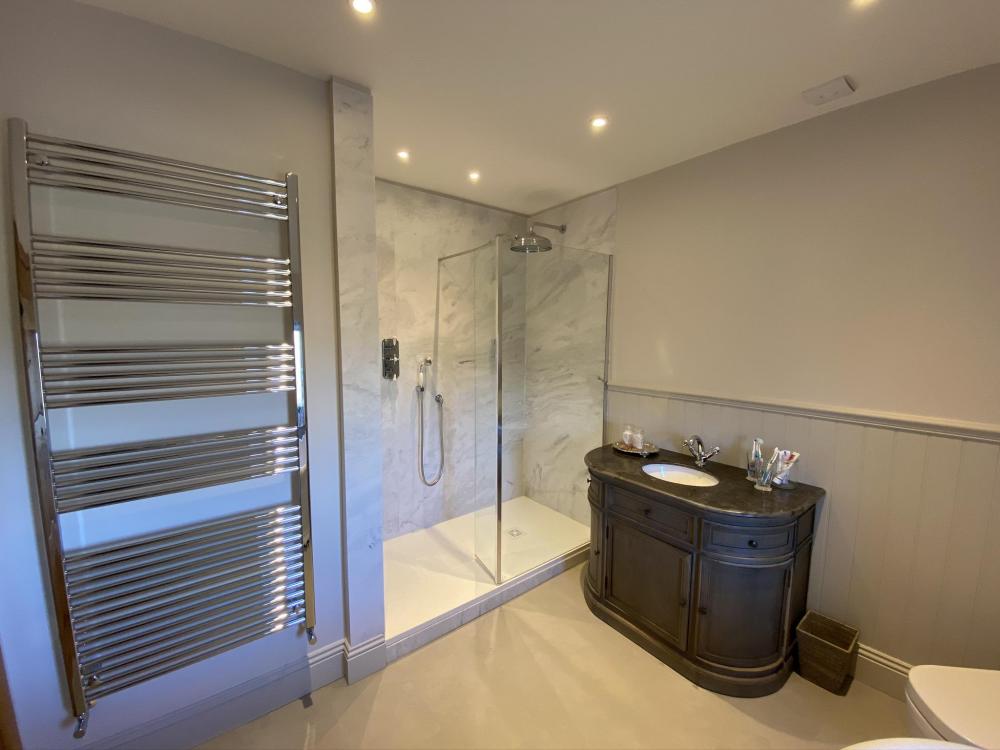
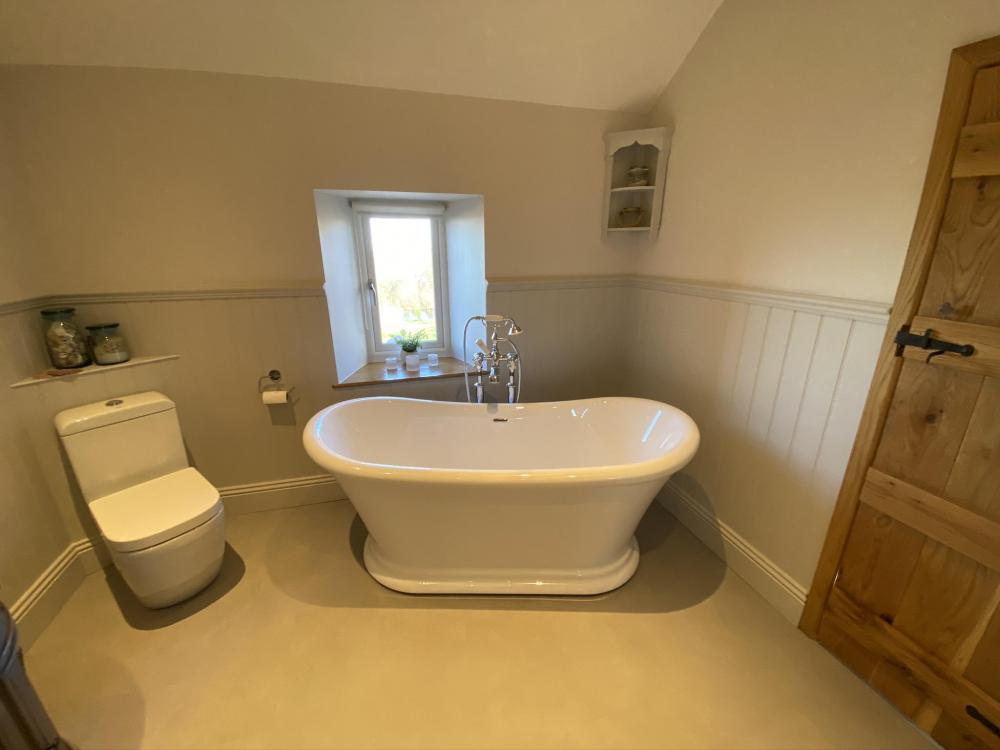
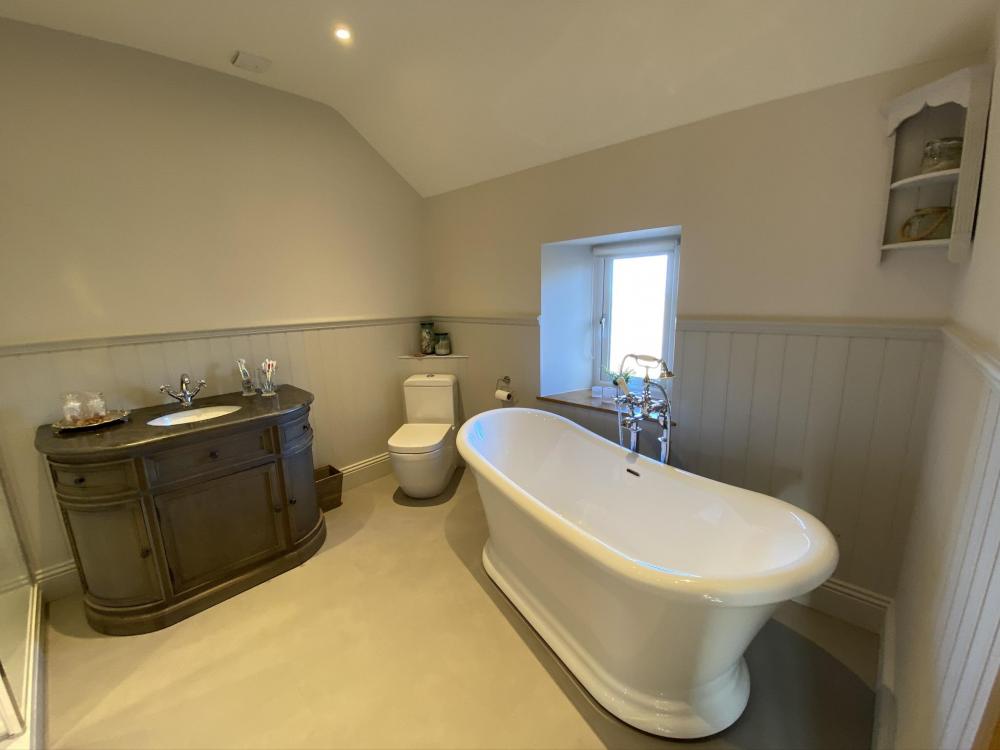
We’re pleased with the way the bathroom turned... still finalizing the decorations (mirrors, etc).. but it’s largely done now,
 3 points
 -
bridles should be doubled up as well
 3 points
 -
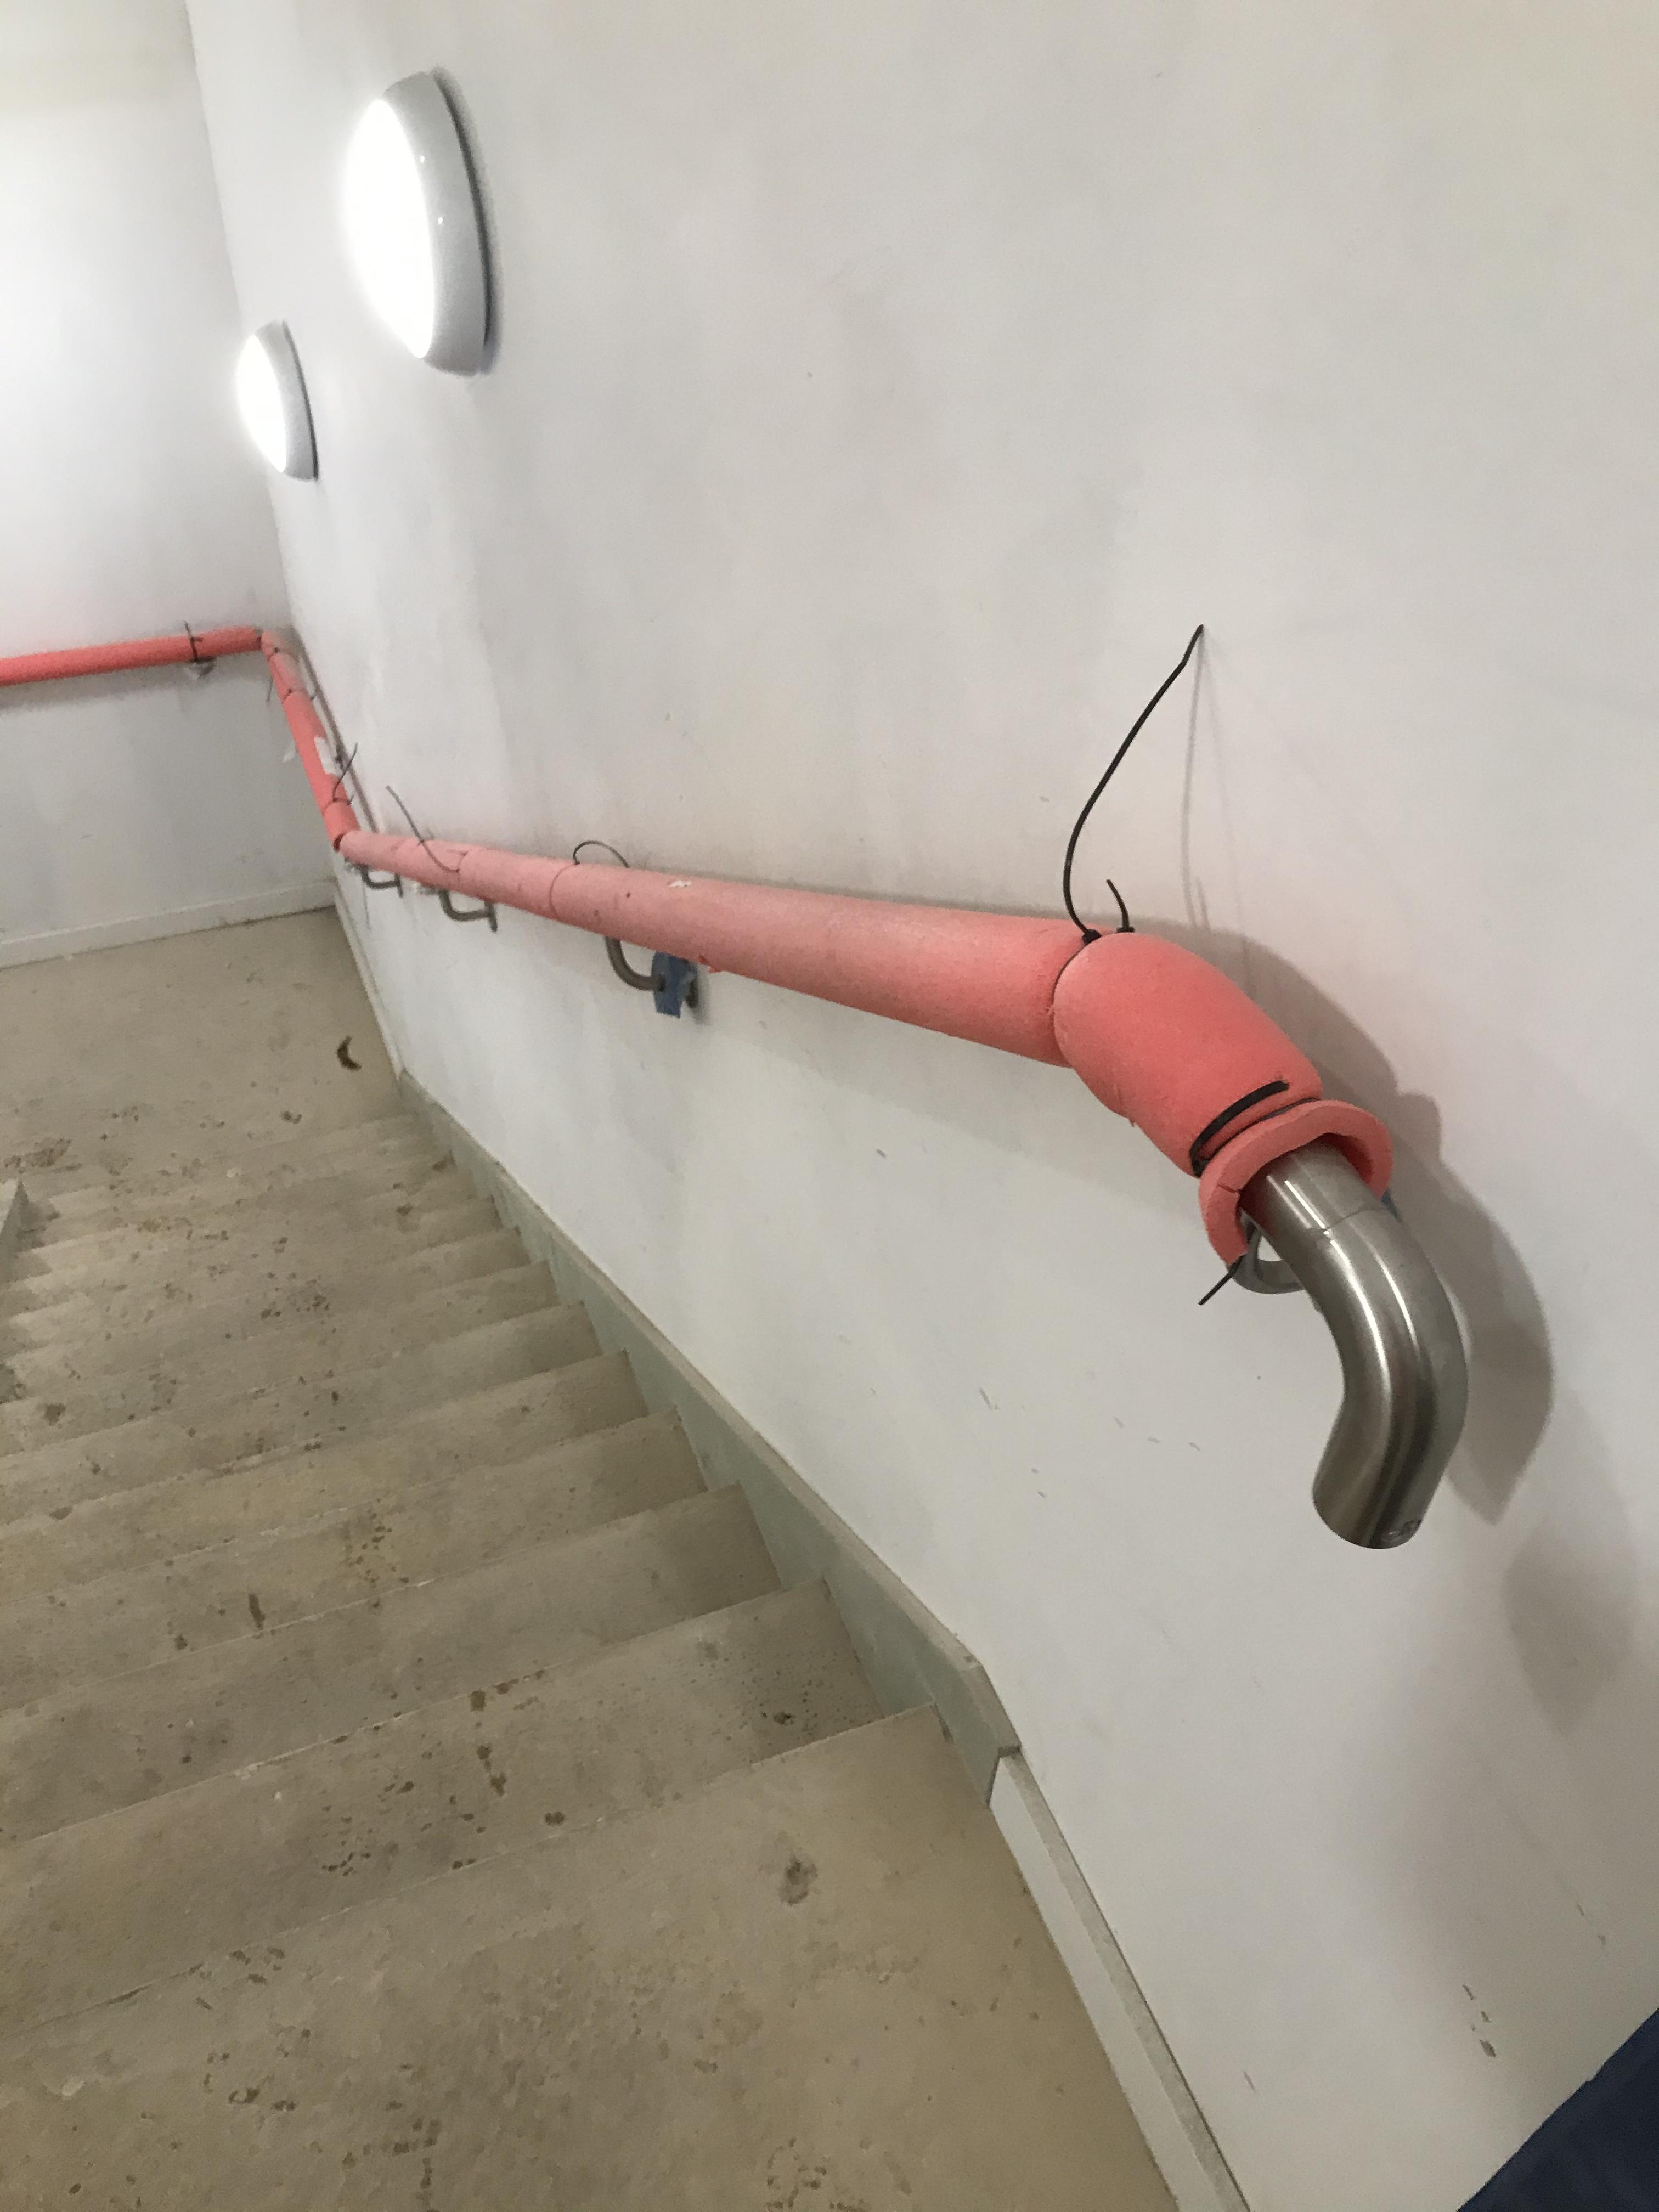
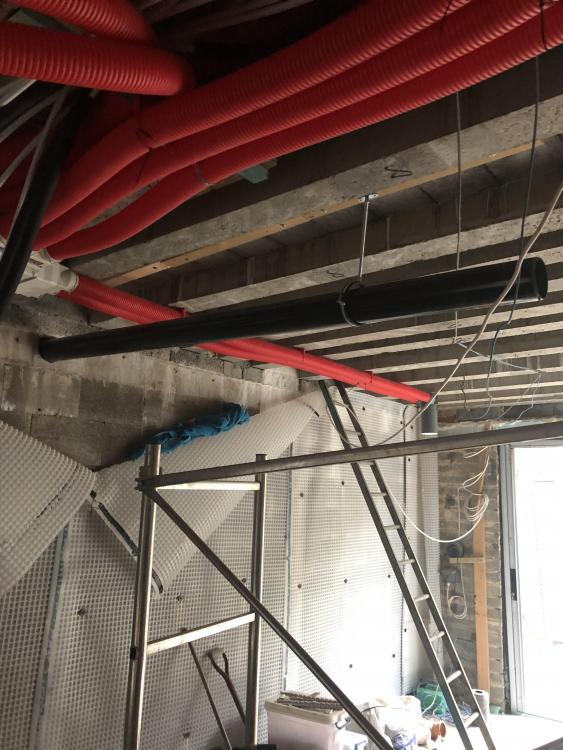
It's to allow for a 2.5° fall on the roughly horizontal bit of pipe.2 points
-
Or look elsewhere... I wouldn't be comfortable just changing the charging model given that this is someone who has seemingly shown little interest in offering you value for money.2 points
-
Right or wrong this is what I did. Seems to guarantee no draughts. I used every bit of pir up and foamed it in. Then used Screwfix vcl and silver taped the joins. https://www.screwfix.com/p/capital-valley-plastics-ltd-vapour-barrier-green-300ga-20-x-2-5m/12869?1 point
-
It should be specified on your plans, but as we know, they're a bit hazy. Ask your BCO; that's who you need to satisfy if you want sign-off. For what it's worth, I think yes, it is necessary, and if it was mine I'd do it without hesitation. The idea is to prevent moisture from 'living' migrating into your structure, condensating where it meets cold air and causing problems further up the road. You can install a cheap polythene sheet with a staple gun to form a barrier, or as @PeterW suggests, foil tape over the timber to seal it to the foil PIR, effectively achieving the same thing. If you can fit PIR that neatly, you can do a VCL! ?1 point
-
As I understand it a VCL is required - it can be done by taping the foil faces of the PIR across all the timber but that's a bunch of hassle and not as effective as a standalone layer. It's variously described as Vapour Control Membrane / Vapour Barrier / Vapour Check (with some arcane technical differences). You don't need any of the fancy expensive ones though for your purposes. A roll of DPM or similar heavy duty polythene is fine (semi-transparent is easier for seeing the studs etc for fixing boards but I think a bit more expensive). Given how susceptible timber can be to damage from moisture accumulating through condensation on the cold side of the insulation, and that you can get a roll of plastic fairly cheap and have it up in no time, I'd say it's a no-brainer.1 point
-
An interesting video of the retrofit of a compact MVHR in a flat:1 point
-
take it your roof isn’t square ..???? you could take out another rafter and then put new double rafters either side (needs it for strength) and then you really should have double trimmers top and bottom. what makes me wonder is how he’s managed to take those out without removing the tiles or the battens ..!! Need to also wrap the membrane into the frame.1 point
-
If you want a VCL then a £15 roll of plastic from Screwfix will do fine. If not, the world won’t end. I would just use foil tape over the joists and studs and be done with it - nice job to do, takes a couple of hours but you’ll end up with a nicely sealed up and shiny room ?1 point
-
You can copy them to any thread. If you see where the paper clip is just along a bit. I keep a blog and take loads of photos as this is useful later (where is stud or a wire/pipe etc?) I think it also helps others see how the how the house build comes together.1 point
-
Here's the company https://www.mcmonaglestone.com/ Shipping heavy stuff always has a price tag with it, Diesel and all that, I got 5 tonne of tiles in from Poland, but I knew the truck driver and part of the 40foot was offloading in the UK so he popped over here as a favour. I was being charged €145 for a bag of Gold and €165 for a bag of Grey, only €100 carriage Worth contacting the reps here to see if they have done it before, but as I said the benefit of shipping heavy stuff falls off quickly with distance. The Tile prices in Poland were 4 times cheaper for the exact same product compared to the Irish market, I also got all my Wetgoods, Gerberit/Roca , again at rock bottom prices compared to the Rip of prices we get here.1 point
-
for a dormer, up here at least, the max you can go is removing 4 rafters. don't know how wide you can go where you are without plannning for a window but that would give a nice big window without massively compromising the roof.1 point
-
55cm is the smallest size most companies make but you can get them up to 120cm wide. Either your rafters are way out of square or his frame work is. As above the rafter should not have been cut without doubling up.1 point
-
This site is awesome it’s just full of stuff you wouldn’t even think of, perfect I will and it’s written down in the floor folder ?1 point
-
Rafters should be doubled up either side of the roof window. That looks a bit rubbish to me.1 point
-
ProDave the drawing shows a 1200x900 window in the gable as does the schedule, however, a 1200 wide window won't fit in the space between a steel column holding the ridge and the roof slope. there is only enough space to fit an 850mm wide one. the kit is being stick built and sizes are as they should be apart from not being able to fit this size window where it's shown. as stated the person who did the drawings, not going to call him an architect. we did find a solution, as the window was of no use, i decided to cut it in half and make the opening 600x900, a bit narower than i'd have liked but saves the cost of a new window and wasting the old one1 point
-
Some dimmers have a minimum load specified. When incandescent bulbs are replaced with LED the load is reduced and can fall below the minimum specified for the dimmer. Adding the fan takes the load back above the minimum specified but is not an acceptable solution. Use a proper LED dimmer for the lights and move the fan to another switch. This might be possible using a modular/Grid faceplate (eg dimmer and switch on one face plate) but depends where the fan is connected to the lighting circuit. or just replace the dimmer with a switch as others have suggested.1 point
-
I recently fitted one of these dimmers.. https://www.medlocks.co.uk/zano-zmo150-led-dimmer-switch-digital-150w-module-only-white Its just a dimmer module, I used my existing face plate and knob. Zano make a range.. https://zanocontrols.co.uk/ https://www.medlocks.co.uk/catalogsearch/result/?q=zano PS It won't cope with a fan though.1 point
-
It was about £40/sqm to supply for the graphite enhanced EPS (150mm between the beams, 135mm above with grid attached for heating pipes) , infill blocks, perimeter insulation. We had it fitted by them (just the beams and the infill blocks) which they did in a day and brought their own crane, cost about £1k extra. The 135mm was supplied because we have heating pipes and therefore need a reinforced concrete topping of 90mm (minimum is 75mm above any pipes) I am probably misremembering - it would have been 150mm of Kingspan.1 point
-
Yes i do roll it. Don't use too much glue, and wipe up any that squezes through with a damp cloth. (Have a cloth in a bucket of water.) I usually lay 3 rows at a time. I will cut, and dry lay the three rows, mark the edge with a pencil, lift the boards back towards you as a stack. Lay down the glue, using the pencil line as a guide. Picking the boards from the top of the stack, lay, roll, and wipe. The last one i did was 60sq meters including 4 door ways, and it took me 2.5 days. Have fun. Re the glue. Don't use too much. The first time i layed it, i did, and it slides around like a pig, and takes forever to dry.1 point
-
Welcome! Start a build post and get your photo diary started!1 point
-
There's a thing called a "quasi easement" that is relevant here, but I cannot remember the detail. I think it has to do with intention to create an easement.1 point
-
Err, are you saying the extractor fan is controlled by a dimmer switch? That's not a good idea at all1 point
-
Preliminary test of theory ? Drain through to outside ; got to adjust the clamp length and add a few more . Aiming for 10mm fall per metre ...
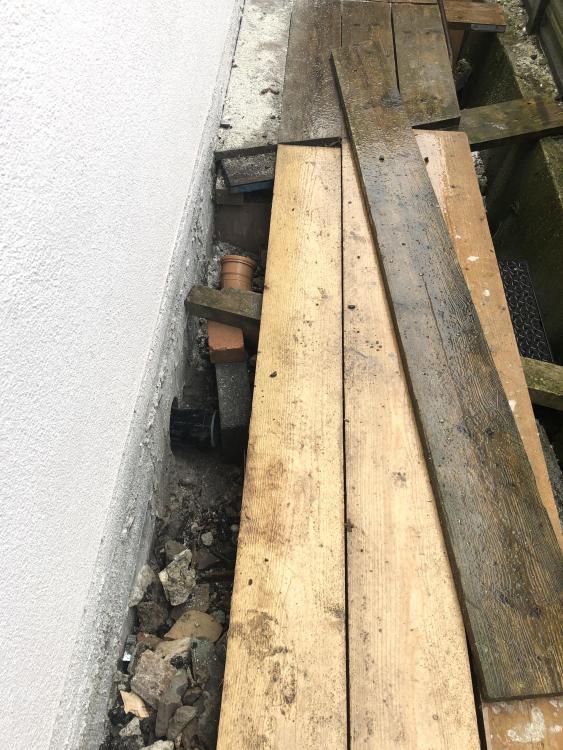
 1 point
 -
You are right Carrerahill. I have laid tons of Karndean over the years, and never had a problem. Post some pics when you are done, so we can all admire.1 point
-
I have solved this. So this is where I am: 12mm exterior grade hardwood core ply laid, it is flat, seriously flat, really happy with it, and I was tempted just to varnish it and be done as it looks nice too! The only bit that needs a little tweak is where I got a little carried away with my router blade depth when removing a 150mm x 900mm x err 5mm section to run the sheet right up to the back door and over the 2x6 floor plate which the door partially sits on I intentionally set it 5mm higher than the sub-floor level so when I ply lined the floor, assuming 5mm ply, it would come in at the same level, but I had no reason to think, back then, that I was going to need to find 14mm so my fridge cabinet sat at the same height as the wall cabinets, easiest solution was to raise the whole floor level 14mm - so taking into account my flooring and the ply I needed min 11.5mm - so 12m ply it was! Anyway, I must have leaned a little heavily on the router or something and ended up maybe taking 7mm - result is that the bit that slides over the 2x6 was flappy! So I just poured in PVA, trowelled it out, put the ply down and screwed it down, it is going nowhere, but it has created a 2mm dip to the door, not to worry I have 4Kg of F Ball Feather Edge compound on its way, might even arrive today - I will also do the screw heads with this. I have Ardex flooring adhesive coming too and an A2 trowel. The actual Amtico will be here tomorrow too, we went for their mid-rage the "Form" and the friendly chap also found me some discontinued 2.5mm stuff in the back of the warehouse I could have for £10 p/m to go under cabinets. So the plan is to mark out the kitchen cabinet layout on the floor plus say 30mm saftey margin, ping a central line across the floor and start with an Amtico "plank" either side and work my way out, once over the cabinet line I can stop and finish it in the cheap stuff. The stuff I went for is 235mm x 1505mm so it should look smart with the large format planks, we have 225mm Oak in the living room and hall and it looks brilliant, I have never had so many comments about a feature of a house in all my life! I have spent hours and hours and hours researching and coming up with a strategy, sitting on flooring forums and talking to suppliers and even fitters - in the end I have come to the conclusion that it is just sticking some bits of plastic to a floor and as the prep is excellent, although really the prep wasn't hard because I built my floors blinking level, it will be fine! If I can build an extension I can lay some Amtico. I think Amtico installers just like to make out that their skill is far more advanced than it maybe is, I also was given horror stories when I decided to lay my Oak, apparently it was all going to warp and buckle and the whole lot would need ripped up. I think much of the horror story stuff is from poor prep, not dealing with the sub-floor properly, particularly where concrete and screeds are involved and using incorrect adhesives. I think the skill in Amtico is laying out borders or putting motifs into the floor but at that, it is just a keen eye and careful cutting.1 point
-
I will do something similar to your photo, thanks. Just been out to measure, the external scaffolding pipe dimension is 48mm.1 point
-
Hi, The manufacturer recommends MS polymer for use with the EPS.....I have a triton TT black membrane(goes on blue at first like blowerproof) painted onto the EPS and that Glue I'm using is called X-tack....IT's Tec7(very popular here) high strength adhesive, most brands have a high-tack formula.... Instant stick and super strong, I imagine it work on just about anything.1 point
-
It definitely will. I temporarily capped off our soil pipe at the top and whenever the toilet was flushed with toilet paper the waterless traps would all 'rasp' due to the suction. Sounded terrible. Refitting the AAV cured it. That's not to say a small(er) AAV won't suffice though.1 point
-
Definitely a separate toilet No one will want to eat in there after a week ?1 point
-
I would pull down probably half of the grade two listed buildings1 point
-
We have just installed an insulated beam floor - our's was by Lynx Precast. All went very well. The build up was 150mm beams with T shaped blocks between, dpm, 135mm EPS on top - this was supplied with a polythene sheet glued to the top to make it easier to clip the u/floor heating pipes to it, 30mm EPS to perimeter, 90mm reinforced concrete slab to be poured to dpc level as soon as there are 48 hours without rain forecast. The EPS is graphite enhanced so that we are getting a U value of 0.12.
 1 point
 -
On that note, we finished all the work on the bathroom yesterday - massive clean up operation today and we've moved back into our bedroom. Will share some photos tomorrow.1 point
-
That’s exactly what they do with pavement scaffolding Yellow foam cable tied Being 6”5 I always asked companies to make sure that lift are 2100 apart
 1 point
 -
Hello, Another post and another year of self building. Since my last entry we have made some progress in a few areas. I previously mentioned some trouble that I had with the treatment tank. We choose a Tricel model as it is widely installed on Skye and the local merchants all suggested it. The alternative was a rotating one with moving parts which I was keen to avoid. Other models were getting costly to be delivered and would require some form of mechanical unloading at my end. After my post I had a fair bit of communication with the manufacturer and the merchant. I didn’t back down and didn’t pay, in the end they backed down and sent a replacement. This went via Inverness and the merchant wanted to inspect before delivering to Skye, guess what they found? Three tanks later and it’s now in the ground. Discharge will be to a ditch, which at this time of year is wet but for most of the year is usually dry, this runs off to a wooded area at the bottom of the croft. Our original warrant and SEPA approval was for a traditional septic tank and soakaway (amended installation was agreed with both parties). After some posts on BH it was clear that a treatment tank would be the better option all around. I should say that a traditional septic tank and soakway is still quite popular in the Hebrides, two recent self builds both installed this set-up. Whilst the digger was here, we decided to get some further work done. A gravel drain was put around the back and is working well. Rotten rock which was at the front of the house was used to bring up the level around the house. A big pile of clay and top soil (or mud mountain as some called it ?) from works back in 2015 was then landscaped around the site. We are pleased with how the house sits in its surroundings. Finally, here is one from the Broch. People have been self building here since the Iron Age! Although this one is down to foundation level with the rock reused multiple times in various self builds during the last two thousand years. We now need to put the fence back up around the site to allow our sheep to come back on the croft. Today’s job has been digging and fitting four posts. The electricity connection was moved from the temporary supply box into the house. The cost for this work was cheap at around £200 and done by two very tidy and polite SSE workers. This simple homemade box was constructed from scraps and has lasted four long Hebridean winters but will now be recycled for another purpose. Talking of recycling, I don’t have a skip on site and everything apart from dust is stored and will be used for another job. Internally all our efforts have been on the upstairs of the house. Upstairs is an easy win to get completed as it’s just our two children’s bedrooms and an upstairs living area. A bit of time has been spent with our MDF skirtings, architraves and cills. We used real wood in our last build project and it has moved slightly over the years, MDF won’t do this and is cheap, but requires work in sanding and painting. Carpets are due to be fitted at the start of January and once these are down it will just be electrical sockets, lights etc to finish the rooms. Internal decorating can then commence downstairs. That’s about it, the kitchen has been fitted and downstairs flooring is done but both are covered by copious amounts of cardboard and I’ll upload some photos once this is removed. Thanks for reading. This will be the last post for 2019, hope everybody has a great Christmas and best wishes for your projects in the New Year!1 point
-
I've just looked in detail at the spec for that Karcher pump, and it has no controls at all, just an on/off switch. The equivalent IBO pump (would do exactly the same thing) would be this one, for £74: https://www.ebay.co.uk/itm/IBO-3-SQIBO-0-55-Borehole-Deep-Well-Water-Submersible-Electric-PUMP-14m-cable/172266242720?hash=item281bde42a0:g:UkEAAOSwepJXX-Aj The snag with this, and the Karcher one, is that it would be all or nothing, and could not be connected to a tap. The pipe from it would have to run directly to the hose or irrigation run, with water being turned on full by switching the pump on. When I was pumping out our borehole I had a submersible pump down the hole connected to a length of 25mm MDPE pipe, and just switched it on, with no controls. It pumped around 30 litres per minute of water, which is a lot, maybe three times more than a typical shower. Watering a garden with it would have needed some thought, as I think the only sensible approach might have been to install fixed irrigation pipes and sprinklers, so that there was no need to throttle the flow rate. One problem with just putting a tap directly on a pump outlet is that as the tap closes the pressure rises, by far more than it does with a tap running from the mains. Even the small 700 W pump I was using would run at around 6 or 7 bar pressure with a tap partially closed, with a jet of water that was more akin to a pressure washer. That's the big advantage of using a pressure switch and pressure vessel arrangement, it keeps the pressure down to a manageable level, even with the tap almost closed.1 point
-
The way the tap controls the pump is via the pressure switch, in conjunction with the pressure vessel, which allows for the fact that water is incompressible (to all intents and purposes). What happens is this. When power is turned on and the tap is closed, the pump operates until the pressure in the pipe to the tap reaches the switch turn off pressure, typically around 3 bar. The pump then turns off and that pressure is held, as there is a non-return valve in the pipe to the pump. When the tap is opened water starts to flow, and the pressure drops. When the pressure drops below the turn on pressure, typically about 2 bar, the pump switches on to continue to supply water. If the rate at which the pump can supply water is greater than the rate at which it's being used, then the pressure will increase. When it reaches the turn off pressure the pump will turn off, until the pressure drops back to the turn on point again. If the tap is turned off, with the pump running, the pressure will increase until it reaches the turn off pressure, when the pump will turn off and the system will just sit pressurised, ready for use. The advantage of this system is that the pump can be placed low down in the well, so it can always draw water, and there's no need to mess about switching power on and off. The tap can be treated just like any other tap. Water will flow when the tap is turned on and stop flowing when the tap is turned off, plus the pressure will stay reasonably constant, between 2 and 3 bar. An alternative is to not have a tap, and just have a pump down the well with a suitable weatherproof switch to turn it on and off. This doesn't allow for any flow variation, as the pump will be either producing water at it's maximum capacity when turned on, or not pumping at all when turned off. Even a small submersible pump will deliver maybe three times or more of the flow rate from a normal size outdoor tap, and so may be a bit difficult to use for delicate watering.1 point
-
The snag with the submersible pumps that places like Screwfix sell is that they are all float switch operated, so won't turn on and off when you open a tap, without some playing around and making underwater mains cable connections to the switch cable and adding a pressure switch and small pressure vessel. To be able to just turn on a tap and have a pump start needs a pump that has a pressure switch that turns the pump on when the pressure drops from opening the tap, plus small pressure vessel to prevent the pump from short cycling. There are two types of pump, and which you choose depends on how far down the water level is at it's lowest. No non-submersible pump will draw up more than about 8 to 10m, so if the water never falls this far below the height of the pump, then you can look to use an above water pump set. If the water level is likely to drop below about 8m from the top, then it would be best to fit a submersible pump with a pressure controller. Something like this would do the job (again, just picked at random to illustrate the type of system): https://pumpexpress.co.uk/shop/the-peak-bundle/ We use a borehole for our water supply and I've found the Polish made IBO pumps to be pretty good value and reliable. You could put together a system using parts from them fairly cheaply, for example: Submersible pump (OK for use at depth): https://www.ebay.co.uk/itm/IBO-3-SQIBO-0-55-Borehole-Deep-Well-Water-Submersible-Electric-PUMP-14m-cable/172266242720?hash=item281bde42a0:g:UkEAAOSwepJXX-Aj Pressure vessel: https://www.ebay.co.uk/itm/Druckkessel-24-l-mit-Membran-Druckbehalter-Membrankessel/182952158436?hash=item2a98cc64e4:g:HYgAAMXQNOZRCnkG Pressure switch: https://www.ebay.co.uk/itm/IBO-PC-59-Intelligent-Automatic-Pump-Control-System-dry-running-run-protection/182278785811?hash=item2a70a98b13:g:EDcAAOSw8vZXMzy21 point
-
Nah...you’ve just copied some pictures from a magazine or a holiday website?0 points
-
The EU have 100 degrees in a right angle so you get these odd half degree amounts when you do the conversion to "imperial degrees".0 points
-
If you're referring to my undercrackers.. no.0 points
-
Maybe some sort of IQ test?0 points