Leaderboard


Popular Content
Showing content with the highest reputation on 01/29/20 in all areas
-
Star wars fan?2 points
-
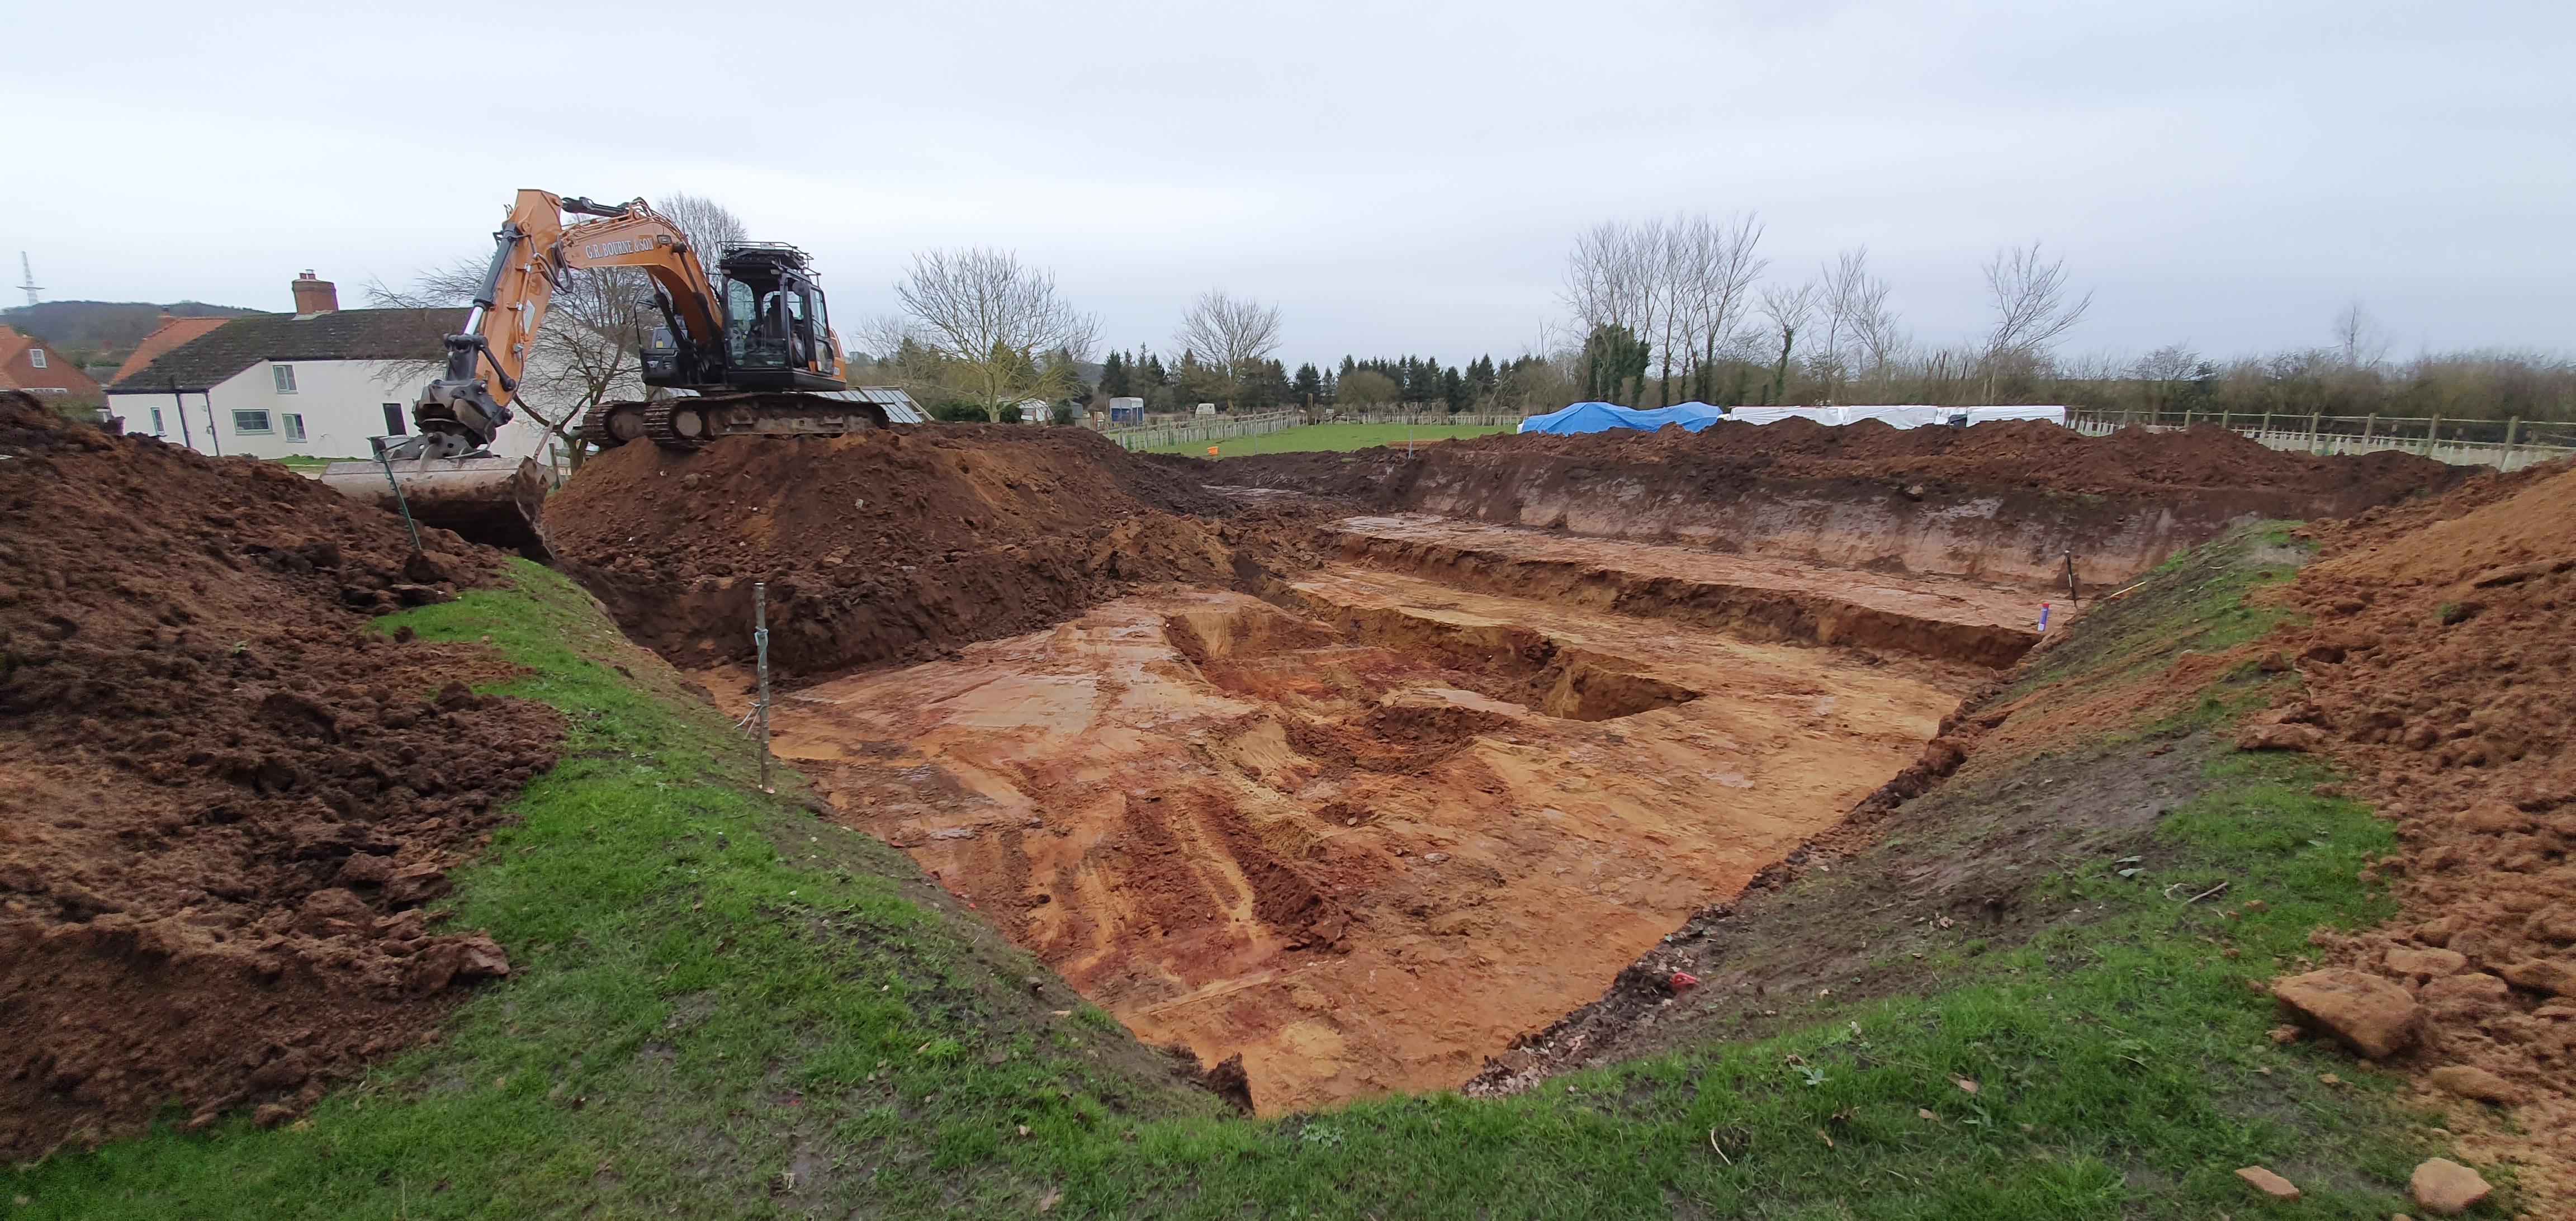
Time for another blog post as we now have 50 piles completed and a nice shiny ground beam linking them all together. The pilers took 6 days to drive the 50 bottom driven steel cased piled into situ just before Christmas, this was two blokes and a fairly shiny new looking piling rig. The rig, in its simplest form, was a 500Kg weight on a string that was capable of being raised and dropped repeatedly. It had some very fancy hydraulic outriggers and a track that could vary its width, but ultimately it was a weight on a string. The pilers said our required loading on each pile (150kN) was fairly modest and explained how each pile would be driven to set. This involved piling away until either a new 2m section was needed to be welded on or the pile started to move less with each blow. When they felt it was getting there, they sprayed a vertical line on the pile and used a welding rod held at one end, to draw a series of 5 lines on the pile, one after each blow. If the spread of these lines was less than 100mm then the pile would be capable of taking the 150kN load. Interestingly I only ever saw this done when I was on site and watching, not one of the piles done when I wasn't there had the vertical white line and marks - I'm sure that's fine.... From a cost point of view, the piles were £1,200 for mobilisation then £127 per pile down to 4m, anything beyond that was £30 per meter per pile. In the end we had 27 piles at 5m, 2 piles at 5.5m and 21 at 6m, which was a total add-on cost of £2,160. So the total piling cost was £9,710. After Christmas the lads returned and were joined by another crew of 2 and the 4 of them started work on the ground beam. The original plan had been to excavate a trench for the beam and just set the steel reinforcement into the trench. When the pilers first saw the site they said this wasn't going to work due to the water and soft ground and we'd need to dig down to the bottom of the ground beams, so they could shutter the beam. After having a concrete blinding delivered and placed level around the route of the beam, they spent the next week placing and tying the rebar along with positioning the shuttering. By the Friday morning it was ready for our first building control inspection. As we are having a Protek structural warranty, the idea of combining the warranty and building control inspections appealed to me. Protek assigned a private building control firm to oversee the inspections, so our approved inspector, a diminutive Welsh lady duly arrived to look at the work the piling lads had done. Happy with everything we were good to pour the ground beam the following Monday. Monday arrived and the concrete pump and wagons arrived at 9.00am, ready to go. The pour was uneventful, but I was badly unprepared for the splatter so had to pop home and get changed into some clothes I didn't mind getting covered in concrete. In total, I think it was about 35 cube of concrete, so a fair amount went into the piles and beams. The lads returned the following day and took down the shuttering and much to my surprise took away pretty much all of their rubbish. That left us with the ground beam in all of its glory. The ground beam was the most costly aspect of the endeavour. The cost for beam itself was £100 per linear metre, of which our beam was 124LM, for a cost of £12,400. The shuttering was unexpected (well not completely, but you can hope) and an additional £4,000. So the overall cost for the ground beam was £16,400, giving a total spend with the pilers of about £26,000. I'm including the costs in the blog as they might be useful for others as comparison. I'm really pleased with the job that they did, the whole thing is obviously very solid and I know we have a decent foundation for the house. It's so substantial it feels like it should be able to be seen from space.1 point
-
Ok - I’ve googled and am confused ! So we will have ASHP and uvc - what does the buffer tank ( it’s only like 20l ) do ? Do I need one ? In a rental I have they just have a 300l Uvc for 4 showers and all DHW - seems to work fine . Someone more intelligent please enlighten me ! ?1 point
-
You can’t transfer a CIL exemption to another person, they have to apply for a CIL exemption in their own right. If the LA determine that work has commenced then I guess that the point at which CIL exemption could have been applied for has passed.1 point
-
That seems strange While you can’t transfer the Cil I would have thought the purchaser could successfully re apply Providing he or she met the criteria Self building to live in the house as main residence Not intending to sell within three years of completion1 point
-
The CGT issue is going to depend upon how long the house has been your primary residence. The taxable gain will be proportional to the time it isn't you main residence. So, as an example, lets say you've lived there for 8 years, you mothball the property for 2 years, and then it takes 9 months to sell the place. When you sell it, you will have owned the place for ten years and nine months. For CGT purposes, they disregard the final nine months, so you only need to consider a total of 10 years, of which 8 years are exempt from CGT as it was your primary residence. GCT is applied pro-rata, so 80% of any gain will be exempt from CGT. From this you can deduct the Annual Exempt Amount - which, IIRC is currently at about £12k. So, if the net gain on the sale of the property is less than £60k, you wouldn't pay any CGT. If, however, you made a net gain of £100k, then 20% of that would be taxable. But you can still deduct the AEA, so you would only pay tax on about £8k. The current rate of CGT on residential property is, I believe, 28%, so the total tax payable on a gain of £100k would be around £2.25k However, if you've only lived there for 2 years, then half of the gain will be taxable (still less the AEA). The longer you have lived in the property, and the less time it is mothballed for, the better the equation looks. Why is the house being mothballed? Is that because it is so in the way of construction work that it is being deemed uninhabitable, and thus no council tax will be payable? And, by the way, £750 for three hours work - it's eye-watering, isn't it, but that's professional fees for you. And they don't even suggest you sit down first, when they tell you that.1 point
-
Same answer as he gave above, just replace Boiler with ASHP. When they get close to target temperature the floor will need less and less heat and the ASHP won’t be able to modulate down far enough so will start to short cycle. That buffer sounds too small though - I would go minimum of 50 litres.1 point
-
We are all so intelligent you won’t understand it ?. I’m concluding that if I am back in gratuitous insults on @pocster habits, then I must be recovering from the pre-Christmas fluey sicky killer lurgy. Actually went out of the house today for about the second time since December 20th. Had my first mild coffee for 8 weeks today and kept it down. Good luck with the system. F1 point
-
Acid works months after and will get it off engineering bricks no problem. Just need a stiff brush and a plant sprayer, make sure the bricks get a proper soaking before you use the acid. Wet the bricks, spray on acid, wait 5, scrub and rinse. Stubborn bits may need another spray.1 point
-
AFAIK, as long as you like but the thermostat won't be operating (you've overridden it) so eventually the room will get too warm.1 point
-
There are several ways this can work. Sometimes it is the central heating programmer that turns on the UFH and avtivates the motorised valve. Im my last house I had it wired so the central heating programmer energised the UFH control box. Then IF any room was calling for heat, the UFH control box would open the motorised valve and then the feedback switch on it would call for heat from the boiler. In my present setup, the UFH controller sends a heat demand to the ASHP and the ASHP controls the motorised valves. This allows it when it wishes, to stop heating the floor and heat the DHW cylinder instead. (you don't normally do both at once with an ASHP because of the different temperatures) I don't suppose you have any documentation how it is wired? You won't break anything by keeping the valve manually opened, but in my case if I did that, then when the ASHP demanded hot water heating, it would potentially senf 50 degree water to the UFH (but the blending valve would reduce that temperature somewhat)1 point
-
Rationel Forma+ 3G Alu clad From the local Rationel reseller (Heswall) Barn refurb scenario - remove, replace, redo reveals. Very happy. It's early days for longevity but very happy with the installer support to design process and the attention to detail on the job. Memory of paying the final invoice is slowly fading. Rationel also did some custom multi-section windows for larger barn apertures for us. These were expensive and in hindsight likely could do better. They are OK and we sorted out the issues arising with multi-section and air sealing but I remain less than convinced that Rationel are good value where you go that far off piste. It did keep it all inside one supply and fit contract though. My reading here suggested they were a fairly safe but not a cheap choice and I do not disagree. For my outward opener traditional look (planning) and becuase of some size issues I didn't have a huge market to choose from in Alu clad timber. The install was refurb with profile change not fresh build so the installer who would take it on was also difficult to find. (Job too small for builders, too big for joiner with a van).1 point
-
Stops the boiler short cycling afaik. If you were to take hot direct from a cylinder with a stat on it would keep calling for heat and firing up the boiler for a fairly small amount of water. In the case of UFH it draws hot from the buffer tank and the boiler only fires up when its "worth" doing so to heat up a chunk of water over time. ...I think.1 point
-
This is not the case. Trip time depends on exactly that - trip time - you cannot with any certainty determine whether the 30mA or 100mA RCD/RCBO will trip first, regardless of where they are located. The only exception to this is if the fault current is between 30mA and 100mA in which case the 100mA RCD/RCBO will of course not trip at all. The only way of being deterministic is with time-delay RCDs/RCBOs which in most situations will undermine the protection that are usually employed to provide.1 point
-
Some RCBOs do have an earth lead, so may cause an imbalance that can trip upstream RCDs. Off the top of my head I know that single pole Crabtree Starbreaker RCBOs have an earth lead, some other makes do, to.1 point
-
Try it and see. If that gets the UFH working then that is progress but is not the problem "fixed"1 point
-
Get them coated with boiled linseed oil to start with and you can just wash the snots off1 point
-
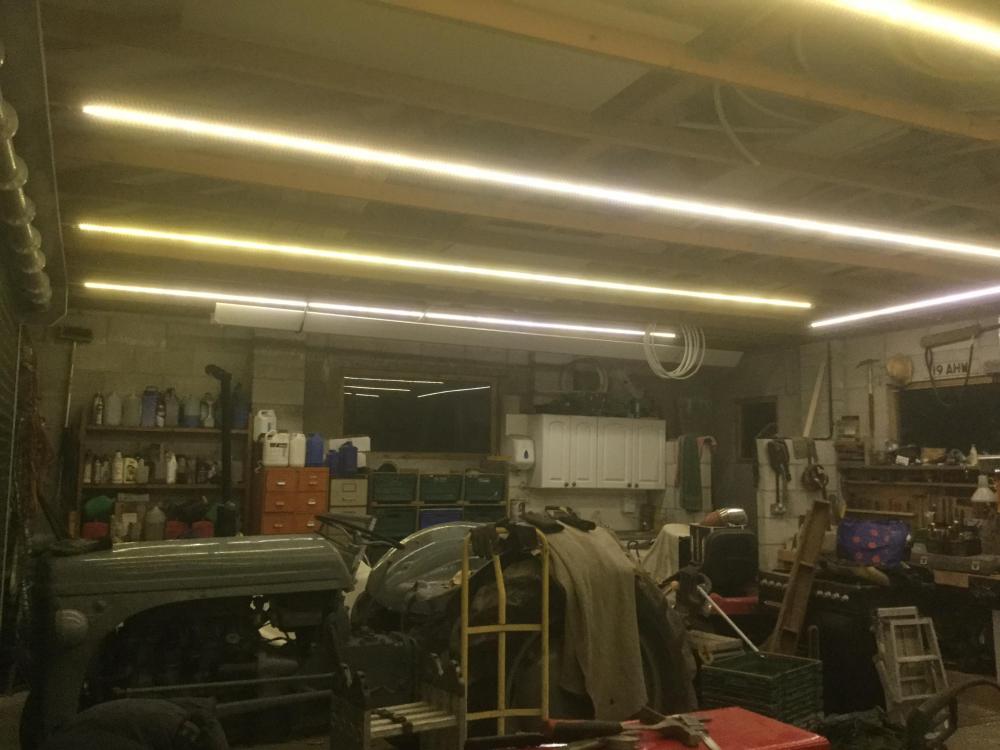
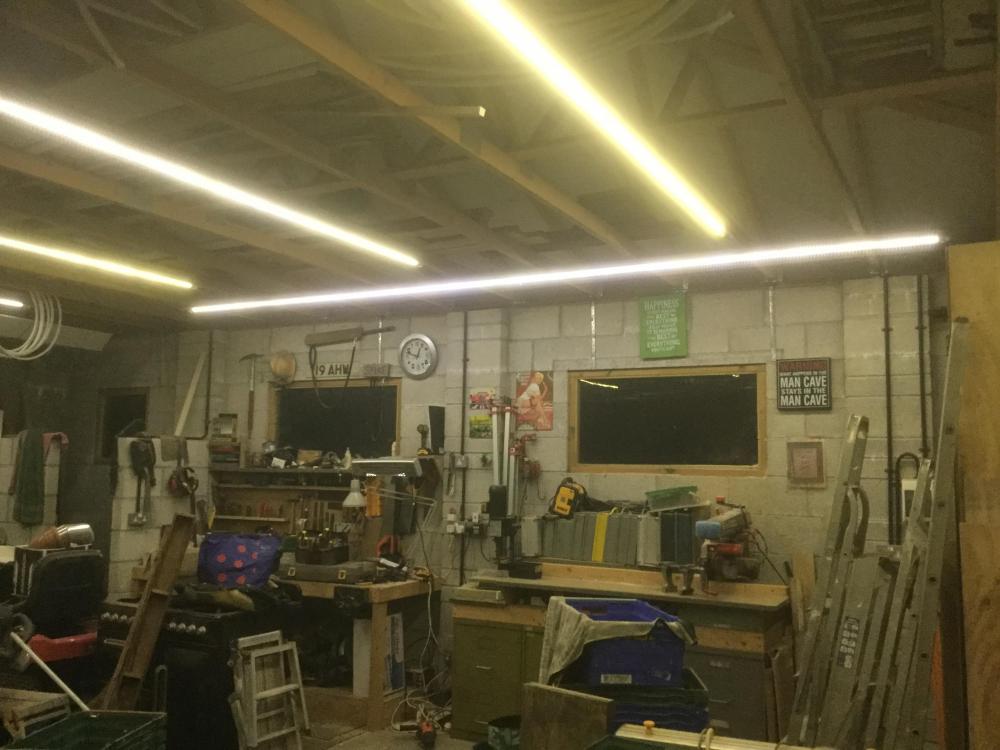
Yes, my lighting is fine for “general work” but I have a mobile led floodlight and a 125 watt CFL for close up and intricate work.1 point
-
The blues are not too bad to clean. I have had some covered in concrete from a floor and they cleaned up OK over a year later.1 point
-
Really because of the nuisance caused when an upstream RCD/RCBO trips as much as anything else. There's no added protection from daisy chaining RCDs/RCBOs without discrimination between trip currents. If there is no discrimination, then upstream RCDs/RCBOs may trip when the downstream ones are tested. It's usually fine. My garage feed is a run of 6mm² SWA protected at the upstream end with a 40 A DP MCB. At the garage CU I have an RCD feeding MCBs for the various sub-circuits, so there's adequate residual current protection on every garage circuit, and if there is an earth fault, the RCD in the garage is the one that trips. RCD protection is required at the user end of any circuit, located somewhere upstream of the outlet/lamp/etc, so they are all adequately protected, but there's no real need to RCD protect SWA cable runs leading to a sub-main CU, all that needs is over-current protection usually. If the cable isn't armoured, then fitting a 100mA RCD/RCBO at the upstream end makes sense and provides the required trip current discrimination.1 point
-
You shouldn't daisy chain earth leakage devices, be they RCDs or RCBOs, without ensuring that there is an adequate difference in the trip current. For example, a 100 mA trip current RCD/RCBO upstream of 30 mA RCDs/RCBOs is fine, as there is current discrimination and the downstream ones will trip first. In your case, as you have (most probably) a 30 mA trip current RCBO upstream of the installation, that is providing adequate earth leakage protection for everything downstream. All that should be fitted down stream are over-current protection devices, fuses or MCBs, not any device that includes residual current/earth leakage fault protection. The exception to this is when a downstream installation is connected as a TT island, with it's own earth electrode, when it needs an RCD/RCBO.1 point
-
You will need site insurance regardless of what your builder has which will cover someone walking into the site and being injured or worse and will cover your building for vandalism or fire damage Your builders policy won’t cover either If your mortgage lender is happy with an architect cert and your not thinking of selling then go with that Quite a few mortgage lenders won’t accept an Architect cert HSBC being one Even with an architect cert or a warranty You will still need BC to sign the property of You can use private or local authority1 point
-
For the lender I went with it was one of the three below to provide assurance to them: Architect/Surveyor inspections NHBC registered builder Structural warranty I went down the Surveyor route as it seemed to be the most cheapest to tick the lender box. Circumstances vary for everybody, if you have plans to sell you might need more assurance. I think all three is way over the top.1 point
-
I always use full bore isolators as Joe has stated above. In my opinion those things with a little screw in the middle, regardless of what make, always end up leaking.1 point
-
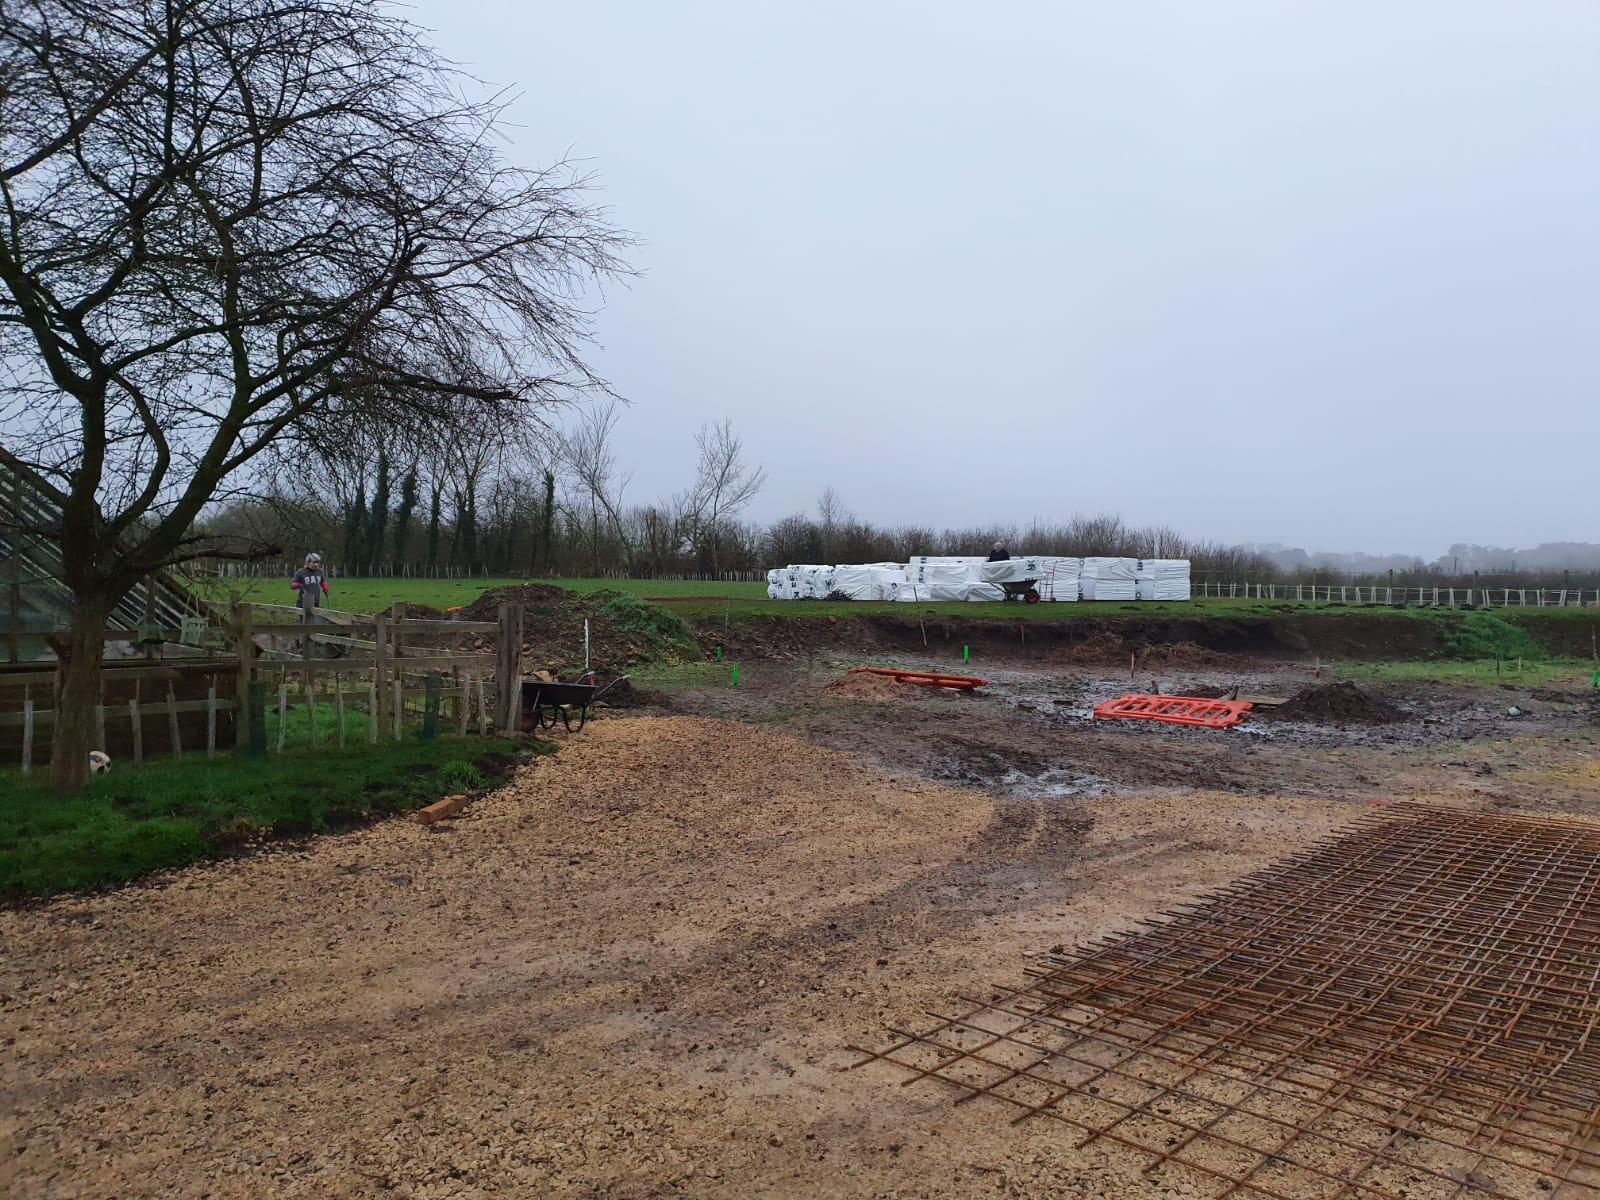
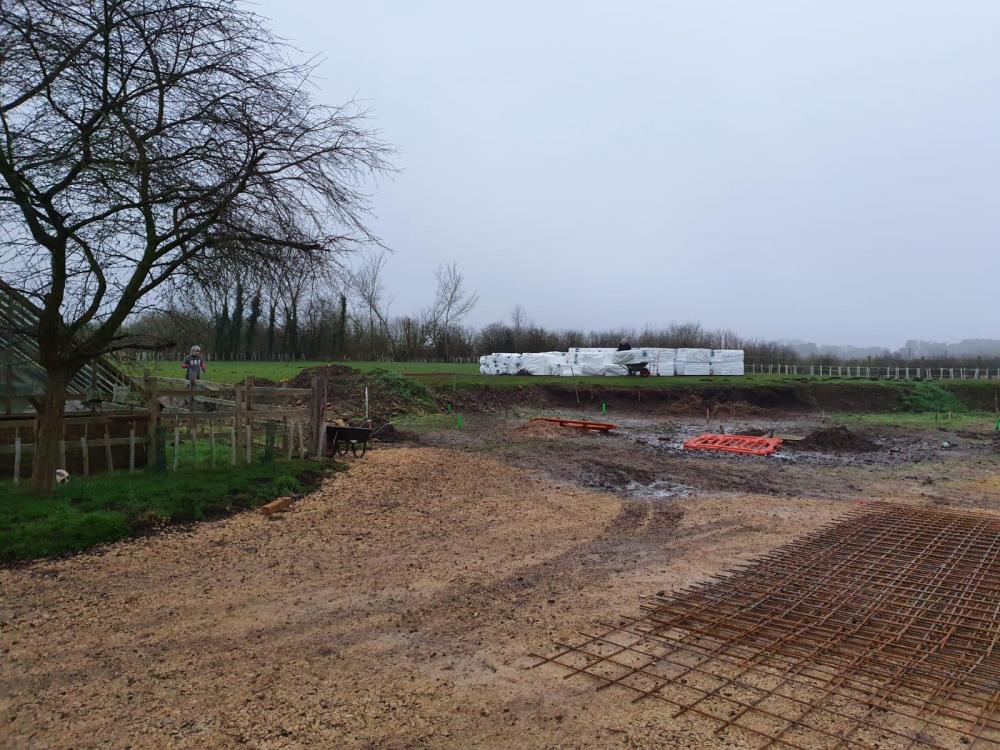
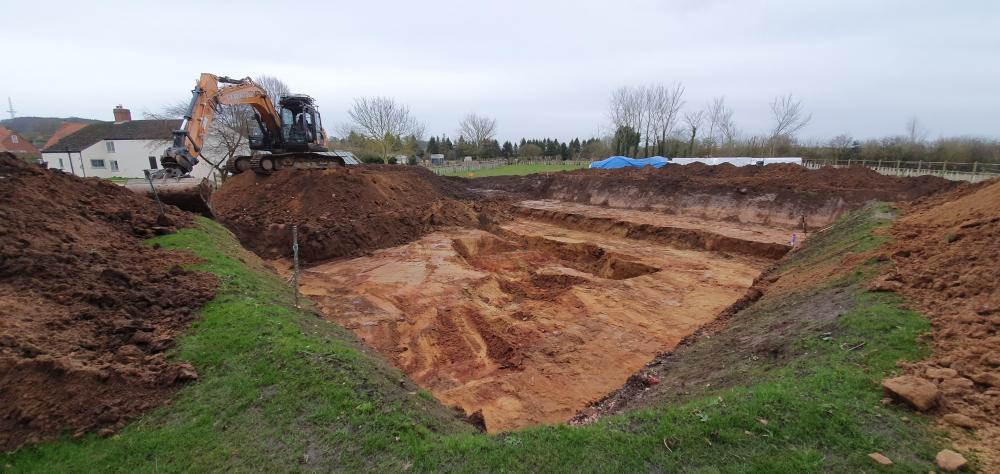
Trying to do as much of the founds myself as possible. The design was done by Tanners, the insulation is from Kore. Due to the ground I have, it needs digging out by 800mil before putting 500 of stone in. 50mm of grit sand to go on that before I can lay out the insulation. The insulation appears to be as simple as a jig saw puzzle - I have a plan with the edges marked out, just follow the foundation design when filling the middle in. The steel is fairly simple, just two layers of mesh, no complicated cages or such in the thickenings. I hope to get all that done and the UFH pipe installed before getting a contractor in to do the concreting. Not alot to show yet other than the big hole!
 1 point
 -
So windows went in a while back. Will try and take better pictures now scaffolding is gone. I really like the windows, but think Norrsken installation and survey team let them down in comparison to the rest of the company. Bay windows came the wrong size so the heading all had to come out, once they were fitted realised they was 2 inches spare either side. A lot of extra work for my builder to rebuild the wall above in line with the new windows. And I lost 4 inches of window. in addition out of the 5 windows left in the house they managed to move the lintels on 2 and the bay wall on another, apparently down to having lime mortar rather than cement. Seriously unimpressed with the window removal, thankfully I am rerendering anyway. but 6 months on I am happy with the windows
 1 point
 -
@peterw are you sure about the steel? I am no structural engineer, but the steel would need somewhere to rest on. It looks like the only place to rest would be the outside walls at each end of the house. This makes it 11-12m long, not only would this be very expensive, but it would be very thick and hard to hide although I think that would be OK due to the small area of roof it could be behind. That small area of roof will need more flashing, guttering etc. Between this and the steel I suspect the lower design would cost more to build whilst being smaller upstairs. Also square metres usually have a value, so you will have reduced the value and spent at least as much. As to the angled sun room, I don't think that would add much to the cost, the roof would be a little more awkward to build and the flooring a little more awkward to install, but I suspect it is minor. Personally I find angled walls a bit jarring, but maybe it is just me. The lower design looks a little better, but for the rear of a house adds little, maybe good for the front of a house, The question re the pitch of the tiles is a good one to check. I would ask about all the bi-folds. Why? Bi-fold are expensive and hard to seal. Would you really be using all those bi-folds. Especially the one at the end of the sunroom, I would assume that any patio is between the back of the house and sunroom, so why open out onto another area of garden. Also a room with only one solid wall will be very difficult to furnish. I would change the end bi-fold to a fixed window at least. I would also try to place your furniture on the plan to see how it might work. If they end up blocked by furniture they don't seem worth the cost.1 point
-
Yep, though other uni's do MSc's in acoustics, I got my two degrees from one of those.1 point
-
just nipped out and took this......
 1 point
 -
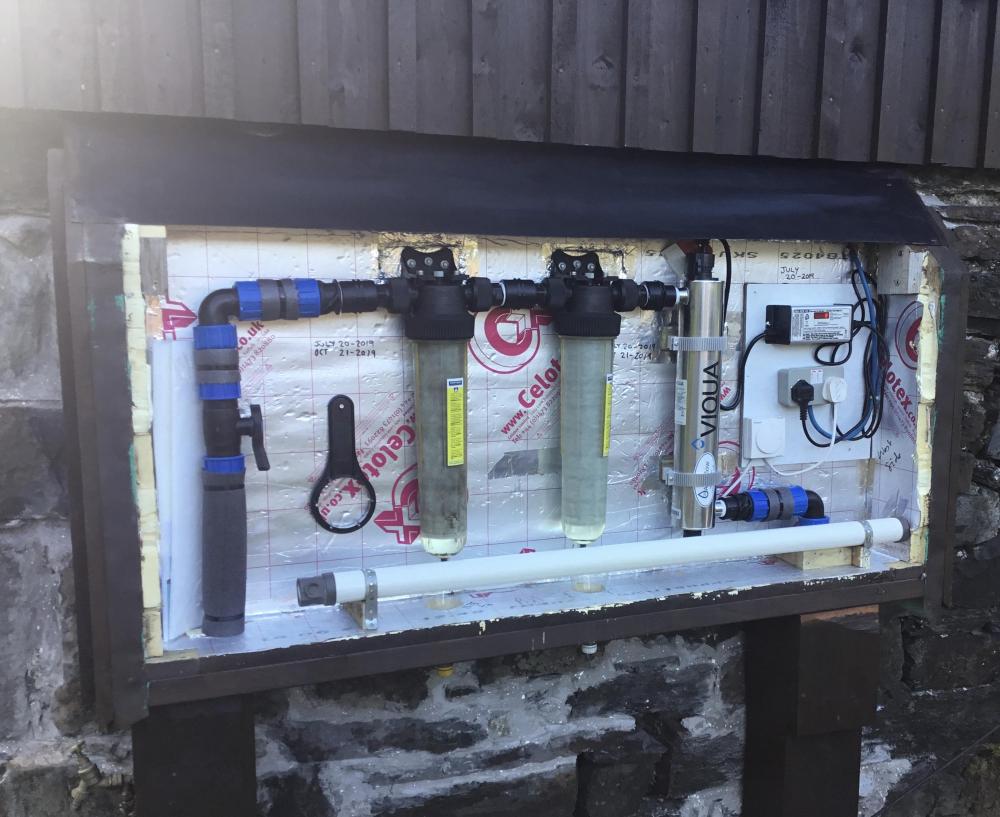
The low iron glass did the trick, total cost £26 via ebay
 1 point
 -
Also, fluorescents are less than a good idea if you have any power tools which which might be moving back and forwards at multiples or sub-multiples of 100 Hz because the strobe effect of fluorescents can make them appear stopped which could lead to an accident.1 point
-
Hmm burn it and cause pollution but get to recycle it... dump it in landfill and no recycling.... it’s a no win situation ......or be a complete optimist and put it in the shed and assume there WILL be a use for it at some point..... I was very pleased when I got to use some of my long kept off cuts to roof my water treatment plant ! ....not so mad now I thought .....
 1 point
 -
Yes Chris at Kingspan is dealing with this for me. I’ll keep a firm eye on my technical drawings from KS and my Architect. Thanks for the heads up.1 point
-
As some have stated it is often hard to get like for like quotes. Look out for the delivery costs as well as cills not being included and sealing tapes and foams not being included. Do you want a site visit to confirm measurements or order off plan. Will they come out at the air test stage to seal any leaks found when testing. My preferred supplier include all theses as standard which actually makes them very good value.1 point
-
Give her a holiday in Devon, all the farmers still use them.0 points
-
No - but budget to potential replace your ASHP compressor every 5 years and that’s about £1000 for a Mitsubishi unit. The other big benefit with a buffer is they can be fitted with an immersion - in the event the ASHP goes tits up, you can still heat the dungeon.0 points
-
Yeah, my tip is get the Mrs her own small shed for gardening stuff. Don't want it in the man cave.0 points
-
And you believe that?0 points