Leaderboard
Popular Content
Showing content with the highest reputation on 07/29/18 in all areas
-
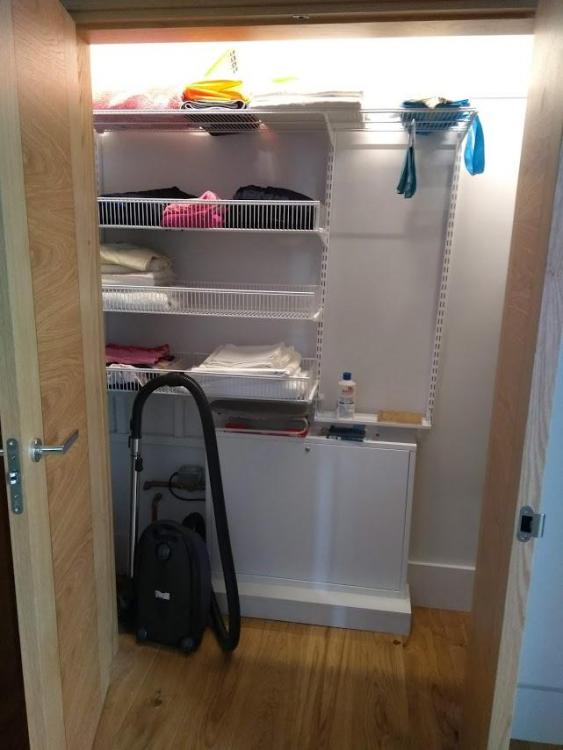
Best include a broomstick store as well then. I built a tall slot in the utility room airing cupboard, designed to take an ironing board, hidden, out of the way and secured so it couldn't try and open itself and fall over. SWMBO was not amused when she saw it, asked what the tall slot was for, and I jokingly replied that it was a dedicated storage space for her broomstick...5 points
-
Just be aware that when @Onoff does a job it’s usually belt and braces.... Well actually it’s 2 belts, 3 pairs of braces, a zip, buttons, Velcro and probably an overcoat and wellies for good measure ...!! You are in danger of actually finishing this in the time it’s taken him to cut some tiles ....4 points
-
Yet another formal offer has just been received, cash buyer, no mortgage, realistic exchange of contracts date. Not unexpected, but it does mean that we much be now near-certain of getting a sale at a reasonable price. I don't think we have ever been in a situation where we've had so many people making formal offers to buy in such a very short period of time. We're leaving it to the agent to do the negotiating for us, as that's all part of the service, and it's something I'd rather not get directly involved with.4 points
-
6 month update. Started fitting ducting for the MVHR, my wall build is 3 layers, 140mm, 70mm and 50mm so the ducting fitted well (luck) within the walls. Just need to uncoil the 50m lengths and start dragging it through the build. Then I added the final 50mm timber and insulation before I started the OSB. It took about 2 months to fit about 150 boards, the vapour barrier, double sided tape, airtight tape, it was quite a challenge especially the vaulted ceilings. For the flat roof, fitted the Velux Rooflights then GRP, about 35sqm, 2 layers. Just need to be very organised and keep all tools and materials clean. I might put some Sedum on at a later date. Had some windows and doors delivered and fitted. Kastrup and Internorm. The whole experience disappointing so far. Most of the Kastrup need replacing due to roller marks on glass. Fitting below average. Finally the Tata SSR. Took me ages to set out but once the eaves and verge square it goes on well. 3 roofs to fit. Now half way through the second roof with 7 Velux which fitted well though very heavy, the soft wood frames very prone to damage if not protected. Working out how the EDW flashing kit works around the SSR takes a while, lots of measuring and cutting, creating upstands and folding but the end result is good. About to move the Kwikstage round again. Body struggling though. If anyone wants more detail do ask. Its all quite challenging but still satisfying.3 points
-
Latest update. Second formal offer has been received, higher than first offer, cash buyer (confirmed that the money is sitting in their bank), no mortgage, defined exchange of contracts date that looks realistic. Another couple have told us they are submitting a cash offer first thing next week, they just need to confirm with the solicitor a realistic date for exchange of contracts first. It's now 6 days and 6 hours since the house went on the market and we have effectively got three offers, plus another two that I fully expect to make an offer some time next week, plus three more than have stated they want to buy but need to confirm that they can get a mortgage first. Our current plan is for the agent to send out a request for best and final offers, with a confirmed exchange of contracts date, to all interested parties early next week, with a reasonable closing date for the receipt of offers, then we will select the offer that is the combination of the least risk of falling through plus the best price. Looks like the house is pretty close to being sold though, whatever happens. We're both sitting here a bit stunned, as this is not at all what we expected, especially given the poor decorative state of this house. Time for another glass of wine, I think, with commiserations to those of you who are finding it hard to sell.3 points
-
In Part 22, I detailed my decision making process in relation to my choice of a pre-plumb Mitsubishi Ecodan 8.5kW ASHP based DHW and heating system. I now have a full set of data covering 12 months so can provide figures in respect of how the system, and our house has performed. My baseline requirement was to maintain 21.5C in the house 24/7 throughout the heating season (October to April), and a supply of DHW water that would allow multiple showers to be drawn off without a drop in the temperature of water delivered at the tap. The Mitsubishi FTC5 master controller / thermostat is set to 21C, and is located in the hall next to the vestibule. DHW is set to and stored at 50C. Over the 12 months March 2017 – March 2018, heating COP ranged between a February low of 3.3 to an October high of 4.6 over the course of the heating season, with an overall SPF of 3.7 DHW COP ranged between a February low of 2 to a summer high of 2.5, with an overall SPF of 2.3 Based on a kWh electricity unit price (inc standing charge) of 12.3p, I paid 3.32p per kWh of delivered heat, and 5.34p per kWh of DHW (inc losses). It should be noted that DHW cylinder losses do slightly reduce my heating demand, albeit at a higher cost than if delivered via UFH. For a reminder of our layout: In winter, with a set temperature of 21C, the house sits at a comfortable even temperature, the main living section of the house tends to sit at 21.5C, the 2nd and 3rd bedrooms at 21C and the master bedroom at 20.5C. I suspect that the slightly lower temperature in our bedroom is due to the fact I set the MVHR vent at a higher supply rate than the other bedrooms. This would tally with my experience of doing the same in our last house. The two biggest factors that impact on our heating demand are wind speed and solar gain. In modelling our heating requirement, I took both into account, along with incidental and household gains. The weather data set was based on a combination of met office and local home weather station information. Our average wind speeds are significantly higher than elsewhere in the country, and combined with the effect of storm force wind speeds (which we get a fair bit of) we do have a higher heat demand when compared to the same house being located in a sheltered inland area. The impact of wind speed, and the differential in pressure it causes is illustrated here: http://www.wanz.co.nz/ConversionChart A doubling of wind speed sees the pressure increase by a factor of four. Average winter wind speeds of 15-20mph (which equates to the standard air pressure test) are common if not the norm here. Average storm wind speeds of 40-50mph gusting to 70-80mph are also common. The impact of the pressure differential that such wind speeds cause was illustrated to me during the build whilst I was decorating. Having masked off the windows with polythene it was noticeable that when wind speed exceeded 40mph, the polythene would inflate on the windward side of the house, and be sucked onto the glass on the leeward side. Whilst we’re not aware of any drafts and the house isn’t any way uncomfortable, looking at the daily heating requirement when wind speeds are high, you can see an increase in the amount of energy used. Part of that will be air leakage (as evidenced by the effect of pressure differential on the windows) part is the unbalancing of the MVHR (gusting wind from a particular direction can cause the fans to struggle), and part is the lack of solar gain on such stormy days. In terms of solar gain, the vast majority of any gain manifests in the public areas. In winter this provides a useful uplift in internal temperatures. Depending on how clear it is, and how long the sun is out, the uplift sometimes compares to having a WBS stove on and really is quite pleasant. More generally, with mixed winter weather, the gain is less noticeable in terms of a temperature spike, but does have the benefit of reducing our heating energy use. In summer, the gain can be significant and does require a cooling strategy. Without any active cooling, the house has at times risen to 25C in the public areas and 24C in the bedrooms. Alongside the MVHR summer bypass (set to activate when extract air is 22C or more) we cool the house down to a more comfortable 22C using cross ventilation, opening windows / taking account of the prevailing breeze. We also have a velux window upstairs, which when opened in combination with a downstairs window, creates a chimney effect that is very effective in exhausting hot air. The biggest downside in using cross ventilation is that it doesn’t work when the ambient temperature is high (not a very common), nor when there isn’t a breeze (again, not very common). You also have to factor in the unexpected as we had to recently as our neighbour undertook ground works, which created vast clouds of dust in the dry weather. Opening windows simply wasn’t possible on those days. Overall the predicted impact of solar gain is as I modelled it using data from the following two sites: https://www.susdesign.com/ http://re.jrc.ec.europa.eu/pvgis/apps4/pvest.php PVGIS provided daily average data, and from susdesign I was able to work out a peak solar gain multiplier to determine what the maximum likely amount of solar gain would be on a clear, cloudless day. Modelling solar gain for both heating and cooling requirement was a very worthwhile exercise as I was able to determine what our worst case requirements were for both, and what strategies would work. I’m fortunate in that the prevailing weather conditions here mean cross ventilation is a viable and workable strategy to deal with overheating. I am however in no doubt that had we built our house in a sheltered location in a warmer part of the country, that we would have a very real overheating problem and would have to use a very different strategy, most likely combining solar films on windows and active cooling. I do have the option of actively cooling my house using our ASHP, via the UFH and if I wanted by retrofitting a duct cooler into the MVHR system, although haven’t felt the need to do so yet. One plus point of the Mitsubishi Ecodan ASHP is that activating cooling is simple (changing a dip switch setting to enable the master controller). All in all, I’m very happy with the way the house is performing in terms of retaining heat and providing a comfortable environment in both winter and summer. The performance and running costs to date are certainly more than satisfactory. Of particular value to us is having sufficient heating capacity to deal with spikes in heating demand (resulting from especially stormy weather) as and when needed, without having to resort to auxiliary heaters or peak rate top up, and the simplicity of use of the master control system. Whilst I could if I so wished set flow temperatures and heating curves, the onboard auto / adaptive program requires one user input – internal set temperature, and the controller works out the lowest temperature way of delivering it. Whilst I had a very good idea of what our heating curve should look like, using the auto / adaptive mode saved a lot of trial and error, and having monitored flow temperatures, have not seen them exceed 32C. For those not comfortable with developing their own programming or control systems, this is a very big plus. Having looked at a variety of options, I concluded that an ASHP would be the most cost effective solution (even after taking into account the cost of replacing the outdoor unit after 10 years) to meeting our requirements, and 12 months on, I have absolutely no doubt that I selected the right system for our requirements. Whilst I have no hesitation in recommending the ASHP system I have, it is important to recognise that low energy or passive type builds really do need to be modelled and individual requirements identified to determine what type of heating, cooling and DHW provision is required.2 points
-
Ask the family member to pay the balance then ...... let’s see how long they moan for then ..! The bevel is there to take the epoxy joint compound - they should have epoxied them together then made it proud, polishing it back to a flat surface.2 points
-
Hmm, bongo drums outside the bedroom.....no, I better not, I'll get as bad a reputation as Onoff!2 points
-
2 points
-
2 points
-
2 points
-
With ingenuity you can put the air bleed lower down. I did just this a few weeks ago when re-filling a neighbours solar thermal system. They seem to have endless problems with it, and I strongly suspect there's a small leak somewhere, but all my efforts to find it have failed so far. Anyway, to save ever going to have to go up to the top of the roof ever again, I replaced the bleed valve up there with a fitting that allowed a bit of 8mm copper pipe to be fitted instead. I've insulated this with armorflex and run this back down behind the panels and into the loft, via the fascia. The air bleed valve is now next to the pump, fill point and controller. Opening it allows air to flow out from the top of the tube manifold on the roof and out of the valve inside the loft. To make sure it worked well I looped the 8mm pipe up vertically for a few inches above the external top manifold outside. Seems to work OK as far as I can tell, although it takes several goes to get all the air out of the system.2 points
-
2 points
-
A lady after my own heart. I like the “ do it up until it’s snaps and then back it off half a turn” approach.2 points
-
2 points
-
Someone had this issue very recently.... I cant find the the thread sorry. Was there an answer to the problem? First real rain since we moved in and its like bongo drums. Lucky its not outside the bedroom!1 point
-
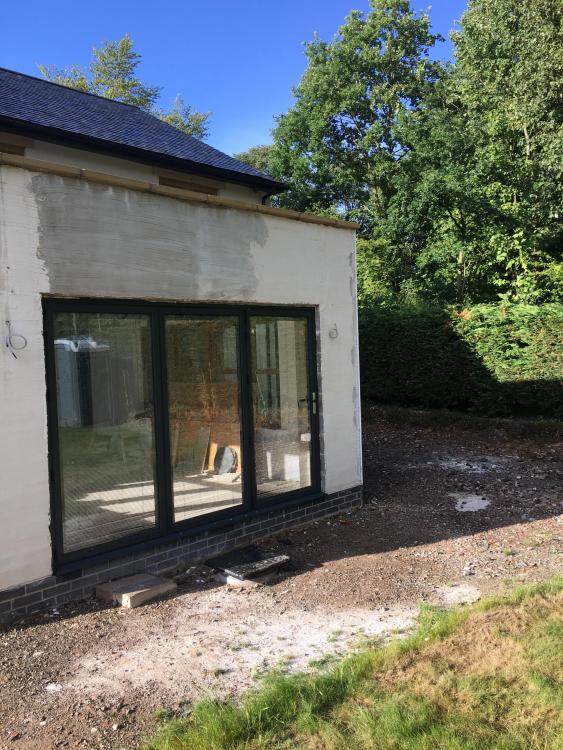
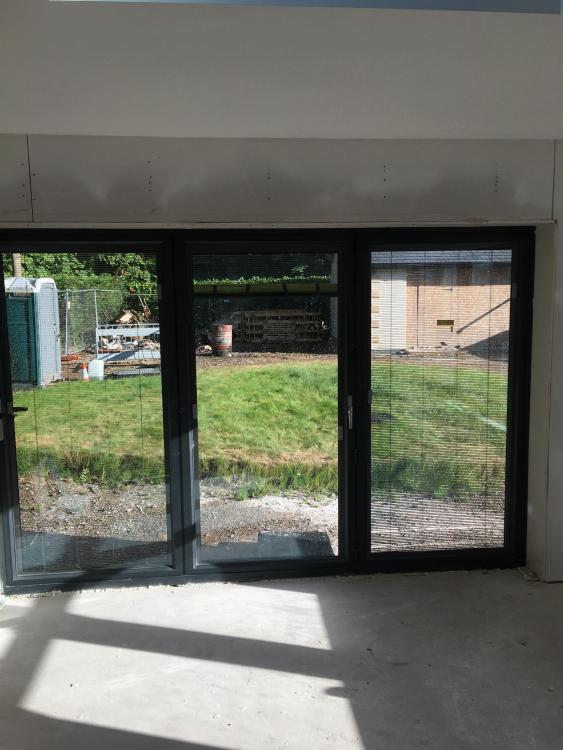
The windows were delivered last Friday. They arrived in three pallets, two of them were lifted off by the lorry's tail lift and a pallet truck. The larger pallet had to have the windows taken off manually. Unfortunately, I don't have any pictures of the offloading as it was all hands on deck. I was however involved in the lifting of the windows, on average the windows were about 75kgs each, but the french doors were double at 150kgs. Here are some of the exterior. And the interior. Facias and soffits have also been fitted around the house. The next job will be fitting the Siberian larch cladding and followed by the slates next month.1 point
-
After 11 days on the job we are now wind and water tight. Plumbers will be in tomorrow, roofer, brickie and electrician beginning of week, definitely moving along at a pace I’m happy with, lots of ordering went on this week to make sure we are ready for the onslaught next week and I may have news about the electricity soon but can’t say much just now, onwards and upwards ?quite an interesting roof in the middle only wish the budget would have run to oak here as it seems a shame to gyproc it all but it will still be an interesting shape1 point
-
1 point
-
Just a quick inter web search - Resin bound surfacing – Stone blend Resin bound surfaces are created by mixing together aggregates with the resin itself. The completed mixture is then poured onto the base surface, where it is spread and finished with trowels to leave behind a smooth, flat and consistent surface that is water-permeable and slip resistant. Resin bonded surfacing – Stone top Also known as the scatter method, resin bonded surfacing is achieved by first applying and spreading a resin mix to the base layer, and then applying the aggregates on top the resin. The scattered aggregates are left to bond with the resin, leaving behind a rougher textured surface that is impermeable to water. Once cured, any loose aggregates which have failed to bond are swept away and removed, to ensure that no loose stones are leftover on the newly finished surface. Main differences As you can see from the descriptions above, the main differences between the two techniques come from the method of application, as well as the resulting surface properties. Resin bound surfacing is water-permeable, while resin bonded surfacing is impermeable. This key difference makes each method suitable for a range of different applications.1 point
-
Had this done in Jan and it still looks amazing, if a little grubby (need to get the pressure washer out). What substrate are they using? My landscaper laid a block boundary (haunched with concrete at rear) and laid about 100-150mm of type 1 and scalpings, compacted in layers. Resin contractor laid 50mm porous tarmac day one and then 20mm of resin bound gravel. The resin laying was continuous to avoid any joins. They used a custom circular mixer that looked like a candyfloss machine vs a bell cement mixer - the gavel mix, sand and two part resin were added in batches, mixed and then dropped into a barrow below before being trowelled into place. They sprinkled ground glass on the top to give a little sparkle and additional grip. As it was Jan, took a day or so to set hard - we couldn't walk on it at all for 24-36 hours. Good luck!1 point
-
I lad I knew walked into his MIL's kitchen to find her standing there holding a broom. "What's up Maureen, can't start it?" said he.1 point
-
1 point
-
Magic potions likely seeing that the missus is a witch...1 point
-
1 point
-
1 point
-
1 point
-
1 point
-
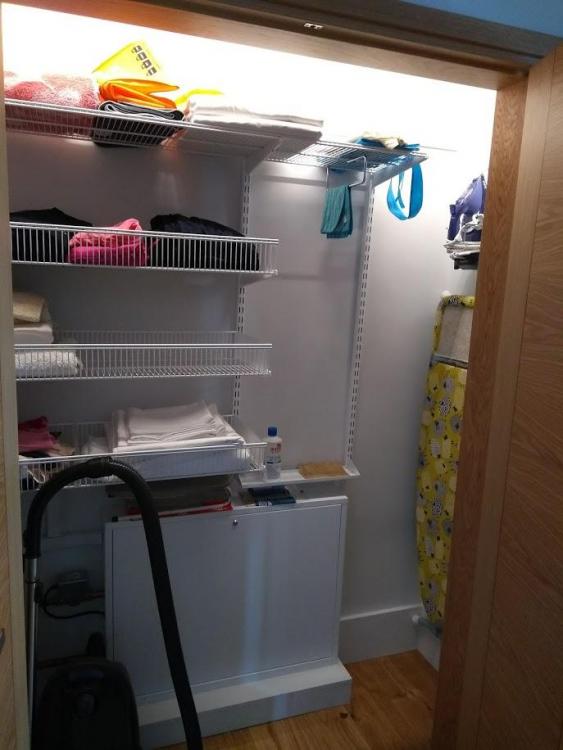
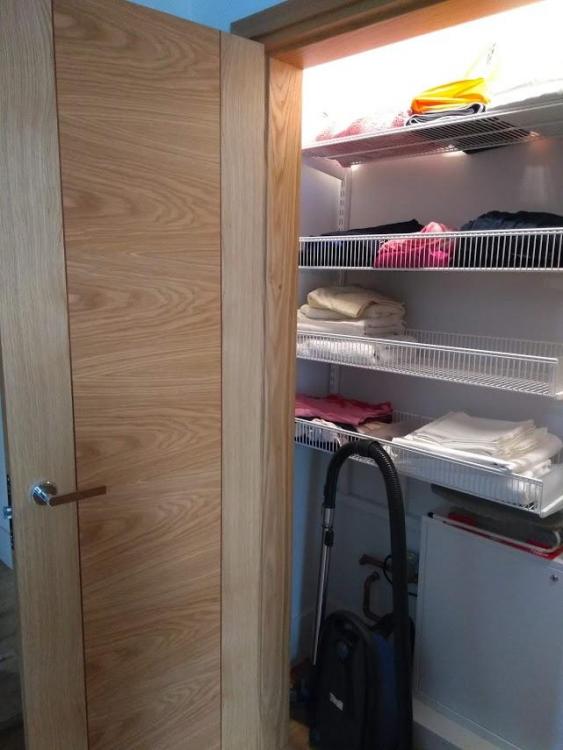
Our linen cupboard is a similar size and configuration - in fact a bit smaller 1800X500MM internal dimensions with 1300mm side double doors. We faced the same problem and in the end went with a steel modular system . It's a well known system called ELFA - see www.aplaceforeverything.co.uk/elfa. We're happy with it though it's not a perfect configuration for the space, which has the 1st floor UFH manifold located in it . It saved a great deal of messing around and worked for us. This system may work a little better with your slightly bigger cupboard and allow a slightly more efficient configuration of shelves.1 point
-
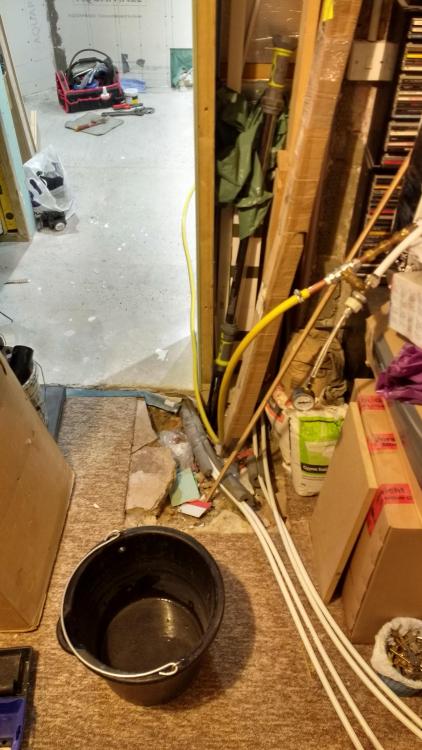
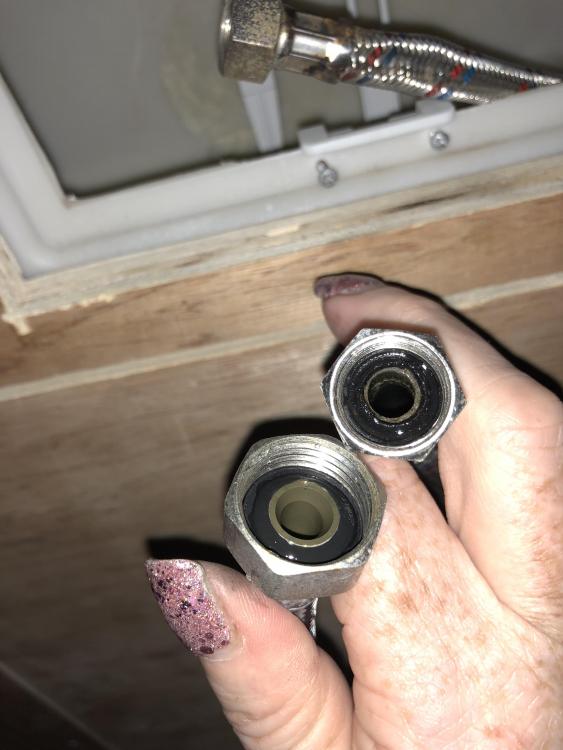
This might sound like an odd strategy given that I hadn’t fixed loo number 1 but I dismantled number 3 so that I could fix number 1. I removed the flexible hose from guest bed 2 and moved it to the downstairs shower room. I didn’t want to do that with the second one I dismantled as the inlet valve seems ok in that one so I’m leaving that be and just fitting a new flush valve. That bedroom has only been slept in for 6 nights since the house was built. The inlet In number 3 wasn’t even attached properly which meant it was affecting the flush valve operation! ? The washer I need doesn’t look like a normal tap washer with a small hole, it’s more a ring that goes around the outside as per the photo. Larger size is half inch, smaller is 3/8” and that’s the one I need. If not called ‘tap washers’ what are they? Anyway I fitted the swapped hose, (tightened carefully by hand @Nickfromwales ?) and it all seems to work. No leaks, water shuts off immediately when it gets to the correct level and flushes ok. Happy days. I still have to refit the flush plate but I’m going to leave that for a few days to ensure that everything is ok first. Just numbers 2-6 to sort now ?1 point
-
Let me throw you a curve ball or two. I am not sure that completely built-in is the only way. For built-in shelves I would be tempted to put a supporting batten all the way across the front for each shelf, rather than trying do extra support in the middle. Then if you wanted to you could do your slats front to back. if I was doing that I would perhaps put a kitchen worktop across at perhaps 900 should a work surface ever be needed, and leave it for boxes below. Though I might tempted to build 600x600 slatted modules, which can then be moved around. if there was something taller than your shelf gap, you could just move the slatted but on the next shelf up. if you wanted to you could even use any shelf or stainless or plastic grid unit from any kitchen system. Another option is literally off the wall ... use a freestanding system, either as @Tennentslager said or even something like iVAR, though that is not slatted. But if it were me I would look to stainless steel shopfitting systems, or the things they use in hotels. Perhaps a set of built in box shelves with adjustable heights down one side 500 or 600 wide (twin slot?), which would not need more support, then a full height gap for taller things (Hoover, Mother-in-law’s broomstick etc) in the middle, and a movable chromed steel shelving unit like this for the linen. Approx the right size, and with brakes. Not expensive, and less work to fit out. Ferdinand1 point
-
Well practice makes perfect as they say. The problem I have now is that almost everything I have to do around the house is my first attempt at it, so basically everything starts off with me having no clue and then after watching YouTube videos on the subject for eons nothing replaces how something actually 'feels' when you come to do it yourself. People who do these jobs over and over clearly rely on their muscle memory a lot which is 80% of the battle. I am starting from both a knowledge and muscle memory position of zero I have never used a torque wrench in my life and probably wouldn't recognise one if it hit me over the head1 point
-
I also have to build a similar cupboard, but smaller. I plan to use PSE (planned square edge) timber slats about 50mm x 25mm, slightly sand off corners and no paint or varnish (white wood). Cheap as chips as it will really never be seen, just functional. Yes for yours a central pillar, vac one side, shelves the other???1 point
-
1 point
-
Damage my nail polish? ?? ? Can’t have that! I’ll be gentle as always ?. By the time I get to do number 6 I may have worked out what I’m doing ?.1 point
-
Afaics it is quite area specific as to which new estate agency network dominates. Here we get Purple Bricks, but not many others. I have seen a few with EMoov, but that seems to be about it. I wonder whether the likes of PB will be introducing a Premium or Top of Market service for ‘prestige’ properties at some time in the future, because the savings for te seller are potentially a lot more in cash terms? I think the varied comments on the thread illustrate just how much it is local factors, local markets and horses for courses. And then that there is another layer of personal considerations on top. We *had* to sell due to a parent becoming unable to live in a large house in the country with stairs and a huge garden, so we went to be near a town centre, and really would have not wanted another winter there. Estate agents here are still ,.. all these years later .... in self-consolation ‘it could be worse’ rather than ‘yay, happy days’ mode. I suspect that we are also seeing some SE landlords or refugees from London volatility and low yields buying up here. We are not a classic ‘buy a street of terraces for the price of your 2 bed docklands flat’ country, which is how certain Northern areas have been seen, but I do see occasional sales of eg terraces by the likes of Savilles at auction, which is a telltale for potential sales to investors from down south. Ferdinand1 point
-
That does indeed look like a professional job, particularly the GRP and the metal work. Pat on the back time I think1 point
-
But prices here have not gone up since 2007 so no it is not the market catching up. Our house was valued by comparing it with the actual sale price of a similar sized house nearby that last sold in 2012. That has just gone back on the market now for £5K above the 2012 sale price. I won't detract the tread by suggesting why this is so.1 point
-
If you use a rubber seal and its plastic components, the rule of thumb is tighten it so far and try it, if it drips, give it another 1/4 turn, repeat.1 point
-
1 point
-
I am late to this thread, but personally I would be looking at a DIY pulley and counterweight system instead to replace the springs.1 point
-
I would take your roof design 1 step further and swap the ridge board for a proper supporting ridge beam, then the roof is supported by that an no need for a cross peice, leaving you the option of a full height vaulted veiling if you wish. If you have not yet got that high it is not too late to re design it.1 point
-
That is because I flatly refused to consider dropping the price to the point where we got less for selling our old 5 bedroom house than what is is costing to build the replacement 3 bedroom house. Nobody of sane mind would PAY to downsize to a smaller house 50 yards up the road.1 point
-
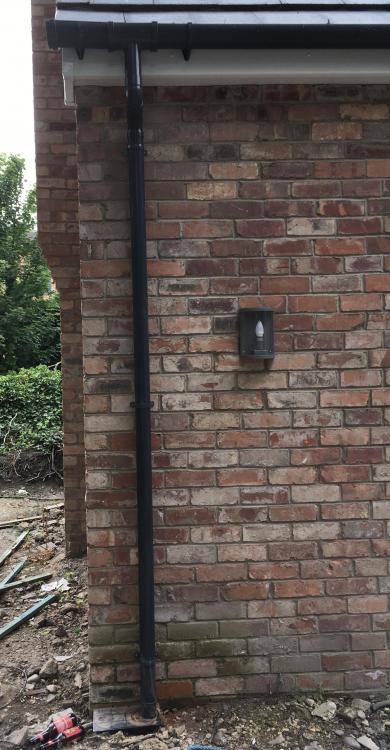
I hate leaves and open gullies so this is the solution I’ve used previously - it’s a standard closed gully top that has a basket within to catch the bigger rubbish as it drops down (also hedgehogs in the gutters) but there is a socket cut to size in the top plate and then the down pipe fits into this. It means the downpipe is supported at its base and there is no open gully1 point
-
...a little more action. The piles started going in today and it was a glorious sight to behold after so much waiting and anticipation. It was, in fact, very understated for piles; these are, after all, mini piles, but there was so little fuss and hassle that it was almost underwhelming. Not quite, though. I may just happened to have mentioned before that I'm on clay. Well, I'm on even more clay than I thought. In fact, you would be hard pressed to find anything other than clay on my site apart from a few meagre inches of topsoil where the garden used to be. Although these are mini piles, they still go down to 12m in some positions and all that came up off the augur was clay. Yellow clay at the top, dark grey clay from about 2.5m downwards. So onto a bit of technical stuff for the piles. They are being put in by Advanced Mini Piling Systems, who are based in Bath, and they're very nice chaps. I have 34 piling positions and these were set out by a surveyor on Friday afternoon. Late Friday, two of the piling guys dropped off the rig for an early start this morning and that's just what they did, about 8am. Now, don't ask me questions about loadings and things like that; I can probably find out if you really need to know, but I take the view that as I've paid an SE to work out these things for me, I'm not going to double up on the effort and fry my brain in doing so. Actually, if I come across the pile schedule I can post it if anyone really wants it. First up, the rig is moved to the piling position and the hole is augured out to the specified depth, with the augur being cleaned of debris as they go. Because my clay is so dessicated, it came away from the drill with no problems and no difficult cleaning was needed. The spoil was just shoveled out of the way of the piling positions. The top 3m of the holes are lined with an anti-heave sleeve - this looked like a giant tube of plastic impregnated cardboard and I suspect that's exactly what it is. I understand that they can, at times, be tricky to put in. The team tried to put the first one straight into the hole and seeing someone balancing on one of these to try and squish it in was quite amusing, but ineffective. The solution was very simple - before inserting the sleeve, it got wetted down with water and they dropped right in. The sleeves are a few mm smaller than the hole, so still a tight fit, but the water lubrication worked well. The concrete lorry turned up mid-afternoon. The drilled holes and sleeves aren't left open overnight, they are always poured and filled by the end of the day, with the rebar inserted. The concrete pour was equally straightforward. A dumper truck gets filled with enough concrete to fill one pile position up to the top of the sleeve, the rebar then gets inserted, tied and pushed in all the way. Rinse and repeat until all the positions are finished. Once the concrete has gone off, the rebar will get tied into mesh. Judging by the rate they're getting through the work, the job should be finished on Thursday or Friday morning at the latest. I will add a word about the dumper truck and, in general, the diminutive size of the equipment. Because everything is on a smaller scale, they were able to negotiate the site and all the piling positions that were down and I only saw one squashed pin. Larger equipment would have run the risk of burying everything, if only to manoeuvre around, but this system was very nimble and capable. The combination of smaller kit and the dry weather also meant that I was able to completely avoid the need for a piling mat, which wouldn't have been cheap. I'm chuffed with how the work went today and just hope that the remainder goes as smoothly and no one gets heat exhaustion - it was punishingly hot on site today, even with the strong breeze. Now, what you've all been waiting for, the photos.1 point
-
A few more images showing the completed UFH network for upstairs, the servicing battens downstairs and also some additional "supports" to accommodate the fitted kitchen units. I have really been impressed with the UFH fitter - he has even supplied photos of vulnerable positions so there should be no excuse for puncturing a pipe after the screed and boarding has gone down. You will see the areas left "unpiped" in the en-suite and bathroom areas. The manifold is stored in the landing cupboard.1 point
-
A few photos of the stone work that has now started on site, whilst others continue to prepare the upstairs for the first fix. I have also included an image of the "biscuit screed" laid upstairs over the UFH pipes. Close observers and those who have read previous entries, will notice that the windows have been corrected with fire battens fixed. Anyway, the stone is called a local blend and is made up of Perthshire stone, Cumbria stone and Borders Buff. The Quoins have a hint of lilac to them, to have blend in with the colour palette of the stones. The Red things seen in the photos are glass fibre Fire Socks - They fill the cavity at the corners and other strategic locations. Either these can be used or indeed 45mm x 45mm battens.1 point
-
Hi @ProDave This is exactly why I am doing a "blog" detailing my experiences and routes for various aspects of the self build. We will never be embarking on such a project again which is a great shame when you consider the "learning" one gains from such a venture. Yes, I can sit back and reflect on where I could have made a saving and or used a different approach but as long as we get over the finish line without breaking the bank, I shall consider it a successful mission. I just hope others reading this record will be able to consider options they may not have considered, as explained by either myself or contributors such as yourself.1 point
-
Rather surprisingly our planning permission was granted at the end of last week. It turned out to be easier than we'd thought and a good few weeks before the planning authority were required to make a decision. We have a few conditions, some tree related as we're surrounded by them and one or two of the usual suspects related to foul drainage etc. As there's no progress on site, we've been doing a bit of woodland restoration (the main reason for building a house here). As I know you all like photos, the pictures below show the removal of some checked/failed sitka on an area of bog close to the plot. The plan is that it will eventually help restore the hydrology and then the habitat. I suppose you say we're just dealing with the 'garden' until we're ready to build.1 point
-
1 point


