
Leaderboard


Popular Content
Showing content with the highest reputation on 05/02/23 in all areas
-
I hate this must have a degree thing. - there should be balance. While I'm in a so called professional desk job my late Dad was a Joiner, his Dad and brother bricklayers. He did an apprenticeship back in the day then ran the small family building firm. I always have the utmost respect for those that do - and try to learn what I can from them be it kitchen fitters, sparks or chipys, roof fitters etc. I certainly can't do what they do well enough and quickly enough to earn a living! That should be a thing in society - right to the top. The attitude must not be those that can't degree take up a trade - but absolute equivalence and respect for that path in life. (Sorry triggered my hobby horse there )3 points
-
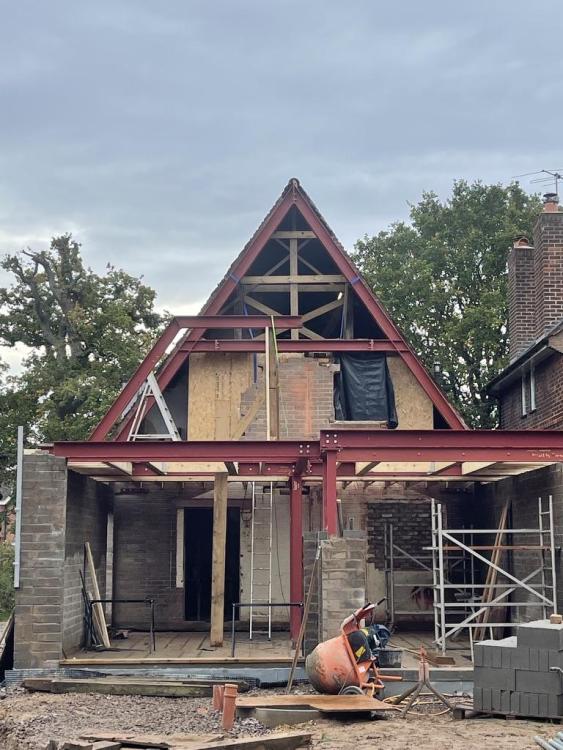
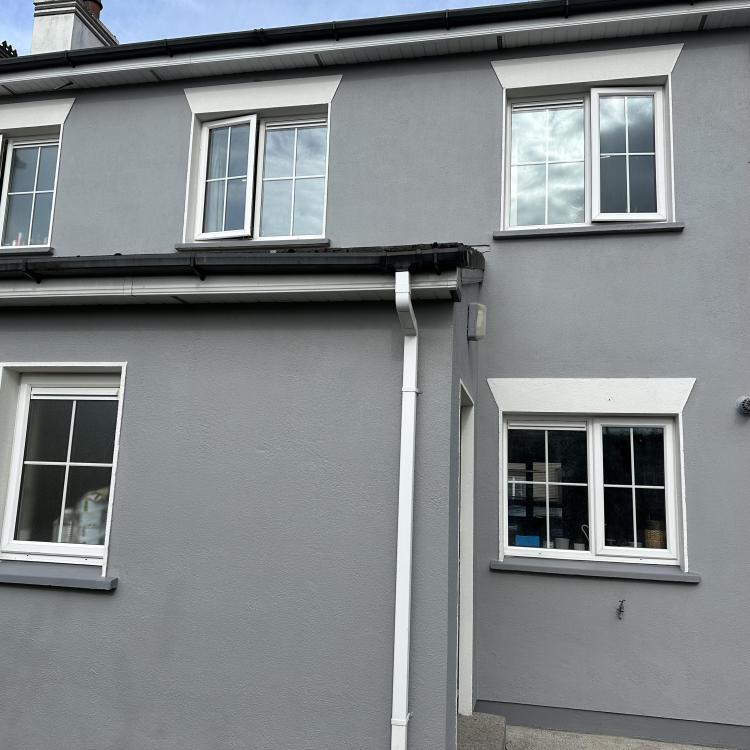
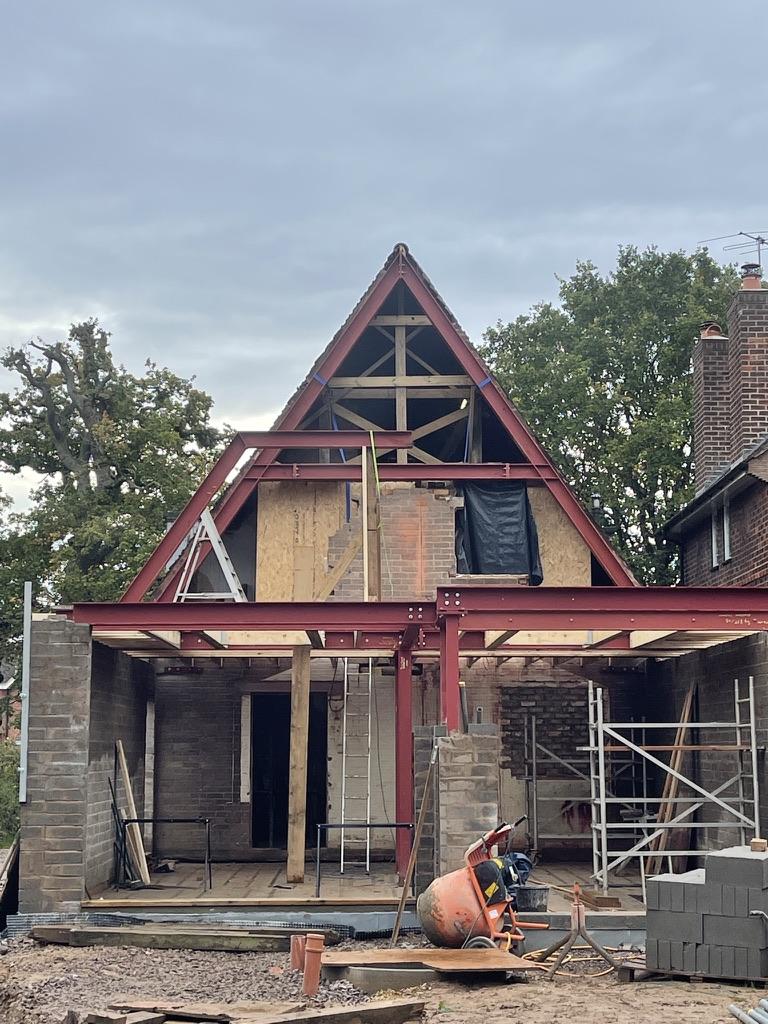
Greetings on a miserably rainy Sunday October morning. Perfect weather for catching up on some blog writing! As the title suggests this blog will be about our external coverings of the house and, by the end of it, the outside of the building will be pretty much finished allowing us to crack on internally. We started many months ago by battening the outside of the buildings. As we are having external blinds and they have a requirement for fitting the blind cassette we needed a large gap between the house walls and the outside of the cladding. This meant 50mm x 50mm timber battens and counter battens. We did this ourselves and saved many thousands and, even though it was slow going (as, it seems, everything is when you do it yourself!), it was very satisfying with the carpenter saying that it was good work and he’d seen chippies do a lot worse jobs than we did. Nice warm fuzzy feeling ensued. We are having a mixture of burnt Siberian larch (https://en.wikipedia.org/wiki/Yakisugi) and, to contrast the black, standard Siberian larch on the ‘arms’ of our property and entrance porch (all will be revealed in photos below) and I ordered all the cladding to be delivered on-site prior to the carpenter starting. The carpenter started on the garage using the standard Siberian larch which we bought from Jewson at a very reasonable price, and quite a bit cheaper than we could get from the usual timber cladding suppliers and we are very happy with the quality of the wood. He then went on to the black charred larch (which gets everywhere and he and his tools looked like they’d been in a coal mine by the end of each day!). We purchased the charred larch from Permachar (https://permachar.co.uk) who gave us a brilliant price. The wood itself was burnt and delivered from Lithuania (https://degmeda.eu) but they will only sell to the UK via Permachar. It is stunning wood, but incredibly fragile and any sort of dragging or scraping will cause the black char to flake off. While he was busy doing that and while the scaffolding was up I thought it a good time to get the guttering started. Our architect specified Zinc guttering and after a lot of thought and looking at stainless steel and zinc we also decided that zinc was the choice for us. We ordered it from Rainclear (https://www.rainclear.co.uk/guttering/copper-zinc-guttering/guttering-fittings.html?color=235) who offer next day delivery if in stock and were incredibly helpful and very well priced. It’s also a clip on system which even I managed to install without any major issues! Around the same time and while the carpenter was busy putting the cladding up our external blinds got fitted. We bought those from a local company called Powell blinds (https://powellblinds.com) who stepped in brilliantly at the last minute after we were seriously let down by Cornerstar Aluminium (long story which I won’t get in to here). The blinds are fitted up behind the cladding above the windows but externally so they will be hidden from view when lifted up. We absolutely love them and during the heatwave this summer we lowered them and this drastically reduced the temperature inside the house. There was still one large south facing window that didn’t have blinds that needed shading. We wanted and the architect designed a Brise Soleil in this area but all we had to go on was a 2D drawing. I contacted a few companies about getting one made and installed and the quotes came back at between £6k - £7k! A figure we simply could not afford. So I did research and spoke to a local forge called Horsham Forge (https://www.horshamforge.co.uk) with an idea I had. He said ‘that could be done but how about this instead?’. He suggested brackets with a pole running through them and vertical timbers slid on. Genius! On to Sketchup where I draw up the brackets and gave them to the forge to be created and spoke to my timber manager at Jewson who procured me some thermowood at the size I needed and got my carpenter to fit it and it cost me £1700 in total. So we saved around £5k by doing it ourselves and we also enjoyed the journey and got a solution that we designed (with the help of the forge of course). We think it looks fab and it does a good job of shading from the sun apart from a couple of hours when the sun is directly facing that side of the house. So we will still get some solar gain but it is definitely reduced and it’s a brilliant architectural feature. 😉 Right, while all this was going on the chippie was finishing up the cladding and now that it is all finished and I have put the downpipes on we have an almost finished external facade to our dream home. We love it and think it’s stunning. So very happy with the carpenter’s work (http://www.kmlcarpentryandroofing.co.uk). Kieran’s attention to detail at the junctions between the 2 types of wood is fabulous as it is in other areas too. He would also discuss any issues and potential solutions with us to make sure we were happy with them rather than just doing something he thought was right. Hopefully the pictures below do it all justice! (Note: please ignore the 110mm brown downpipe in the below photo! It will eventually be a rain chain but this works for now. 😉 ) Thanks for reading and we hope you like what we’ve achieved so far.2 points
-
Attach a geocomposite drain sheet to the back of the wall then just backfill right up against it. Water will drain to the lowest point so have some way to discharge it.2 points
-
The message is, if you are going to do practical work you are a failure. It was when i was at school in the 80's, and its much worse now once Blair got the whole "you must have a degree" bandwagon rolling. The single best thing i ever did was ignore everyone and get a proper apprenticship. Sadly, even now, if you are just coming out of school, where are those proper apprenticeships that give a good engineering grounding. I dont know of any outside the MOD. Just watered down training schemes to get you earning money for the employer double quick. Usually focused on a very narrow range of tasks. Which of course increases the chances of staying tied to the employer. Even if this mindset changed tommorow, it will be 10 years plus before we see the benefit. The message today still is, if you go into a trade, you have failed. And the industry training schemes seem to focus on those that have failed acedemically. Thats why we are where we are, and why the fabled 1.4 million heatpumps wont happen.2 points
-
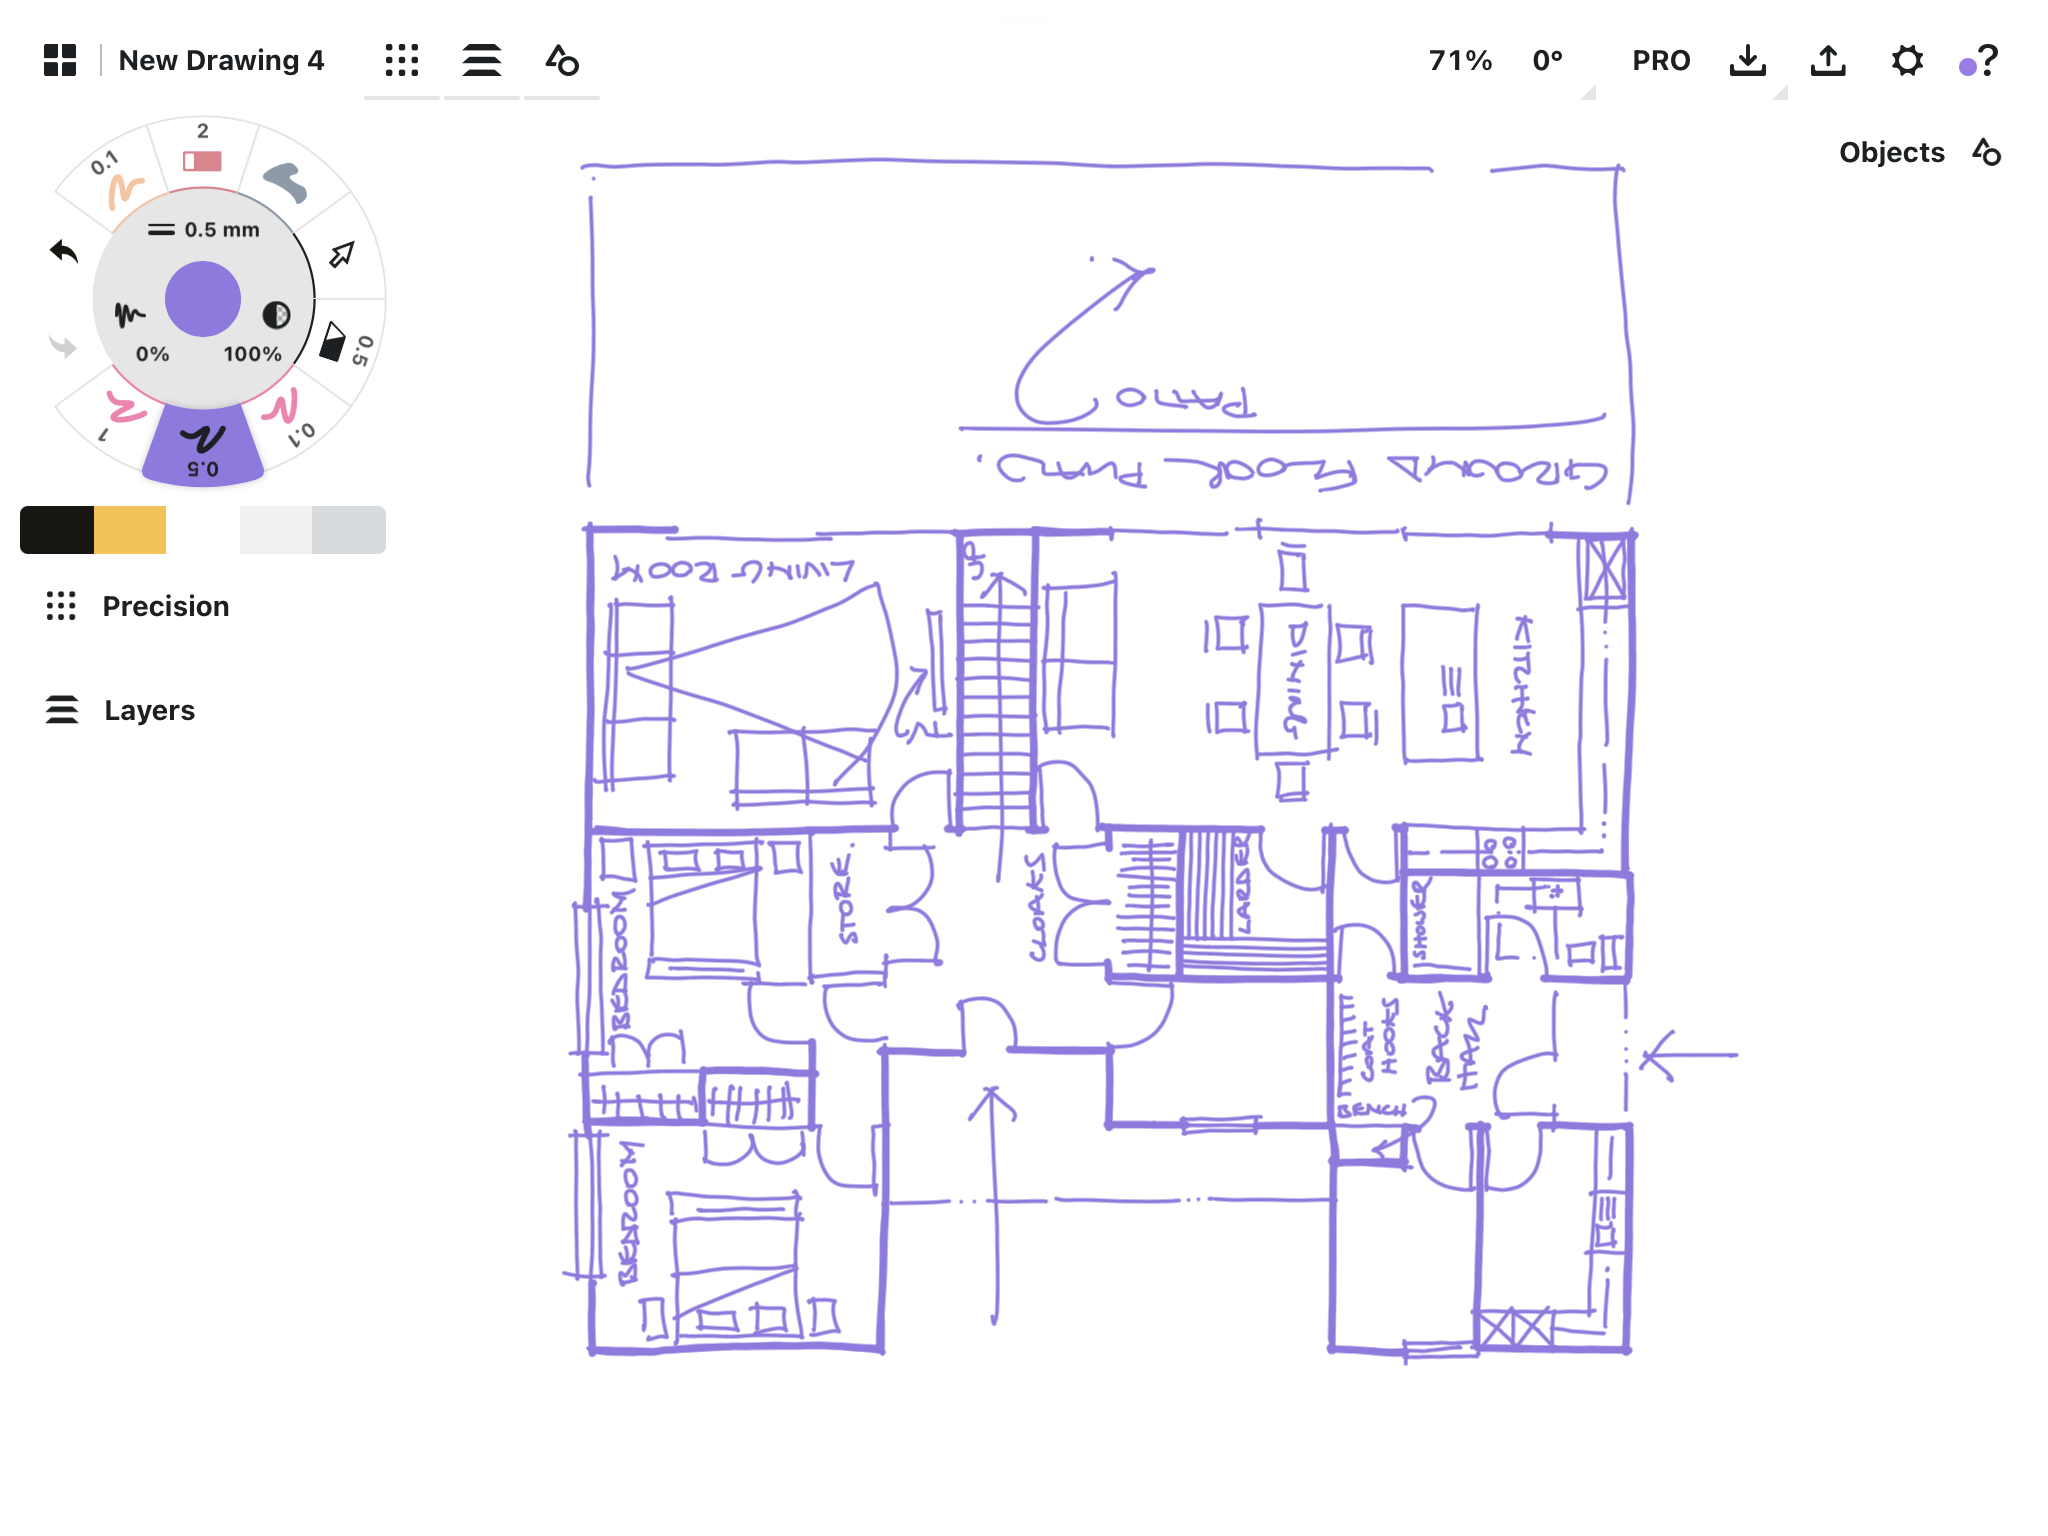
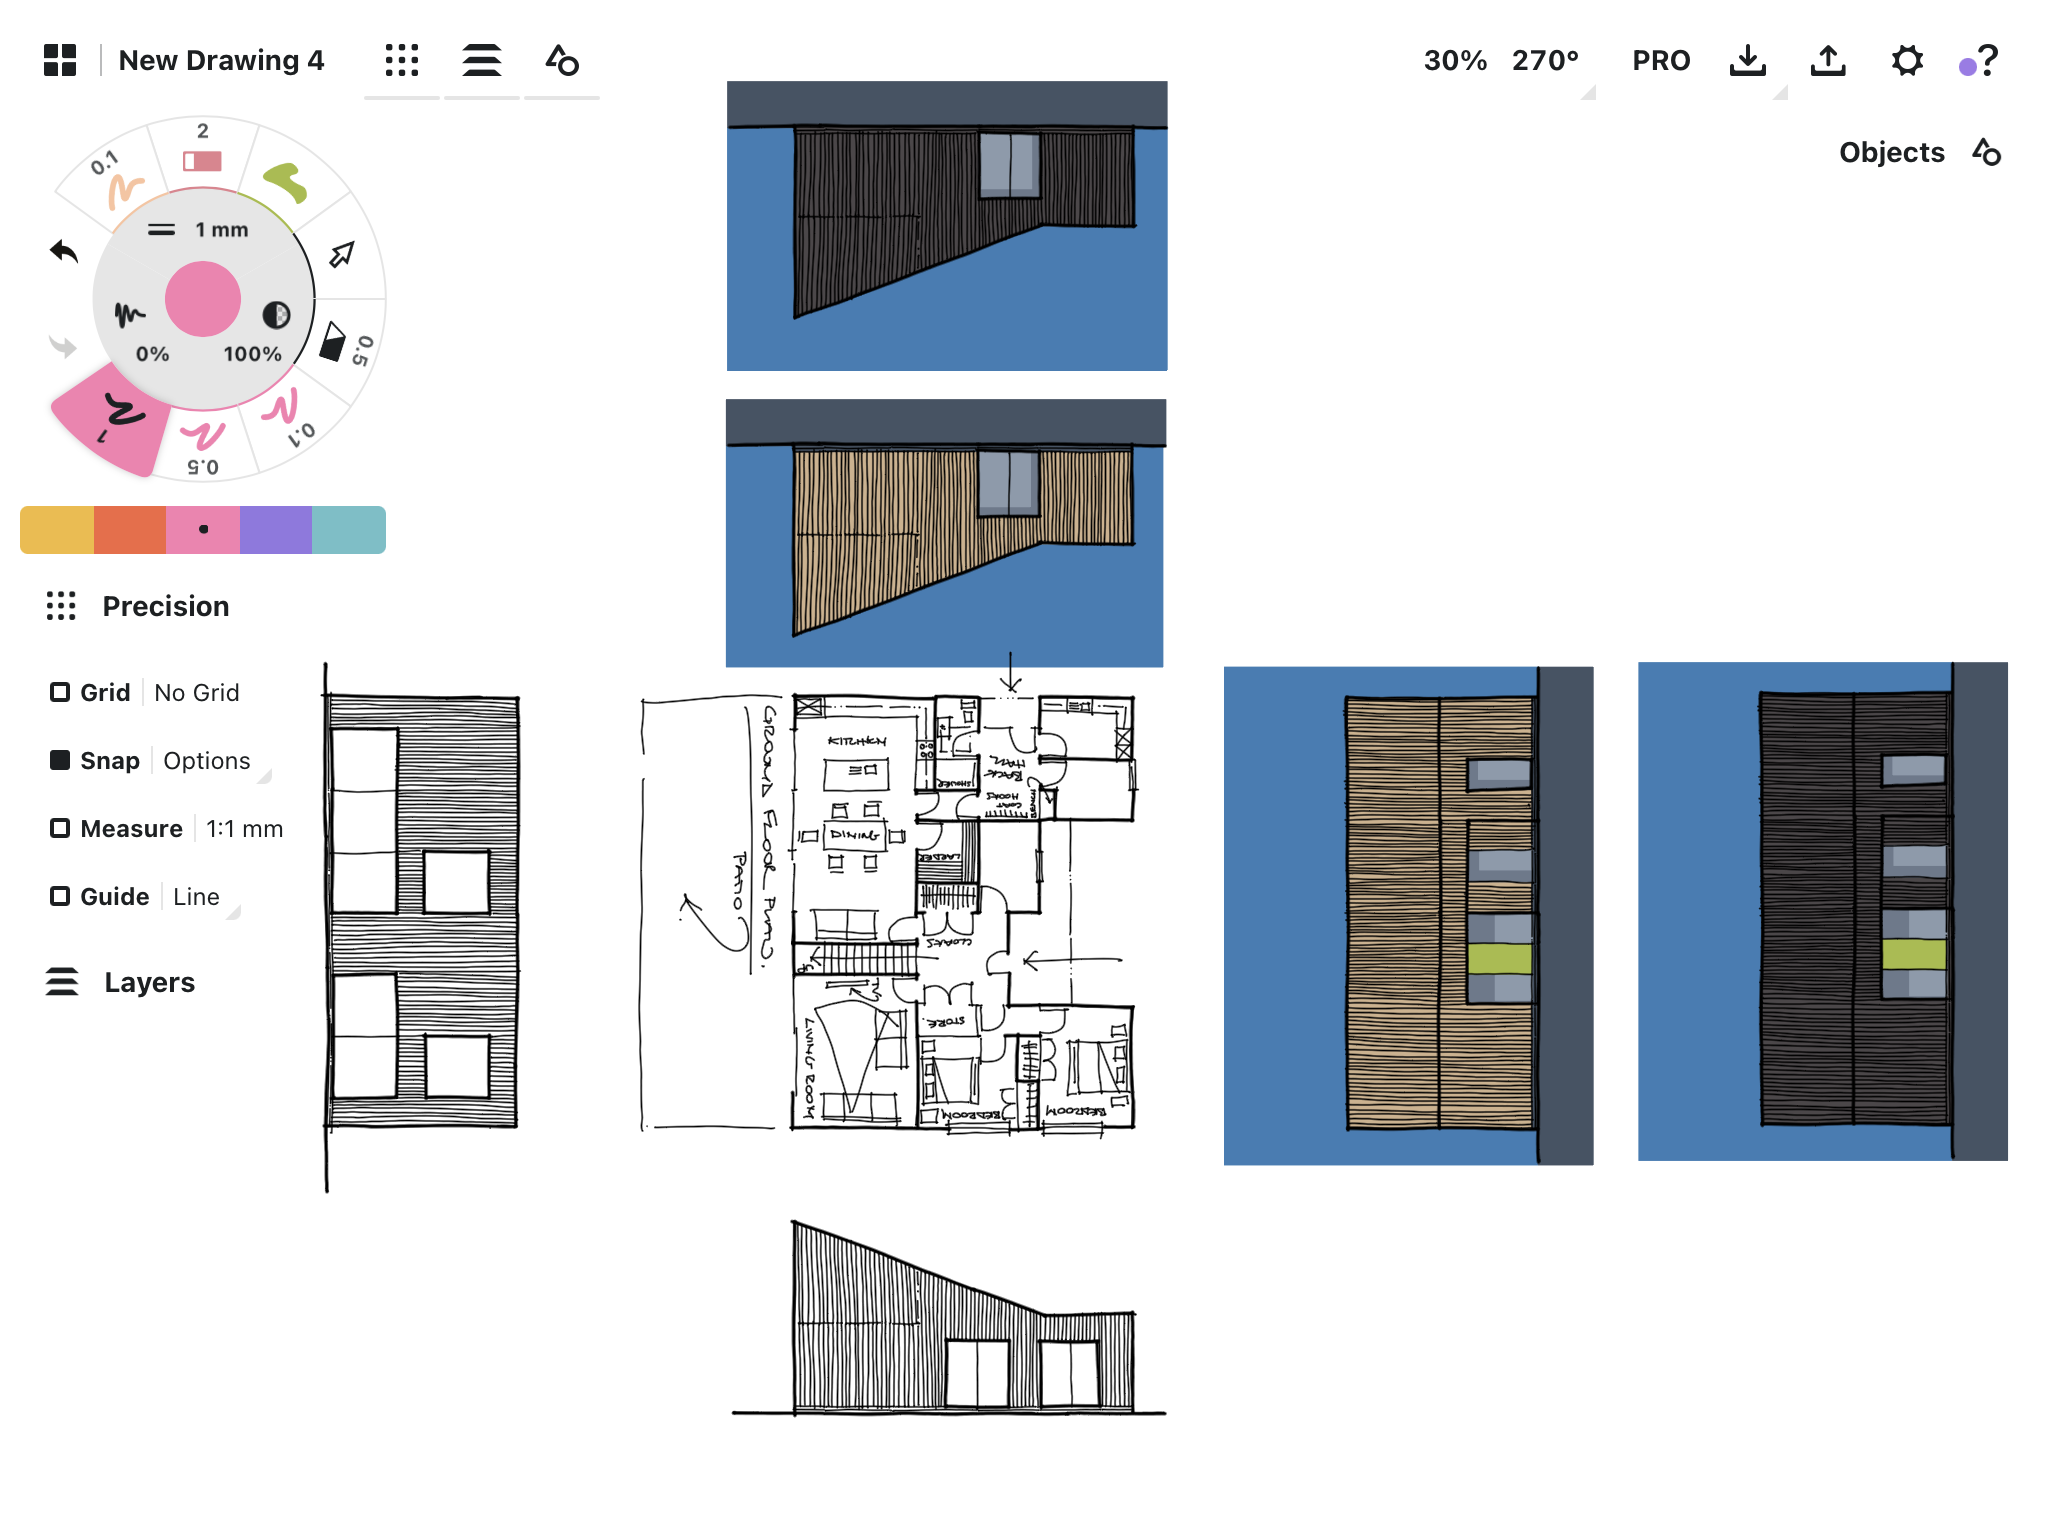
Alternative plan to your posted layout.

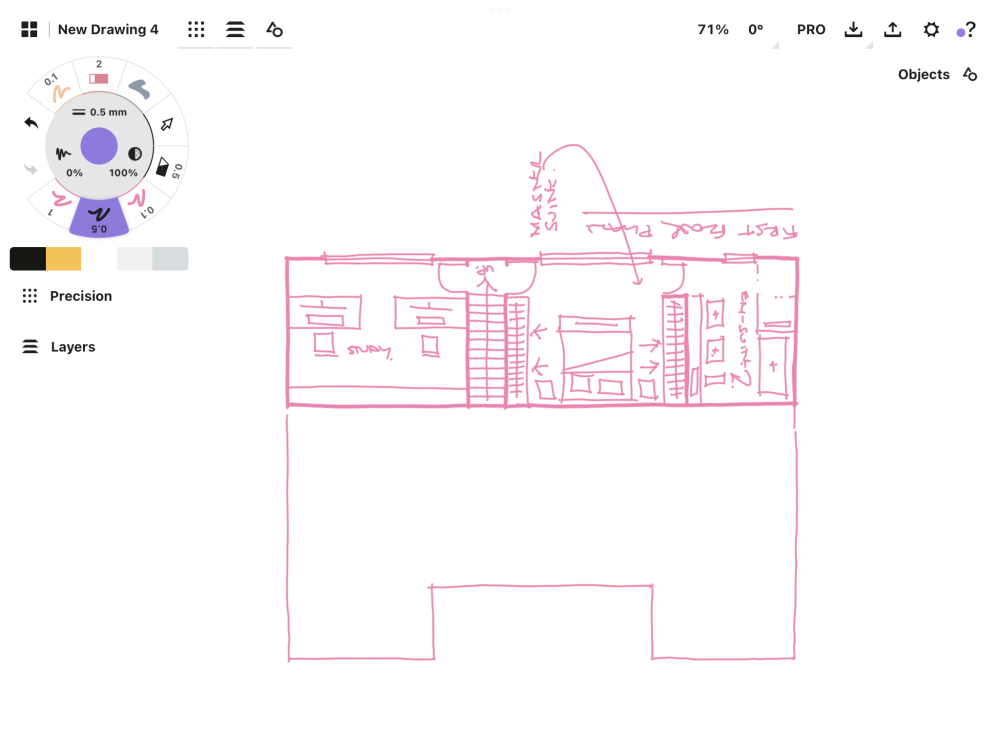
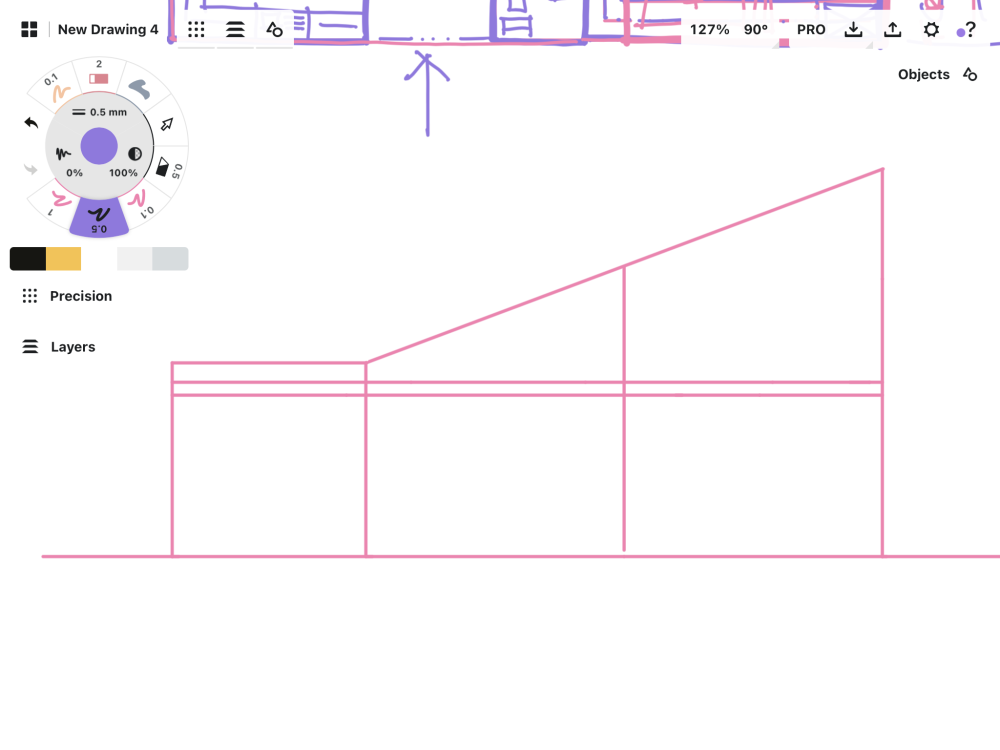 2 points
 -
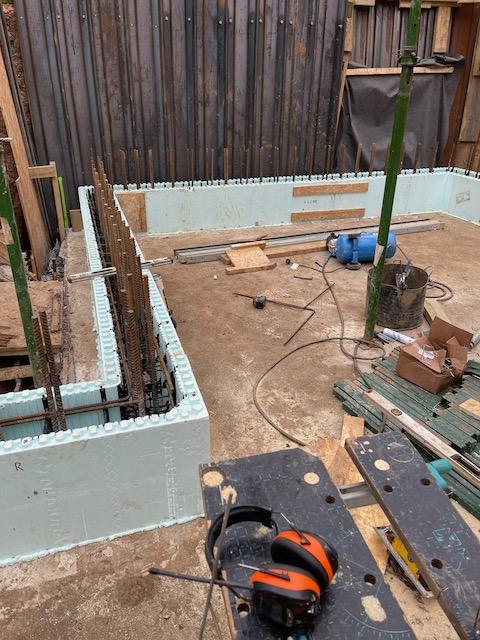
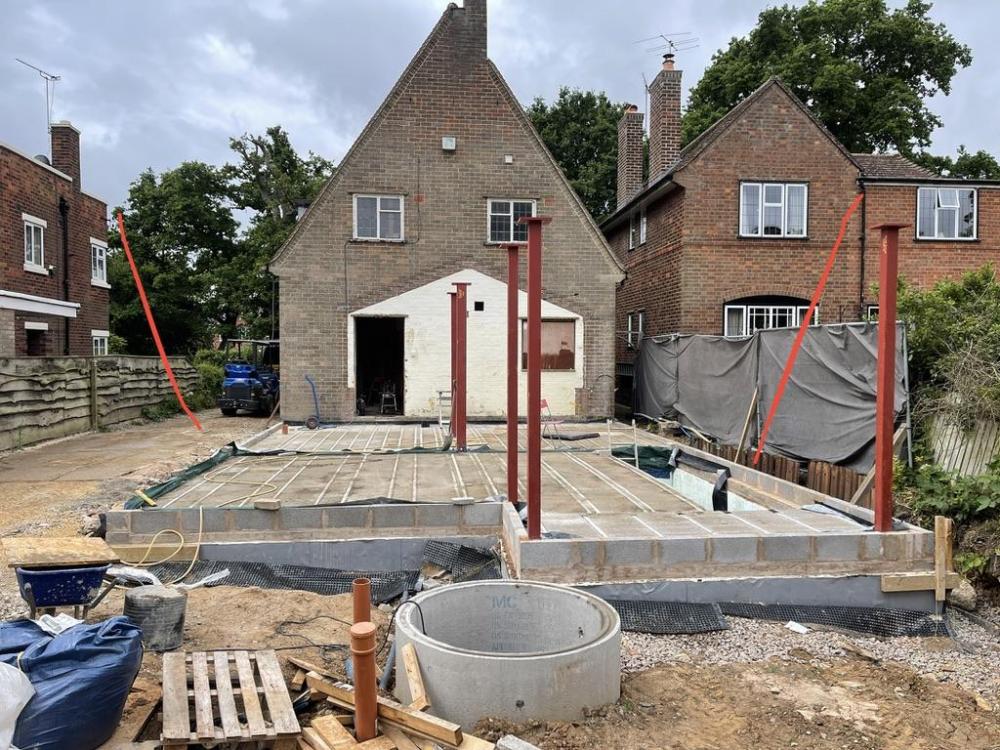
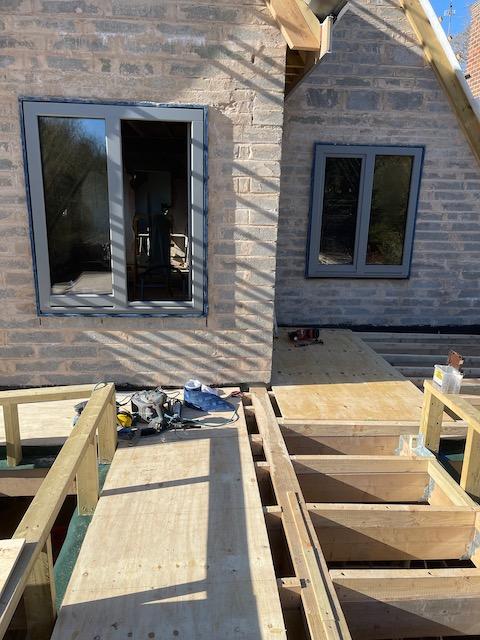
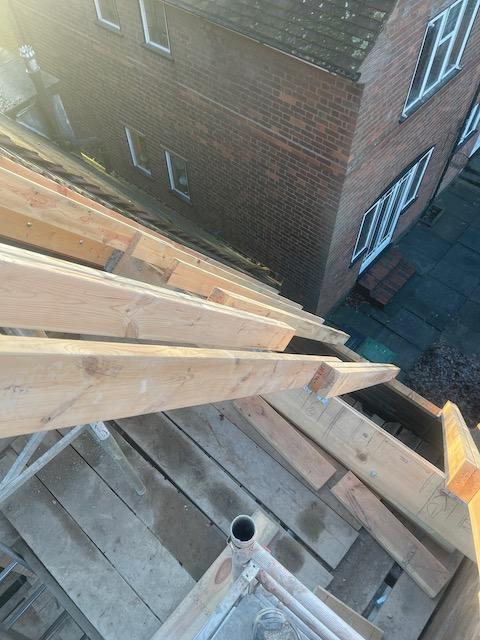
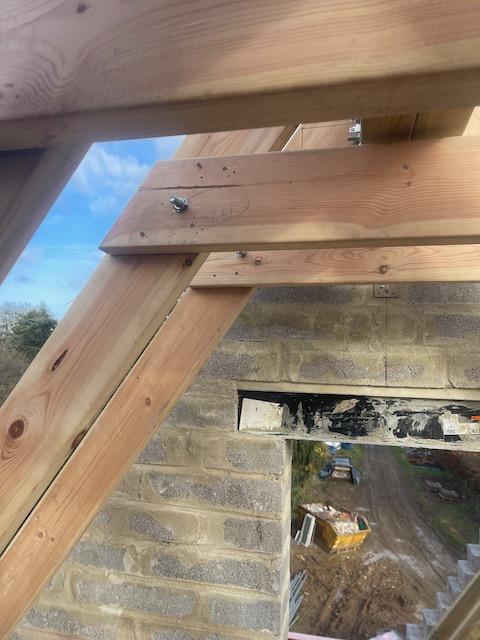
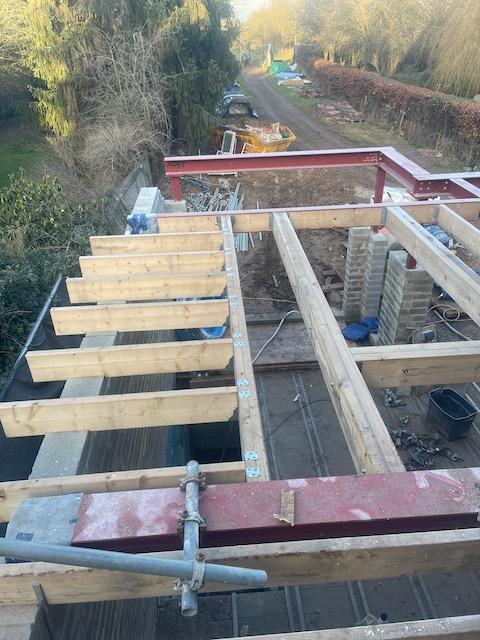
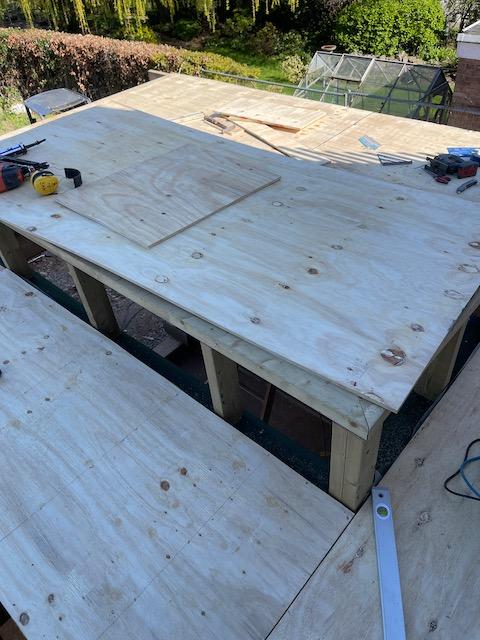
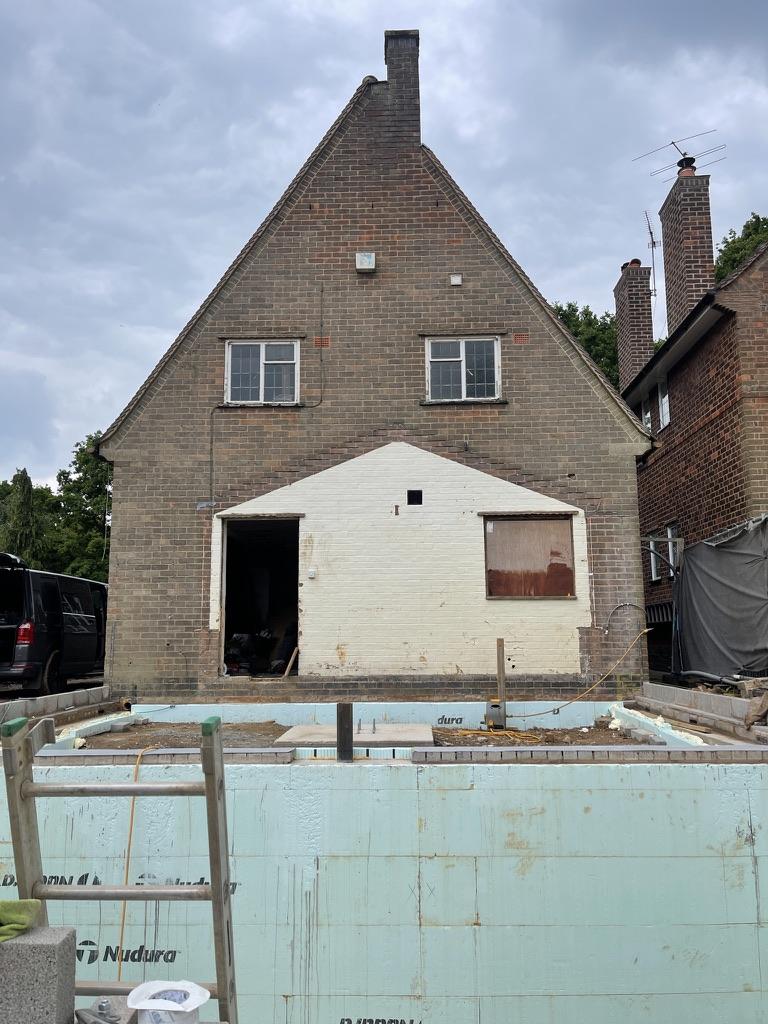
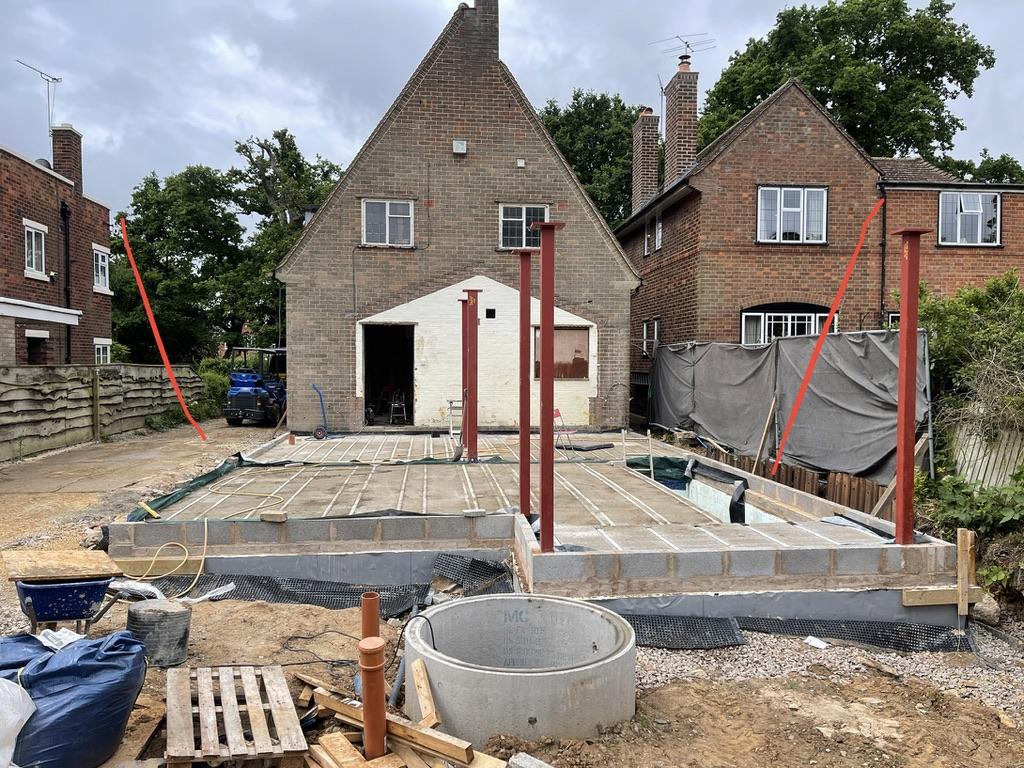
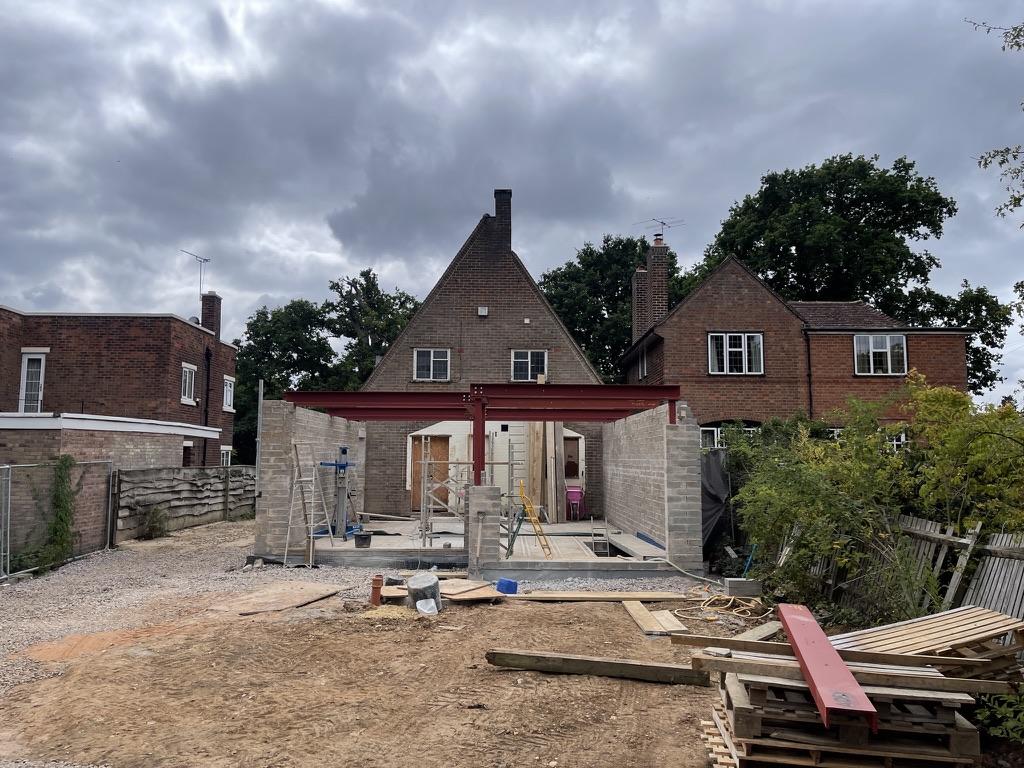
hello everyone. Here are some details on our project we started. Its a 1950 detached house 170sqm which we have extended to 240sqm with a basement and loft conversion. Just about at first fix stage now. Trying to make it as low energy and airtight as possible. Calculated heat loss so far is around 6kW. Apart from a few concrete pump drivers and a crane driver we have done all the work ourselves - me, the wife and two nearly-grown up kids..
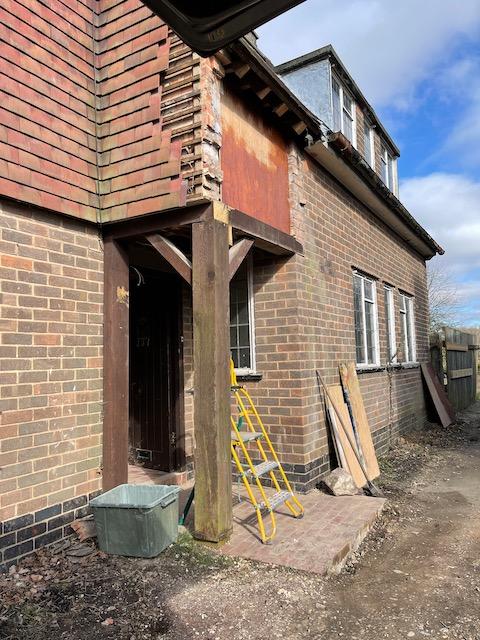
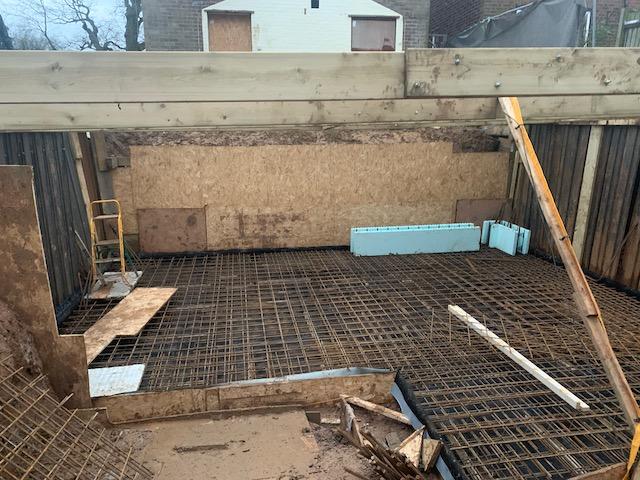


 1 point
 -
Hi - and Welcome to THE forum for people like us.... This may be another one of those occasions where the designer has not understood your build ups correctly. To get an accurate calculation do what @Thorfun suggests. The spreadsheet is here: https://forum.buildhub.org.uk/applications/core/interface/file/attachment.php?id=62325&key=a181232df44762993cdfe81c623c7c47 I think..1 point
-
Your planning officer line seems fine to me - won't affect the application. The issue is - you've pissed off all your neighbours - or at least one who is organising against you. Question is does that affect you in the long term - do you care if you fall out with them?1 point
-
Picked up a landroid L last autumn with an offer they had on their ebay store for about £350 - I think they have a new model due out, so look for offers. I've only just deployed it, but my findings so far: Cuts well, though it does a random pattern, so obvs no stripes Wire positioning has taken some tweaking, my lawn is on a slope and although wire was placed at required distance, it struggles at the bottom of the slope where there is a 5 cm drop to the path, so I have had to take the wire back a bit which means I will need to manually tidy up this edge, the other edges all work fine The stock wheels do struggle if our soil is wet as they clog up, the only problems this seems to cause is a) increased wheel slippage b) sometimes struggles to dock - our dock is on a slight incline (against manufactures recommendations) which probably doesn't help. I've ordered some aftermarket wheels that I hope will help, and will probably rellocate the dock On the whole pretty happy with it, and much nicer to sit back with a beer watching it work than doing the graft myself1 point
-
The Red Shed.
 1 point
 -
I ended up wimping out and leaving it. Insurers have got a subcontractor who has a subcontractor they're sending out to demolish it tomorrow, so will see how they approach it.1 point
-
I had a Yard Force SA650ECO back in 2020. The garden wasn't really suited to it - slopes, in particular, gave it trouble, but it also struggled to get between the two zones, through a relatively narrow corridor. It was great when it worked, but I had to rescue it from itself most days. Neighbours and passers-by were absolutely entranced by it, though.1 point
-
We’ve got a garden about 190m2. We have a Worx Landroid about 5 years old now. Does a brilliant job but …. I still use my old petrol mower at the end and start of the season as it gets a bit wet for the robot to go out (ie it rains too much). This year (we live in Northumberland) I’ve just put the robot out. Main reason is that it’s been a really wet April here and for some reason the dogs have dug some holes in the lawn over winter where we’ve had ‘critters’ which needed fixing which I’ve only just done. The robot goes out for about an hour a day. if you want stripes then forget it and you’ll still need to strim edges (even with the worx close to edge system) main reason I got mine was that we worked away and I got fed up of having to do a ‘major’ cut when I got home which was occasionally every two weeks during summer. hope that helps.1 point
-
It makes no difference having tapered edges I can’t remember the last time I used square edged boards More than ten years ago You don’t see them on sites1 point
-
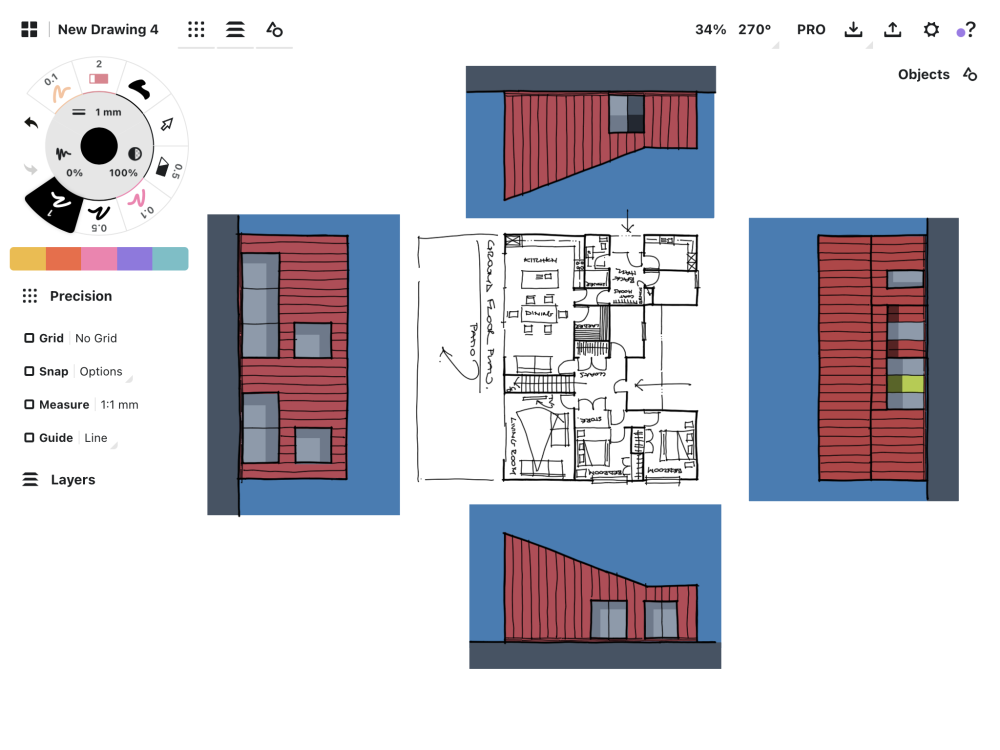
@AppleDown let’s put it this way, your effort is significantly better than your architects and you are barking up the right tree. The bedroom wing is a very neat idea being downstairs and gives it separation from the living space. You and your kid will appreciate this when older. Appreciate its not a final design but maybes just give the bedrooms even just another 20/30cm so you’ve got maybes 1-1.2m from bottom of bed to wall. Minimum cost but will square them off and will be a lovely size. Give yourself more storage in the hallway, you won’t regret it. I like the window through to see back garden, but likewise that could be a great area for a big storage cupboard. the little room off livingroom perfect playroom then future study. swapping dining table with secondary seating in living would be an obvious call. upstairs your long storage room will be invaluable I genuinely think you’ve got the makings of a great layout there. Lots of multi functionality and nices spaces. When your old and infirm the upstairs can be used by your visiting grandkids.1 point
-
In order to push the amount of power you would like to push into the grid, your inverter(s) have to raise the voltage at your connection. People nearby will have that extra voltage appearing at their connections too.1 point
-
Yes it's a nonsense. While it is understandable that the DNO should have a say because they have legitimate concerns e.g. if you export more than your license you might push the voltage too high*, my experience and quite a few others over at https://camelot-forum.co.uk/phpBB3/viewforum.php?f=11 is that they are happy with DIY installs of both panels and batteries. In which case if the technical standards are met why should the companies trading in the power care who installed the means of production. * Have never understood why they are concerned about me suddenly supplying more than 3.68 kW yet do not care (or even know) if I turn off an electric shower drawing 9.5.1 point
-
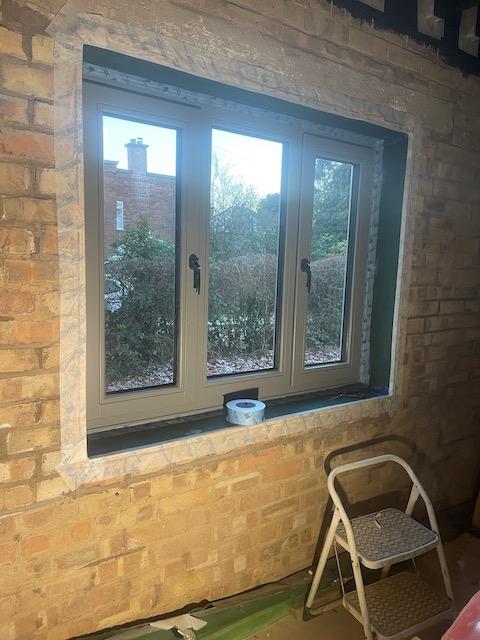
yes. the SEG80s. https://www.hallmarkblinds.co.uk/assets/trojan80-spec-sheets.pdf thank you. we like it to and it casts lovely shadow patterns as the sun moves round.1 point
-
Good to know, thanks. I really don't get why any additional certification (beyond what the DNO accepts) is needed. Payments are based on metered figures after all so why does anyone care provided that the DNO is happy. Bizarre unless I'm missing something..1 point
-
Just as a note- MCS don’t have a monopoly on export payments. SSE, OVO, E-ON, Scottish Power and British Gas all accept Flexi-Orb certification as an alternative to MCS. Octopus don’t accept it at the moment though so it’s no good for getting a top export rate.1 point
-
The alternative is square edge boards then the bead goes on, then when you fit your skirting you find the wall kicks out for the last few inches to the corner.1 point
-
Thereby driving up the market for batteries which are environmentally hostile, at least for now.1 point
-
I was thinking you could either send it outdoors or you could run the 110mm pipe parallel to the joists.1 point
-
Things to consider here are how are you going to finish the blocks, if you plan to render them you will need to consider the constant dampness that will come from the inside of the planter, through the block and damage the render, if you use facing brick it could be the same, so you need to consider how you will build them and put in an isolation layer for moisture. Blocks are blocks, you do get facing blocks but you probably want to be looking at facing bricks. For construction ideas consider some methods used in the waterproofing of retaining walls. A Geo-drain type membrane might help you here.1 point
-
1 point
-
Agree it would be better to deal with the water behind the wall than try to hide it. Is it too late to put in a land drain behind? Some form of waterproofing membrane on the back face would give the best result.1 point
-
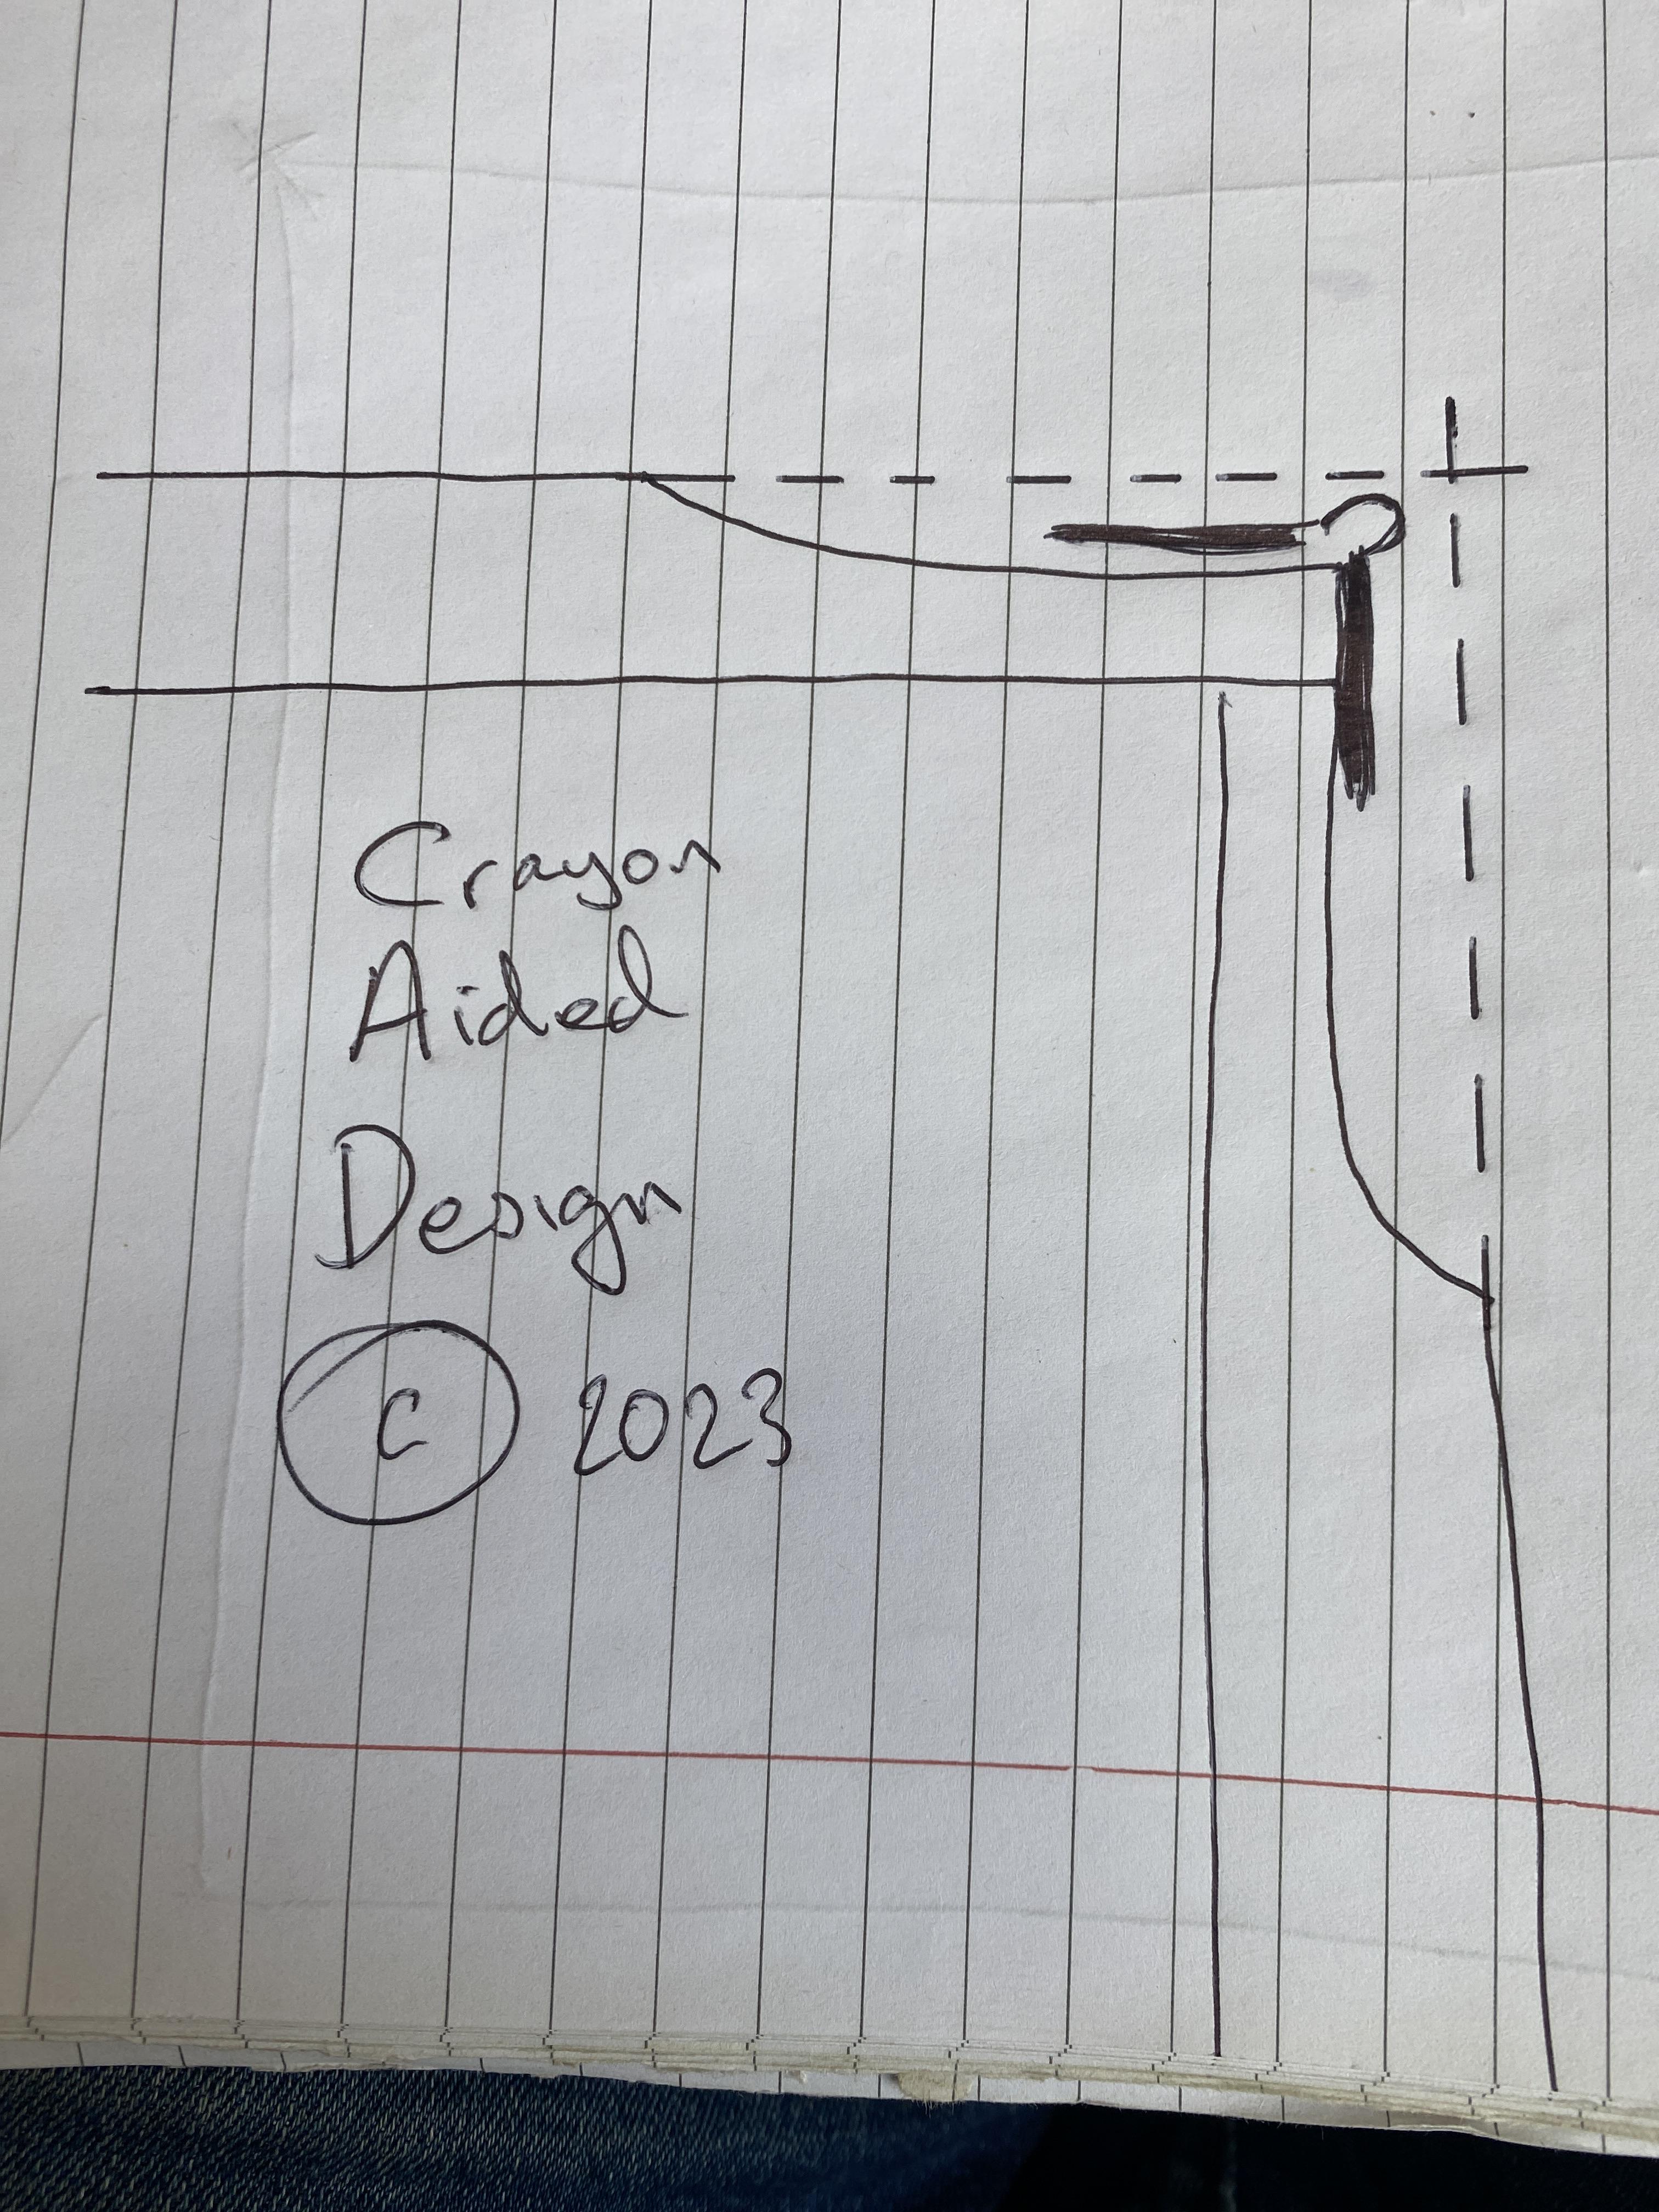
The flow rate at the combi boiler cold inlet is what pushes hot water out of the taps. As you are "stealing" from the rising cold supply to it, multiple times before it gets to the combi, you will likely see a significant loss in performance for the DHW output. If you run 22mm all the way ( to the last T-off ) and then drop to 15mm > combi, then effectively you have enough capacity in the 22mm pipe to service the "theft" as well as still having sufficient residual capacity to provide adequate cold mains 'potential' at the combi. Any instant water heater should have "cold mains priority" which is either achieved by running a dedicated feed from the stopcock to the appliance, or by doubling the capacity of the single supply pipe.1 point
-
Plants - couple of shrubs in that bed infant of it and you'll not see it after 6-12 months.1 point
-
If you bridge over the ground stump/root combo with a bit of rebarred concrete, that would support most things. I think it is what they used to do to cap mineshafts down here. Now they put a metal cage over them. Then send the dogs down. https://www.cornwalllive.com/news/cornwall-news/dogs-rescued-after-falling-porkellis-8123356.amp1 point
-
+1 for brick slips and same concept as tiling but better looking.1 point
-
Thanks for the comments.1 point
-
1 point
-
?screw-in wall ties, build single skin of brick and then replace the copings that you think you'd have to replace anyway? (Or brick slips? Though I'd be concerned about the adhesive de-bonding in the same way that render might).1 point
-
if you can remove it with a machine, its likely that wall will come down behind it though. Grinding just removed the top part from sight, the reason he was leaving you the arisings was so he didnt have to pay to tip them. Either way when it comes to digging the footings the bottom of the footing has to be deeper than any roots visible. Hire in the largest machine that you can fit, ideally a 13 tonner but nothing less than 5.1 point
-
What they are saying is the cable or transformer is inadequate and needs upgraded. Personally I am forming the opinion if I do add extra solar I just won't tell anybody. I export almost nothing from what I have and the same would be true of any addition (with batteries)1 point
-
Etc’s latest idea, or something similar, gives you the multifunctionality for your circumstances. Upstairs study used for small child bedroom until older then they can go downstairs if necessary. You can use upstairs spare room as nursery / bedroom / guest bedroom /study / snug / dressing room as you see fit as as your lives change. Everything you need as a minimum is downstairs should this be a home for life and as you get older. 100% agree that having the living space to rear on this plot is the way forward, and your own design has wasted space especially hallway.1 point
-
Dolet us know their responde. A lot of us are waiting to pounce on the DNO for higher export limit.1 point
-
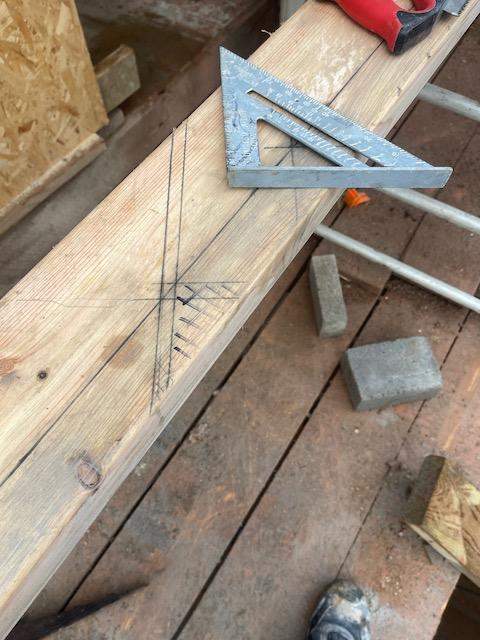
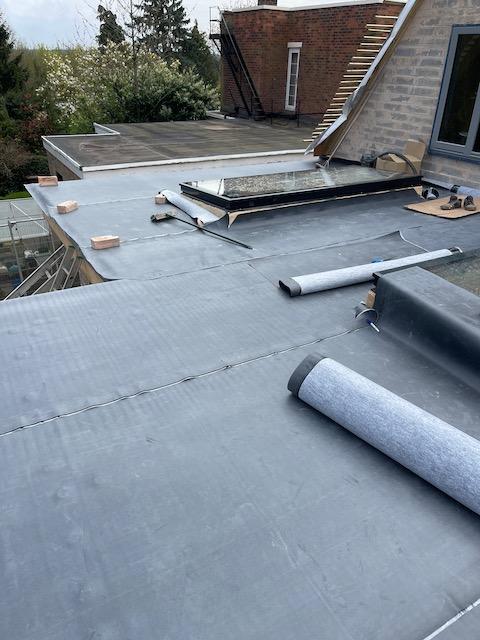
The reason you've been given the job is its fidly to do right. I folded inside corners and taped outside corners and it took ages. A Hot air gun is your friend
 1 point
 -
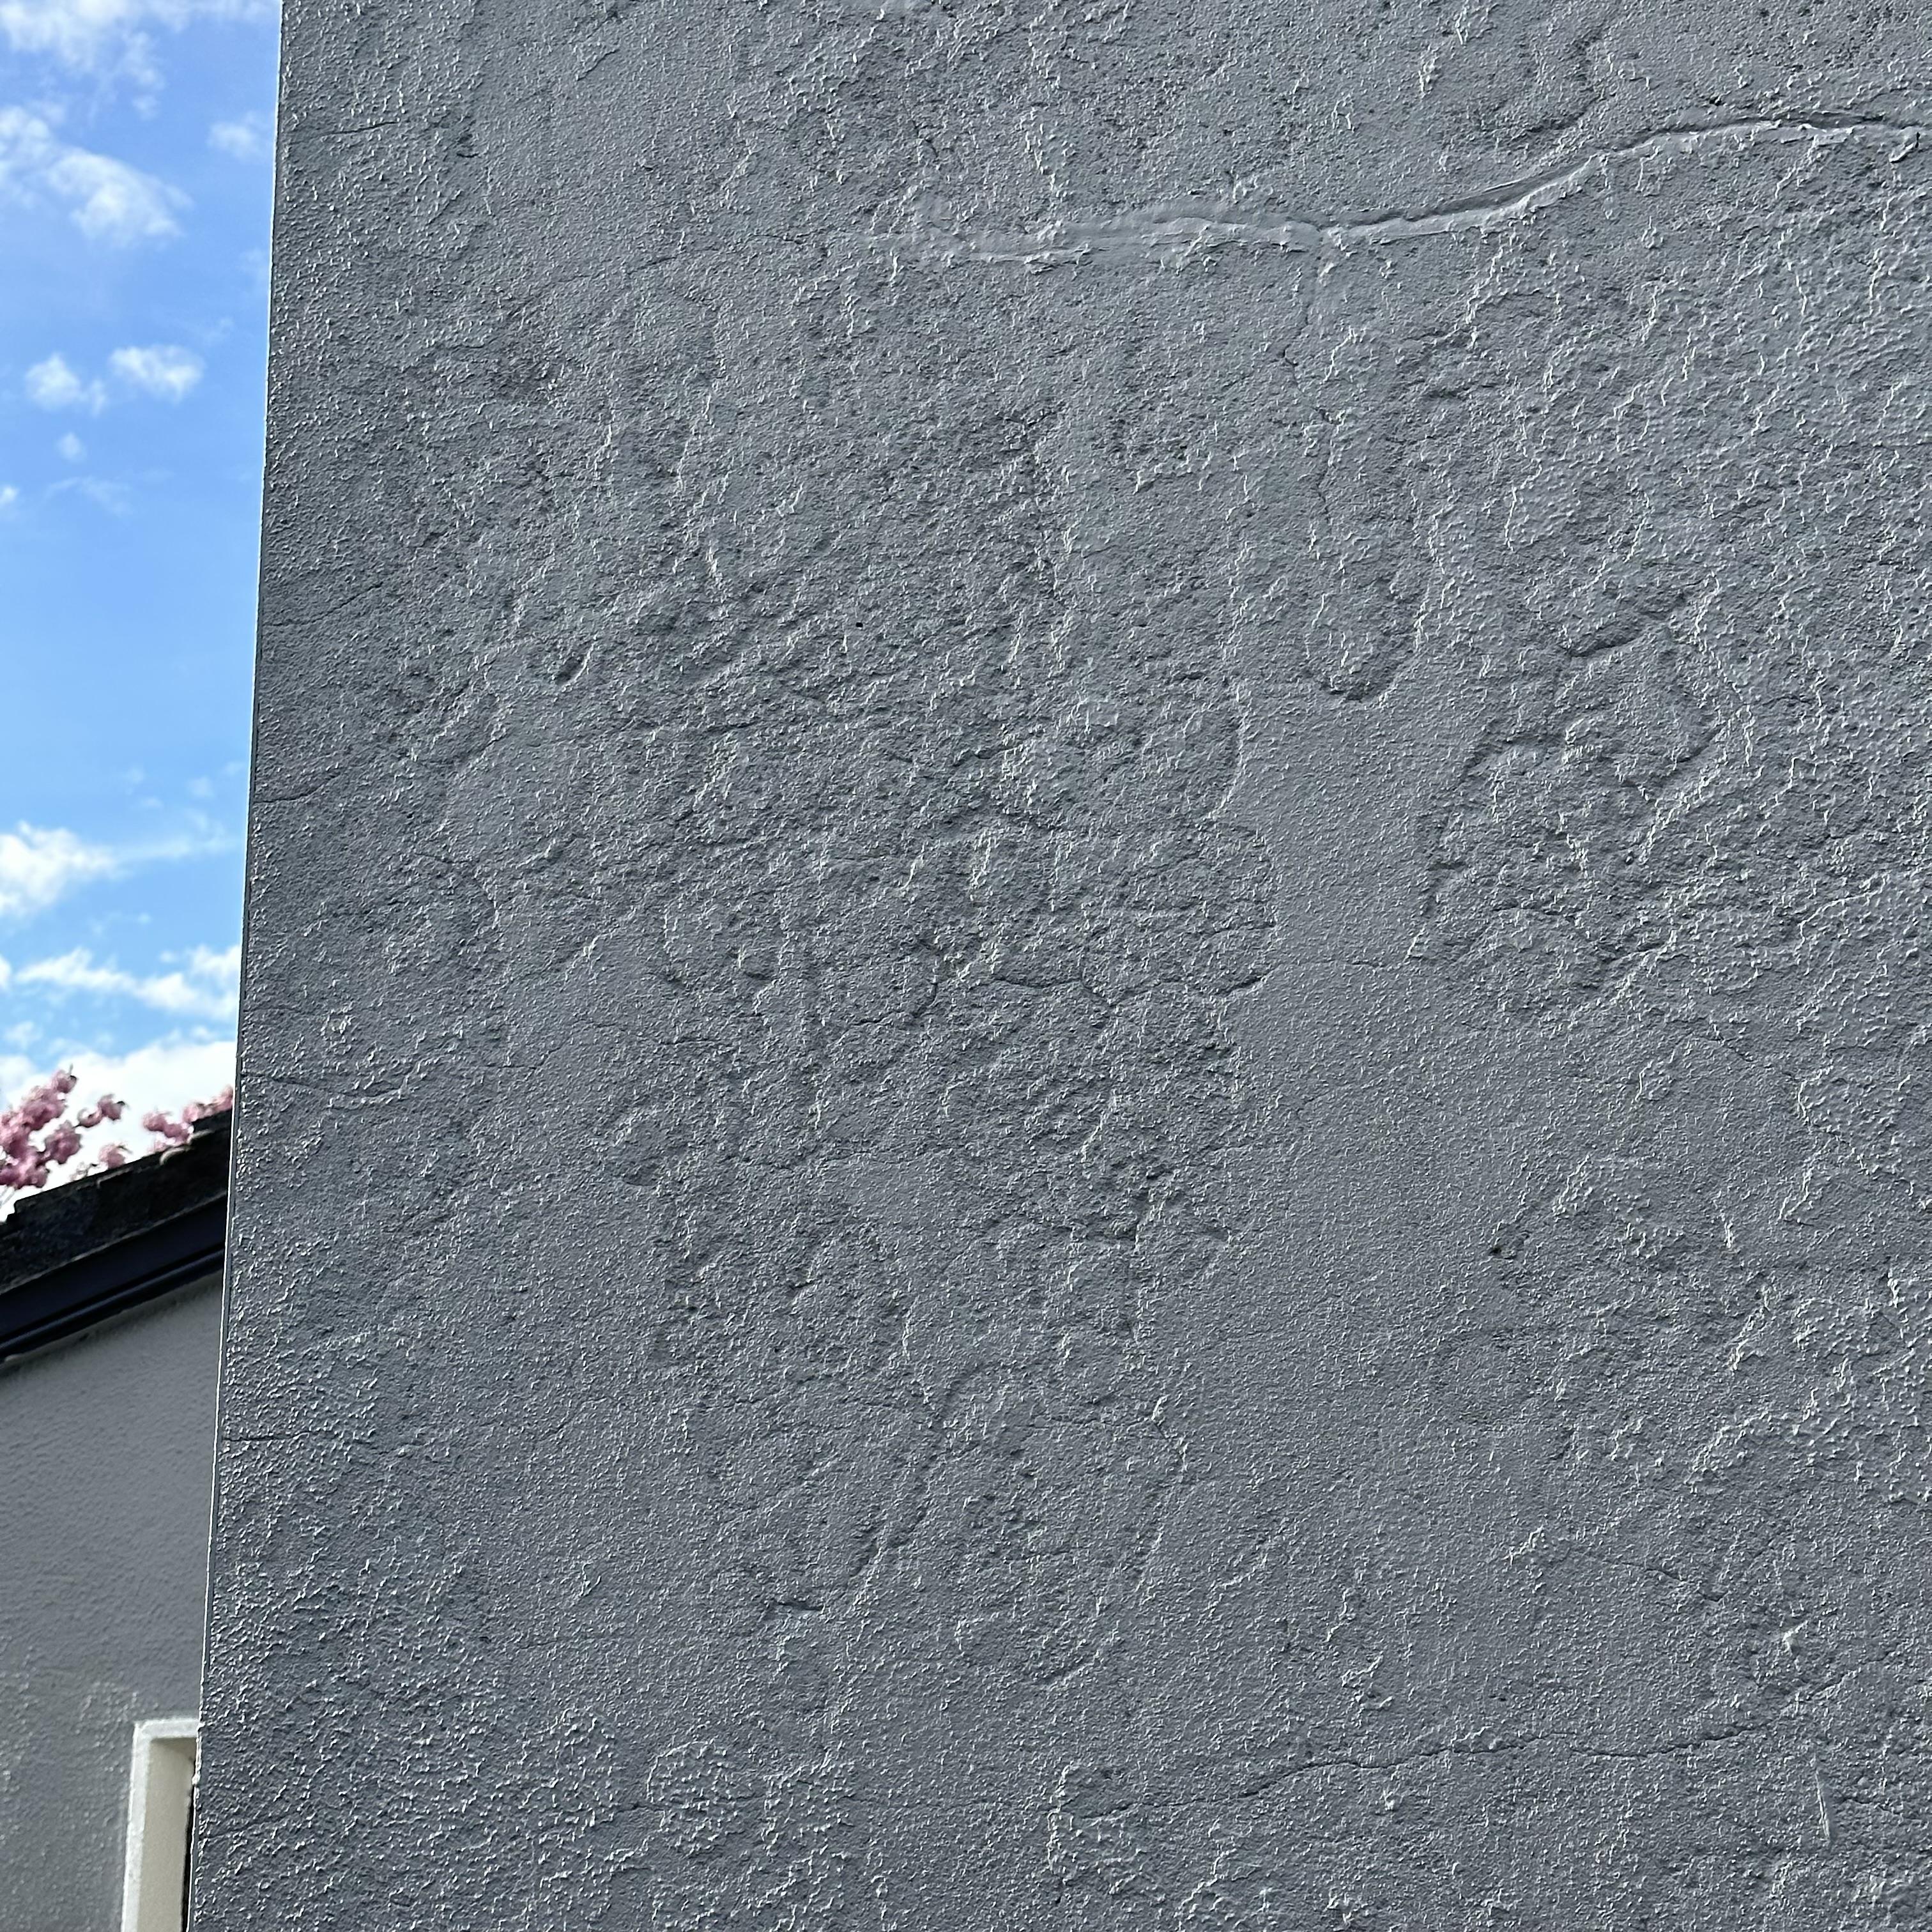
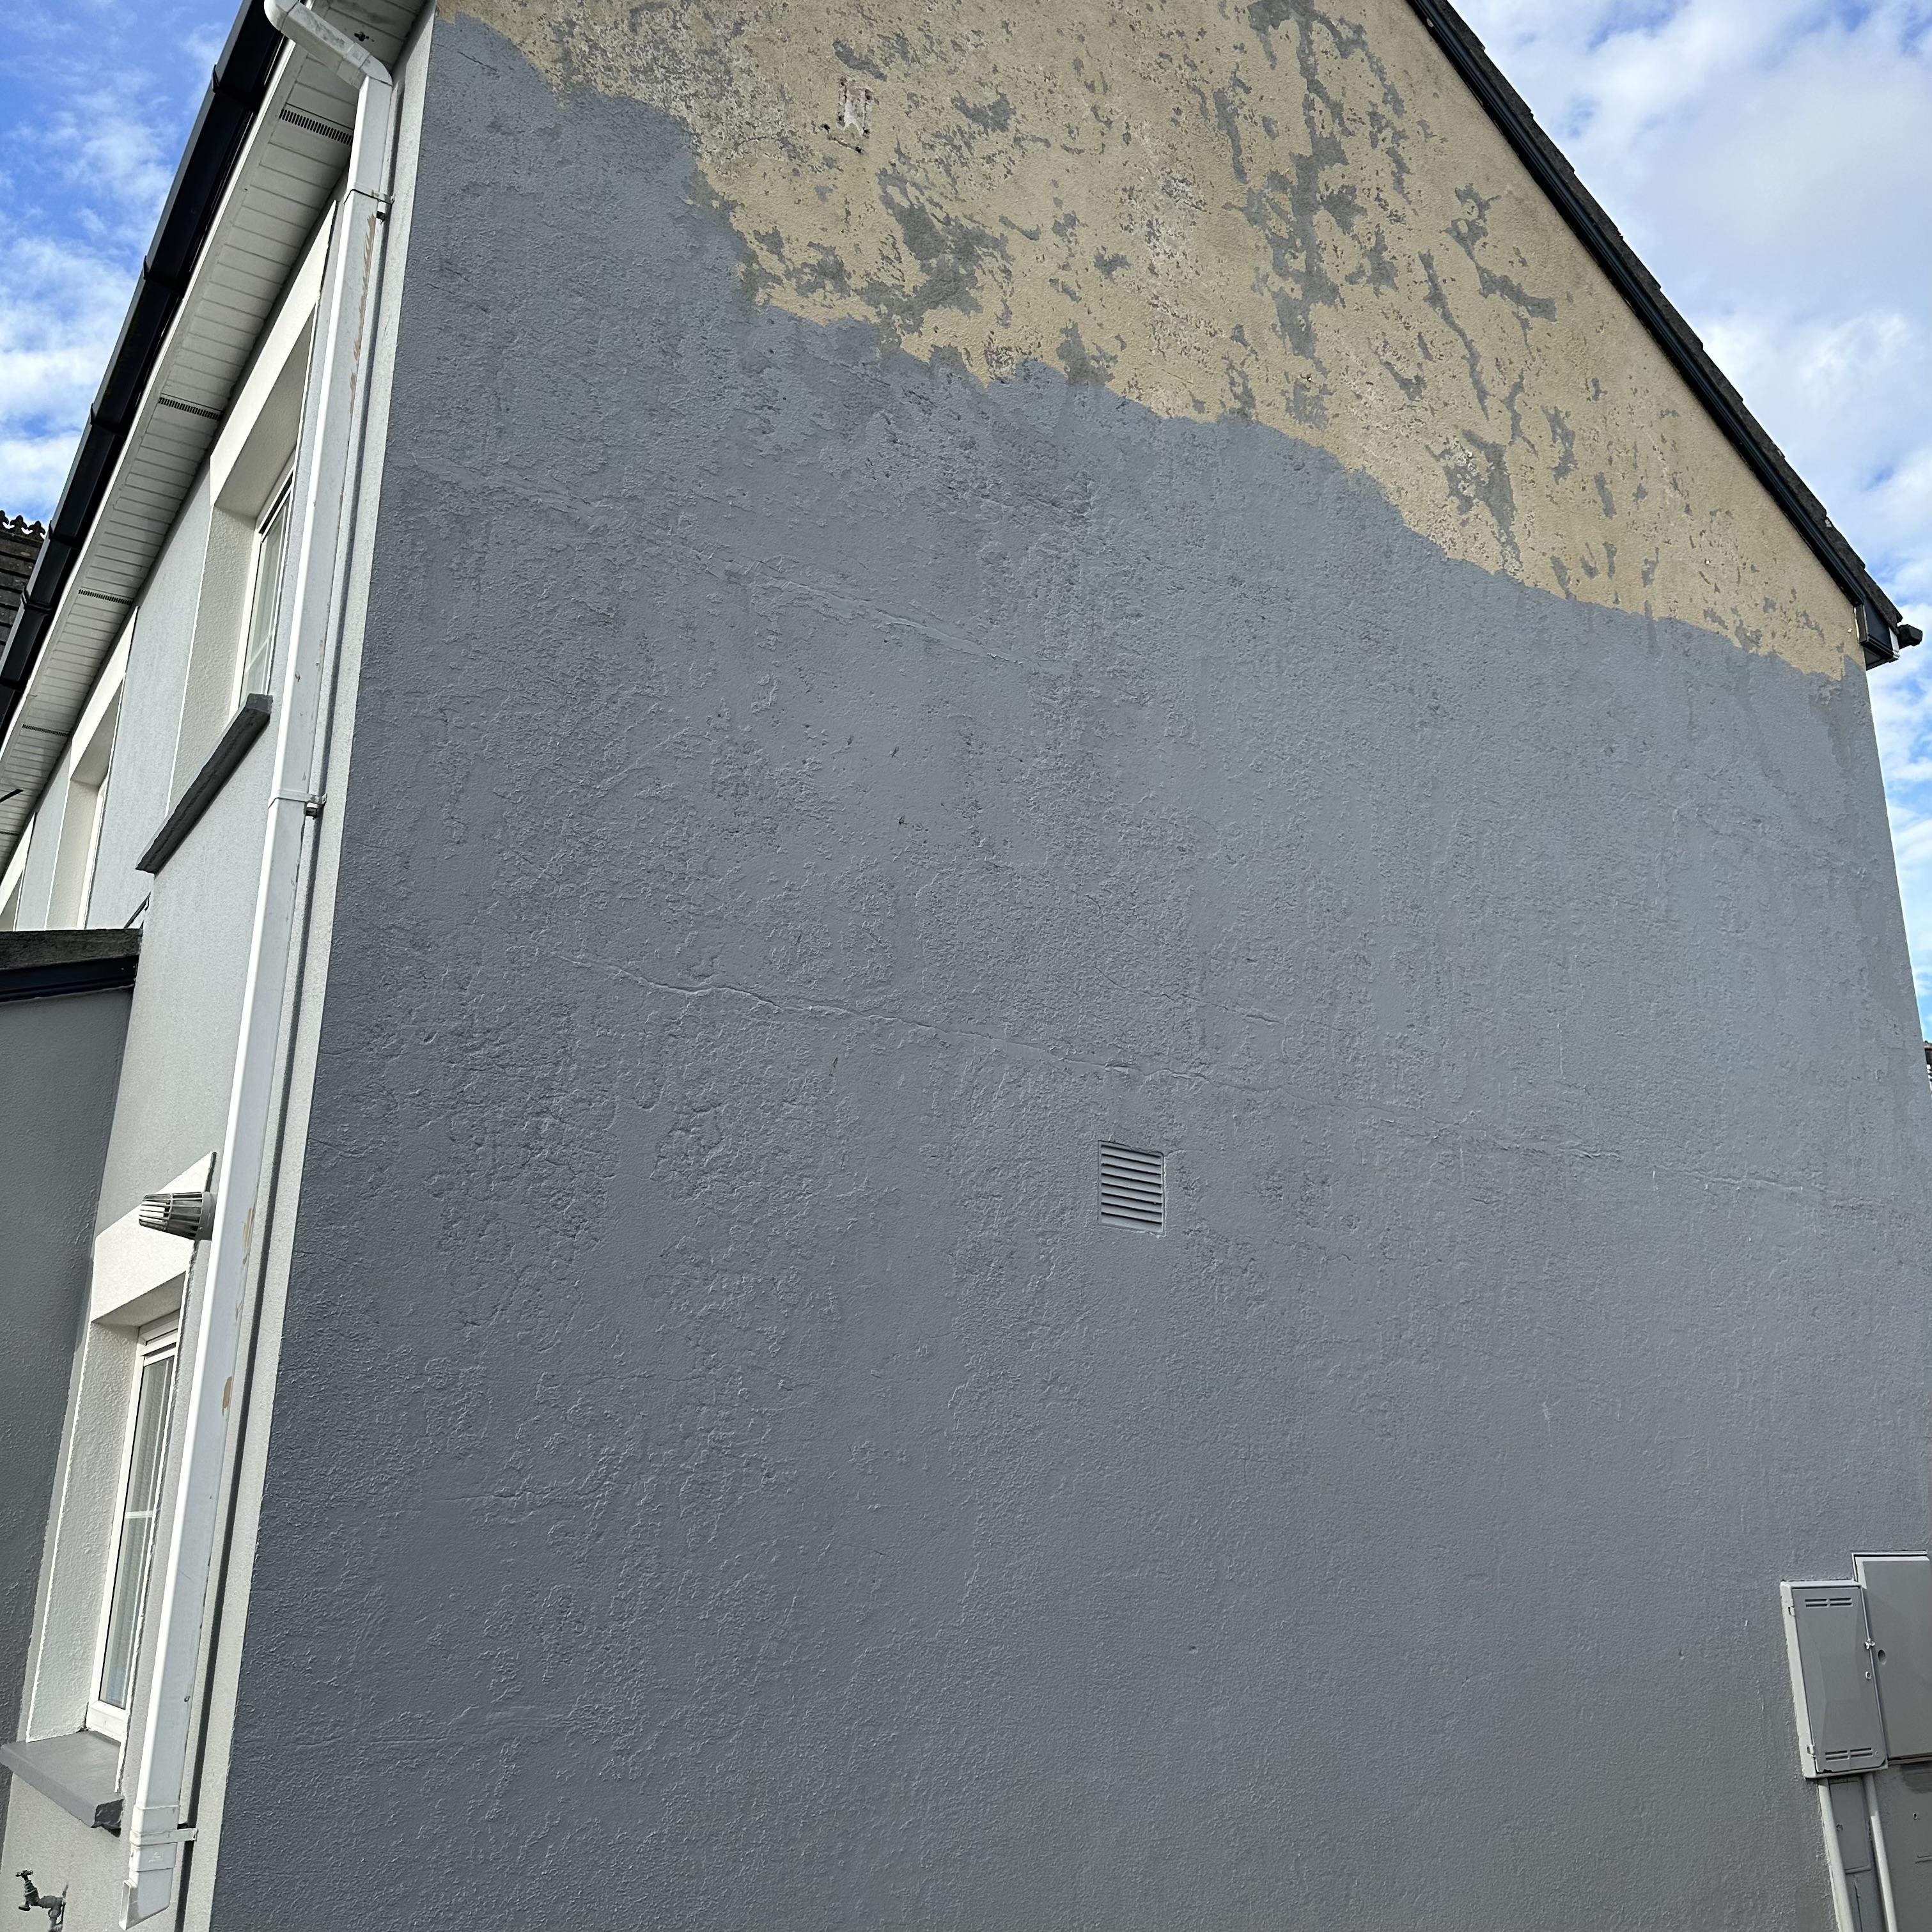
Front and back ok. Just gable is bad.
 1 point
 -
Sorry the total of files can be only 5.68mb and my first photo is 6mb. I’ve tried to make it smaller.
 1 point
 -
If it's multiple joints solvent weld would give a more rigid solution, but both will work, just support the joints and ensure the pipe cuts are clean, square and free from burrs to minimise the chance of flushed waste catching in the gaps. And make sure the fall is correct.1 point
-
200mm working length is a bit tough. Otherwise, Bosch CYL-3 from FFX are good. I have a good 6mm DeWalt for the combi that's quite long. It has three flats on the chuck end as well. SDS for the more grown up stuff1 point
-
1 point
-
here some more recent ones...
 1 point
 -
We had a deck in our last place and tried everything, most failed in less than a year Sadolin wood stain is the way to go. Got a nice light blond stain that worked a treat.1 point
-
As far as I can tell, most people on BuildHub who have an insulated raft have their UFH pipes zip-tied to the reinforcement mesh as shown in this video. It's certainly how mine was done.1 point
-
If there is no sun our Sunamp charges overnight on the Octopus ‘Go’ tariff which is 5p/kW. We do not have an ASHP or boiler, just the Sunamp. The Sunamp provides DHW (not heating) for a household of 4 taking 4-6 showers a day, the bath is rarely used. It has always charged up in the 4hr cheap tariff window, normally taking around 3hrs. It’ll charge from PV if the sun is out and it will start charging after minimal discharge. We have never run out of hot water. It cost us £1500 and despite our one little hiccough with it I think it’s an absolute bargain and brilliant.1 point
-
Wales had to wave his boy off from school today as he's off for an 3 day outdoors jolly. Coach going at 09:30. Yay ? You shouldn't really be coming across tapered fittings in a domestic plumbing install TBH as they're typically only found in true iron fittings, but some weird and wonderful bits of equipment come as such, now and then, but rare. For BSPP the humble roll of PTFE tape is the weapon of choice. You can use fibre washers and wind the fitting right home, but I find the rotational force combined with compression of the two meeting ( washer and opposing mating surface ) chews the washer unless your absolutely spot on with the number of turns and torque applied. With PTFE you don't have to turn the fitting completely home, and you have to be pretty hard done by not to get a reliable joint. 13-18 turns of tape for rad valves Everything else needs a minimum of 21 turns, but if the dry fit is slack then don't be afraid to shove a good 26-28 turns on. What the fittings doesn't want will get displaced anyhoo but the number one thing to do, after applying the tape but prior to assembly, is to grab the taped fitting in a clenched hand and squeeze the tape down whilst giving a slight clockwise rotation ( turning the tape on in the correct direction is paramount of course otherwise it'll twist off as you do the fitting up ).1 point


.jpg.c21f3ac78c9b7efd90cbdcb312744dc5.thumb.jpg.7adcad4c0e384f5ecd7d56b0618df6e5.jpg)

This leaderboard is set to London/GMT+01:00