Leaderboard
Popular Content
Showing content with the highest reputation on 05/05/24 in all areas
-
Cracking insight from Jilly here.. so much info in seven lines of text.. Folks read every line of Jilly's text, learn and digest the deep knowledge she is imparting. To get the best out of this you'll need to go and do your own work.. Jilly is saying.. here is where you need to look out for your own benefit. Just a quicky for any doubters here.. Jilly talks about underpinning.. she has been there and worn the tee shirt in terms of piling etc on her domestic project.. she knows her stuff. Or bluntly.. if you don't take her advice then don't come back on BH complaining later if it goes wrong.3 points
-
You need specialist advice. Sometimes crown reduction is advised instead, to prevent heave which could happen if the trees were removed, due to the sudden extra water under the house, so they may have got another opinion? Could it be in a Conservation Area and the trees have TPO's? Or they don't own the trees? Removing the trees might ruin the character of the house/area? Lots of houses have been underpinned, it's not the end of the world, but it scares people and lenders. If you proceed, you must stay with the same insurance company, the policy can be transferred and you must confirm this will be the case as part of your due diligence. Other insurance companies won't touch it.3 points
-
I hate the pure white renders We call them council Estate render The large choice of off whites are much nicer2 points
-
A contactor and a relay are basically the same thing, but a contactor is generally more heavy duty. I wouldn't be trusting those shelly or sonoff devices to consistently handle 13 amps, regardless of what it says on the box. You can see from the video that the relay is pretty puny. A decent DIN rail mounted contactor is peanuts and will reliably operate a 13 amp load for years, probably decades, and take the heavy lifting away from the IoT device.1 point
-
1 point
-
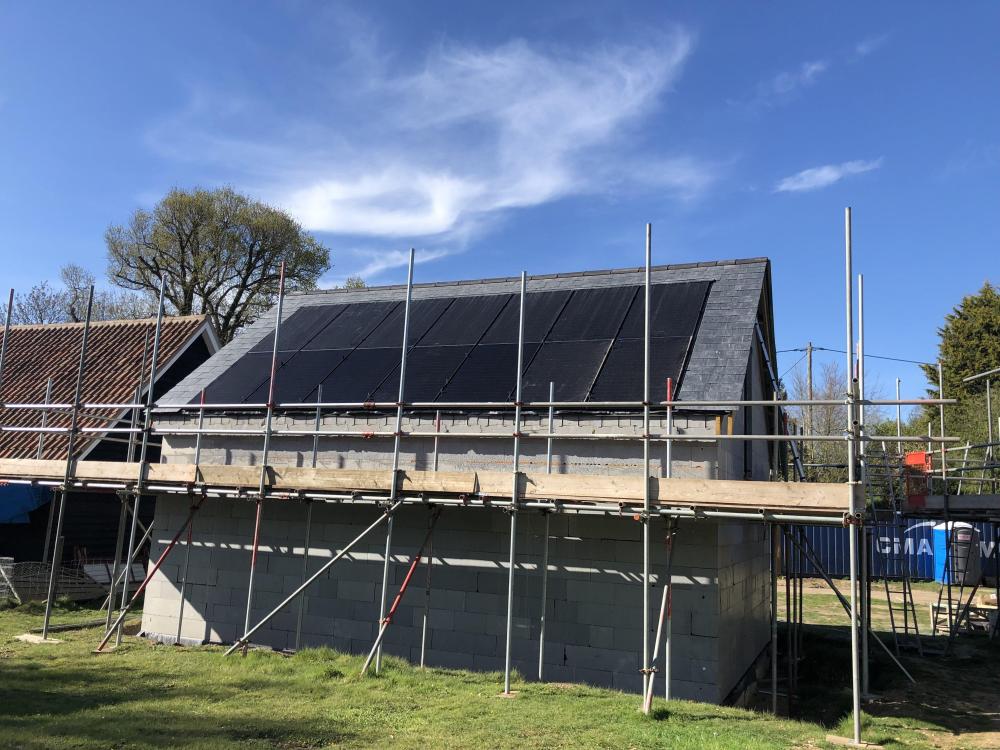
I used the GSE in roof system for my install, very simple. When I looked at the Viridian system, there were specific panels it was specced for. I had already bought 2 panels for the first phase of my build, so these panels wouldn’t work with Viridian system. It is surprising how many different sizes there are of solar panels.1 point
-
My 2004 C2 is going to car heaven this year as it won't pass another MoT and my dad has welded it that many times its beyond help now. I have a nice cheap 2015 Fiat 500 Sport waiting for the builder to finish the drive before it comes home. I'm quite excited about getting aircon and electric windows!1 point
-
Yup. @HandyAndy, you cannot connect to the underground pipe with that boss strap. Completely against b regs. You need to expose more, get a 110mm Y branch (not a T branch) and then extend a new piece of 110mm pipe to a gulley pot underneath where the shower pipe exits the wall (as close as you can get it). You need to approach your building control person BEFORE going any further.1 point
-
1 point
-
1 point
-
Dig out around the 110mm pipe, fit a branch and come across to fit a proper gully , then take your waste into that1 point
-
Juton Demideck, expensive, no primers needed, unless coating steel, is just good and lasts well.1 point
-
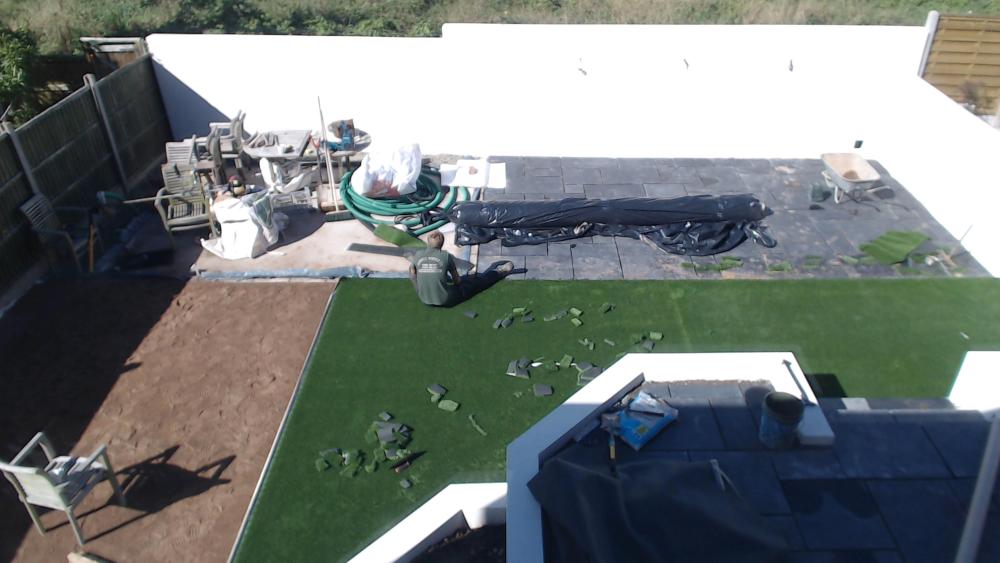
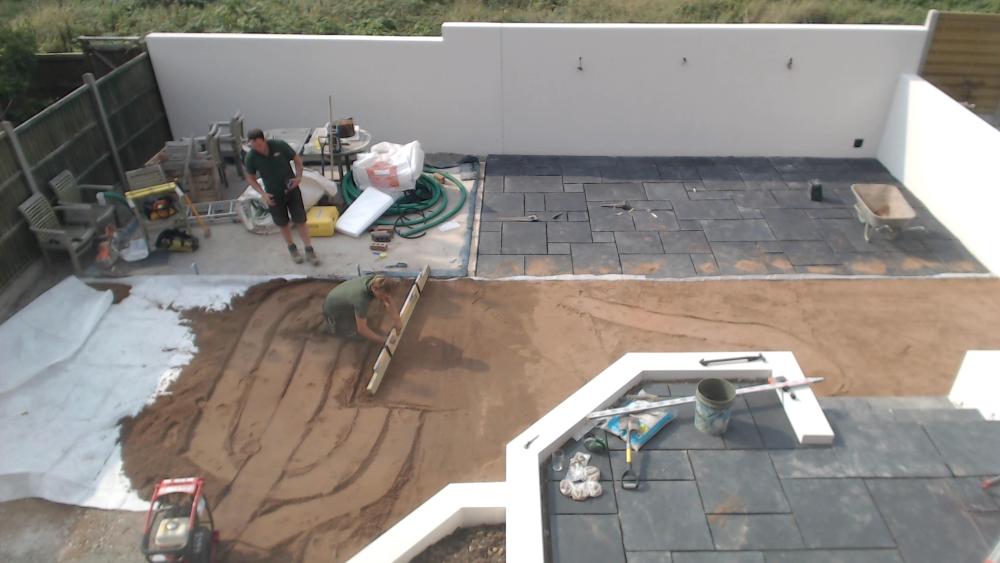
It's definitely a thing. We have K Rend Silicone FT Textured Render in White at our current place and at times, you need sunglasses! I've tried to find some old photos of when it was being installed to show the difference when the sun catches it. Same camera and position, so hopefully you'll get the idea!1 point
-
Neither. You should speak to the CIL department at the Council as you may have to go through a Transfer of Liability process first.1 point
-
That's my technical level! Texting or ringing the gate - I'd have to be about half a mile away for a signal or somewhere down on the towpath, I'd rather just open it when I'm literally at the gate! We plan to get an additional 3 fobs so will have 5 in total. I just needed to understand exactly what we did and didn't need from their suggestion but I think I'll just order the main kit without the extras.....1 point
-
Many will get as much pipe in the floor as possible to get the lowest flow temperature. But there are practicalities not covered by that sort of statement. Your heat source will have a minimum flow temp, normally about 25. It will also have a restart delta, in my case the ASHP will not restart after a heat cycle, until it sees a delta of between 6 and 8 between target flow temp and return water temp. Now once your actually heating your floor it will settle at 2 to 3 degs hotter than the room. So a return temp is going to be in the 22 to 23 range (once floor is warm it stays warm for many hours). So realistically your min flow temp is about 28/29, so WC curve or set flow temp starts there. So design the floor loops for about 30 to 32 at the highest demand point (coldest design day). Some comments on the pipe layouts I would move pipe away from external walls, have them a good 200mm or more away. The heat flux will heat the floor in this areas, but the edges will be coolest, so least side way heat losses. You never walk on those areas or there is furniture over so no issues. It's a waste of energy heating under kitchen units. Your whole floor area is a radiator all exposed areas of that floor will heat the room space. Having hotter bits really makes no difference. Halls are a movement space, yours looks like it will be the hottest space in the house. I have no dedicated loops in the hall at all, just use the pipes that transit through that space spread at 300+mm centres, it always warm because every heated room feeds it it with heat.1 point
-
If you are still thinking solar, why not pre prepare for that with a PV diverter that does two immersion heaters, with a timer and WiFi if you need it. It doesn't care if you actually have PV or not, its just a CT clamp doing the the reverse detection.1 point
-
1 point
-
The Sonoff device is likely already using a contactor as it's rated up to 20A. I can't find any explicit documentation though. Teardown (20A version): https://youtu.be/O1HvycrP4s4?t=457 You can also get big monsters like this (switches up to 5500W): https://tech.scargill.net/sonoff-powr3-powerful-controller/1 point
-
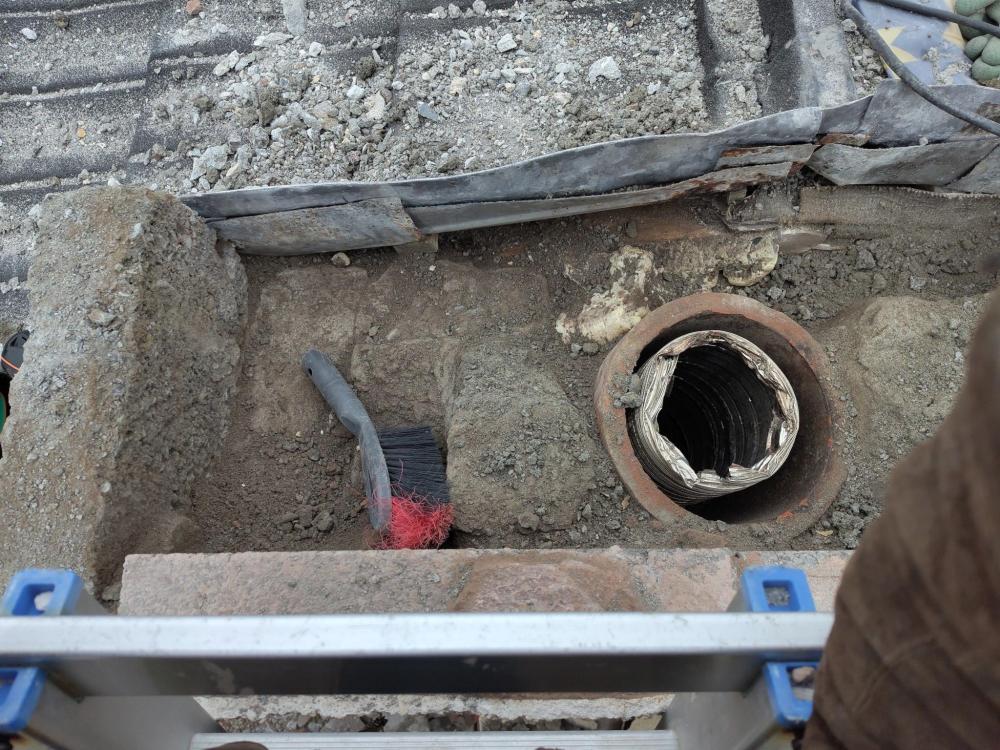
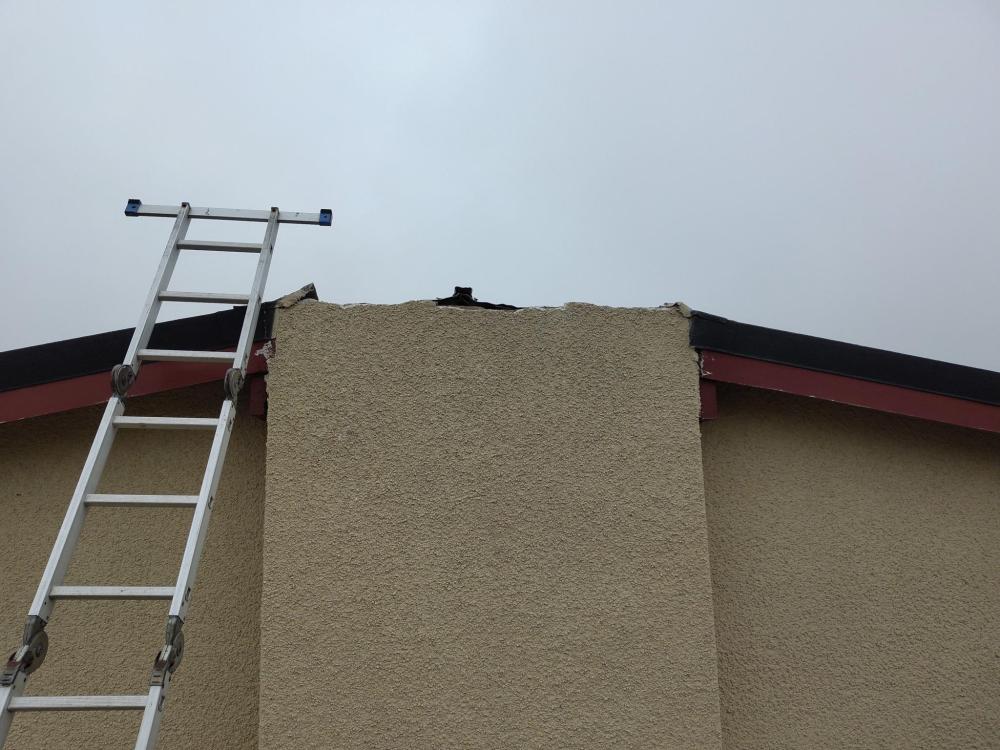
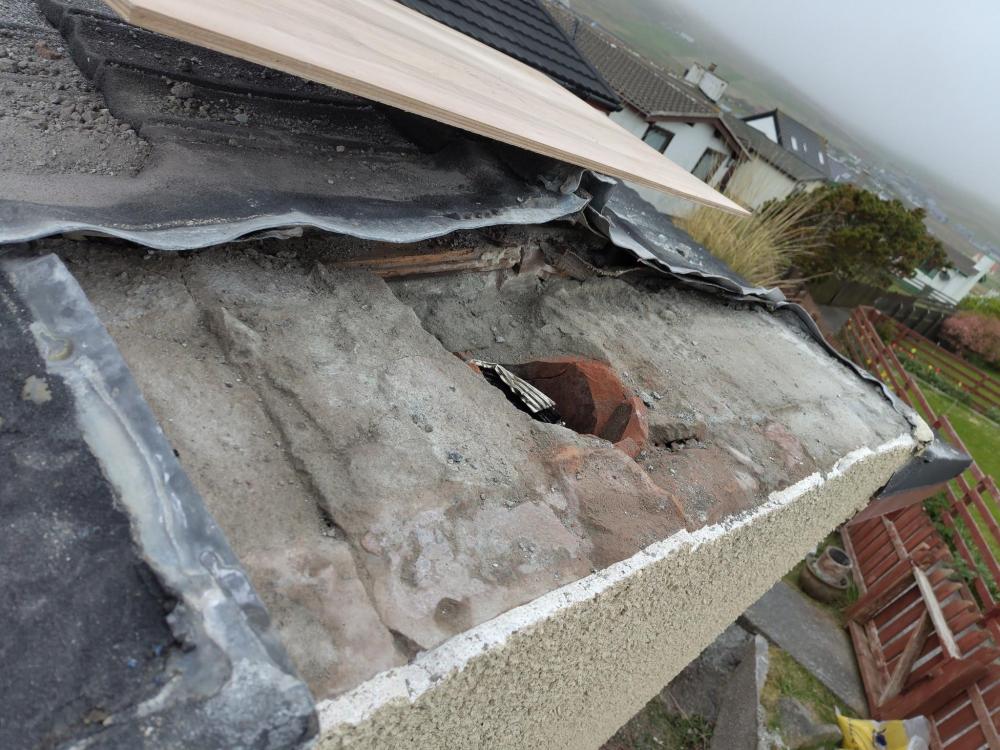
OK, the stack is gone. I ended up going down one course further than I wanted though, as the blocks on the inside face were completely rotten - they crumbled away as I removed the blocks on top of them - so I'm kind of in no-man's-land, height wise. Too low to easily cast a crown, too high to rebuild the roof, even if I had the parts. Fun fun. Yup, that's expanding foam - making up a good chunk of one of the block that crumbled away, and the one below, bless it. The top of the roof deck is just visible; it's above the surface near the ridge line, but then dips down below. If I try to cast something, I'm struggling a bit with the form - it'll have to come up flush against the lead, and then have an overhang past it to keep the water out, and needs to be at least 50mm thick everywhere. Tricky, but... doable? I suppose I could lay some block to get some height, then cast over that, but presumably I'd need to leave several days between the two stages? I could dig out yet more block and try to extend the wooden roof, but I really don't have the parts 😬. Big sheet of lead and a hammer?1 point
-
1 point
-
Hi, was that the local council BR dept or local private firm? can’t see what the problem is, you can do your own planning and building regs, you might need a SE for some parts or some figures for the roof etc. Part O has a spreadsheet available and that’s ok, once you get into it. Once BR are approved then start building. If you need a mortgage and/or a warranty then it’s these insurers who might want more details but it’s still all possible.1 point
-
I think the issue here is the upstands.... Or lack of. You really want the tanking and thresholds a good 200mm above the tanked surface. Or the door /cladding thresholds. Where does water go if it teachers the threshold at the door?1 point
-
1 point
-
Thanks @joe90. To be clear: I wasn’t planning on covering all the holes. Just the ones I added. The shed did come with lots of vents, but costly these weren’t enough.1 point
-
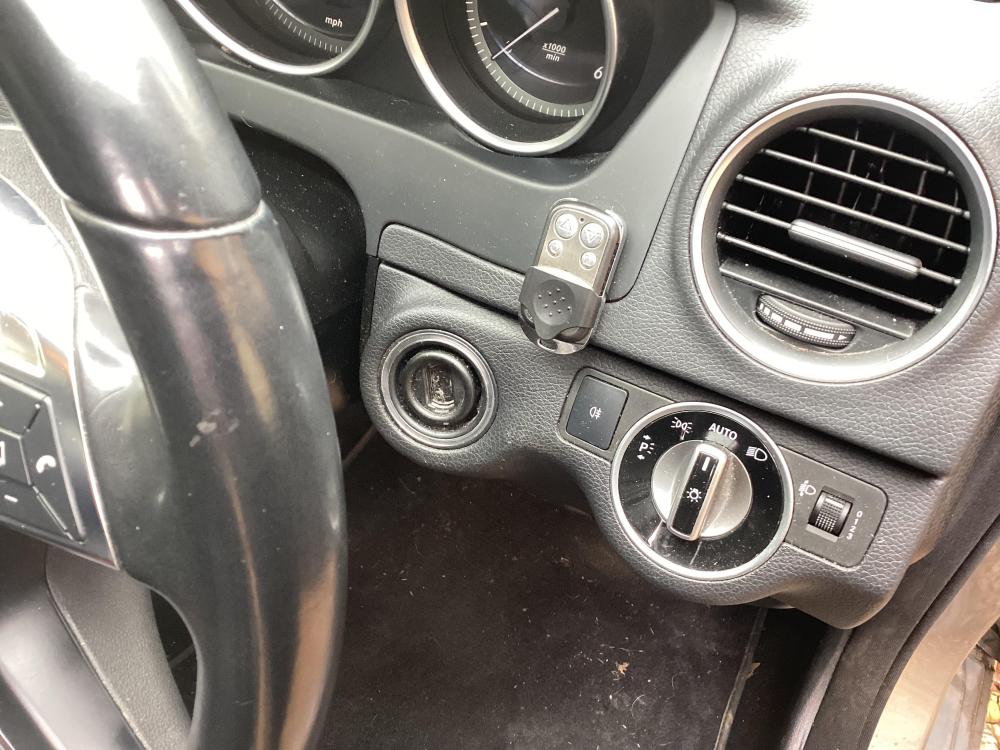
I removed a dash blank and got my lad to copy and 3D print it to take a push button. then you take a fob apart and solder the push button to it with a couple of wires,1 point
-
1 point
-
I would recommend ducted or split A2A heating with Direct UVC. Almost instant heating, very efficient and room level control. It would provide cooling in summer as well. we are pleased with ours1 point
-
I don't want to be having to use my phone in a moving car every time I arrive home. More interesting for me would be some sort of geofencing function that caused it to open as I got near. Worse, my driveway entrance is right at a sharp curve in the road and we can have traffic from both directions suddenly appear as we turn in.1 point
-
Got my quote Veismann Vitocal 151-a which has an integrated indoor unit with 190l tank and all the other required gubbins including a 16l buffer, fully installed apart from the concrete pad. After the BUS of £7500 grant I’ll have just £1800 to pay so chuffed with that. clearly not all MCS cert plumbers are crooks1 point
-
With any self build, unless you can afford an Architect/Builder to oversee the whole project, you're going to be chasing people, materials, answering questions and more. My own project is up to roof stage, timber frame is finished, roof finished but outer brick/block leaf is next, then soffit, fascia, gutters, then porch, then windows & doors. Each have their own challenges. On top of my day job! I've a delivery of lintels tomorrow and I only thought to ask what size rigid truck is it to find out it's a full Articulated Truck with a moffet (look that up in goggle!!). Won't fit in my housing estate!! cue plan B, C and D !! We're going to offload it to a footpath outside my house on the other side of a council wall and I'll use a hand truck to get them one by one into the site through a gap some teen made wider last year and it was never fixed by the council! I'm sure each self builder has a raft of such stories. My house needs 2500 bricks and 1280 blocks. The brick supplier I'd booked and paid for in full, was meant to deliver this Friday along with the block supplier providing all the blocks, sand, cement etc. They gave away the bricks to another (assume larger) customer and it's 2 weeks to get a new order in from Belgium. I tried the other supplier I found in google for the same bricks and got through to the same woman I'd been dealing with, same company, one's a shell I'd say. Tried the supplier and they only supply to this one company in Ireland. Anyway, as a one off house they can bump you down the list so I tend to like to get things onsite a week or two early to avoid this added hassle. I've very tight for storage but if you have a brick layer onsite and no bricks you'll be forced to buy something, anything and have to live with it forever. Time management - getting answers to questions is one thing, learning on the job is another. I want to nail in about 200 nails by hand but after realizing my initial attempts were leaning tower of Pisa'esque, I purchased a first fix nail gun, my first! Wow! 200 nails in 3 hours, all batons attached to the window openings. I can sell it later but the right tool for the job for sure! I've to install my first express nails tonight after learning about them from a neighbour - fixes wood to concrete. The roofers left 6 Velux boxes behind with BBX on them. What are they for? An extra? Do I need them? I think they are to act as a vapour barrier and possibly air tightness according to initial google searches. Something else I've to figure out later on. The roof has turned out well hasn't it! They had to finished the Oriel Window Metal / Trocal flashing before they finished roof tiling. It has a ventilated ridge and those plastic covers at the edges all the way along the roof line instead of cement they used to use. I've about 40 spare tiles stored away! The outer brick/blockwork is my next major hurdle. There's a few items I need to buy, figure out and get onsite: 100mm DPC for above 1st course of blockwork above foundation 18" DPC for around windows Expansion ties - Ancon PPS200 ebonded Safety Tie - box of 250, at least I have spares! I can return the unused ones. Wall vents - using Timloc Cavity Wall Drill Vents - you drill a 25mm hold angling upwards and then plug this into it. This absolves the brick layer from having to install them as they go Wall ties - the timberframe supplier provides 4 boxes of these and marked up where the studs are to get good purchase Stop Bead and Drip Bead (plastic) for render, Weber OCR, Weber paint (I'm doing this job once the blockwork is finished), Mitre bond glue (2 part glue) Gutter Brushes for later Expansion Joints - I've two 10 meter gables, each require two expansion joints. There's an awkward window and ESB box on one end of one side so thankfully we're putting the expansion joint past both of these even though you should have one every 6 meters and within 1/2 of this distance from the corner, ours will be 3.8m from the corner. the timberframe amazing team marked up the best positions for expansion joints and identified this one before the Structural Engineer signed off on it. I've taped up all the Solitex on the outside of the Timber Frame, plugged the side door up with timber, OSB and more Frontex WA. We're still installing a lintel in the blockwork but will ignore it otherwise for the block course and if someone wants to open it later they can with an angle grinder! It saves wasting a lot of space in the utility room having a door there with no purpose. There's no sink = reason to not make it a boot room really. I'm lining all the window openings with insulation over the next week or so and adding batons to take the window straps. They want a strap within 100-150mm of any corner and no more than 700mm apart. The Straps are 1mm thick and come inside the window about 100mm. I've sourced wood to exactly match the insulation thickness which can be hard but avoids trying to plane / table saw wood onsite. This Friday I've to hope everything fits onsite as it's delivered and we've room for a telehandler afterwards for when the brickie's start! That's a snapshot of my week! I'll do a post about powering electrical devices onsite without a generator using an Electric car & Anker 2kW battery soon I think, some lesson learnt there!1 point
-
The permitted development criteria are different for business premises. One of the criteria is that any PD extension should not be within 2m of a boundary. At 50cm it obviously is, so cannot be PD with all other things being equal. If this extension will have an impact on you then by all means contact both planning enforcement and BC.1 point
-
After my horrid time earlier this year I am now going to post something more positive. As of yesterday, I was offered a job, not ideal (is any job ideal), rather than working from home I must go to the office which takes 40mins each way and hubby is disappointed that he will be left on his own all day. That said even with time out for funeral 250 miles away and wet, wet, wet we have progressed. Some pictures. hardcore & binding (take 2 after previous issues) now the expansion foam around the sides The heave protection next then taping next was the rebar here is the pour on top of the rebar - 200mm drying concrete slab with no hint of everything underneath, typical building, lots of expense and nothing to see. the first row of outside blocks added showing the cavity first blocks over DPC with all the rain we have created a bit of a swimming pool It was at this point that we purchased a puddle pump as hubby really didn't like having to kneel and build low in water going up with some windows & doors framed insulation going in joining the existing walls to the new part this is where some of the kitchen cabinets will be hung, so although internal we are using heavier blocks to take any necessary weight On the left hand side you can see part of the existing barn that will be staying. The roof is currently being held up with barrels and wood building from scaffolding is a real milestone, makes it seem like we are getting somewhere. To protect the insulation, we have the original insulation from the barn roof cut up to provide a 'roof' over the cavity. Having made the frames for the remaining to windows these need to be placed in situ for building around. This area will be our front hall and snug. Of course, the front door will only be used by visitors, but we will go through the hall internally to get into the snug. With all the cavities it is smaller than I hoped, but with all the insulation it will be much warmer than our single skin house. Hope you enjoy the pictures, next time I hope to be at lintel and wall plate level, but we would like the weather to improve. Thanks for reading Jill1 point
-
We had our first air tightness test today and achieved 0.25 ACH!! 🎉 Absolutely chuffed to bits with that. We have spent a lot of time taping every possible penetration, but I was still anxious in case we hadn’t quite been as scrupulous as needed.1 point
-
1 point
-
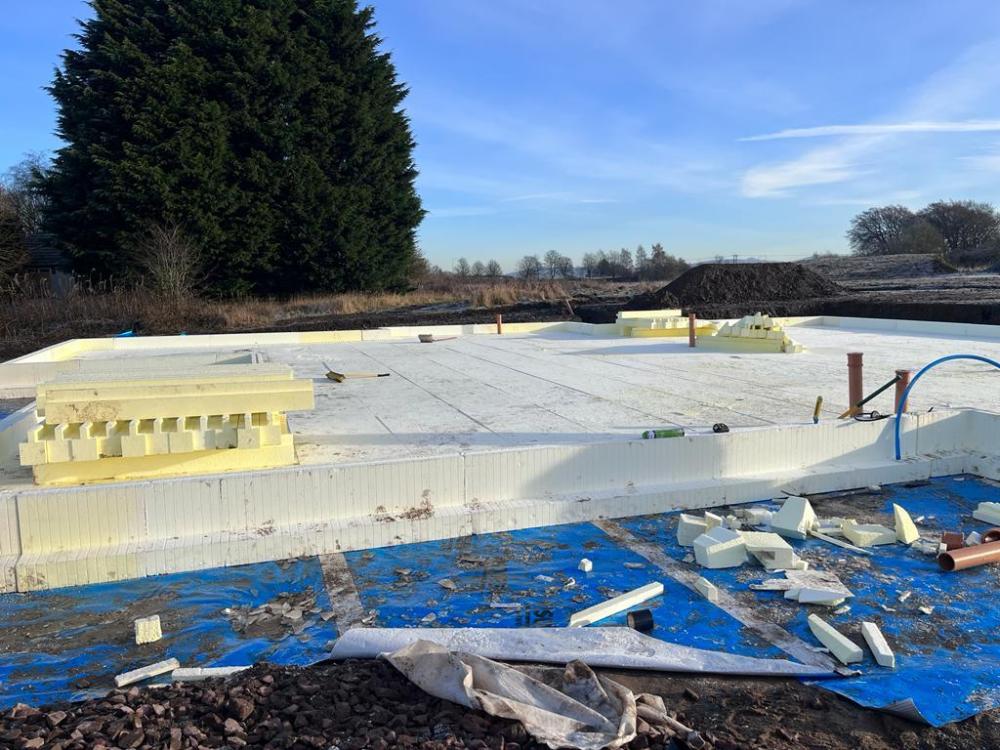
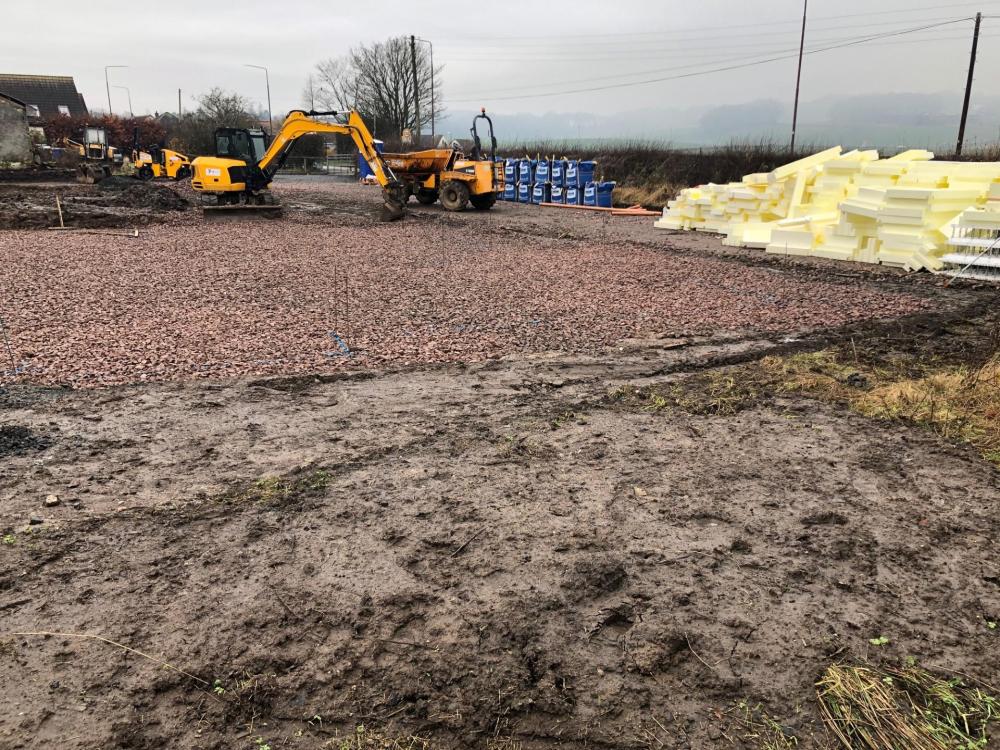
I have just been through this very topic over the last year or so in Central Scotland. First recommendation - challenge everything. My experience here is that the "worst" case scenario is typically assumed with limited justification especially from 3rd parties. In our risk adverse world, I experienced people making (faceless) choices based on those worst cases vs what might actually be a more pragmatic approach. Had I challenged more - I would have saved time and money. As part of my planning application, I was required to do a phase 1 desk survey, which highlighted my plot was a low to moderate risk of unrecorded shallow mine workings (not uncommon for this area - like mentioned in earlier responses) and potential for ground gases. This outcome then placed a requirement to do an intrusive phase 2 site investigation as part of my planning conditions - including 6x boreholes for ground gas monitoring. Based on the phase 1 desk survey, my site was allocated an initial CS2 rating by my local councils 3rd party contaminated land consultant (noting my council outsource this work). It's at this point - I wish I had challenged more, as I feel in hindsight, this was excessive. Having obtained quotes for the phase 2 survey, a couple of things jumped out. The cost was ~£6K as per examples listed above and the monitoring period was over 3 months. Based on these costs, the potential for ground gas to be discovered anyway, and a naïve thinking I would be ready to build soon and the monitoring would hold me up, I took the decision to include a Gas Membrane in my slab design and accept a CS2 rating in Lieu of the gas monitoring. And that is where things got really fun, as for me, it was not just a case of "just" including a membrane. Instead, I had to: 1) for my building warrant, I was expected to provide a Contaminated Land Response, detailing how the Gas Membrane would be installed, and how the design met BS8485 2) not only was a membrane required to meet the points allocation needed to pass CS2, I also needed to demonstrate my slab was reinforced with minimal penetrations (pretty easy) but also then design in a passive ventilation layer below my slab (all of this is in BS8485). Giving me a points score of 4 (target was 3.5) 3) detail how the membrane would work along side my insulated raft formwork 4) provide external 3rd party validation of the membrane installation in line with CLA:IRE guidelines 5) my BC could not answer ANY questions on the topic. All discussions went via their 3rd party, had to be via a "design" and typically had a 3 week turnaround. Based on being thoroughly frustrated at this point due to many things on my build, I actually composed document 1) myself by getting hold of a copy of BS8485 and demonstrating a compliant design. I did not obtain costs for a 3rd party to do this, but I would expect low £ thousands as its (rightly) outside the scope of a SE and Architects specialization. All in all, by the time I include the Visqueen membrane, the labour, the 3rd party verification, the cost of the low fines gravel ventilation beneath my slab, I will have spent ~£10K. I sleep at night, by convincing myself that bore holes may have found ground gas, and I would have then spent and additional £6K on monitoring and I didnt spend extra on someone else designing the solution. BUT - some pictures below to show it can be done Low fines material for ventilation (this was quite expensive) - 300mm deep, 260m2 (my house is going to be quite big - ground floor at 200m2). Could be cheaper going for preformed venting sheets from the membrane manufacturers. And installed below my formwork (still to be dressed on the sides of the formwork). Excuse the mess. Hope that helps1 point









.jpg.c21f3ac78c9b7efd90cbdcb312744dc5.thumb.jpg.7adcad4c0e384f5ecd7d56b0618df6e5.jpg)


