Leaderboard


Popular Content
Showing content with the highest reputation on 11/06/23 in all areas
-
You can do overhangs quite cheaply if you make the the structural engineer think about, our total steels bill was £9k including full design, all surveys and the install.


 2 points
 -
New build originally designed around a gas boiler and UFH, flow temp are low as could be, due to 300mm pipe centres. So previous setup was, gas boiler, big buffer, mixer and pump on the manifold. The flow temp out the buffer was consistent, but filled based WC (Weather Compensation) curve. Flow temps varied between 26 and 34 degs (at -9 OAT). The heat pump is installed without a buffer, all UFH loops open, with no actuators, mixer or pump on the manifold, so as simple as it gets. Have a single thermostat, just to give a start permissive for the heating. Couple of observation 1. The min heating temperature of the heat pump is 25 degs, dT is 5.4 degs, so a return temp would be 21.5. 2. After one heat cycle at a low flow temp (26 degs), the floor doesn't cool down enough to allow to ASHP to start up again. So heat pump would not restart. That didn't work 3. At low loads heat pumps cycle, I typically have a 10 to 20 minutes run time and 45 minutes off. The recirculation pumps continues running at all times. If the heating load decreases (OAT, solar gain etc), the heat isn't transferred out the flow as quickly, so the off period of the ASHP increases. 4. To compensate for the on/off run nature of the ASHP, and to get the required heat into the floor, you need to flow at higher temperatures at low loads, than you would expect. 5. So to make up for the on/off nature I increased the flow temp to 29. The flow temp pattern through the floor is typically (8 deg day), heat pump ramps up to set temperature and when it cannot modulate to control dT the heat pump shuts down. The flow temp and return temperature stabilise down to about 24 and flow will slowly cool over over the next 40 minutes, down to about 23 and the heat pump starts. 6. Very small increments in flow temp have an impact on house temp, less than 0.5 degs change in target temp, can be felt in the house. 7. Been tracking the temp on a Shelly H&T today, temperature drift in the house is around 0.2 degs. Have tested the 3 basic modes of operation so far, operation controlled by thermostat, batch charging overnight on cheap rate, and continuous running 24/7 on straight weather compensation. So far leaving it to run all the time seems the cheapest to run and easiest to implement. Have a simple Shelly H&T set up in the hall, to record how temperature moves over time and OAT changes, this will allow fine tuning of the WC curve.1 point
-
I use a vodaphone smart sim, £4 a month. I’m not sure that it has a data limit. If you look on vodaphone’s website you should find it. They don’t work in ordinary mobile devices and are especially for this kind of tech.1 point
-
I would want to be taking a section of the slab up and replacing the lot in new plastic pipe. Including the run under the foundations. Then you can get it as you want in the place you want.1 point
-
They have 2 speed settings, 1 is quiet, 1 is audible. But they also have an auto setting which i prefer, when the temp is low, the fan is fast and then slows a lot as it approaches the set point. Think this will be the best setting, i dont it being audible if its cold in the room. I used tectite copper push fit for most of it, with plastic push fit where necesary. The 28mm was all copper though and there were a couple places i couldnt use 90deg's. God knows how much copper ive put in. Theres a small mountian of the old stuff to take to the scrapper!1 point
-
They’ll be fine at 32 amps. I’ve seen videos of them tested to far more than that before they start to fall to bits.1 point
-
I can't comment on that product without seeing it working. Generally foreign stuff doesn't work for UK rain, especially in the old days when we had drizzle. Absolutely right, that leaves should not reach a soakaway, or it will become a compost heap, and block. Neither should they go into storm drains, simply as good practice. I've experimented and my opinion is this: Don't fit gutter guards whether hedgehog fillers or wire mesh over. They do keep leaves out of the gutter but then they break down and become a stinking mass and thd gutters don't work. Don't fit gutter outlet guards for much the same reason, unless it is very easy and safe to access and clear regularly. Do fit a gully with grating at ground level, with the dp stopping a hands width above to allow easy clearing. An oversized grating helps. OR take the dp down to the grating bug cut out a mouse hole for getting leaves out. A silt trap works well too. But it needs a stilling chamber. I use a biggish chamber and put a bulkhead across the middle. I asked our worst bricklayer to build a brick wall and then the poor joints let water through with no leaves. More formally, make the bulkhead from expanded metal. Sticks and leaves float to the top, silt and so on sinks. Inlet and outlet at half depth.1 point
-
You can also buy EU->UK switch adapter plates from Gira https://ivoryegg.co.uk/shop/products/gira-2849-00-bs-adapter-support-ring?taxon_id=141 point
-
A cut 25% of the overall depth of the slab is enough to act as an initiator so that if it does crack, then it will (should) crack in the cut. But, do you need to control the cracking. You've mentioned a float finish and a self-levelling filler if needed, so there's no plans to polish the slab. It's probably not important where it cracks (if indeed it does). Just make sure you use a Ditra mat type un-coupler if you are putting tiles down.1 point
-
You would be better off going with your first thought Send the drawings out Find.a contractor or contractors that seem ok with references to back this up They will have a standard contract that they use Payment schedule etc Then start going through the fine detail from the foundations to the roof Then modify the contract to suit you both Any decent contractor will sit down and do this with you1 point
-
I've a 43" TV fitted to plasterboard using Fischer plugs. You don't need much if they are flat mounted.1 point
-
Perhaps a vacuum is enough. Perhaps you have a Friday unit. This one is going back to the shop. Not my flare leaking but the factory brazing where the pipework branches. I thought it was my flares at first as the sniffer went nuts when inserted in the factory insulation that I'd dutifully wrapped around that pipework; but it was actually refrigerant leaking down the insulation from the factory joined end. Heated diode detector for F-Gases with a fan to suck in air for sampling. About £60 inc VAT. Only lasts about 50 hours but senses F-Gas (R32, R314a, R410A, R...everything except R290) leaks down to 3 grams per year. Sensitivity turned way down here because it went bananas *the moment* I came indoors after checking the outdoor unit. (always zero these outdoors) This gets you about as close, in terms of detecting leaks, as pressure testing with nitrogen to say 30 bar. If the gas wasn't pishing out I'd have the unit in full heating mode to maximise the pressure on the lines / maximise leaks when doing the checks.1 point
-
Going through the ply means you have the max pull out possible (short of a washer and nut behind). TV’s are not heavy and they are slim so majority of the load is straight downward putting the screws in shear rather than tension. Say 4x 5mm screws will hold a very big tv, a couple extra at the top is belt and braces. if you need piece of mind, stick a piece of ply behind the location of the fixings as a doubler … not needed unless you intend doing pull ups on the tv bracket.1 point
-
They don't need to be round, rather European back boxes are round so that is what Loxone use in most videos and supply. We used round and found them easier (once you buy a 68mm hole saw).1 point
-
1 point
-
You can use typical UK boxes, the fixings holes are on the same centres, but the UK boxes are slightly larger and Loxone switch plates won't fully cover them. I used UK boxes, but got some stainless escutcheons laser cut to make sure the aperture was fully covered.1 point
-
Making decent progress with the painting. I was going to buy a sprayer so hired one. What a pia it is as it’s always blocking. I decided to stick with the traditional method of rollering etc. although might try again with the sprayer when I get to the vaulted ceiling. I’m a pretty good painter if somewhat slow and quite enjoy doing it. Like everything it’s in the prep. I’m really impressed with the white emulsion I’m using. Crown Contract Super Covertex. I got a job lot of it cheap from Travis Perkins. Thinned back a bit it covers well with only a mist coat and a top coat needed really. I’ll do a final coat of the wipeable stuff in the heavy traffic areas. Our custom made glass hand blown lights for the open plan area turned up on Friday and very beautiful they are too. I can really recommend Emily at glow lighting. Great to deal with. https://www.glowlighting.co.uk/?utm_source=google&utm_medium=cpc&utm_campaign=20623605482&gad_source=1&gclid=EAIaIQobChMIoInDj7yvggMV752DBx3ofASPEAAYASAAEgLlPfD_BwE1 point
-
As others have mentioned, check how the unit is positioned with a spirit level. Some have profiled polystyrene which allows you to mount level, and some don’t meaning you have to mount off level to allow drainage1 point
-
Day 31 of the build. (this is taken from the day we started shuttering the foundations) The weather up North has been spectacular for about 3 weeks, so we (Mandy and I) pushed to prepare and pour the slab before the weather changed, as I'm sure we will get a few weeks of low pressure, wet changeable weather after this spell. Following on from the foundation ICF walls, I'd already loaded around 20ton of 40mm to dust in a pile the slab area. Sat on the sand blinded radon barrier. Job one was to sort the drainage. I'd posted previously about my plan, and some constructive comments suggested changing my planned route, but with the extra length of run to the drain invert level I would have had to increase the floor height even more. So stuck with my original sketch. We ran string lines to mark the main areas, namely WC, SVP in the plant room, shower, WC and Bath, a need ran the drainage to the locations, as the utility backs onto the plant room I didn't add a drain in here as I'll run through the stud and use the SVP. Once the drainage was in place and is tested. We spread out the hardcore and compacted it. I used 10mm crush and run to bed the drainage and cover the pipes, I also ran ducting at this level, bringing in water, power, treatment plant feed plus some future ducts. To get the hardcore level / flat I used 3m lengths of galvanised conduit set on mortar pads all level to each other and used a 4M ally beam to screed the slab. I compacted the first layer then used another screed pass to fill in any deviations and used this as the level for insulation. I used a combination of 200 mm EPS 70 (50mm sheets and 100mm sheets all layed to stagger the joints, and used foam to seal to the ICF. The top layer was 100mm EPS150 this gives a firm hold for the UFH staples, and a firmer feel to the insulation layer. We plan to use a large shower tray and have this level with the floor, so I made this area sunken with two layers of EPS150 and a layer of 50mm PIR. As we were installing the insulation I installed 2 * 100mm ducts for the ASHP in the second layer of insulation these were only 800mm long, and a duct for cables. I also added flex ducts in the insulation for Hot & Cold services to the kitchen, utility, WC,Shower,bath, all these were cut using a hot knife. Lastly I cut some pipe for floor sensors in the kitchen, lounge, bedrooms and bathroom. The underfloor heating consists of three loops around 95M length, planned using Loop cad. The manifold was plumbed , filled and a pressure gauge to ensure no leaks. We have good water pressure so could pressurise to 6 Bar. ( With the heat ☀️ this rose to 9 bar one day). The above picture also shows K Steel screed rails. I used these to break the slab into smaller bays, and mainly will be under stud walls. The slab will for the foreseeable future be our finished floor, so I wanted to introduce expansion joints and force any cracking to these locations🤞. I also used Tibmix metallic dry shake topper on the concrete, the dry shake should help suppress the fibres and also increase the surface hardness. The pour happend on Friday 16th June, the first 5cube arriving at 8.30. we did the kitchen bay first which needed the 7t 360 to move / place the concrete, then, poured the WC / plant room and utility bay. This was an error, I wanted to pour the lounge next so both bays could be finished at the same time, but under the pressure of the pour took advice to do the awkward section next. This resulted in only a 3rd of the lounge bay having concrete, so this was spread out lower so the next load could fill the bay. By the time the second load arrived, the kitchen and utility bay was ready for power floating. The pan worked well and I had some time to start edging the slab, the rebar didn't allow the power float to get to the edge of the slab. By 13.00 all bays were in and leveled, but not floated, but the sun was very hot, and the kitchen bays was getting hard rapidly, I managed to float this but was struggling to to get a perfect finish. To dry shake makes the surface hard and this was apparent, the lounge and bedroom bays floated better, and to the main the dry shake suppressed a lot of the fibres but there are still some visible. The kitchen bay was rock hard by the time I managed to float again, and although it is fairly flat you can see, but not feel, the path of the power float. I used Setseal 6 as an acrylic sealer, which seals the surface and aids the curing process. By the time we finished the floor was rock hard, I mean hard, the idea being that the slab will slowly cure now but will not be affected by rain etc. Time will tell. Due to the temp, and the float not getting to the edge, I will have to carry out some remedial work on the edges of the slab, as by the time I go to troweling these it was too late. Today the slab looks great, it's flat and level, but the perimeter 2 inch will need some polishing, as will a section in the plant room. I'm confident I can get this fixed. Time will tell. The following picture doesn't do the slab surface any justice. It looks rough, but it's glass smooth. So 10.5 cube of fibre reinforced concrete. Power Floated, and this was non stop until 17.30. My chest and fore arms are wrecked from trying to tame the power float. I'm a little disappointed in the edge finish, but looking at it another way, it's way better than if it would have started raining, or the wind that we have today. I'm sure a few hours with a wet diamond polisher will rectify the edges. Maybe another hand would have been good. 🤔. Onwards to the ICF walls... .1 point
-
I've seen these but never used them. I've used the hair-like fibres and so have any readymix suppliers. It just rubs off underfoot. Yours would rub off with a carborundum or a brick, I'd think. Anyway, it's saved how much on steel? A few hundred?1 point
-
I'm thinking ecotherm did the U value calcs and passed them onto your designer. They are hallucinations unfortunately. Start at 200mm PIR (or 300mm EPS)in the floor. 200mm mineral wool in a full fill cavity and 3g good quality UPVC windows and doors. Avoid french doors and brush sealed sliders. They leak like the Titanic. Instead make sure all doors and windows have compression seals to shut.1 point
-
Sorry, I missed this. Basically the slab is very good, I did put screed bars / expansion joints into the slab and the only cracks follow these lines. around 90% of the slab is flat and smooth. the worst areas were the edges where I couldn't get the power float, and the sun made finishing with a trowel due to drying quickly impossible. There were a few high spots which we have ground with a diamond disc, unfortunately this exposed more of the plastic fibres, the fibres used in out slab are around 50mm long 1mm thick and 2mm wide, so quite chunky things really, and the result of this is that there wont just wear away, and a blow lamps to burn them off is not satisfactory. So decision made - LVT flooring it is..1 point
-
Re caravans. Find your local dealer, there is a steady supply of second hand ones coming off holiday sites when they get too old. The advantage of buying from a dealer is they usually have several to look at and choose from and they have the transport to move them, usually included in the sale price. We paid £4K for ours, it was actually still on the holiday park when we viewed it, and we chose it for it's unusual layout with the living room in the centre and a bedroom at each end which suited our site well. So it came on their wagon straight from the holiday park to our site. You can buy privately but you have more work and travelling if you want to look at several, and you may find transport harder to arrange, our local dealer will only move 'vans they are selling or buying, they won't just move one privately sold. On our first build when we sold the 'van at the end, I think the closest transport company the buyer could find that would move it was somewhere around Elgin.1 point
-
I have a ceiling light with 3 led bulbs in it and one of them shines gently all night. If i recall, it is taking energy from the inductance ( no something else) always present at a live cable. The same thing that encourages flies to circle a light that is off.1 point
-
When you say stays on, you mean glows VERY dim and can only be seen when it is dark? If so capacitive coupling between adjacent L cores in a 3 core 2 way switching cable can cause this. This can sometimes be cured by reconfiguring the usage of the 2 way switching cables to put the switched L cores either side of the earth. Or fit a snubber in parallel with the light. Or just try different types of light bulb. If it is staying on at full brightness then you have a different fault.1 point
-
I would take up their offer, which should be free, they will not want you coming back again, so should use a different, possibly a high adhesion primer. Looks like the primer has just sat on top of the factory coating, instead of bonding to it. Hence coming off easily. Any other option is going cost your back pocket, and may end up in the same place. Painted kitchen doors even when factory done, do chip and scratch, they will say it has patena.1 point
-
Following threads on here I’ve not extended the UFH to the upstairs. I have wired for two wall panel heaters or will just use portable heaters if needed. We have a electric towel rail in the ensuite and we’ll probably add electric UFH too.1 point
-
We’ve wet UFH on the GF Five bed Solid build and have never used the first floor rads We building a larger house UFH to GF My wife didn’t want to add any rads this time Our bedrooms are usually within 1 degree of the GF I’d seriously look at your insulation levels1 point
-
If I were to pull any weak points from that list it would be the walls and windows. I'm not sure if 90mm insualtion gives you 0.18 anyway unless you've something else going on. Aim for 0.15. And for windows, definitely triple. Ours average at 0.8, some are 0.5 (a 40mm thick, 2x2.4m unit), and not that expensive in overall scheme of things. About the same as kitchen and bathrooms combined.1 point
-
Local static caravan dealer, had a choice of quite a few, Private might be cheaper but transport was included on mine. Vans tend to be relatively cheap when they are too old for most sites to keep them on.1 point
-
Well I paid £5k delivered fir a 30ft x 10ft two bed, bathroom, lounge/kitchen and kept it/lived In it fir 3 years , They do sell on as well. Luckily ours was fir a replacement dwelling so services existed.1 point
-
Yes most tiles are bedded on 10-15 of adhesive1 point
-
Can you get a pipe freezer and fit the valves that way? https://www.screwfix.com/p/arctic-products-pipe-freezing-kit-150ml/433fj1 point
-
Had a lot of similar comments, with that and mould related comments, and wasting your money insulating the slab, because heat rises - it doesn't go down.1 point
-
Most tradespeople are lucky to have one credit account at a BM. The credit assists cash flow. You will get a better price by paying as you go. That way you are not borrowing from the BM. In time the BM may allow the occasional favour of ' pay next time you are in'. More important even than that is priority delivery. That all changes though for large purchases, or highish spending levels, when they really want the business. Then a credit account will be as good. Think small and accept whatever credit they offer, and always pay in good time. Working together with your favoured BM, giving them a chance to match other quotes, can be the best way.. allowing them to make a profit along the way. But you will do best by studying the market for each product so you know a fair price when you see it. BUT. professional buyers spend their time chasing another 1% here and there. There is much more saving to be made by efficient design and avoiding of waste. Any waste. It isn't only the stuff in the skip, but the timbers that could have been smaller, the earth you didn't have to dig, etc.1 point
-
Both are threads I posted early in the life of the forum. They are quite long now ! Still worth some time, as there is a lot of useful info - an example is that self-builders can usually get the 10% trade discount at Wickes, plus a further 10% (ie 9% since it compounds on top of the Trade Discount) by using a membership scheme discount card available via various memberships etc (I get mine via a Health Cashplan, but employers, trade unions etc do similar). The latter schemes operate by you loading cash onto a reusable cash card eg before you go to the shop, and you get 5-10% more value than you load up. Another one is the potentential value of points Credit Cards (spend a few 10s of K and you get a nice holiday bonus at the end), or Interest Free Period Credit Cards. HTH. Watch the detail. My two threads mentioned are here: and here:1 point
-
i used this company, bent and powder coated to my design cheaper than I thought.
 1 point
 -
Fwiw just for variety I'll share what we did. My build team didn't use ducts at all. Each cable had it's own hope drilled right through (our retrofit is a mix of masonry and TF) and then individually grommeted and taped to the OSB on the inside. A couple places one grommet serves multiple cables. Some 30+ cables done this way. We achieved 0.5 ACH on a retrofit, so I'm happy with the result (although in a couple places having the option to pull more cables without drilling more hopes would be good)1 point
-
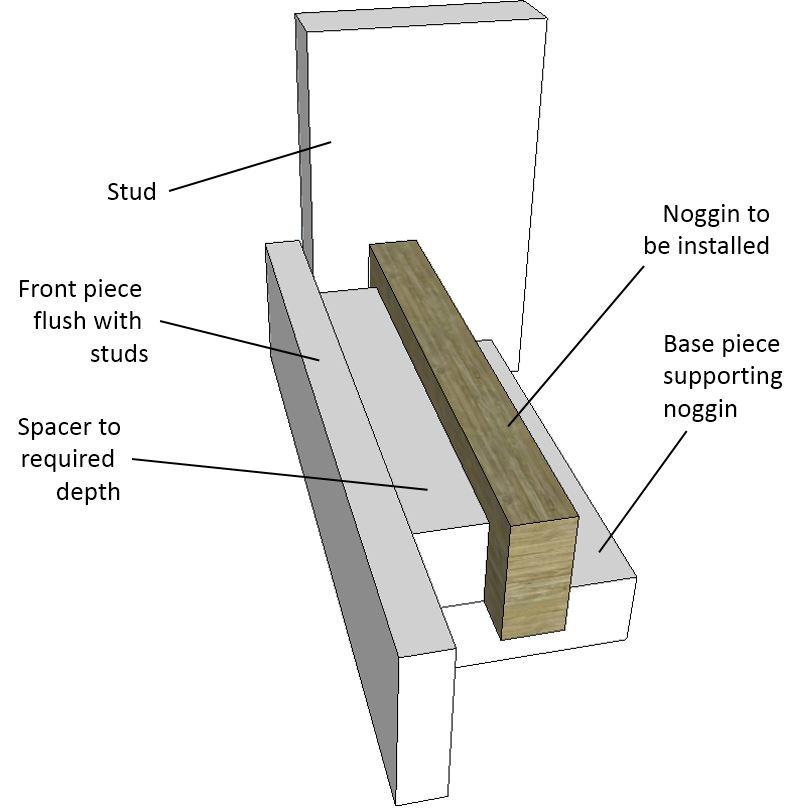
We have metal boxes throughout - my electrician was damning of plastic backboxes, but I don't know whether he'd tried the Appleby ones mentioned by @ProDave One thing I did that made things a lot easier was to knock up a jig: The front piece is held against the front face of the studs (the nearer stud is omitted for clarity), and the cut-to-length noggin dropped into place and pulled forward against the spacer. This ensures the noggin is installed square. Optionally, you can add a bit of wood to the bottom to rest on the floor or base of the studwork. Saves you holding the jig in place while you install the noggin, and ensures consistent heights without the need for a measuring tape.
 1 point
 -
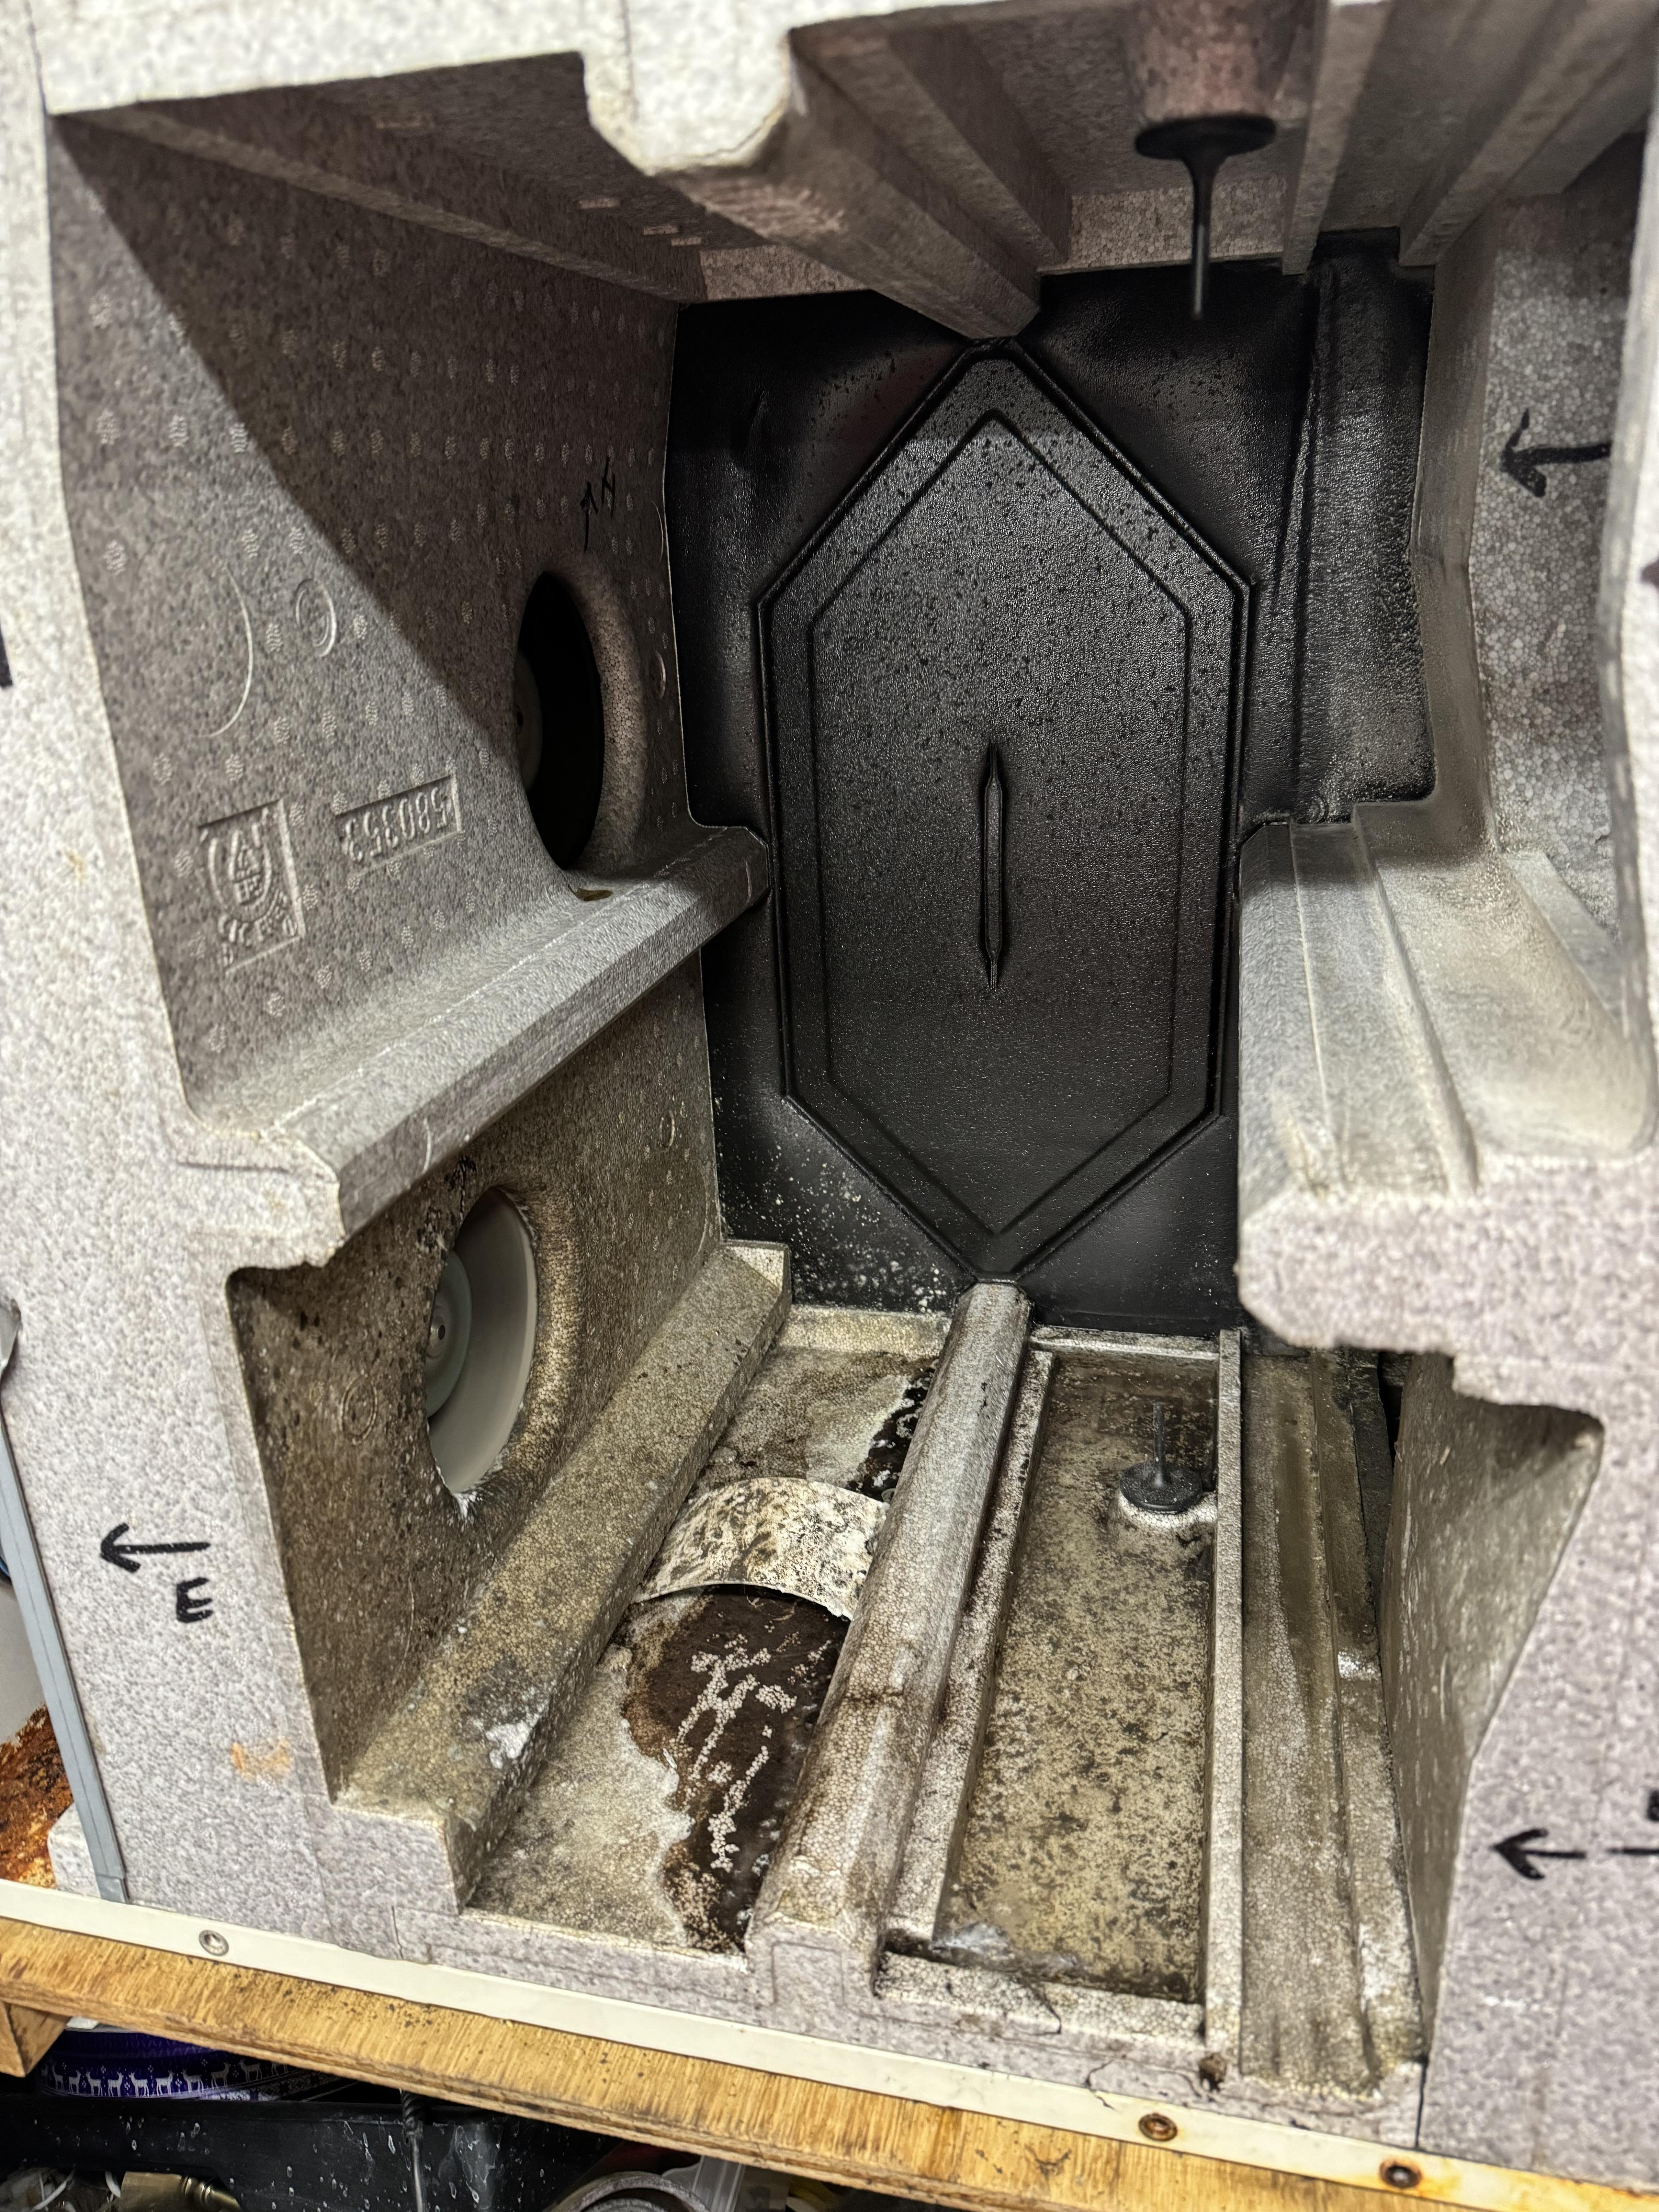
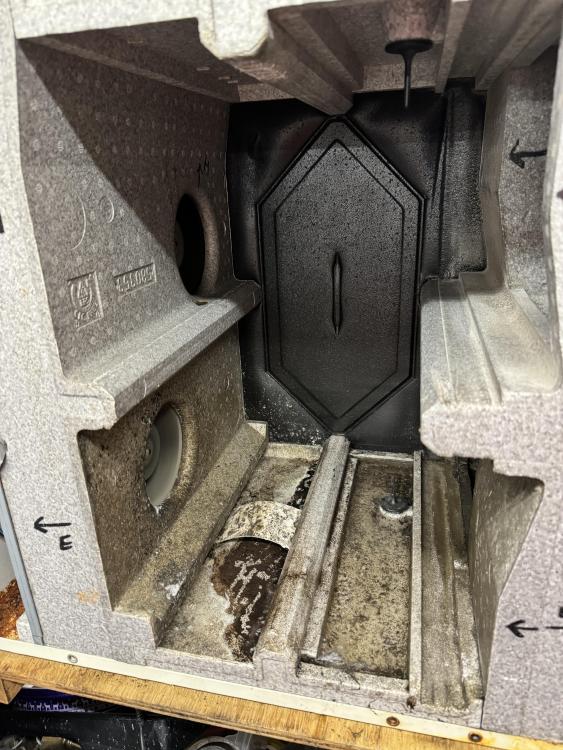
Not a pretty sight is it? The exchanger is covered in mould on the same side as the condensate drain. It could be this has something to do with the house having combined MVHR and hot air central heating, which has been discussed a few times on here recently in less than glowing terms. The bottom right section is where the external air comes in and the bottom is full of water. That side doesn’t have a drain. Bottom left is where the air goes out to the outside. There’s a bit of water and mould there but the drain is working (I just poured 2L down). But lots of mould on the exchanger in that quadrant. I hadn’t looked inside for a year or two, when I fixed a problem with the condensate drain freezing up. That’s all fixed now and anyway it hasn’t approached zero this winter yet. Any pointers please? Just as a sanity check… it seems weird that the bottom two quadrants are external air and the top two are internal air, shouldn’t the air streams cross over in the exchanger? This is a Brink Renovent HR, paired with a Brink Allure gas air heater which blasts air around the house at 800-1,350m3/h even when the heating isn’t on. Obviously looking to get rid of the Allure and switch to some form of heat pump, probably an air to air one separate from the MVHR based on the comments on here. Thanks for any thoughts especially on the pooling water issue.
 0 points
 -
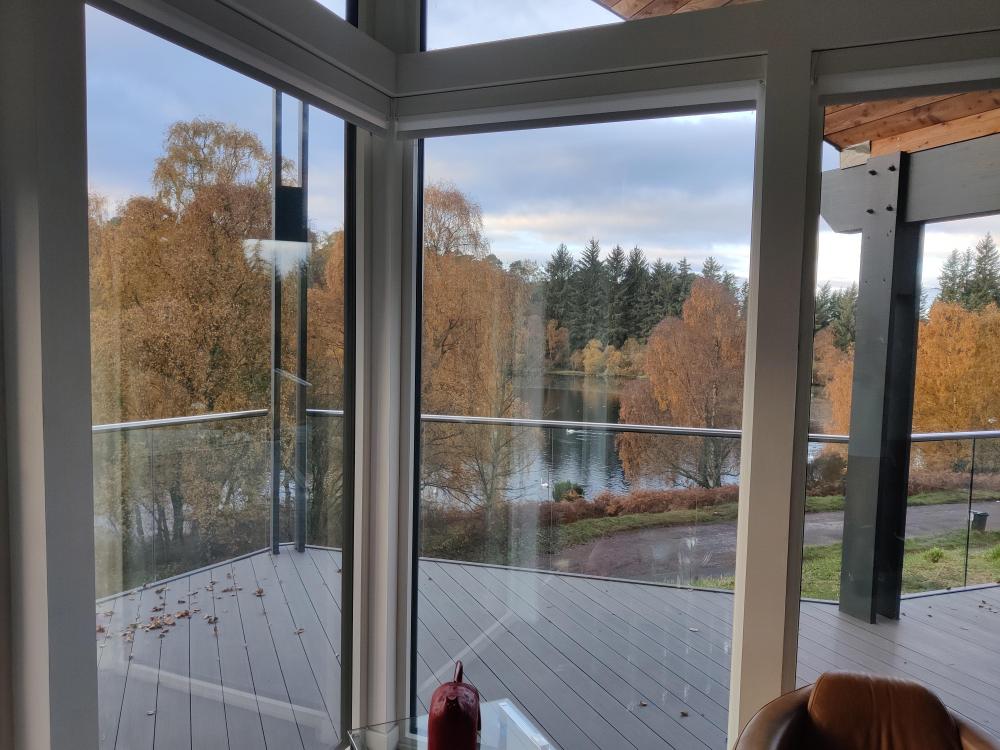
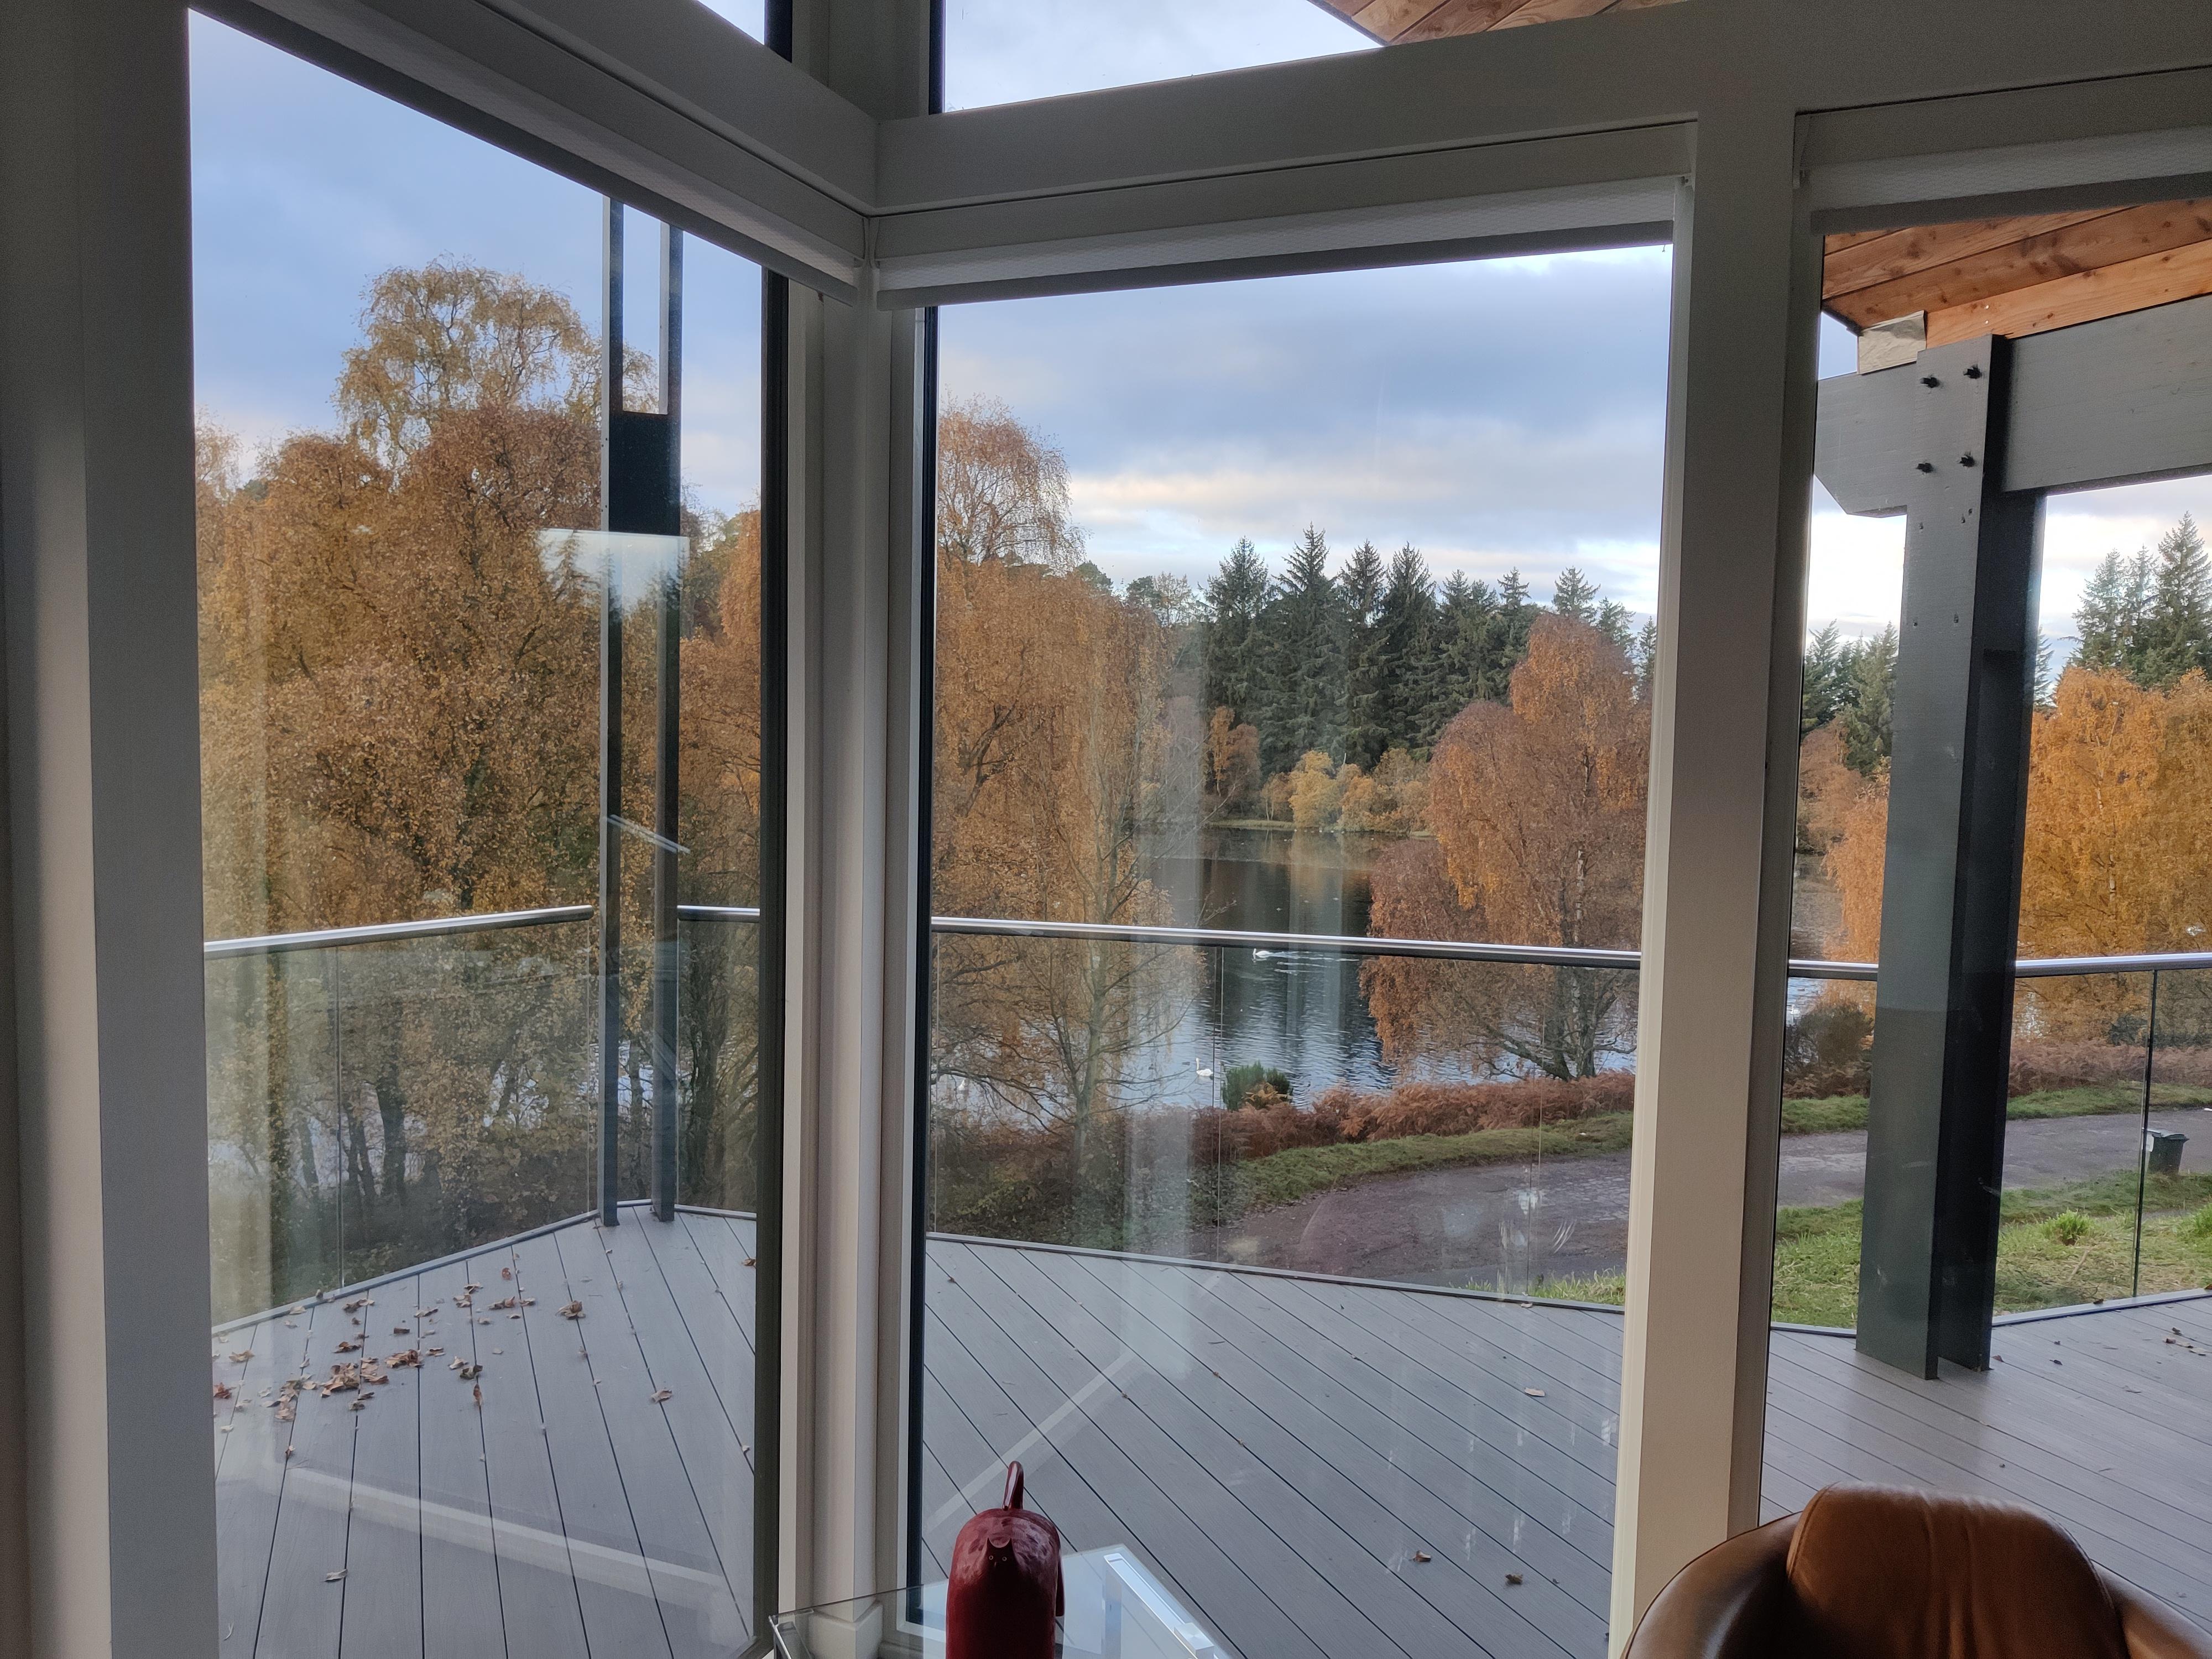
The living room.0 points


.jpg.c21f3ac78c9b7efd90cbdcb312744dc5.thumb.jpg.7adcad4c0e384f5ecd7d56b0618df6e5.jpg)