Leaderboard


Popular Content
Showing content with the highest reputation on 07/10/23 in all areas
-
Since starting this build we've had a handy mound of "spoil" from which I have been taking regular photos from the same(ish) spot to remind me of progress during the "down" days which we self builders all suffer from time to time. I thought I'd share this with you. It starts in May 2021, when the major groundworks had been underway for a few weeks and goes up until April this year - about 2 years. First a picture of the mound of spoil for reference: and now the "timelapse": Since that last picture we've been putting on the warm roof structure, so any further photos from this vantage point don't show much sign of progress. so until something significant happens in August this view won't change much4 points
-
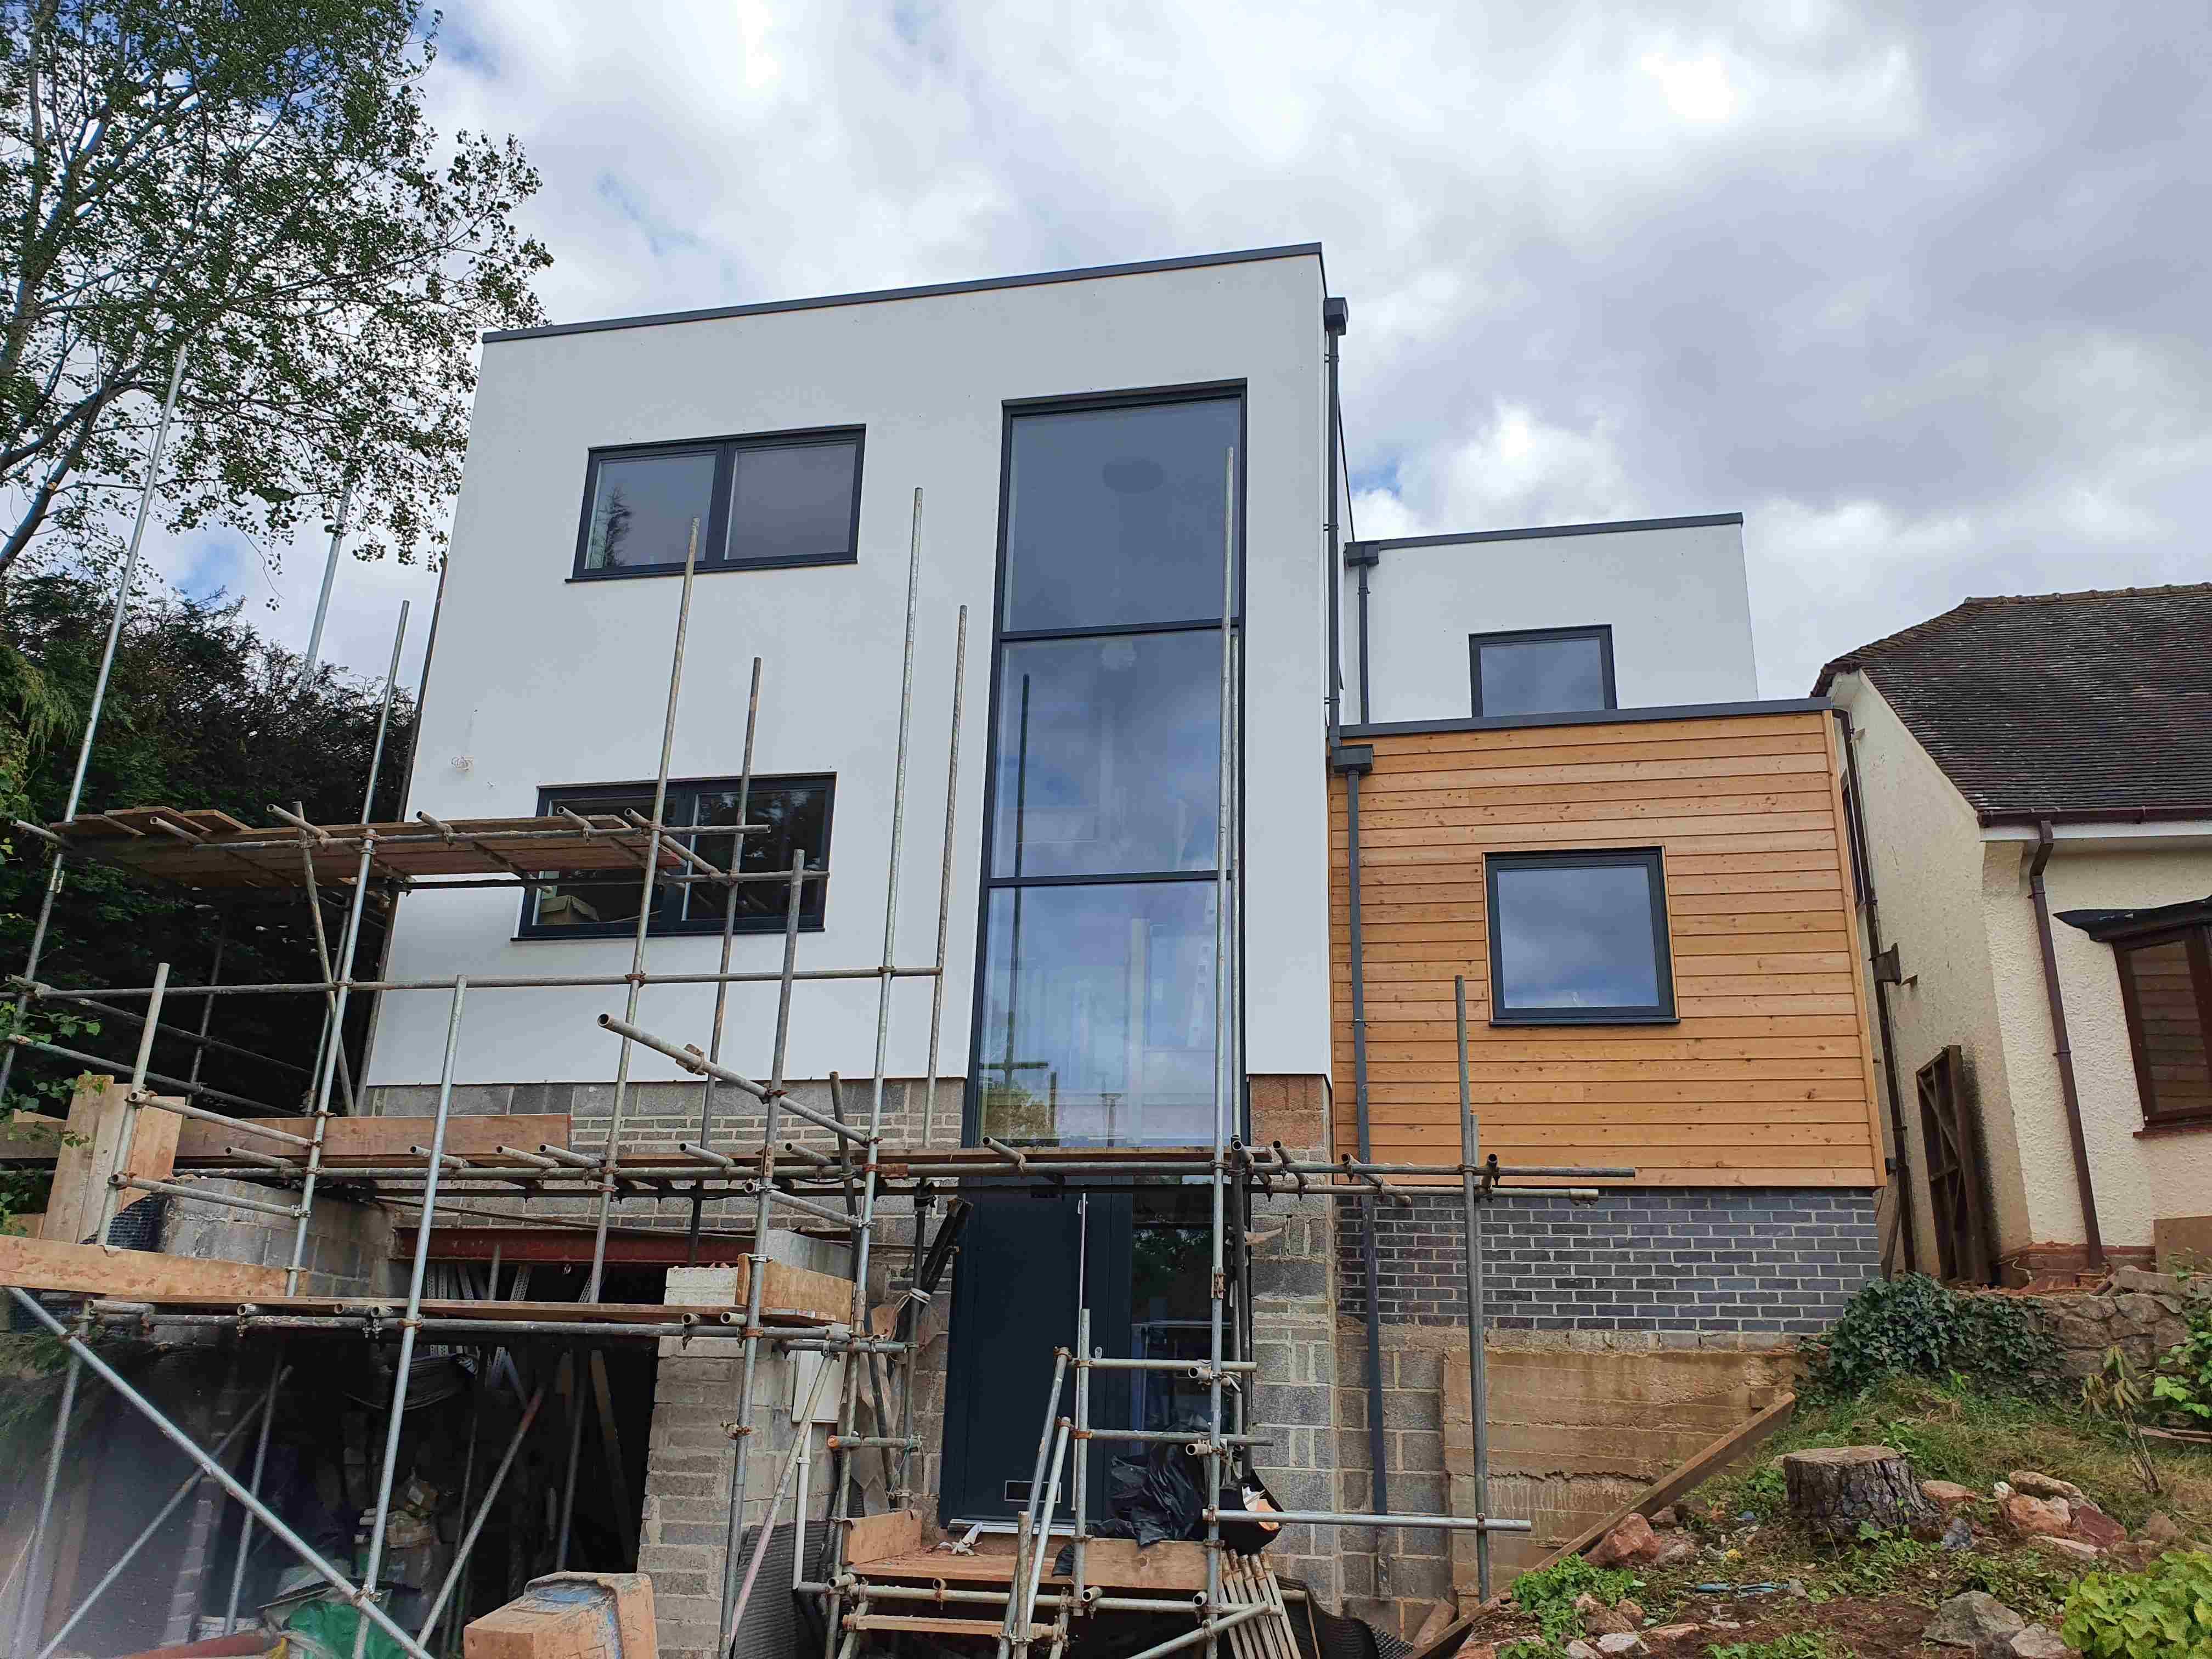
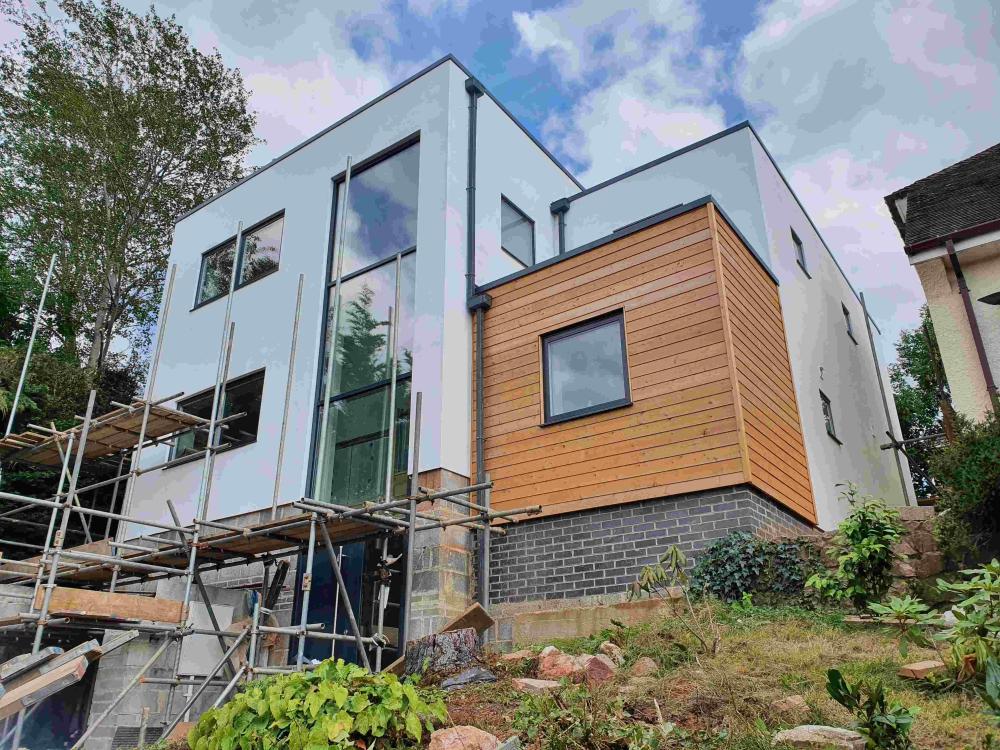
The majority of the scaffolding is down. A long way to go still
 2 points
 -
For anyone discovering this thread in a historic search: we got a phone call to tell us that a case officer was assigned on Thursday last week (6th July). The application was made on 28th April, so almost exactly ten weeks. Again, the EA person I spoke to was very helpful.2 points
-
Just saying Hello, We are rebuilding a 1950's semi. For my sins I am the owners "retired" father and thus have been bought in as the unpaid gofer, info gatherer and fixer... Project summary: This a big restoration job on a 1950's built house. Plan is to add kitchen extension and loft extension and rework interior. Project includes adding 100mm exterior insulation to first floor and re-rendered outside walls, adding ~30mm interior insulation to outside ground floor walls and re-plaster. Digging out ground-floor floors, adding insulation, fitting under floor heating and re-screeding throughout. Lifting first-floor floor boards, insulating and fitting underfloor heating throughout first floor and loft extension. Replacing all windows and doors with either double or triple glazing. Insulating roof spaces to 250mm equivalent. Fitting MVHR system and an air source heat pump for heating and DHW. Rewiring will include new lighting, new rings, data cabling for a distributed network, distributed TV and sound Then new kitchen, 2 bath/shower rooms and loads of built-in furniture. Objective is a long term, efficient comfortable home. Current status is that we are ready to pour ground floor have most interior demolition complete and have the first floor and Loft extension ready for first fix. Going to be very busy. DonJ1 point
-
+1, and will soften the hammer off the WC's and any 1/4 turn taps which 'slam' shut. At 8bar, you defo need a PRedV on the main as that will be causing all kinds of havoc 'behind the scenes'!! Set it at 4bar and the flow will still be stonking. A 3bar PRedV actually strangles the flow quite a bit, so make sure you can define the set pressure. Remember that you need to have water flowing through the PRedV to set it accurately, so leave a tap on somewhere just running a couple of l/p/m whilst you set it.1 point
-
Perhaps some pictures to put this into context, particularly if they also show these line posts?1 point
-
Solar panel will become a roof above my ASHP to keep the worst of the weather off it. The green dots are where the pipes will go through the wall to the drain back unit
 1 point
 -
What is it about solar thermal and solid fuel heated water. Completely outdated, expensive, require too much maintenance but none the less my inner schoolboy really likes the idea of playing with them.1 point
-
That sounds fine. It'll give you a U value of about 0.22.1 point
-
Check with the supplier?1 point
-
Unless you are going to study the building industry, learn how to make a dwelling airtight, and be on site every single day to manage the trades executing this work, you have NO CHANCE vs a TF build with a guaranteed AT score. Add all that grief (and still loads of) uncertainty, and then redefine "mega cost" please. Go find a general builder who; a) knows what airtight actually means, or b) one that will put your money where his mouth is and offer up a guaranteed AT result of even sub 1.0 ACH.... Let me know how that goes! The facts speak for themselves, and the TF suppliers I have conversation with have diaries which are jam-packed into next year. There are people who can't hang a shelf, and for them it's far less risk to appoint a TF supplier with guaranteed outcome than it is to get a general builder to knock up a masonry shell and hope it turns out OK. TF company will be contracted to produce an end result, builders will just typically 'put something up'. Good luck tying to define in court where they went wrong when your AT score comes back at 3.0 - 5.0ACH and you are stuck with what stands in front of you . I've turned up at many a job where the clients are all smiley faced and overjoyed with progress, only for me to say "WTF is all this mess?" I turned up at one job, the second lot of groundworkers (which replaced the first lot of assholes, all paid up and work was dire) were just starting to cover their work over with pea-gravel, and I said to the clients "none of that complies with B-Regs, tell them to stop now and do it all again". They had been paid £7k in advance and just buggered off when challenged. Current project, we're coming up to £40k worth of 'damages' done and hidden by the builder, he had most of his money up front, was challenged, then.......buggered off. Both clients to date have received £zilch back off either job. There's north of £61k there. See a pattern here? This is nothing to do with the build, or what they're building it with, it's 100% to do with the people you are dealing with. The people who own the company, and it is they who decide how the job goes and it is them you are investing in. Members on here have built with masonry and achieved super-good AT results, but that's the exception and not the rule, as not a lot of people who wish to self-build know anything whatsoever about the construction industry, worrying as that is.1 point
-
How can you add a window if you cannot get access to outside?? like the rendering, fascia soffit, guttering You really need to address this issue, or what will you do when the neighbours call the police and the builders walk off the job??1 point
-
I don't think we disagree. I count that as reasonable.1 point
-
I think this may work. I will have to see if I can get a quote once the builders are back on site. Thank you so much for suggesting it. I never knew these existed.1 point
-
Have you looked at https://www.velux.co.uk/products/sun-tunnels This might get you out of a jam here ?1 point
-
I agree. They have already put up the fence. I can still put the window for some light, though not sure of the exact use of it except to tick a box (likely not adequate). Now looking into alternatives for BCO to approve this as a bedroom. I would like to keep it for my mom if she ever visited. She like all elderly people will not use the window to escape in case of fire.1 point
-
I would suggest that this is their alley and their land as it’s outside your red line showing the property boundary, unless your deeds specify you have “right of access”. On another point there is no point in you have an egress window (escape) if you can’t get over their fence 🤷♂️1 point
-
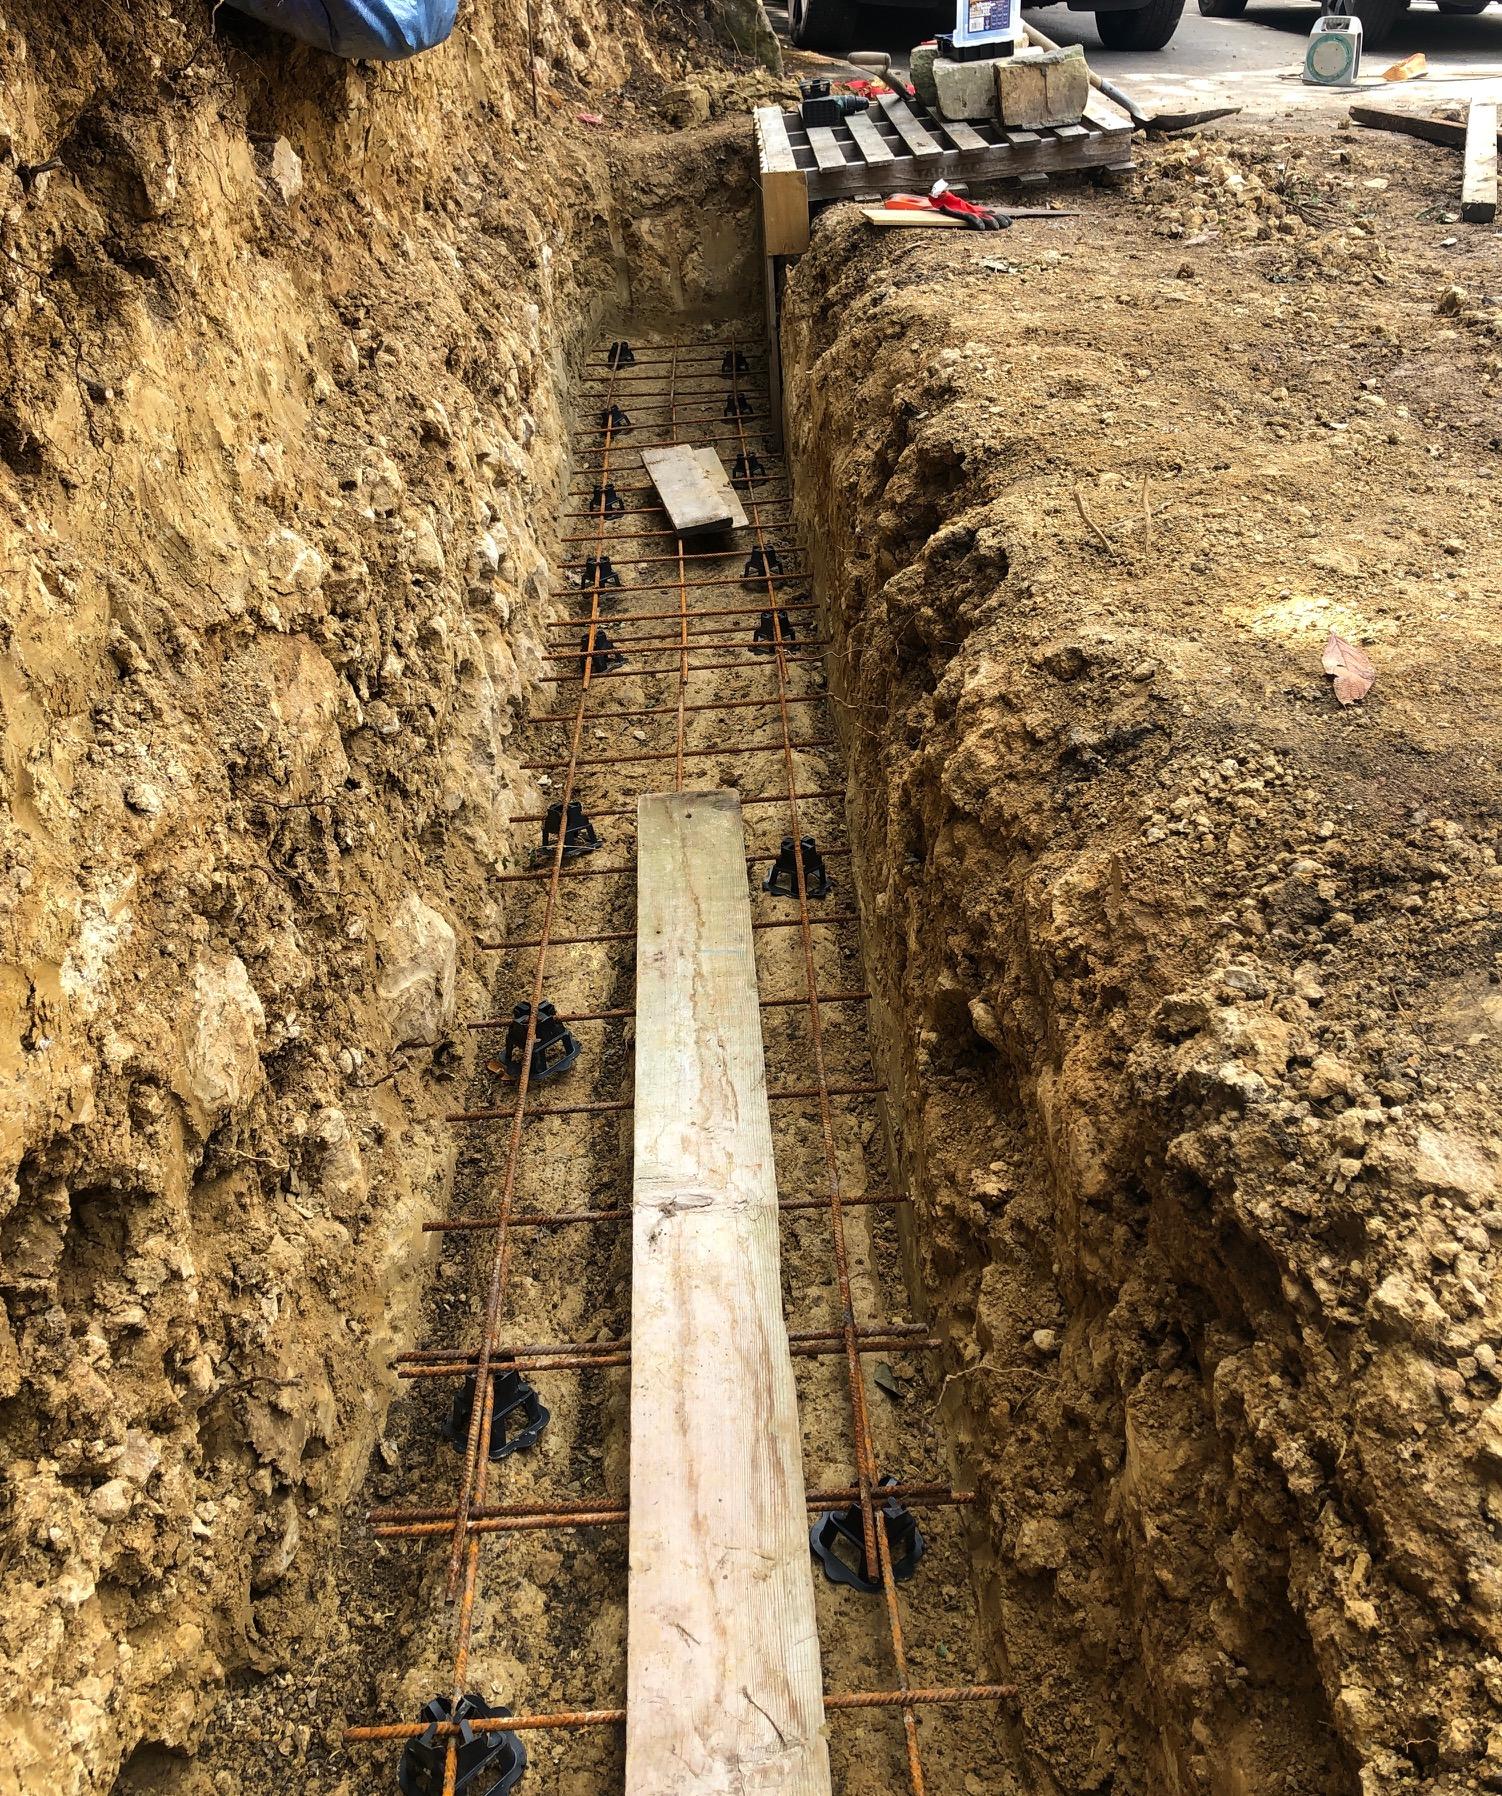
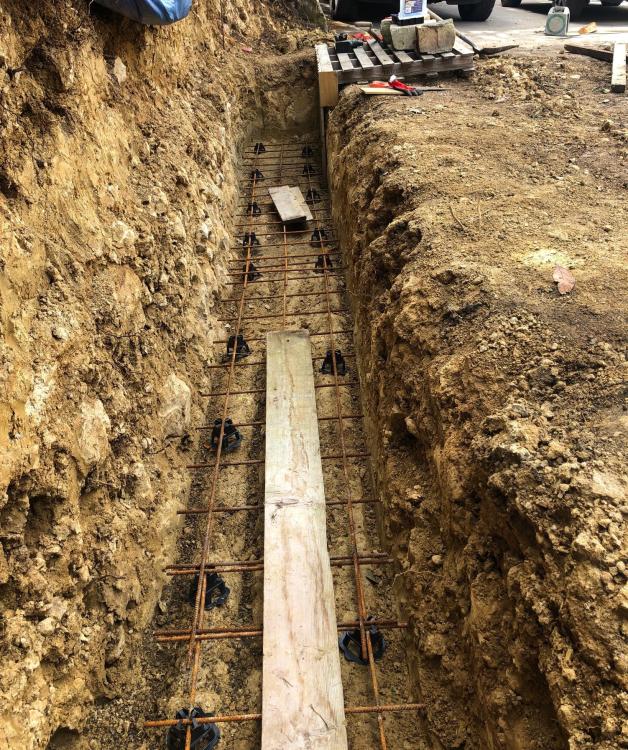
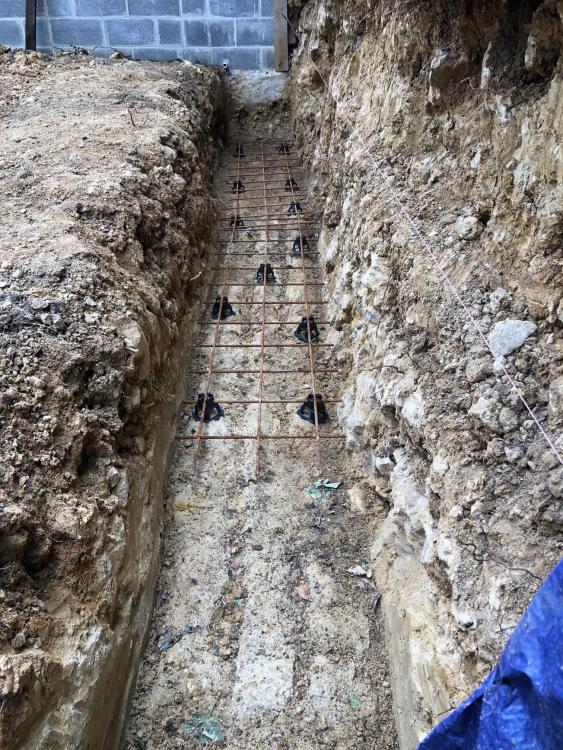
Hi All Few progress pics. Laying the bottom layer of 10mm mesh at the moment on 50mm stands. I'm planning to make up 40cm high chairs with 8mm rebar ( or 6mm ? ) to support the top layer of mesh. Progress is slow because it keeps raining and i'm trying to keep the trench as dry as possible. Ground was rock hard when it was dug out but the base of the trench is slightly soft where the rain had got in. Anything to worry about ? Maybe a few inches of type1 or plastic sheeting would have been a good idea in retrospect. Trench is a bit messy due to the number large rocks which came out. I quite want to put in some formwork for the top edge but probably not required 😉 I saw this permanent formwork being used on another site and was very impressed; https://cordek.com/products/corgrid#:~:text=Corgrid permanent formwork panels consists,ensure quick and simple installation. https://www.maxfrank.com/uk-en/products/formwork-technologies/01-permanent-formwork-pecafil/ Anyone familiar with it ? I'll probably order the concrete delivery for later in the week. Weather permitting.
 1 point
 -
Are you doing Loxone DIY or having someone do it for you? Either way, it's a good idea to understand what's going on in the cabinet, and if you need any other satellite cabinets at this stage. Also to understand if you need the LXN-D. In terms of trunking, depending on how much you are doing with Loxone there could be a huge amount of cables coming into the panel, both 24v and 230v. What I have done, and I think others also do, is use two lots of trunking with the LHS trunking for low-voltage and the RHS trunking for 230v. This follows the standard practice of using the LHS of the cabinet for low-voltage wiring and the RHS of the cabinet for 230v wiring.1 point
-
If you ask for someone to make you something bespoke, then you don’t buy it, they’re Donald Ducked. C’mon, it’s been the norm for as long as commerce has been around. Tailored suit? Pay up front. Etc.1 point
-
I DO agree with Nick on the above and also using any power tool with no experience can be disastrous/dangerous. I modified my first table saw (small table top) by adding a table top around it giving support before and after the blade. I also invested in stand alone adjustable roller supports for long timber, one in front and one behind 👍1 point
-
I can’t win them all, lol. I used a table saw for the first time, and I made a proper mess at the mid point and end, just through inexperience and that other thing…..wanting to keep my all my fingers and thumbs. That is a big distraction tbh. If it’s a table saw which has a nice big bed and supports the wood then great, but the small square table-top saws are a baptism of fire. For a one off job, and if the OP isn’t using these tools every day, then the track saw will be a great choice imho. If the OP feels confident, then go with the table saw, but I’d recommend spending an hour or 2 running dead stock through it to get some practice in before going at the linings, as it’s pointless going through all this to save money and having to buy new linings as they got chewed by the saw. Particularly difficult to consistently keep the whole length against the blade fence all the way through to completing the cut, AND get it out of the blade before it gets another unwanted shave. I’d not consider this without a competent second pair of hands. Track saw can be clamped and used ‘mono’ so that would be my choice here, based on the OP’s experience.1 point
-
Yes I guess it comes down somewhat to interpretation, ensuring the safety of future users and what the person signing it all off will accept. I surmise that if you have a 2m wide x 1 m high CU you will have loads of safe zone to play with.1 point
-
edit looking on Streetview it would appear that the boundary is halfway between each property (except for no.18 which uses the gap as the driveway to a rear garage). Would it be worth knocking the door of one of the other neighbours and asking them how it works for them? Try searching planning docs for the other houses as there might be useful drawings (side porch between 16 and 18, and again 30 and 32 for example1 point
-
My dad built his glasshouse base and small garden walls on a base of concrete blocks on their flat on top of a layer of quarry dust. Nothing moved or cracked. Bricks directly on the ground will definitely move and crack. You need a little more.1 point
-
The DNO letter has the MPAN in it already (well mine does anyway). Check your new smart meter - press the blue button 'A' until you get to the Export kWh. That's the reading Octopus use.1 point
-
1 point
-
Yes, concrete foundations for me too.1 point
-
why not Wilo?1 point
-
I think it depends on your water board, the commercial builds I have done, we install a boundary box in the ground, run pipe from this location to the point of use, and Scottish Water or approved contractor makes the connection. type of connection depending if they can turn water off, how many building it affects. live connections can also be made. Generally not something the user has to worry about, saddle connections are used as they are a convenient way of providing a connection.1 point
-
Yup, all looks kosher I'd look at a retro-fit hot water cylinder insulated jacket on eBay etc and wrap that buffer up to the nth degree, just a shame it couldn't be in the heated envelope somewhere. FYI, you can tee the returns into each other wherever they are easiest to do so. Top and bottom and diagonally opposite is best, but it could be piped top & bottom entry with both pipes the same side if it made things massively easier, tbh. Fills up with the rest of the system off the filling loop, yes. Remember to manually crank the zone valves to the fill / drain position (via the lever on the side of the valve) when filling or draining. For the ground floor and 1st floor rads, will these all have TRV's on each rad, and will they likely all be at least a % open whenever the heating is turned on / calling? I'd say that would be a yes. If so, I'd suggest fitting a 3-port valve, located up at the buffer, to prevent it from being heated (and wasting heat) unnecessarily eg if the 2-port zone valve for 'rads' is open ergo no short-cycling. In a nutshell, you can then choose whether the buffer is 'in play' or 'bypassed', and this is a doddle to do. You just power up the 3-port off the same wire that opens the 2-port for rads, so it 'flip-flops' between the 2 states. All you need to do is buy a 3-port diverter (NOT a 'mid-position' 3-port) and Bob & Fanny are yours for the taking Rads ZV = closed means buffer is in play, and vice versa. Should make this as energy efficient as you'll ever get it 👍. BH buffer pic.pdf Edit: wiring may be far simplified if you use 2x 2-port at the buffer, but my brains a bit fried, been a long day. Edit #2: Scratch that, the 3-port is spring return so all good to use 1x 3-port for this . Beer o'clock I think.....1 point
-
1) Sell the panel. 2) Purchase beer. 3) Enjoy solar thermal by sitting on a chair in the garden getting a tan. 4) see item 2.1 point
-
Is your pipework mostly copper or plastic? By shutting off a high flow under high pressure, you create a pressure wave (surge) the propogates back downstream. In the water industry we use either surge vessels (bit like a large expansion vessel) or a surge relief valve. These deal with the shock wave by allowing it to push the water in to an empty space. In a closed system like yours, there's nowhere for the water to go so the energy is transferred in to the pipework and attached applicances. Not normally needed in a domestic setting tho, either turn your tap off slowly or reduce your pressure down to 3bar. I'd be doing the latter as you're also reducing the risk of a leak by a factor of several (there's a graph somewhere with failure rates and pressure.)1 point
-
At 8 bar I would fit an inline PRV and then a small potable expansion vessel somewhere to reduce the pressure to 3-5-4 bar max in the house. It won’t reduce the flow that much, and you’ll not have the pressure bounce on the flow switch in the combi that you’re getting today.1 point
-
Well as if by magic the post has arrived at midday with a large package from HMRC. Just two invoices with a total VAT amount over £2000 were rejected as I only had Pro-forma invoices and they want originals. Time to talk to Polysteel and get all the money back!!1 point
-
Just to add, you can pay private building controllers for a "plan check service". The route you could go down is: 1) Get proper system design done (after percolation testing) 2) Submit the design for a plan check to building control/approved inspector, I imagine this would cost in the region of £1000 3) If building control pass the plan check, they can also then submit the design to the local water authority for comment (this is what's done in a normal building regs application pre commencement for a new STP). 4) If all of the above come back good, submit it all to a bundle to the EA, then they will have everything they need to make a decision.1 point
-
To be thermally efficient I understand that the glass units should be within the insulation zone, whereas if flush with the brickwork they will be in the cold zone. I have done some a bit like this in Velfac but used a small cill projecting about 25mm:
 1 point
 -
Used UPVC 3G T&T on a job and they are great - on the 3 panel units we made just the centre units T&T with two fixed side panels and they work really well.1 point
-
I’ve noticed a lot of water around one of the Atlas boxes Time to dig up and have a look Has to be one The most crappiest jobs I’ve done nightmare to get the pipe ends out I’d missed putting a 50p stiffener in one of the pipe ends
 0 points
 -
Crikey, is the ASHP in the next village? Are they on the same floor of the house, or GF & FF?0 points