Leaderboard
Popular Content
Showing content with the highest reputation on 02/22/23 in all areas
-
That's for a basement though I don't like installing a skinny heated layer over a decent constructional slab as it simply turns on and off ( as a heat emitter ). Not desirable AFAIC vs the huge thermal time constant(?) you achieve from heating an entire slab. That allows you to strategically 'inject' pockets of low cost energy into the floor as a battery / heat bank and for that to slowly release heat into the home with near zero difference in temp shift ( hysteresis ). Simply night and day better IMHO. Heating a constructional slab / passive aka insulated raft is absolutely the better option, and installing a 300mm wall a-la MBC and fully pumping with cellulose is just an absolute and inarguable no-brainer ( budget allowing ). If you are time-constrained ( or impatient ) then removing all the extra labour / cost / detailing / airtight measures of a multi-discipline wall system will pay massive dividends in 'getting a wiggle on', as one MBC PH TF I was on took 31 days from a hole in the ground > passive raft > frame up and complete ( YES, 31 DAYS ) including a couple of weeks on stop for the slab to cure before the frame went on. When the stars align, I will build my own out of MBC PH TF, and develop with that or Nudura. Just waiting for a ship to come in, and then it's off developing I go . Anyone who wants quick, stress free and to have a huge amount of liability / responsibility removed should look long and hard at MBC's offering with a minimum guaranteed airtightness score of 0.6ACH to boot! Folk, some are / were on here, have had issues with MBC and them farming stuff out to sub-contractors, I'm on one that suffered this atm, but thankfully Joe took direct action and this has now been resolved. No company can say they've been 100% issue-free 100% of the time, I don't care who they are, ( or if they do then they've just been very good / clever in covering it up the trail of breadcrumbs ). DIY'ers won't want to pay the premium for a turnkey package, some will actively desire acquiring their self-build wings, so, as with anything, it's horses for courses. The choice of company and service will be down to the clients own remit.3 points
-
With todays energy prices ( and future ) I'd take that statement with a pinch of salt, sorry. I often suggest sand blinding > 25mm sacrificial EPS > DPM > 100mm EPS > 100mm PIR if the depth is there without £££'s, but same can be achieved with 150mm of PIR. IIRC 140mm is B.B.Regs for a heated slab, but I haven't slept much this week. The maths are further impacted on whether it's being heated by oil / LPG vs a well matched heat pump2 points
-
Thanks so much Susie. I'll take a look tomorrow, since today has been devoted to providing appropriate information to demonstrate that our passive house design complies with the council's requirement for 10% renewables and is therefore an acceptable proposal......... Grrr.2 points
-
Ok first to bite. A distraction question. No, of course not. Does a well designed, properly used wbs cause pollution in the countryside? Yes. But it is a reasoned pragmatic option. The pollution is slight, much better than bonfires and open fires, and no worse than gas or electricity. ( reference pollution maps). I am starting to suspect that the anti wbs arguments are being encouraged by ' big oil' and Tufton St. Hence the easy articles for lazy 'journalists' quoting high pollution in london, blaming wbs as a distraction to the real issues of cars, loe emission zones, lack of home insulation and other 'liberties'. Btw, your comments on the video are not convincing unless you know he isn't a scientist, know he is a nob, and think that being from 'up north' is relevant. If anything you are turning me more to his arguments than yours. Do you have connections to declare to big oil or the libertarian wing?2 points
-
Haha, Im guessing that like myself, you spoke to a few trade "professionals" and realized that winging it yourself may be more informed that some of the pros!2 points
-
EIS have 100m sheets at £37 + VAT so not far off what i paid in June, So you don't want to be paying anything over £50 a sheet2 points
-
In my humble opinion: For all those entering the world of improving there home: Aim to go APE It worth considering all the AIM and APE elements before making decisions. That is Airtightness, Insulation, Mechanical Ventilation with Heat Recovery OR Heat pump Ventilation, and Air Source Heat Pump, Photovoltaics and Electric Vehicle. Some of these will not work properly without the others, and some will complement others: A MVHR will not work properly without Airtightness. An Air Source Heat Pump will have to compensate for the lack of Airtightness and/or Insulation to the degree that the benefits become questionable, especially during winter, without them. An ASHP uses electricity and Photovoltaics can supply a little during winter and a lot during summer when cooling can be a problem and an ASHP can supply cooling. PV can supply a little to an Electric Vehicle during winter and plenty during summer if your vehicle is at home during sunny days. Extending a property and only doing AIM works to the extension will be no good, you have to do all the property within the thermal envelope. And thinking of running costs: a) Airtightness and Insulation should have no running costs and last (Well, loft insulation lasts over 40 years, in our experience) with the exception of UPVC units for windows and doors, but that being said it will last 30 years? b) Our MVHR unit servicing 100m2 floor sized home uses about 260kWh a year; far far less than would be used to heat incoming cold fresh air in winter, and we clean the filters twice a year. c) ASHPs are, in my opinion, still in their infancy but we are now in the second year of use here. We were very careful to follow best practice in the design and installation of our system, did a lot of bespoke tweaking, and we now have an upgraded 1970’s timber framed bungalow that uses less than 20kWh per year per m2 of floor for heating. d) PV would be a lot less attractive if there is no ASHP or EV (or battery backup) or diverter to the hot water immersion. In my humble opinion, if you have a suitable roof you should install as much a physically possible. Electricity production costs (cost per kWh) are difficult to evaluate because it depends how much is used and how much is supplied to the grid. We decided to go with the PV cost divided by 7 years, which for us works out at £1.60ish per day. Yesterday the PV produced 12kWh all of which we used. Remember, 5kW of PV panels will not produce 5kW because you would have to have: i. No shadowing of any of the panels during sunlight hours (like trees, buildings or chimneys. ii. All the solar panels face exactly the right angle in relation to the summer solstice midday sun for their position on the planet. (Perfect angle facing south and perfect slope) iii. solar panels completely clean iv. the sun is completely unobscured v. the Inverter is 100% efficient vi. all the other losses due to cables, and equipment, and so on. e) Knowing the above PV limitations professional installers often add extra panels to make up for these losses. (Our inverter allows us to add roughly 28% more panels than its kW rating) f) PV panel installations will produce about one fifth of the power in the winter compared with what is produced in the height of summer. g) The electric vehicle and charging from the PV only really works together if you can have the vehicle plugged in during the day and supply over 3kW from your PV (or a large proportion of that). This is why we went for the biggest PV that would fit on the roof. We then installed a system which only charges the when the PV is on and generating over 2kW in winter and 3kW in summer. (we have a 13amp charging system). So, if finances cause you to have to consider only a few in my humble opinion AIM first and go APE later. (But prepare the property for the APE works as much as you can). Best of Luck Marvin2 points
-
2 points
-
we didn't put PIR inside studs. our studs are filled with 140mm glass wool (Isover 32) with 80mm/100mm PIR internal to the studs. What IS a PITA is cutting that internal PIR around the roof attic trusses. no issues when insulating internally on cut roofs as it's simply a large sheet screwed through to the rafters/studs. but, if the OP is going pumped cellulose in a 140mm TF then I would suggest they consider other companies that offer twin wall 300mm thick walls fully pumped with cellulose and get rid of the petroleum based insulation. Although, if the TF company is doing the PIR install work for you then it's not such a ball ache! I'm sure I've saved a load of money doing it myself but it is so very time consuming I do kind of regret it.2 points
-
Welcome Shaun. I don't think that's right. Lots of people on BuildHub (myself included) have an insulated raft, and I believe that the only thing that's run through it (horizontally) is UFH loops. You definitely don't run plumbing or electrics through it. The other approach you've been told about is effectively the old-fashioned screed on a slab approach, but with only minimal insulation between screed and slab. I can't see any advantage to this. You don't put UFH loops near walls, so with even a moderate amount of care, you shouldn't hit them with anything. In a well-insulated house, you don't need a fast reaction time from underfloor heating. When it's cold, you want to use the slab as a heat reservoir. If you use a low-and-slow source like and ASHP, then you don't want/need fast reaction. If you use a higher temperature source like a gas boiler, a slower response will help smooth out peaks and troughs. Personally, I think you're adding considerably cost and complexity by having a further layer of insulation and a separate screed, without really gaining much benefit.2 points
-
Some sort of block and beam floor. Can't tell if the infill between the T beams are standard blocks, large blocks or insualtion blocks. Looking at the very bottom RHS suggests an insulated type infill, e.g. https://www.cemex.co.uk/suspended-floor-systems Further reading here https://www.bdonline.co.uk/cpd/cpd-4-2017-insulated-suspended-floor-systems/5087724.article Pretty standard stuff these days, tho not that widespread. Normally overlaid with more insualtion and then a thin screed. Inherently "bouncy" over longer spans, natural quality of reinforced concrete beams. Bugger all you can do about the bounciness if that's what is annoying you. Unless the builder has exceeded the manufacturers / engineers span tables or inadequate intermediate supports. You'd need a camera survey done via the floor void to confirm. As it's a recent build, the design drawings and calculations etc should be available via building control.1 point
-
PM me where you are roughly. I might know someone off the MIG welding forum.1 point
-
Did my PV myself with just a spark to connect up the sparky bits and test / signit off. If you're doing a new build then an in-roof system is a no brainer as you save a fortune on slates and no issues with planning compared to ground mount. You get pretty good payments in the south these days for self generation so I'd fill your roof, as much as your ESB connection will allow you to. Start the convo now with them, will take months.1 point
-
1 point
-
I'll take some. It gives me a great excuse to go for a walk and stare at people's properties.1 point
-
1 point
-
@Shaun McD you shouldn't have any issues with Kudos, I'd say they're on a par with MBC based on the quotes, spec, and meetings I had back before we began. / we ended up going with Leadon's tho as being the best price vs spec option...1 point
-
Why is PassivHaus levels excessive? 150mm PIR doesn't even meet the proposed 2025 Building Regs. With a 2,600 ft² footprint, I'd be concentrating my insulation on the floor and roof.1 point
-
yeah. exactly. a breathable layer on the outside of the TF and the AVCL internally. thought it was pretty standard.1 point
-
My Father was a director of Shell. Some of us have been banging on about the problems of WBS for over a decade now. When I did my BSc, we had a module on biomass. I was one of three to highlight the pollution aspect. The other two were from Africa and knew first hand the problems that it causes. It is easier to follow the science than a political agenda, and more correct. I would be quite happy to swap wind turbines and solar farms for biomass. But there is a problem with that. If we took all the biomass on the planet, including what is in the oceans, we have about 400 days worth of energy at current usage. It really is not a viable option on so many levels. Really is time that the developed world did something about it. If I said nothing ever again, about WBS, they are still going to be outlawed in the not too distant future, but before then, it will be considered unacceptable to use them. So the warnings are there, fit one by all means, but no complaining when they have thier usage limited by legislation.1 point
-
I don't have a distinct VCL membrane in my build-up. I have foil-backed plasterboard that restricts moisture entering the wall/roof. Unlike your air-tightness layer, the VCL can have small gaps and breaks, as long as each layer towards the exterior has a higher vapour permeability than the one before. Just for good measure, I also don't have a distinct air tightness membrane. My frame is externally sheathed with T&G Egger DHF board that has a non-curing butyl adhesive in all joints, which is the air-tight layer.1 point
-
and the very knowledgeable folk on here that give great advice or even another avenue of investigation. once you start on here you will soon realise the number of rabbit holes that you can fall in to trying to find information. but hopefully you come back out of the hole in a more informed position!1 point
-
1 point
-
1 point
-
I believe the advice is not to plant a vegetable patch or fruit trees over, but as long as you are not consuming anything grown over the area you can plant what you like, incl. lawn. Assuming you haven't got a very high water table, where a drainage field would not be appropriate, it won't be boggy. I don't believe you could install in such a way that it would be OK to drive over.1 point
-
You still test room by room, but with the whole house pressurised. You're not looking to replicate Michael Jackson's "oxygen tent of eternity", so going full bore in each room may be a bit OTT? All I need now is somebody cleverer than me to tell me how to gauge the ACH from the DIY rig. The winner gets a half-eaten Greggs steak bake. Only been in the van for 2 days, still good.1 point
-
I was thinking on a room by room approach too, would reduce the volume of air to move through the fan, and would think it be more manageable sizes for a novice tester? My better half reminds me my time is not worth much so...1 point
-
1 point
-
Use a builders flexi-tub bucket? Wedge that into the hole and tape, then push the fan into the bucket until snug. Cut the bottom completely flush / out of the bucket, of course!1 point
-
search on here, someone else was doing this with a car radiator fan jobby from a scrapyard.1 point
-
yes of course but how does that relate to floor / insulation height, if its a ground bearing slab inside the foundation walls its independent of the foundation walls. I can see the relevance if using block and beam but not for ground bearing.1 point
-
you want the inner and external courses to be exactly the same height for wall ties if nothing else!1 point
-
Just checked my invoice 24/06/2022 88 sheets 100mm Celotex £3366 + VAT £573. so total £39391 point
-
could be a tray there moving the DPC higher........ with regard to the channel, id want it tight as possible between the tiles so there isnt a need for grout as it wont stay there. The plastic swells in the sun and cracks it as its soo thin.1 point
-
June last year, a company in Norfolk https://easterninsulationsupplies.co.uk/1 point
-
our basement has 200mm EPS under the slab as an insulated slab. at the time I wanted to run the UFH pipes within the slab but it didn't work out that way and so we eventually put down 25mm PIR on top of the slab (mostly to aid in the stapling down of the UFH pipes rather than anything else) and then UFH pipes followed by a 50mm cemfloor liquid screed. I don't see a problem doing it this way except for the extra cost.1 point
-
I started our heating journey similar to you, lots of zones, but after 18 months have ended with a single zone. Your buffer size is defined by the smallest zone that can be in use, and the amount of water you need in the available system to give a suitable heat pump run time and allow defrosting. So the smaller the zone and bigger the heat pump, the bigger the buffer. Other thing to consider is flow temperature, to get best CoP it needs to be as low as possible, so coupled with UFH both require long run times, so forme the zones did nothing just got in the way of a simple system.1 point
-
But that's not possible with IWI, is it (dew point outside)? It will always be internally, somewhere, and the least worst location would be within the insulation, assuming it's foil faced, taped etc, so internal air can't reach it?1 point
-
Generally the less zones the better, this is to stop the ASHP cycling. To reduce cycling a buffer/volumizer or low loss header (they all do near enough the same thing) is used. The ASHP will have a minimum volume that can be heated, part of the reason that zoning is not idea. Dew point is a function of relative humidity and temperature. Think of it as cold, single glazed, windows, in a stuffy house. They are cooling the air, but due to the relatively large temperature difference, go below the dew point temperature. If you are using the slab as a cooling element, then the temperature difference does not need to be so large, the increased area takes care of it. There is a hand wavy, never below XX°C, but that is purely guessing. A proper and thorough heat loss assessment needs to be done as this will take other elements such as MVHR, external temperature, target RH and the heating/cooling per m2 into account.1 point
-
1 point
-
1 point
-
With my planning fight (which I won 🤣) we had bats in the area and after the bungalow burnt down the ecologist suggested bat boxes in the trees till the build was finished. I didn’t want bat boxes in the house and suggested that as I was building the workshop/garage first I incorporate bat boxes in the ridge of that and the ecologist said they were sufficient for the whole site, however the planners still said they wanted them in the house as well. Well I argued in my appeal that the ecologist was more qualified than the planner to decide such matters, so I won on that point as well 👍1 point
-
There's no "may" about it, and it would be the best money spent. Ola @seano, welcome to the madhouse If I can be blunt, no, you do not want to. It doesn't sound like you'd have room to ad the minimum 140mm of phenolic rigid insulation which would be the very minimum insulation I'd ever install for a client if they wanted UFH. If the SE says this can all be dug out, then please do so! You'll need to examine the foundations first and strategize how this could be done ( by leaving sufficient undisturbed ground around footings / pads etc, but it would be well worth the effort. Plus, you'd end up with a new, flat, even slab to have underfoot. FYI, the UFH pipes would then reside in the concrete and all the insulation would go under the, then, constructional slab.1 point
-
Yep - hex nipple / socket same difference just nothing to grab on that with a spanner but will work fine. If you can’t get a 3/4 male drain cock then get a 1/2 one and just get a 3/3 to 1/2 reducer1 point
-
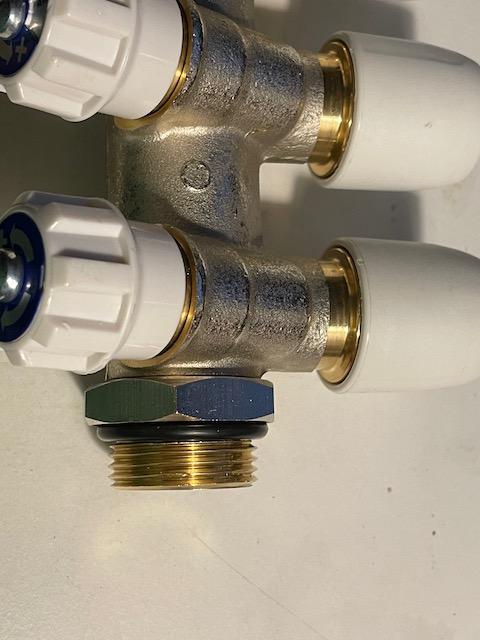
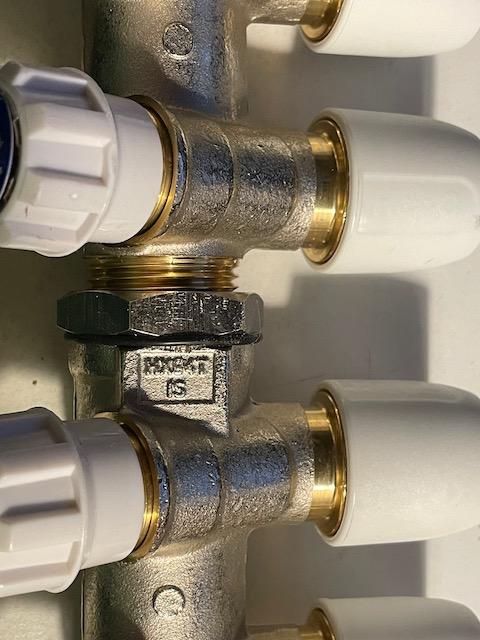
got another noddy question. putting together my hep2o brass manifolds and I notice that there's a rubber grommet on the male end. does that mean I don't need any form of tape and do I tighten until the rubber grommet is fully squished? my first attempt I've used some loctite 55 on the male thread and screwed in to the female end and then tightened the nut which has squished the rubber ring as shown below here's the rubber ring at the end of the one I attached waiting for the next manifold to go on.1 point
-
1 point
-
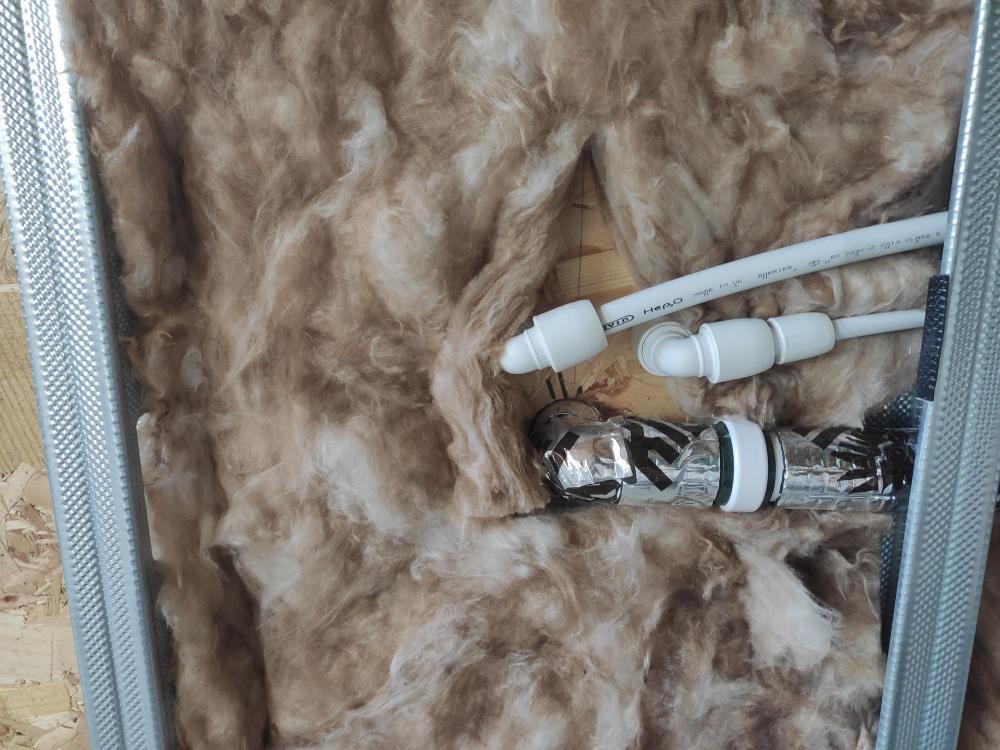
Placing the pipes between two layers of 25mm APR. I wanted 15mm pipe sticking out of the wall to attach the basin flexis to so used a 15mm/10mm reducer and 15mm elbow. Where I'm going to box out near the floor I was able to send the 10mm pipe through at a slight angle to allow it to fit in the 70mm cavity. I pushed the Hep2O fittings together really hard, but the In4Sure rumble was very hard to feel except for the reducer. I couldn't rotate the last elbows either as they had to be assembled once already through the wall. I don't want to disassemble it and reassemble in a different order that allows turning. How important is that?1 point
-
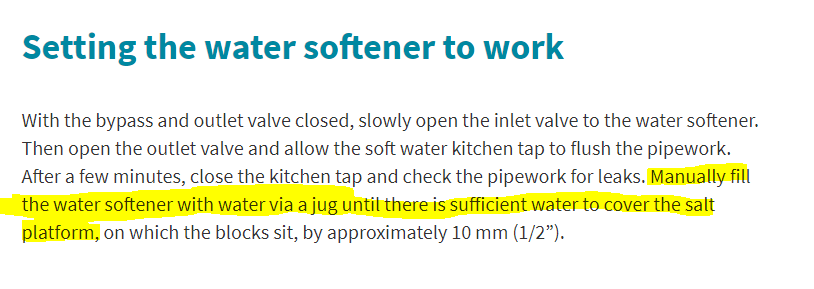
Okay, following on from my post here (where I purchased a used Harvey twin tank softener) I have now gotten round to finally installing the unit: I don't have any user/install instructions apart from what I have found on the web. So having installed all pipework, turned off bypass valve and opened up the valve to the unit, I can hear twin tanks fill, but then starts squirting out of the fill valve ( the pipe thing mounted on the side, between the two tanks.). Is that supposed to happen? I'm guessing not as instructions state the water softener compartment should be filled manually with a jug of water: So I imagine if the above instructions are correct, then my unit should not be filling up! Video attached to show the water running out of fill valve below. I turned the water off in case this isn't supposed to happen! 20201109_154119.mp4 Is it perhaps in regeneration mode (see first pic)? Or perhaps an o-ring needs replacing in the fill valve? Or as it's a float valve it will stop filling when the desired water level is reached? Thanks in advance for any tips!1 point
-
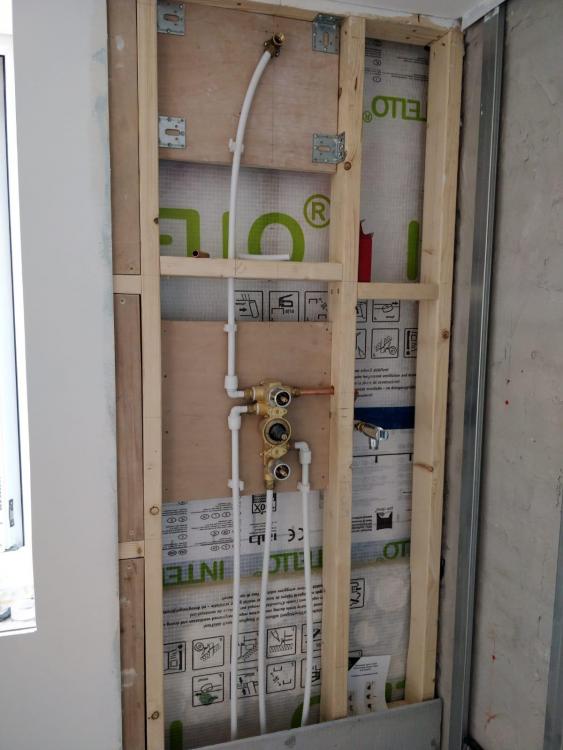
Yes I can access it from the front by pulling off the panel. Previously I've plaster boarded the framework up. But you could easily cut through it to fix it. Just how inaccessible will yours be? I would guess that the worst case would be tiles on cement board in front of it. I always try to make things accessible, but in reality its not always possible. Second best option would be to be able to see it via a endoscope/camera. I've yet to have a leak from a hep2o, I would be more worried about having a brass connector in there. This is my shower setup. consisting of several compression fittings on to hep2o pipe and 4no. 3/4" to 1/2" bsp reducers. This is 100% inaccessible or visible. I do wonder a lot of the time as to whether its dripping away behind there or something. All I can do it try to take comfort in the fact that I left it pressurised for 24h without a sign of leaking. But at the end of the day, if it does leak, I have the ability to fix it and finally get rid of the bloody P-Bath.1 point
-
Is it only the WC onto that vertical rise? Your allowed around 1300mm before you really need air admittance so you should be fine with a direct termination to the WC. Any standard WC will have 7" centre for the outlet and enough room for that flexible bent pan connector. Personally I'd recommend a solid unit as that flexible one will end up under floor level where it changes from flexible to solid. Making that off to the finished floor will be a challenge for you that I'd rather dodge . Mark the WC centre and bring the soil up according to the WC of choice. Of course, that means buying it now but I wouldn't suggest any other way if it were me doing the job. The rigid bent pan connectors can be cut to length and will allow you to bring the 110mm pipe up through the floor slightly and then you can seal up with ease against rigid pipe instead of fragile flexible pipe. That make sense?1 point


.jpg.c21f3ac78c9b7efd90cbdcb312744dc5.thumb.jpg.7adcad4c0e384f5ecd7d56b0618df6e5.jpg)


