Leaderboard


Popular Content
Showing content with the highest reputation on 03/10/22 in all areas
-
Cellulose can be blown in on site. Better than plastic insulation too IMO.2 points
-
2 points
-
I've put polished concrete floors into a lot of projects. Huge polished floor to the atrium of a Performance Theatre, Several Universities Projects, lots of houses and even my own house. Many of the projects won prestigious RIAI Awards. I've also seen polished concrete floors by others go horribly wrong. Some put in the wrong reinforcement, some use the wrong mix, etc. I wrote the below for someone at work but is relevant for you too. If you've any questions on any parts let me know. Concrete The concrete is 35N10 which is reinforced with plastic fibres at 900g per cubic meter of concrete. As a polished floor goes in later it might need to also be a pump mix as you’ll have doors, windows and roof on. Whoever you get to do your floor will help input on this. Placing of concrete It’s not just the grinding and polishing of the concrete that’s important. The placing and power floating of the concrete is critical. Unlike a regular concrete floor, a floor poured which will be polished has to be super flat and power floated for hours after. Very few people in Ireland can do this correctly. Formwork for steps and other edges has to be perfect and have 45 degree edges to allow trowels into the corners. Little things like dragging a vibrator, shovel or rake through a floor when placing the concrete the wrong way will result in the drag mark being visible when the floor is polished. These things may not be visible to the untrained eye but are flaws in a lot of cheap or poorly installed polished floors that can never be fixed. Spend time and money on this part as a poorly poured floor can’t be fixed by grinding and could make the errors even more visible. Crack Joint These have to be around every 6 meters max and are a saw cut made the day after in the concrete about 30-50mm deep which is later filled with a flexible mastic. Don’t have any areas too small as they could rock like paving slabs. Don’t have them long and thin either as they can crack in the middle like a seesaw. If you have a few pipes in the floor, eg heating pipes coming from a manifold it’s a good idea to have a joint here. It’s also good to line these up with any columns you have. Hide them under lightweight internal stud walls and have them at all doors, etc. You have to think about underfloor heating pipes and ensure they’ve sufficient coverage before cutting the crack joints. That’s where the thickness of the floor is important. Expansion joint Not to be confused with a crack joint these are flexible day pour joints and are also positioned above expansion joints in the structural floor below. As a result they’re slightly wider than a crack joint but again are filled with flexible mastic. For a house you probably won’t have one however we had one on a larger project I worked on a major project. Coloured Stone This is optional. I’ve done it in some projects but not my own floor. Make sure you get the contractors to quote for 4-5 samples if you plan on using coloured stone as you don’t want to get a claim later. You can pick whatever stone you want and also the size of stone. Usually they’re sprinkled over the top during powerfloating. They can be mixed through at the concrete plant but you’ll use a lot more coloured stone and it will be a lot more expensive. Glass which can also be used has to be lead glass as ordinary glass can shatter when grinded. Slip Resistance The slip resistance of polished concrete usually complies with all regulations. Like any regular floor it can be more slippery when wet. Additional grinding and polishing doesn’t necessarily impact the slip resistance of the floor so thinking a shiny polished floor will be a lot more slippery isn’t right. As it’s a domestic situation I wouldn’t worry about this however if it’s a public building you’ll need to include in your specification a slip resistance pendlium test to be carried out at the end of the project to prove the floor is safe. This is a useful document to have in the safety file should someone slip in the future. If you want to get it carried out for peace of mind you can. Sealing Make sure you ask in your quotes for sealing the floor after it’s grinded and polished as the concrete is porous and will absorb tea/coffee spills and heavy traffic if not sealed. The sealing will make the floor a tiny bit darker but in my opinion is worth it. Protection Include in the spec for the contractor to protect the floor after its poured for the duration of the works. We had two layers of cardboard over the floor for three months. It dired out more in areas where it wasn’t protected and at joints but once exposed the variation disappeared. Just ensure it’s well protected everywhere particularly if its not yet sealed as any paint spills etc, will destroy it. Grinding and polishing You can very lightly grind the floor and then polish it as normal if you don’t want to expose aggerate or alternatively grind it to expose the aggerate and then polish it. Grinding a floor is time consuming and therefore expensive so include for grinding the floor to expose a lot of aggerate and for a lot of polishing. You can then later decide with samples not to grind as much or go for a reduced polish. If you don’t specify the amount of grinding required they’ll assume a very light grinding with no aggerate revealed. The floor will be grinded in stages starting at 10 grit working through 15 grit, 25 grit, 50 grit, 100 grit, 200 grit, etc. 800 grit is matt finish and 1500 grit would be a medium shine with 3000 grit a high shine. If you want lots of stone aggerate exposed they’ll spend longer at the 10 and 15 grit before moving up. Reinforcement We used a plastic fibres reinforcement. You can get thin ones and heavier ones but the heavier ones can appear if you look closely in the finish. It’s 900g per meter cubed that use used which is standard. Don’t use steel fibres and don’t use steel mesh. I researched a lot of failed concrete floors and one major issue with steel mesh is when they cut the crack joints they don’t cut through the steel mesh so the floor can’t crack at the crack joints. The joints are still reinforced and therefore crack elsewhere. Perimeter You’ll need flexible insulation 12-15mm thick around all perimeters and at columns, service popups and penetrations, etc. Don’t use rigid insulation as this won’t allow the slab to move and therefore risk cracking. Another issue is with stone walls which are very uneven require thicker flexible insulation. If you intend to dryline do this after the floor is poured and you’ll hide the perimeter insulation easily. Thickness Our floor is 100mm thick and that’s the optimum. Don’t go below 75mm as below this is too thin and you’ll risk cracking. If the floor changes thickness anywhere you’ll need additional crack joints. For example if you’ve steps, ramps or around all recessed matwells as you have a change in thickness in the concrete. Services All electrical trunking and mechanical services should be cut out of the insulation below the concrete floor. If a 50x150mm electrical trunking was placed on top of the insulation the concrete would crack over the trunking. Where we had several pipes close to each other in the floor we had to include a steel plate to rest over to ensure the concrete remained 100mm think and didn’t flow down between the pipes increasing the depth but also preventing the slab from moving. Underfloor heating This works great with polished concrete floors due to the thermal mass of the floor and the slow release of heat. It’s important to have the floor well insulated so put in as much insulation as you can afford otherwise you’ll be paying to heat the ground under the building. Another key point is to ensure the underfloor heating pipes are firmly clipped down to the insulation as any pipes which become loose or if the plastic staples become loose they can be exposed or damaged in the polishing of the floor. Also you’ll be cutting into the slab for the crack joint and if the pipes rise a bit you risk cutting them.1 point
-
Standard method is bonded glass or slide markers - photos are taken or measurements and then the crack sizes recoded over time. Quite a lot of work to do there - rebuild of the wall etc along with confirmation of any drainage issues which could require new drains or soakaways.1 point
-
You’ll also need building control approval and they may not like gallows so worth finding out beforehand. Good advice here https://www.labc.co.uk/news/how-to-get-it-right-removing-chimney-right-way-video-showing-wrong-way It seems a bit steep to me to be honest, that’s not exactly a big job and if it’s patching the plaster and the ceiling I would say £3k at most, with £200 for the waste collection.1 point
-
In that location I would look at a splash back designed for kitchens one piece, or in your case 3 pieces, no grout to get dirty. And you can probably fit it yourself with a tube of pu adhesive and a tube of silicon.1 point
-
1 point
-
Rockwool, Knauf and plenty others do something similar to frametherm. Look at insulation hub, they tend to have good prices and normally free delivery. Found what ever centres you have it all needs cutting.1 point
-
There is quite a lot of controversy about claimed u values for multi foil type products but my main concern for this would be flammability. Even though flame should not penetrate your plasterboard I would not want to deal with an outbreak of fire in a concealed void. Get a sample and hold a match under it.1 point
-
Yes, most kit labourers in a factory/shed will be of a lower experience/skill then an experienced joiner. The kit providers are looking to make the maximum profit from you! Some providers will incorporate equipment which injects insulation into the panels (this can't be replicated on site) but PIR/glasswool cut well (by you!) on site, will provide a very good result.1 point
-
Yes, unless you are feeling confident. I would rather put more money my joiner's way rather than the pay for the overheads, showrooms etc for a kit provider.1 point
-
I assume your heat pump is loaded with a heat curve based on outside temperature. So basically it should work the same as weather compensation system on a gas boiler. Where the heating is designed to run 24/7. Each room has a TRV, to manage the room temp, but not call for heat. The system will operate a setback of a couple degrees during night, so the pump has an easy time of it during the next morning. Running this way your circulation temp can be reduced. Don't try to operate as normal gas boiler, with lots of on/off, as you will wasting large amounts of energy. Long, low and slow should be the way to think of it. Run for long periods, to allow a slow build up in temperature at a low circulation temp. Then let the system maintain it. Set the hall thermostat higher and let the room stat/trvs manage the room temps.1 point
-
OK, my understanding of the real risk of climate change is not just it getting a bit warmer than usual each summer and learning to live with it, it's irreversible (on a human timescale) change to the environment. These changes are also known as tipping points. e.g. if the Gulf Stream current slows down due to an increase in fresh water from melting polar ice then UK will shift from a stable moderate climate to North America style summers and winters (we're on the same latitude). Our national infrastructure is not built to deal with that so it will be economically challenging and disruptive to adapt. If extreme weather events, such as storms and flooding, move from being once in 100 years to once a decade or more then that will be extremely disruptive. If ocean levels continue to rise due to warming seas and melting polar ice then costal regions globally will be challenged. Lots more examples out there but they're all connected to a steady rise in temperature and other human activity and each one has the potential to be very disruptive to our way of life. And history shows that when life becomes untenable in parts of the world, people move en-masse to where it is better. Calling it a 'brigade' is a cute way to discredit a global scientific consensus and I doubt the world would have convened for the latest COP (even though the output was somewhat disappointing) were it just some fringe notion. You may well not like the medicine being prescribed and you may well be right that other nations need to do more but just ignoring it1 point
-
If this install is on a garage roof and theres access to the underside of the roof mount micro inverters or optimisers in the garage roof where they are accessible anytime. Get the roofer to notch the tiles and feed the cables through a slit in the felt next to a rafter1 point
-
My rule was top height below a horizontal line from the ridge (planning regulations I think) and 300mm from the roof sides. Loads: well, we just had 120 mile an hour winds a couple of weeks ago and there all still there, and now I wait for the one foot of snow test....1 point
-
We installed an ASHP in October. Previously had gas with Drayton Wiser TRVs in all rooms .. all quite complicated. A heat pump , to maximise CoP and reduce starts (consume more power) should be run long and low. Mine is now 24x7 with setback of 2C at 10pm. So far we seem to be using less energy heating the whole house vs switching rooms on and off using the TRVs. The other thing to note is that by using the heat pumps thermostats it's able to work out the optimal flow temperate .. external binary controls won't do this. Also, unless it's changed, Drayton said not to use wiser with heat pumps as it causes too many starts. Evohome is expensive .. I'm sceptical that you'd ever get your money back vs using heat pump's controls1 point
-
I used Isover 32 batts and worked perfectly for 600mm centre studs. ironically though in our house there aren't too many studs that are 600mm centres due to panel joins, extra studs for support of windows etc. so we ended up having to cut a lot of it anyway. https://insulation-uk.com/products/isover-timber-frame-batt-32 this is the stuff we used. got it from Jewsons.1 point
-
Welcome. Gorgeous house. Time for leg-work. And Net-work: with the emphasis on work. Look at your local authority planning website. Look for planning applications which are close physically and close in character to your prospective house. There's a huge mine of information there: look especially within the sub-group mentioned above at those applications which were refused. Note why they were refused. And do the same for those houses in the same subgroup who were accepted - and why. Talk to estate agents and listen between the lines. Good luck, Ian1 point
-
yeah. our installer threw a wobbly when I complained that he caused a 6 week delay by sitting on questions from Warema (which put me completely out with regards to the timber cladding, scaffolding, drainage and other follow on trades, not to mention the financial impact that a 6 week delay can have on a build) and he basically told me to find another installer. so I've found another installer locally to me who offers many external blinds and I'm in the process of getting quotes for them. once I've made a decision on who to go with and got them installed I will update here.1 point
-
If you want them stacked that works well and looks good. We are having a side by side layout.
 1 point
 -
Of course it's would be a bad idea to crimp a live cable carrying over 48V DC. That's obviously why you don't do it. Nor do you have to given that panels are terminated in gendered MC4 connectors. Any extension cables can be prepared disconnected and finally connected in the safe manner that they are designed to be. This is all very obvious so I guess you're just emphasising the potential dangers if insufficient supervision or understanding is employed. IMO Your observation in no way means DIY installation should not be undertaken.1 point
-
Looking good!1 point
-
There's a massive range of TF providers local to us, and while some of them certainly aim at the developer market, none of them do design and kit supply quite the way many of the Scottish firms do. Every job is a one-off and there are plenty of choices within each company as to what insulation and airtightness levels you might choose to aim for.1 point
-
Most timber frame factory builds are used by developers who can squeeze the TF companies, also they have many repeated designs on large sites vastly reducing the cost of crane hire, design and erection teams. Mass produces TFs are sadly almost all built to just tick the Bregs minimums. Us self builders are somewhat more forward thinking. The gap really narrows once you go to one off designs and builds. Having scouted a couple of bog standard TF factory builds the general care and attention to continuity of insulation and airtightness+windtightness membranes was poor. If you wanted to spec to a passive level stick building was competitive with the few excellent TF companies that provide this . This cost difference will no doubt change when passive goes mainstream no doubt.1 point
-
Yes I messed up. I have revised figures. Searched for 80kWh but given price for 10kWh storage1 point
-
I'm not a fan of edging, I prefer just to wipe a fillet of grout around the periphery.1 point
-
Try a different approach. Just apply to BT for a "new line" and see what they say. Our cables are underground and that did not stop OR doing a survey for free, so I ask again "what has changed over the last few years?"1 point
-
Planning is everything. You can do really nice things with metro tiles, but you need to choose your layout style, spacer size and setting point very carefully. Grout colour also essential.1 point
-
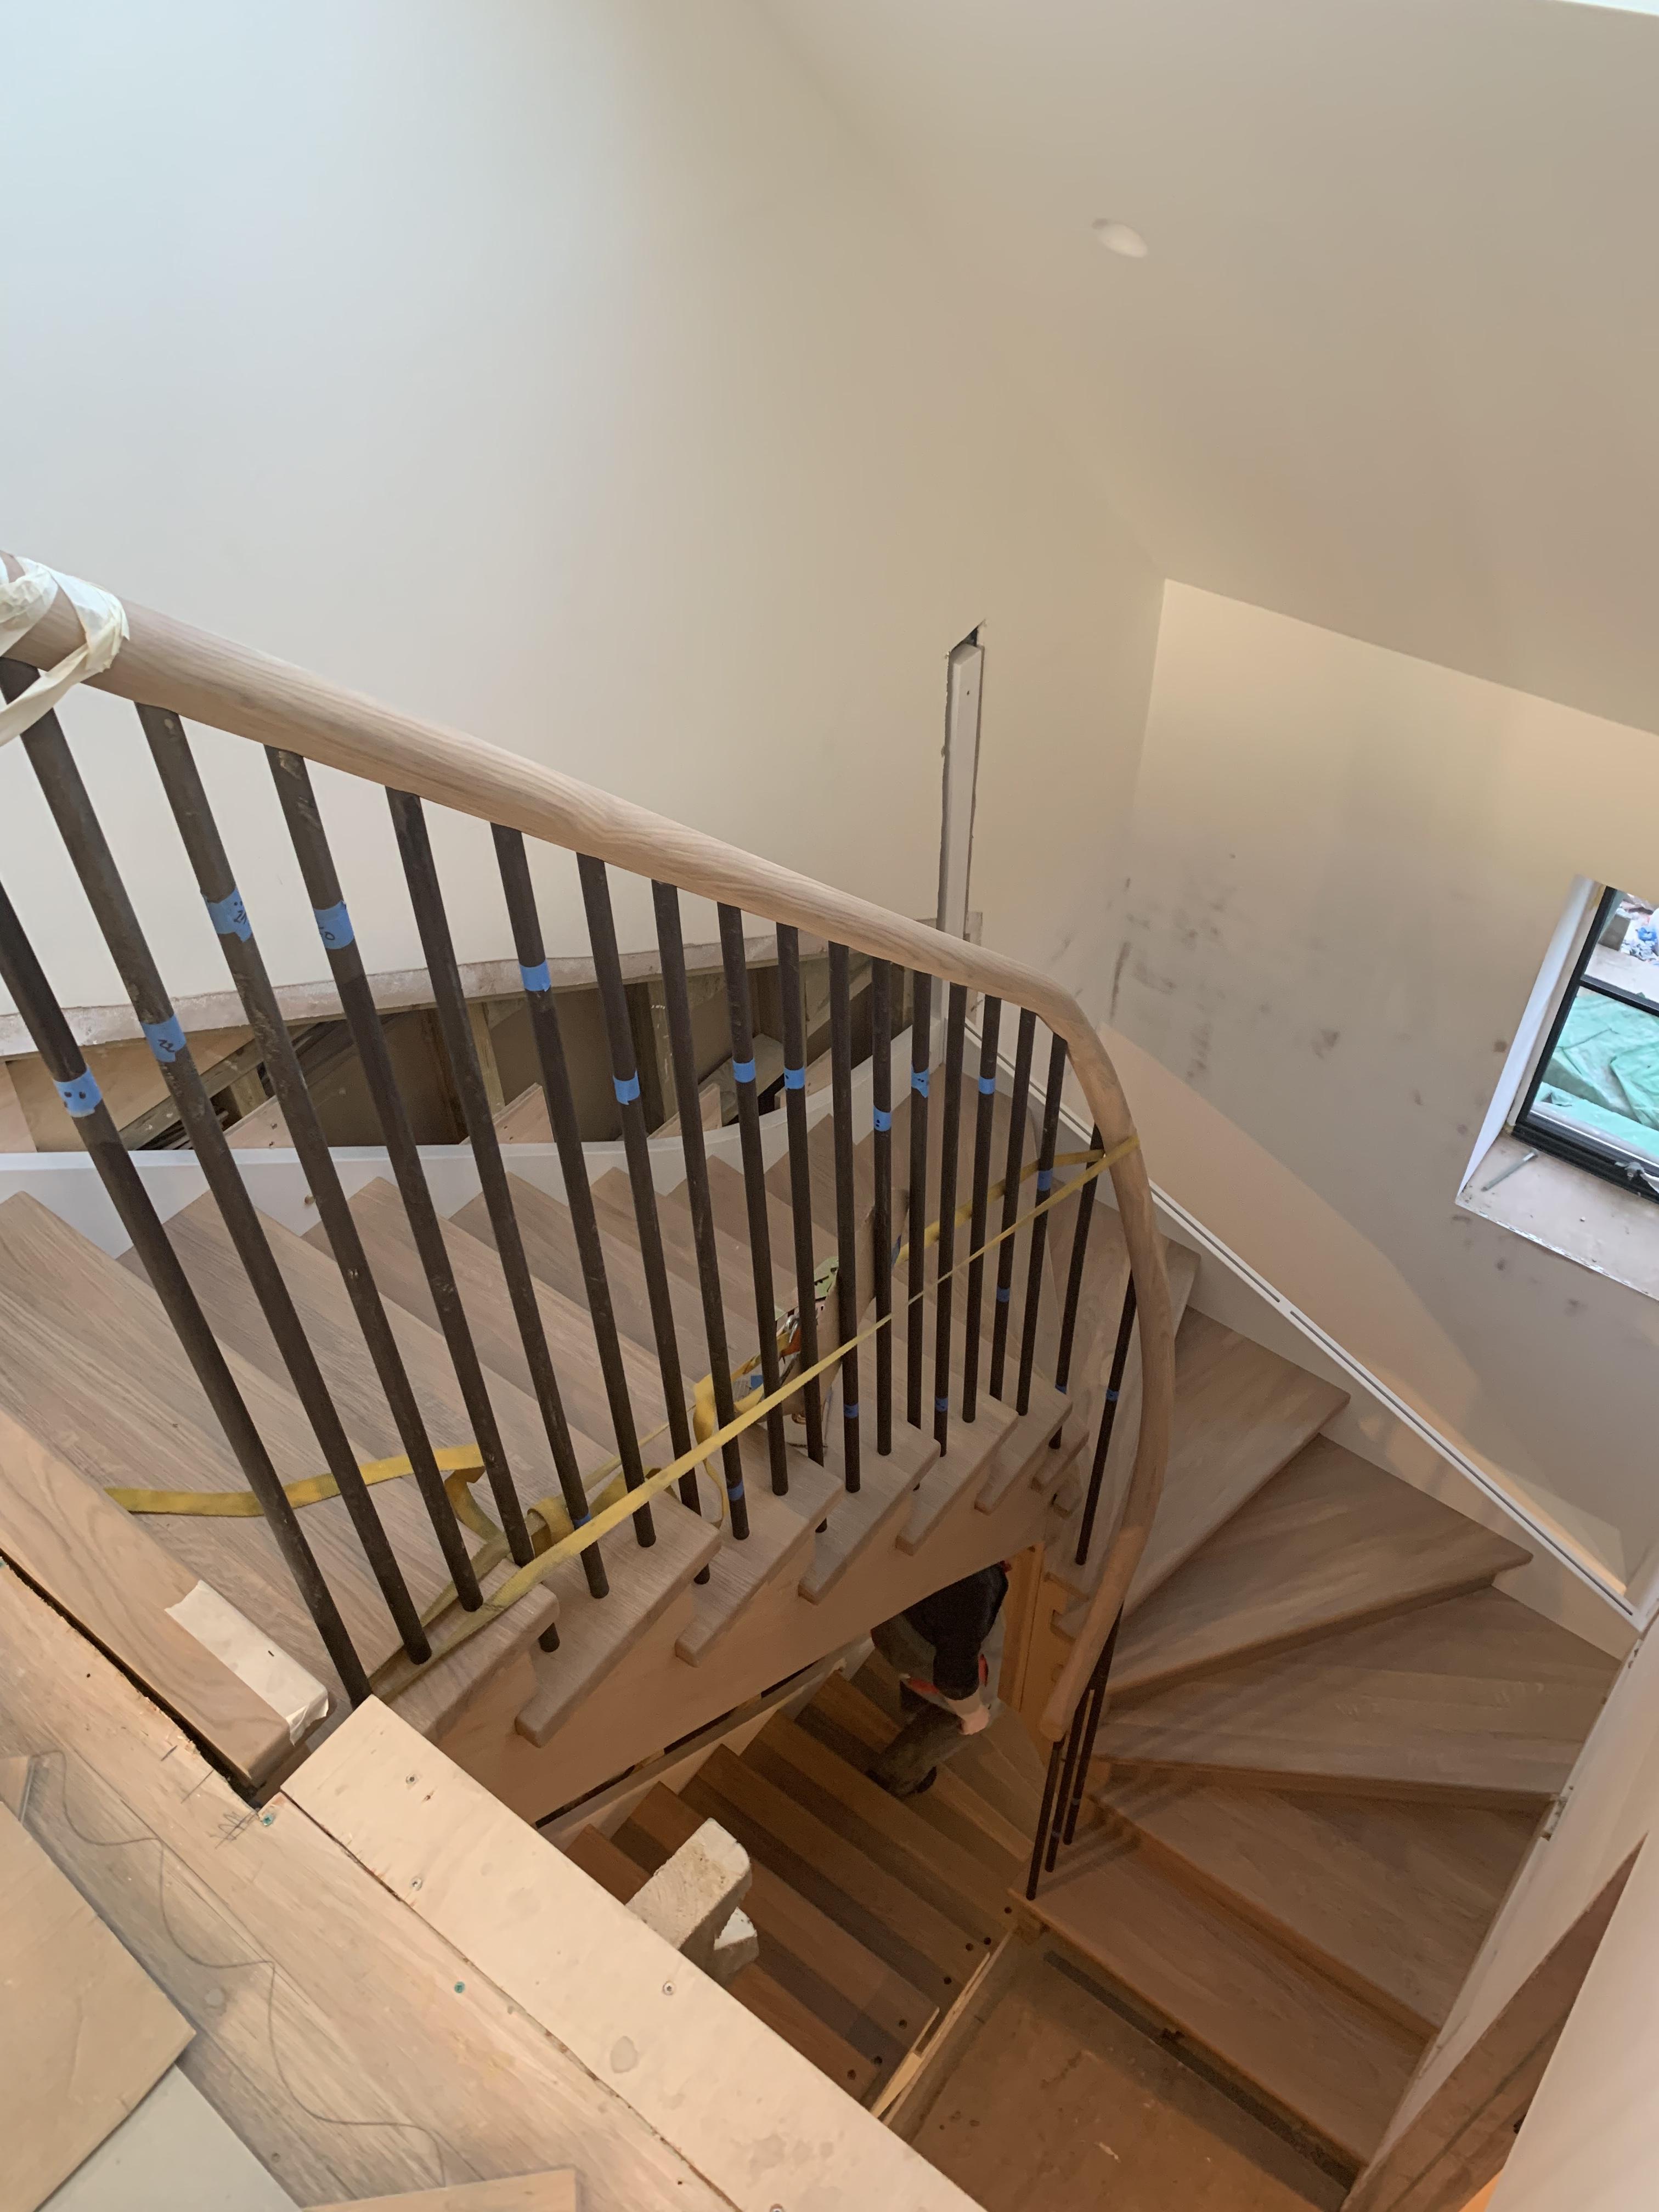
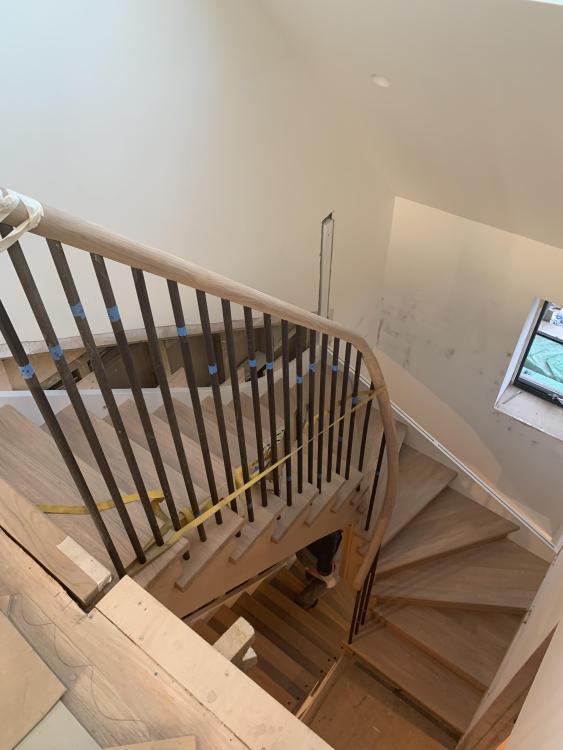
Not sure it’s very japandi, but this is our staircase, going in recently. Not wore finished yet, but you get the idea… Oak handrail, steel spindles coated in a slightly brown shade of black.
 1 point
 -
Waterproof tile adhesive Mapei grout, tile spray protector all from either screwfix or toolstation should be fine. Silicone between countertop and bottom of tile. Would not use premixed grout myself. Make sure you apply the spray as soon as the grout is completely dry and before being made dirty. Leave to dry. Second coat. This should protect grout from staining. Yes I know spray not cheap...1 point
-
Why buy Russian, even if you are allow. Put your money in the UK with Scottish Larch.1 point
-
I think what struck me about the Viridian solution is that no trays seem to be required at all. Aluminium flashings around the panels keep the water out using the panels themselves. The Easy Roof looks very similar to the GSE. Clearly all are tried and tested solutions. All three brands seem to have some sort of Velux compatibility. I've also been wondering in terms of a self install (for a new build) which kit would be simplest to be installed by a roofing contractor (or DIY) - thus potentially avoiding having to get an MCS approved contractor to build half the roof alongside a roofing contractor. I can't see a clear winner really.1 point
-
Build them into the masonry would be my preference. Even if only the top chord went in with a bearer under or over the bottom chord. Horrid if it starts to work loose.1 point
-
I have GSE in roof and 30 panels fitted. None of the plastic tray is exposed, it being covered by the panel and aluminium trims and flashings. As an alternative there’s the following https://en.irfts.com/easy-roof-evolution/1 point
-
Long time lurker here picking an admittedly random point to join in! But I've been looking intently at the in-roof solutions for some time. I'd love to hear from someone who's used the Viridian in-roof solution as it seems to avoid the plastic trays GSE use. Whilst I'm sure the trays are made from a good quality plastic and designed to resist UV etc, eventually they must be susceptible to going brittle and cracking. The Viridian solution seems not to need a tray - but not seen and detailed photos of an install.1 point
-
@DragsterDriver I have started down the double-sided tape route and it is working well so far! but I haven't tried to yank it off the wall yet (and I'm not going to!) but it is staying put for now and I'm sure it'll be ok until I can get the battens up to hold it all in place securely.

 1 point
 -
The issue here is that initially this company was promoting a product that didn't work in the way claimed at all. Caused a stir and a lot of suspicion, as they had claimed that the multifoil element could provide far greater levels of insulation than it can in practice, and consequently there was a fair bit of mistrust (well-founded, given the chequered history of the introduction of multifoil products, with their ludicrous and easily disproven claims). They changed the product completely, so that now it works almost entirely as a conventional insulation material, the foil layers do very little, other than, possibly, reducing air movement a little bit. There's no long wavelength IR to be worth being bothered about inside the fabric of the structure, so the foil is now really only there to differentiate this product from competitors. It's performs at about the same level as most other fluffy-type blanket insulation materials, and they are quoting a sensible value for λ of 0.033 W/m, pretty typical of a fibre-type insulation (rock wool is around 0.032 W/m.K, wood fibre is around 0.037 W/m.K, PIR foam is around 0.022 W/m.K) . It's no better, or worse, than most other fluffy type insulation, but that's wholly down to the honeycomb fluffy stuff, not the foil layers. It does have the advantage all fluffy blanket type insulation has of being relatively easy to fit well between frames, and an additional advantage in that it is as clean and comfortable to use as wood fibre (so much nicer than rock wool). The downside is that it has a pretty short decrement delay when compared to wood fibre, or even rock wool.1 point
-
Put clear perspex sheets in front of the railings, seen it done before.0 points
-
And you have Geberit AquaClean toilets (from memory) so you don't need toilet paper .... bet you've got the warm air bum-drier version 🙂0 points
-
Leave unconnected until night time. Hence my neighbours thinking Santa was early last year.0 points
-
Not an MCS installation? That's crammed in tighter than Brintey's postman!!0 points
-
What are you frying up, whole sides of pig?0 points
-
Think I'm going to change my name to Slayerofdreams.0 points