Leaderboard
Popular Content
Showing content with the highest reputation on 01/08/19 in all areas
-
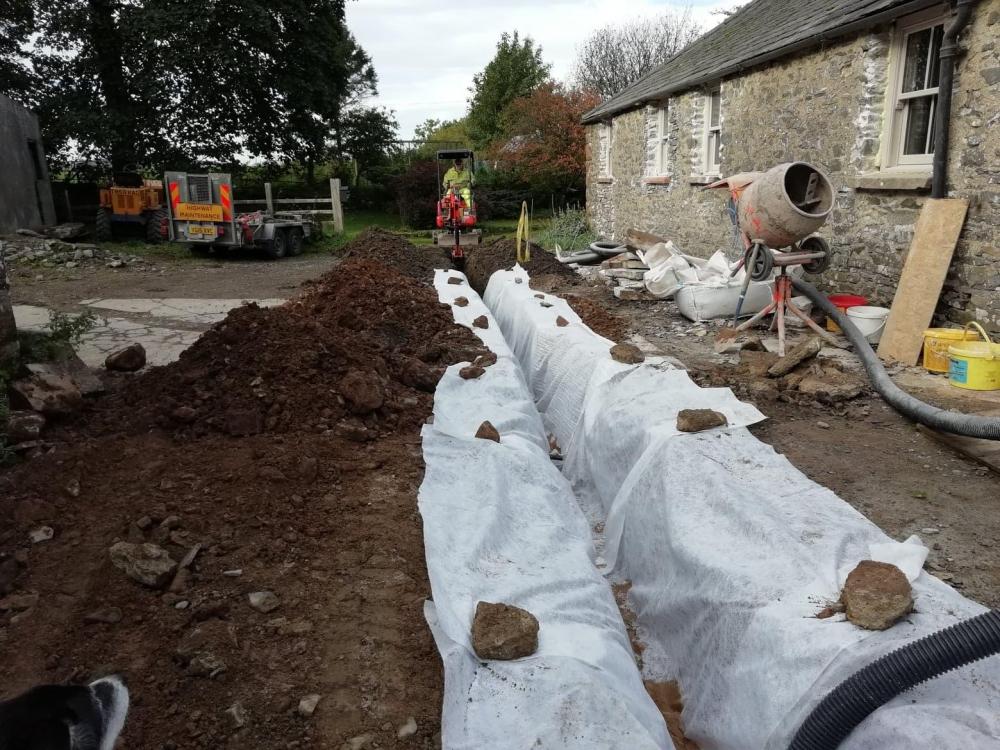
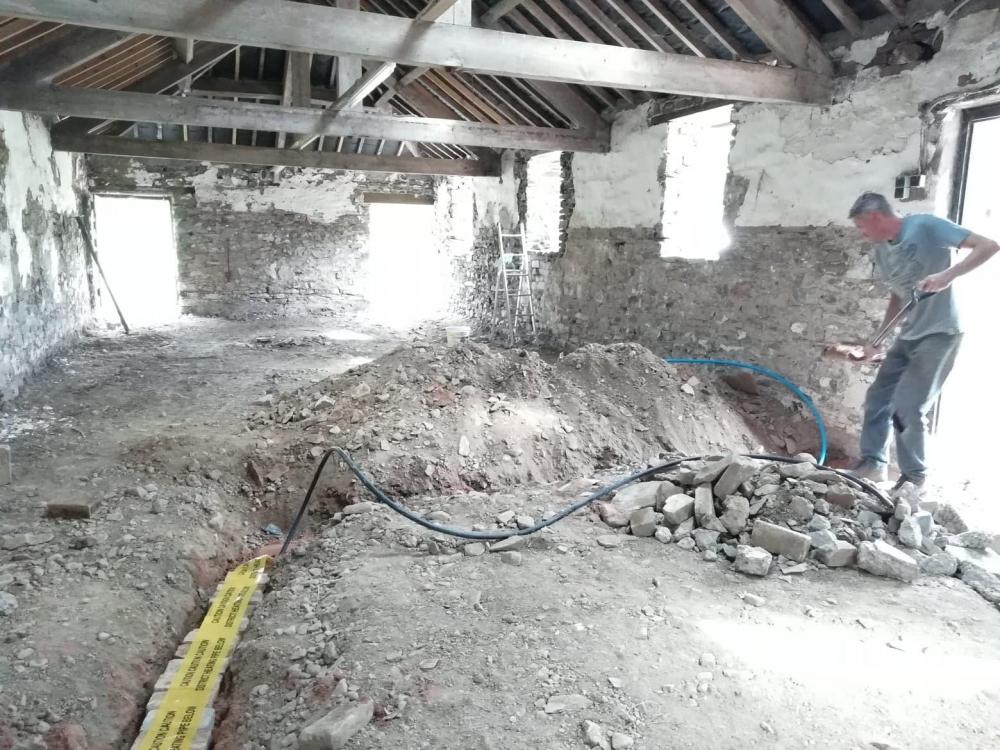
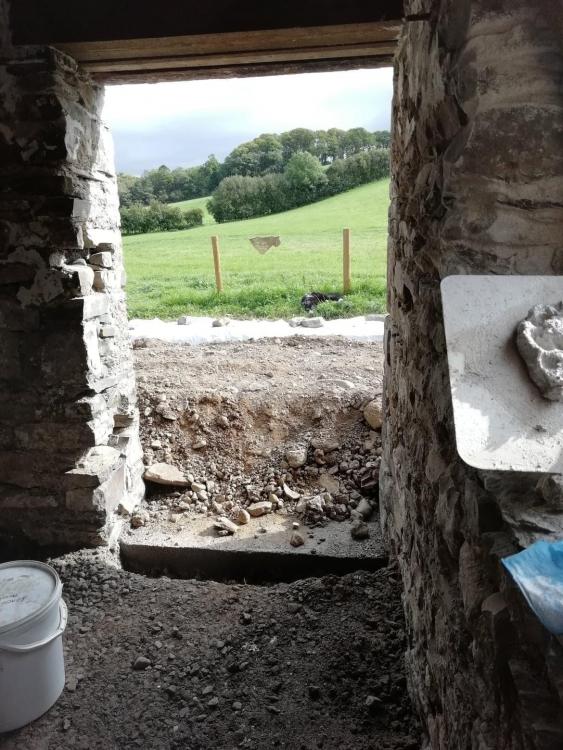
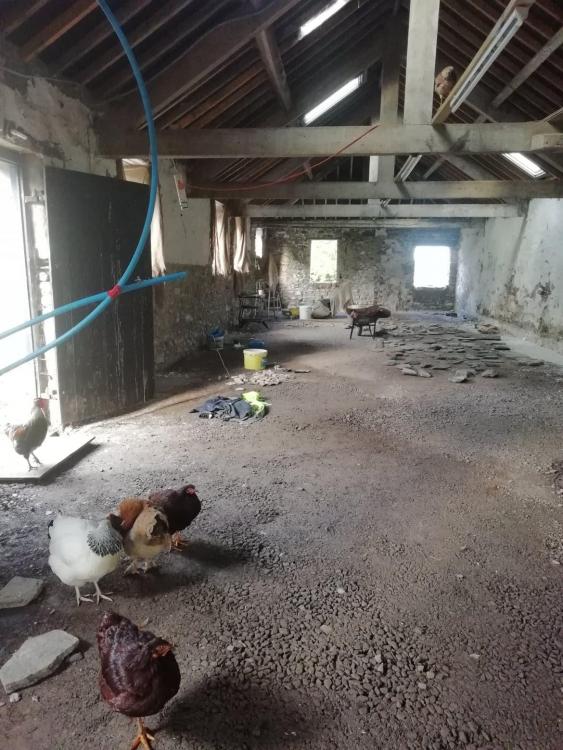
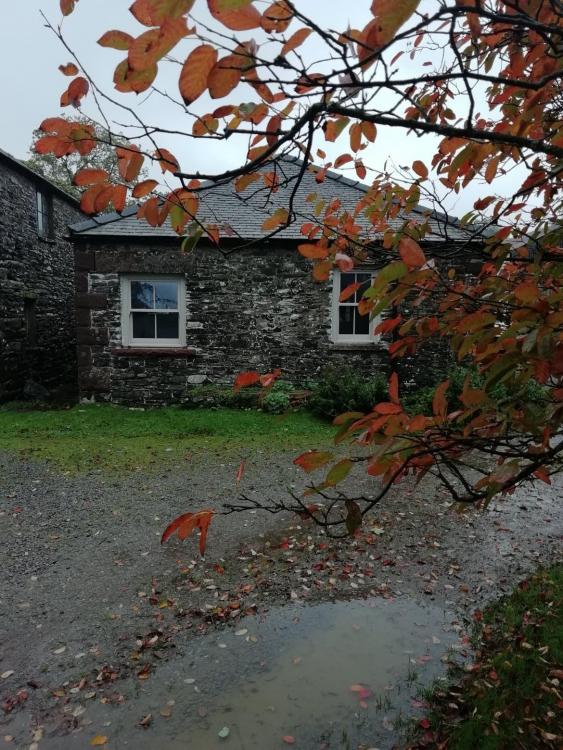
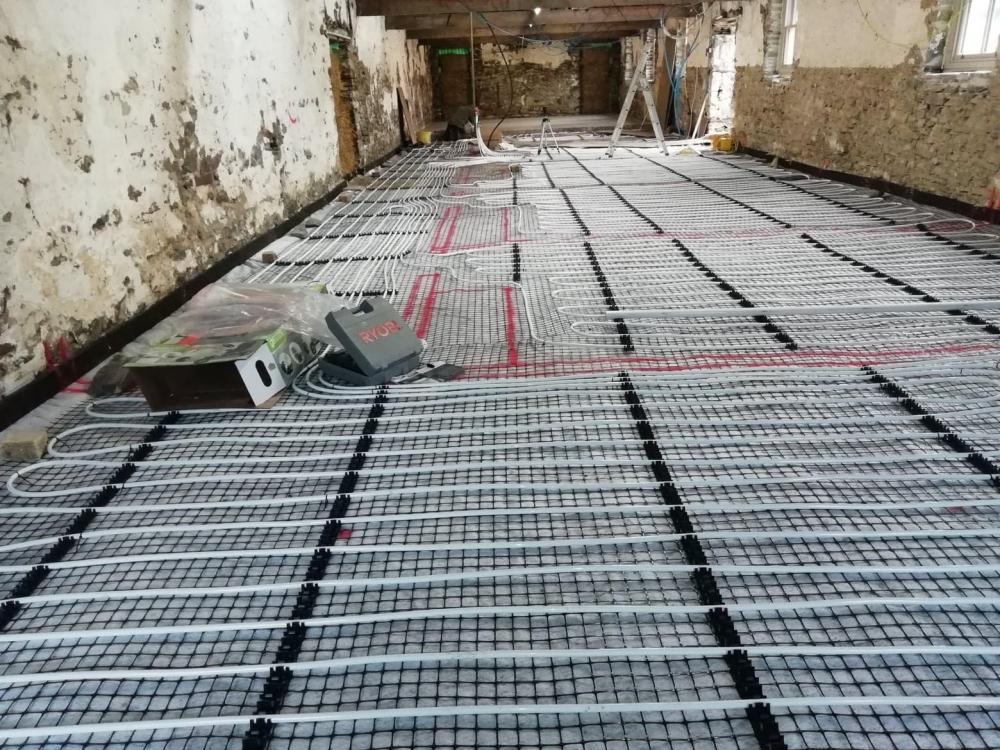
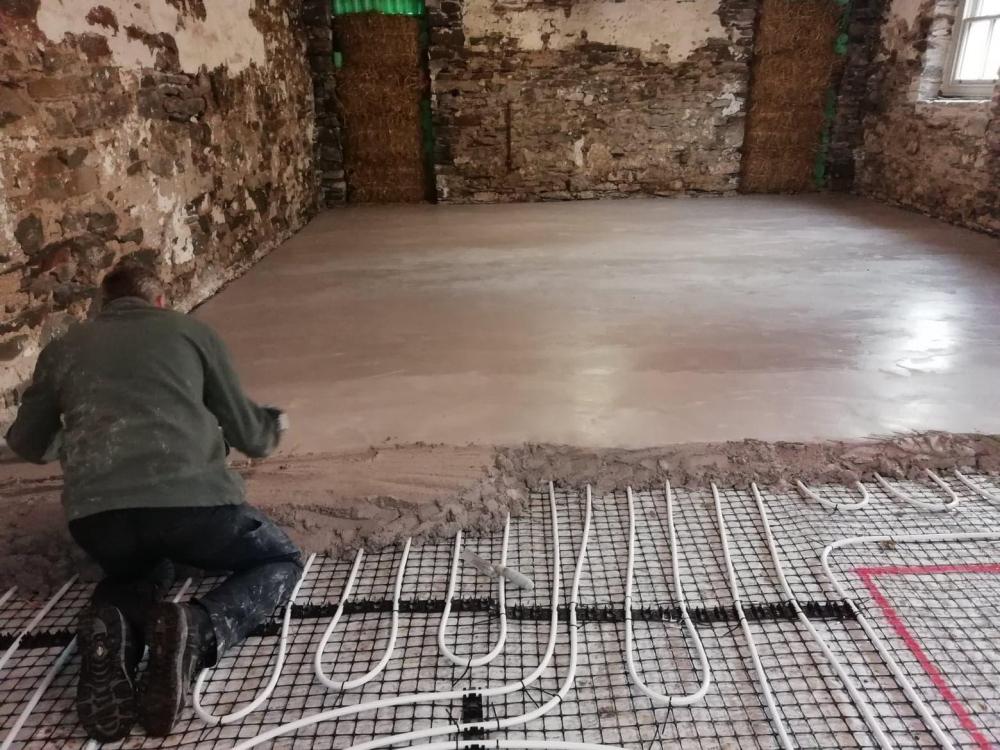
Greetings, Just checking in with a bit of an update. Our four walls and a roof has moved on a bit. We are doing the work ourselves, used only one tradesman (to construct stone wall) and with small two kids to raise, as well as building and various 'interesting' events such as having to replace the roof on our temporary accommodation, I haven't been on here as often as I would have liked. We have: cleared the internal space of animal stalls, rooms and concrete render embedded our water and electricity supply pipes levelled the earth inside the building, put down Geocell foamed glass insulation enveloped in a terram, put in UFH system and lime screeded on top. Lime pointed our window reveals and installed wood framed windows raised the door lintel heights to allow for floor level coming up dug lots of trenches to put in land drain, civil drainage and oil feed pipe scrubbed the roof down ready to spray with woodworm treatment. millions of all the in-between stuff that uses so much time but doesn't make the headlines We did the lime screed ourselves and it has gone fine, it was a big job but we are pleased with the result as no problems with it despite finishing at half an hour to November and lime being temperature sensitive - we were running a risk with that - but the winter has been kind enough. So much has gone on there isn't any point going into technical detail on it all in this post, but I am happy to discuss any aspects anyone might find interesting/relevant to their own project4 points
-
We make a start on 15th October with the diggers arriving on 16th October. By the 17th October, state of play is as per the picture below. The gabion wall on the right of the plot was put in by the vendor as part of the infrastructure works. The trench on the left is for a gabion wall that we are putting in on the other boundary. As there is quite a slope from back to front, we are putting another gabion wall across the plot to act as a retaining wall. All OK so far, but there is a surprising amount of muck that came out of the trench for the gabion wall which will need to be taken off-site. On the plus side, the plot had already been stripped of topsoil and as we are using a passivhaus foundation there was not too much extra muck on top of this. The builder we are using has been involved since the early stages of the project. We didn't go to competitive tender but worked with the Architect to look for someone with experience of the build method we are using who we felt would be able to build to our budget. We are living around 3 hours drive from the site and made a decision out of necessity to continue working in our day jobs throughout the build, however we are purchasing all of the materials ourselves or via our own accounts which we expect will make the build more cost effective. This arrangement works to my strengths as whilst my practical building skills aren't great, I should be OK tracking costs and getting good prices on the materials. Original plan was to get the gabion cages in place and fill them as time allowed, but the Passivhaus foundation could not be delivered for the requested date of 24th October, so once the drainage is complete, filling the gabion cages becomes the main task to keep the team onsite busy. By 26th October, the majority of the drainage and gabion walls are complete The following week is spent finishing of the gabion walls, landscaping, groundwork and preparing the grit base for the Passivhaus foundation. There is however a further delay on the Passivhaus foundation, so a decision is made to push on with the garage to keep everyone on site busy. At the end of the week (2nd November), the slab for the garage is laid The garage progresses quickly the following week and the Passivhaus foundation arrives on 8th November. There are some small dimensional inaccuracies with the Passivhaus foundation base that need to be corrected, but I am thankful this is spotted before the concrete pour when it is relatively easy to fix. It is however another delay and distraction we could have done without. On the bright side however, there have been no nasty surprises with the groundwork / drainage. Work continues on the garage w/c 12th November with prep for the house slab starting at the end of the week. DPM and steelwork for the house slab go in on the 19th and 20th and following a review of the weather forecasts, we go for the 23rd November for the concrete pour. The concrete and concrete pump are ordered again, the rain holds off, temperature is ok and the pour goes to plan. Garage has also now been boarded.2 points
-
Anyone any experience of this ? Such as : http://www.lighting.philips.co.uk/prof/indoor-luminaires/downlights/luxspace-poe I think could be very popular!2 points
-
2 points
-
Yes! I had a bundle of joss sticks sat in a drawer and used them to track down smaller leaks. SWMBO was not impressed with the smell of the house when she got home and thought I'd been having a crafty toke while she was out...2 points
-
Here are my thoughts using those check points mentioned in another thread. Does the plan clearly convey an objective? Yes. How well does the plan achieve that objective? Pretty good. Would I enjoy a short holiday let in the property? Strong yes with its walking distance to central Cambridge but mostly it is a refreshing alternative to most British domestic house design. Would I want to own or build this property? Strong yes. I think the market would financially reward the builder, it provides a non car based lifestyle in a global ivy league university city. The design provides something different in a city where buyers should be receptive to innovation. As a buyer of the property I would start discounting from the asking price to fix the elements of the internal design that do not work for me. Specific comments: Like others I had a bad reaction to the sky light arrangements. The sky lights look like adhoc retro fits implemented to fix a design error, the net result is a roofline that resembles a maintenance depot shed. Suggest fewer larger non square roof lights. Having said that I do appreciate that black and white technical drawings tend to over emphasize detail and in real life these skylights might visually melt way. I would want to rework the landscaping to create a late afternoon patio outside the main bedroom to catch the late afternoon sun though I appreciate your current focus might be internal privacy from the road. The snug simply does not work and it would take some particularly creative internal decor to improve this. I cannot think why I would head for the snug when leaving the kitchen because the living room is the same number of steps away with much more window area. If you wish to retain the snug you could adopt some ideas about creating a cosy space by looking at traditional rural spanish houses that have a hunker down for the winter inner living room. I would swap the utility room and bathroom around and have the bathroom door facing down the bedroom corridor. The occupants of bedroom-2 should find the bathroom closer and this will also improve the coupling of utility room and kitchen. Keep the kitchen/living partition wall. The design is already open plan enough and that wall helps specialize the spaces. Finally and a biggie. I don't like the 1960's aspect ratio of the principal windows. I would subdivide them with pillars though I fear this would cause havoc with you carefully crafted solar gain calculations.2 points
-
Janet and I want an energy efficient house, but what does that mean in practice? The whole concept is still largely rejected by the UK building industry. In our initial research, we either found books like the House Builders Bible which are good but superficial introductions on the concepts but without serious detail or at the other extreme academic papers on micro details. There is precious little in between, and to be honest we have found far more gems of knowledge in this site. All my experience and intuition concerns living in a traditionally built house. An energy-efficient house is just a different beast entirely, so I discarded my intuition and put my trust in the physics, maths and engineering. Likewise, we only considered the views and recommendations of those who have actually lived in this type of house. One of the first things that I did was to build up my own version of Jeremy Harris's Heat Loss Calculator.xls (which he first developed on this GBF topic). I plugged in the numbers for our own house design, but in reality there are only a few parameters derived directly from the house geometry that drive this calculation (my numbers are in brackets): The internal footprint of the slab (71m²) The internal surface area of the external walls, less windows (179m²) The internal surface area of the roof, less roof windows (93m²) The area of windows (23m²) The total volume of the internal living spaces (419 m³). Each of these is multiplied by a factor derived from the design to give a heat loss per °C: a U value in the case of the first four. The last is more complex in that I had to build up a composite heat-loss based on the rate of air exchange, its unit mass and specific heat, and importantly the recovery efficiency of the MVHR. For a typical winter external temperature of 4°c and an internal 21°c, this gives a delta of 17°c for fabric heat losses. The slab delta is somewhat different in that the ground temperature under slab is far more constant – say 10°c at the centre of the slab and maybe 6°c at the edges in the winter raising to 15°c in the summer. Plugging in our current design values (from our frame supplier, MBC) gives the following heat loses for a typical January day: Slab: 97 W (9%) – 71 m² x 0.105 W/m²/K x 13° Walls: 364 W (32%) – 179 m² x 0.120 W/m²/K x 17° Roof: 171 W (15%) – 93 m² x 0.105 W/m²/K x 17° Windows: 313 W (28%) – 23 m² x 0.800 W/m²/K x 17° Air change: 180 W (16%) – 419 m³ x 0.025 W/m³/K x 17° That's 1.1 kW in total, or as I sometimes say to friends, the whole house could be heated by a single 1-bar fire. Clearly this heat loss varies according to season, so if I plug in an overall temperature profile for my location, I then get the following daily heat losses in kWhr : The house is reasonably balanced as a system: no single component dominates the heat losses. However, this wouldn't be the case if we dropped the heat recovery element of the MVHR, for example, as this would increase the air change heat losses by roughly 5x, becoming the majority of total heat loss. This is why the inclusion of MVHR is such an important component of energy-efficient design. If we look at the risks and sensitivities in this sort of calculation, then they broadly fall into two categories: failures in airtightness and thermal bridging at boundaries. (Googling these highlighted terms will give background explanations of what these are). All internal surfaces in a properly implemented energy-efficient house are within a few degrees of the internal temperature, which also means that there are no internal condensation surfaces. A serious consequence of thermal bridging is that surface temperatures can drop significantly at the bridges below the internal dew-point, causing surface condensation. Failures can occur with sloppy design or poor attention to detail during construction, so I believe that it is a lot more important to find a frame manufacturer / assembler who gives us confidence that these issues will be effectively addressed (as failures here could cost kilowatts of heat loss or mouldy surfaces) rather than whether the walls have a nominal U value of 0.12 or 0.14 (which varies the total heat loss by roughly 60W at most). However, this heat calculation isn't the whole story: We typically have three occupants in the house and being alive we radiate heat – roughly 300-400W between the three of us. The 23m² of windows can let in up to 1 kW/m² incident energy in direct sunlight. Our average daily electricity usage in our current house is 16 kWhr / day. We will cut this a bit in the new house, but this is a combination of lighting, DHW and running electrical equipment – fridge, washing machine and my live-in son's Gaming PC + Xbox. Apart from some of the DHW used (which literally goes down the plug hole), all of this energy eventually ends up as waste heat within the living environment, and therefore adds to the general heat budget – that's roughly 1kW plus the solar gain. This 24 kWhr/day or more means that we will often have a heat excess within the house. On the other hand clearly these temperatures are profile averages and there will be periods where the temperatures will be lower, and below zero for extended periods. However, even a doubling of the temperature deltas only give a running heat loss of approximately 2 kW. My overall conclusions are: Our overall heat budget will be in near equilibrium for large parts of the year. At most the sustain heat input requirement will be of the order of 2kW peak. We need to manage heat excess efficiently and automatically up to say 2kW. I want to expand on this last "automatically" point: in our current farmhouse with its 2ft thick walls, the house environment is sufficiently stable for a large part of the summer and autumn that we turn off all heating and leave windows ajar all day, relying on natural ventilation. We feel that warmer weather should result in periods where we can do the same in our new energy-efficient house. However, we don't want to be forced into the situation where we have to dash around the house a few times a day opening and closing curtains, blinds and windows just to keep the house at a stable temperature: in general, the house should look after itself. This imbalance (or a lot more on sunny days with the solar gain through windows) is a material issue and to put this in perspective consider: The mass of the liveable airspace in the house is some 500Kg with a heat capacity of just over 0.5 mJ/K or 0.14 kWh/K. The specific heat of the slab is less than that of air (0.75 kJ/kg K), but the mass of over 7m³ of slab concrete is significantly more (16.4 tonne) giving a heat capacity of 3.42 kWh/K and the plaster board, etc. within the walls adds perhaps another 10% to this capacity. There are various equations for the heat transfer between the slab and the air above it but a good ballpark is 10 W/m²/K – that is roughly 0.7 kW/K for the entire slab. The slab and the other fabric which sit within the thermal envelope of the house has over 20 times the heat capacity of the air inside the house. So if we were to heat the input air from the MVHR to 10°C above room temperature, this will transfer about 0.7 kWh heat into airspace of the house in one hour at 0.5 ACH – the same as running the slab at 1°C above room temperature. In extremes we can easily lift the slab temperature say 5°c to increase the heating slab effect five-fold, but at another 2x the air heating route will start to be problematic with noticeable effects on air quality and background noise if we increase the ACH to do so.. Our initial intention was to use an integrated MVHR + ASHP(Genvax), but there was always a concern that this would be inadequate to cope with extreme cold spells, so we planned to use a supplementary closed wood burner. However the problem with any stove is the minimum output (typically 2-3 kW) which is simply far too much for the living room to cope with. So we abandoned that idea: there's no point in installing a stove that you will never use in practice. This analysis plus Jeremy's reasoned argument also convinced us that an active UFH slab was the way to go, for the following reasons: It's a relatively low cost option. It addresses a saleability risk: "I want to fit a gas boiler" With a suitable ASHP it enables active cooling as well as active heating. In circulation mode it is extremely effective at distributing the heat throughout the entire slab from any hot spots caused by direct sunshine through the windows. With this reasoning the advantages of a combined ASHP+MVHR just seemed to dissolve, and we've now decided to abandon the Genvax in favour of a standard passive MVHR system. We have still to chose the ASHP, but we are looking at a low power (say ~5 kW) monoblock inverter-based design alone the lines of Jeremy's active slab approach, but more on this in later posts as I finalise details. We also need to think about the vertical temperature gradients in the house (our hallway / landing rises through all three floors into the loft space). Hence this is only part I of the thermal design.1 point
-
Concreting a drainage pipe is quite normal Exspecially if it cuts across a drive Running a mains water in a footing is ridiculous and concreting over it is pretty stupid Services should be in a designated trench and be wyap certified I think Russel sumed it up perfectly You can’t trust someone llike this1 point
-
If it helps, we had our mains water enter the house to where the utility sink would be but then realised we needed a water supply to the cylinder which was some 2 metre away in the same room. To resolve this issue, a connecting piece of blue MDPE was laid across the floor and and the finished screed poured on top. The builder, plumber and heating guy, all independent of each other were happy with the arrangement. It wasn't ducted either. Not saying it was the right thing to do but that is what we have done.1 point
-
Is the water main in any ducting or just buried? I thought the drainage pipe is fine as long as it has a joint either side for movement?1 point
-
1 point
-
@TheMitchells Thank you! It's a bit of a drive from London, but will definitely explore. @ultramods thanks, glad we were thinking along the same lines and are well into the selection process you listed! Highlight of the Christmas family getaway was a visit to a Porcelanosa showroom ? thought-provoking, indeed. Our provisional plans went up for a public forum beating earlier this week and the results were really helpful, working on amendments now! @Square Feet we are demolishing an existing bungalow we're currently living in, so the services are connected to the plot, so hopefully will not be much of a drama to disconnect and re-connect, and we're keeping services entry points almost at the exact spots as current. @recoveringacademic and @Ferdinand - believe me, we are reading it methodically (early stages), but I completely take your point! Nothing is more loathsome than newbies asking primitive questions for a 1000+'s time, can totally relate to the feelings it brings up :)) The only reason why I asked it (whilst reading everything else) was out of fear that there may be some crucial deadline I missed just because I have not yet read up to that page! Anyway, so far this is the friendliest forum I've seen in a long time, and I wholeheartedly intend to obey the rules and not irk the Masters and the Gurus :) bad for karma, they say! Everyone, thank you very much. Now back to reading....?1 point
-
Just a brief codicil written just over a year after we moved into the house - gosh, how accurate this modelling turned out to be as built. Our house is a 300mm twinwall TF on passive slab with a local natural stone skin, and it essentially performs as per this simple design calc.1 point
-
Irrelevant...they'll invent a catastrophe regardless. As a photographer i've used several GD houses that are now available as shoot locations and every owner i've spoken with has said this.1 point
-
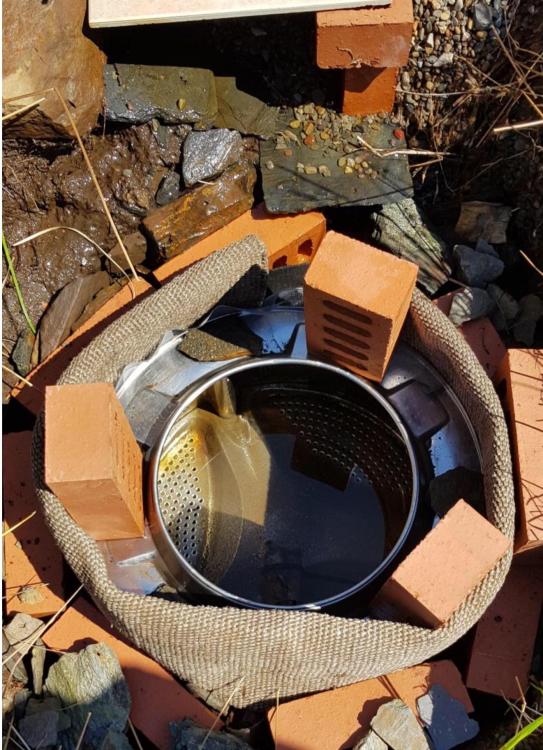
Like this? I did the same a few years back for a private water supply. Been working for 4 years without a blockage. Looks a bit messy at first1 point
-
1 point
-
Interesting. What's the betting to be eligible you still have to have it installed my an MCS registered installer?1 point
-
Don't exclude us from your market (couples with child / children) The space you have is big enough for 2 bedrooms As an ex B&B proprietor I certainly would not want to run a B&B into retirement, that is too much work so the idea of the self catering sounds a lot less work. From a trade point of view, we found AirBnB very disappointing. Booking.com gave us (and continues to give our tenants) a steady stream of guests. You could follow the model we have (unintentionally) of just letting the whole thing to someone else that wants to run it. You would not get as much income, but you would not have to do much work either. The "portable building" / no building regs route frees you from some of the accessibility and circulation space requirements so may allow better use of space. You get into a grey area as a portable building can only be single storey. Some may argue being on top of a garage, it is 2 storey. Perhaps a phone call to the duty building control officer to clarify is you can build a portable building (caravan in building regs terms) on top of a concrete garage roof and still be BR exempt.1 point
-
This is something I've been mulling over as I have land available. Assuming you have a reasonable market, and the return on investment is acceptable, I think they key question you have to ask yourself is whether you wish (now or in retirement) to be tied to having to manage and service such a business. Of the various locals I've spoken to who run their own holiday businesses, maintaining high standards is probably the most important thing, which for the most part means rolling your sleeves up and getting the scrubbing brush out. You could of course opt to get someone in to clean and do changeovers, but would they really do as good a job as you / to the standard you want. I'm not convinced (and judging from various places we've stayed in) that paying someone (unless you pay them an awful lot) to do the changeovers and cleaning will result in the high standards you aspire to. The other thing to consider is, again, in retirement, do you want to be tied to doing say two changeovers and scrub outs per week, not being able to holiday etc. A small part time job may well produce sufficient income, perhaps have more flexibility (depending on the job) and not tie up your capital.1 point
-
If you want to find the studs after the plasterboard is up, and you haven't marked the floor, then magnets work well. I have some pencils where I fitted neodymium magnets to the end, and these are great for finding plasterboard screws and a lot more accurate than using a stud finder. I also have a dozen or so left over magnets (small ones, around 6mm diameter x 6mm long, IIRC) that I use as markers. They will just stick to the wall wherever there is a plasterboard screw, so I can put several in place to show where all the screws/studs are without marking the paint finish.1 point
-
@jamiehamy, We're probably similar to your target market, in that we like to stay in reasonably nice self-catering accommodation from time to time and, as you say, there are some absolutely dire places around, especially in your neck of the woods. We booked a place not far from you a few years ago, arrived late in the evening, took one look at the place and decided to drive off and find a hotel for the night, it was that grim. Your location is good, it looks as if the accommodation and its setting might be ideal for couples, so I would think it should do well. I guess it really comes down to the return on your investment, but if viewed as a pension investment then that probably makes the sums look a bit better.1 point
-
I made up three, all of which used the same routing guide and bit: a three slot jig which I used for routing door hinges and the door liners. Door hinges are traditionally cut asymmetrically, but I decided to centre my middle hinge and offset the top and bottom hinges by the same amount -- because of this the same three slot jig could be used for left and right hung doors and left and right liners. I only had to remember to offset the top of the jig in the frame by the door head gap when cutting the frame hinge cut-outs, and I just used a 3mm spacer for this (or occasionally a 4mm if the liner head wasn't quite true). You do need to get the spacing and dimension in making the jig accurate to better than ½mm. A dado jig for cutting the heads A mortice jig for rebating the lock plates and keeps. Just google youtube router jig door hinge etc. for example how-to videos. As well as the router set, you will need a set of decent chisels and a sharpening system, and you will also find a Trend Corner Chisel pretty much essential.1 point
-
I did contact channel 4 suggesting a “Green designs” programme a few years ago as it is a popular subject among us self builders. My build would have been no good for TV as it was on budget, Windows arrived on time, and there was no Agro with the architect!1 point
-
1 point
-
Do you want children (or more children)? I’ve not seen one episode of Grand Designs where a partner doesn’t get pregnant ?1 point
-
Just to add to this (and why I am so suspicious of structural engineers), our neighbours the other side (you can see the house in the background of the picture) also had their property looked at as they had several cracks all around the property. The cracks were deemed to be superficial and the structural engineers wrote to them to that effect. They patched everything up and sold up and moved on. Two years down the road, the new neighbours started suffering from more cracks and the internal floor level changing. The original insurers then paid out for a complete rebuild as luckily the first owners had kept the letter confirming no structural issues with the house. Their cracks looked no different to the ones shown by the OP. What I am saying is, a photo cannot tell you definitively what is going on with the house. The only way to determine if there is a problem, is monitoring over time, measuring pins at various points around the house to determine if there is still movement. We could see a history of our house moving over a period of 3 years.1 point
-
No, not yet. But by accident I do have a spare electricity meter, so I might just consider connecting to log how much energy it uses. There have not been any "multiple ladies showering" incidents since I fitted it, so I am sure it has not saved the day yet.1 point






.jpg.c21f3ac78c9b7efd90cbdcb312744dc5.thumb.jpg.7adcad4c0e384f5ecd7d56b0618df6e5.jpg)
