
Leaderboard


Popular Content
Showing content with the highest reputation on 03/14/24 in all areas
-
I wouldn’t do that as it could cause you different problems. Figure out how to fix the problems you have. It’s all doable with a bit of thought, care, and the right products.3 points
-
Morning All Just introducing myself , time served joiner based in Gloucestershire. Moved onto site/private ,carpentry/Joinery after selling my joinery workshop in early 2000. Regulary drop in and read the topics so thought i would join ☺️ I will be starting my own timber frame extension in a few months when planning is through + plus a full renovation of my current house2 points
-
Plan for ZERO holes in the membrane. I did this by. 1. Running a service cavity below the membrane, making everything go in here. 2. Put plywood where ever you need to penetrate and tape the membrane to that. Use the ONE WIRE for ONE HOLE mantra. I even drilled the holes and labelled them for the electrician. 3. That left a very simple set of instructions for the electrician. Don't ever make a hole in the membrane, only in the ply. ONE WIRE per ONE HOLE If there's any accidental holes just tell me. There will be no bollockings, no scolding, no problem. Just tell me and I'll fix it.2 points
-
I think we ought to be encouraging larger tanks. They store the same amount of energy at a lower temperature (suits ASHPs) in the colder months, and allow greater usage of diverted PV power when the sun is shining.2 points
-
The heat loss test basically heats cylinder to 65 degs in a 20 deg room and maintains that temperature for 24 hrs and measures how much energy is required to keep it at 65 degs. But storing water at 45 to 50 your losses become really low. Reducing by around 50% for both cylinders. I would think the biggest difference to cylinder heat loss, is the piping install and insulation which is never mentioned or included in the heat loss figure. Store at a lower temp and don't worry about it. But some perspective the oso delta geo coil is £1800, my slim line cylinder was £1000. It would take 40 years of savings to make up the cost difference.2 points
-
Yes, I have been saying that for years on here. The joints will need to be treated when it is dry, but as they can be done in a very short space of time, and the joint can be made near enough rain proof with a PU adhesive during installation, it is not much of a problem. One advantage of sheathing a substrate is that it is done in a workshop, where there is less problems with weather, the UV in sunlight can cause the exposed surface to cure faster than what is next to the substrate, this can cause problems with under curing. Another really big advantage is that it is easy to sheath different substrates i.e. thin ply, thicker OSB, foam sheets. If you want to get really posh, different surface finishes can be incorporated i.e. non slip, arty patterns, fake tiles. I really do think that GRP is an underused material, but I think most of that comes from the industry 'doing it on the cheap' and as an afterthought/panic measure, rather than incorporating it at the design stage.2 points
-
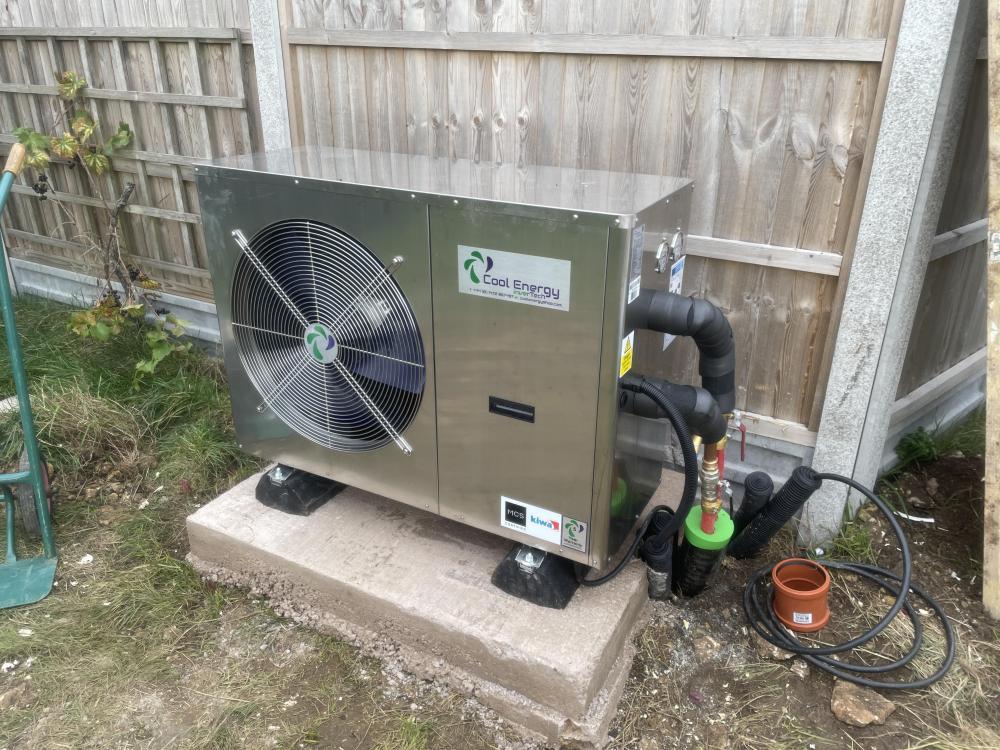
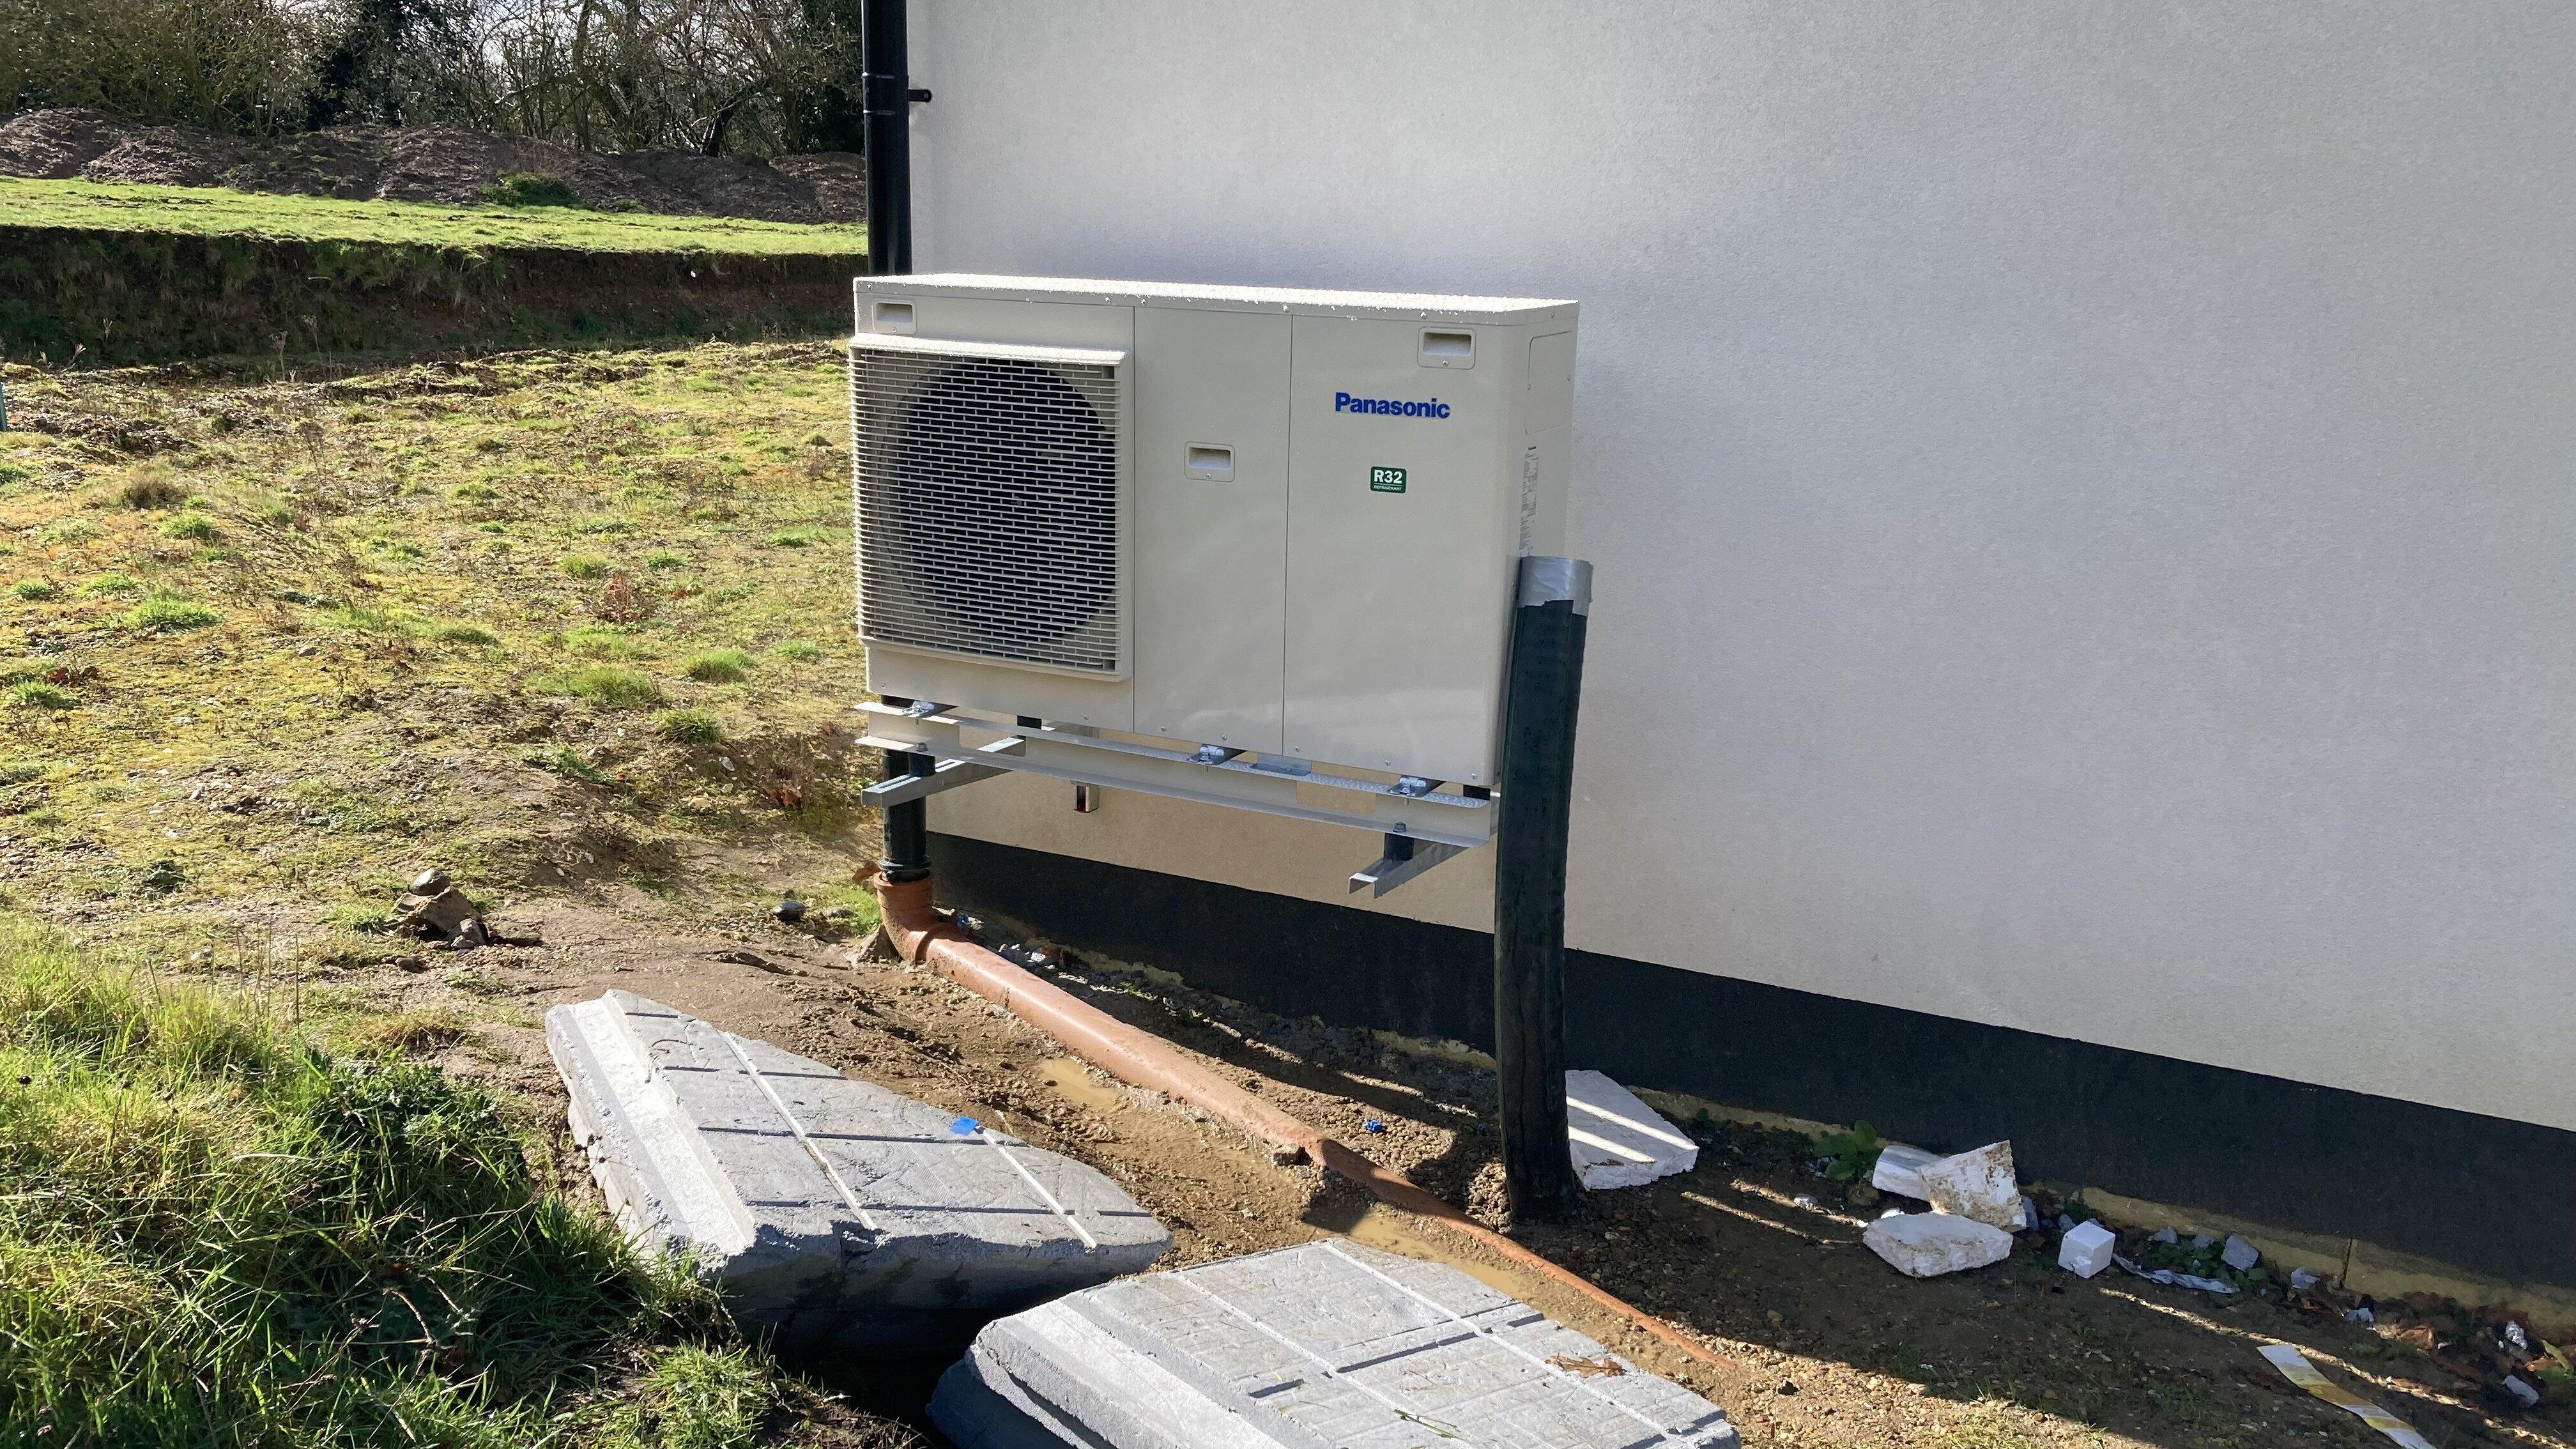
We talked about it a little in this thread. This is @HughF install. He has a good tip about using Solar piping UV resistant tape to finish off the install. But it is expensive. https://www.bes.co.uk/high-temperature-insulation-tape-x-15-m-20220/?refSrc=42745&nosto=productpage-nosto-1-c I’m just about to do this. The Primary Pro pre-made flexible pipes from Intatec are 750mm, but you can get longer ones from other suppliers. https://www.intatec.co.uk/product/heat-pump-hoses/ https://primary-pro.co.uk This thread from the Ovo forum has lots of interesting pictures and advice. https://forum.ovoenergy.com/my-smart-home-138/heat-pump-pipe-insulation-energy-efficiency-starts-with-the-pipes-9477 I’m going to use 28mm water softener flexible pipes with primary pro insulation. I need a 1” BSP connection at both ends. The water softener pipe spec limits it to 65° water temp. I will cut the underground insulated pipe and try to get the best finish I can. I will upload some pictures when I’m done. I’m currently waiting on BES to ship the insulation. Note: For any one interested, I choose to hang my ASHP from the wall because it was going to be a long time before any landscaping work would be done. I did not want The ASHP concrete plinth to dictate what we ended up doing in regards to levels and access. I got the idea from on of Urban Plumbers YouTube install videos. He was very positive about wall hanging ASHPs.
 2 points
 -
Just as an update - they accepted my PV solar invoice as additional and are paying it. Fairly straightforward process, which I'm pleased with.2 points
-
I am currently running about 30% cheaper on ASHP, compared to gas boiler. When comparing all electric usage, to gas and electric. Battery and E7 helps, but neither would help with a gas boiler.1 point
-
A common mistake by smart people is to underestimate the available depths of stupidity and incompetence. When it comes to making something as idiot proof as possible I agree with @MBT6 a well pitched roof, with good overhangs and no valleys, covered in slate or tiles is one of the hardest to really screw up.1 point
-
I'm good thank you 👍1 point
-
Ideally there would be hollow blocks and reinforcement, or some other stiffening. But it's not high and you are draining the water. It will be OK.1 point
-
Our static caravan was 28 square metres. 3 of us survived in that for 18 months. BUT the house shell was already up and wind and watertight, so plenty of dry storage, a second loo available in the house, laundry set up in the house and an office with my computer etc.1 point
-
Good afternoon and welcome1 point
-
The gravel let's the water flow to the weepholes. So it's OK. Geotextile folded back and between the gravel and topsoil presumably? And relax.1 point
-
3 pages, will only link so it opens on page 2?1 point
-
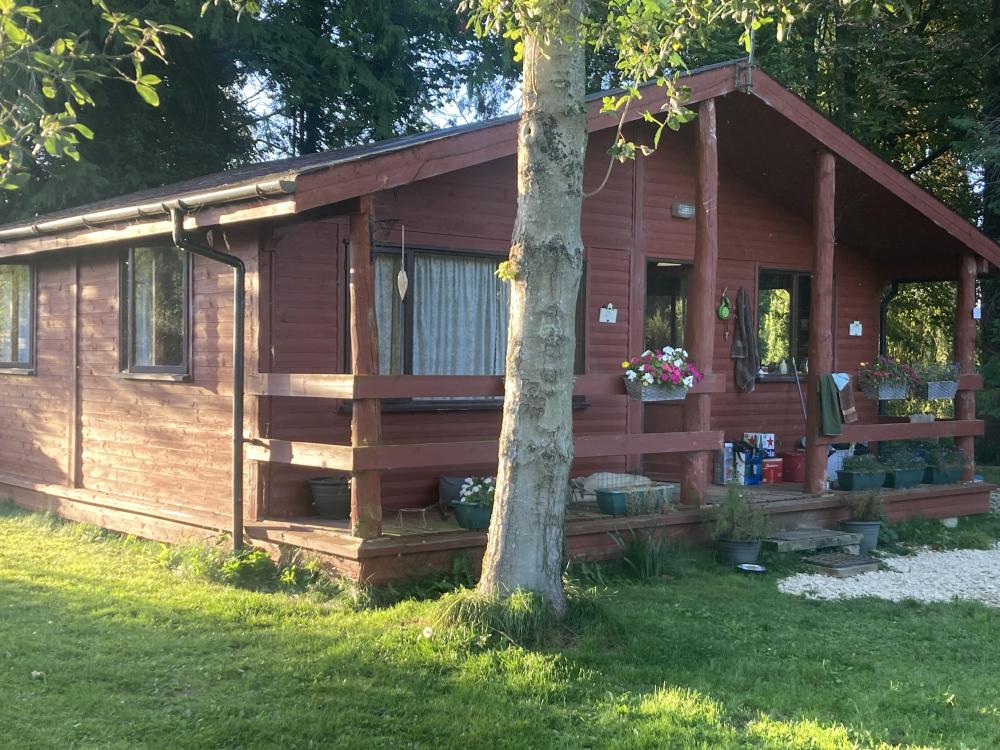
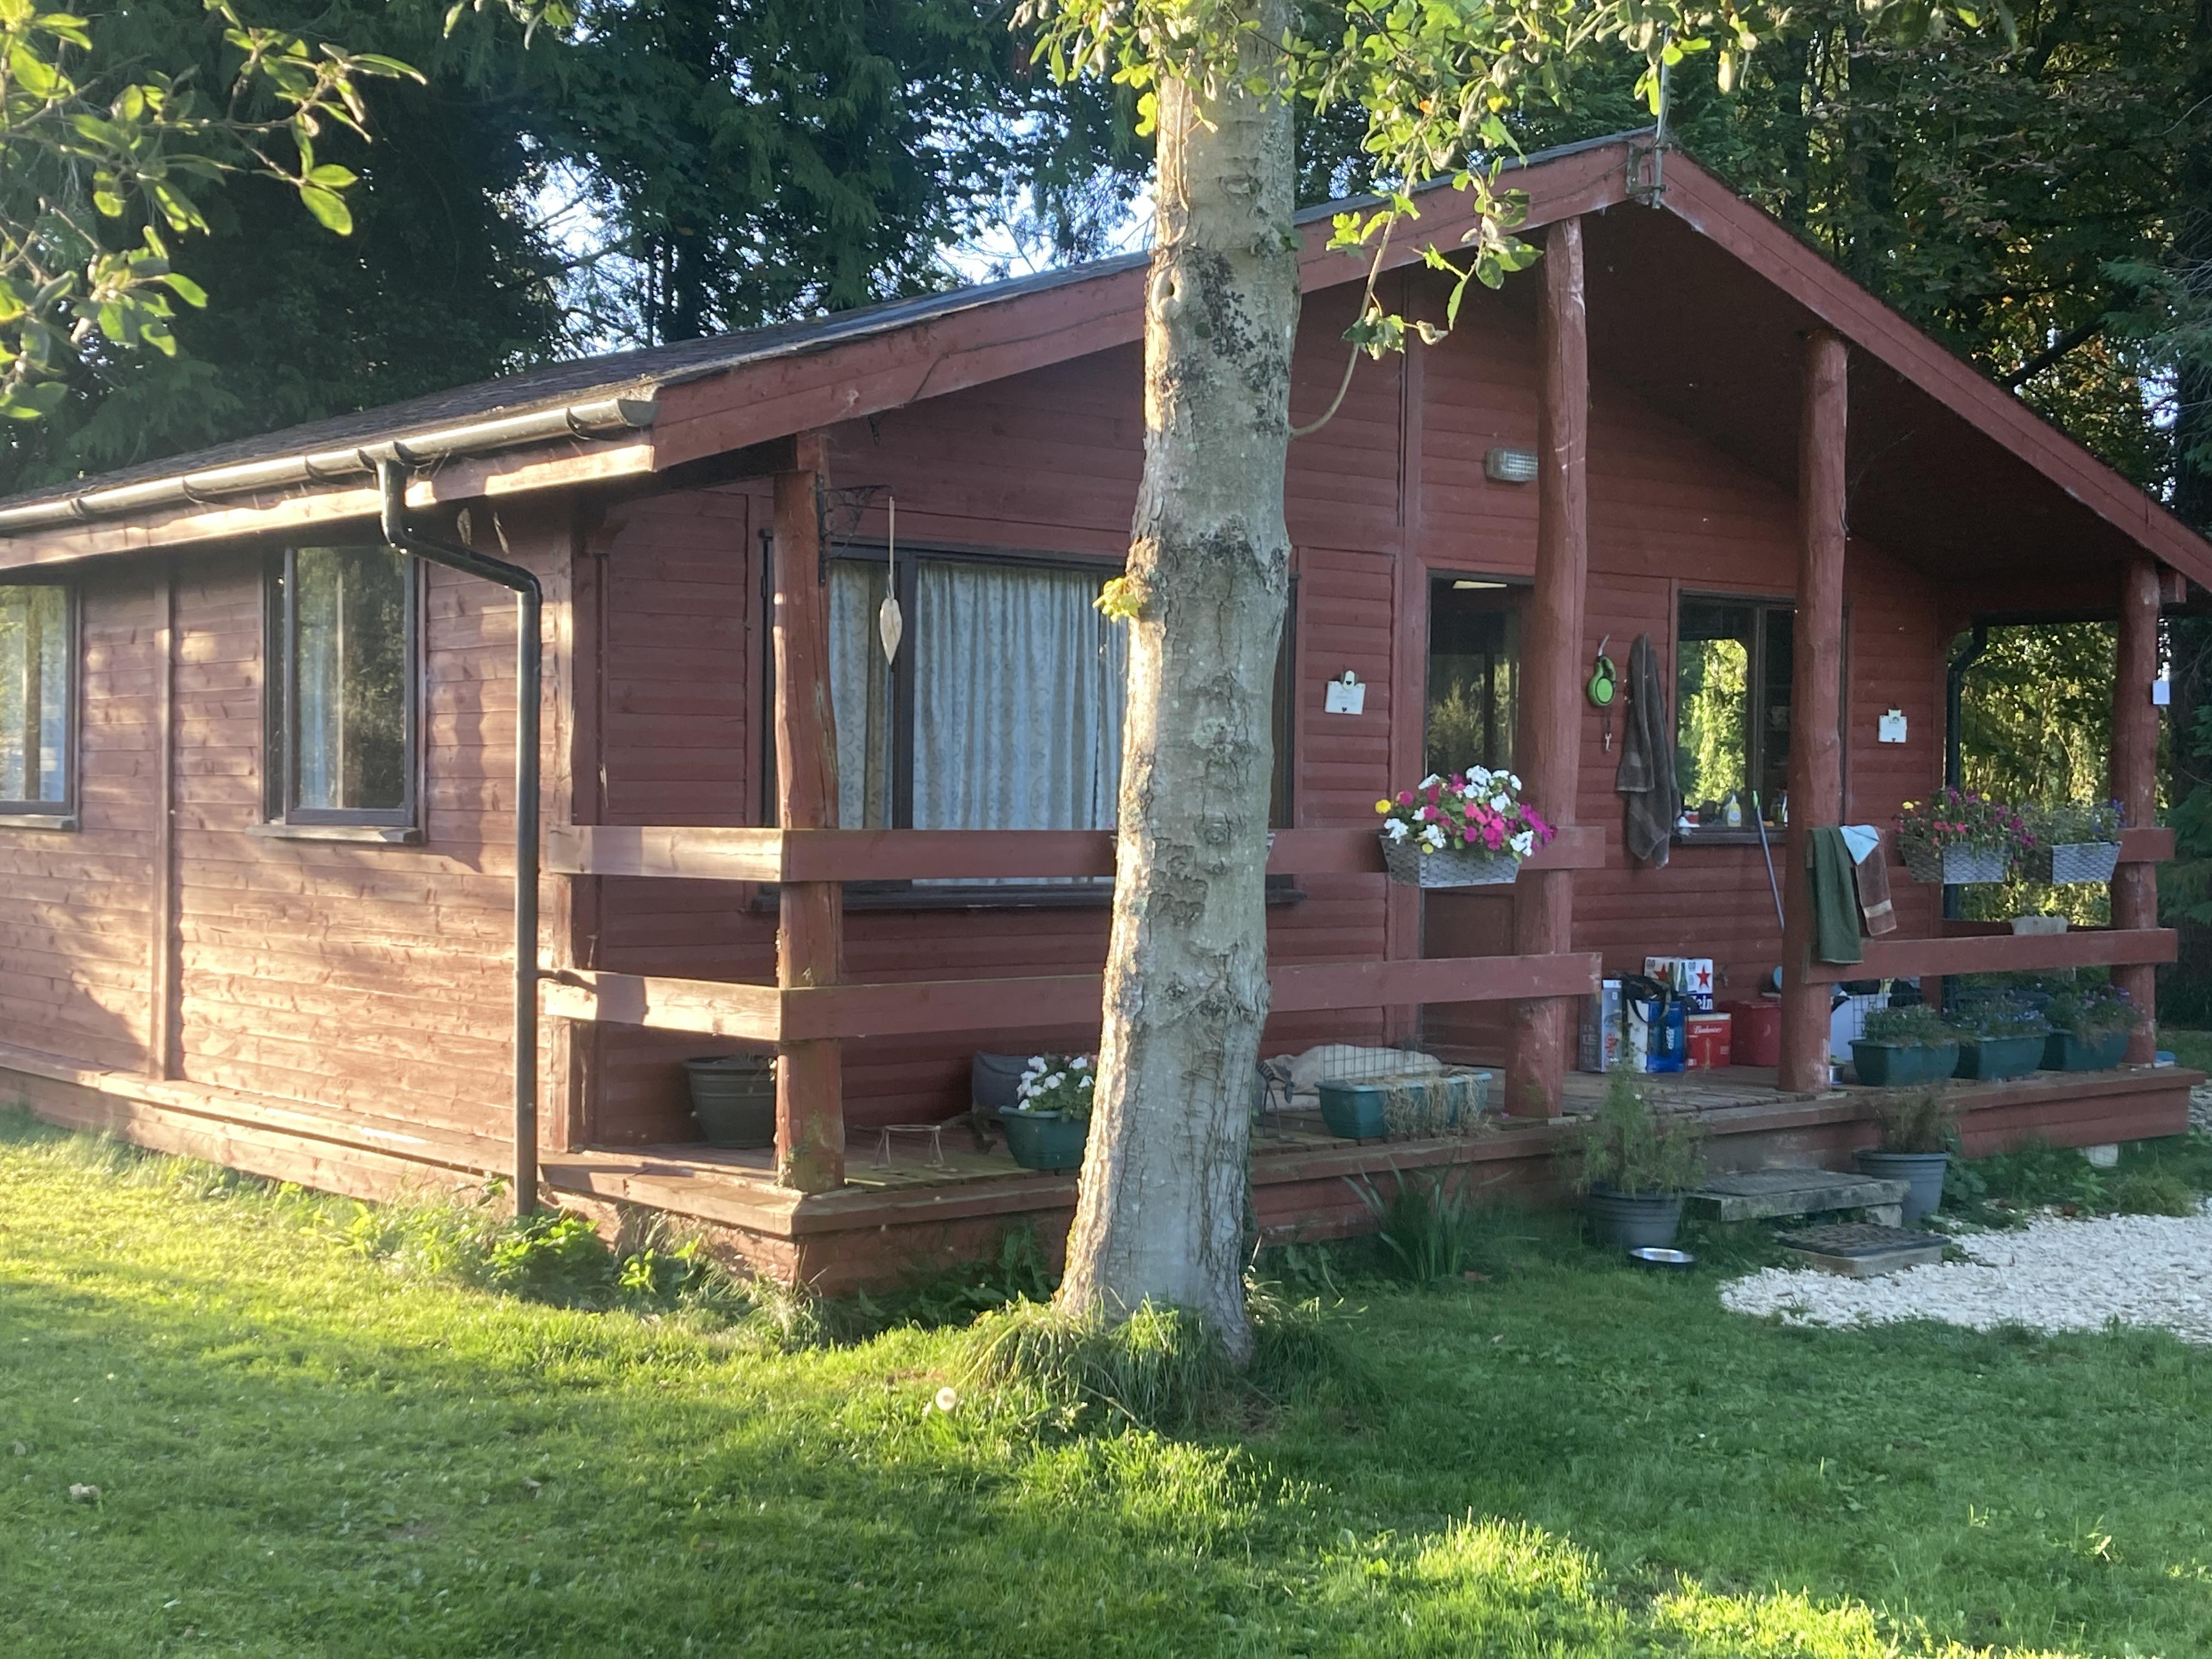
6x6 split 50-50 front and back so 6x3 kitchen open plan living room then 6x3 at the back with 2 small bedrooms and a tiny bathroom, we only use one bedroom the other one is a dressing room clothes hanging and drying space. bedroom is tight, double bed against one wall with 600mm at the bottom of the bed and 1m to the side of the bed. we have lived in it for two years and it’s very comfortable, the only downside is no storage. my wardrobe consists of a stack n store box with 2 pairs of good jeans and 3 pairs of work trousers, a few t shirts and that’s it, everything else in storage.
 1 point
 -
Says a company keen to sell ufh. That will lose a lot of heat. With only the floor slightly improved, 8% perhaps. But you will improve the roof and walls and windows, and that floor loss will become 80%. I would say ufh on 20mm of eps is a very bad idea. Even upgrading to pir would double the benefit, but 20mm is still not remotely enough. So it seems you have been given bad advice. BTW. Welcome.1 point
-
No. Geotextile is permeable. Its function is to keep muck and clean stone separate. The pressure is reduced by having weep holes through the wall.1 point
-
The question/sticking points here would be, would a rung of a ladder be classed or accepted as floor and escape windows must be at eye level. Again could this be on a ladder? Probably no to both, but what if there was a small platform or landing? I’m going to say no, you won’t get away with it, even though the likelihood of needing it is relatively low.1 point
-
i can confirm both plastic and copper are fine, i have both. Its just a speedfit connection. Copper where i needed to add in compression checks (then converted to plastic underneath) and plastic where i just wanted to keep an unbroken run to point B. Dont have any great photos, but you can just see it here on the right hand side
 1 point
 -
Probably rusted because of lack of movement. 16°C and above only happens 21% of the time, and some of that is at night. And we had a really hot spell last year.1 point
-
Yes, my suggestion of 'grommets-with-a-slit' was effectively to give a substrate to work off, similar (but not as strong as) @Iceverge's ply. Each 'cut grommet-hole' would still require Tescon tape or butyl tape to complete the job.1 point
-
24m is too small to live in comfortably for a year or more, I currently live in 36m cabin while we build ours. so I would build a large ancillary lean to, you can put a freezer in it, washing machine and storage for work clothes and stuff. if you are building it for future use then it will have to comply with fire regs and various other things, so just build it to the correct spec. building control won’t care much if your living in it, just tell them it’s just at weekends when you stay over.1 point
-
This is heartbreaking to see. You could use these photographs to compile a guide on how not to install cables. Our spark starts on site tommorrow. I plan to be there every day to prevent this sort of butchery. I think the only thing to do here is cut back the battens around the holes and then patch with some membrane and install a grommet. The problem is the grommet will need to be fed over the end of the cable and that is probably all the way back at the consumer unit now.1 point
-
Hi @AppleDown we are paying £8600 for stage 3 detail design development including drawings for warrant (Scotland)SAP and integration of structural engineers design, some items listed at this stage, I can do but informed it comes as a package so I cannot take elements out.1 point
-
Not sure in a domestic setting there is a legal requirement, but get the facts and do a risk assessment. We reheat our cylinder generally twice a day because we use the contents, not because we loose the heat. If you are consuming the cylinder contents daily there is zero risk. If you go away for a few weeks at a time, you may want to use a sterilisation program to keep you safe. If you have anyone with a weak immune system, avoid the risk use a sterilisation program. Not every case is the same, do the research make your own mind up. Commercial property is different.1 point
-
Also start shopping around for a structural engineer, as they feed into your BR drawings, i don't think your AT's quote includes this.1 point
-
The same architectural technician that did my planning gave me a fee for doing the build regs submission, it was £2.5k + VAT (in 2021). I thought that this wasn't that bad a price, however as its a complex build and i would be PM'ing the construction of it, so i wanted to know how it was all going to fit together. I ended up starting drafting up the building regs drawings myself. This took me a lot of my time but it gave me a great knowledge of how the house was going to be built. I agreed with the architectural technician from the start that he would be able to check the drawings / spec and let me know any changes (without any liability taken on his part) which was a few hours of his paid time, including any technical queries i had on BR interpretation. The drawings set i produce was very detailed and way over what i would have got for my £2.5k fee. I did everything that was in your list above other than the CDM risk assessment, and of course the PI insurance that the architectural technician had and the risk was all mine. I submitted the building control and they had only a couple of comments / changes which were an easy fix. In end the same architectural technician oversaw the build for the warranty, with no major issues. To me that sounds pretty high for the works, especially an AT (i could be well out of touch though). I would be tempted to get another couple of quotes to see what the local market is like, from what i have seen of your plans there is nothing to crazy in terms of a technical design to meet building regs.1 point
-
I am going out as it is Comic Day, but shall look for it when I get free.1 point
-
Welcome. Your input may be very useful.1 point
-
Possibly not the same thing as we're in Scotland so must submit for building warrant before starting. Our architectural technician has quoted: Stage 4 Preparation of Building Warrant drawings based on Approved Planning package 3500 Submission of application, start forms ,completion 89 each Dealing with building warrant points 250 Engineer’s certification and design details in regards structure (Allow subject to quotes from engineers) Allow 2200 TBC Drainage Design Allow 675 SAP 375 EPC 190 CDM Pre construction Plan 350 all + VAT I think this assumes that the foundation and timberframe design will be done by the engineer and the TF supplier, respectively. We then have the option on: Constructional package, precast, steel, window schedule etc. 850 This provides construction based package for build combining engineers package to architectural technician's package So I'm expecting to spend £8675+VAT to get through building warrant. I suspect the submission of start and completion forms to planning will be 2x£89 that I can easily save. Other than that, I'm expecting to just pay the money to get it right.1 point
-
Cheers, mother (expletive deleted)er1 point
-
I started using GRP 49 years ago. I suspect that the remains of that kayak is still not rotting away at the bottom of the Isis between Newbridge and Northmoor.1 point
-
I'm sorry, but that is a load of twaddle. You're seriously worried about green streaks on the roof? Oh no, our PVs have some lichen growing along the bottom edge, what am I to do, they've only been there twelve years and we're in the wet and windy South West. We're going to be building a flat roofed extension as well, there's no hope. Perhaps we'll be alright though, as technology has moved on and there are now roofing materials that allow flat roofs to be built safely.1 point
-
I get paid for grid export, no FIT.1 point
-
we created all the penetrations from the plant room before the first air test. A 100mm duct for power (in and out plus PV) and 50mm duct for data/control wires (BT fibre in, CAT6 out (plus spare), ASHP control). These go into an external kiosk. Which has an external distribution board and a POE network switch. What this means is that all external wiring and external data requirements are wired with no additional penetrations plus if we forget any we can add them at a later date. Air tight grommets used to seal ducts. And they will be filled with air tight foam once second fix is complete. They were temp sealed for our first air test (0.42 ACH)1 point
-
They have obviously used galvanized angle beads instead of plastic or stainless The easiest solution would be to knock the beads off and add a cement band around each window At least it won’t look like a patch up job NHBC won’t be interested They will I’ll put it down to bad workmanship1 point
-
Ok. They loose double the amount of heat compared to the OSO, on a 300L UVC, 2.32kwh/24hrs vs 1.18kwh/24hrs Telford: https://www.tdlonline.co.uk/Heating/Hot-Water-Cylinders/Telford-Stainless-Cylinders/Telford-Tempest-Cylinders-Heat-Pump-Coil/6134-/Telford-Tempest-300-Litre-with-Heat-Pump-Coil-33sqm-TSMI300HP OSO: https://osohotwater.co.uk/product/delta-coil-dcpp/1 point
-
I can see a steel lintel. I'll go knock off some cement to see. I'm guessing it spans the flange at the top you can see. About 400 centres so steel must be at least 600mm1 point
-
Thanks Nick. The direct distance UVC to stack is ~3½ m so even with the elbow reductions we are well under the 9m limit for 22mm.1 point
-
I would err on the side of caution and say yes, they are load bearing.1 point
-
We sold ours during the pandemic and we had several people bidding against each other for it and it sold for a lot more than the asking price. The buyers were all interested because it was a PH.1 point
-
Yes it is a serious matter. The floor is expected to take domestic loading, spread out. A wheel can be a very direct point load, on a block or 2, or directly on a beam. Thus not to be dabbled with. Wheel size, or jacks, will matter too. I would want jacks to be onto a timber bearer across the beams. I only considered rough terrain mewps becsuse of the big wheels and to cross over bumps gently. Scissor lifts will spread load onto 4 wheels. Booms can have 3/4 of the load on one wheel, or jack. Also. The design load for a precast floor normally assumes the screed is laid. The screed adds considerably to the strength. Precast planks 150 thick will bounce simply with jumping up and down on them. With 70mm on top, they don't.1 point
-
It needs serious checking. I used a pair of boom ones on a big sports hall floor of planks, before the structural screed. They calculated as comfortably OK when standing symmetrically but not with the boom out to one corner and fully extended. The steel erectors understood and used them appropriately. On beam and block similarly but there's a risk of blocks cracking.1 point
-
Me. Please don't do that. Erector. If I was going to fall off, I would have died years ago. Me to HSE: I want to use fall nets. HSE: They are a continental idea and we don't allow them. The erectors must shuffle along and hook themselves* to the structure. Now? At least the rules are clear, albeit costly. * that's a slow (15 mins?) way to die of blood blockage, hanging in a harness, unless there is a mewp to get you down.1 point
-
+1 on the above. done far too many small portals as fill in jobs and lost money on every one …. And that was during 90’s when steel erectors walked over portals, climbed columns and monkeyed across purlins.1 point
-
Erection only? I'd say that will take 4 skilled men : day 1. Offload and prep. 2 erect primary steel and a few rails 3 to 5 remaining rails. 6 sundries and clear up. 7 contingency so 7 x 4 x £250 average? crane or FL 2 days mewp 7 days 10% sundries 30% markup if a working owner. Otherwise 50% £13k. To £15k assumes ready availability of the skills, if not, add accordingly. and a hard running surface. Inside and perimeter. If not, forget the above. assumes all parts correct, foundation bolts correct, and no drillling. would i do it for that? No. Too many things go wrong with other peoples frames on other peoples sites.1 point
-
Balance the radiators to give more flow to the cooler rooms, second line of defence would be TRV's on the radiators On/off controls on a heat pump is a no no. You want it open loop and dumping low temperature heat into as much floorspace as often as posssible1 point
-
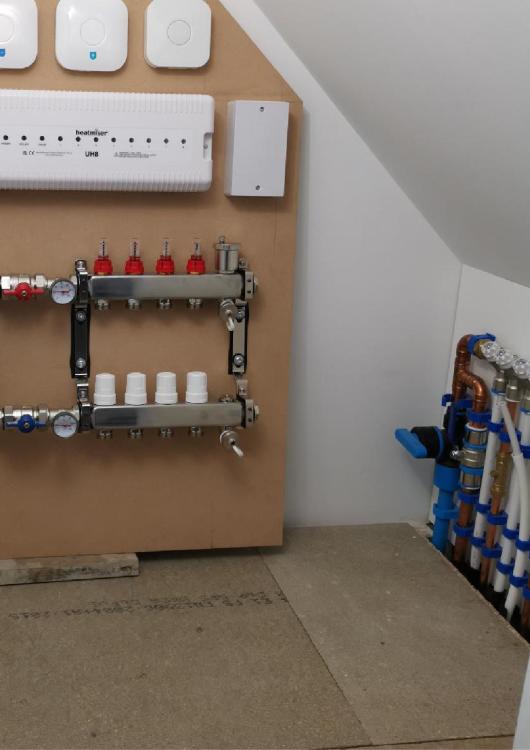
Good memory - I used the Jupiter System on my 1st Floor. It was relatively expensive but has worked really well. The Jupiter Heating System is as attached. It is installed on the top of 22mm OSB flooring, with engineered wood floor finish to bedrooms and porcelain tiles to bathrooms. The Ground Floor was UFH installed in the insulated raft foundation when it was poured (an MBC installation) and not heating was installed on the 2nd Floor. ideal_eco_constructions.pdf Installation-Guide-IDEAL-ECO.pdf InstallingTimberwithJUPITERUFH.pdf System_Eco.pdf System_Ideal.pdf1 point


.jpg.c21f3ac78c9b7efd90cbdcb312744dc5.thumb.jpg.7adcad4c0e384f5ecd7d56b0618df6e5.jpg)


This leaderboard is set to London/GMT+01:00