
Leaderboard


Popular Content
Showing content with the highest reputation on 02/16/25 in all areas
-
@flanagaj, it's a rite of passage. It's a hardening (cintering?) process. On hearing of our application - and subsequent success, our immediate neighbours Were gratuitously rude - in person - in public made ridiculous Trump-like baseless claims about our intention to build told lies about our intentions to anyone who would listen made false representation to the Planning Process at an open public meeting nailed a communal gate shut, denying us access to a communal pathway across his property ( photo here on BH somewhere) trolled me here on Buildhub Eight years later they have forgotten their behaviour. Speak civilly, wave occasionally, chat now and then. One neighbour came to apologise, and ask for help. That took guts, and I admire him for it ( posted here on BH about that discussion) They embarrassed themselves, and want to forget. To me behaviour such as theirs is a simple symptom of their lack of emotional intelligence. And thus need to be forgiven. But not forgotten.4 points
-
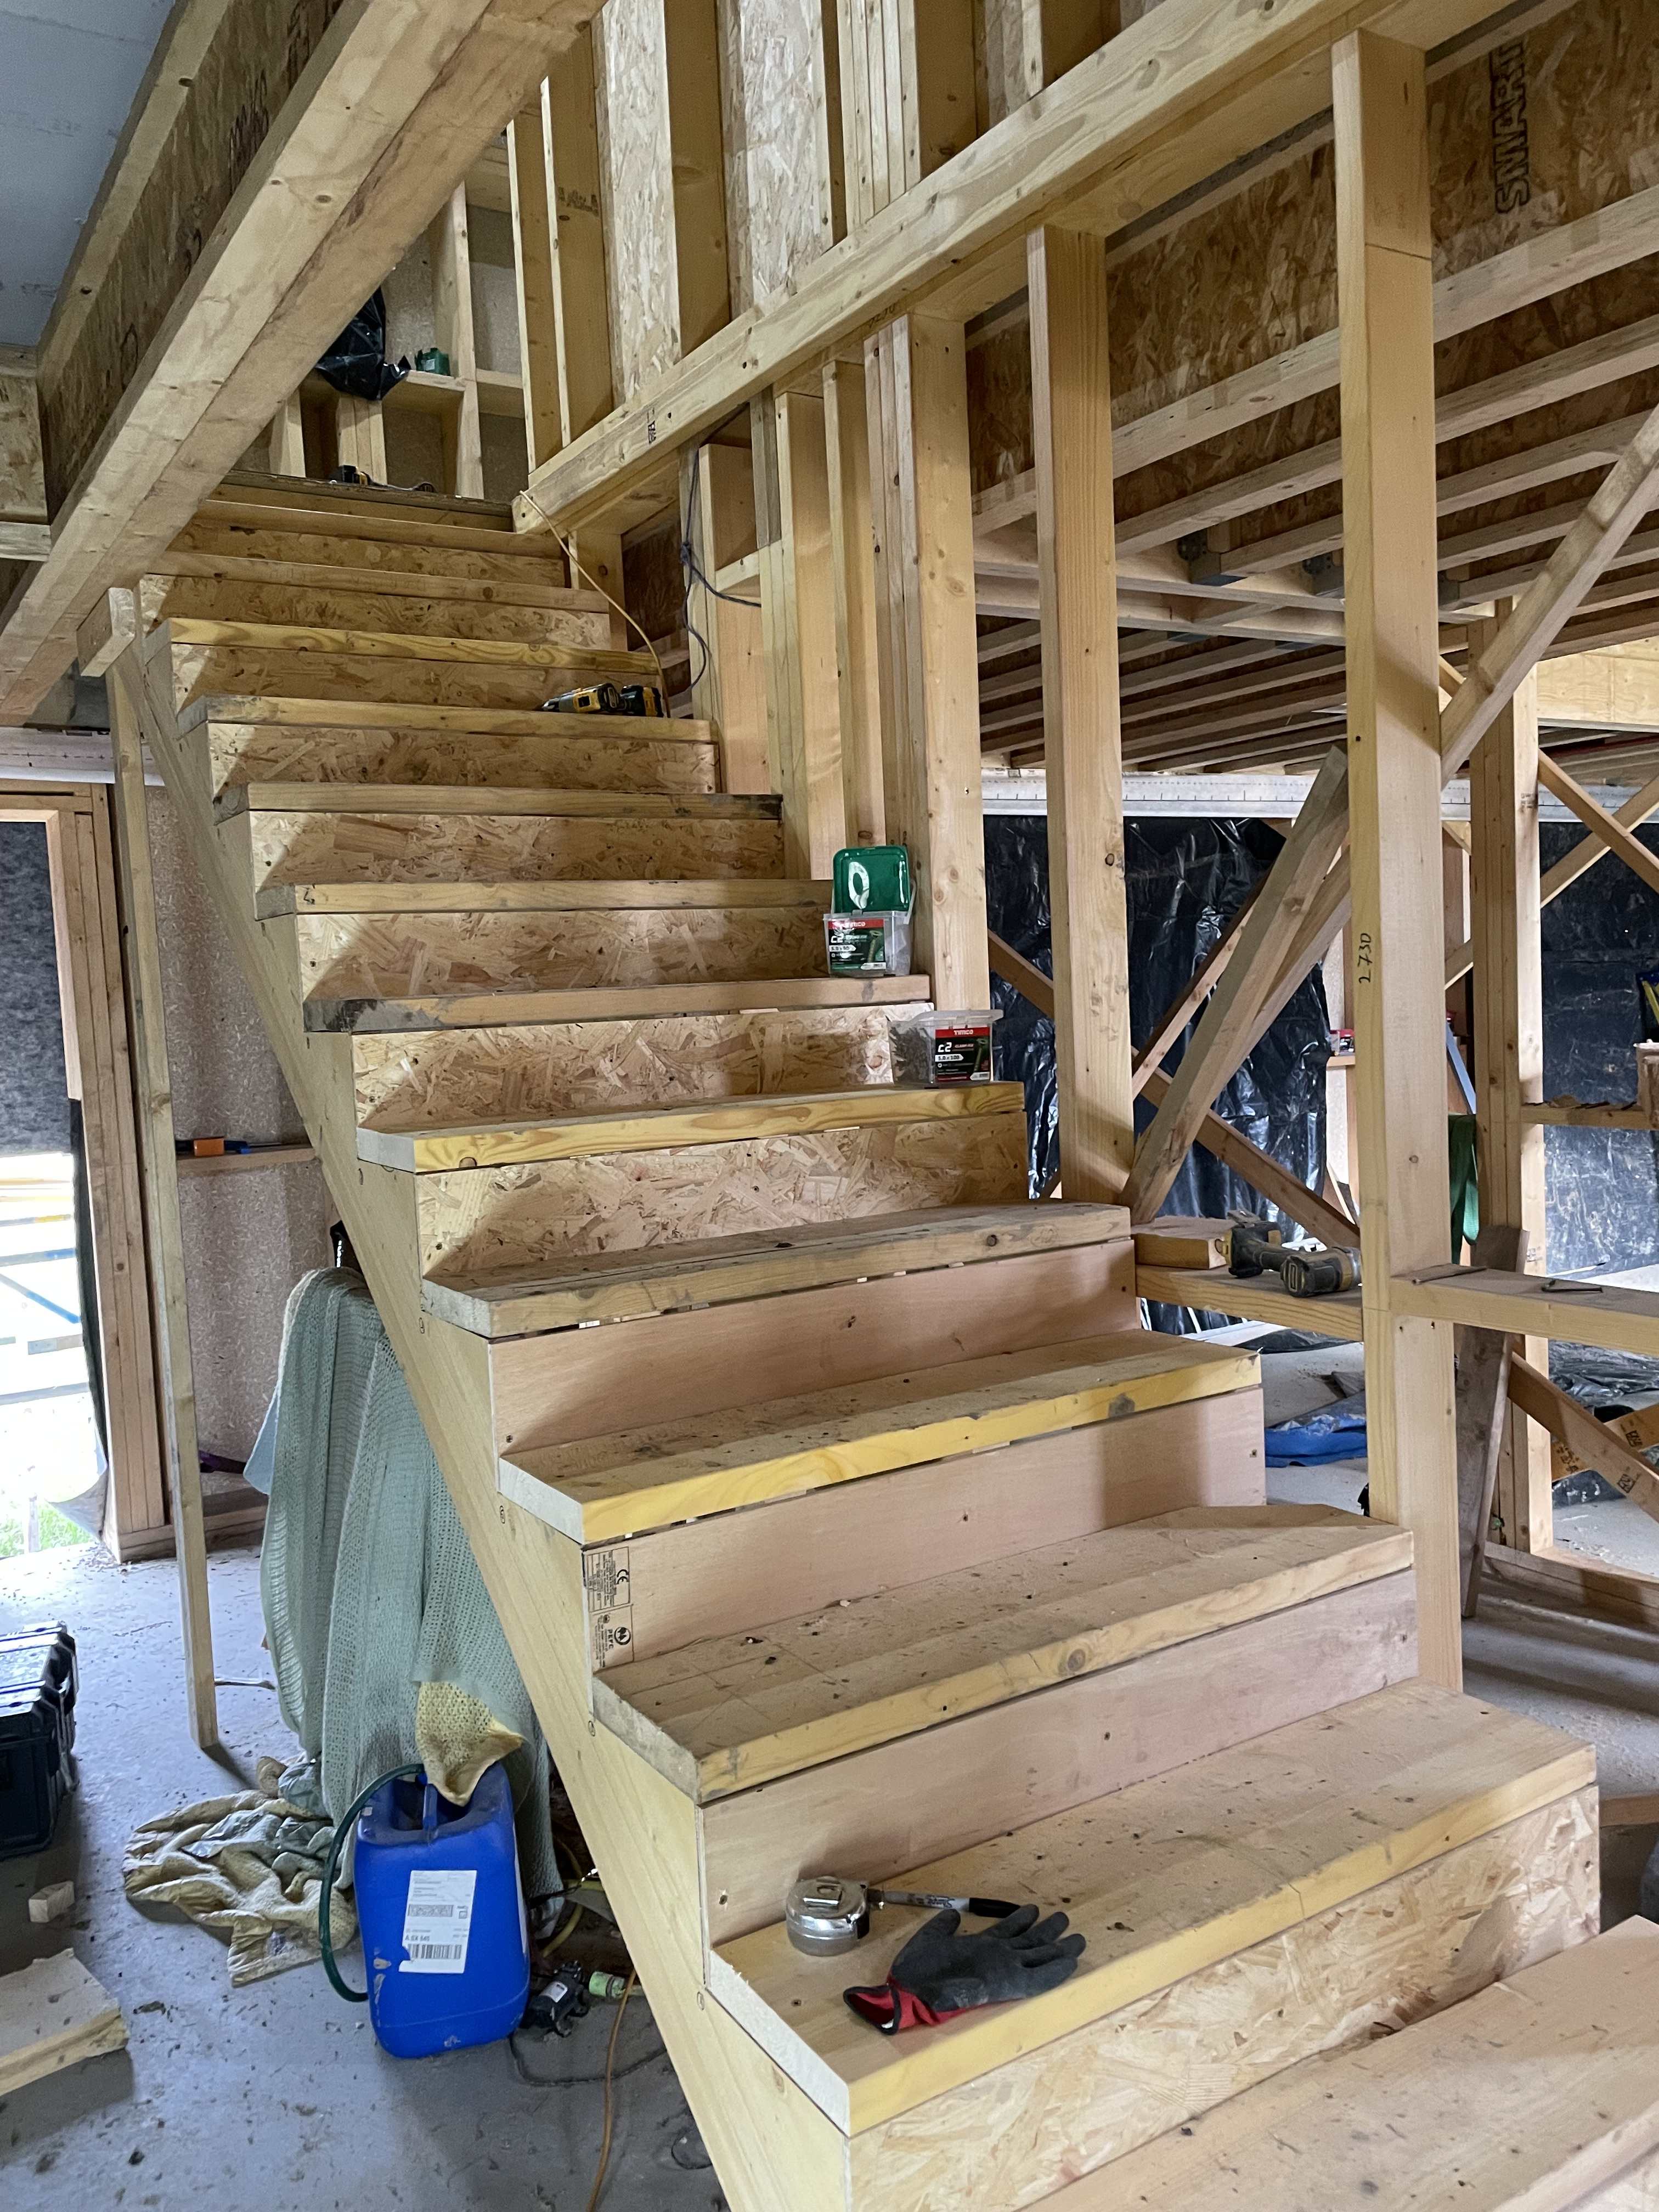
Built a rough staircase today. I needed a better way of getting materials upstairs. Next step is to take the windows upstairs ready for fitting.
 3 points
 -
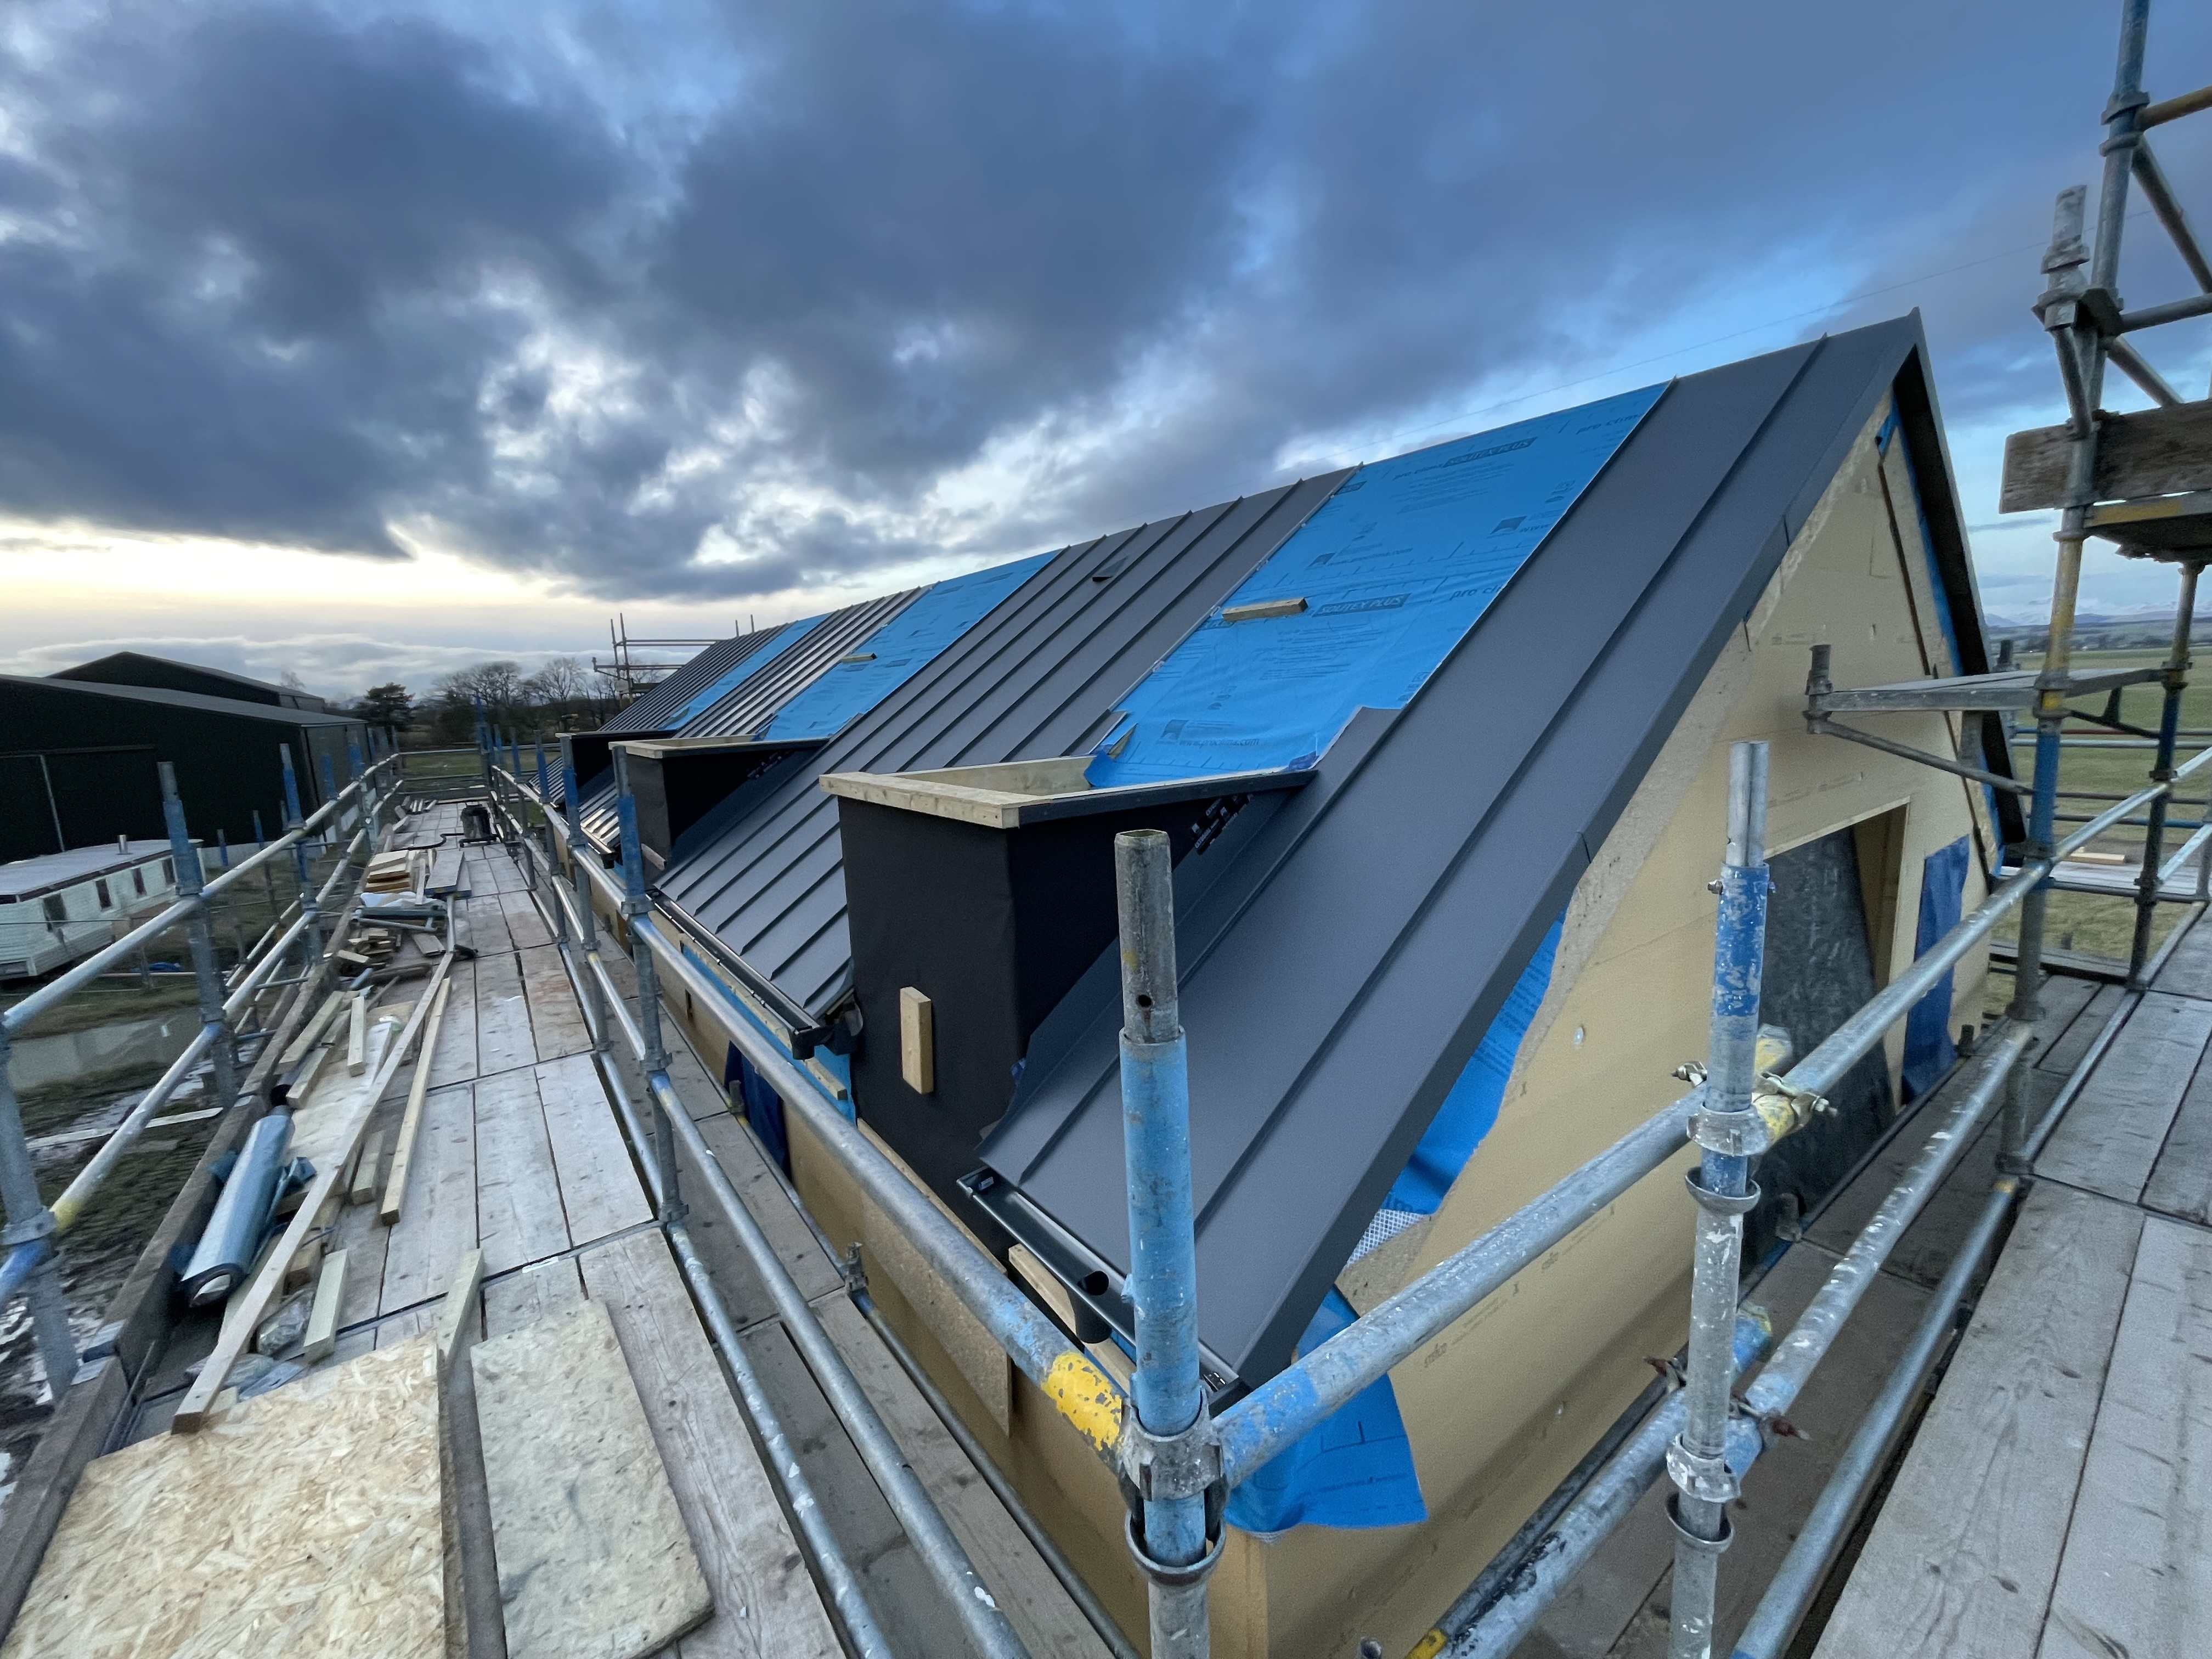
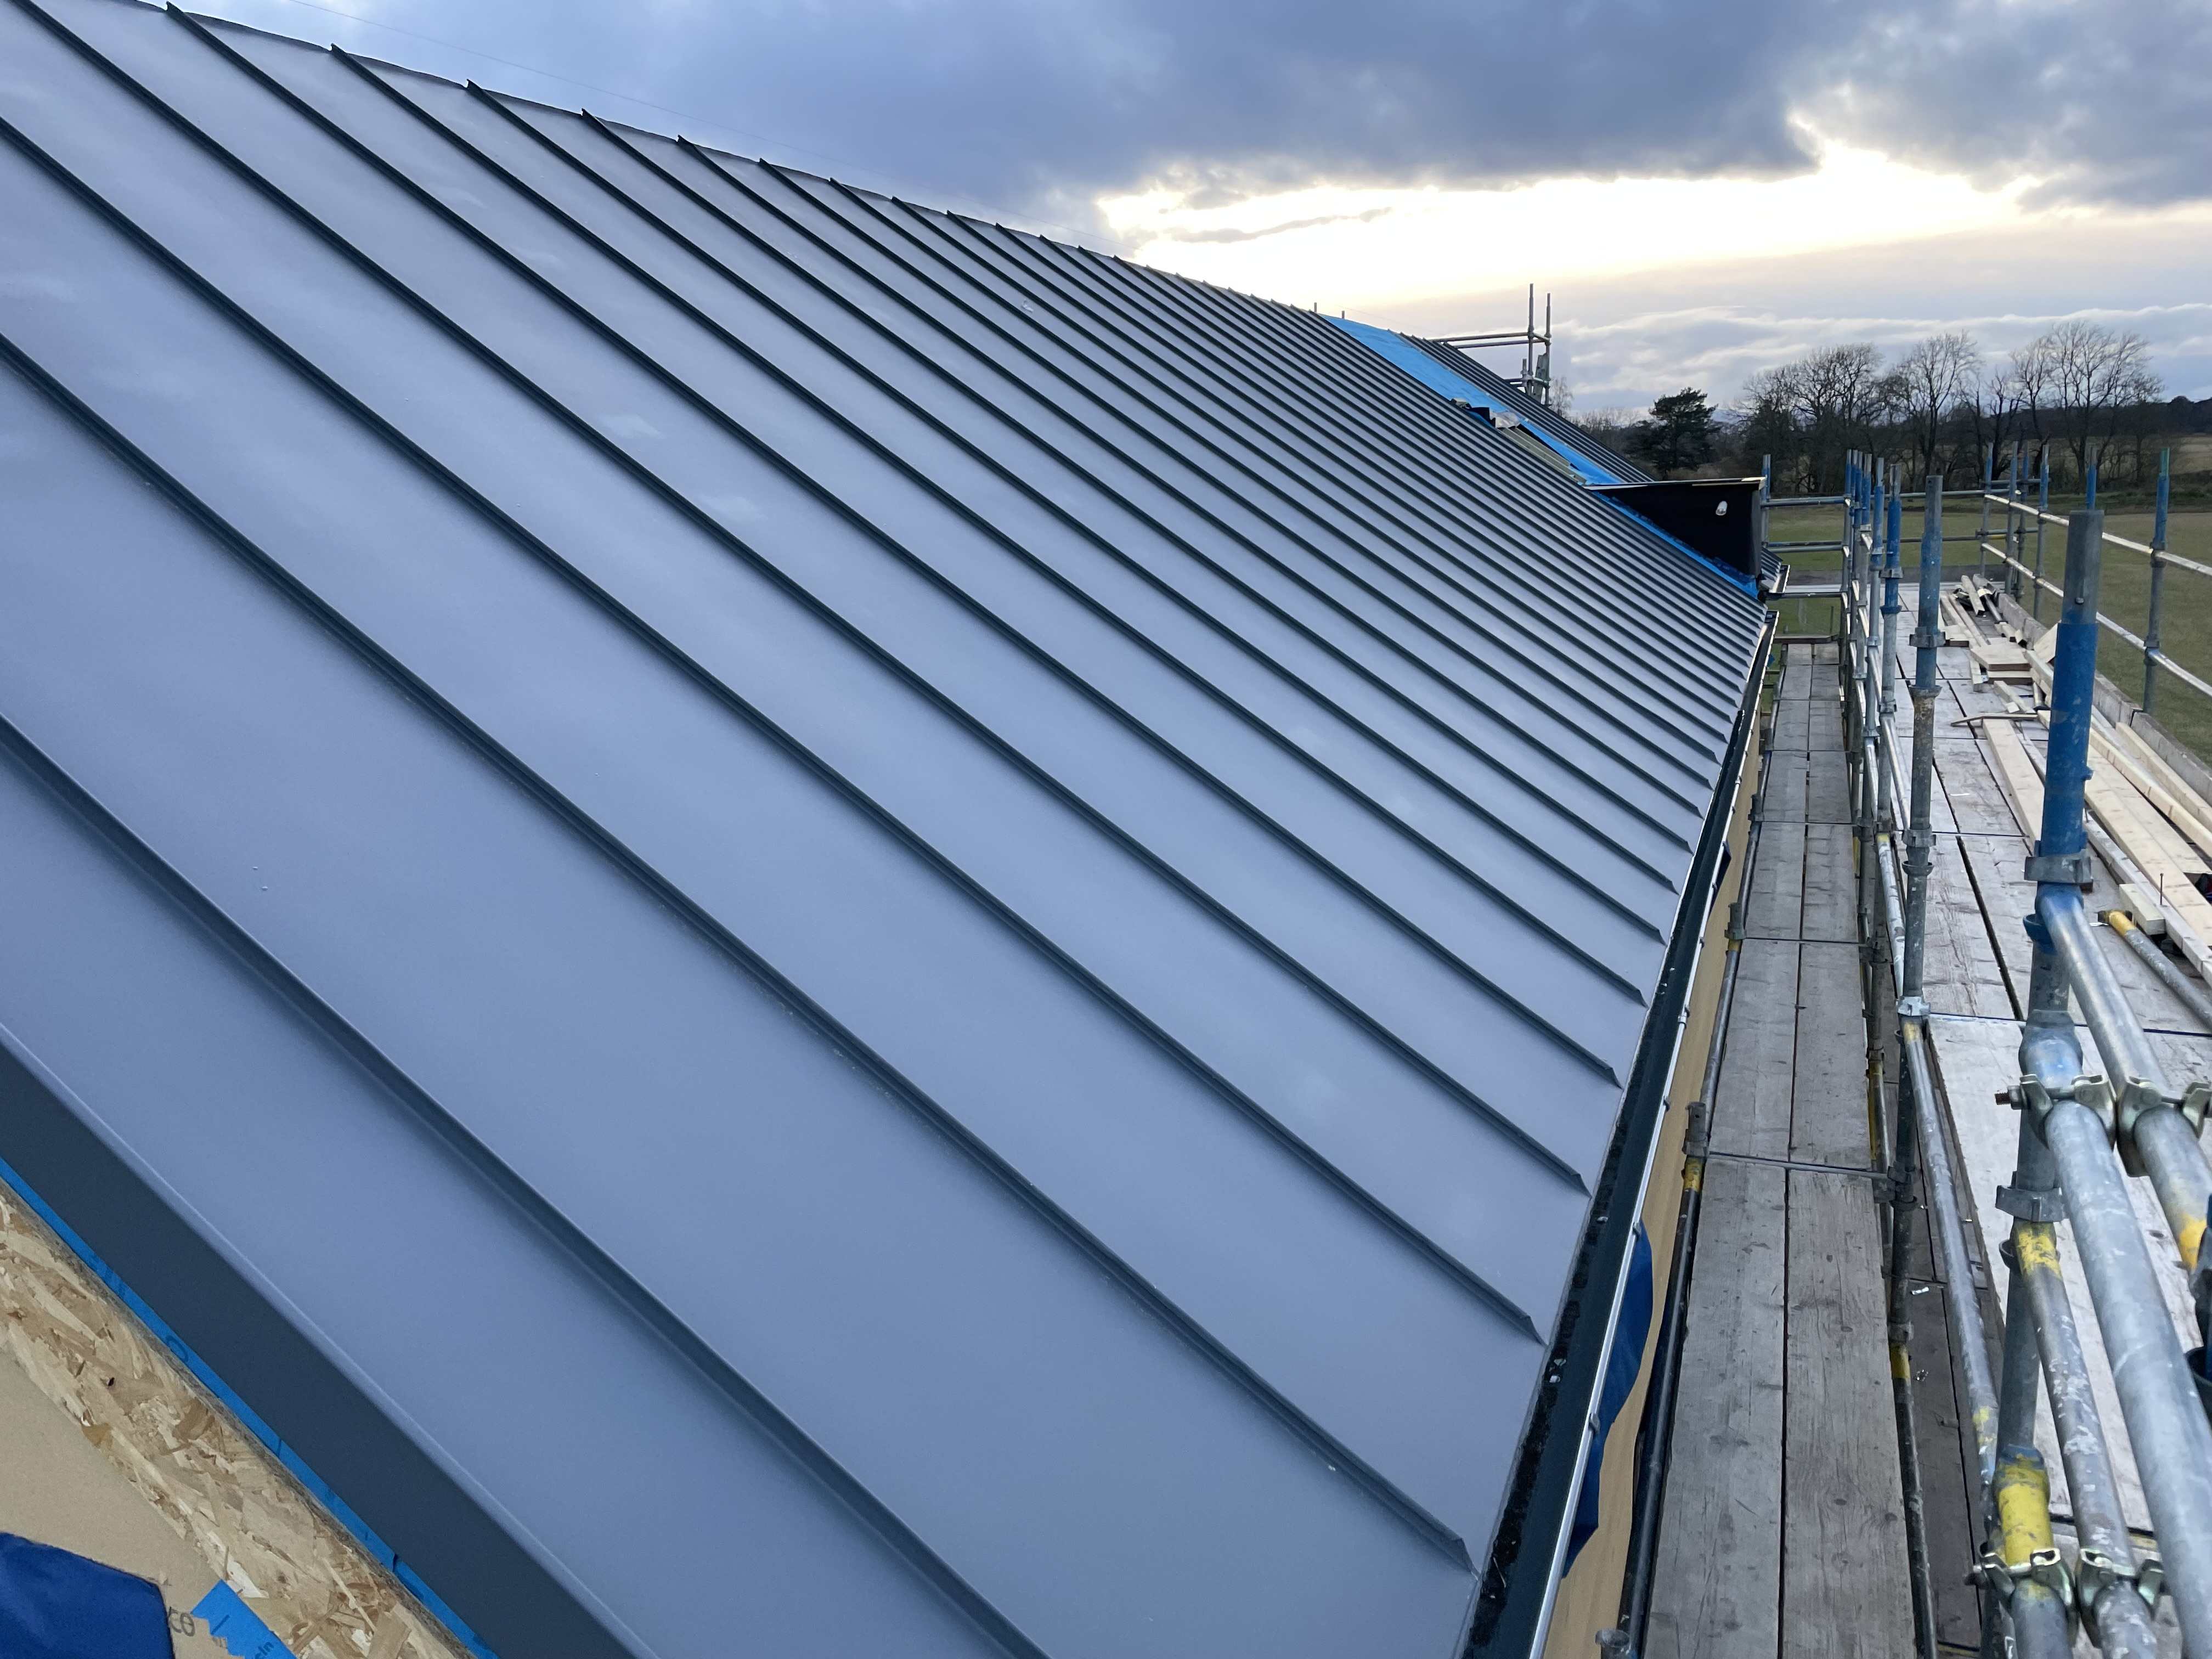
Still up at roof level but I see light at the end of the tunnel with the roof. A couple of weeks and I should be able to get rid of the hire scaffold and then switch over to my own. last week I installed my first window, 1 down 23 to go.. What this project needs is a one man band joiner. I need someone I can work with together. What I find is most companies work as a pair which leaves me redundant and paying twice as much. I would rather employ one person for a long time rather than multiple people for a short time. This is especially true with theses passive house style builds as a lot of time can be lost scratching heads with unfamiliar details.

 3 points
 -
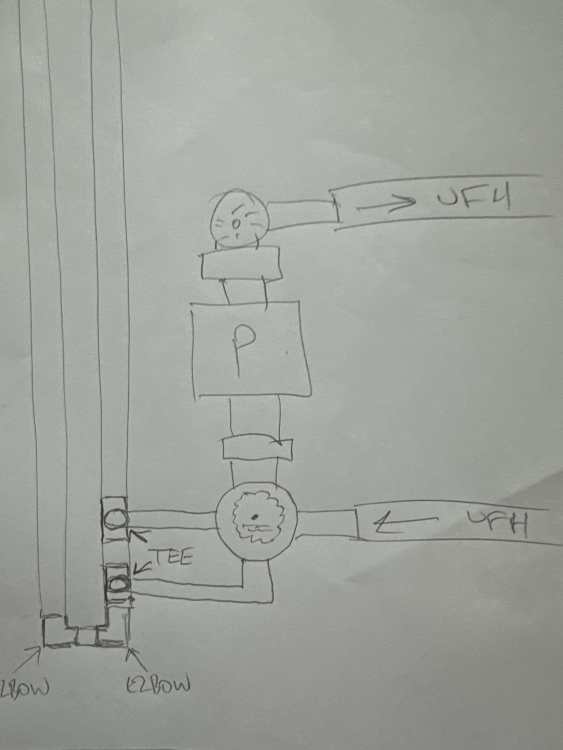
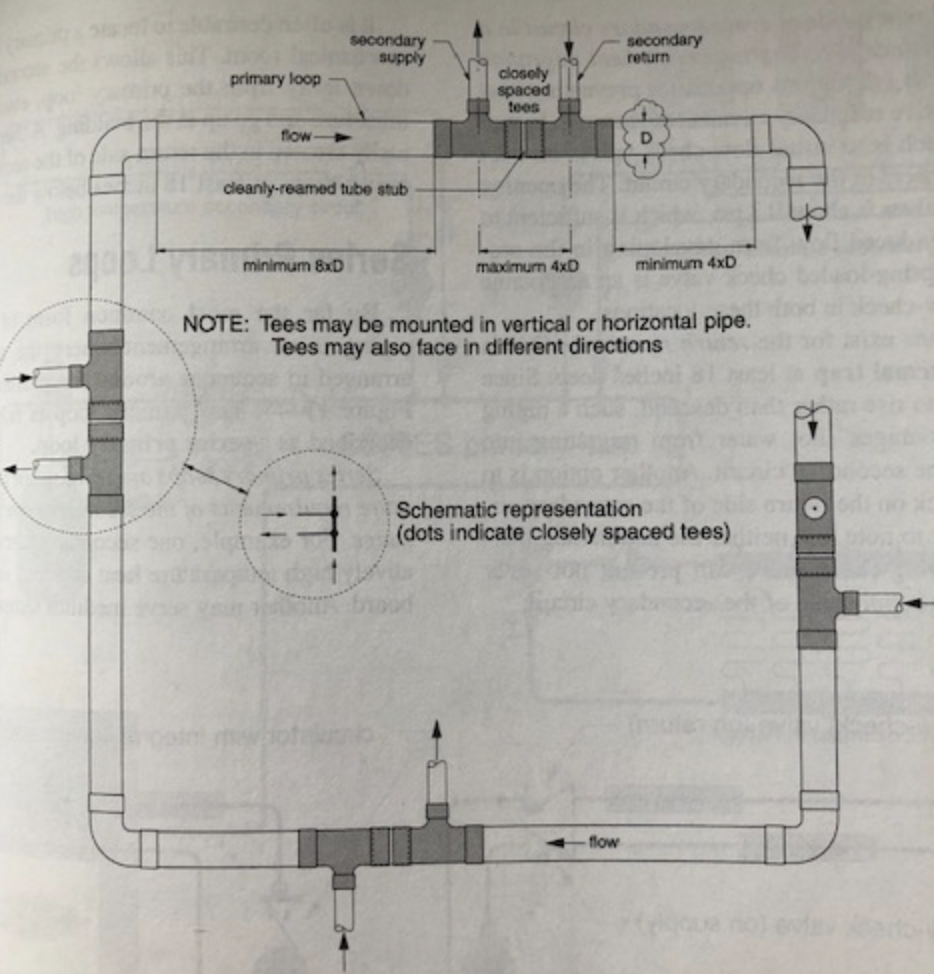
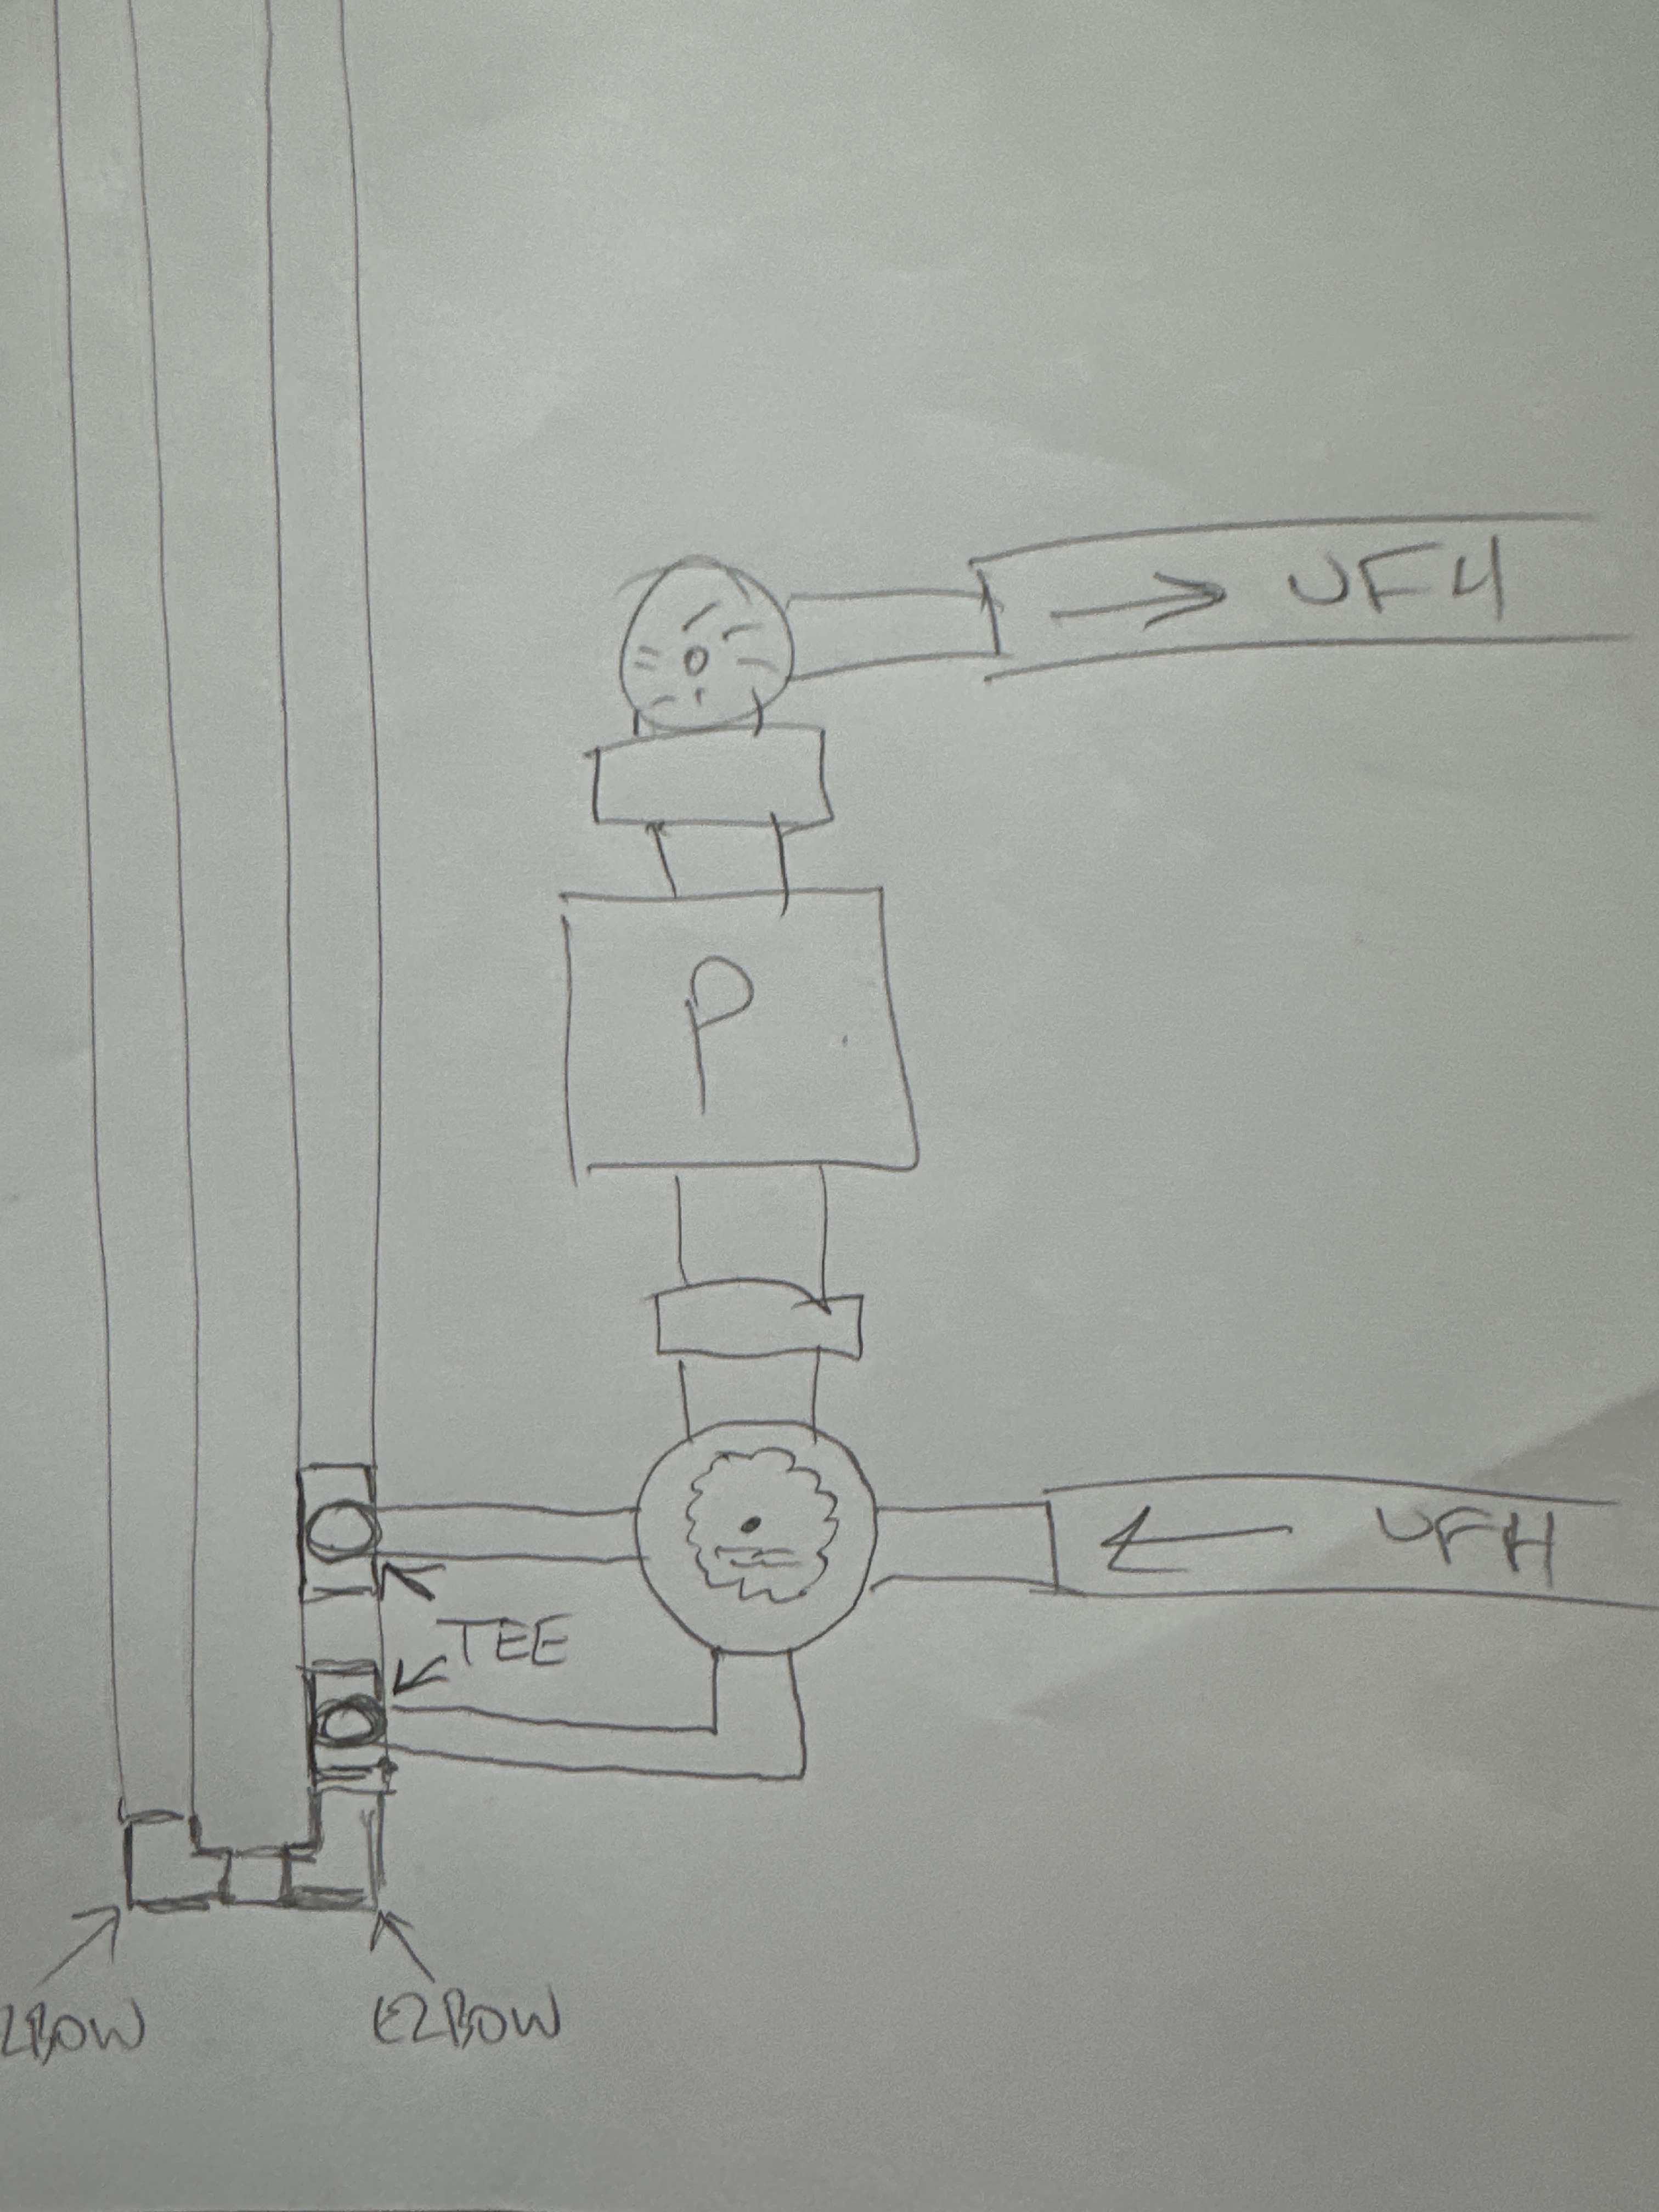
Guidance on close coupled tee install dimensions, so you get proper hydraulic separation.
 2 points
 -
>>> Lots of my adversities have died ( not guilty my lord ) , so they can never apologise . Hopefully there are not many police constables here on BH. It’s a bit extreme … but somehow understandable.2 points
-
I've put in antislip shower trays. They have a texture a bit like sandpaper. They take some keeping clean, but better a dirty shower tray than a broken leg...2 points
-
Can only answer Q1, we use our cinema room all the time - it's the main screen, we hardly ever use the lounge.1 point
-
Yeah it’s something which would need to be done before boarding out, and if your going to the effort of taking the boards off, for me I’d just wet plaster, but I would imagine it’s just not financially viable. I too have one room with dot and dab from when I didn’t know any different, I’ve tried my best to improve it but it’s still far from airtight, again not much I can do now without a lot of time and effort1 point
-
Nearly. Set thermostats to 22. Ideal is to trim everything to get the room temperatures you want. But after a couple of days of settling. Set backs are serving to make the heat pump work harder than it needs too.1 point
-
I thought the fitted appliances where VAT allowable - have I got that wrong?1 point
-
@Burkle Quick swap and not too hard to do.
 1 point
 -
Steel is great conductor of heat. Under block and beam ground will be about 6 degs. Insulation through the floor will make zero difference. The post will be sucking heat from house a very quick rate if not insulated. 25mm PIR insulation and plasterboard. If you have the option to have outside the heated environment, do it. Other insulation is definitely needed1 point
-
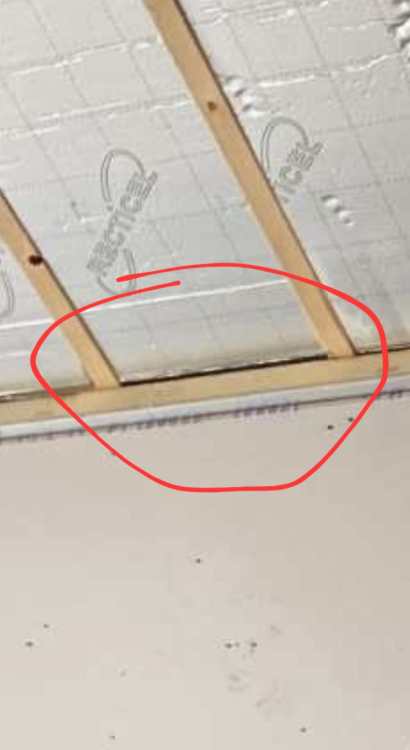
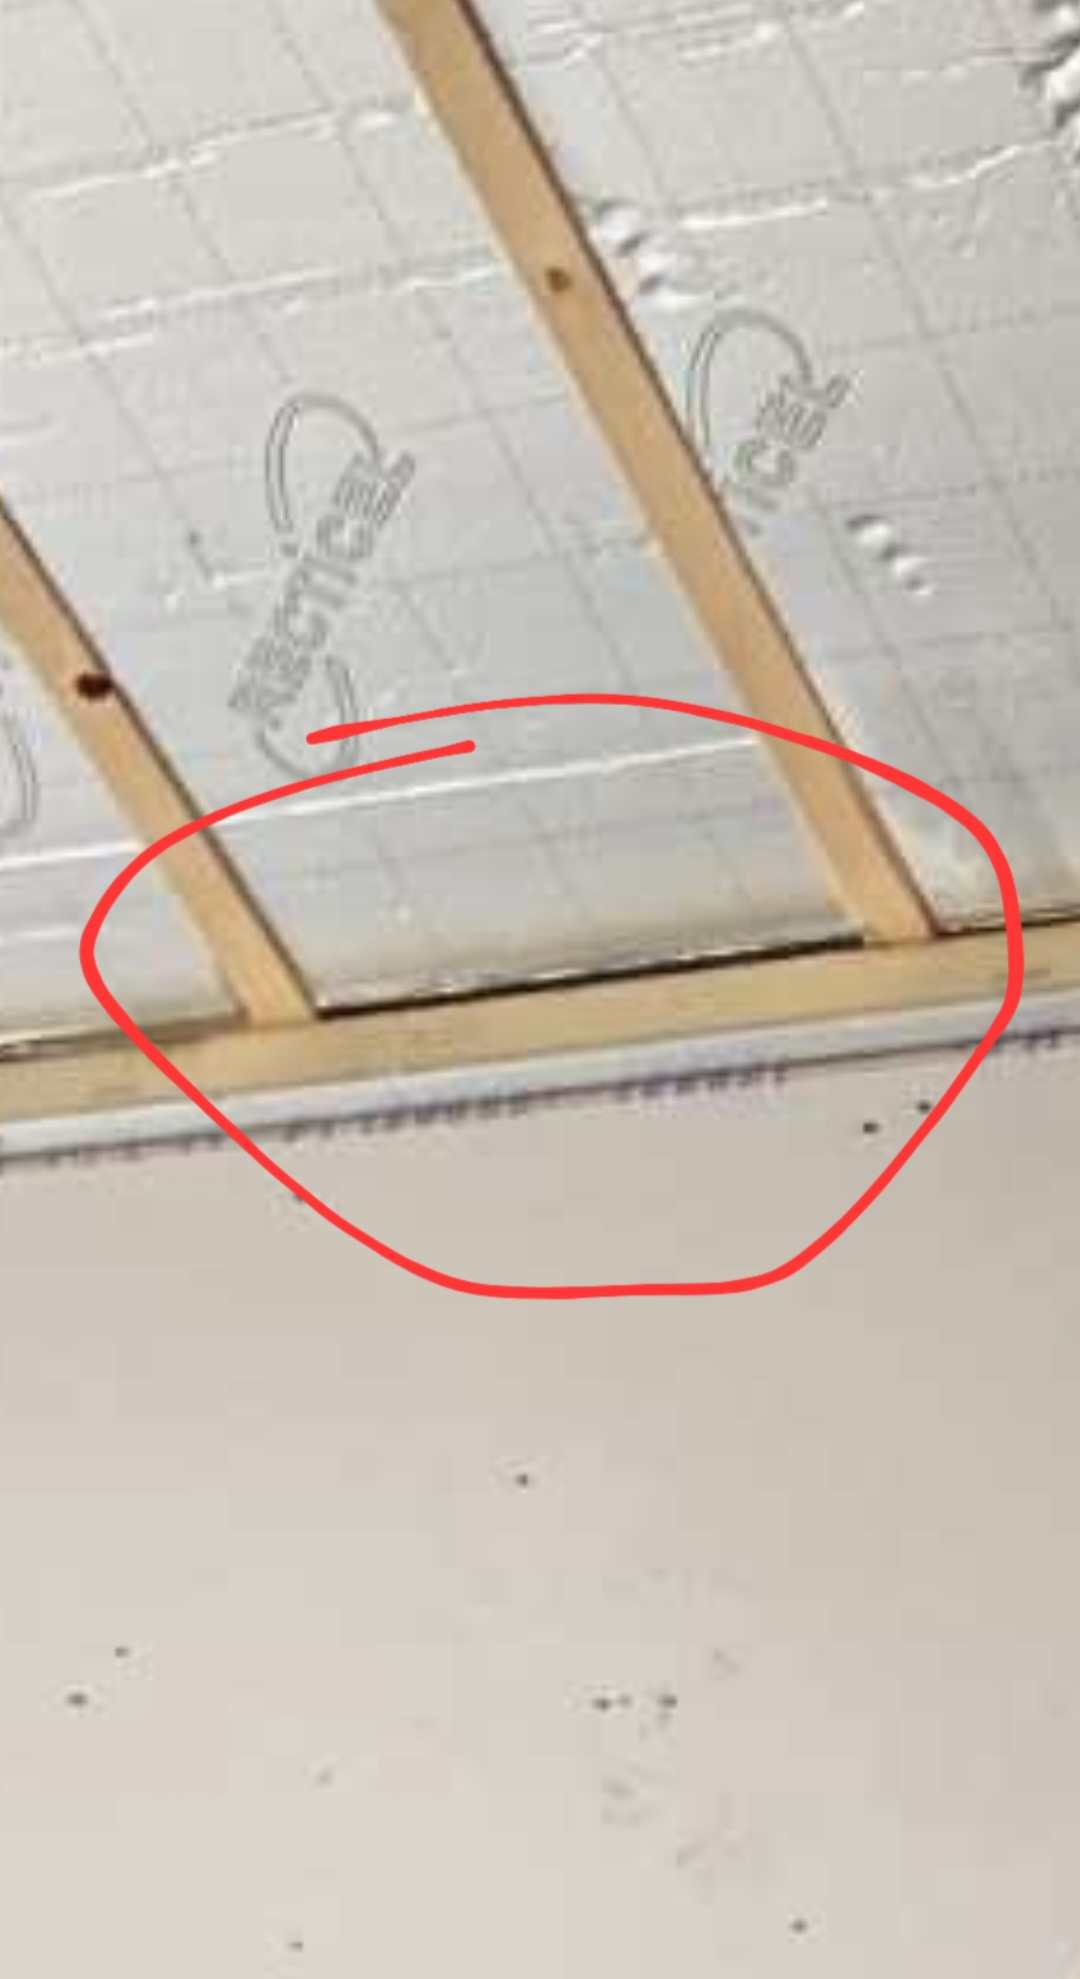
You’ve got ventilation going on above the roof insulation which is good, however the detailing of the pir install is not so good, which may well be allowing this ventilation a path down behind the plasterboard. For me, the gaps need filling then taping over before any hint of the ceiling plasterboard goes up. Because there are gaps the cold outside air is making its way round the plasterboarded wall. Tiles off or ceiling down. Fill the gaps, tape up jobs a goodun. Save it for the summer though A common method for fixing the plasterboard not having continuous ribbon of adhesive round the perimeter of each board is to drill a series of holes at specific intervals and squirt a low expansion foam (Illbruck or soudal) what have you got on the ceiling? Is it insulated board or just regular board? needs rectifying really, don’t want to say you’ll end up with mould issues but it’s possible where the colder spots are.1 point
-
Did they use cavity closers around the windows?1 point
-
You could hide it with coving.....1 point
-
and lined, not libed. I've only done it in ugly plain concrete . Call it brutalism as an excuse. But you could stain it, roughen it or clad in stone.1 point
-
Not sure but on the setting we use it's about 170m3/h - which is fine for us - we have a lot of vaulted ceilings, so while it's 250m2, it's a lot more than normal in terms of volume.1 point
-
You would drill into the rock, perhaps 4 or 6 times, and insert rods of 12mm or 16mm. So it won't fracture. Then build a small shutter, 500m square or so. Libed so that the concrete foesnt stick. Some reinforcement in there. Let's say 500mm high for now. Fill with concrete. 0.125m3. That's just one or 2 mixer loads to barrow to position. Dismantle shutter for reuse and repeat.1 point
-
Just tiles, looking at the overhang of roof you may need 3 rows off to see the internal junction but it will give a good opportunity to see everything and fix what you find. Quite likely, you can have really snug fitting PIR and you’ll still get air leakage through it. with the tiles off you may be able to improve the issues. The problem with dot and dab even when installed as per manufacturer guidelines with continuous bead of adhesive, it only takes a bit of block shrinkage to create a new path for air leakage, lots of people use a parge coat on the blocks to get around this but for me wet plastering is the easiest way of achieving airtightness which you can clearly see long term is staying that way.1 point
-
Sintering, or frittage, is compacting small stuff, with heat and pressure, to make a solid mass. Frottage on the other hand, is different.1 point
-
Hello all. I'm renovating, or more precisely completly rebuilding, a 300 square metre house in mid devon. 2 years in, about a third of the way through. Also currently building a garage /workshop in the garden.1 point
-
Actually that isn't the post that discussed dot and dab fail.. Memory fail..1 point
-
What sort of rock? Is it a natural outcrop or under soil? A photo? In principle you can build straight on rock but you would expect to make a concrete base, bonded to the rock with steel rods in epoxy, then above in whatever material, probably steel. But if it is only about 1m, as suggested, then concrete or masonry.1 point
-
Not in this country, but my house in oz was piled foundations with the short piles only 600mm deep before hitting rock, we drilled into the rock and resin fixed starter bars into the rock, the pile was then poured and anchored to the rock by the starter bars. as the house got wider each pile was slightly deeper as the rock sloped away. it’s very common over there to scrape the soil away and secure steel posts to the rock.1 point
-
Very much the way we went with it as well, including the mitred joint and also shark nosed edge for the worktops (which adds a fair bit of labour). We did have a tambour unit (I didn't know what it was called - I just used to call it the 'shutter/roller' cabinet) but it went away in the final design when we added the larder which will have a slide out shelf to be used for things like the coffee machine, kettle, toaster etc.1 point
-
I think you have two problems here. A large room with a floor like a sponge for absorbing the heat. Once up to temp it might not feel like it drops too much, but it's going to take a while to get up to temp, not having underfloor heating in it. That seems to be the preferred method to most. The detailing around your insulation at the joints seems poor (see picture). Foaming up the gaps like this would have made quite a difference. I'm guessing the cold spots are from gaps like this, From there it will travel down the walls behind the plasterboard, and put through the sockets.
 1 point
 -
Yes, Self build so the VAT is claimable - apart from any freestanding appliances which seem to be excluded. So it looks like we'll have to pay it on the washing machine/dryer. Unless we go for integrated ones but then the cost of the surrounding cabinetry probably makes it about even anyway! Price wise - yeah, been to a few places and apart from a place that wanted to quote us £50-70k for a Hacker kitchen (same layout) - I haven't found anything cheaper. Not tried Howdens/Magnet etc as we like the German kitchen look. The reason I'm hesitating is that I think it's a little too much to pay for MDF cabinets - albeit very nice ones with top quality hinges and lights etc. We've also got a fair number of drawers, a double door larder and storage on both sides of the island, all of which didn't help the price.1 point
-
It’s surprising just how little of a gap you need for a huge amount of airflow to come from behind plasterboard. definitely investigate everything you can, that should be fairly easy to access without having to damage anything1 point
-
Can't say anything about the Vent-Axia but we have a Zehnder ComfoAir 350 and are very pleased with it. We run it on it's lowest setting with automatic humidity sensing turned on which clears bathrooms quickly. Ours is a similar build but 250m2. Ours was installed by the builders contractor, so no experience with BPC or ADM. I seem to remember a discussion about an issue with one MVHR unit, where the condensate was dripping from the base of the unit and was collecting on a side of the unit away from the drain. Might be worth searching for. Can't remember if it was a Vent Axia EDIT - here it is ->1 point
-
White Stone Effect shower tray here. The one we have isn't slippy. Set flush with tile floor, open one end and works well. Needs a scrub with soap once every couple of weeks, easy and quick to do.1 point
-
https://www.slipdoctors.co.uk/products/anti-slip-bath-shower-coating1 point
-
Chances are you’ve got a plasterboard tent then especially with how much air flow you are getting through your sockets. it’s very hard to resolve this once it’s been fitted, you can try injecting flexible foam behind all around the perimeter at 100mm intervals, but it’s not easy to get a perfect seal. either wet plastering the walls or having a properly airtight service void is the only true way of resolving this, but it would mean removing all of the wall boards and starting again.1 point
-
Rough tiles are no problem: a glug of bleach, a brief scrub, wait a minute, rinse. Done.1 point
-
Tbh, I can’t remember and will check that during another viewing. If not, I’m sure it’s something I could sort.1 point
-
We have a wet room with tiled floor. The choice of tiles was based on what was likely to not be slippy when wet, and we chose rough tiles that resemble sandpaper when dry not flat and shiny.1 point
-
I honestly believe that if I was told that I had Two weeks to live, The last thing I would do would be despatch my neighbour painfully.1 point
-
Welcome. If you have not already done so, please start a new topic under the relevant heading so that the replies go to that rather than in this intro section.1 point
-
You can’t put it down directly onto a slab It will pull in to quickly And edging strip is needed for expansion and will take about 30 minutes to install1 point
-
Hello! Thank you very much for your participation! It was actually deliberate. These are called "attention checks" and these checks help us determine the percentage of participants who are carefully reading the questions, which directly impacts how reliable our data is. If a large percentage selects differently, we know we need to be cautious about the overall results.1 point
-
Yup, that's the kiddy. That should make the (new / old whatever) boiler very happy and let it go on to live a full working life AND enjoy retirement1 point
-
As a cabinet maker of 30+ years I can safely say their patter is tosh. Yes solid wood expands and shrinks across its width but thats why solid doors are usually frame and panel construction to avoid the problems associated with movement. Also doors and draw fronts expanding and shrinking a little bit wont matter as there are shadow gaps between them so they wont fowl. I'm not against the look of some of the German Kitchens. Quite like some of the Nolte ones myself. Also I agree with John as when you get under the skin most of them are made in very much the same way with similar materials. What matters most in my experience is a quality fit. A cheap well fitted kitchen will look better than an expensive poorly fitted one1 point
-
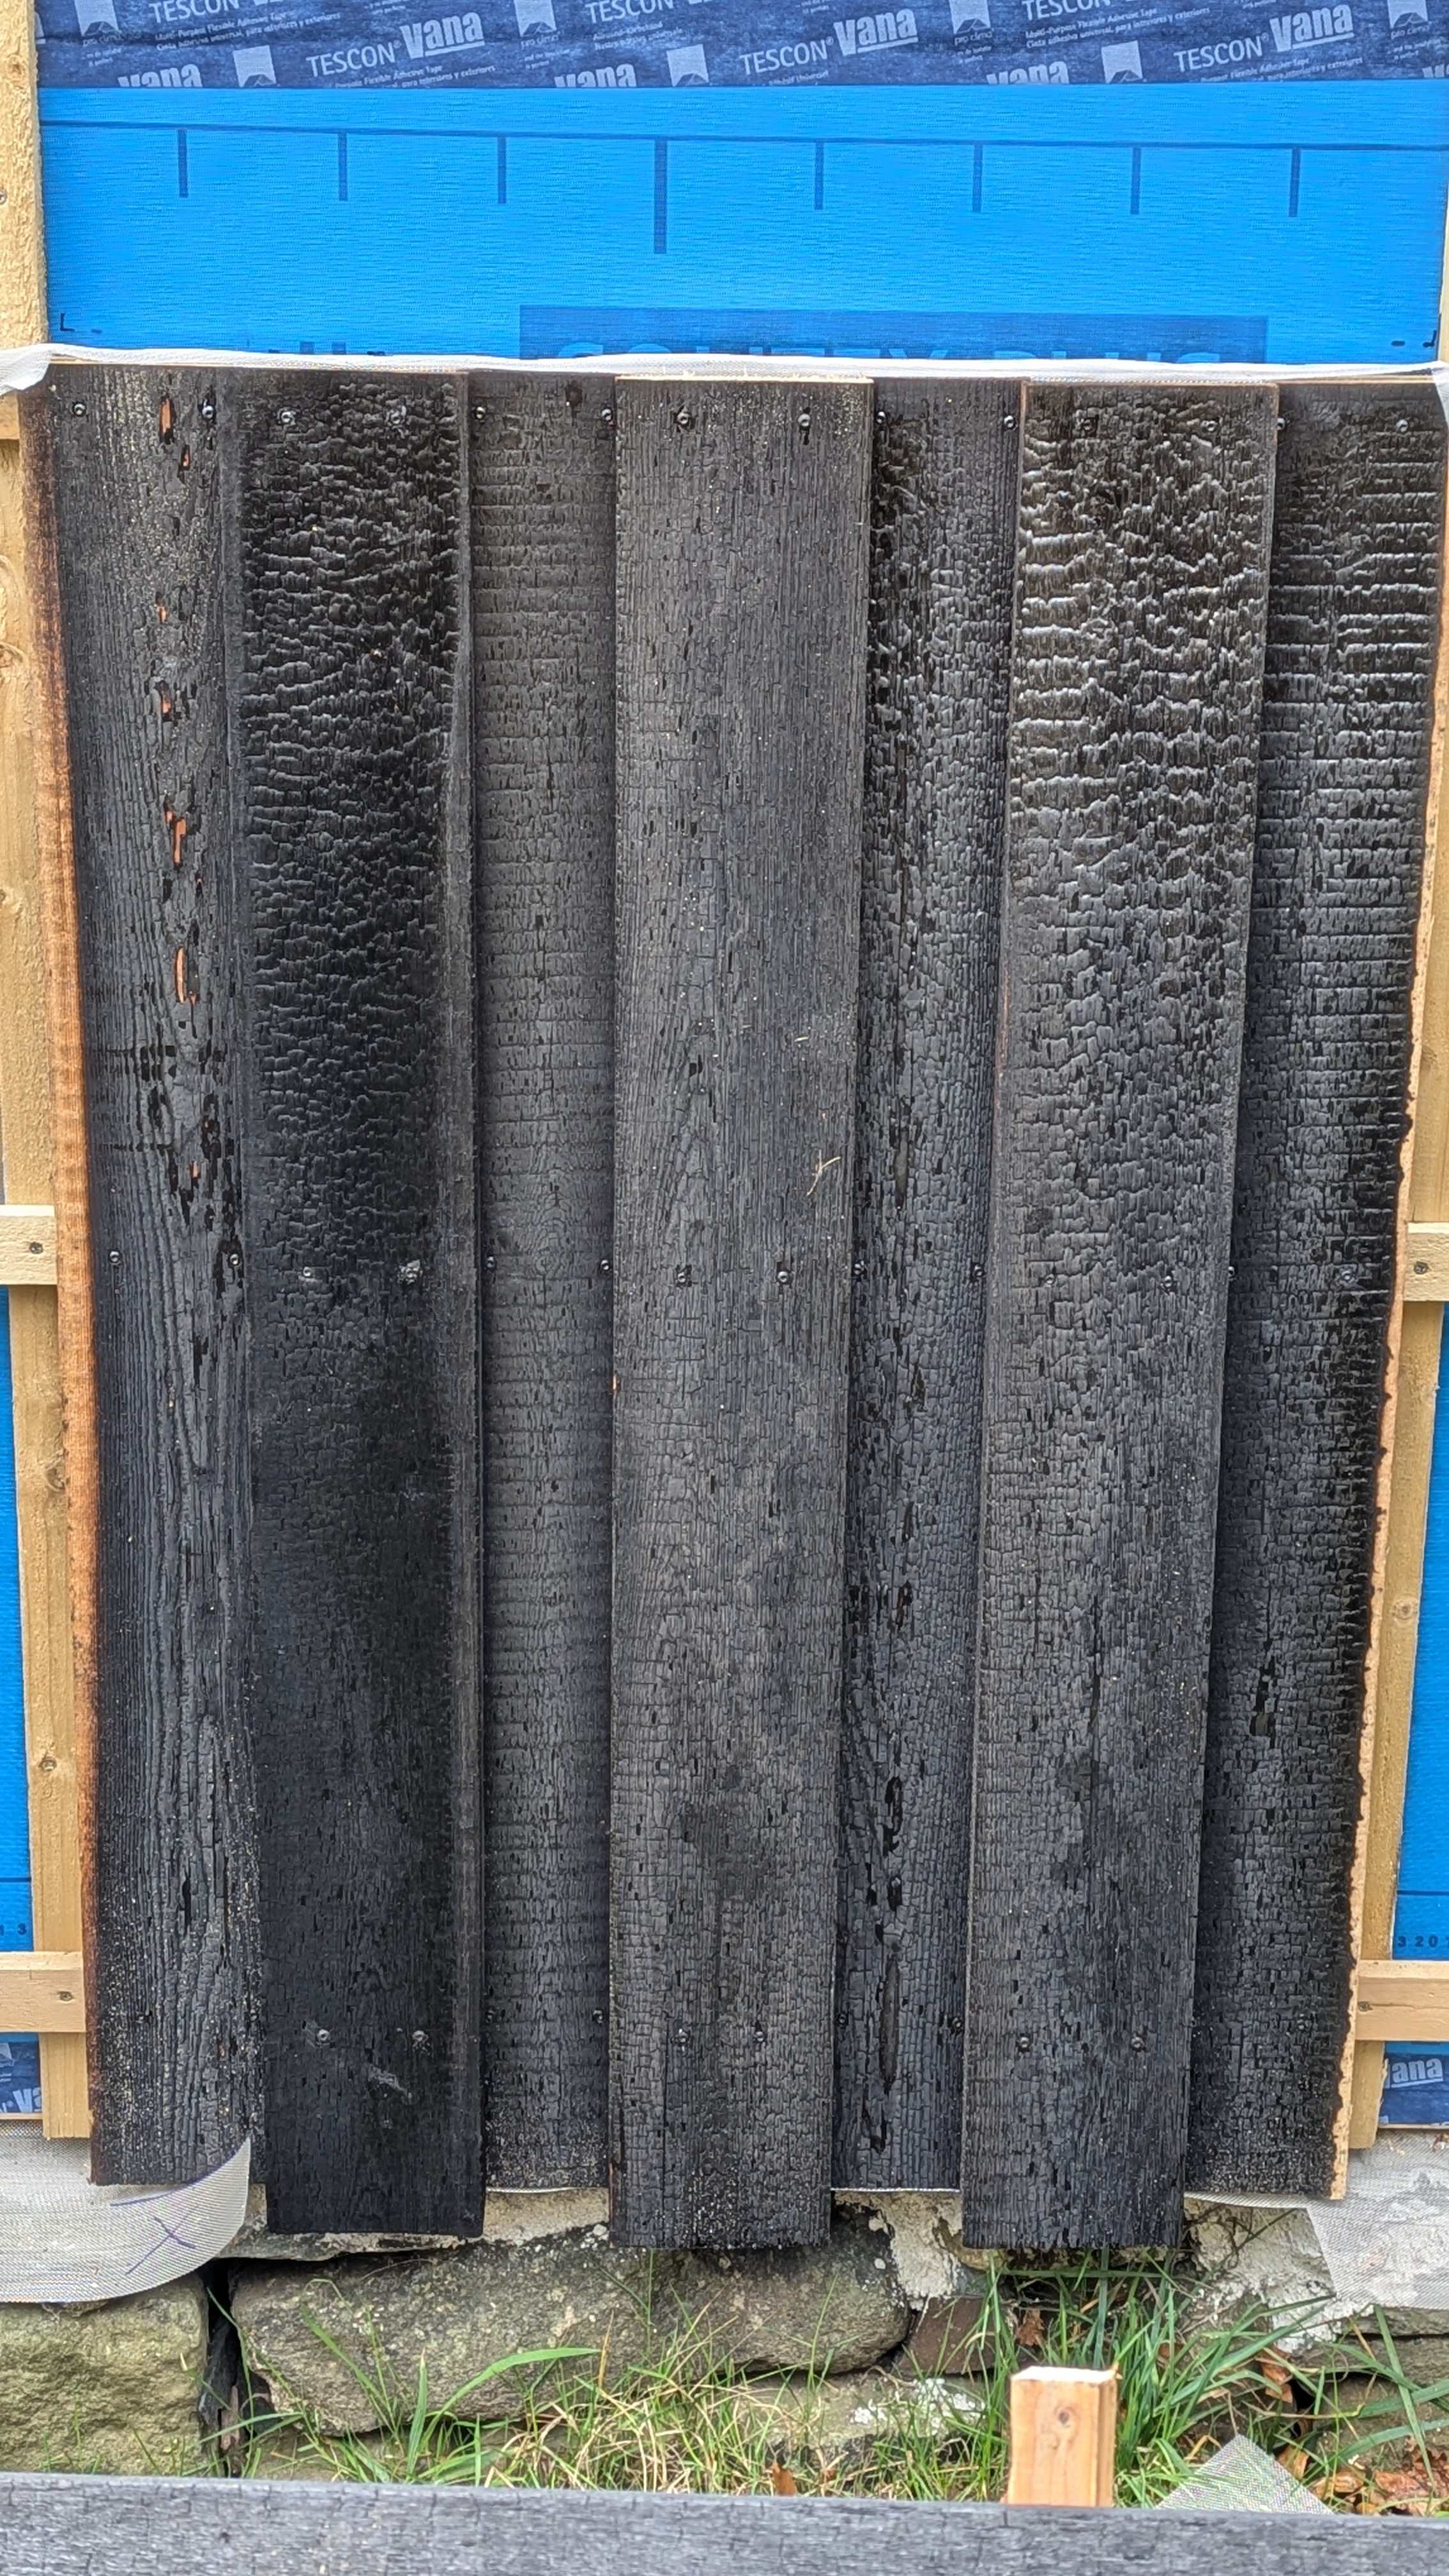
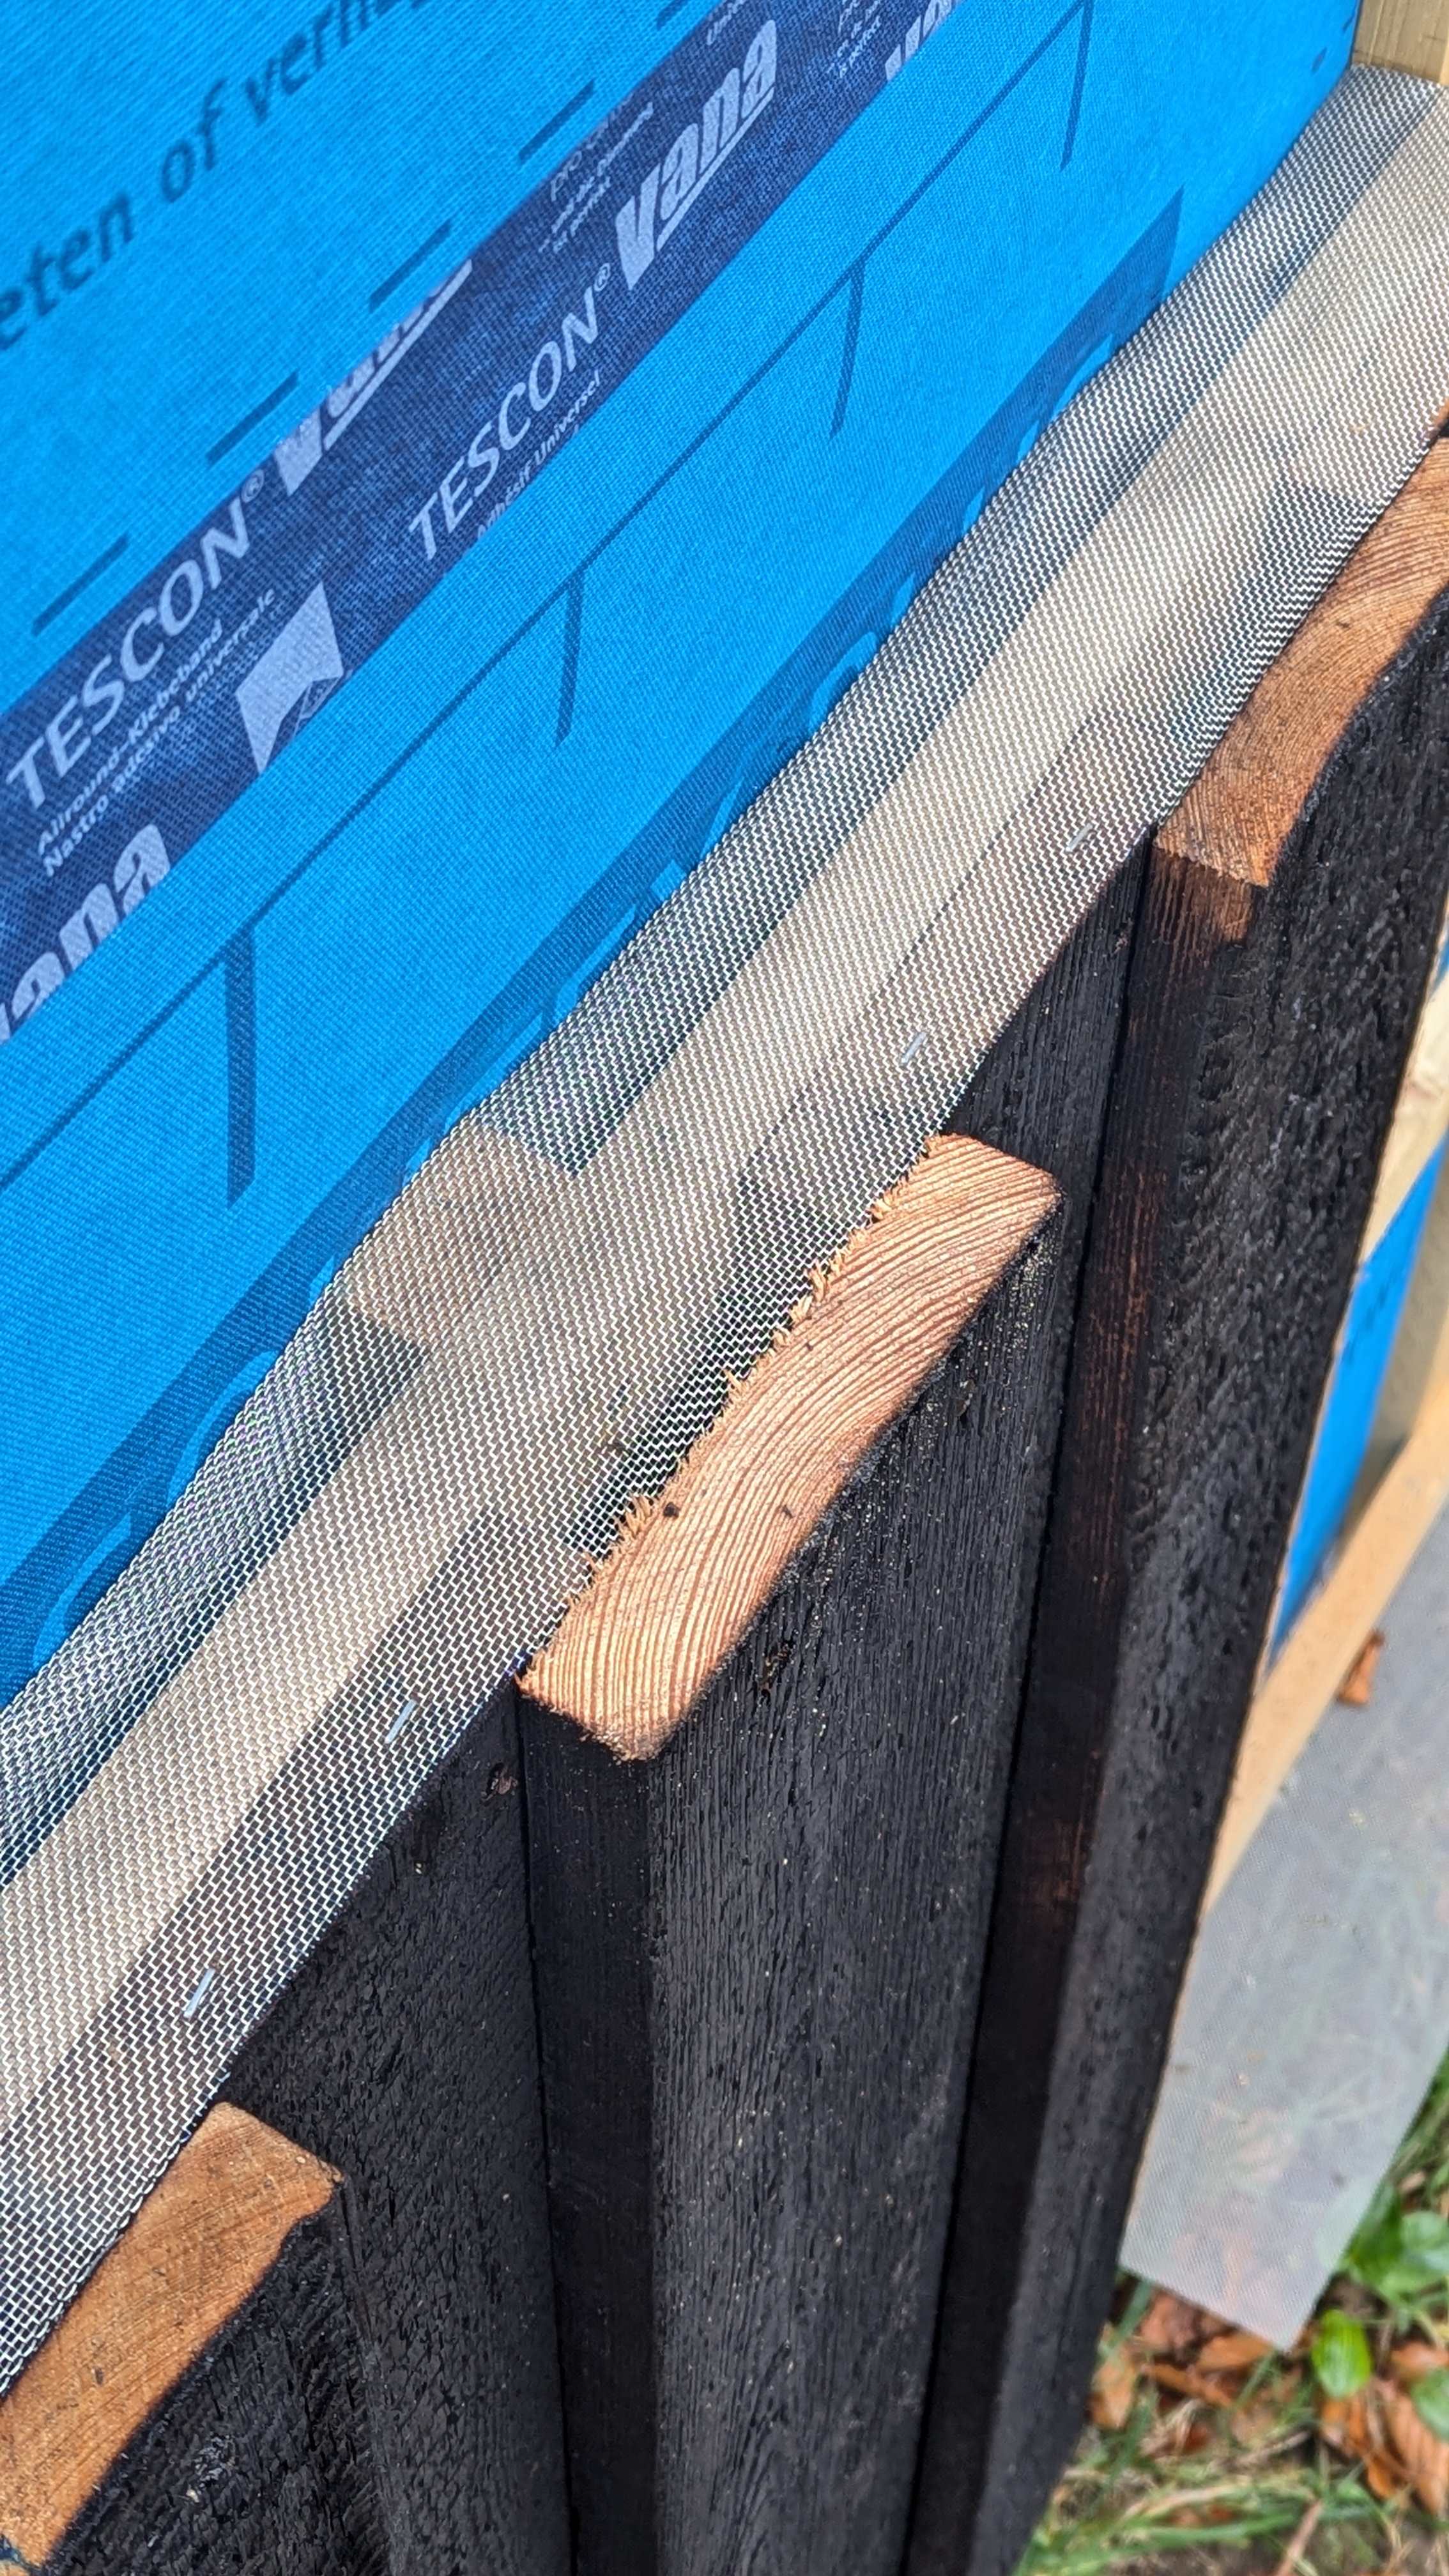
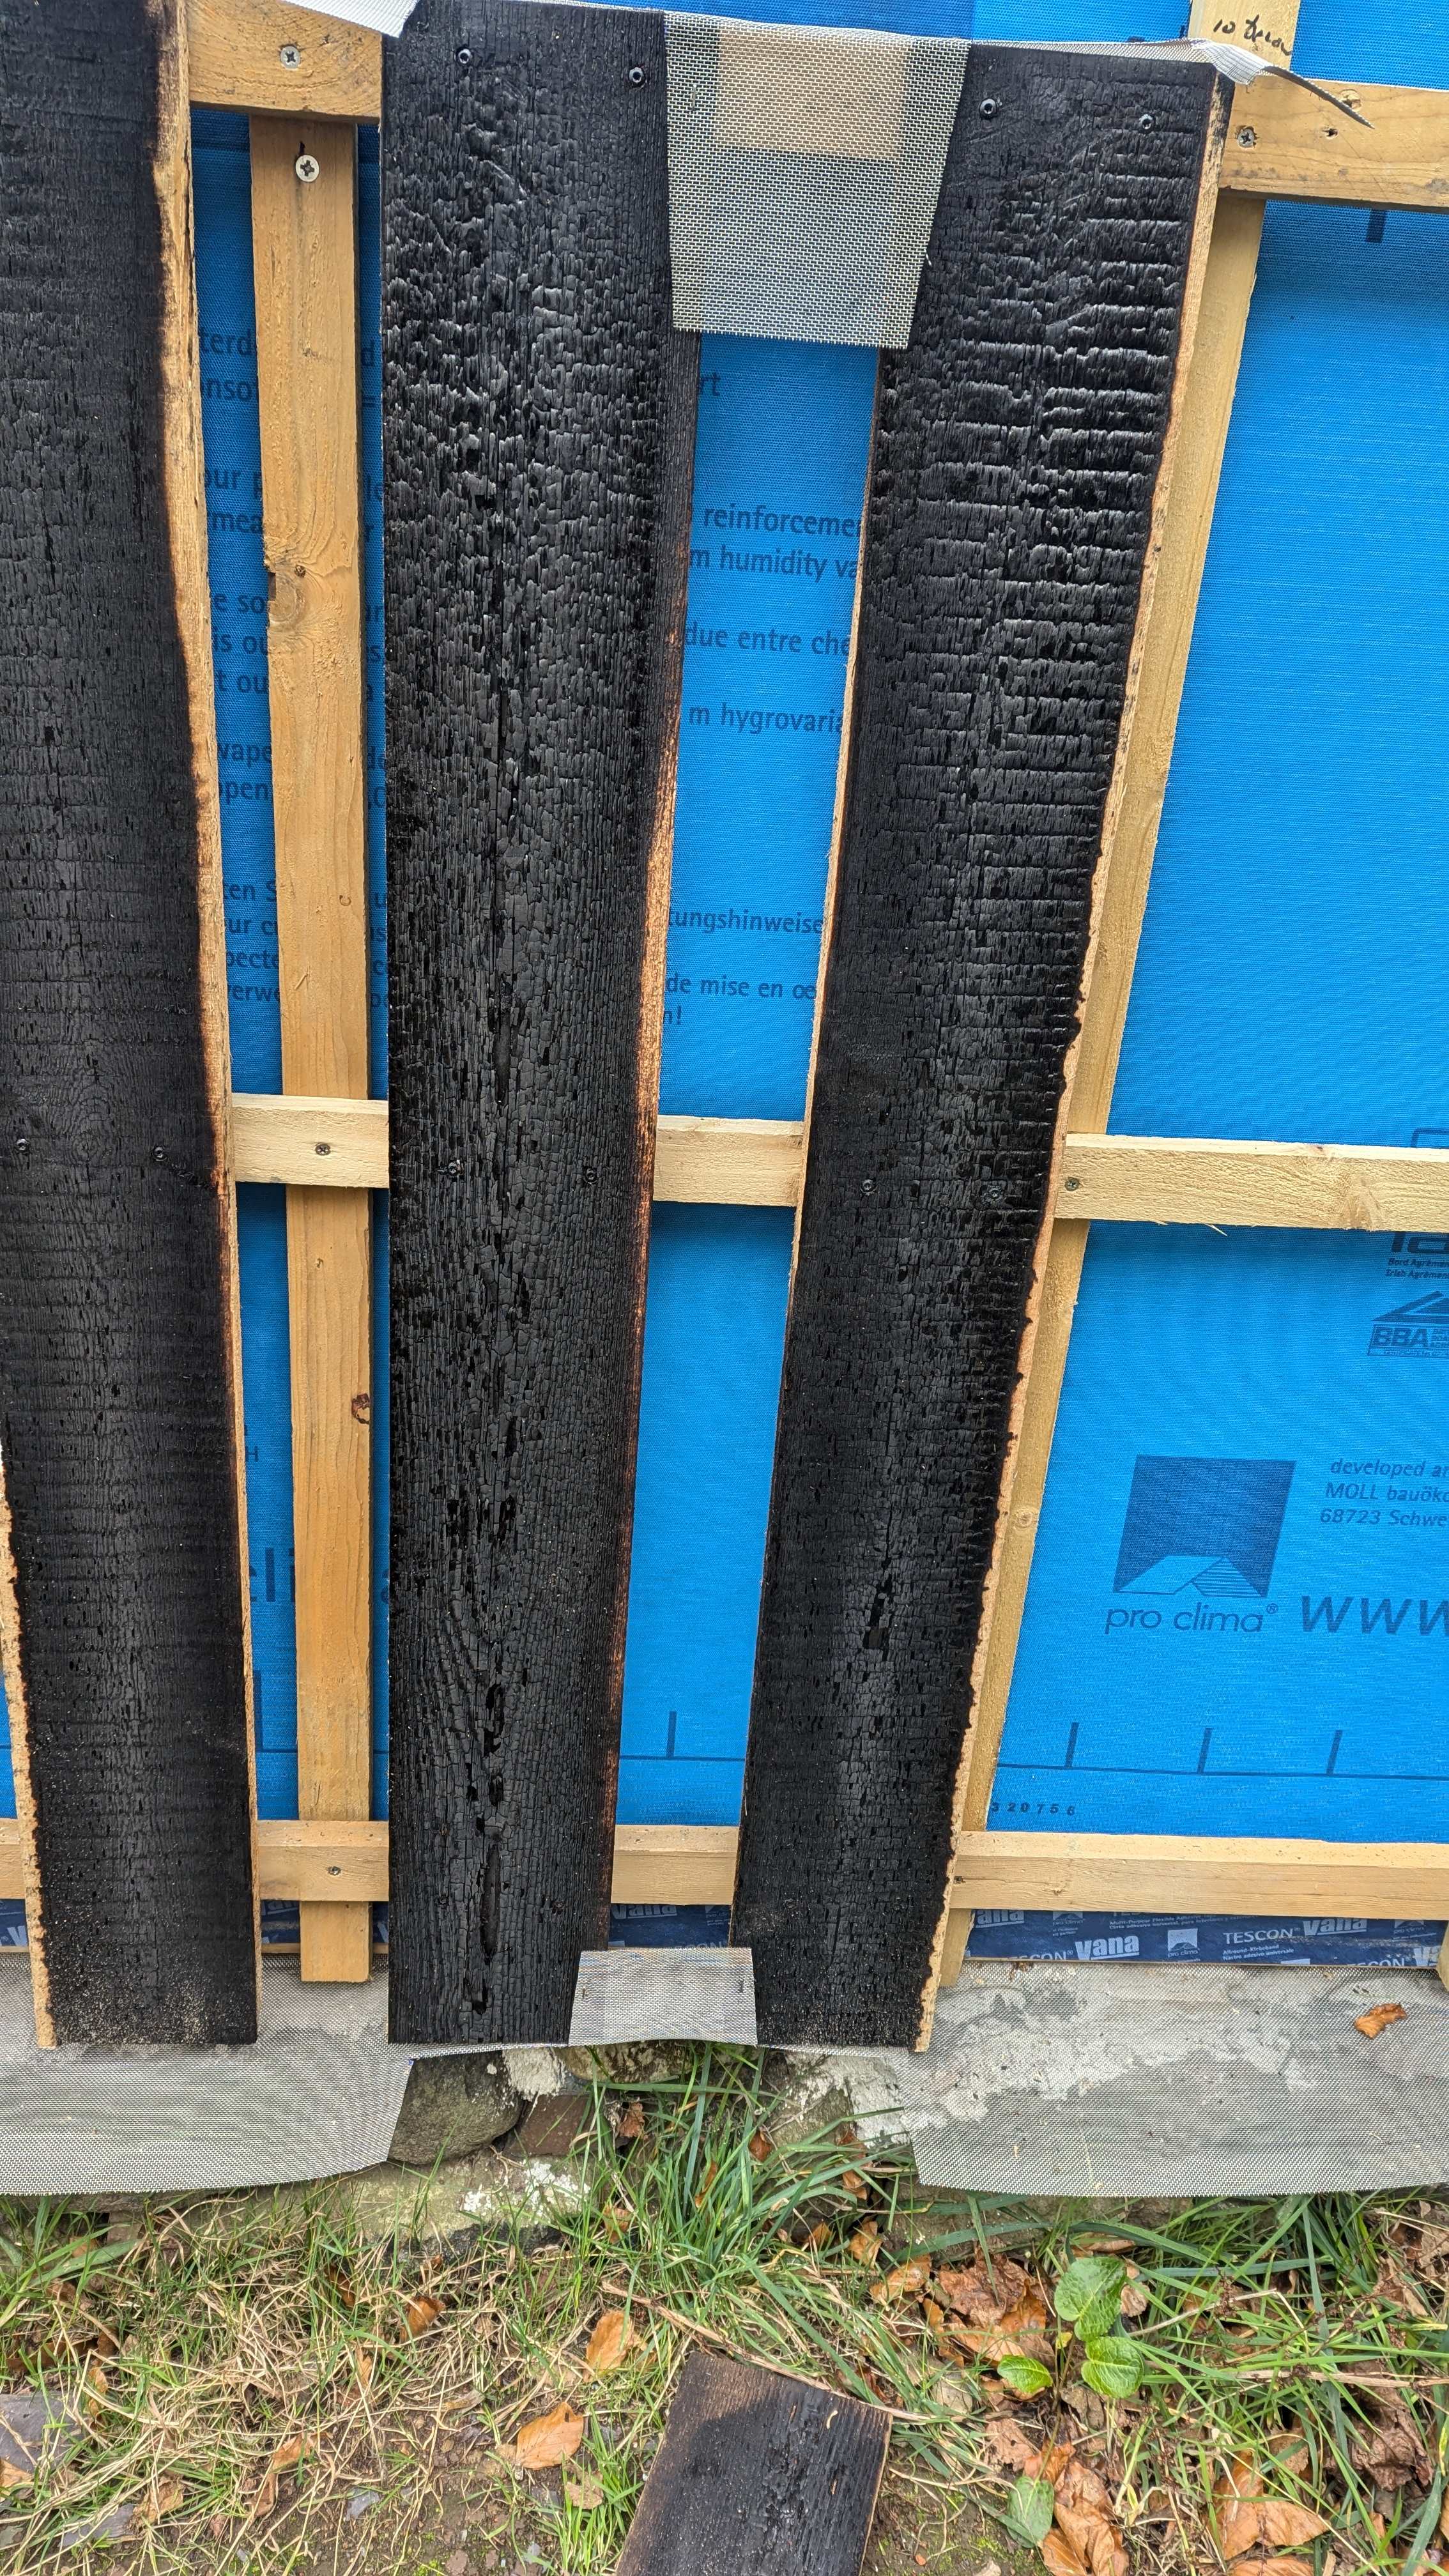
I thought I'd share my approach to wire mesh with board on board cladding. I couldn't find any real detail about this is trada publications or internet. Mesh is held behind the counterbattens or under a batten at the sill level, then folded over the first boards with a couple of staples to hold it in place. Where the mesh would show it's cut away and then the top board holds everything in place. Fairly quick, simple and relatively inexpensive for a roll of stainless mesh.

 1 point
 -
I have got to the bottom of it: IPT - Internal partition Type EWT - External Wall Type1 point


This leaderboard is set to London/GMT+01:00